Tenth Doctor Brown Suit Tutorial – Trousers Waistband
Begin by applying a lightweight fusible interfacing to the underside of your left waistband (piece CC) and right waistband (piece DD).
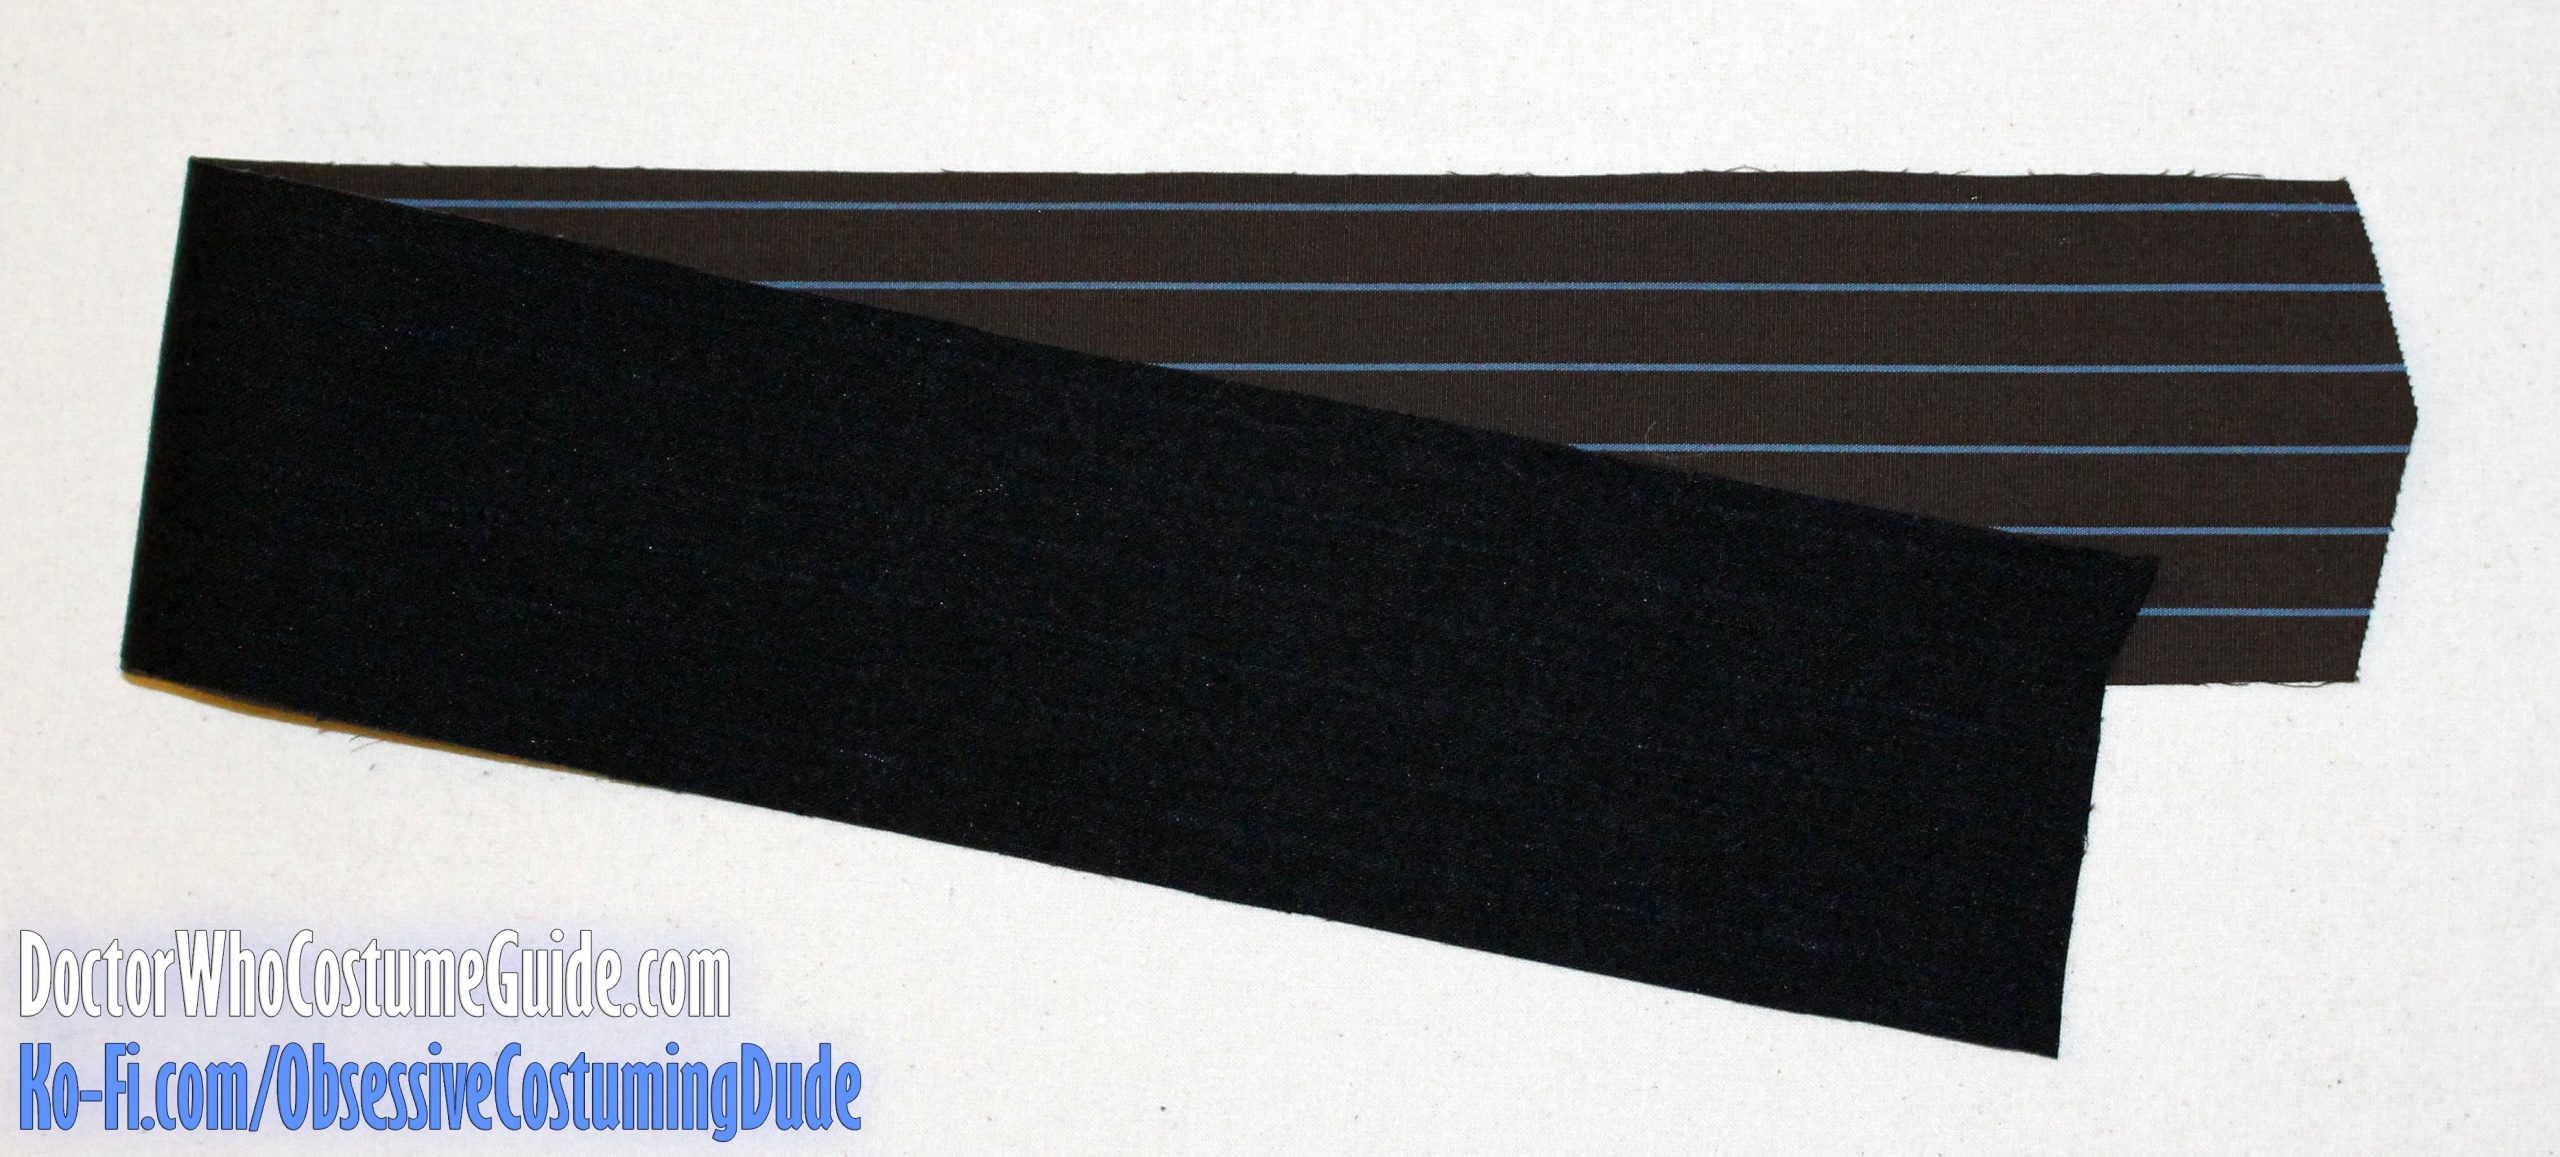
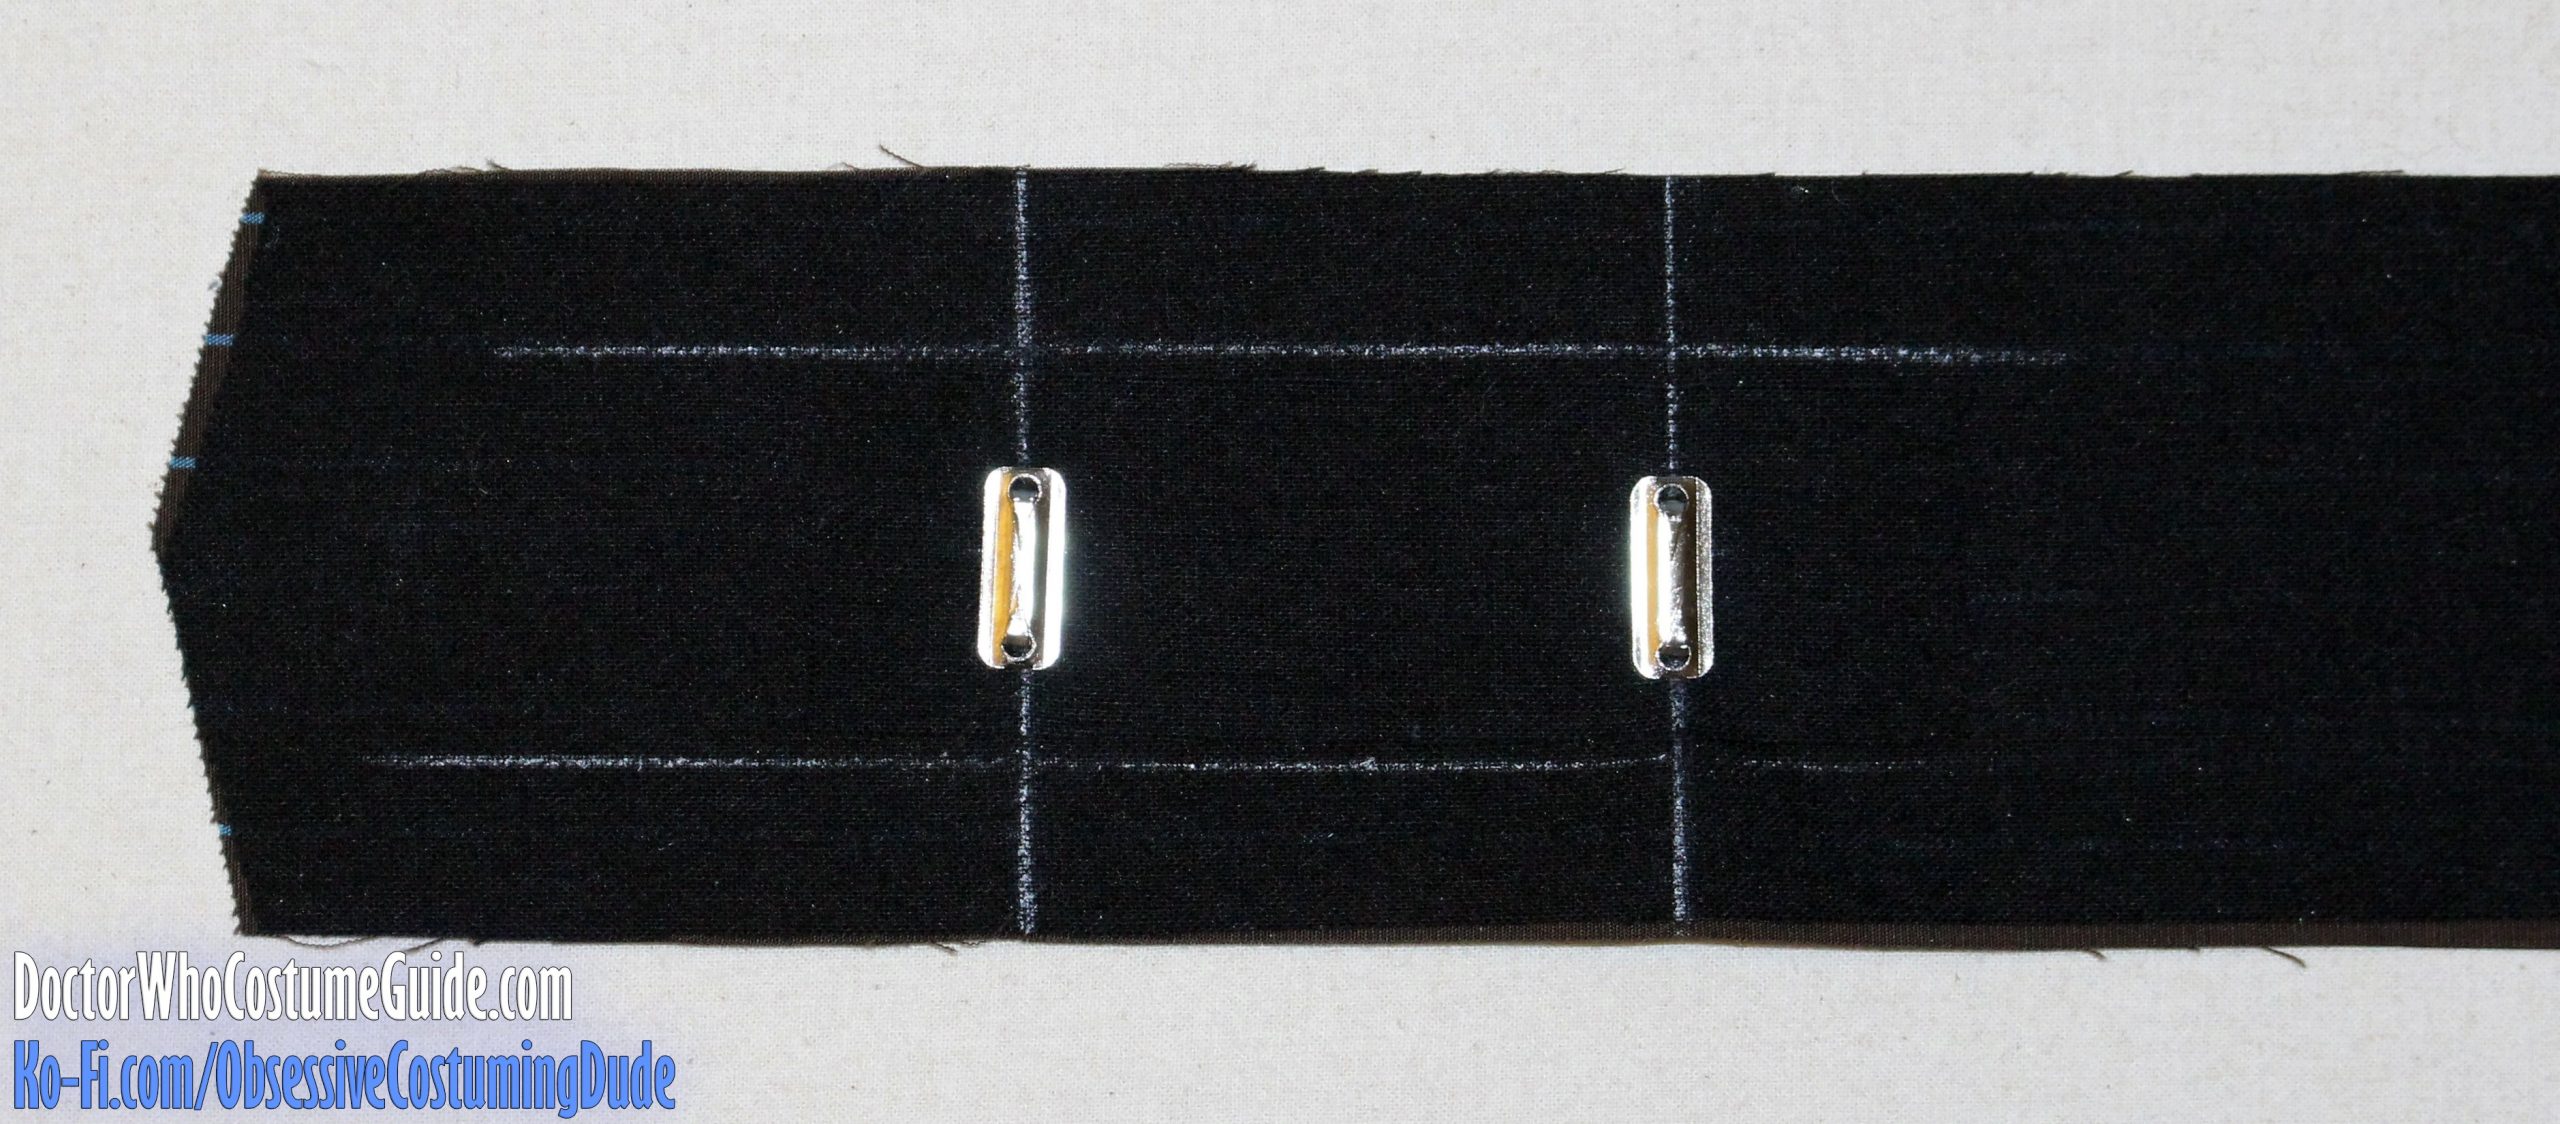
Mark the upper and lower seam lines on the underside of the waistband, as well as the hook-and-eye closure placements.
Then cut apply a second, smaller layer of fusible interfacing over the closure area.
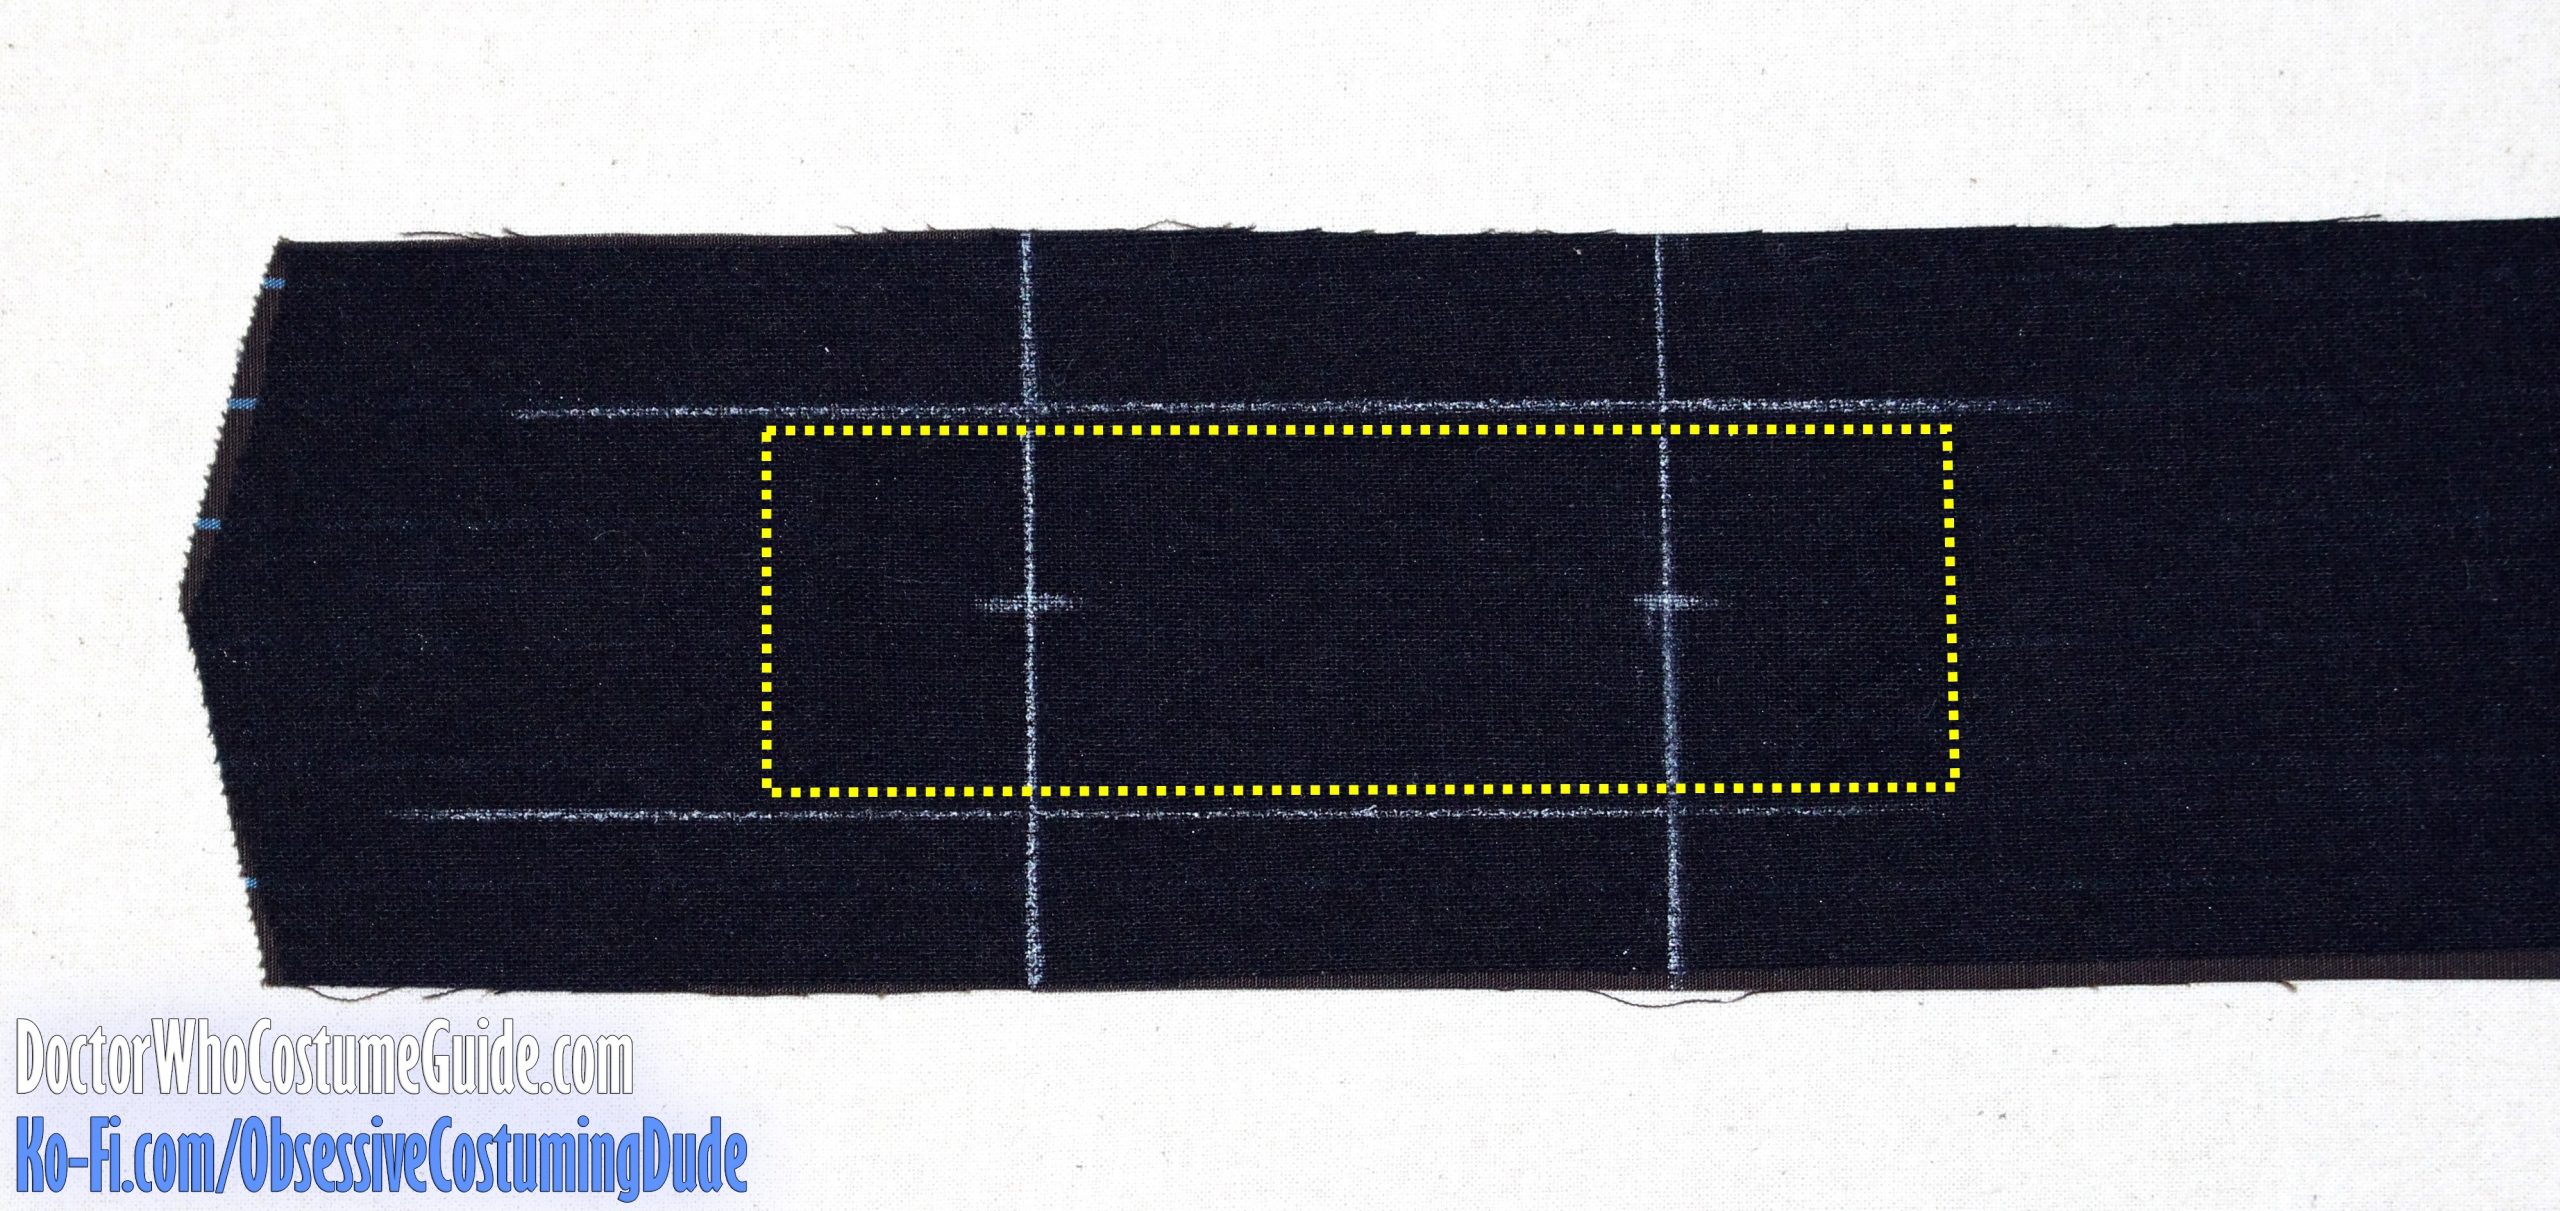
As mentioned in the “required materials,” you can use the standard retail hook-and-eye closures if you’d like, which are hand-sewn to the garment.
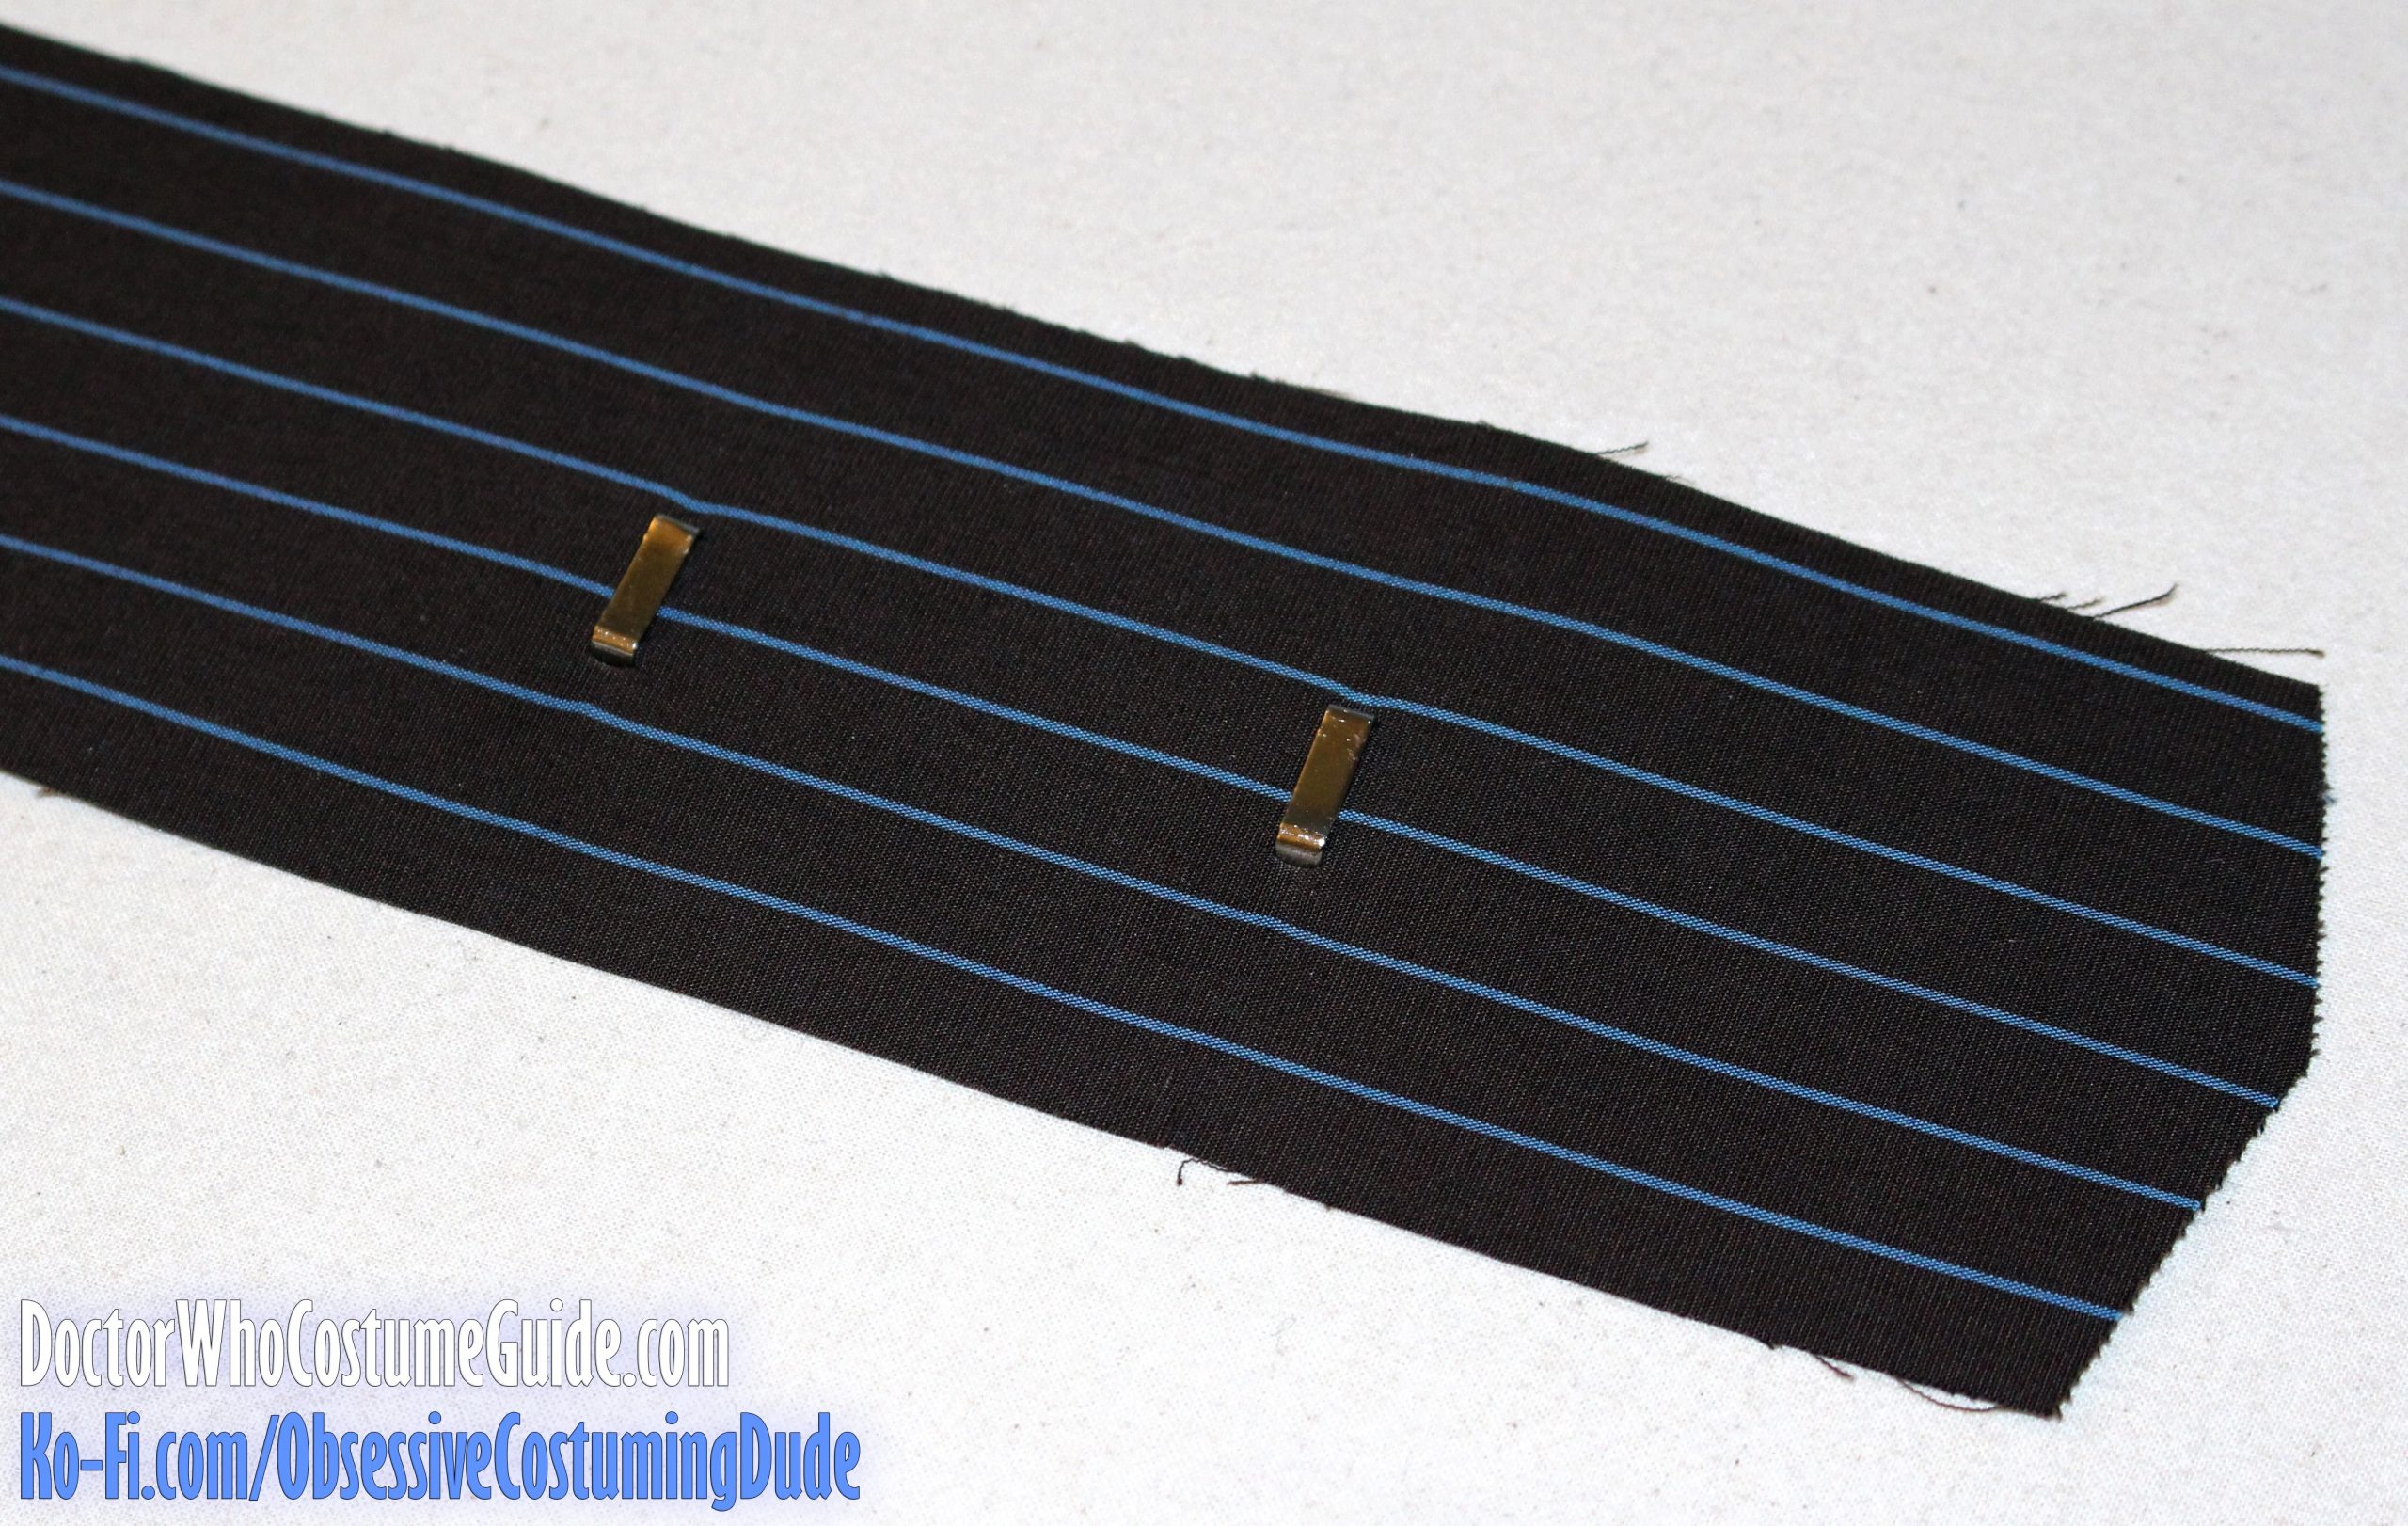
However, the original GAP trousers had the four-piece style that are attached via prongs to a metal backing, so I suggest using these.
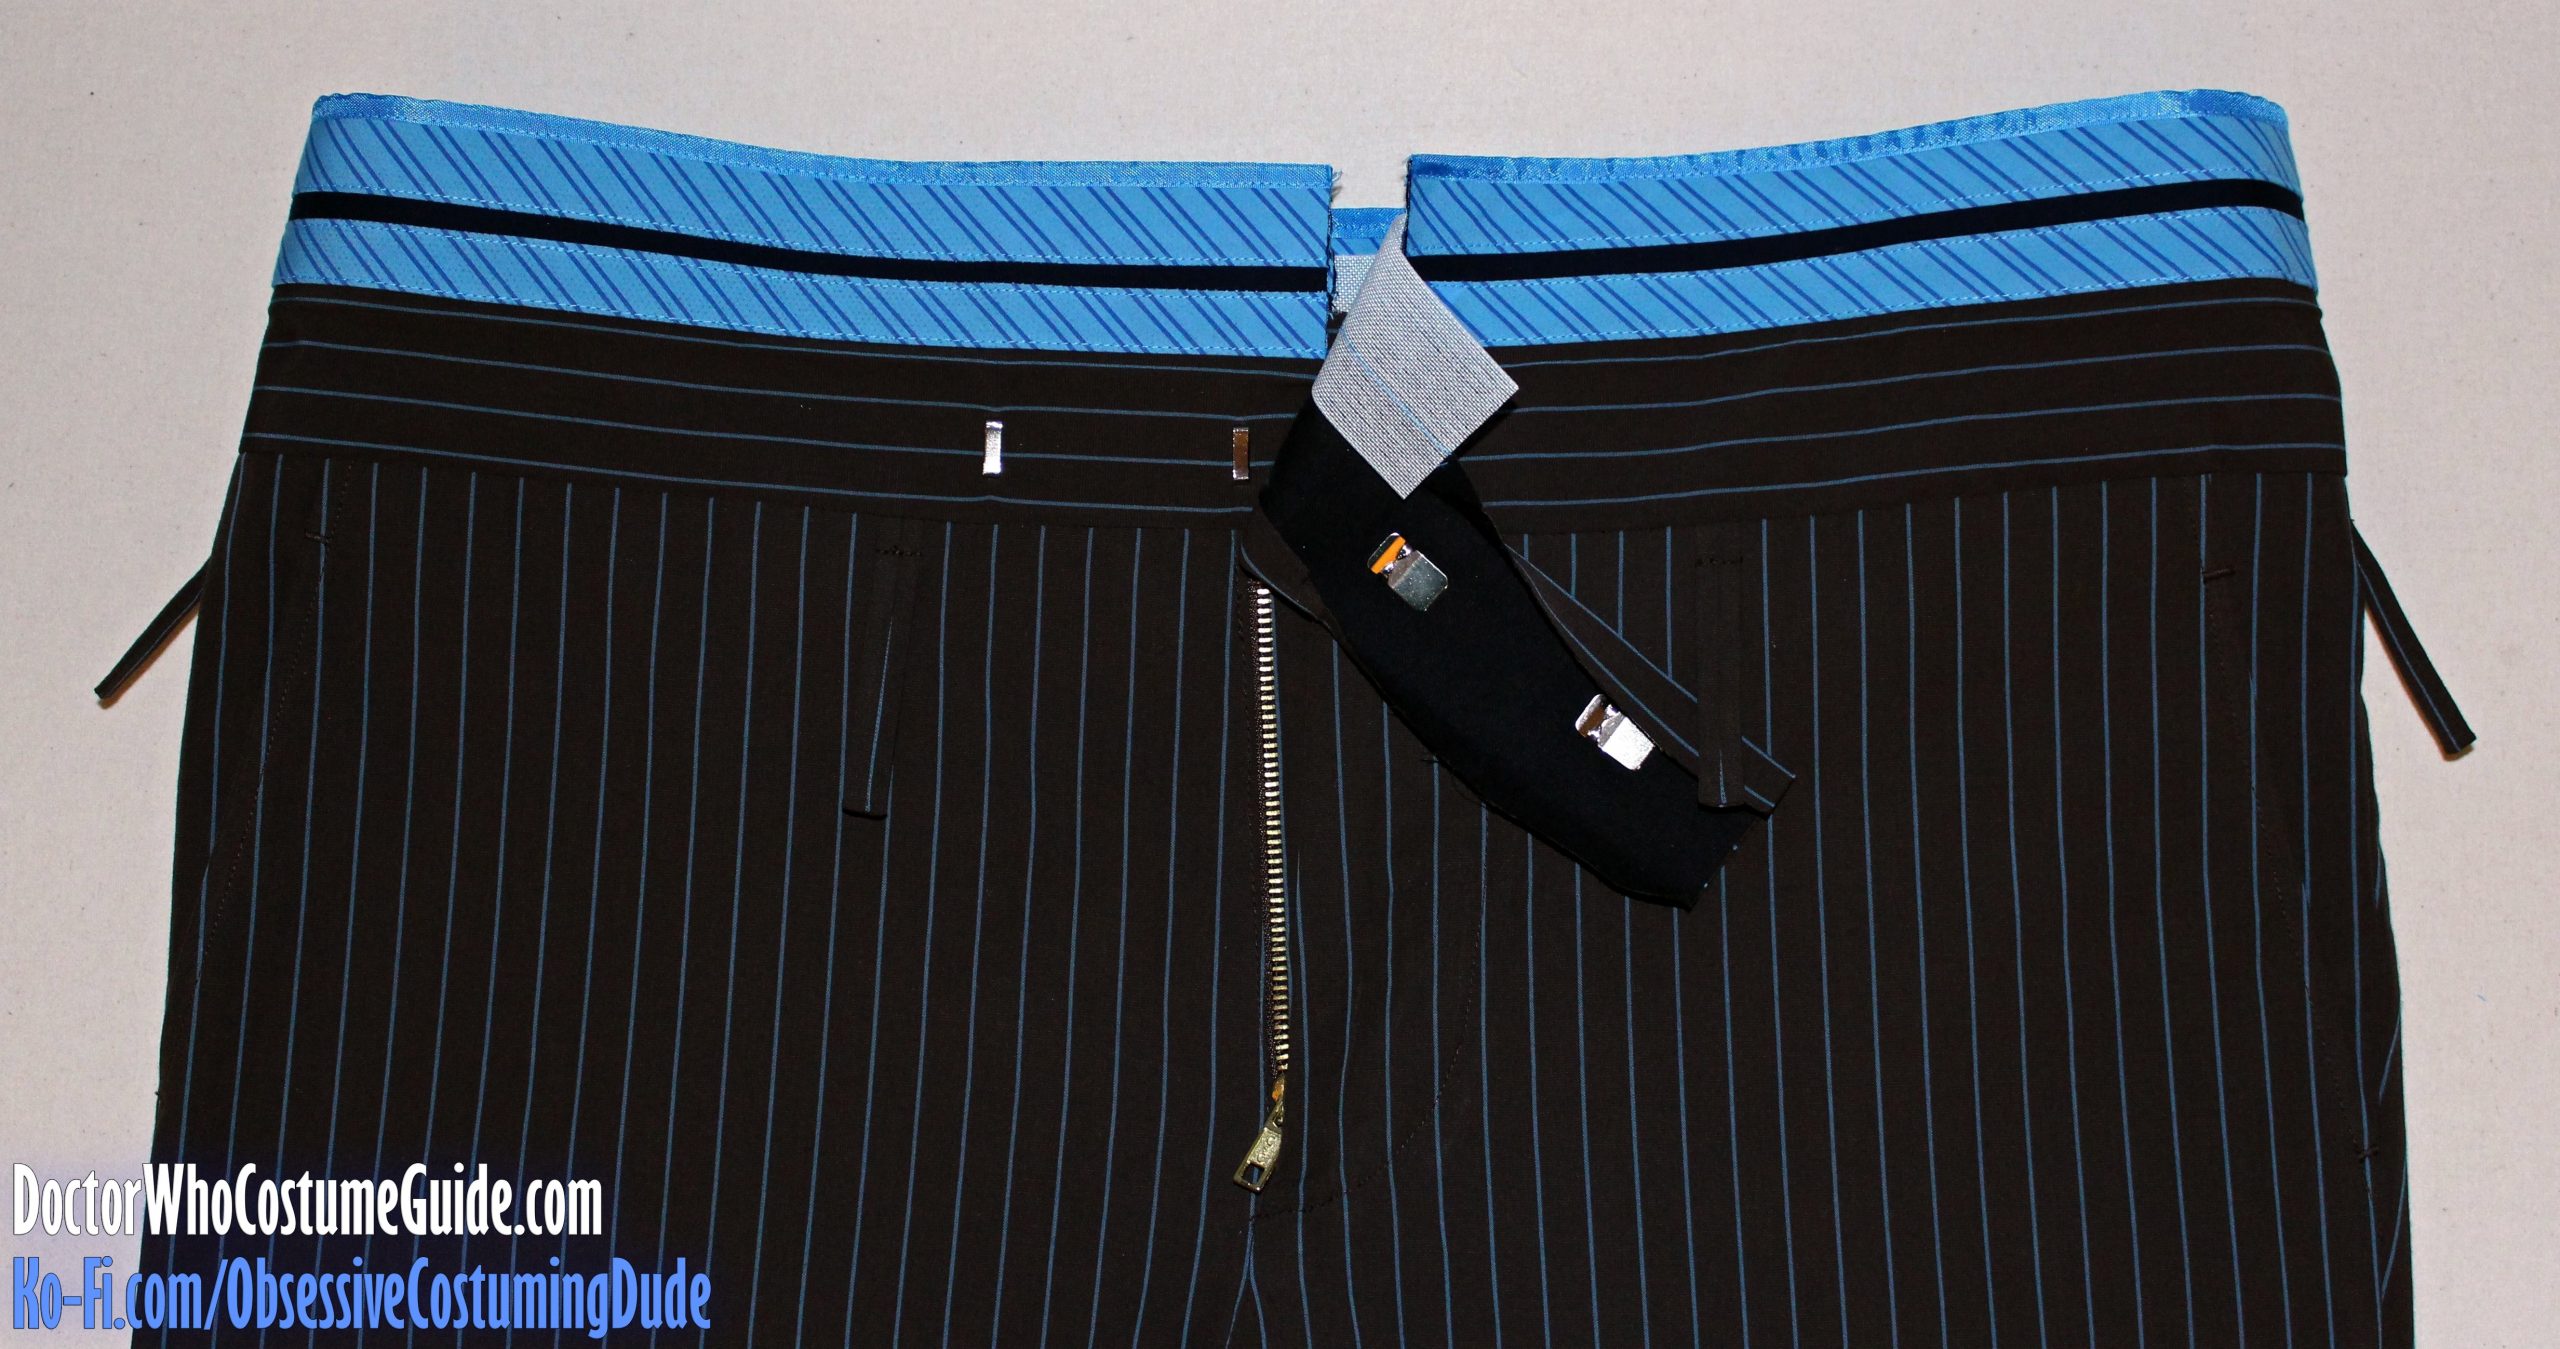
Position the closures using the guide on the printed pattern, and attach them.
Fold the right waistband’s upper seam allowance downward and press.
Cut a length of your 1 ½” Ban Roll sufficient to extend from the center back to 2 ¼” from the front edge.
Open the waistband, and baste or sew the Ban Roll to the seam allowance close to the edge.
On the left waistband, the Ban Roll should only extend to the front fold line, just behind the metal closures.
For the waistband facing fabric, you’re free to use whatever fabric you like (of course).
However, if you’re wanting to mimic the appearance of the original GAP trousers, you have a couple options.
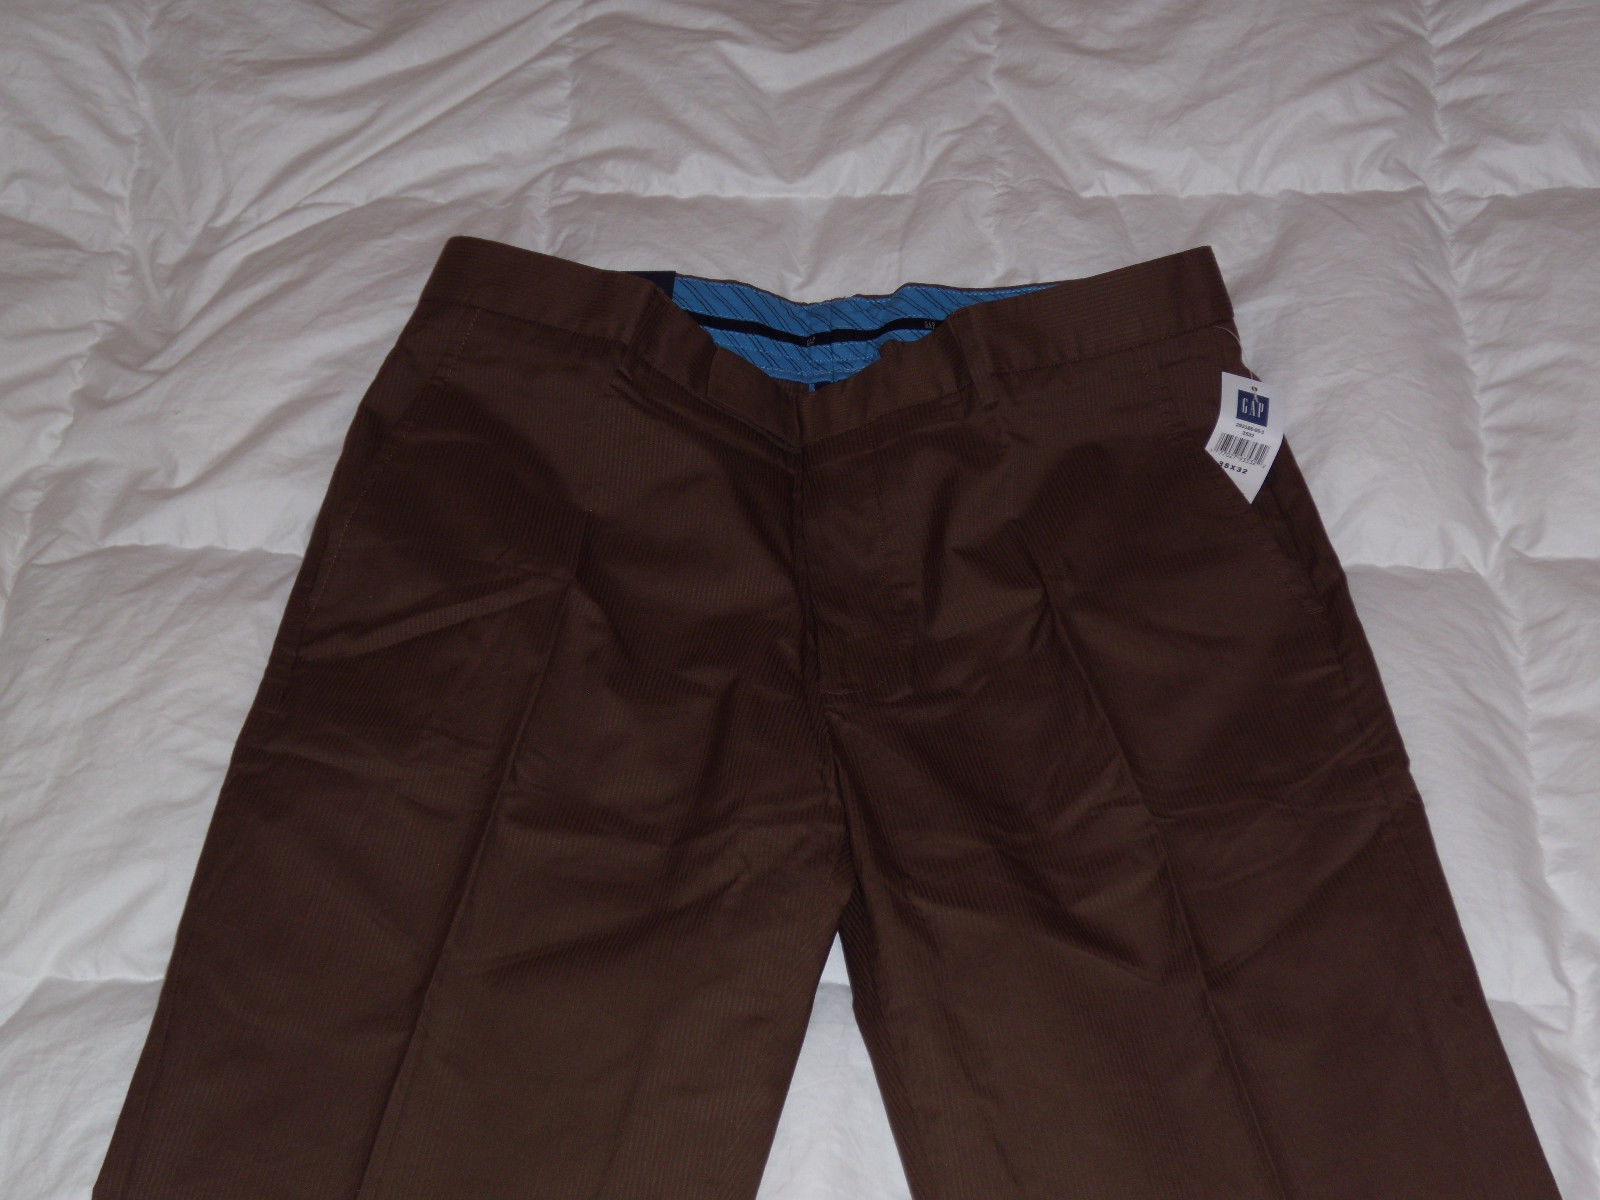
First, you could track down a pair of “alternate” GAP trousers (such as the pair pictured below) that had an identical waistband style, then carefully remove it and “Frankenstein” it onto your replica 10th Doctor trousers.
(I’ve seen at least a couple other “alternate” GAP trousers styles that appear to have been identical in their construction to the ones Tennant wore in Doctor Who, albeit in different color schemes. I, personally, own a gray pair that, as best I can tell, are otherwise identical to the “actual” ones.)
Alternatively, you can make your own GAP-style waistband via the following technique and materials.
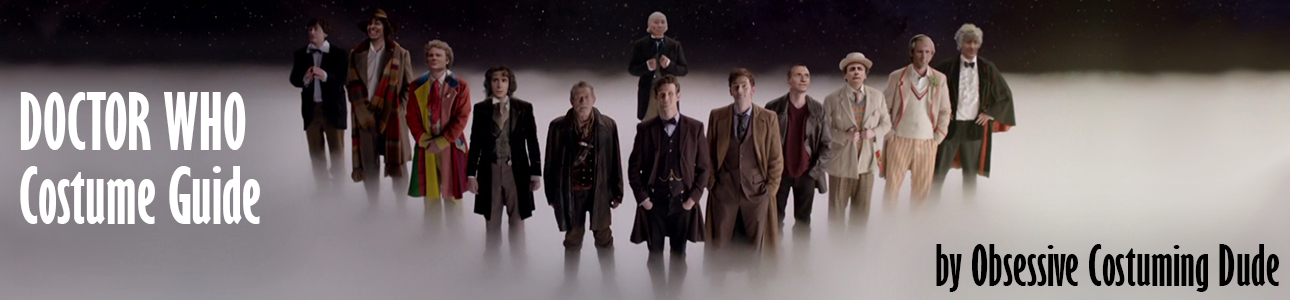
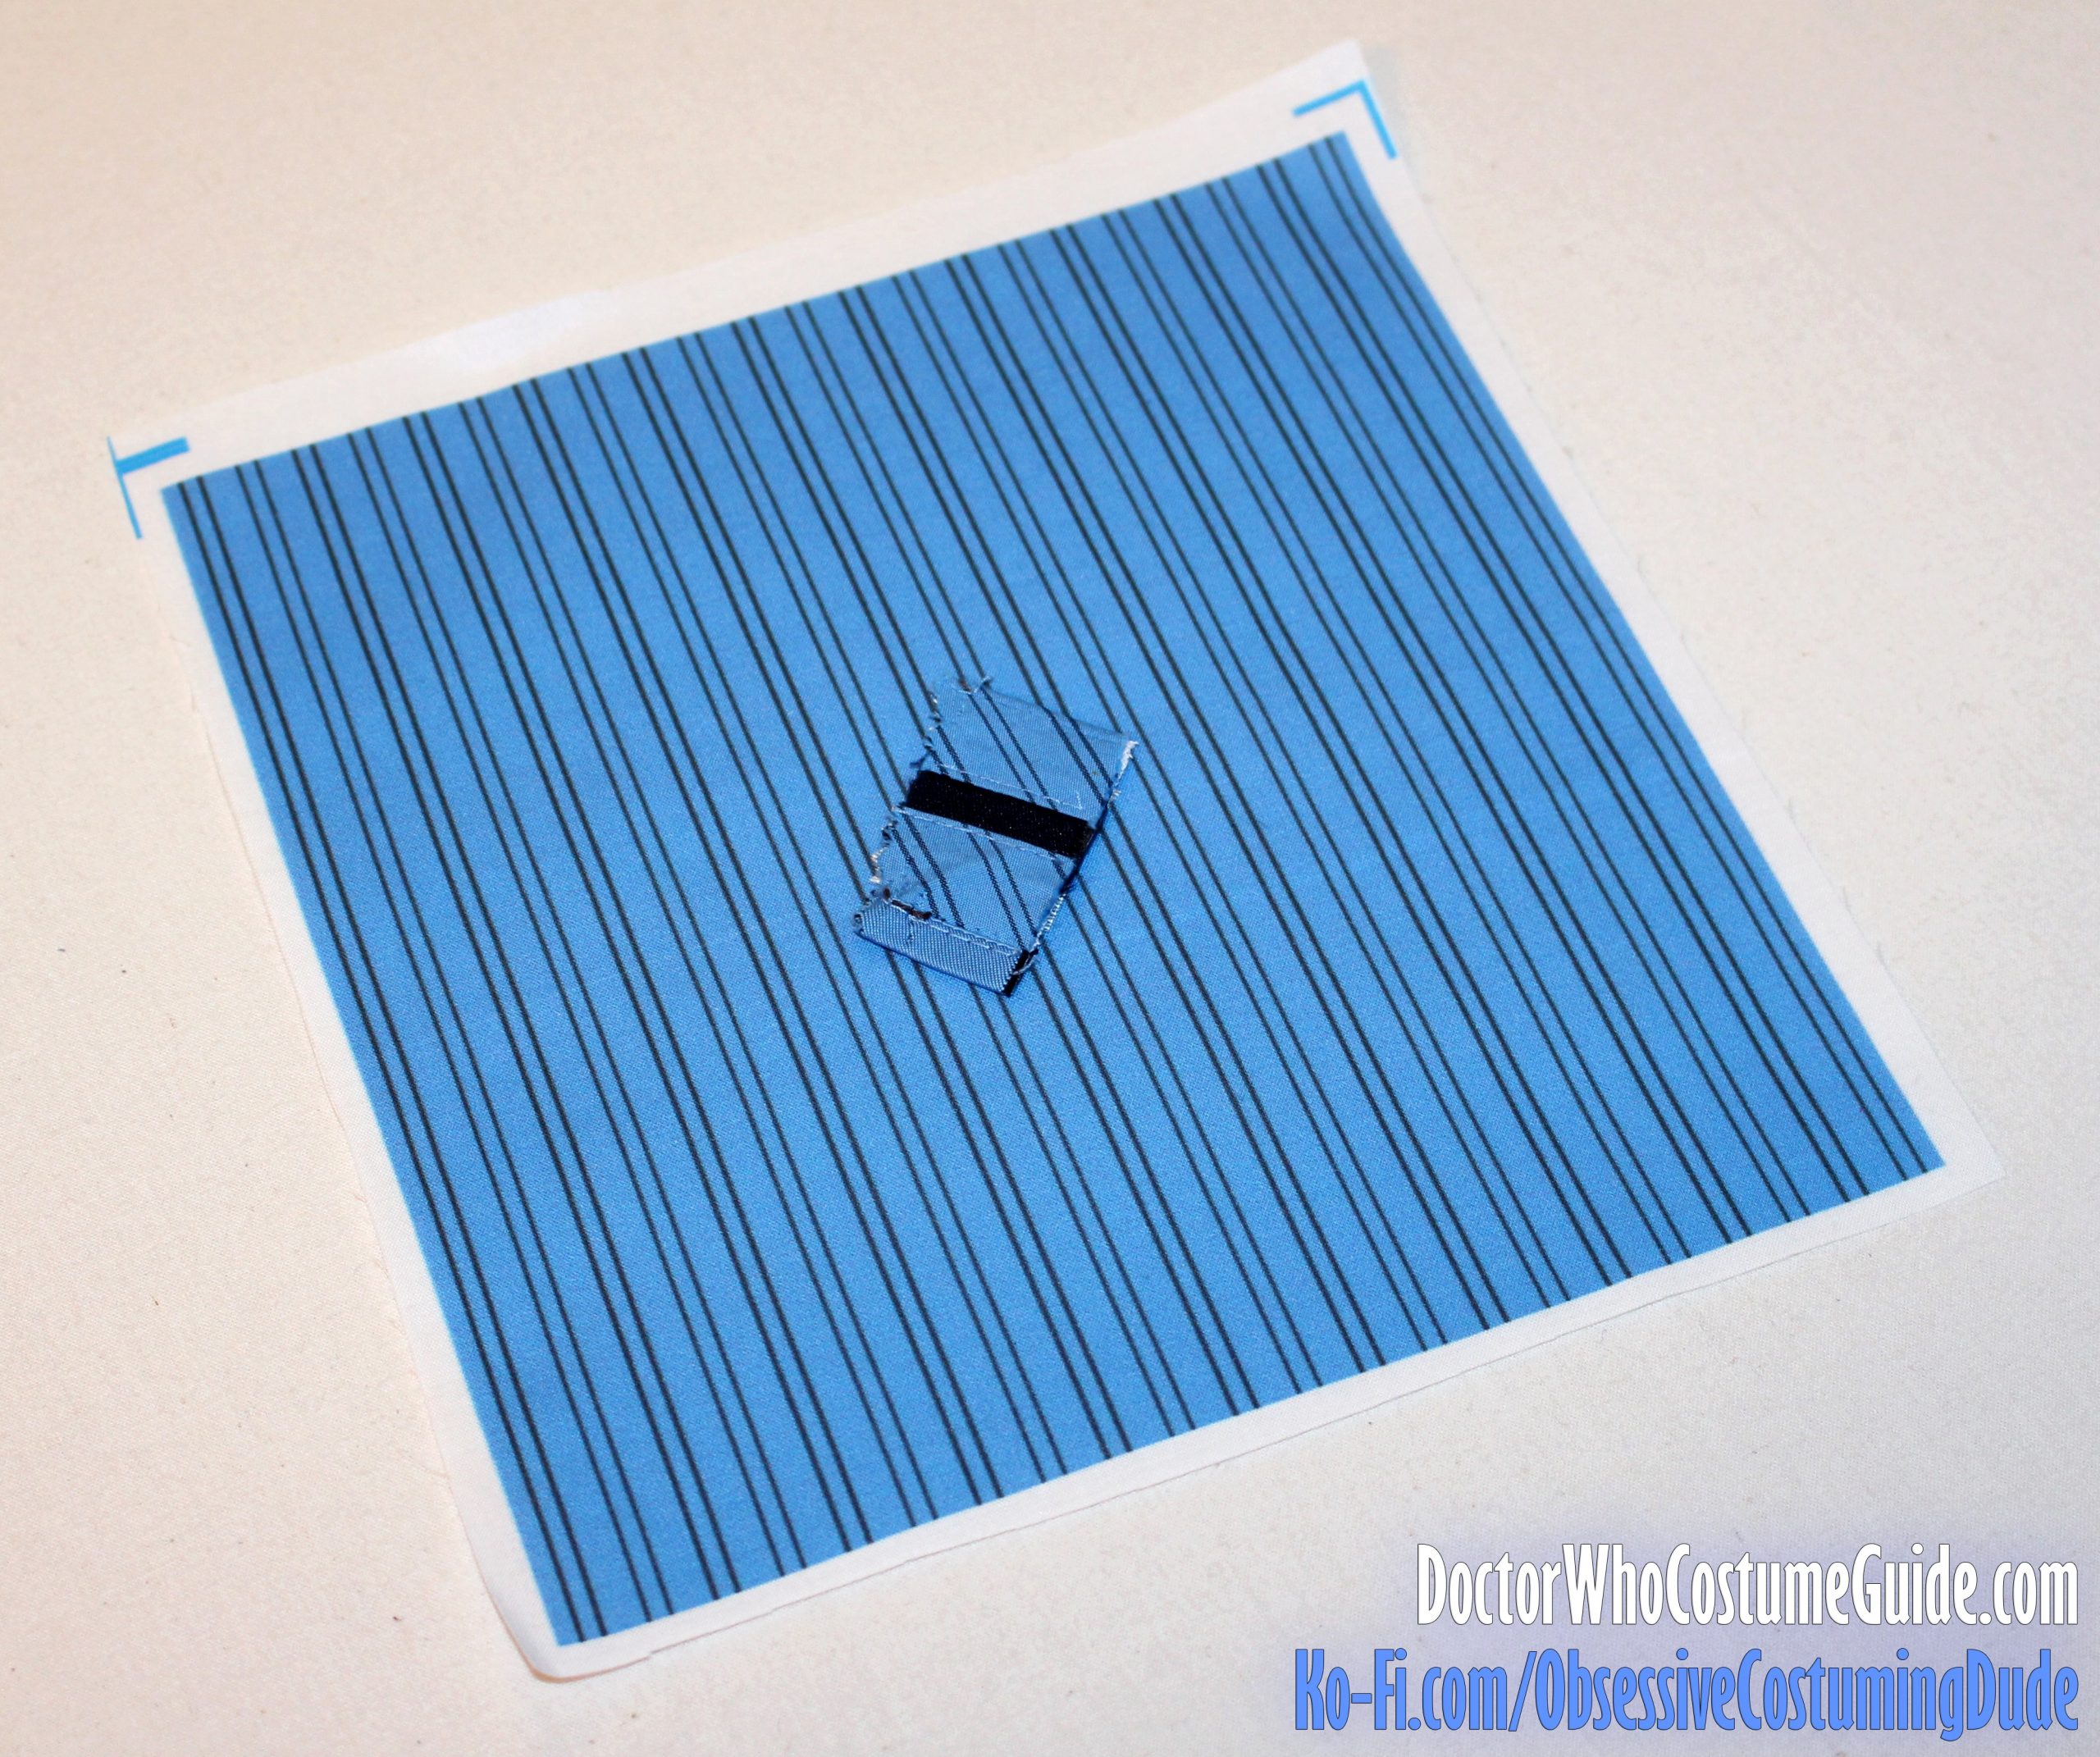
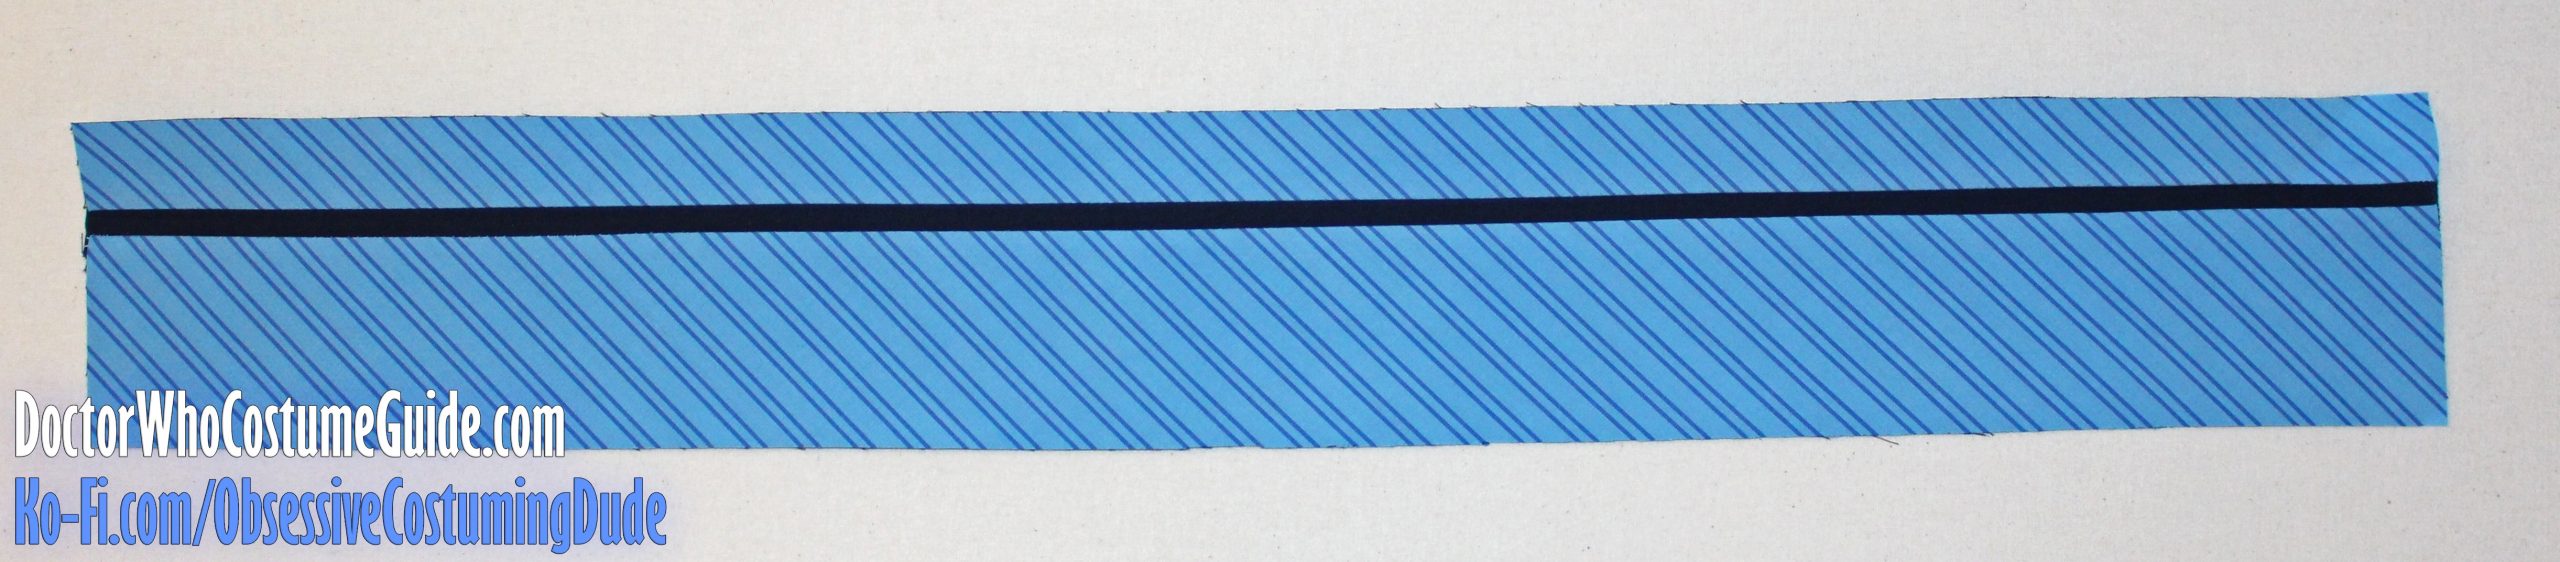
For your convenience, I’ve created a couple Spoonflower prints that are very close matches to the original GAP waistband facing material.
The first has the stripes going vertically, parallel to the fabric selvage, like the original almost certainly was.
With either option, their “Basic Cotton Ultra” (pictured above) works great.
(I used a different fabric option for the tutorial trousers, because I hadn’t designed the Spoonflower print yet.)
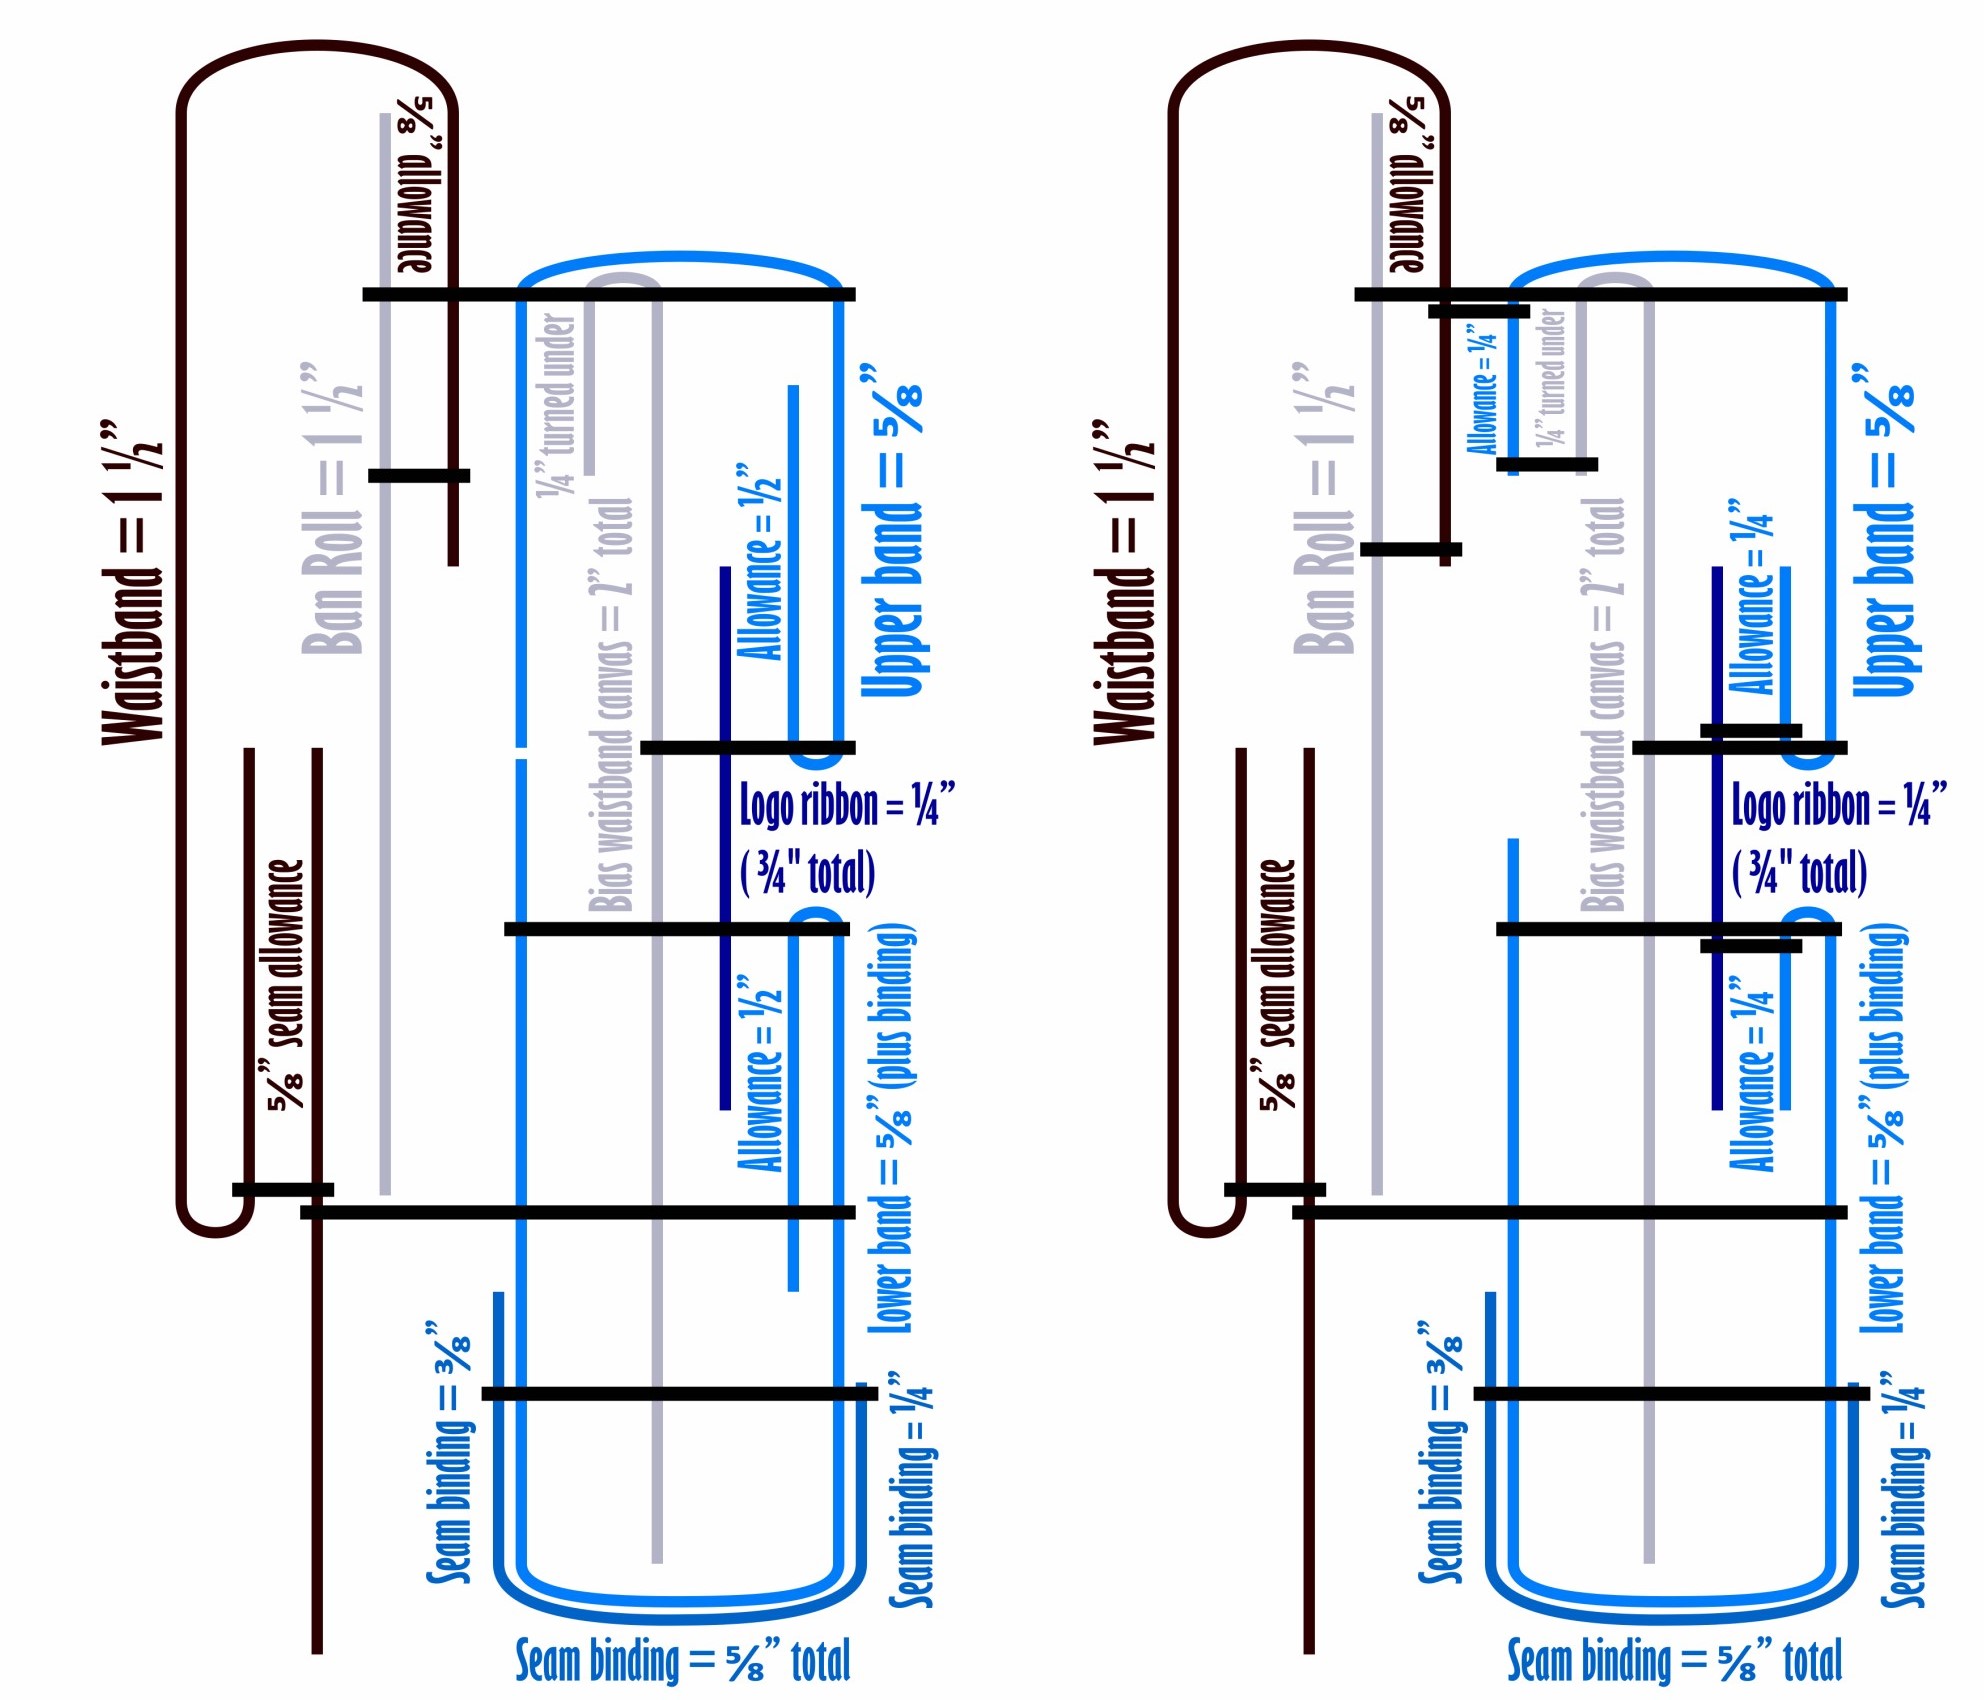
Below, to the left, is a diagram of the original GAP trousers’ internal waistband construction.
While this may make a certain amount of sense in an “assembly line”-style factory setting with individual sewers whose sole job it is to churn out waistbands by the hundreds (or thousands), I find certain aspects of it to be unwieldy for the typical “home sewer.”
Therefore, I made a few minor internal tweaks with individual “home sewers” in mind, and on the lower right, you’ll see my custom adaptation.
The waistband appears identical when viewed from either side, but I think it’s much easier for people like us to assemble!
(Special thanks again to Alex Murphy, aka “The Ginger Doctor,” for providing me with a sample from an actual GAP trousers’ waistband and helping me reverse-engineer the original assembly process!)
Cut two strips of your waistband fabric that are 1 ⅛” wide, for the upper waistband facing.
Cut two additional strips that are 2 ⅜” wide, for the lower waistband facing.
If you’re using the print with the vertical stripes, cut your strips on the bias, with the stripes running from upper left to lower right. I also found it helpful to stabilize the bias strips with a lightweight fusible interfacing (even though this doesn’t appear to have been done on the original GAP trousers).
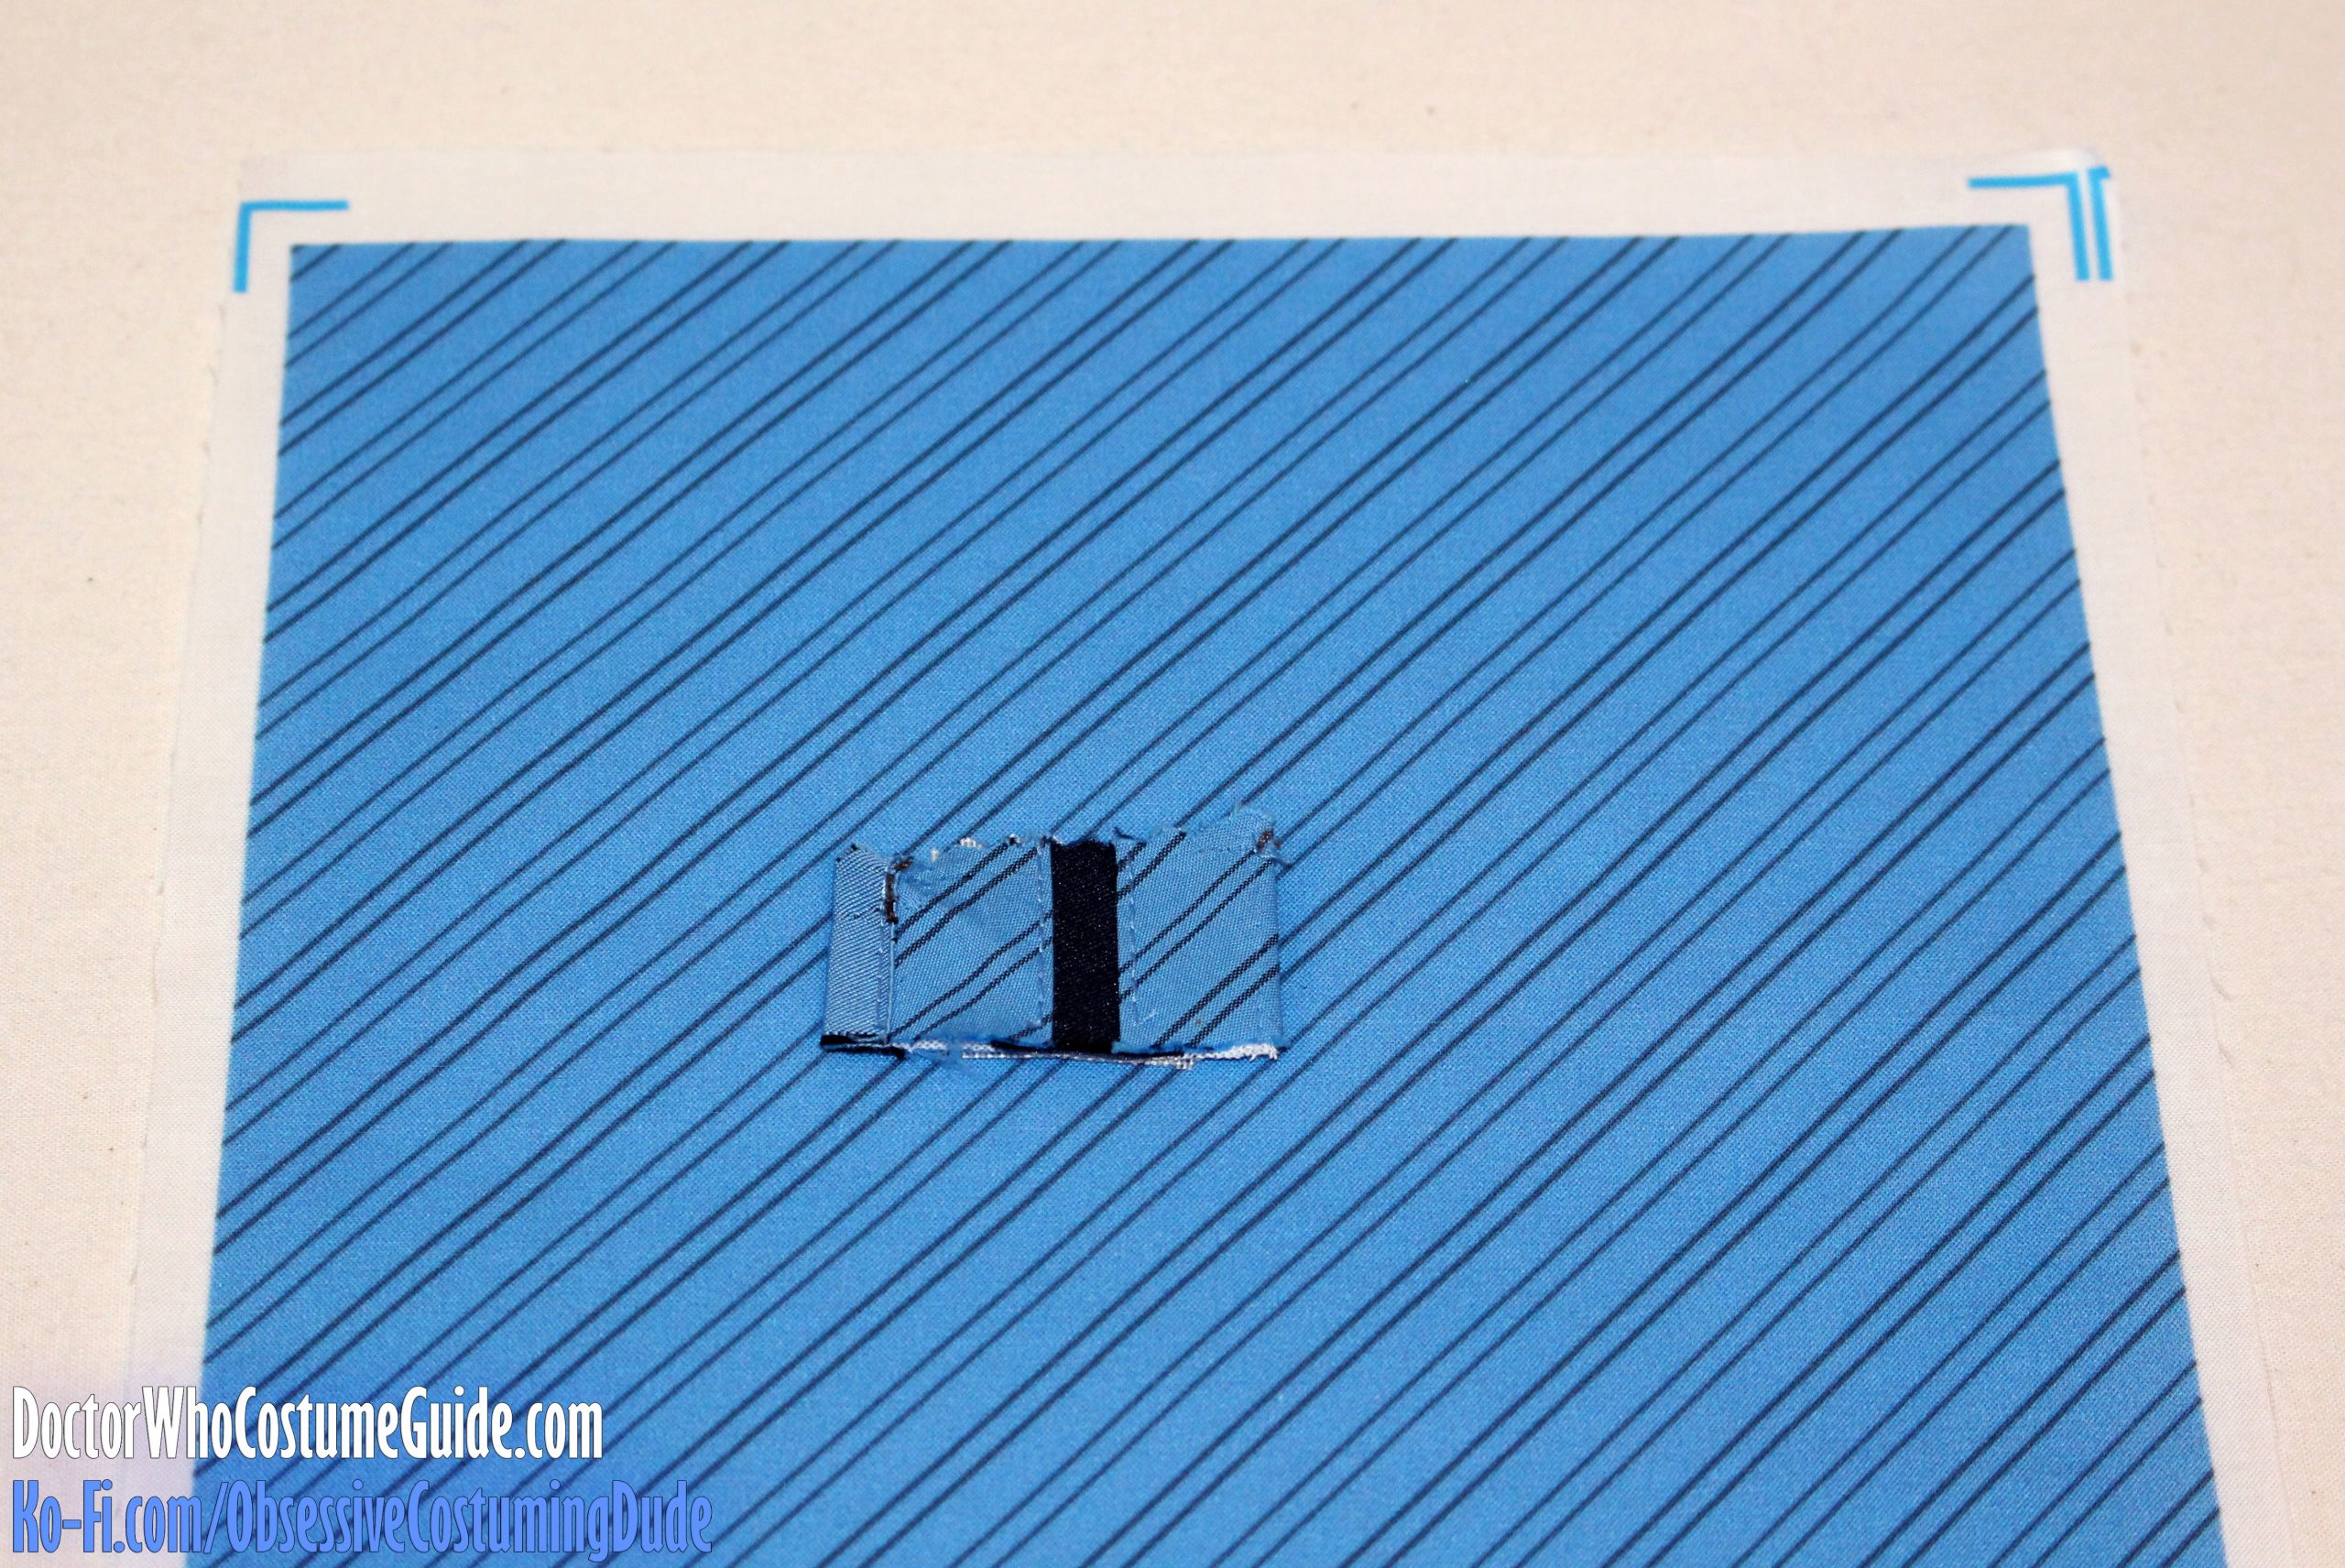
If you’re using the print with the diagonal stripes, just cut your strips on the straight grain.
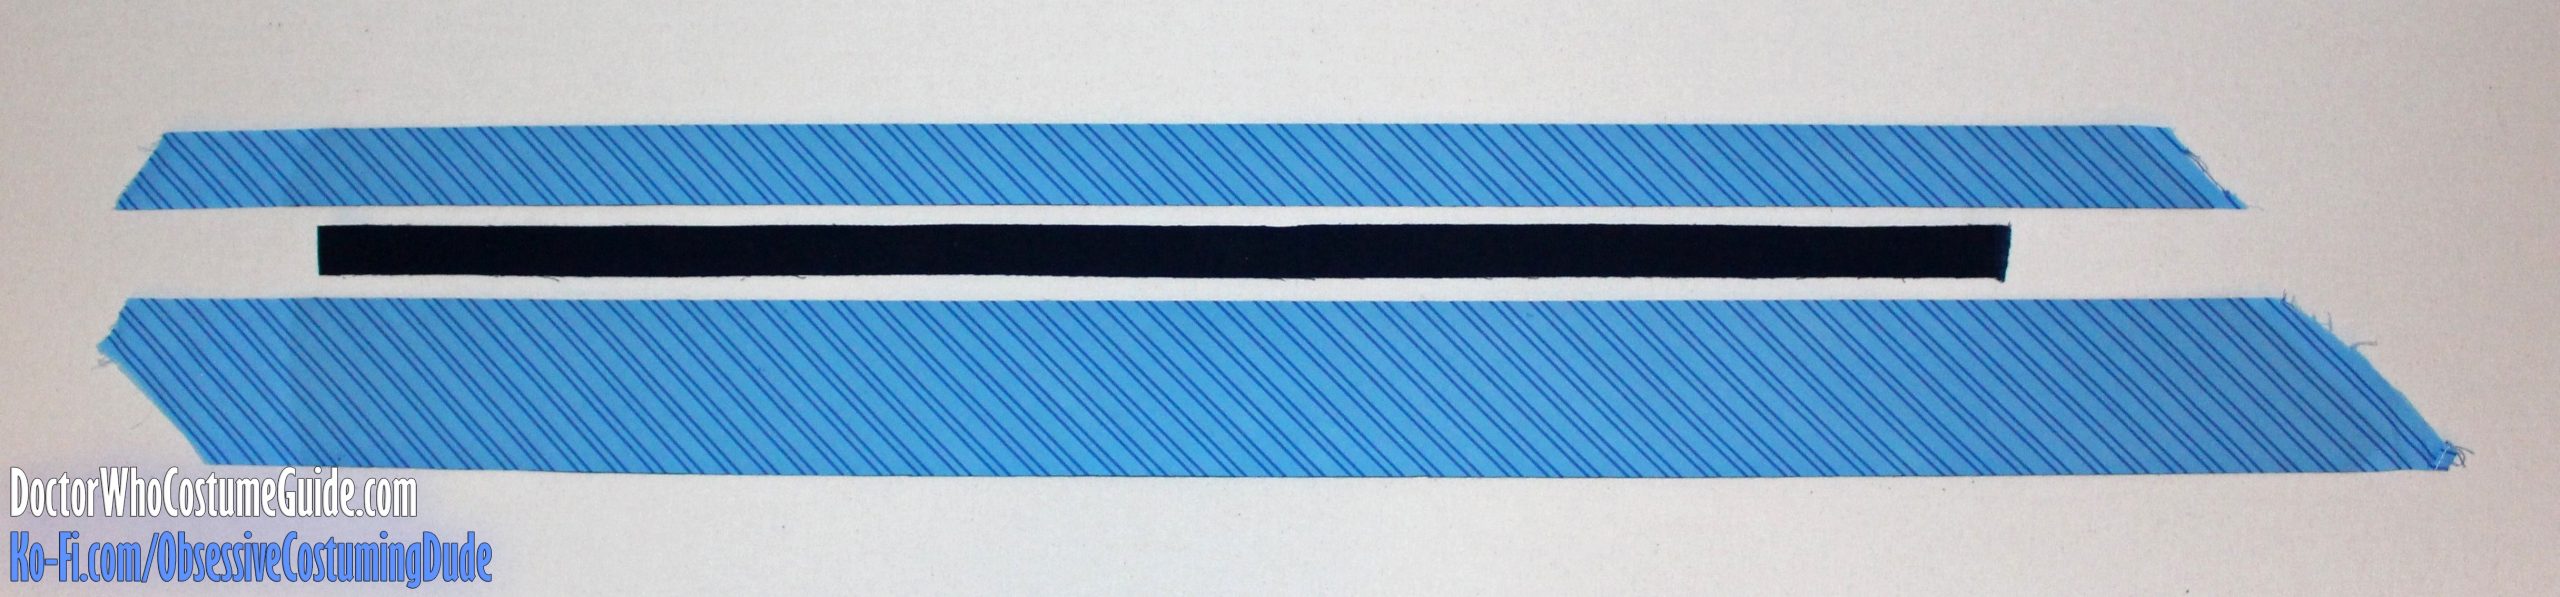
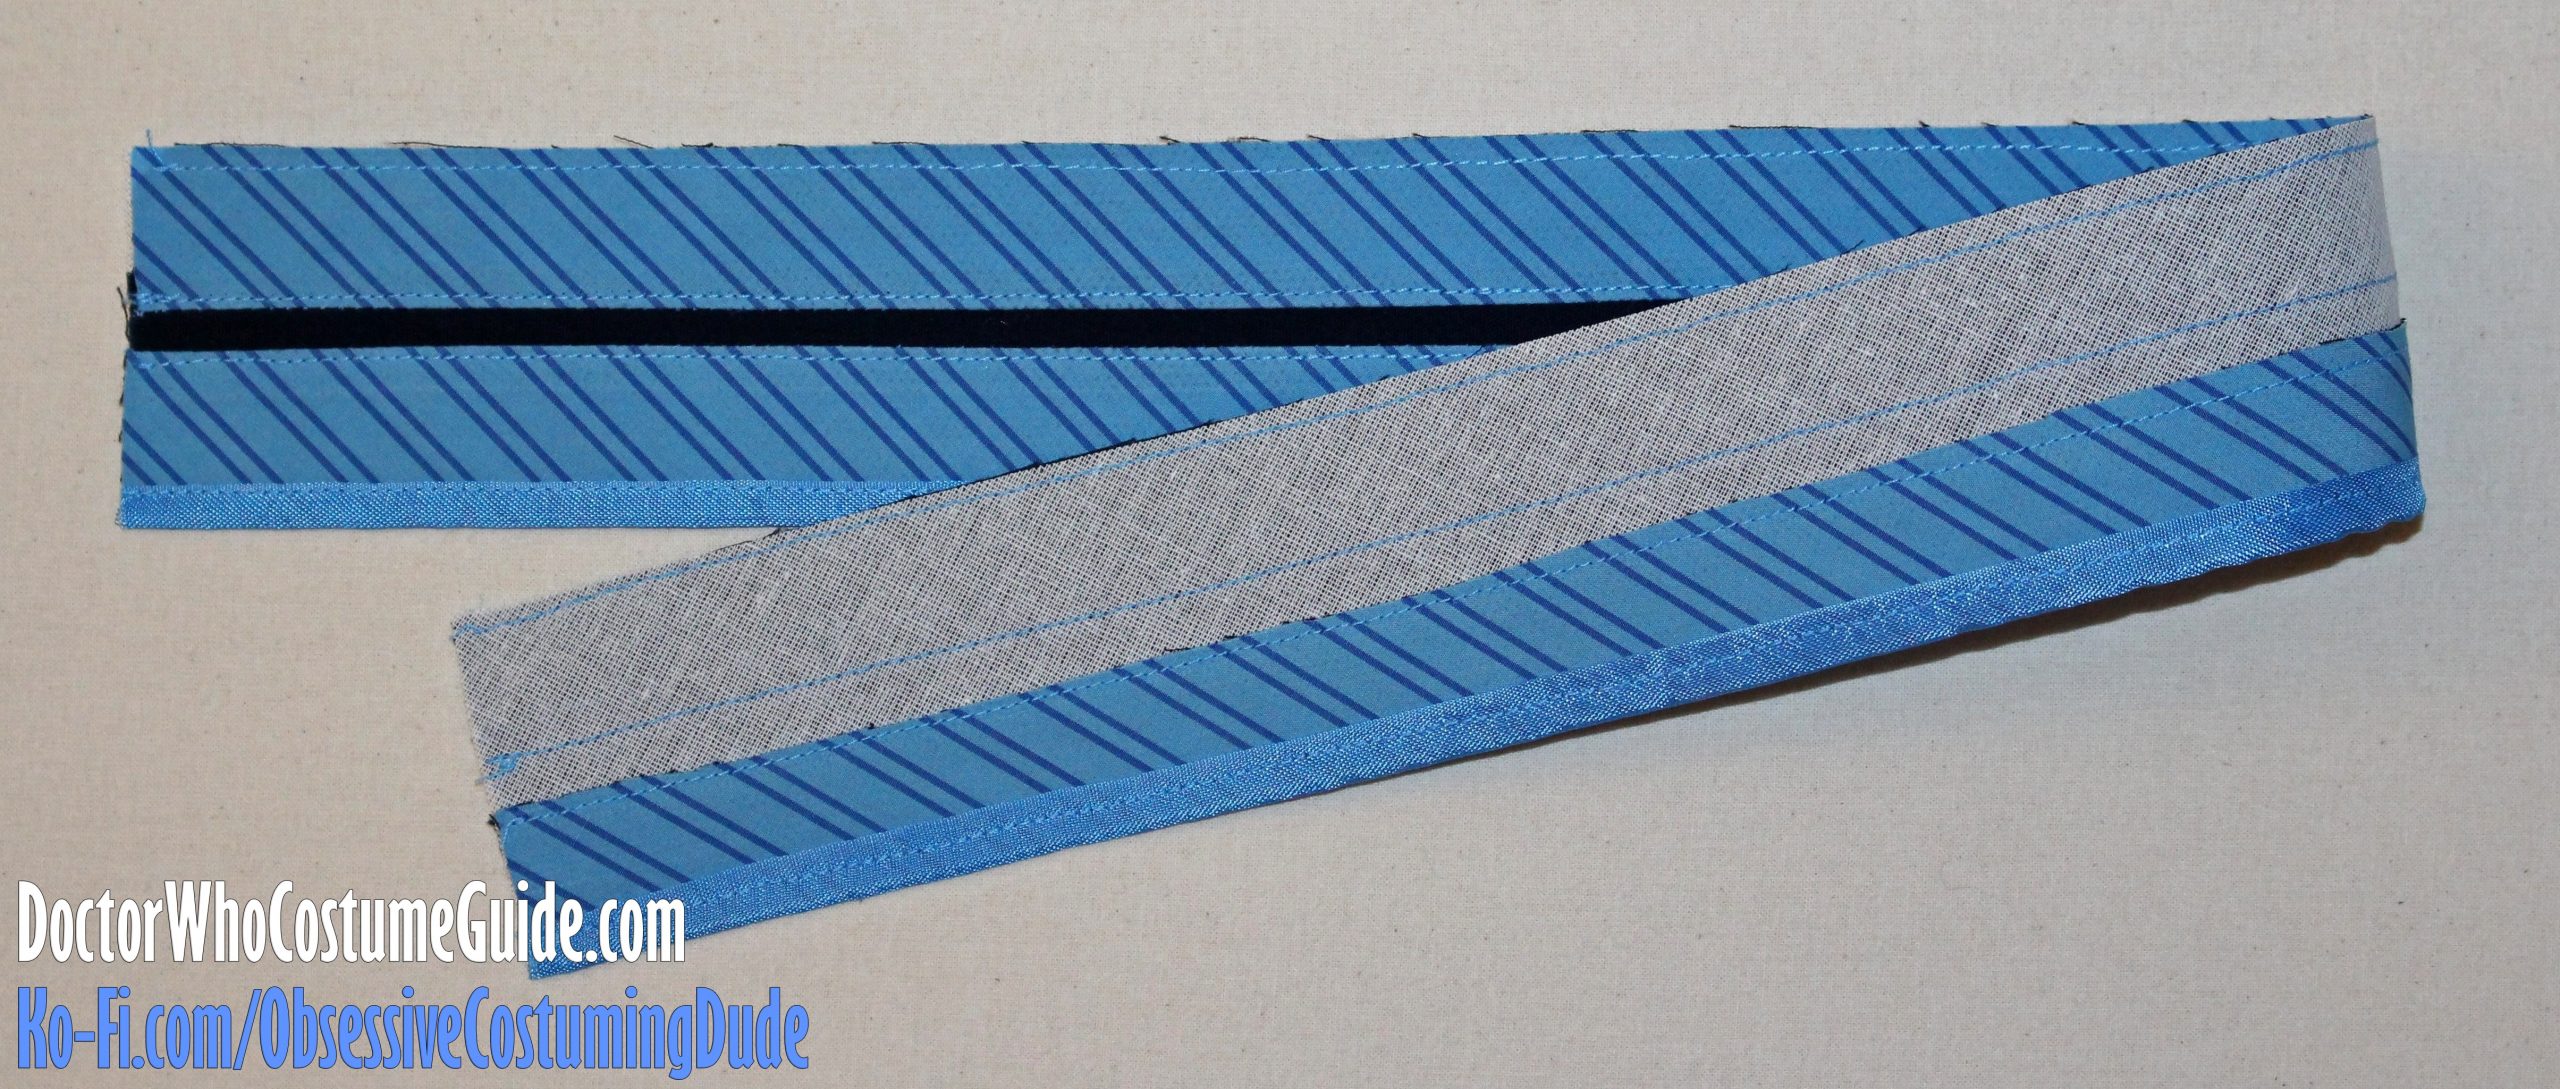
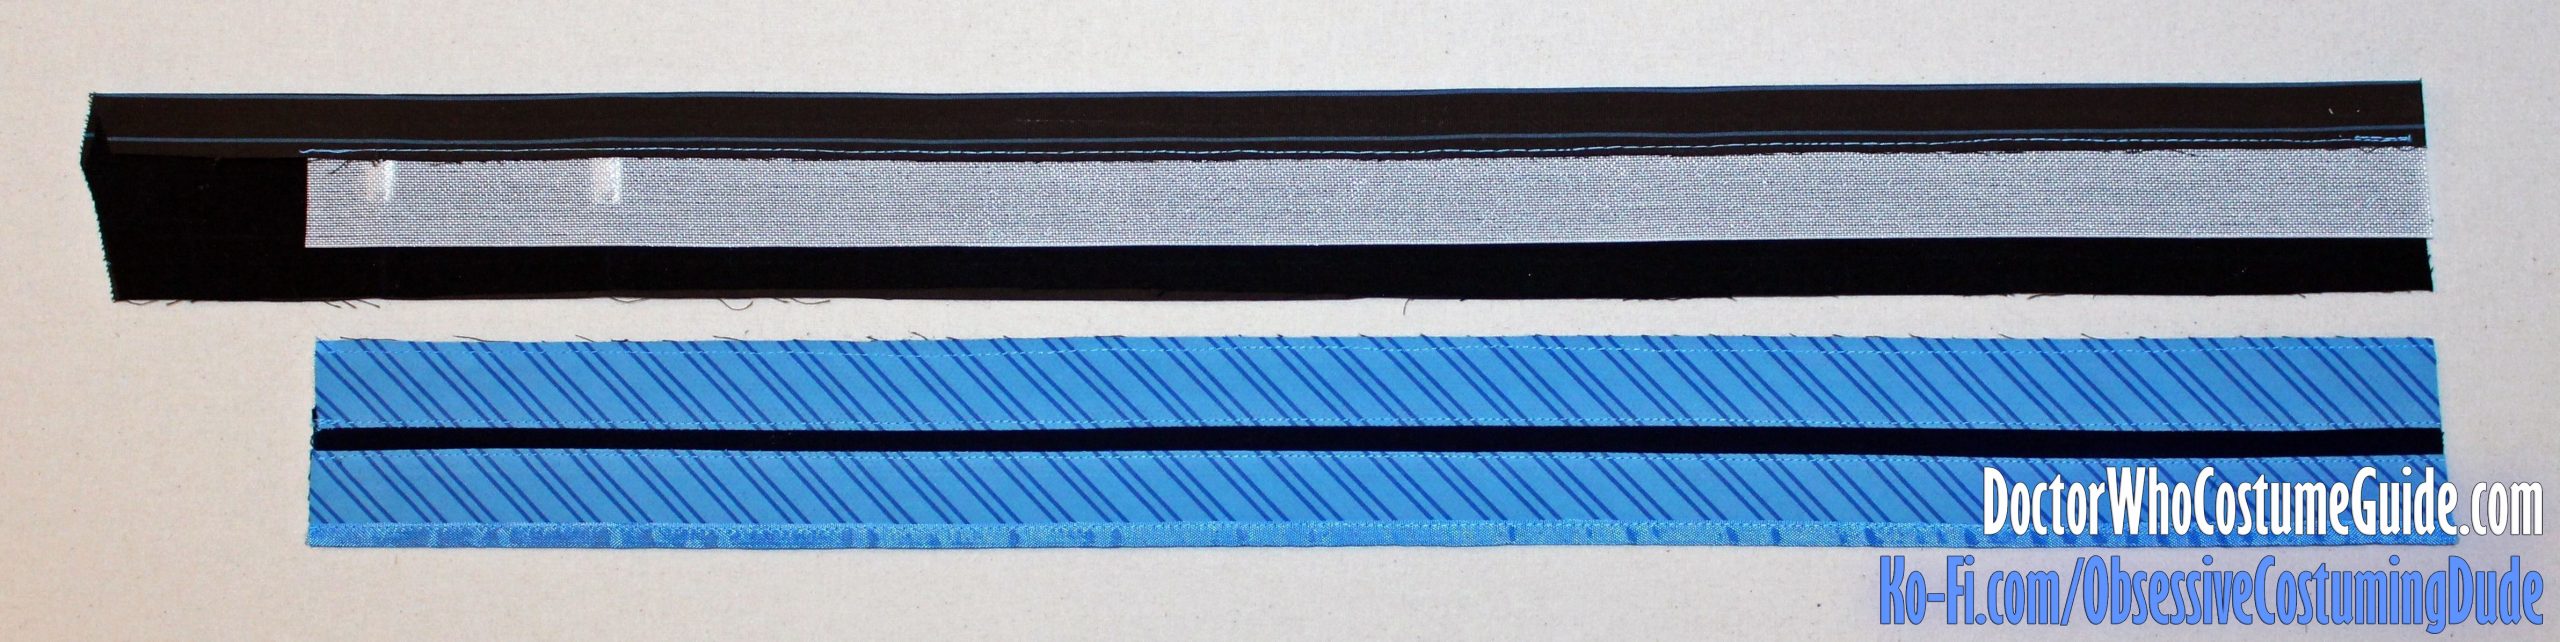
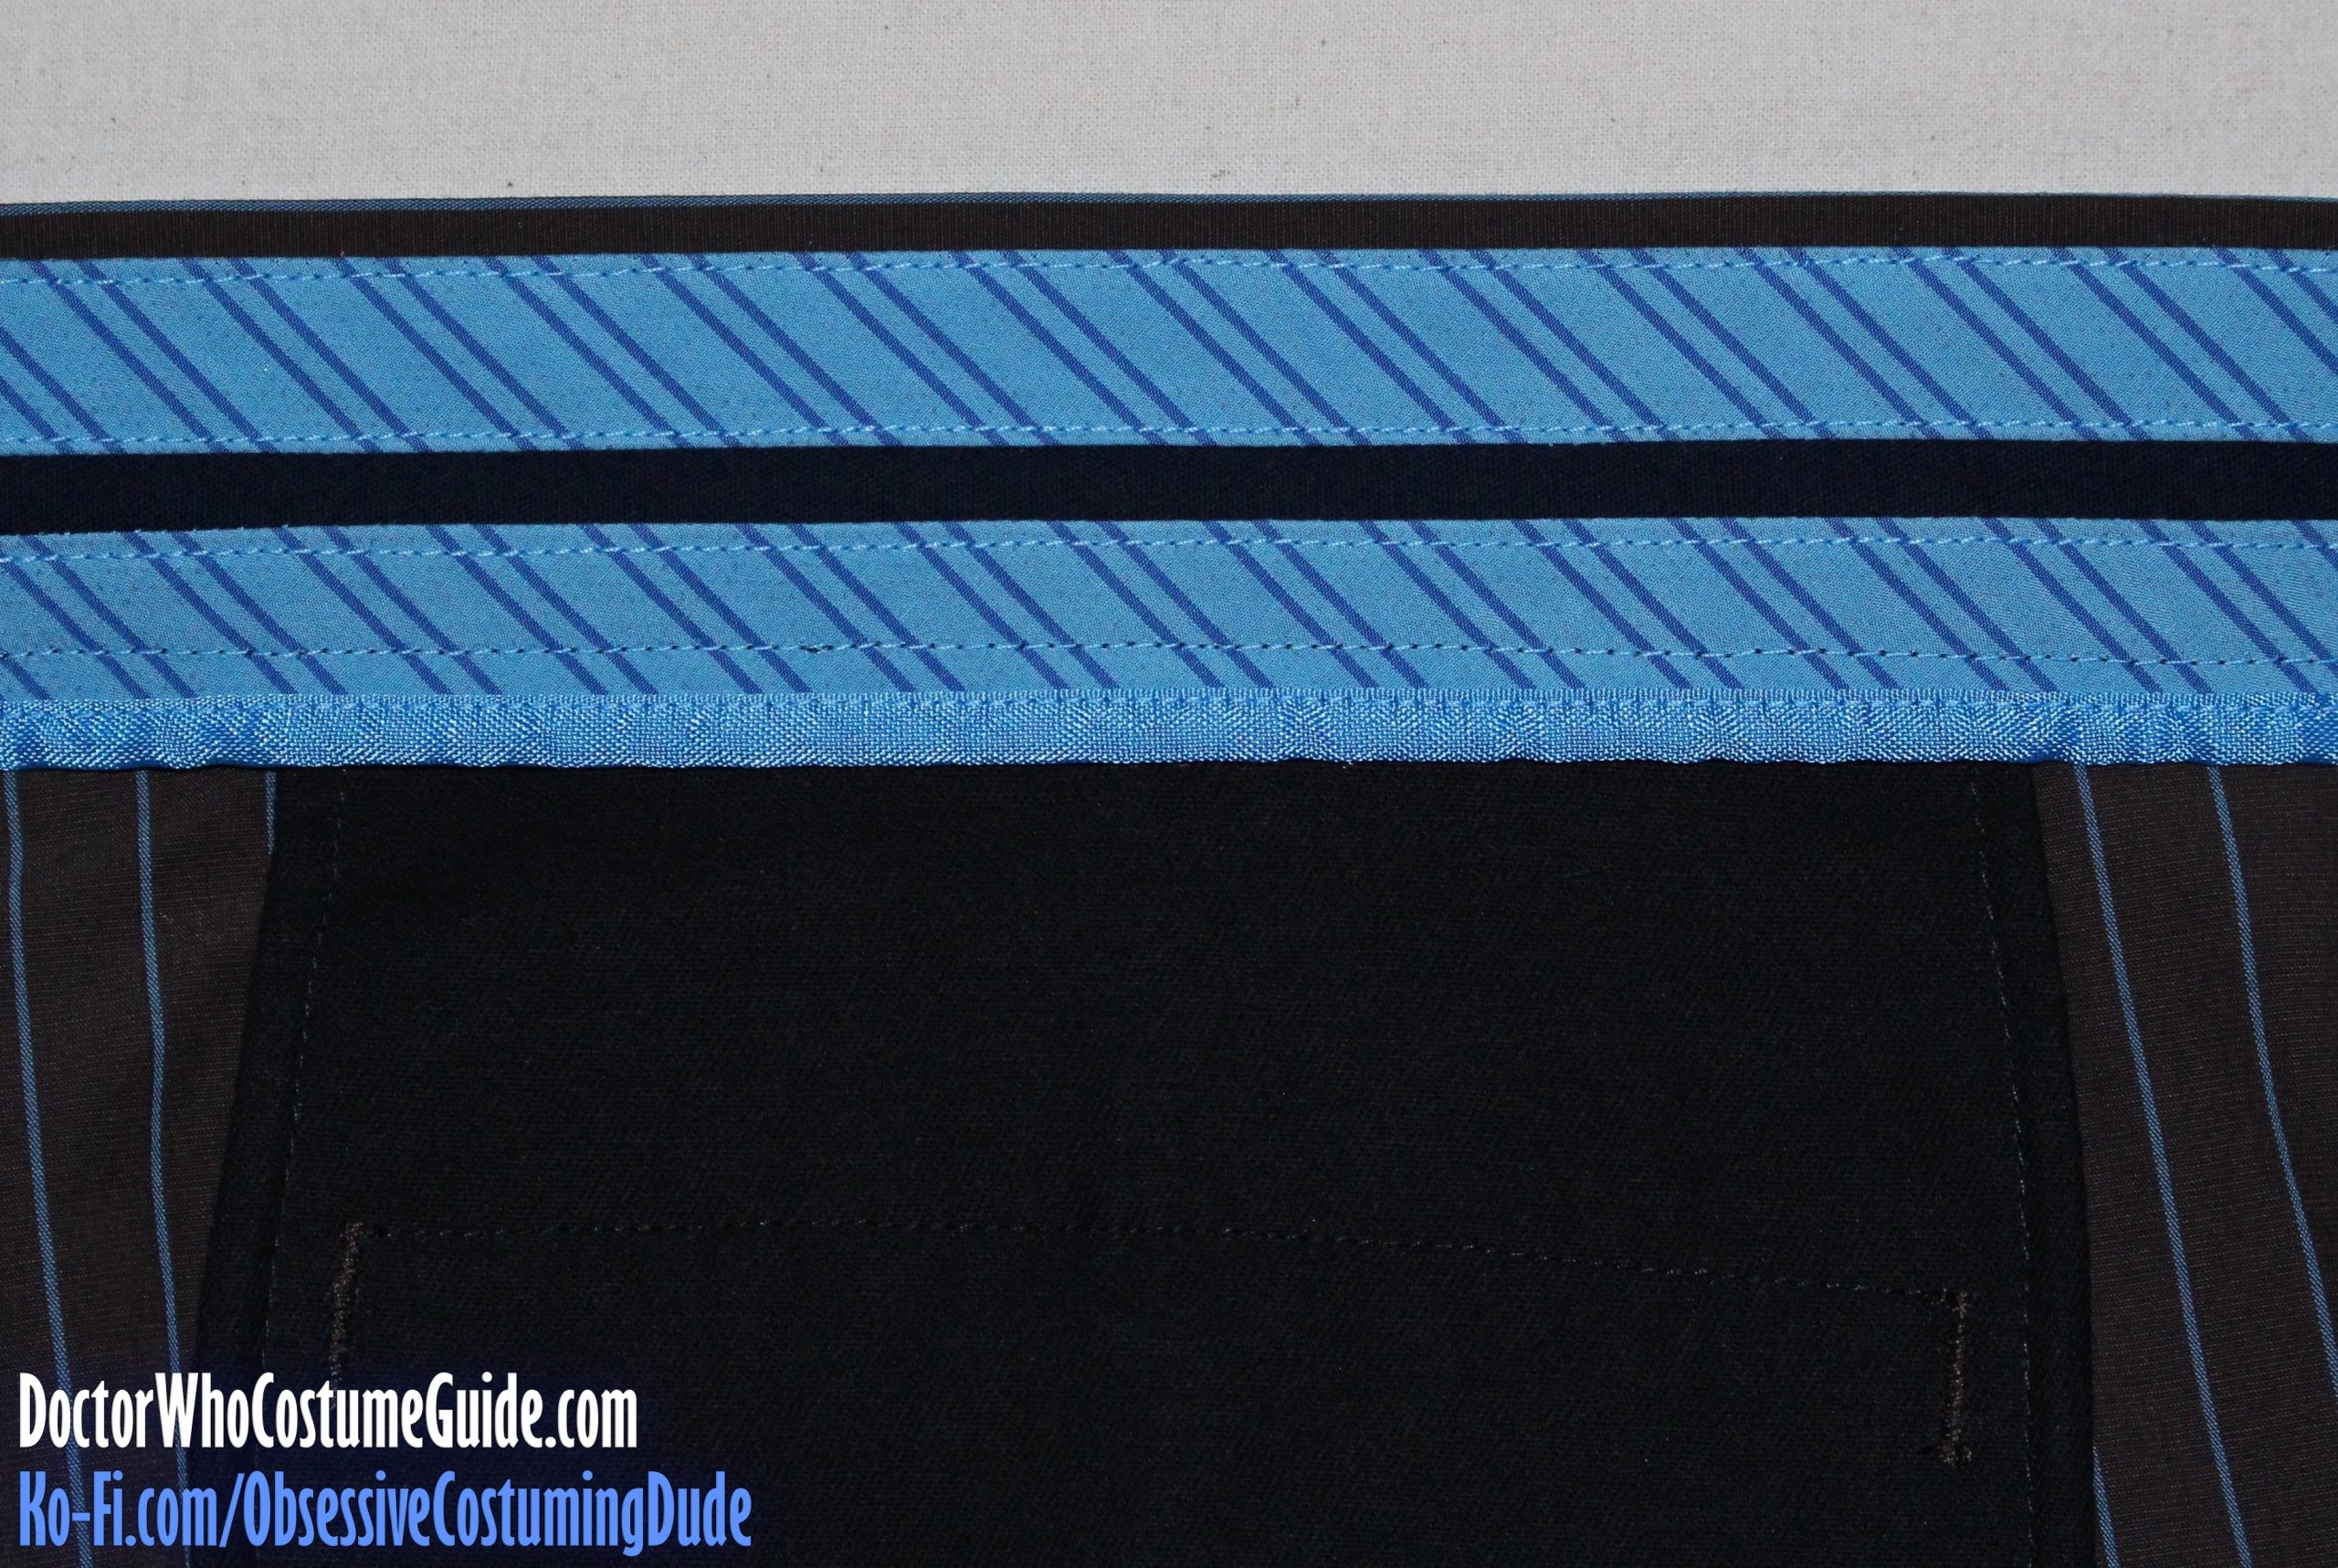
Sew your navy “logo ribbon” to the upper waistband facing strip, right sides together, with ¼” seam allowance.
Press the navy “logo ribbon” down, and the seam allowances upward.
Repeat for the lower waistband facing strip, taking care to match the stripes across the ribbon.
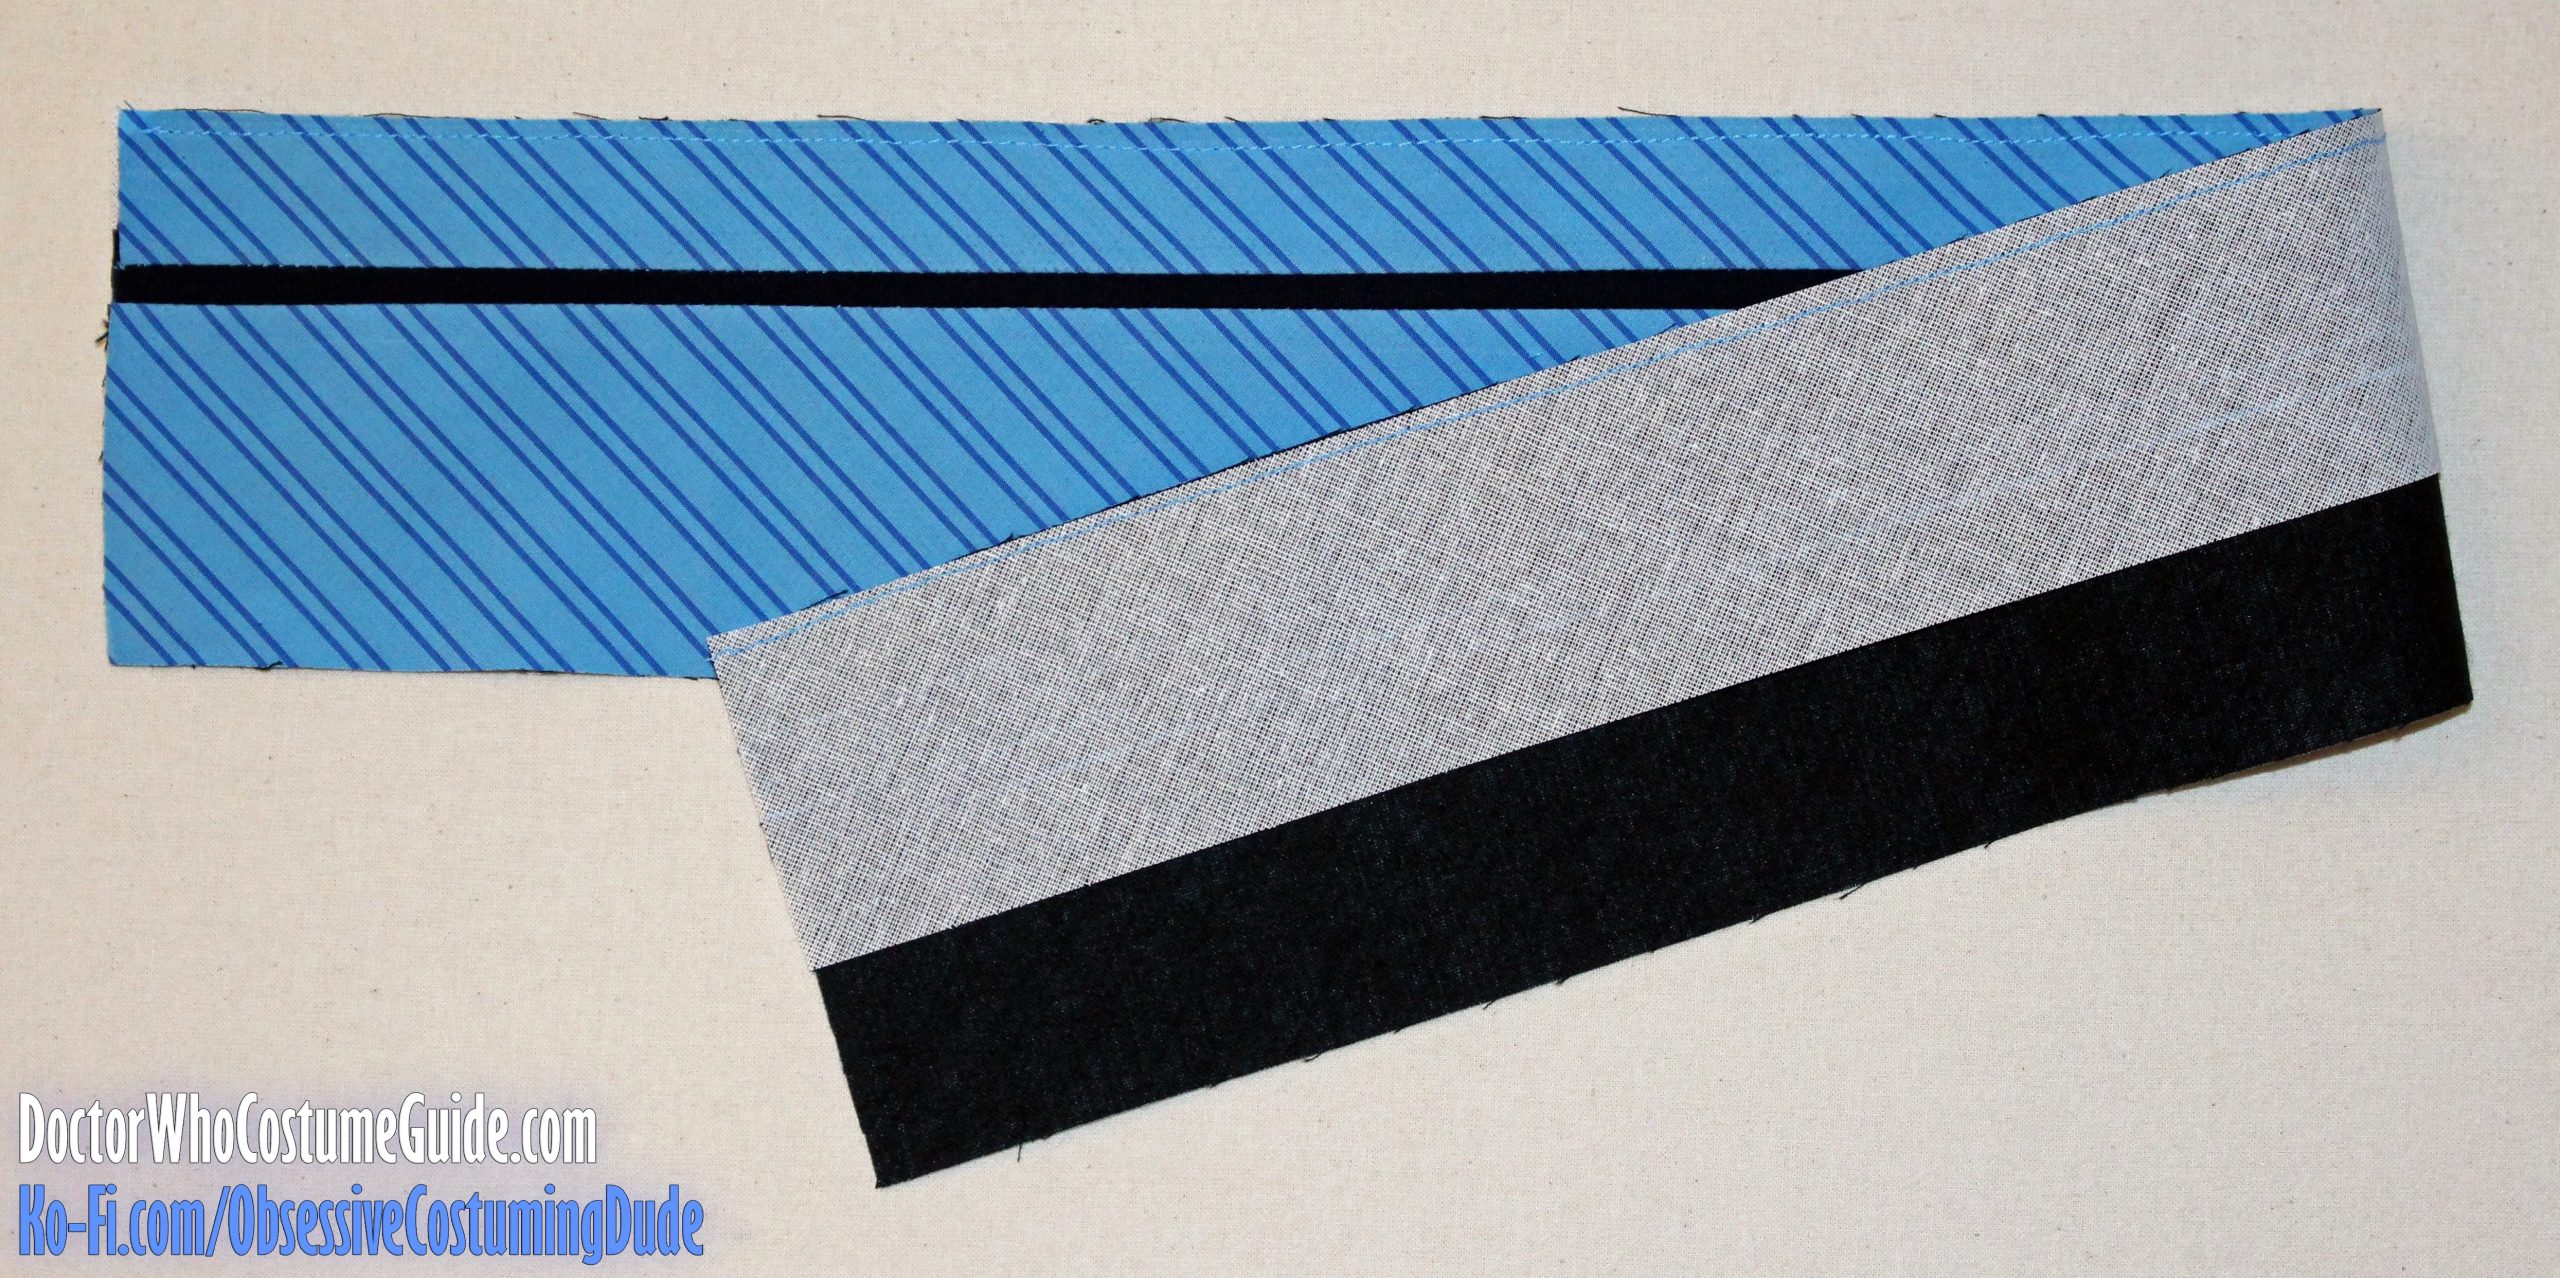
Baste or sew your 2” waistband bias canvas to the waistband facing assembly near the upper edges.
Fold the lower edge of the lower waistband facing fabric upward along the lower edge of the bias canvas, and press it into place.
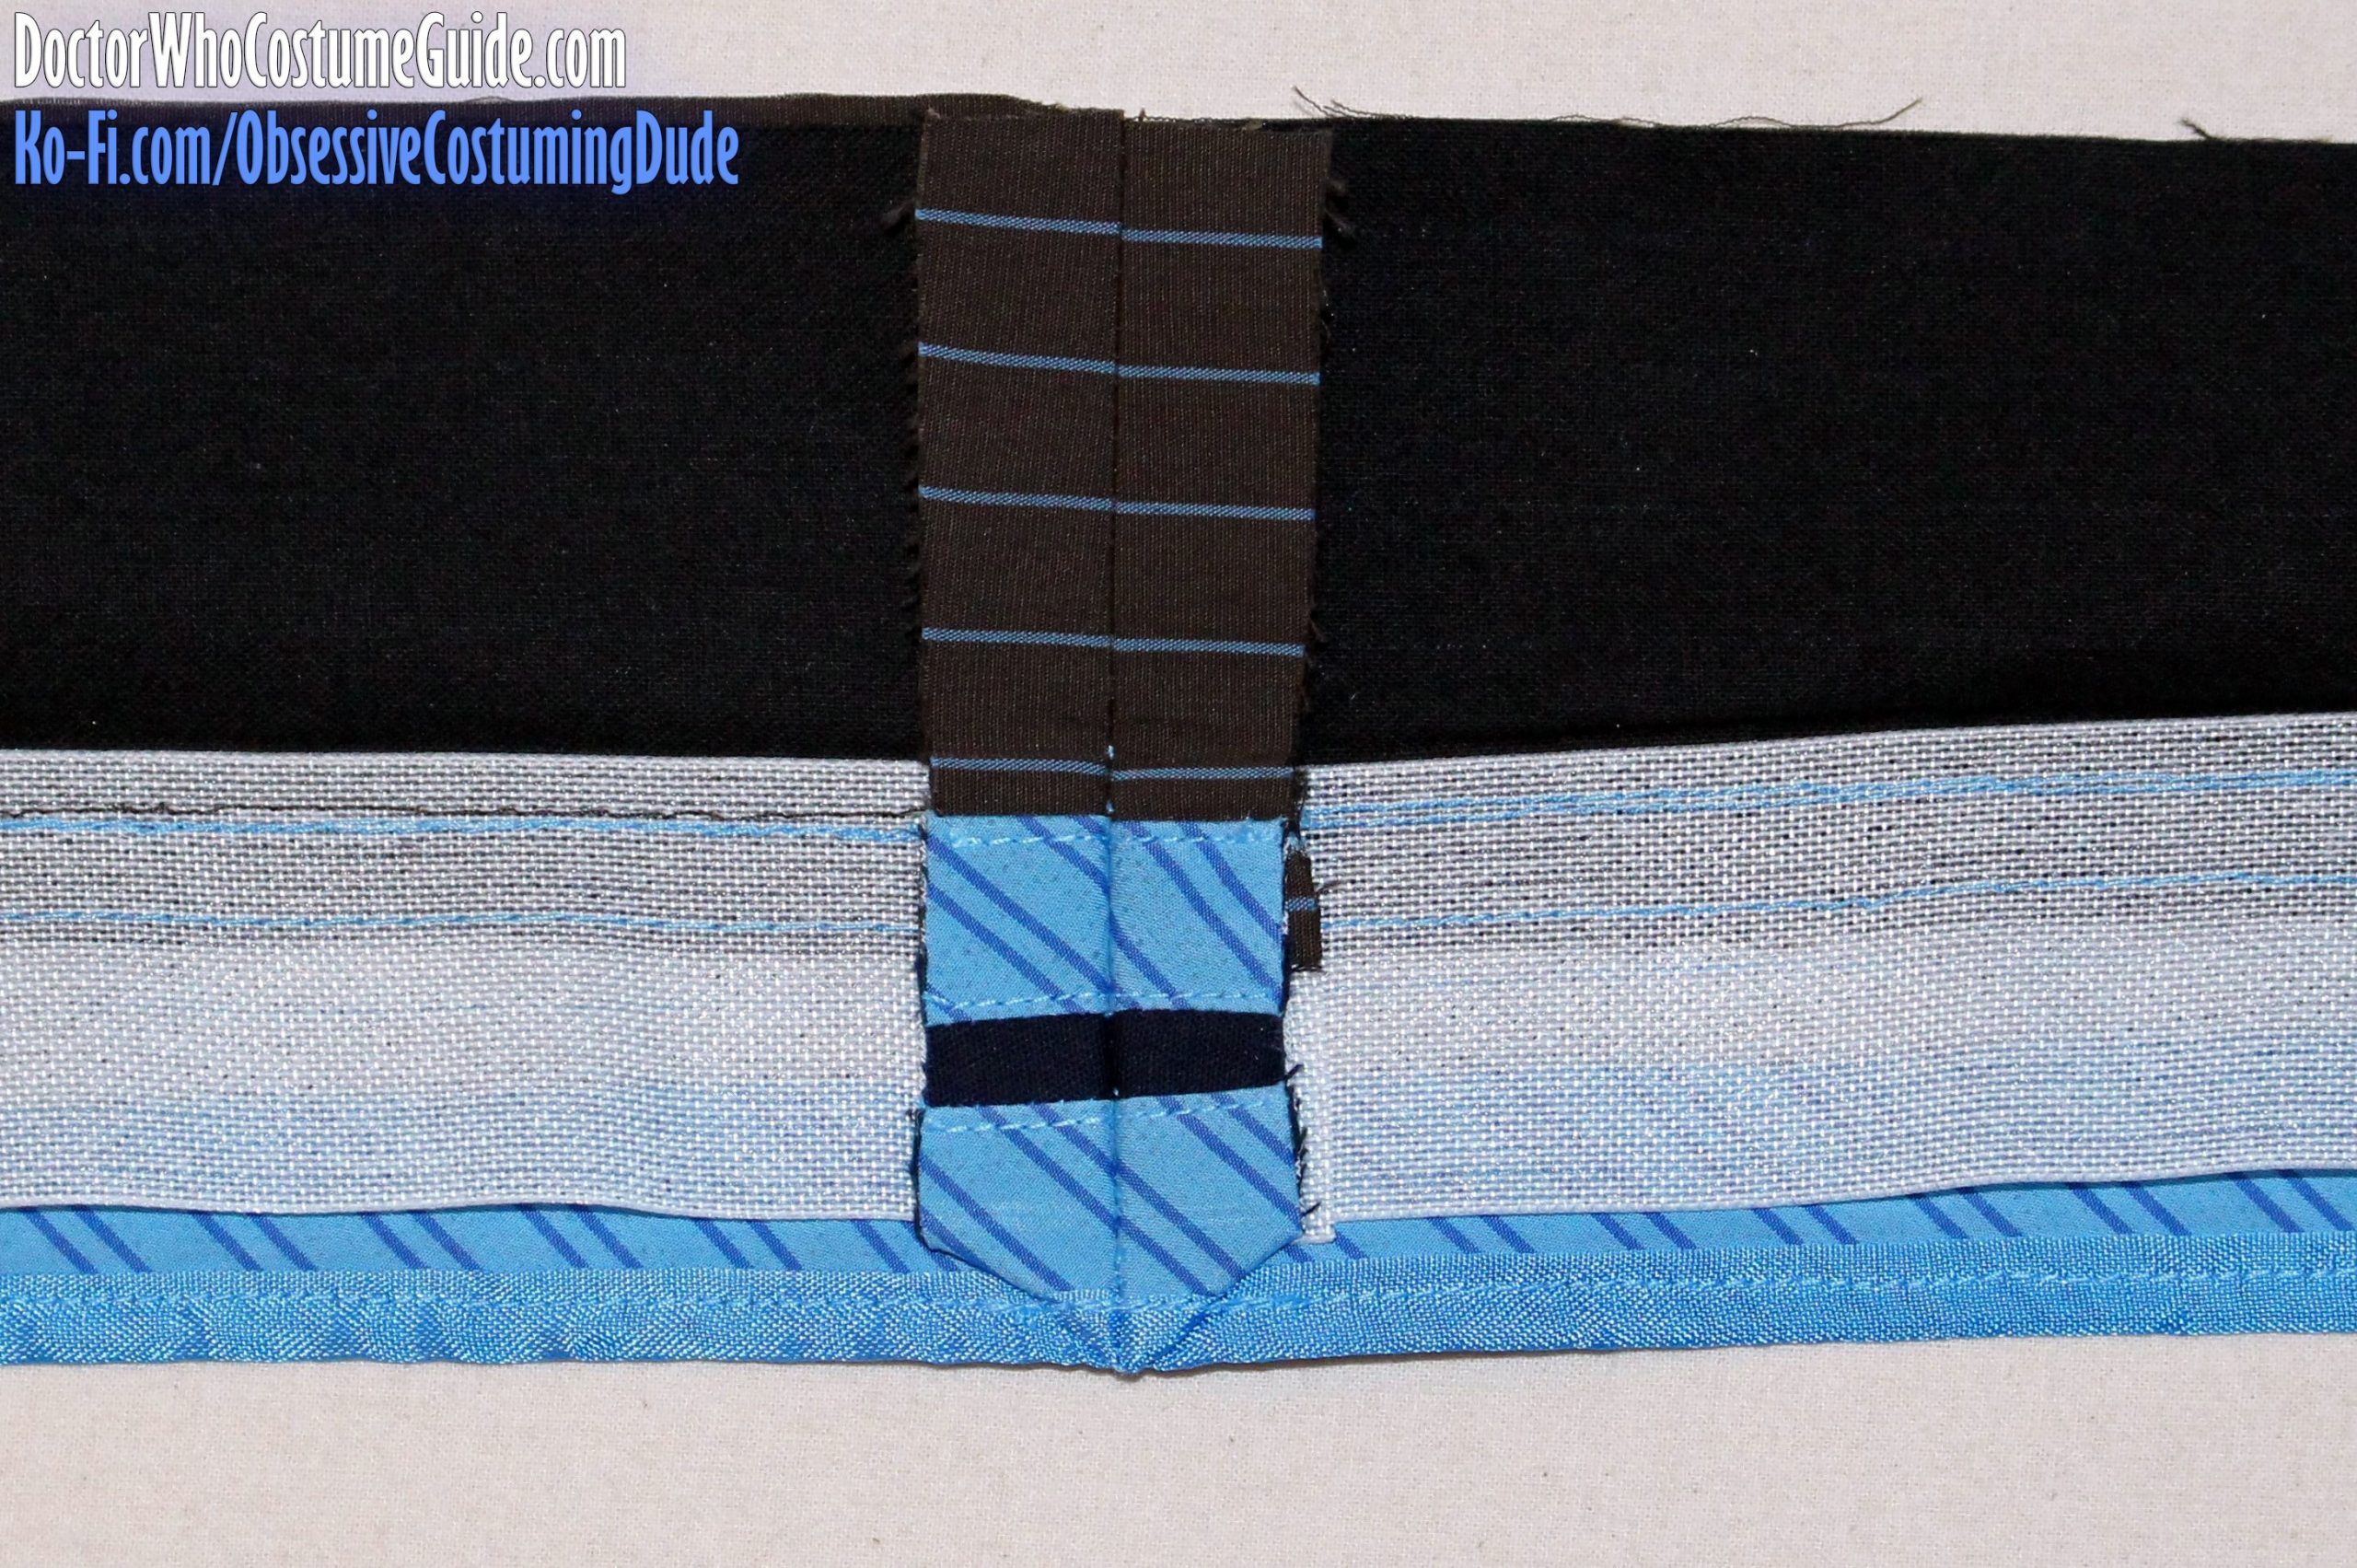
Using your blue thread, edge-stitch through all layers above and below the navy “logo ribbon.”
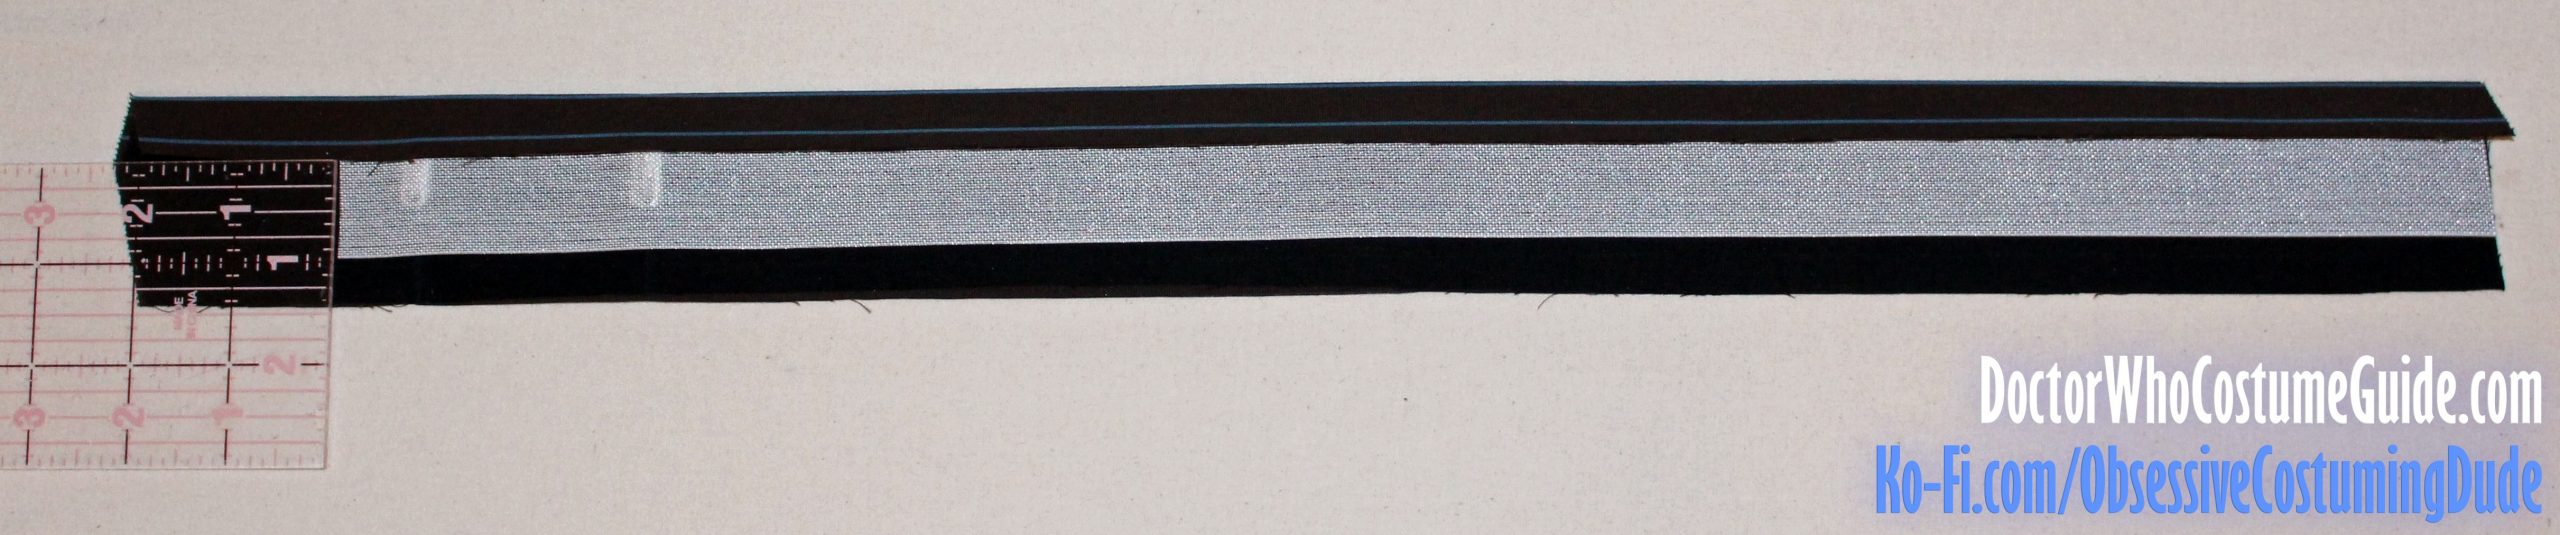
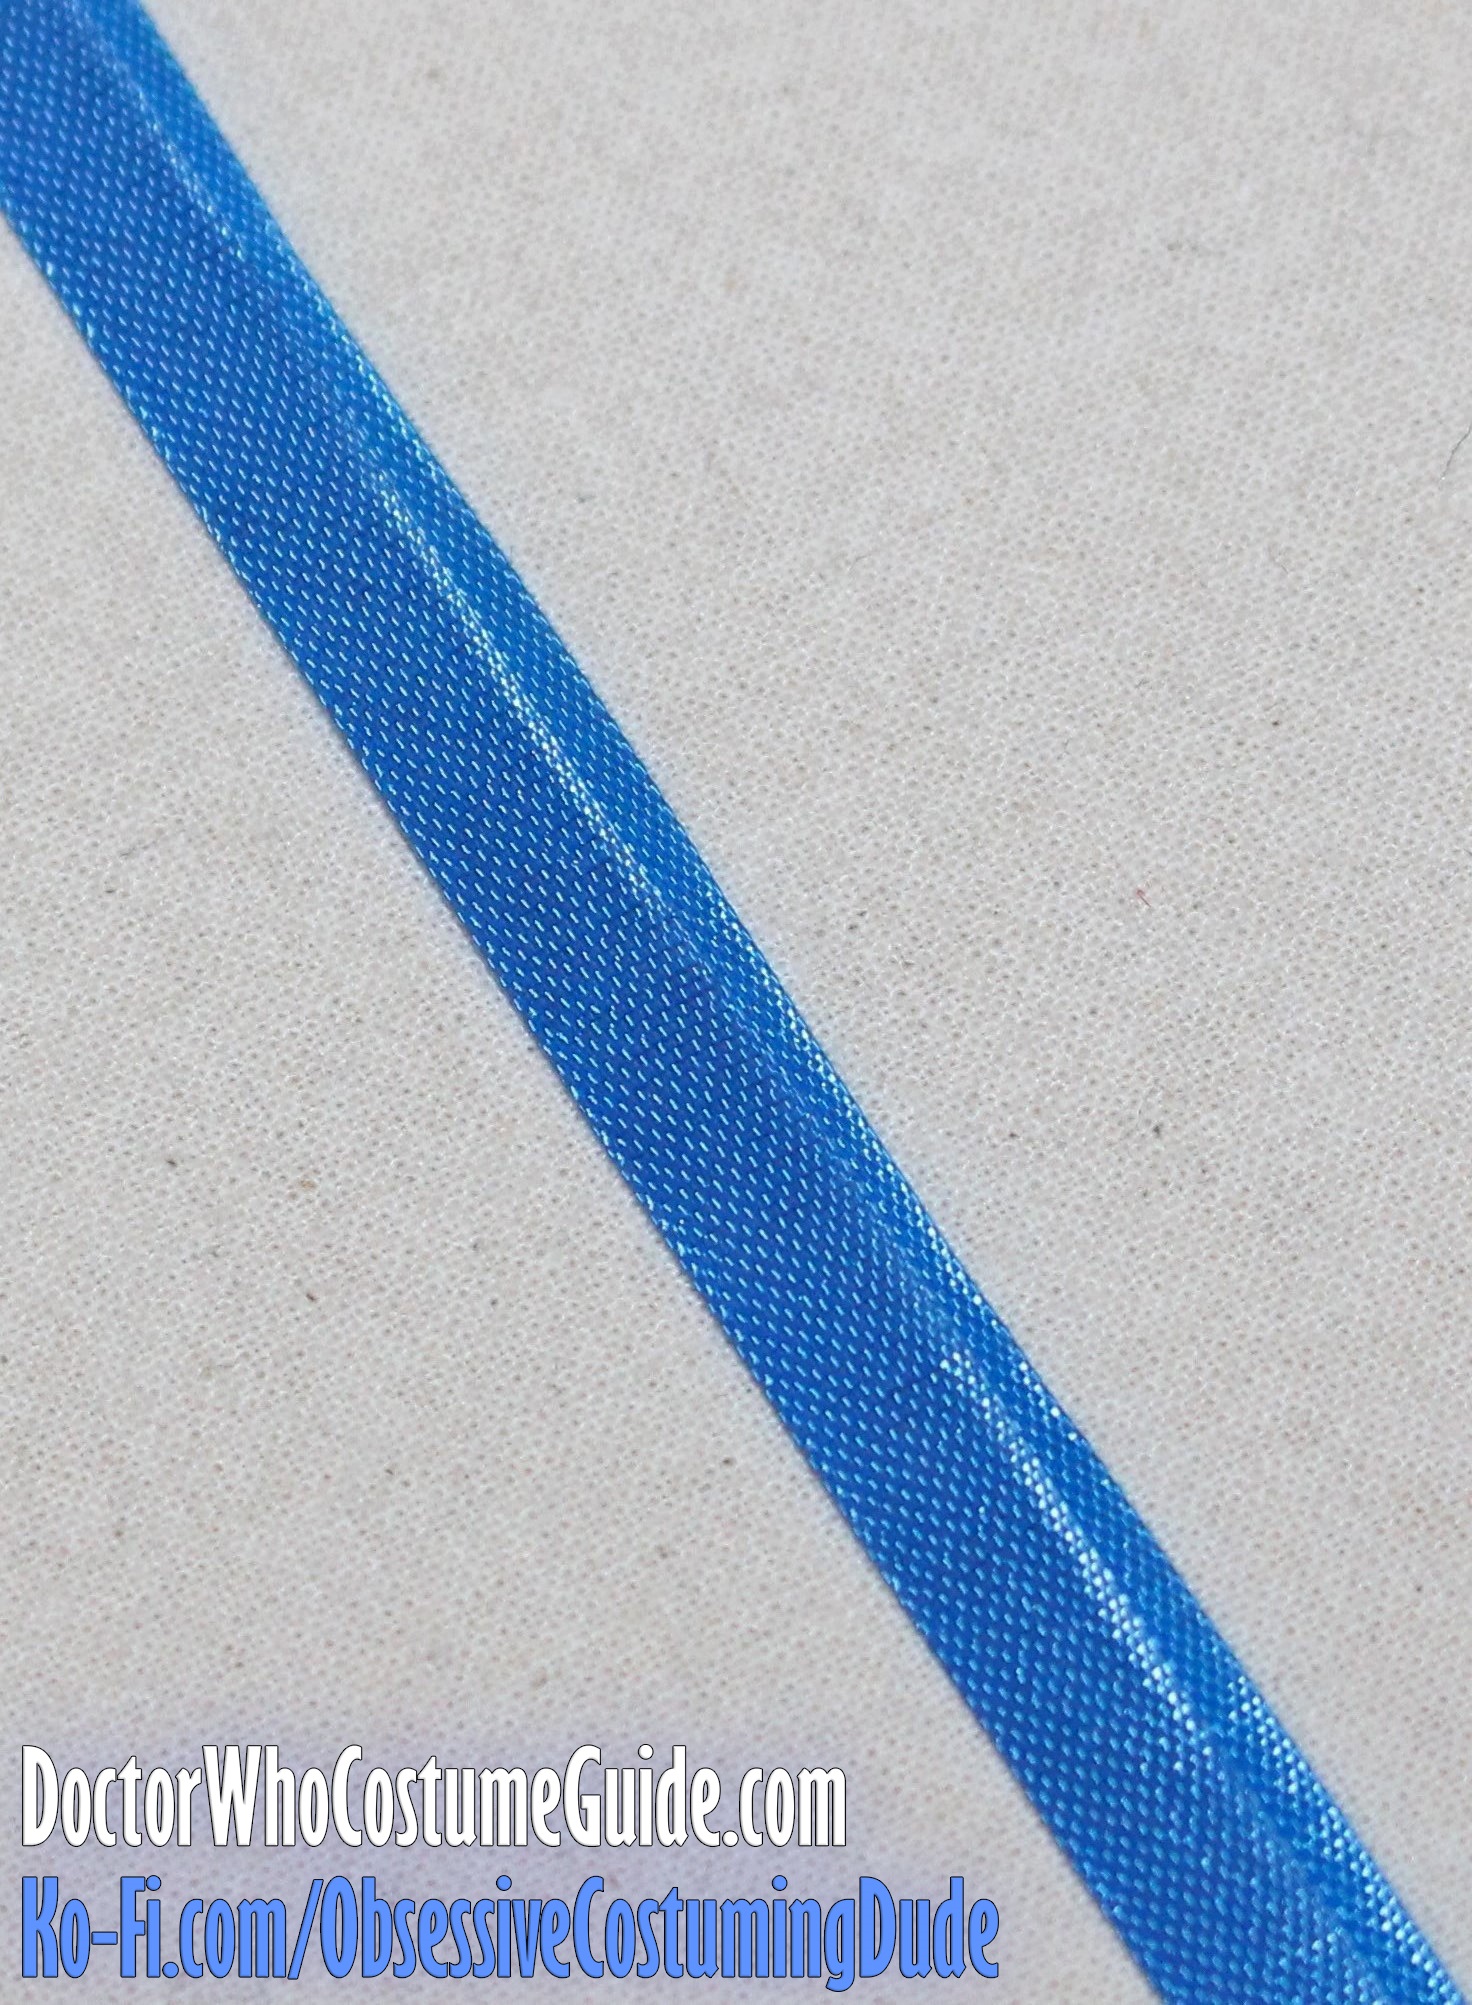
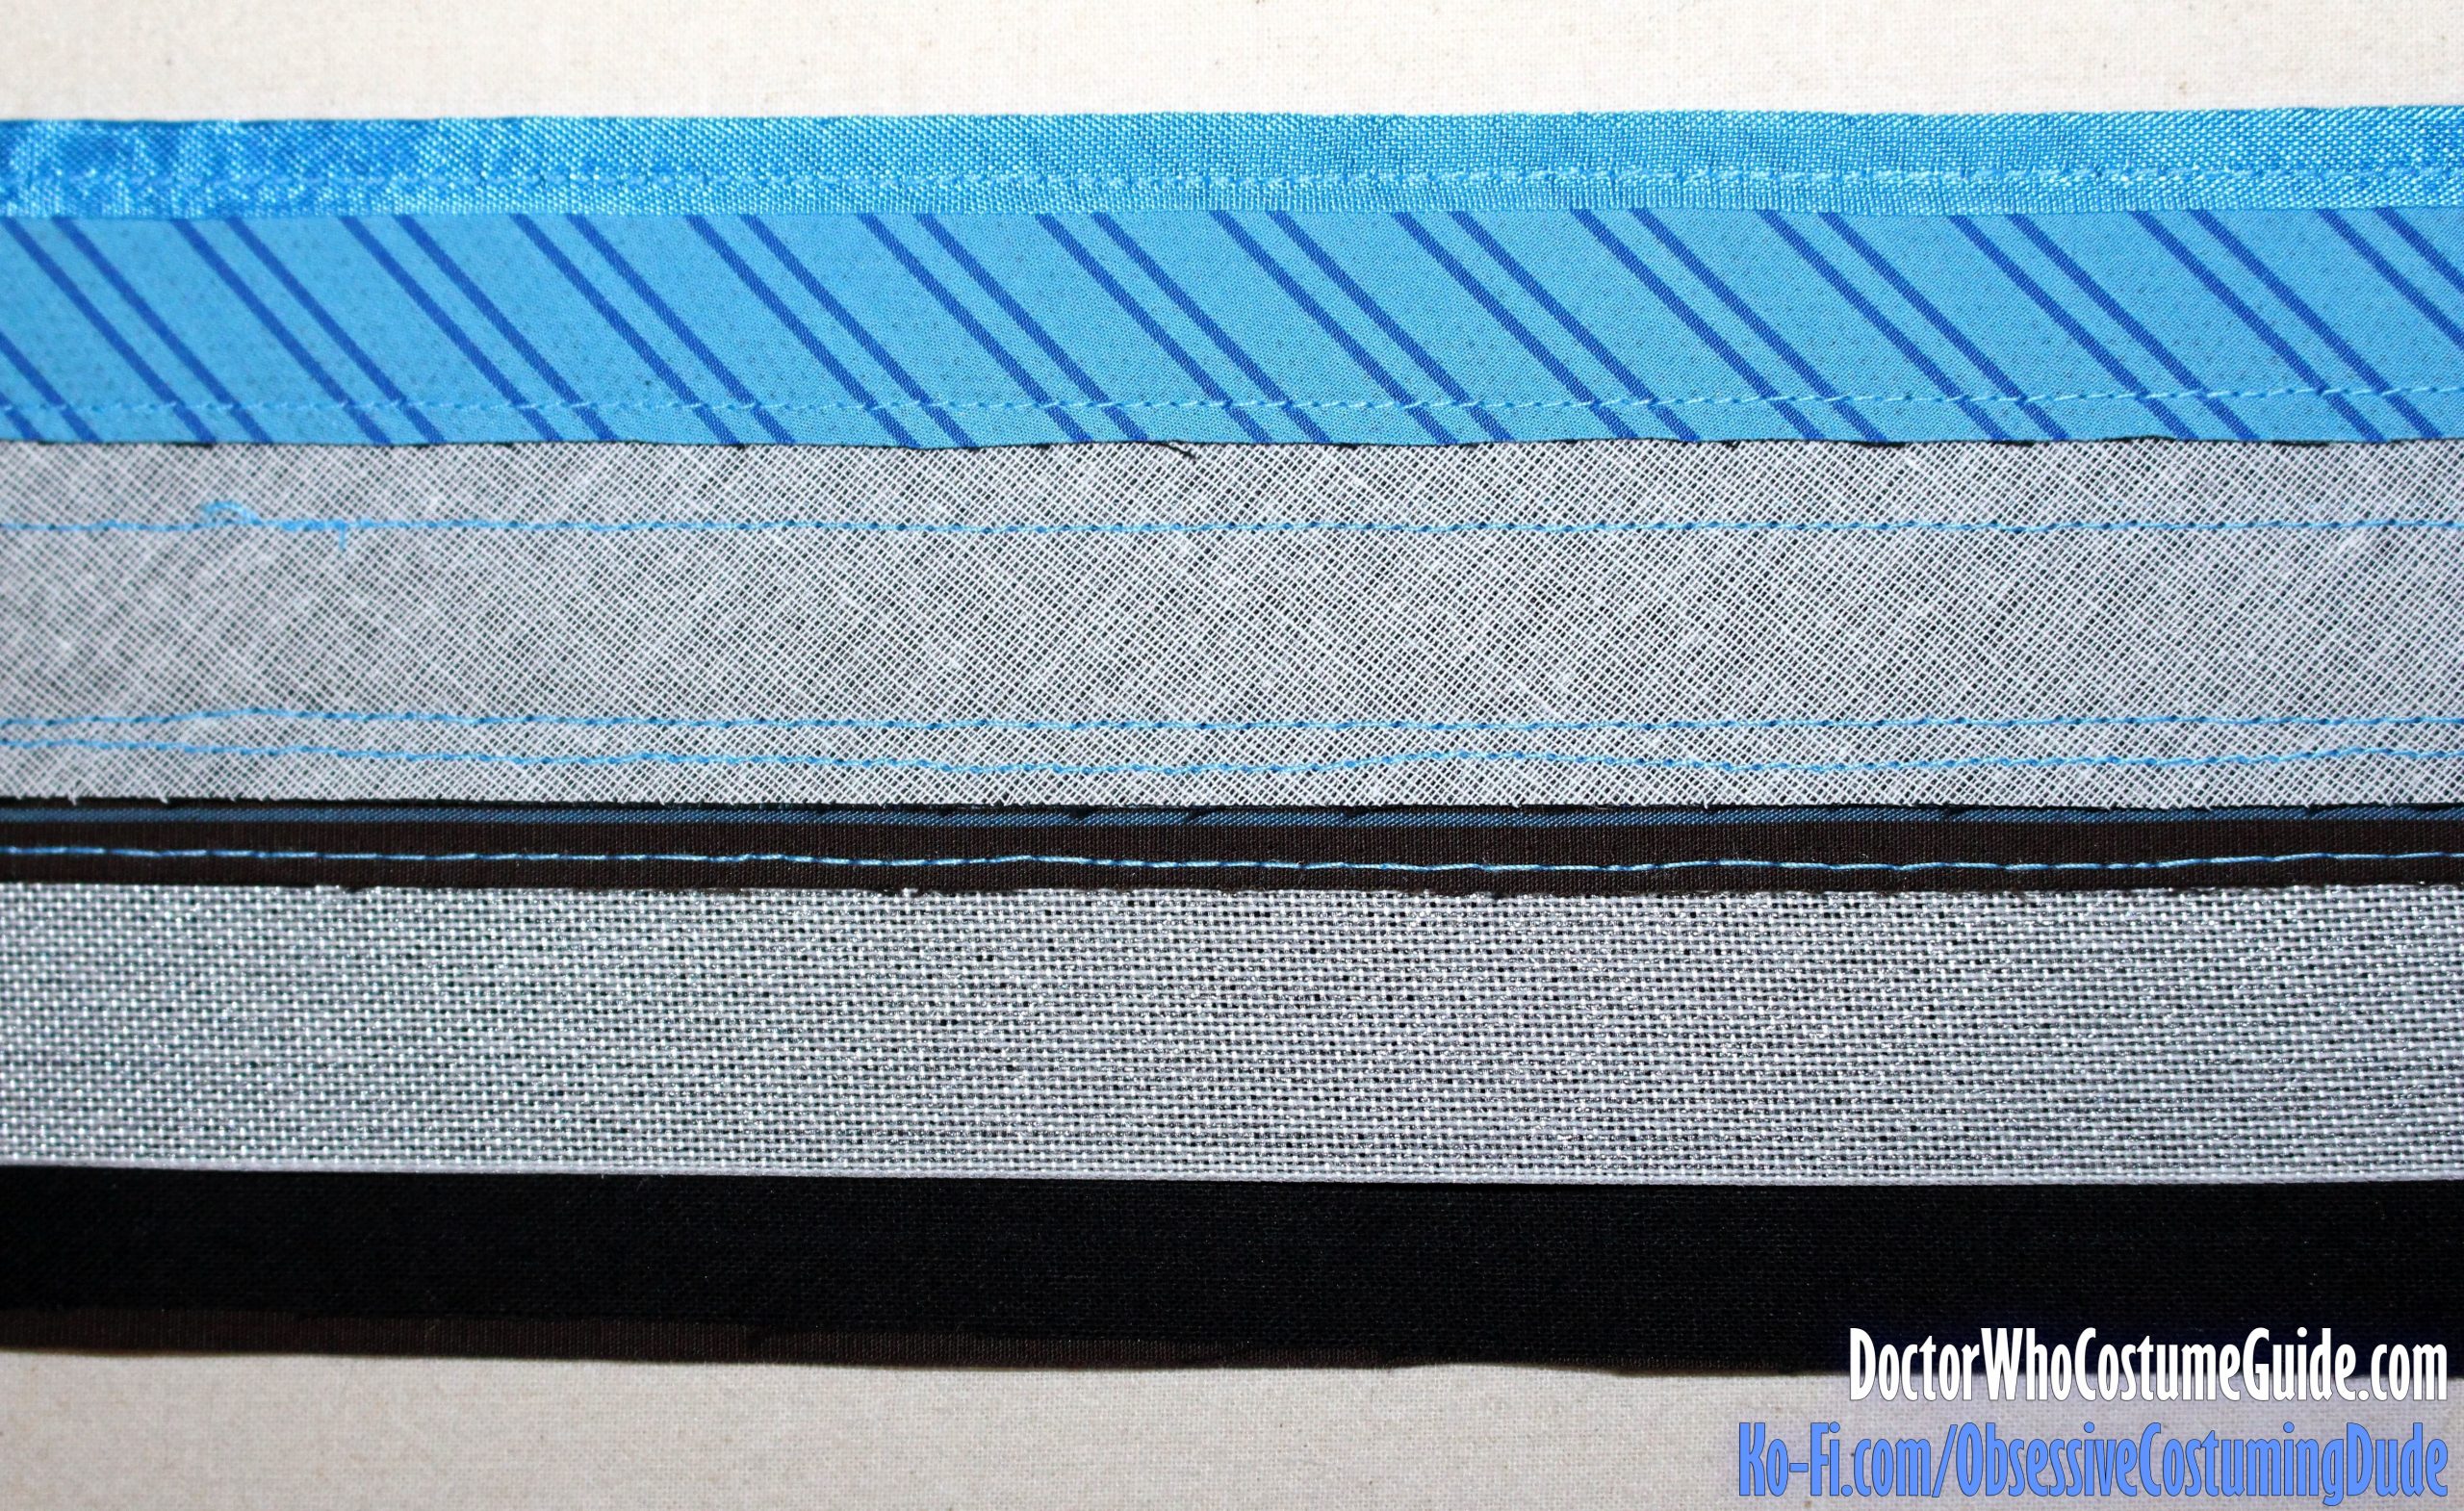
The lower edge of the waistband facing assembly is accented with seam binding.
As I mentioned in the “required materials,” the “medium blue” seam binding from Wawak was the closest off-the-shelf option I found.
However, I used white seam binding and dyed it with Dharma Trading Company’s “Sky Blue.”
Neither is a perfect match to the original GAP trousers’ seam binding, but both are close.
Press your seam binding almost in half, with one end slightly wider than the other.
Again using your blue thread, edge-stitch the seam binding to the lower edge of the waistband facing assembly.
Trim your waistband facing assembly to the same length as the Ban Roll.
This next step is a bit tricky …
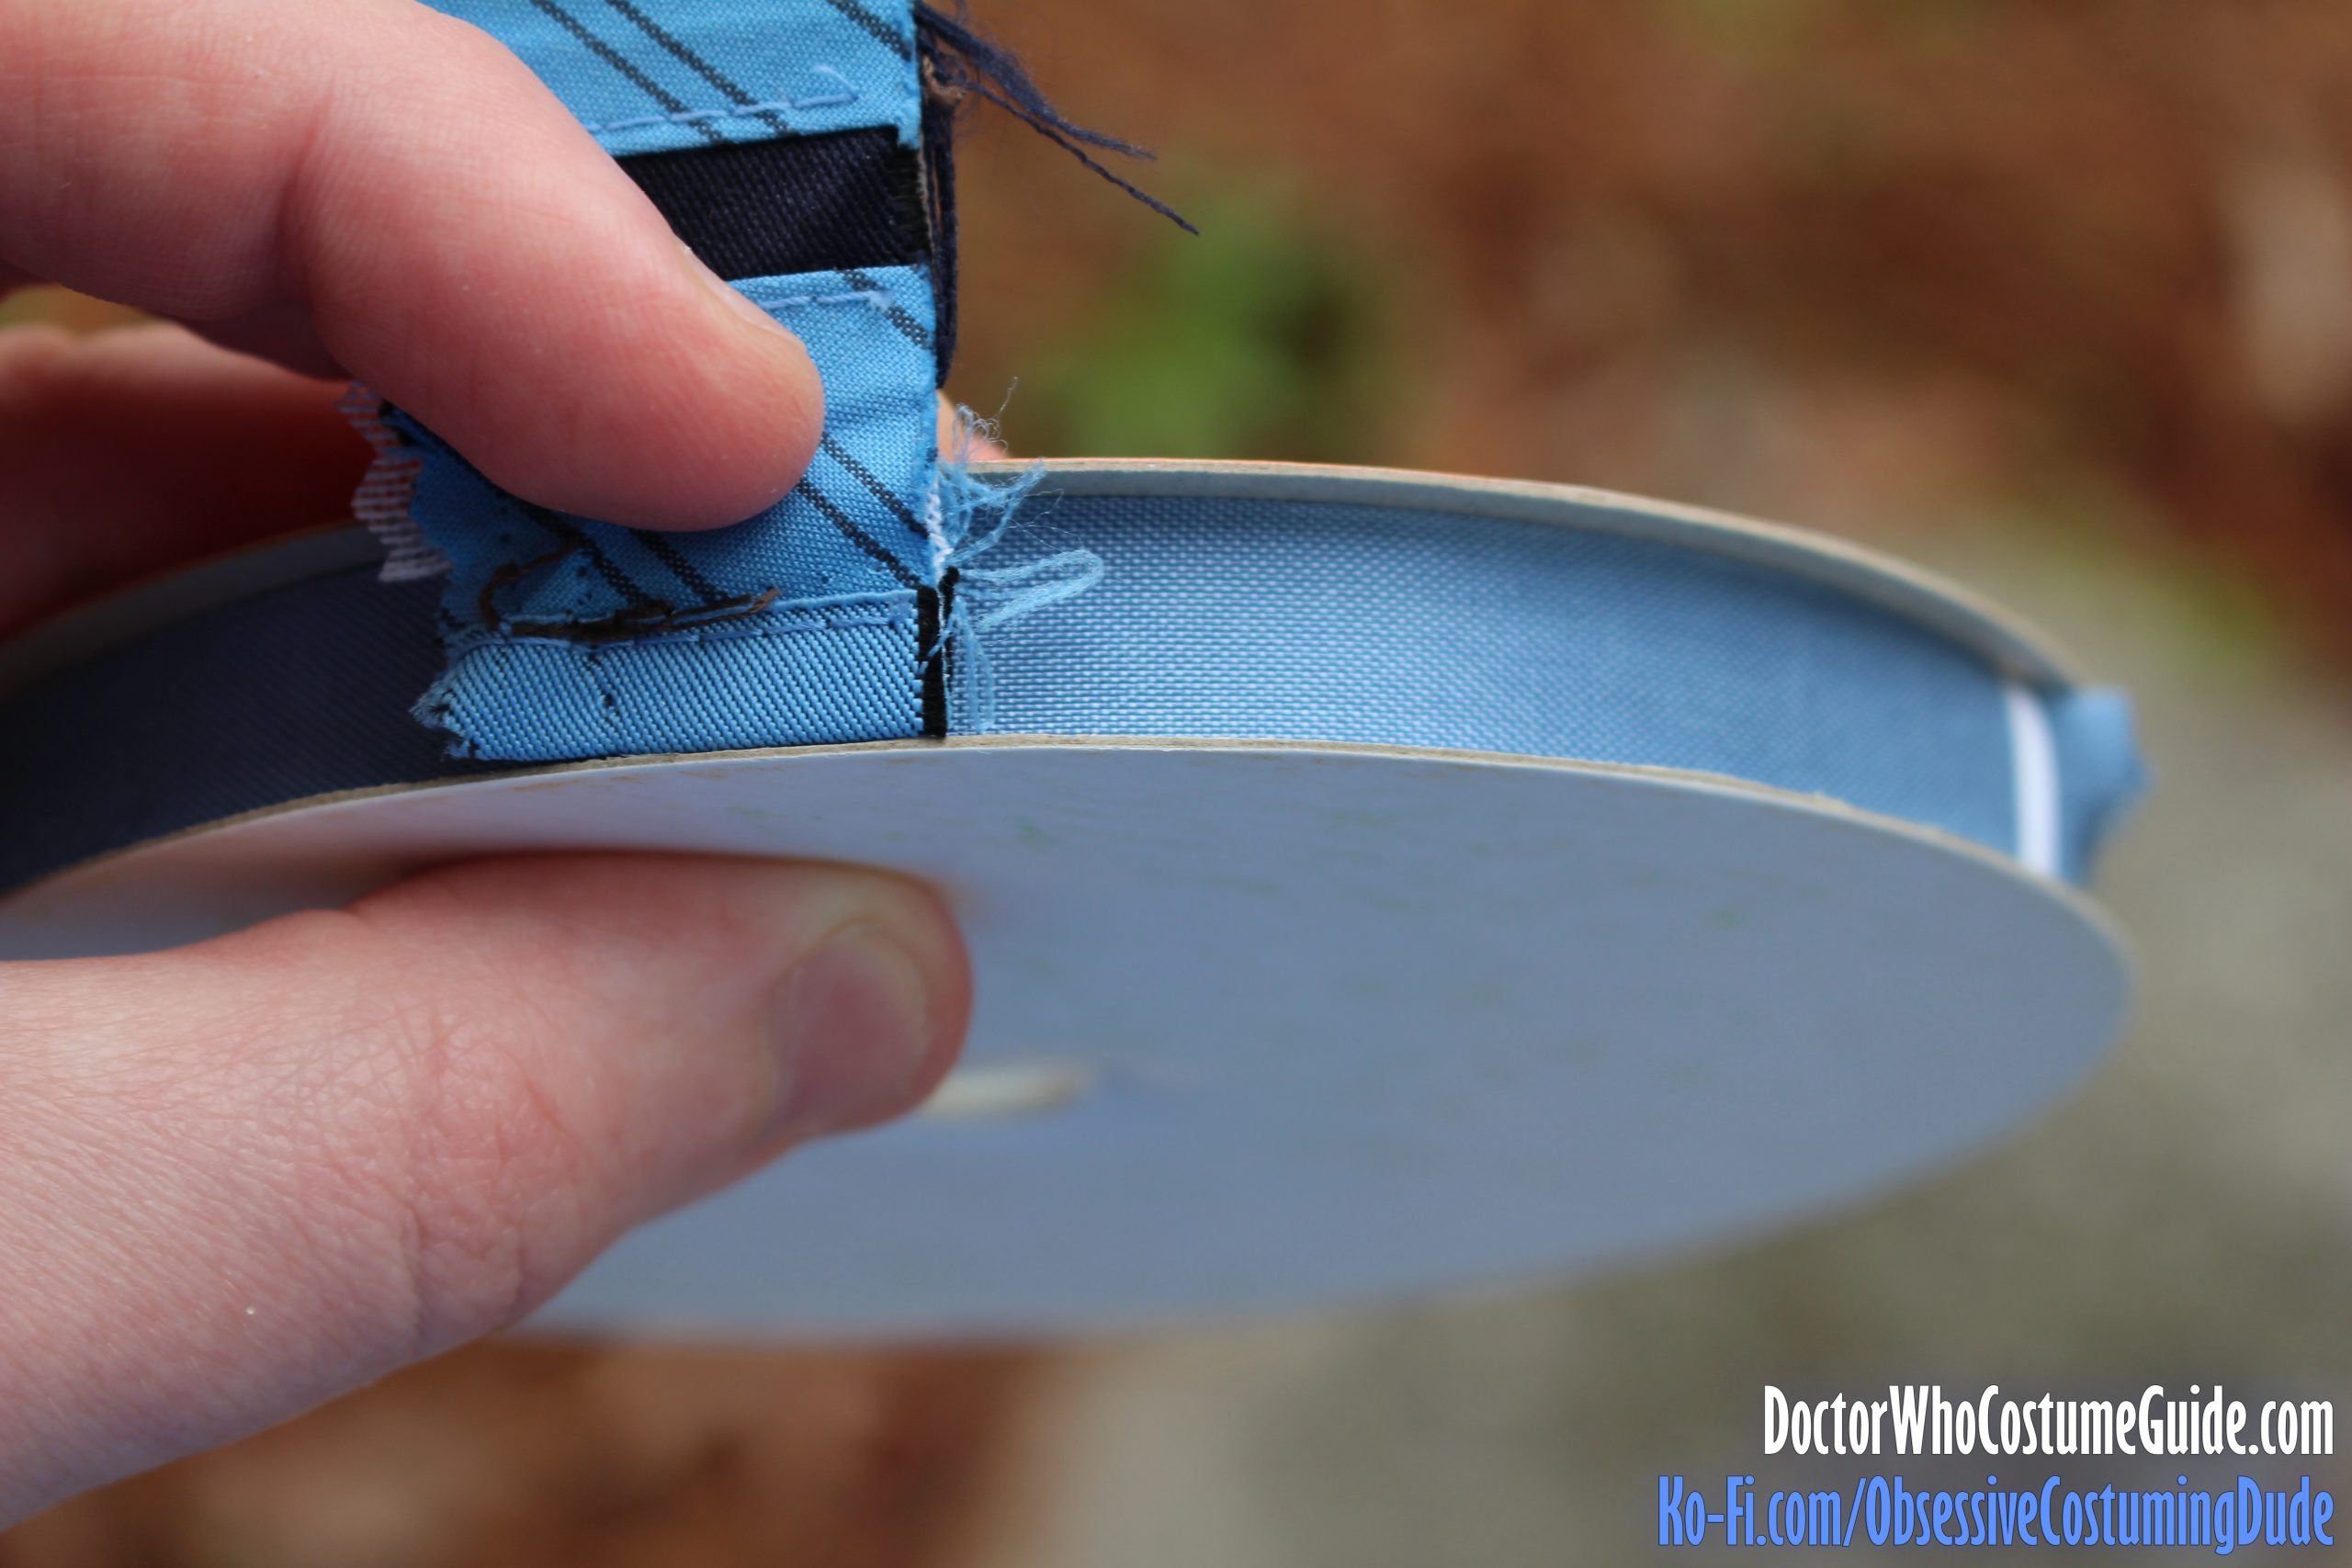
Sew the waistband facing assembly to the waistband’s upper seam allowance (and Ban Roll), ⅜” from the lower edge of the allowance – and with the edge of the facing ⅛” past the edge of the waistband allowance.
Fortunately, this case, we have a pinstripe for reference, at that exact location! So position your waistband facing assembly flush with the lower pinstripe on the waistband’s seam allowance, and stitch ¼” from the edge of the facing assembly.
Press the waistband facing assembly downward.
Using your blue thread, edge-stitch the top of the waistband facing assembly to the waistband seam allowance (and Ban Roll).
Repeat the process for the left waistband assembly.
On the left side, the waistband facing assembly should only extend to the center front.
Unfold both waistband assemblies.
Sew the two waistband assemblies together along the center back, matching seam lines and pinstripes.
Something I also like to do is fold the lower corners of the seam allowance under and stitch them into place.
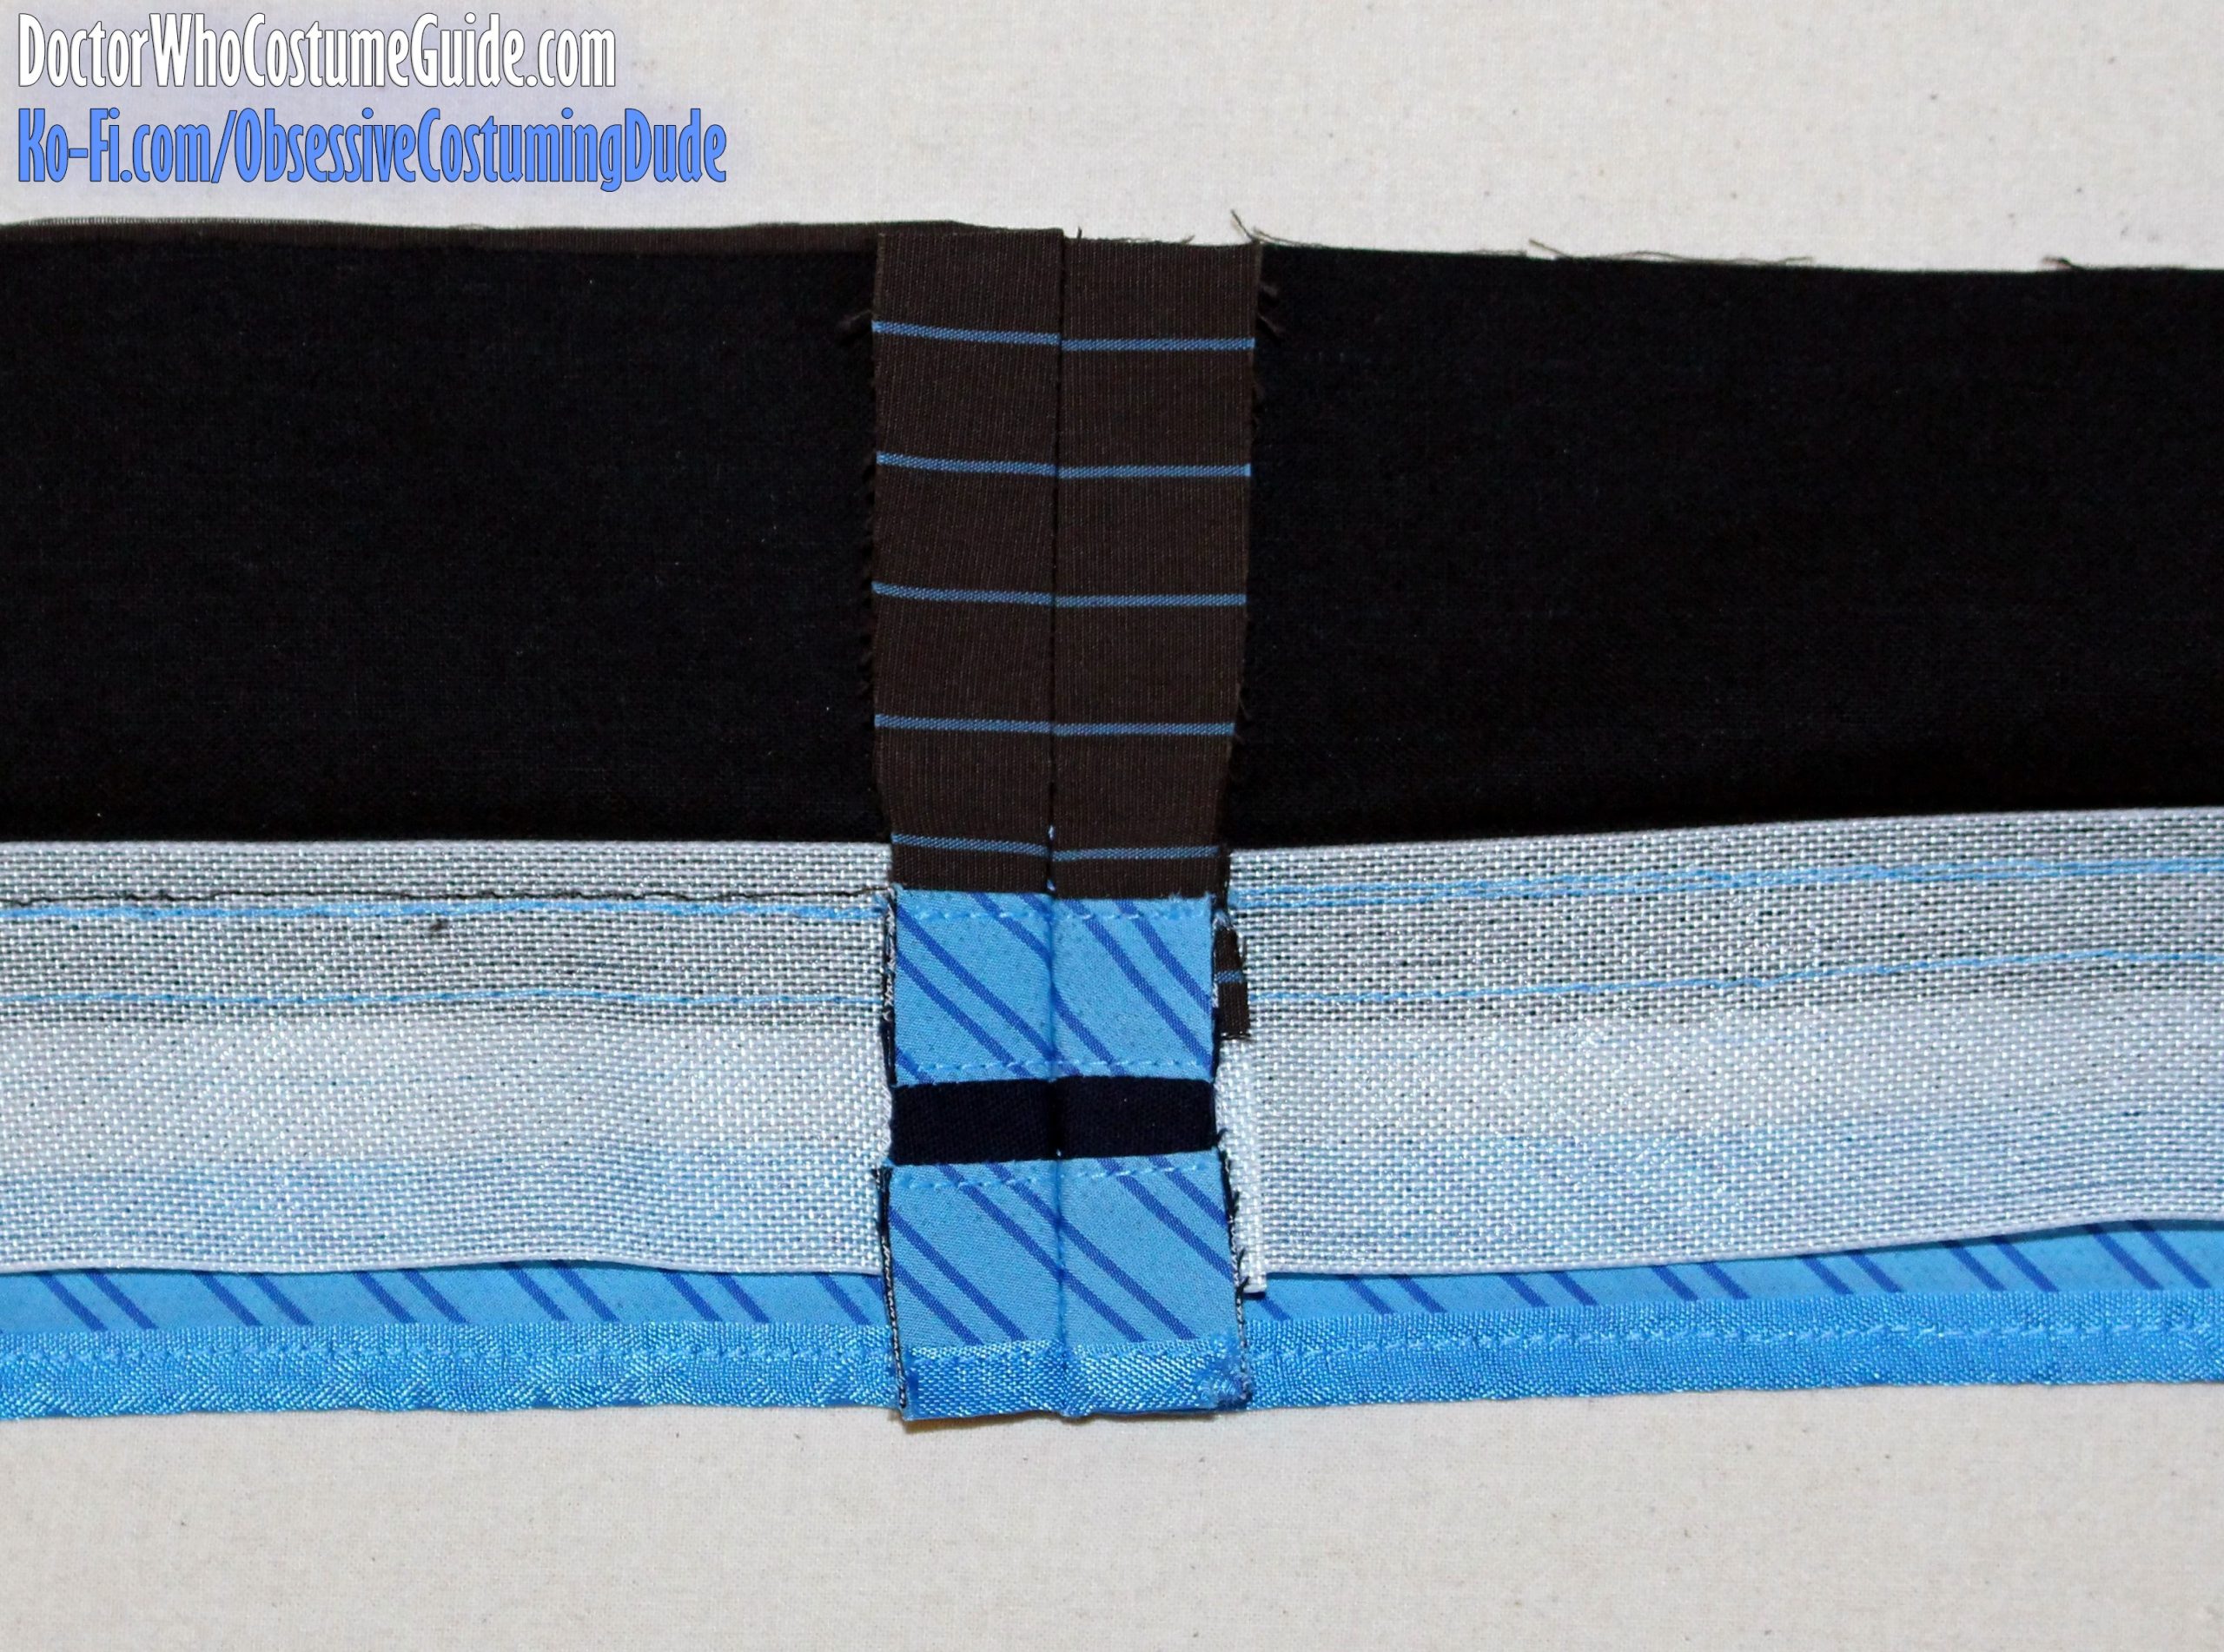
Make sure the belt loops are folded downward, out of the way.
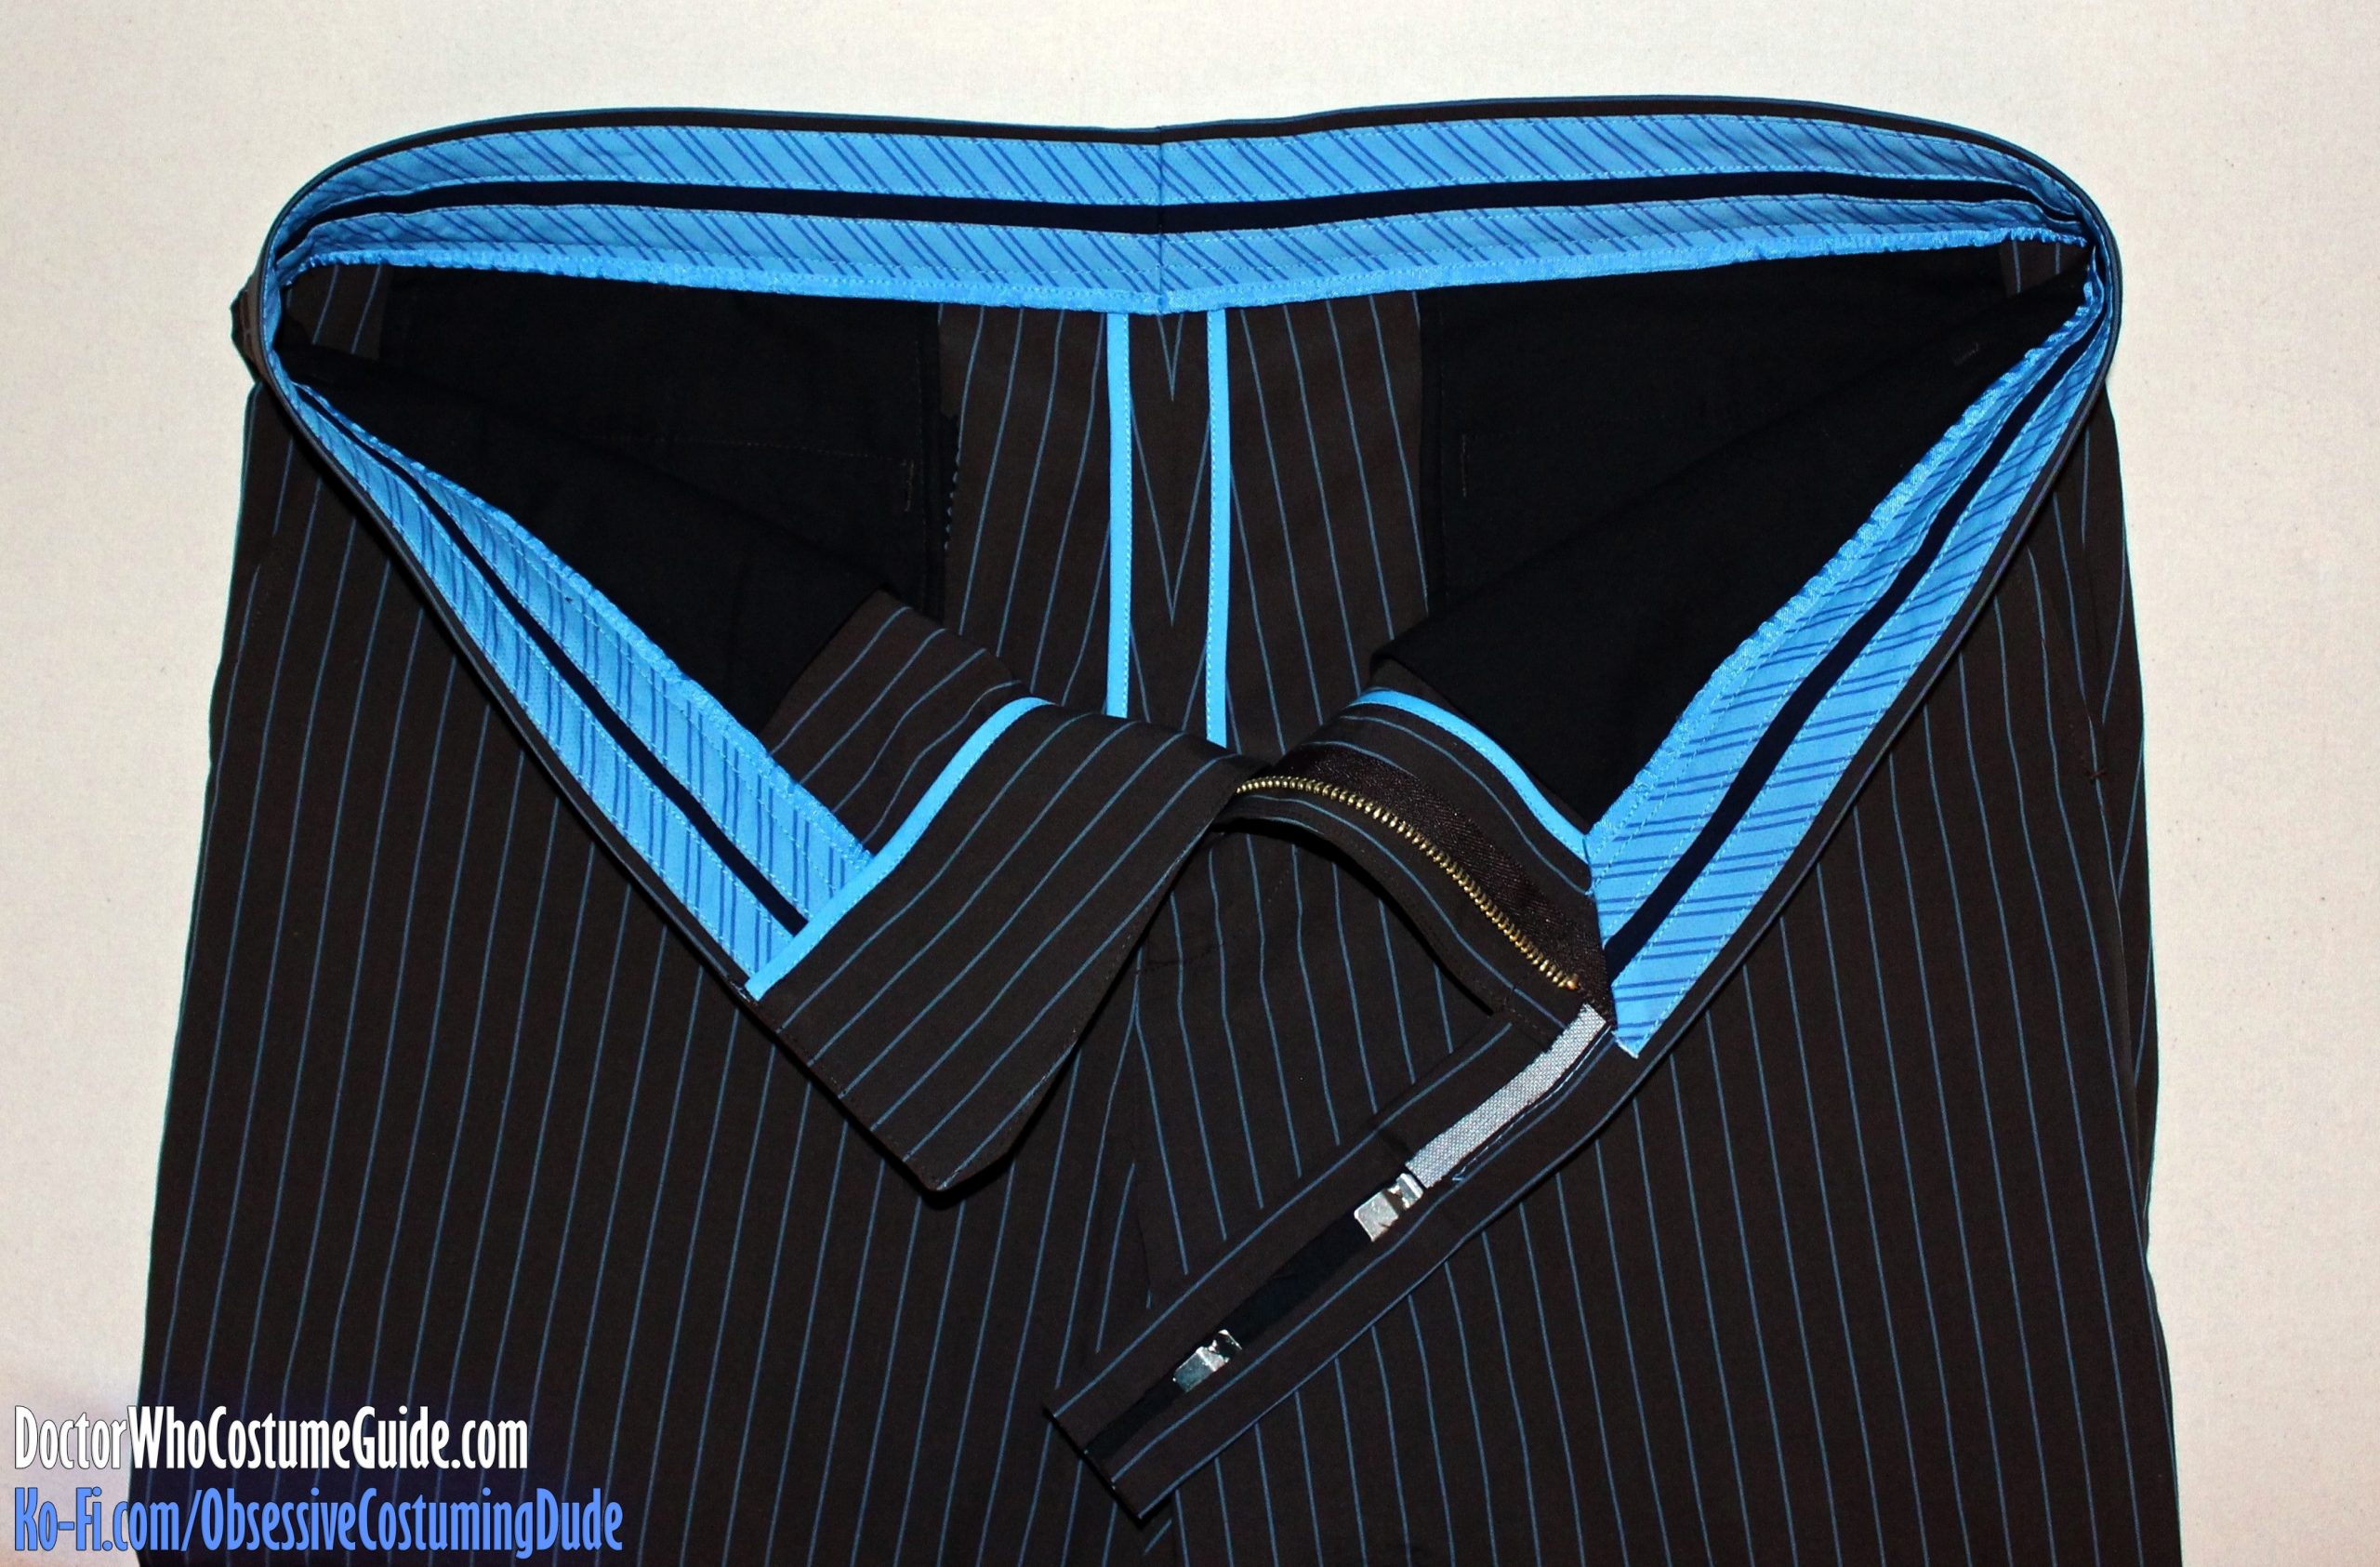
Open the waistband assembly and place it face down onto the upper trousers, right sides together.
Sew the waistband to the trousers, matching center fronts and center backs.
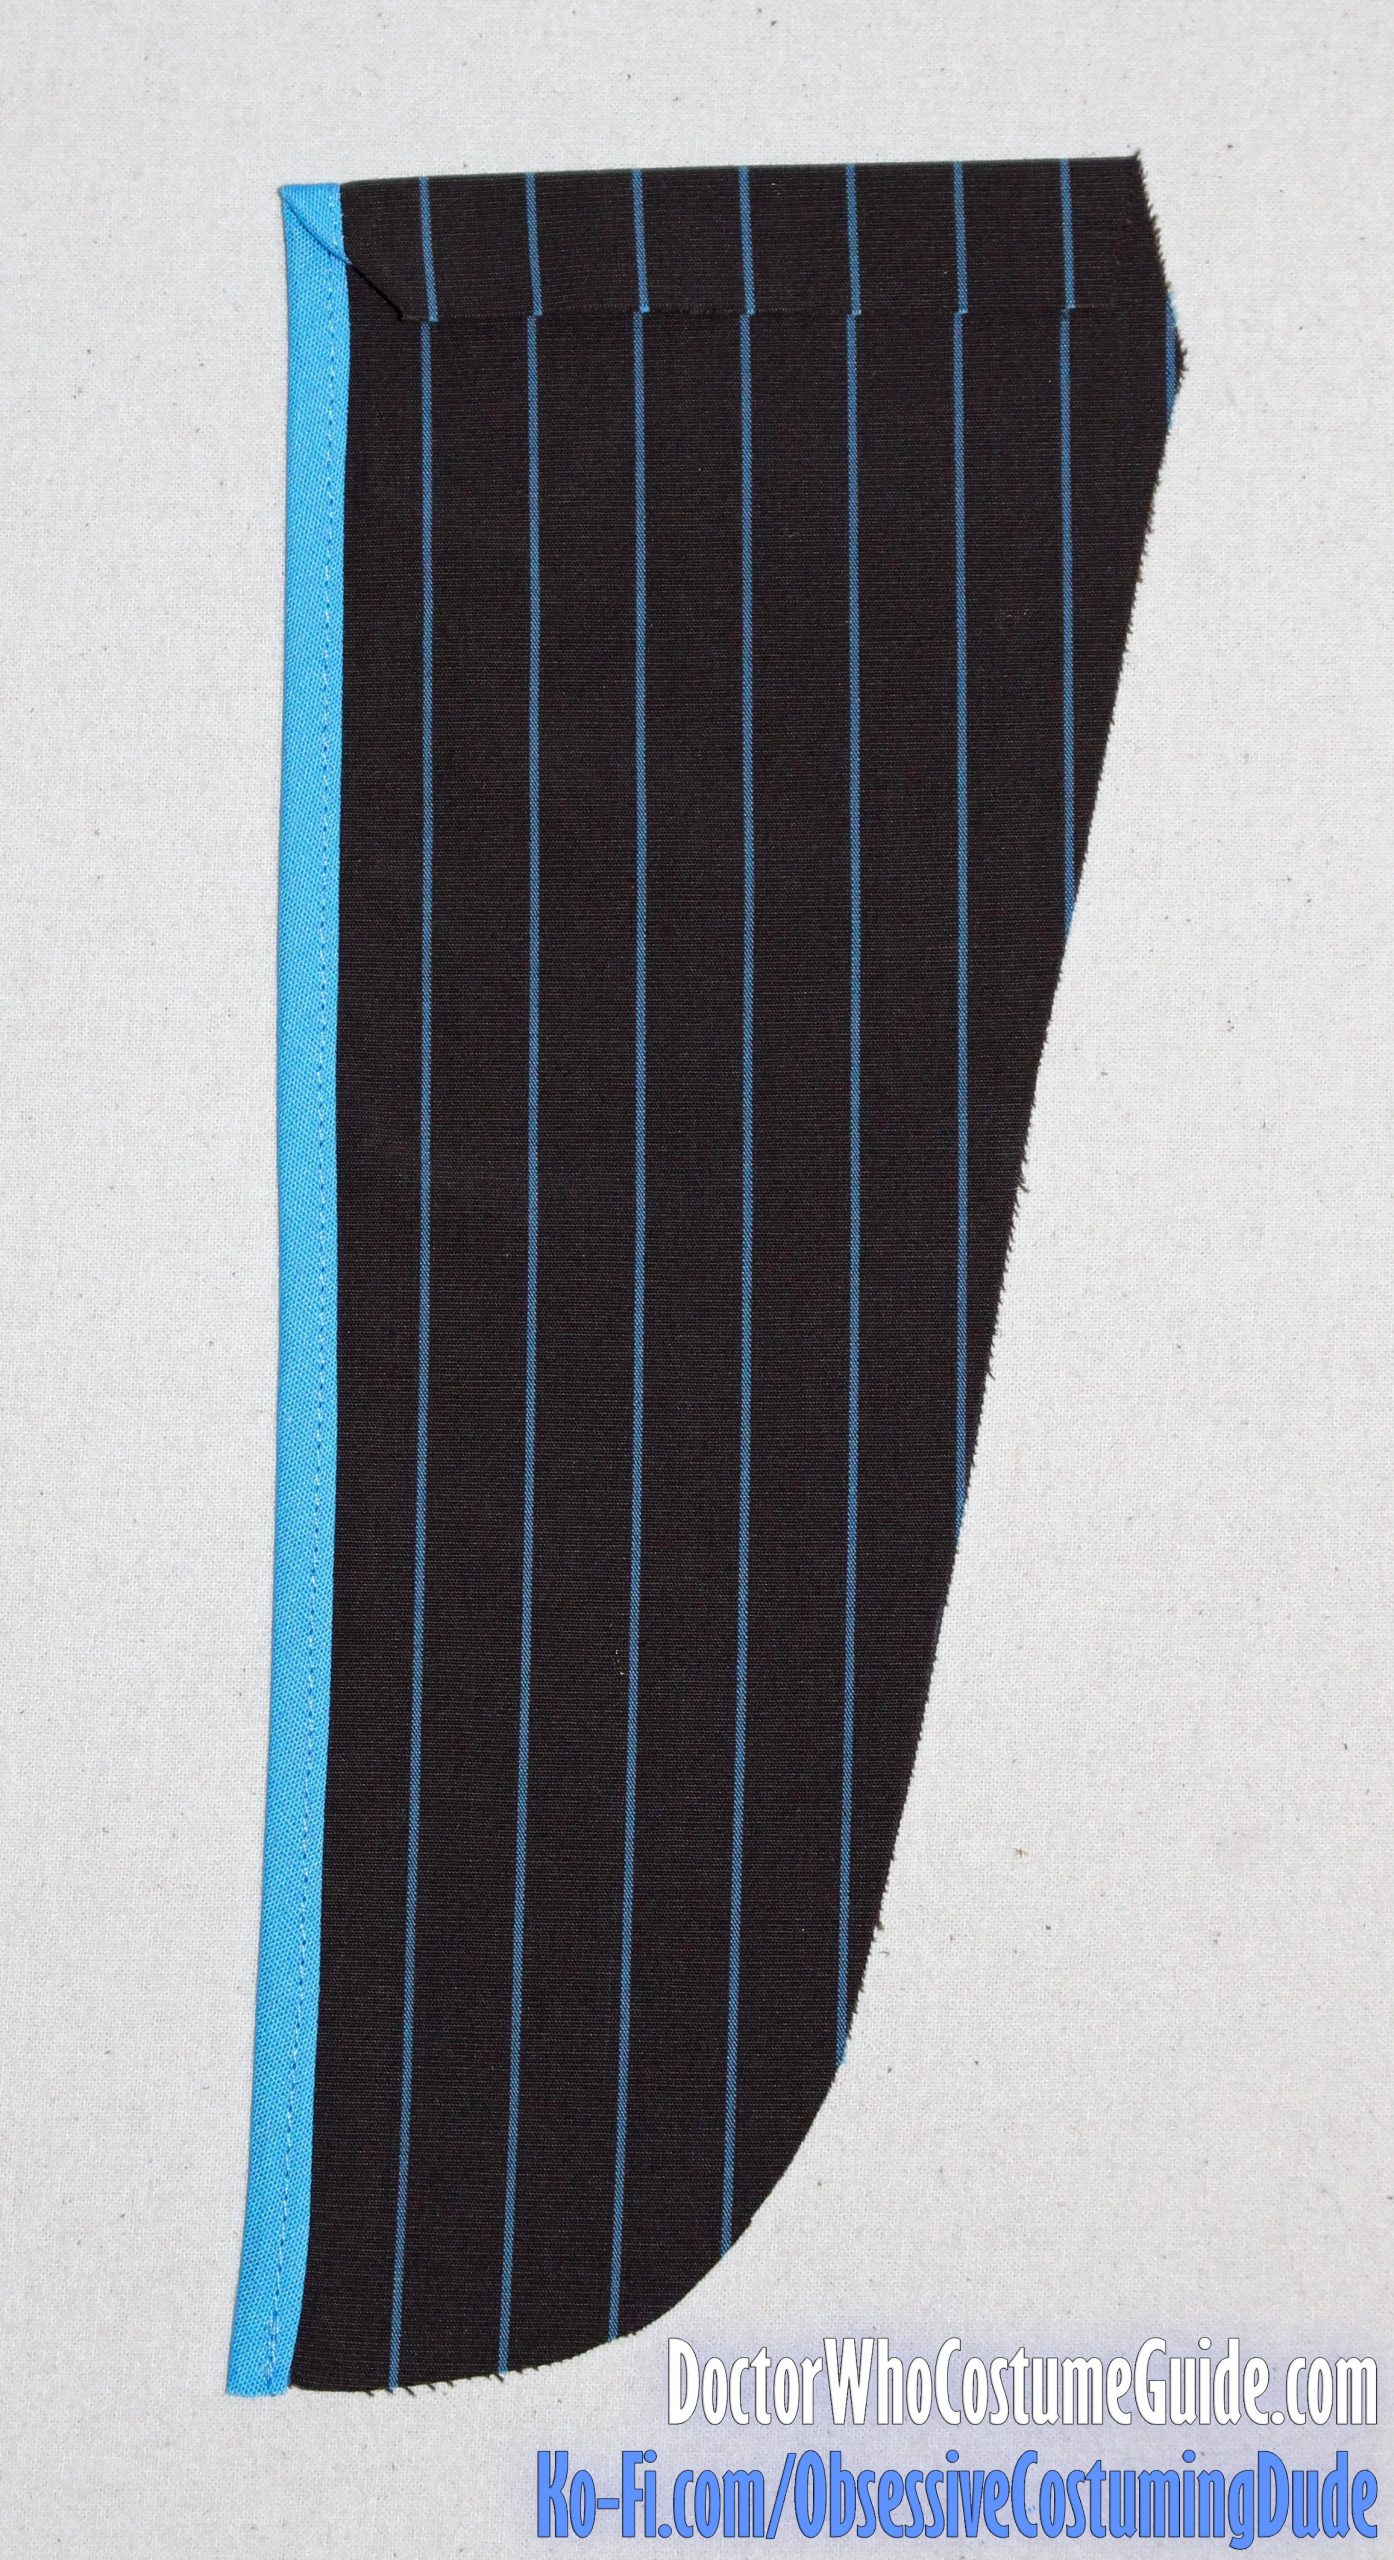
Press the upper seam allowance under on the remaining right fly piece.
(This piece will serve as the right fly facing.)
I also like to press the upper, bias-taped corner under.
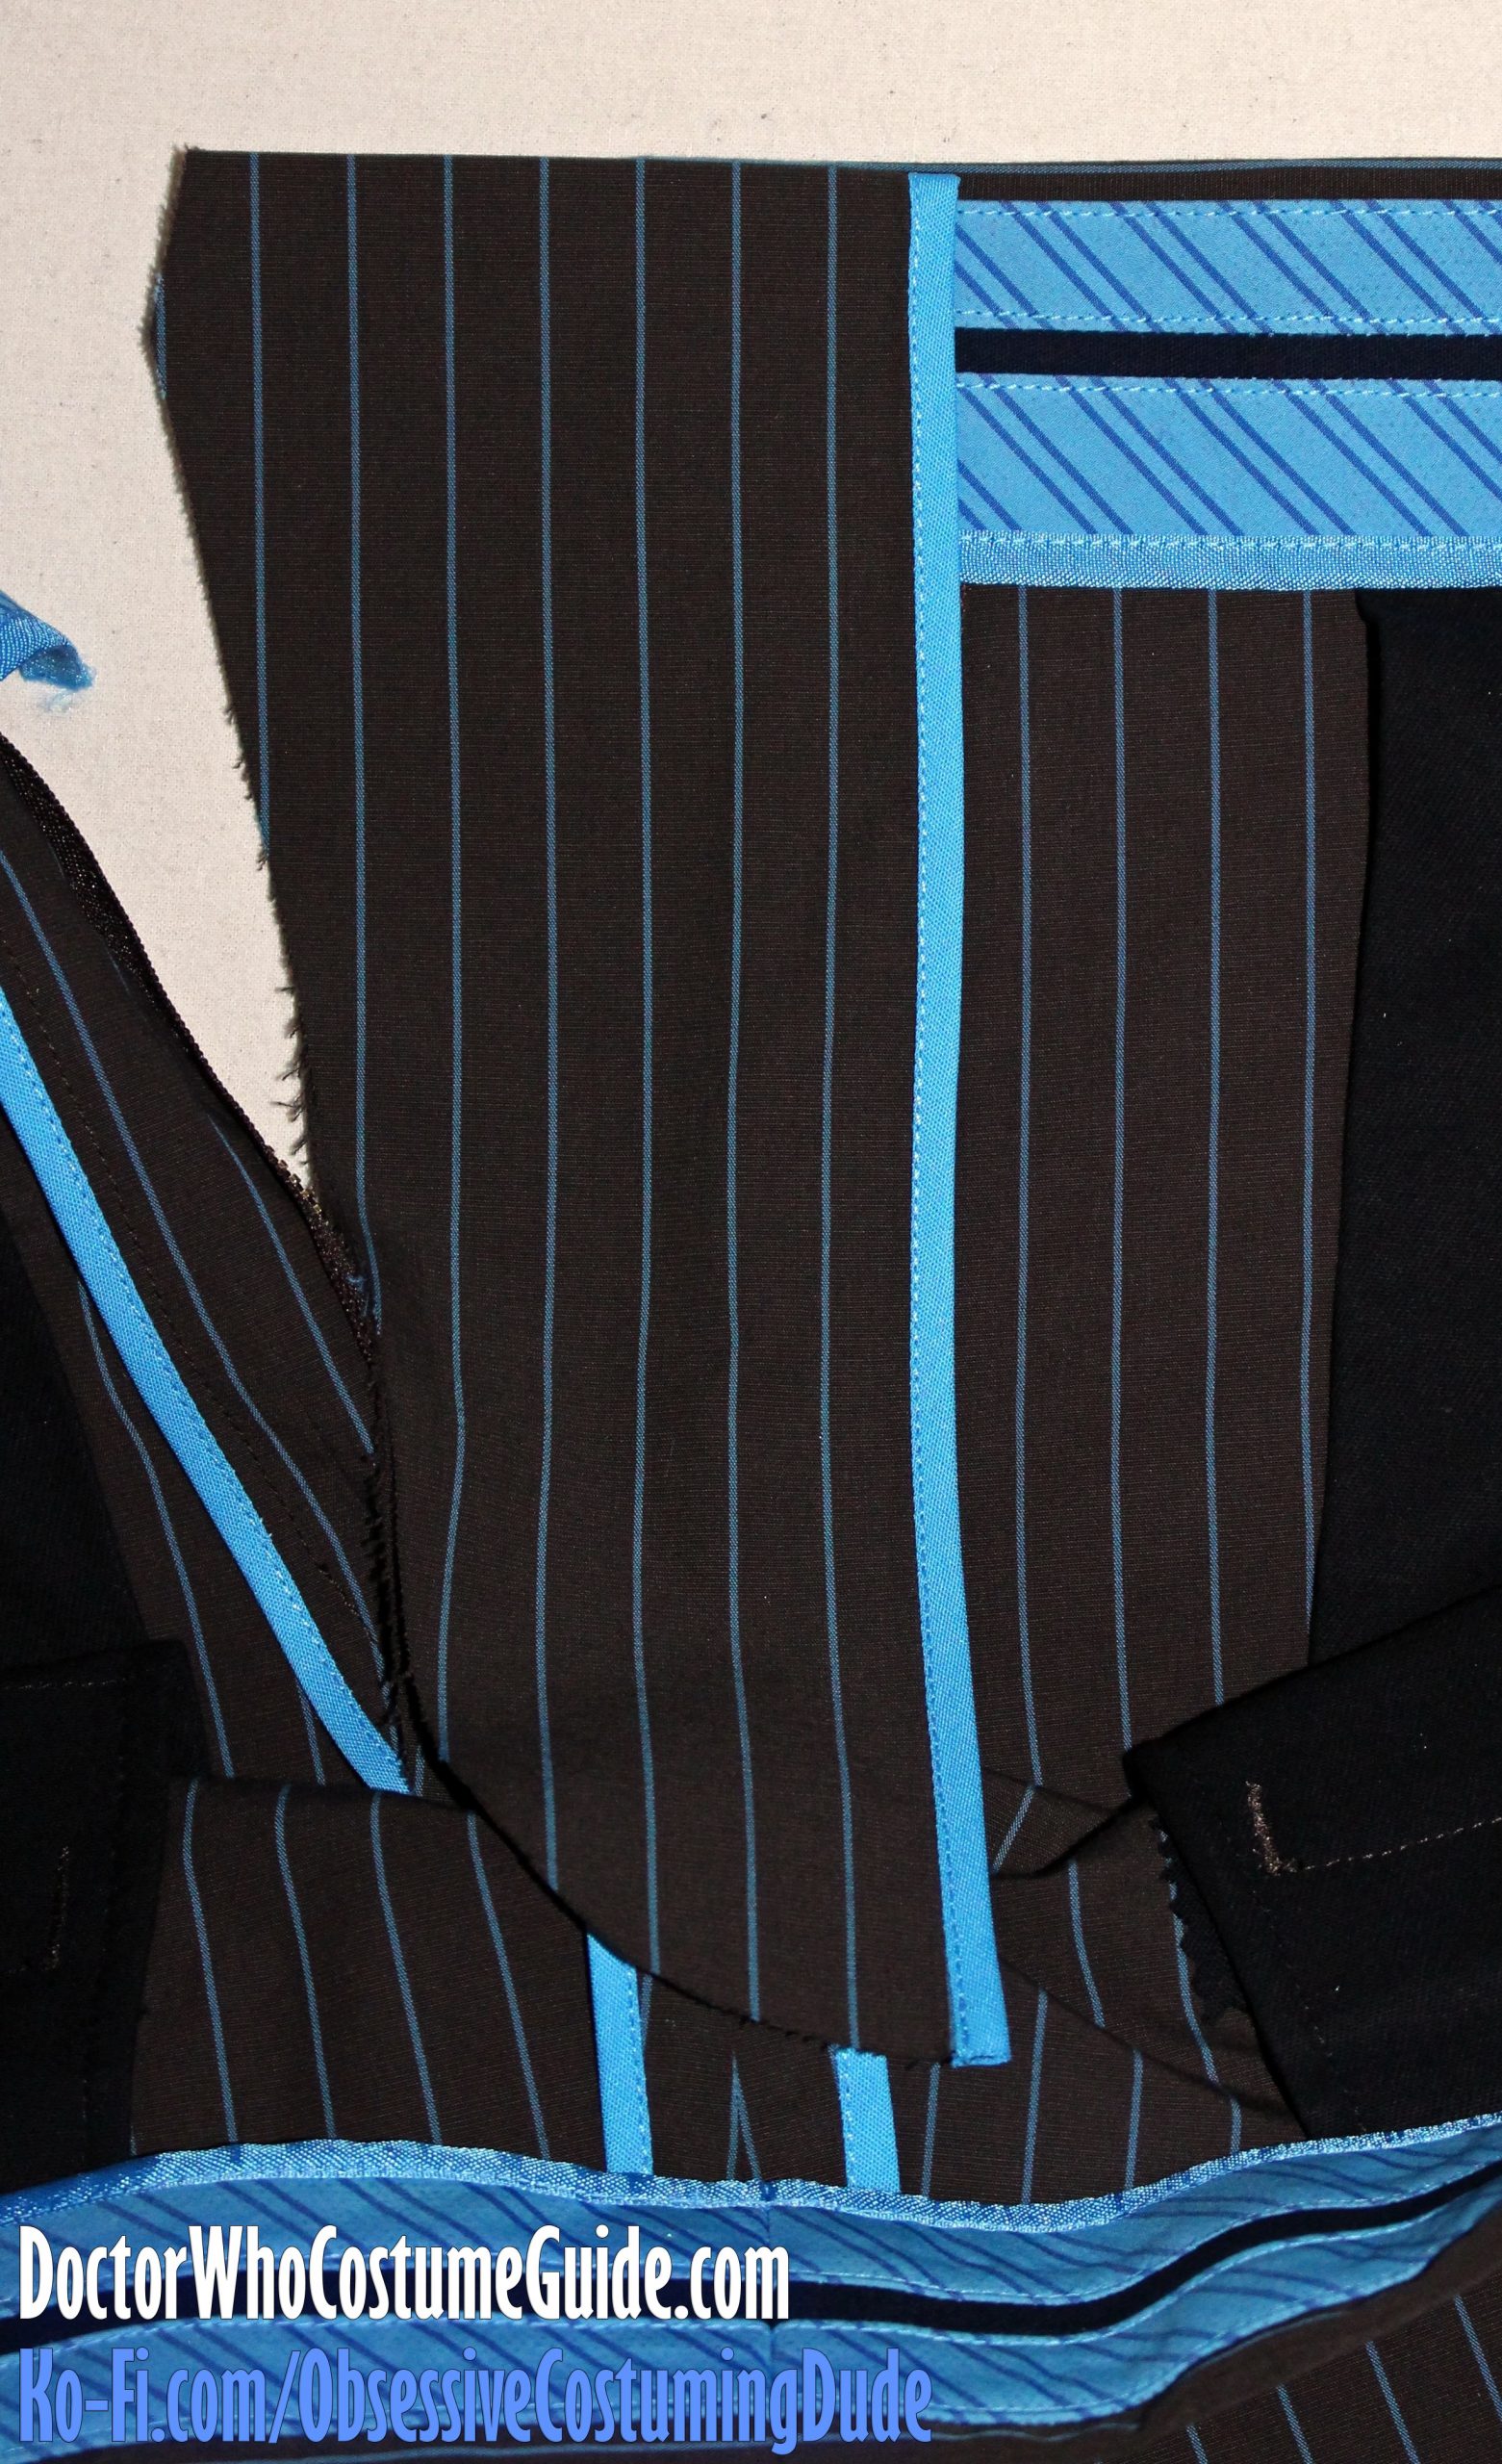
Place the right fly facing on the underside of the trousers’ right front, so its upper folded edge is flush with the waistband’s, and its raw edges are flush with the raw edges of the waistband and other right fly.
Pin the fly facing into place along the waistband facing.
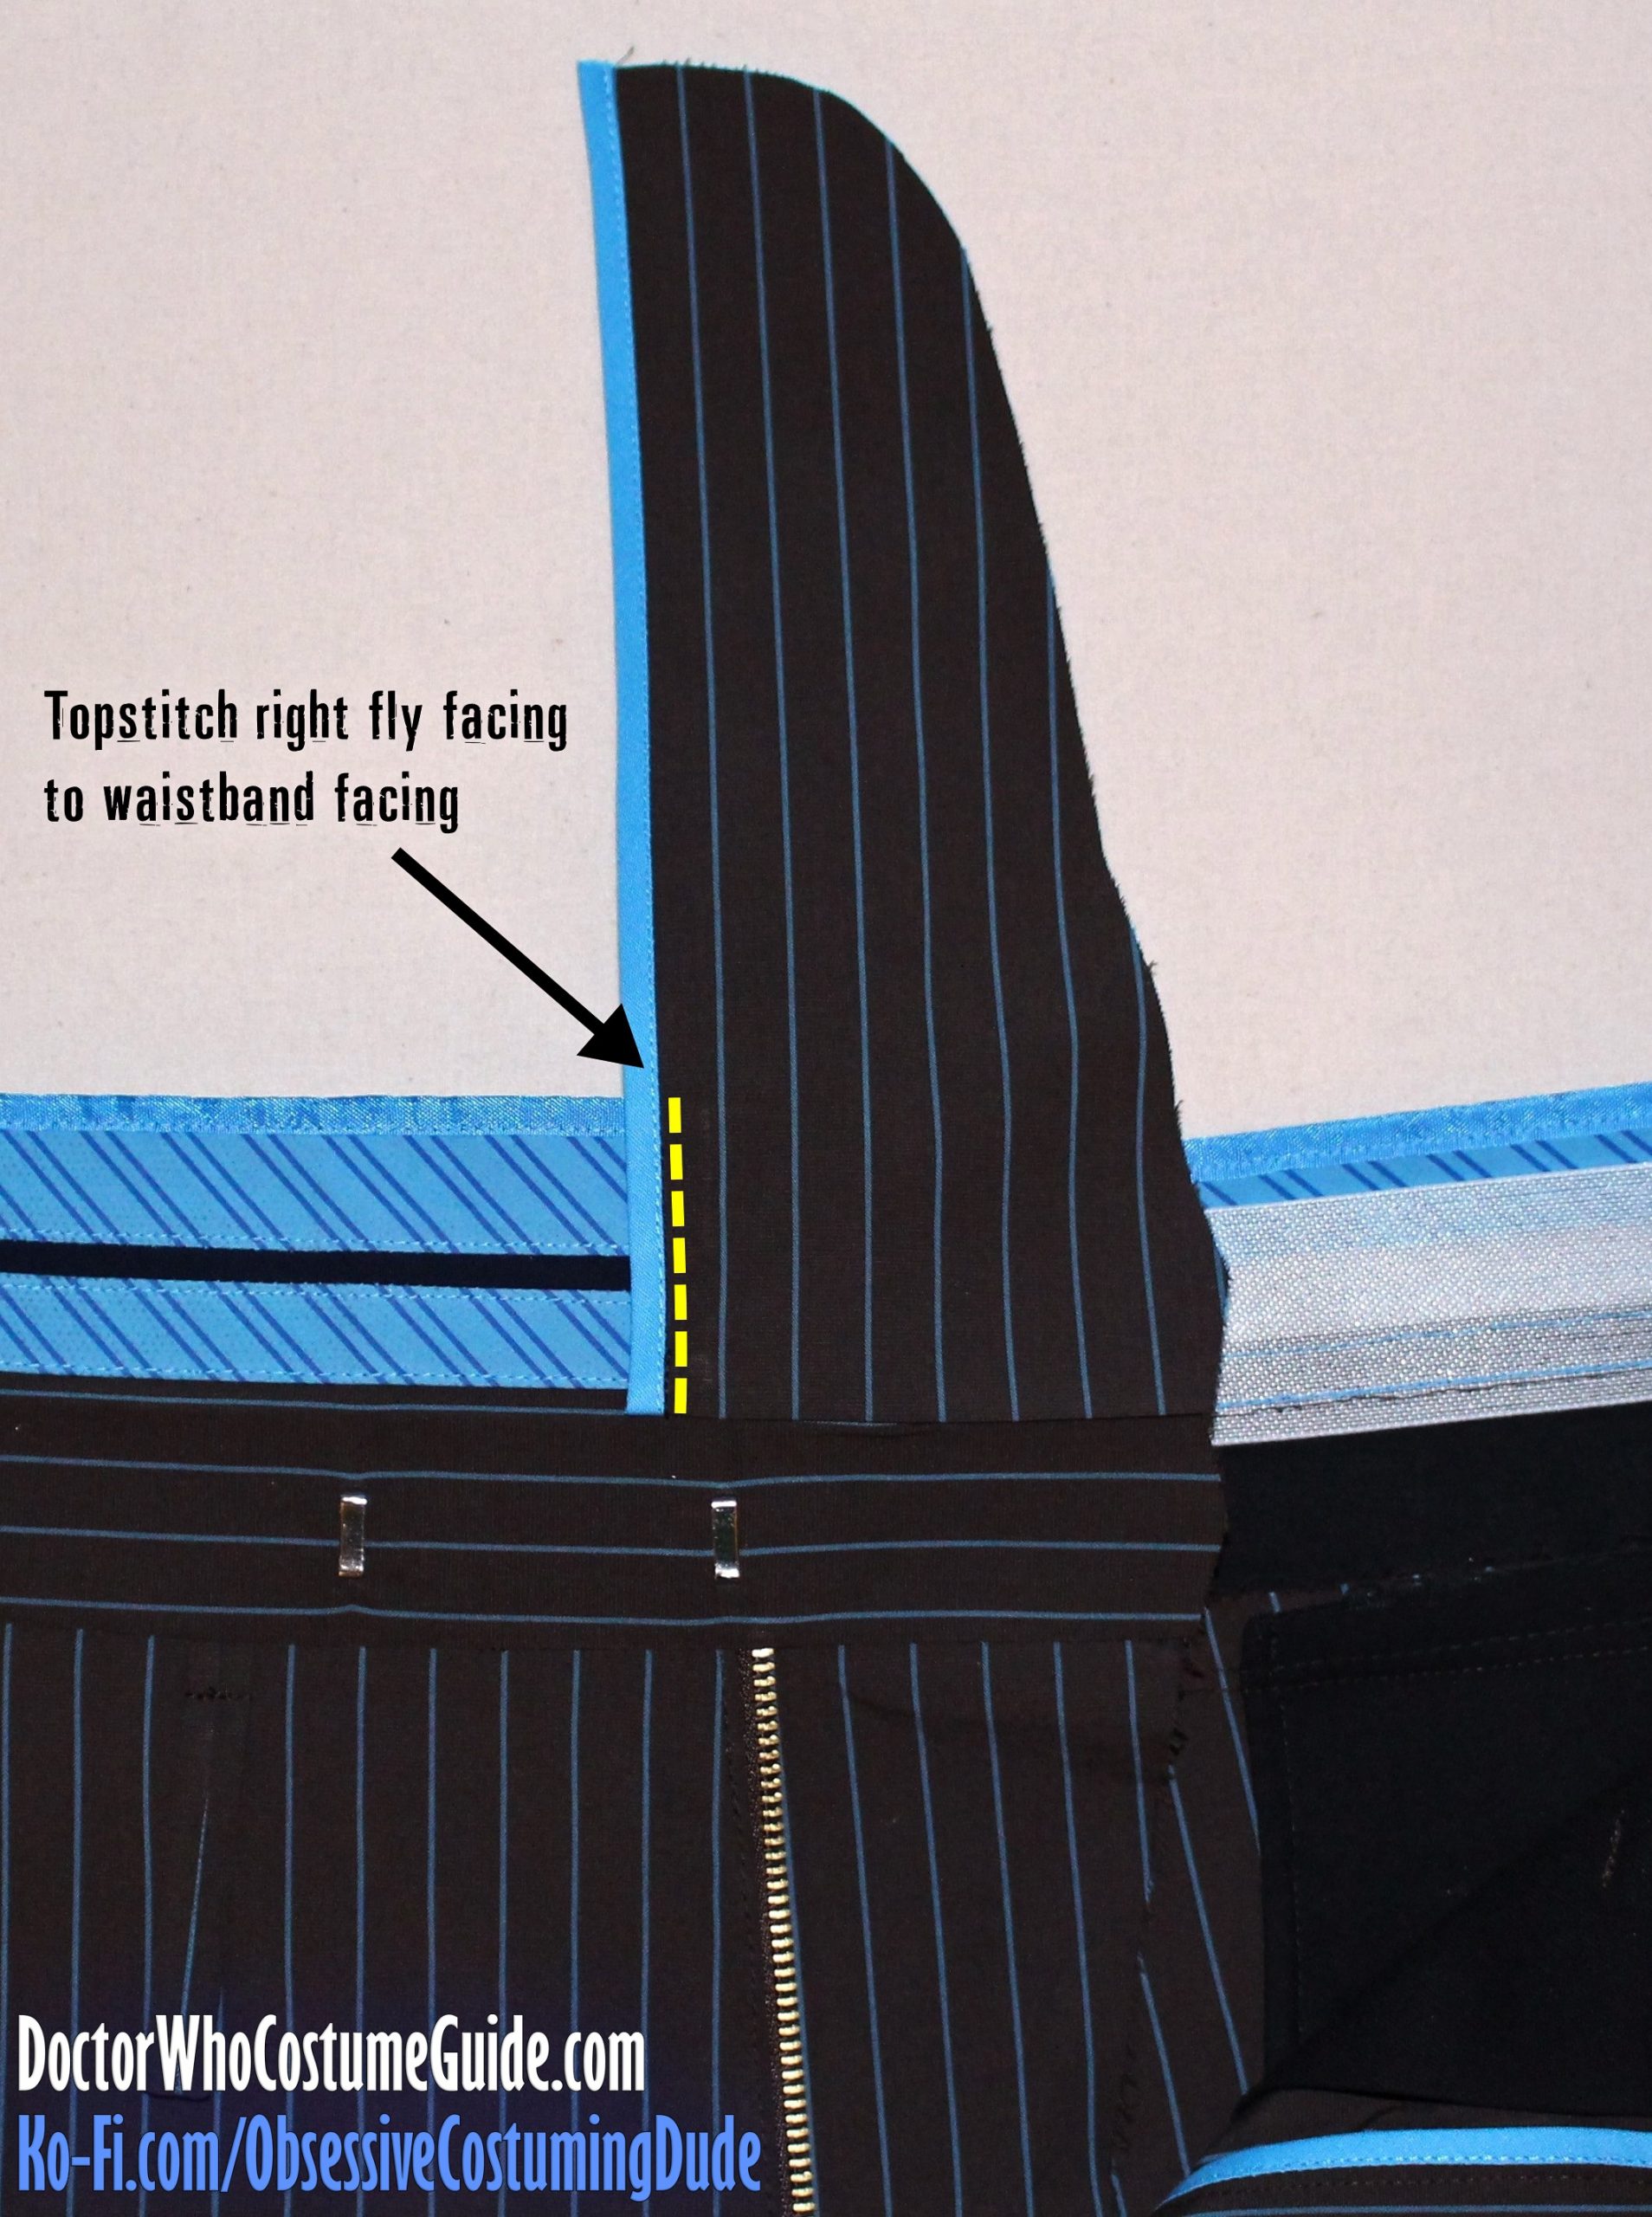
Carefully unfold the waistband facing again, with the right fly facing exactly where it was.
Topstitch the right fly facing vertically onto the waistband facing, close to the bias tape.
The next step is also a bit tricky.
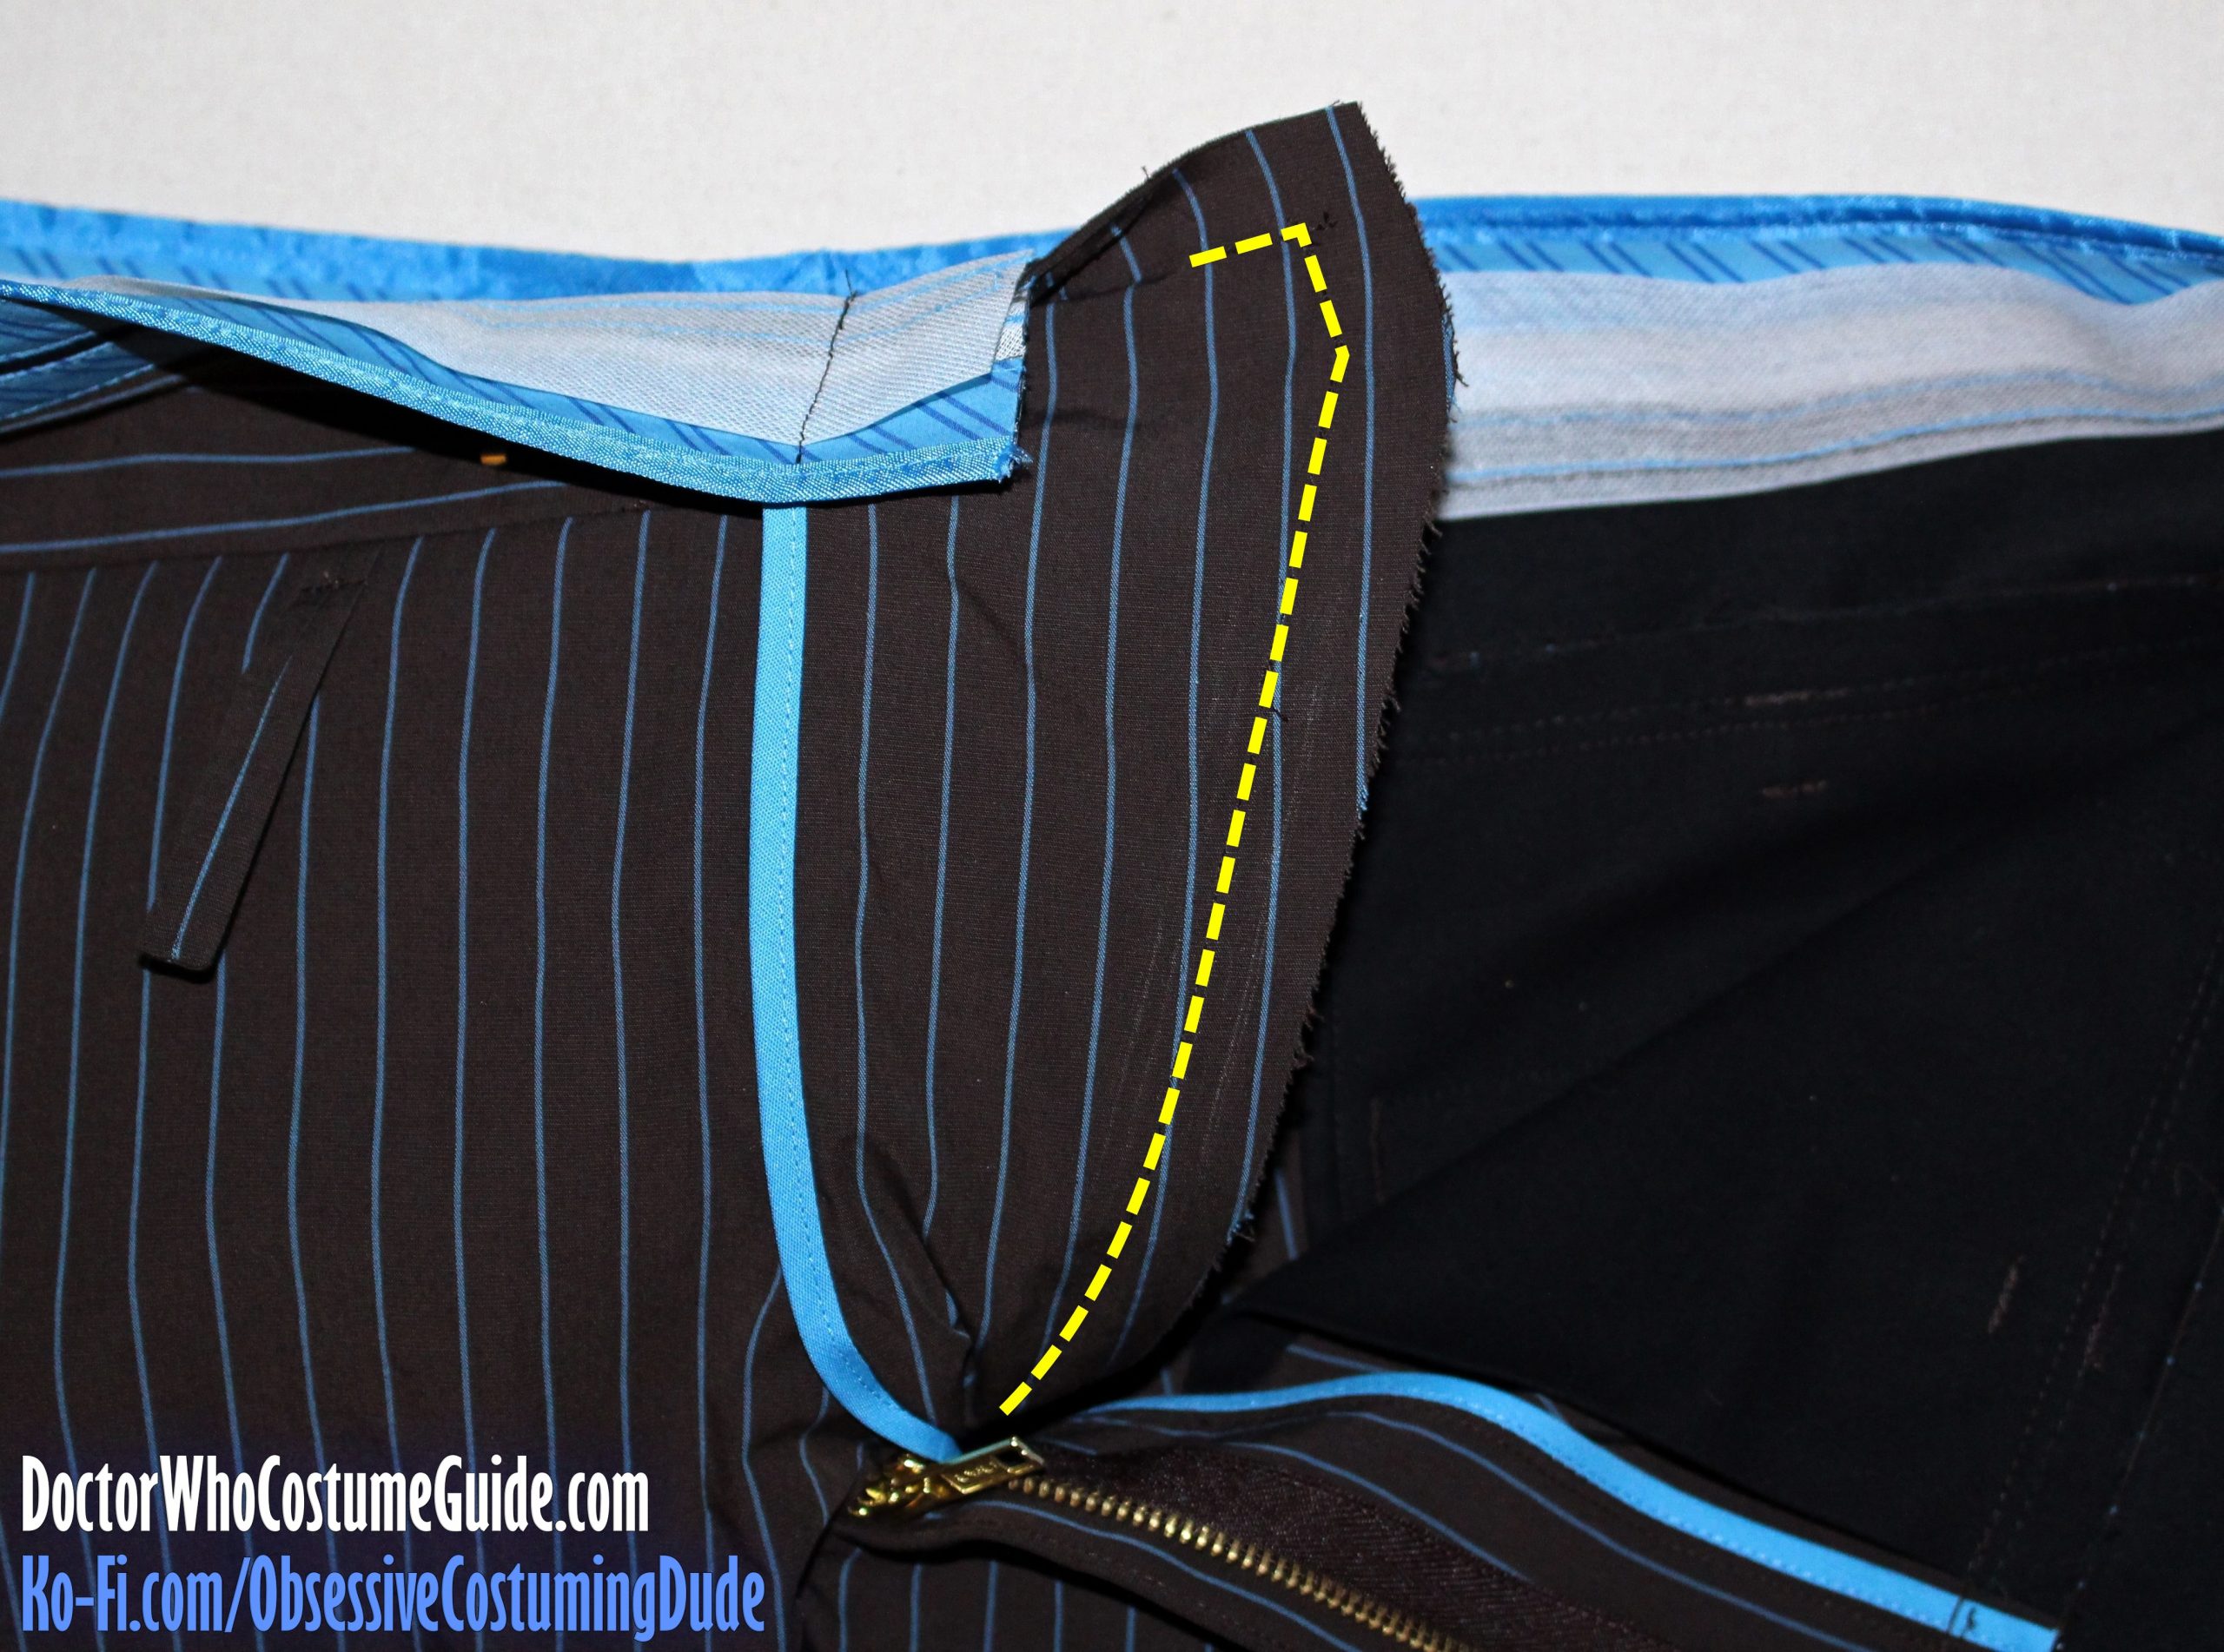
Fold the right fly facing downward, so it and the waistband/right fly are right-sides-together.
Sew the fly facing to the fly along the outer edges, and as far along the upper edge as possible.
(Note that along the upper edge, you won’t be able to stitch all the way to the previous/vertical stitch line. Just go as far as you can.)
Trim the outer seam allowances down to about ⅛”.
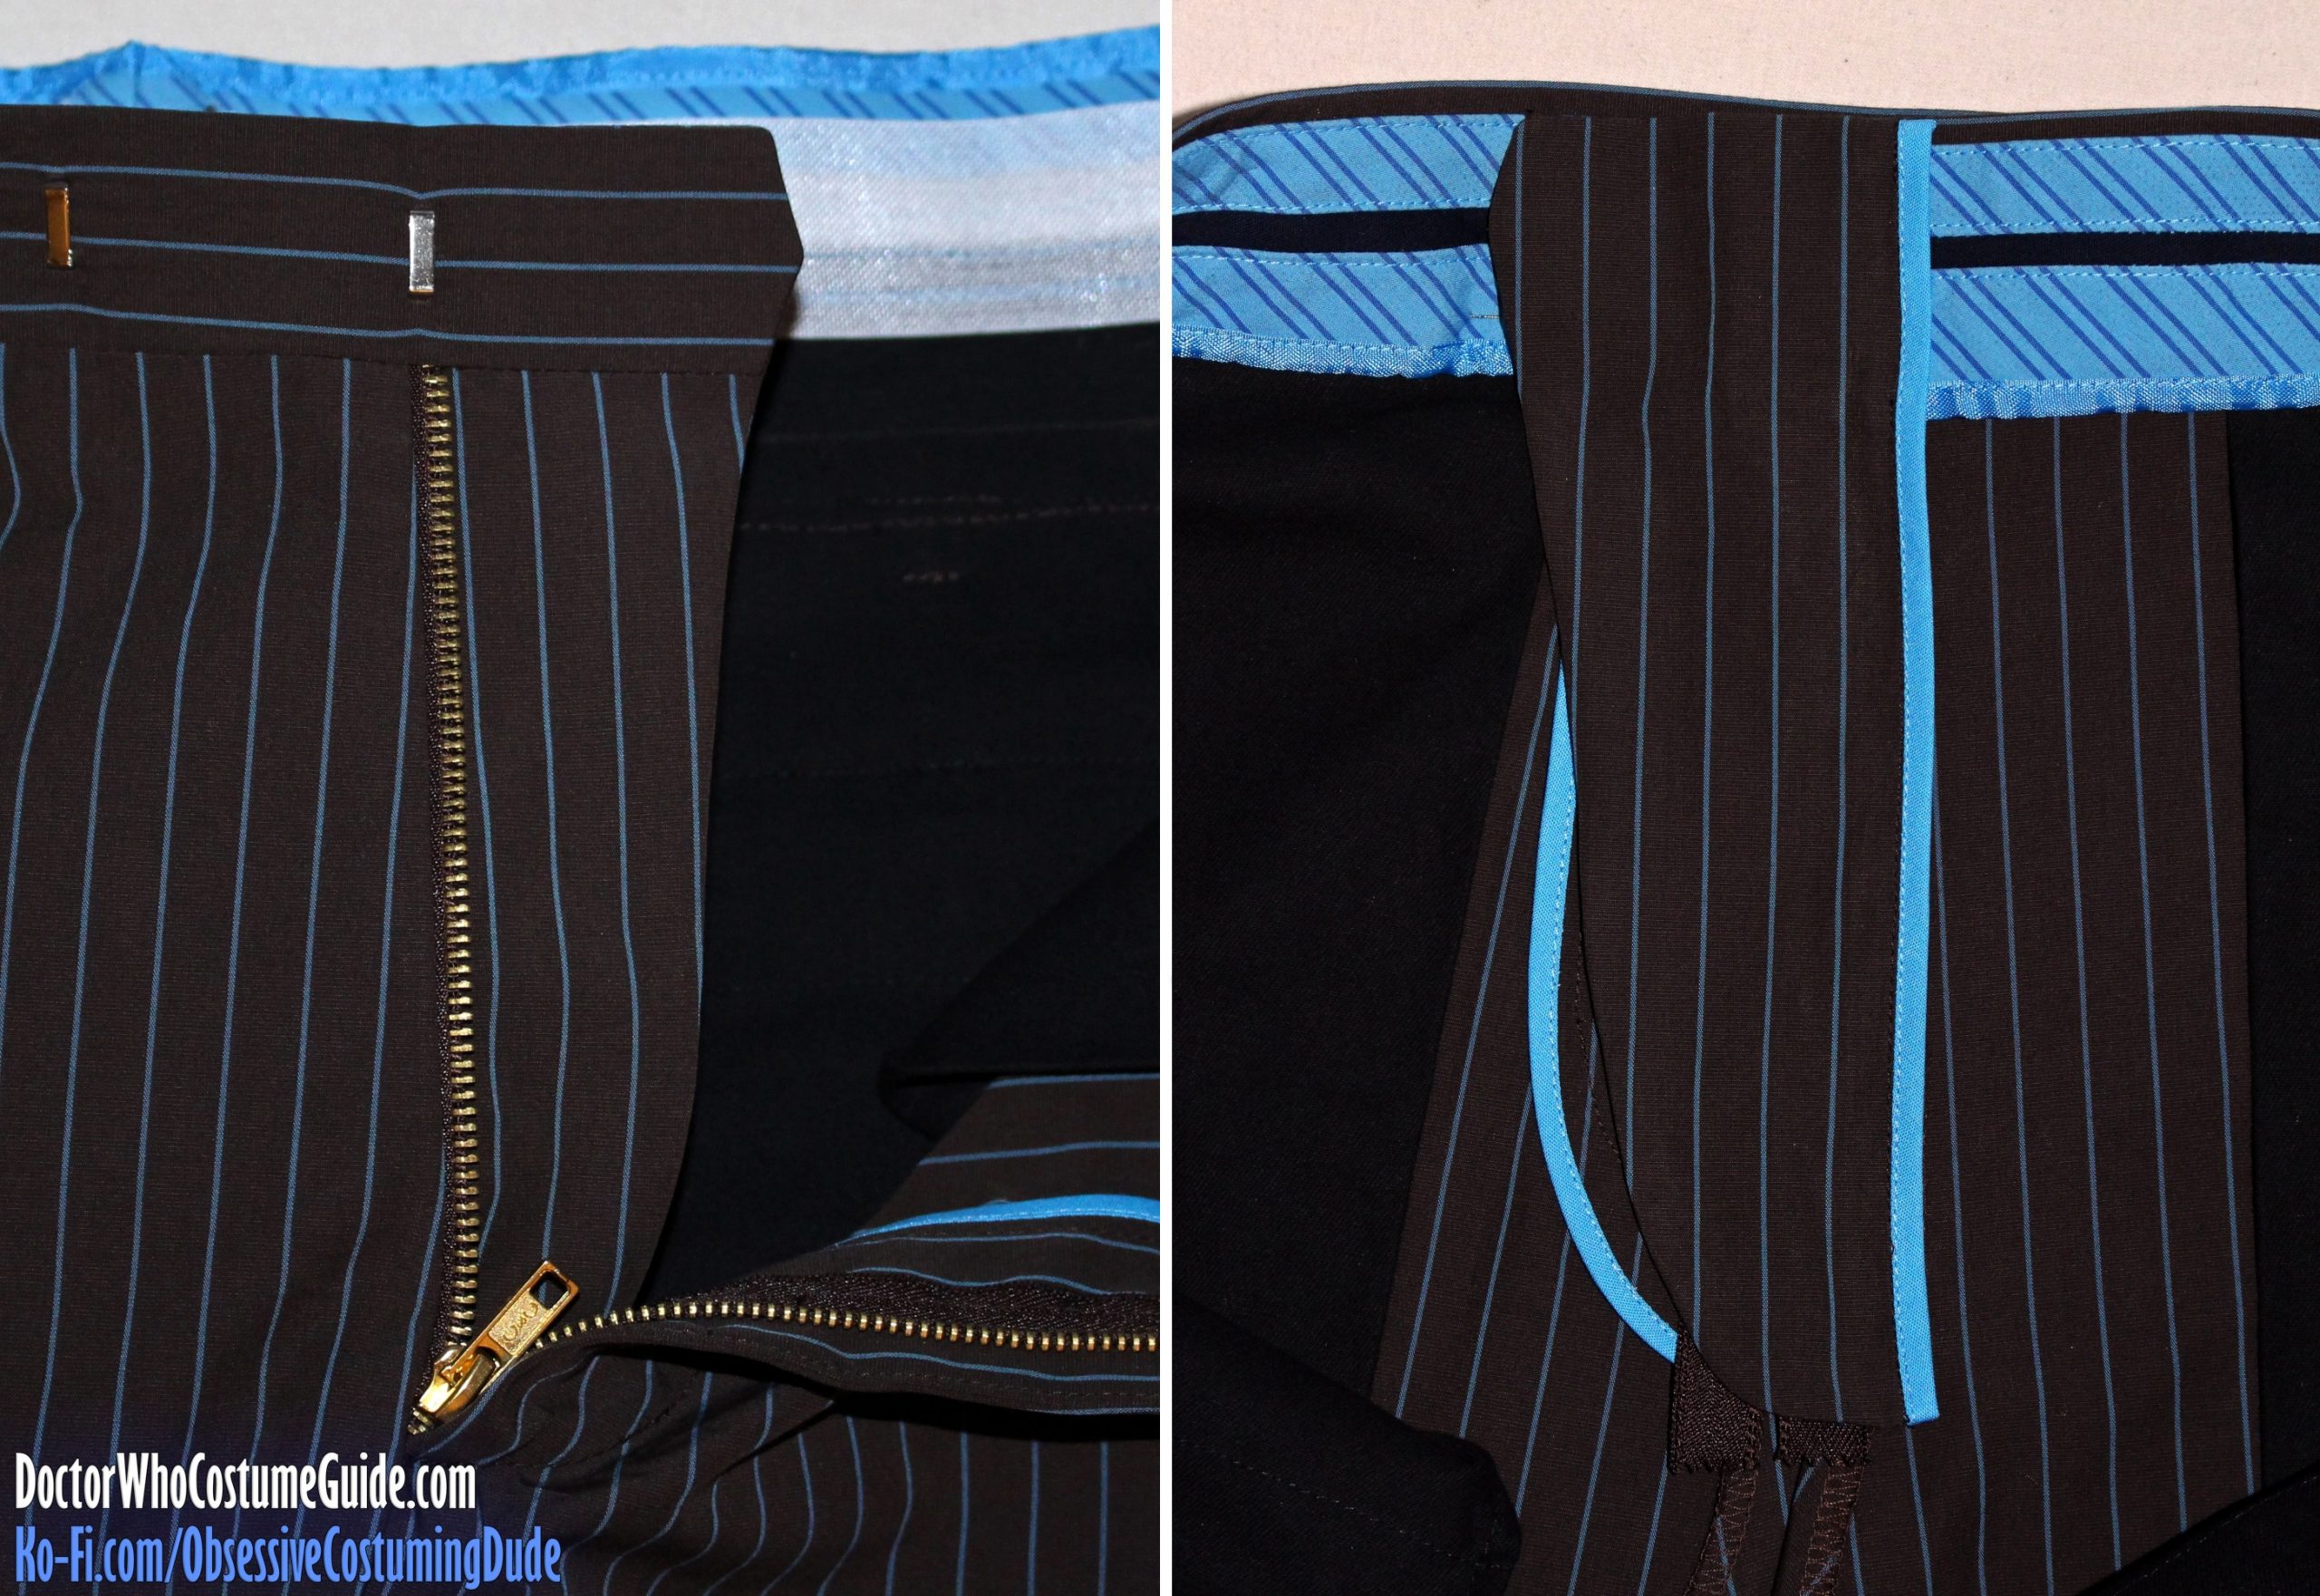
Turn the fly facing under and press.
Edge-stitch the upper and outer edges of the right fly/facing.
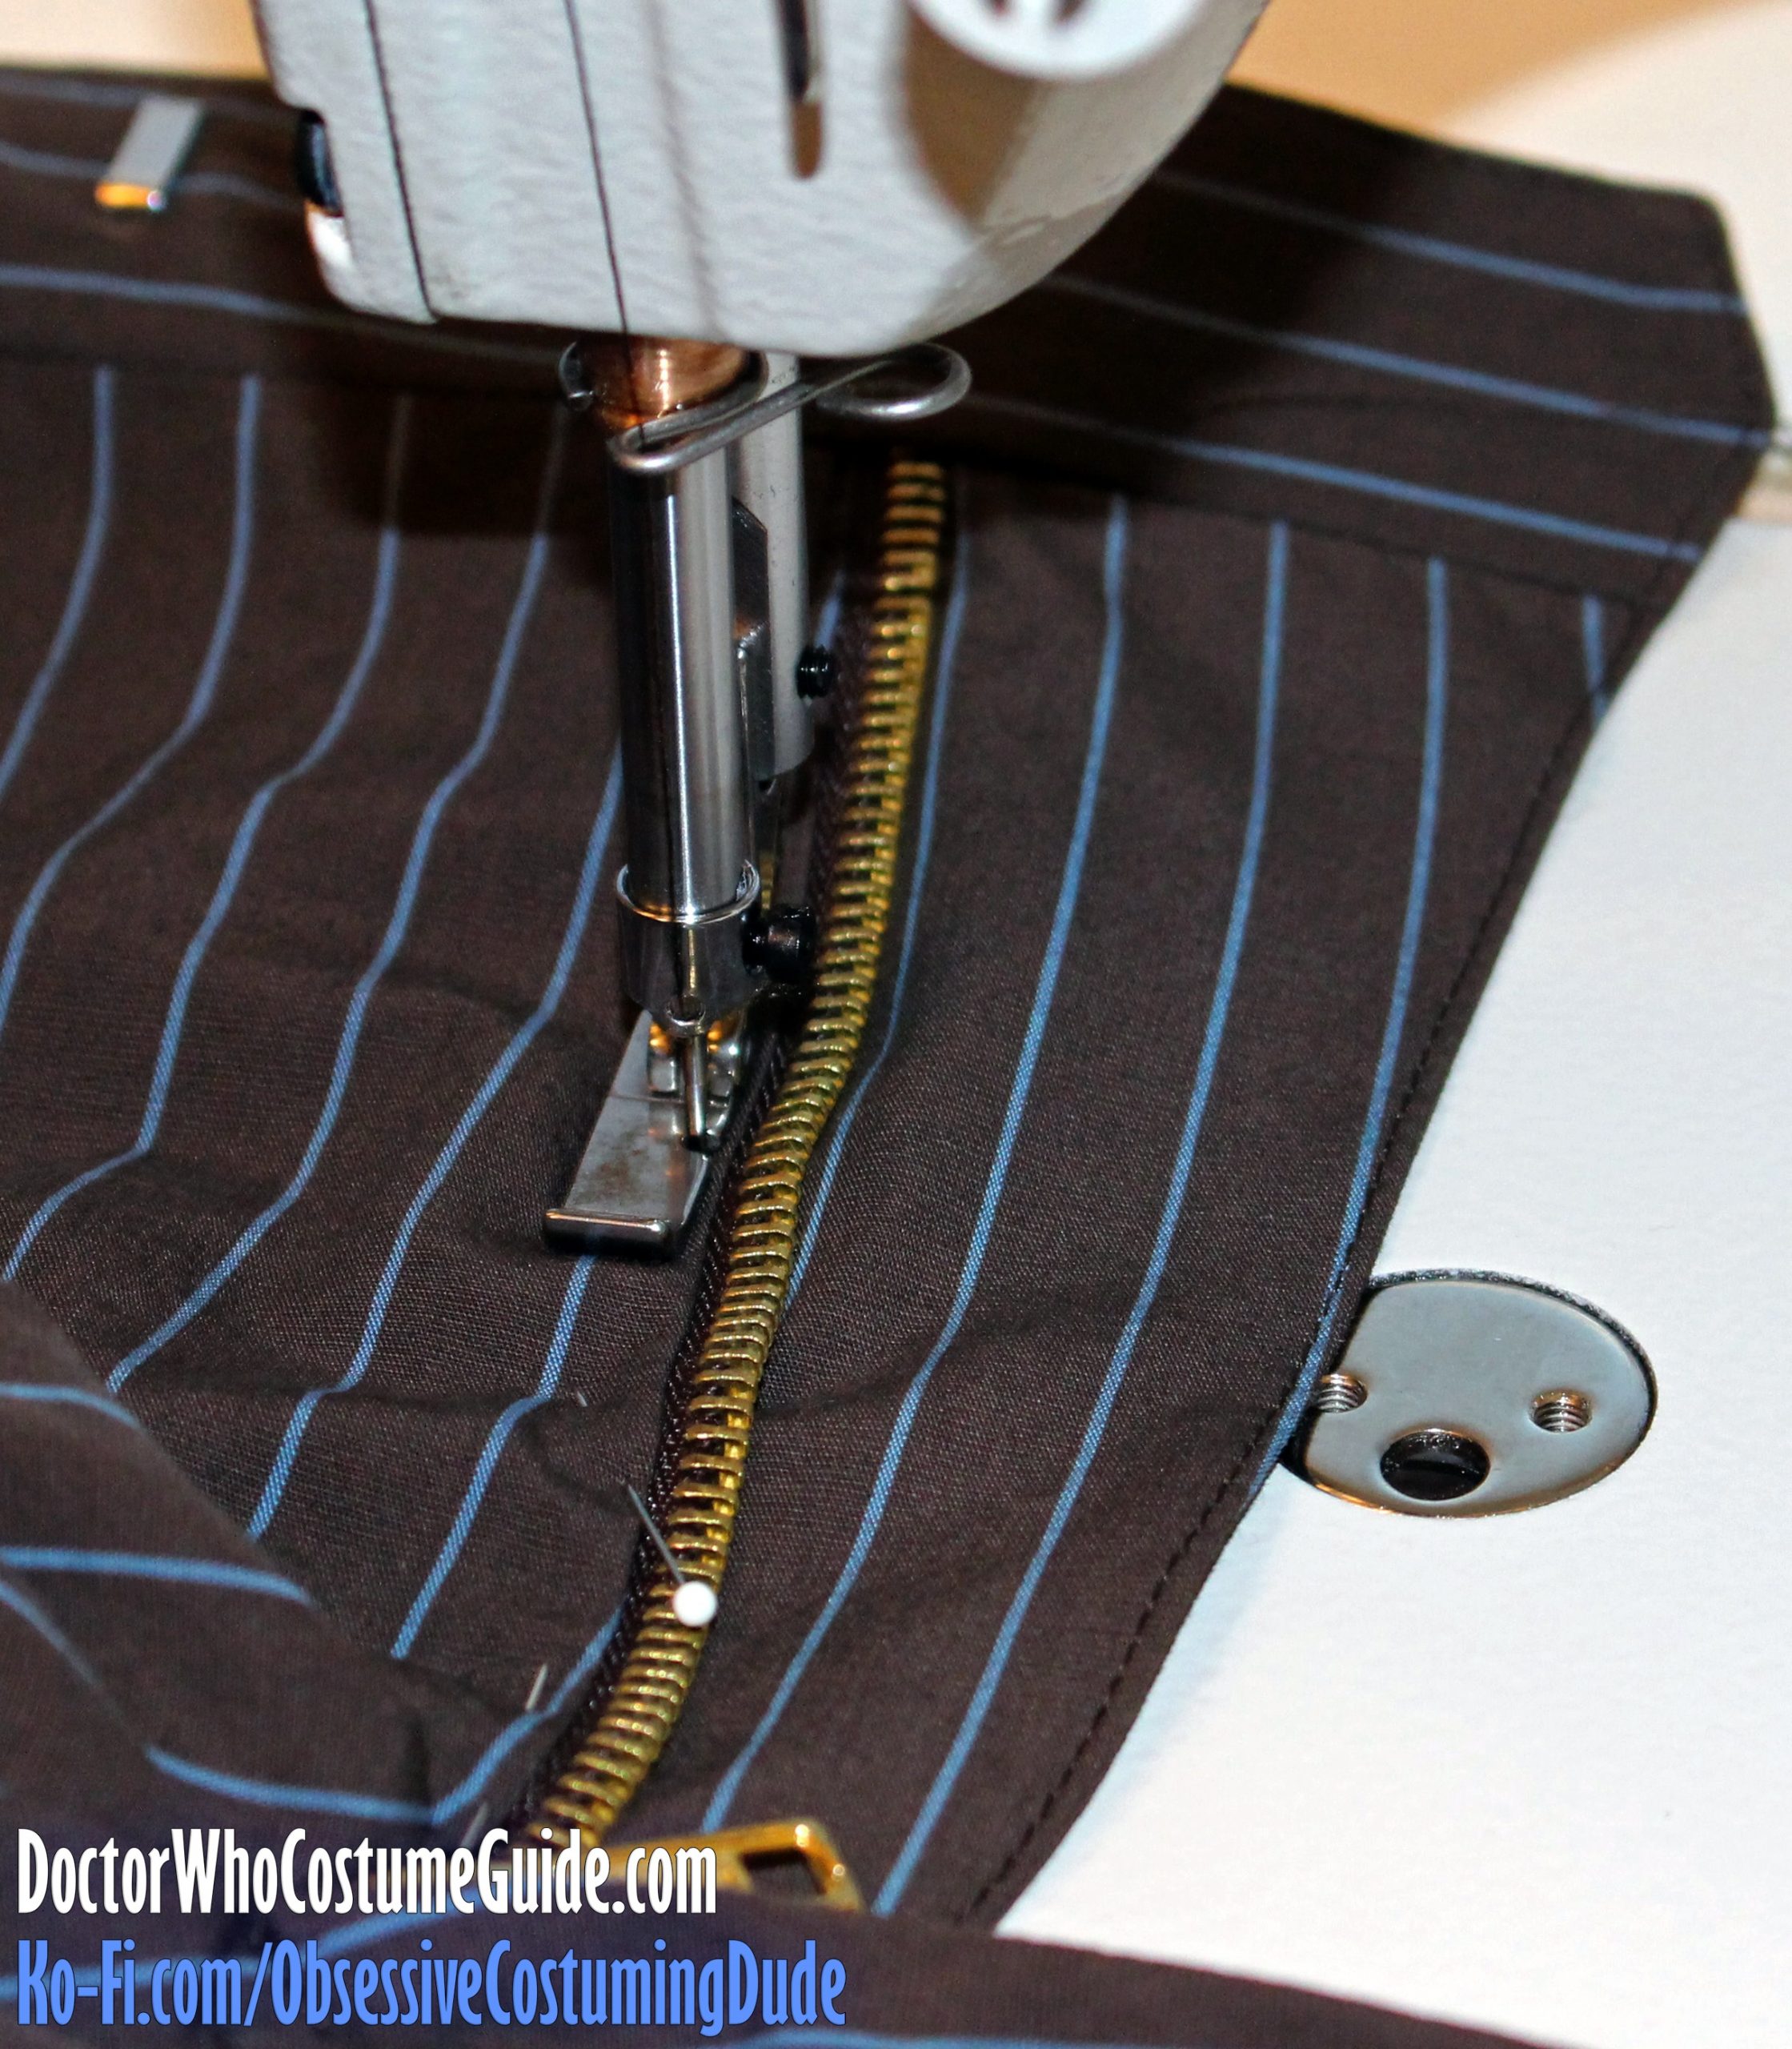
From the right side, using your zipper/piping foot, anchor the right fly facing into place by edge-stitching close to the fabric fold, next to the zipper teeth.
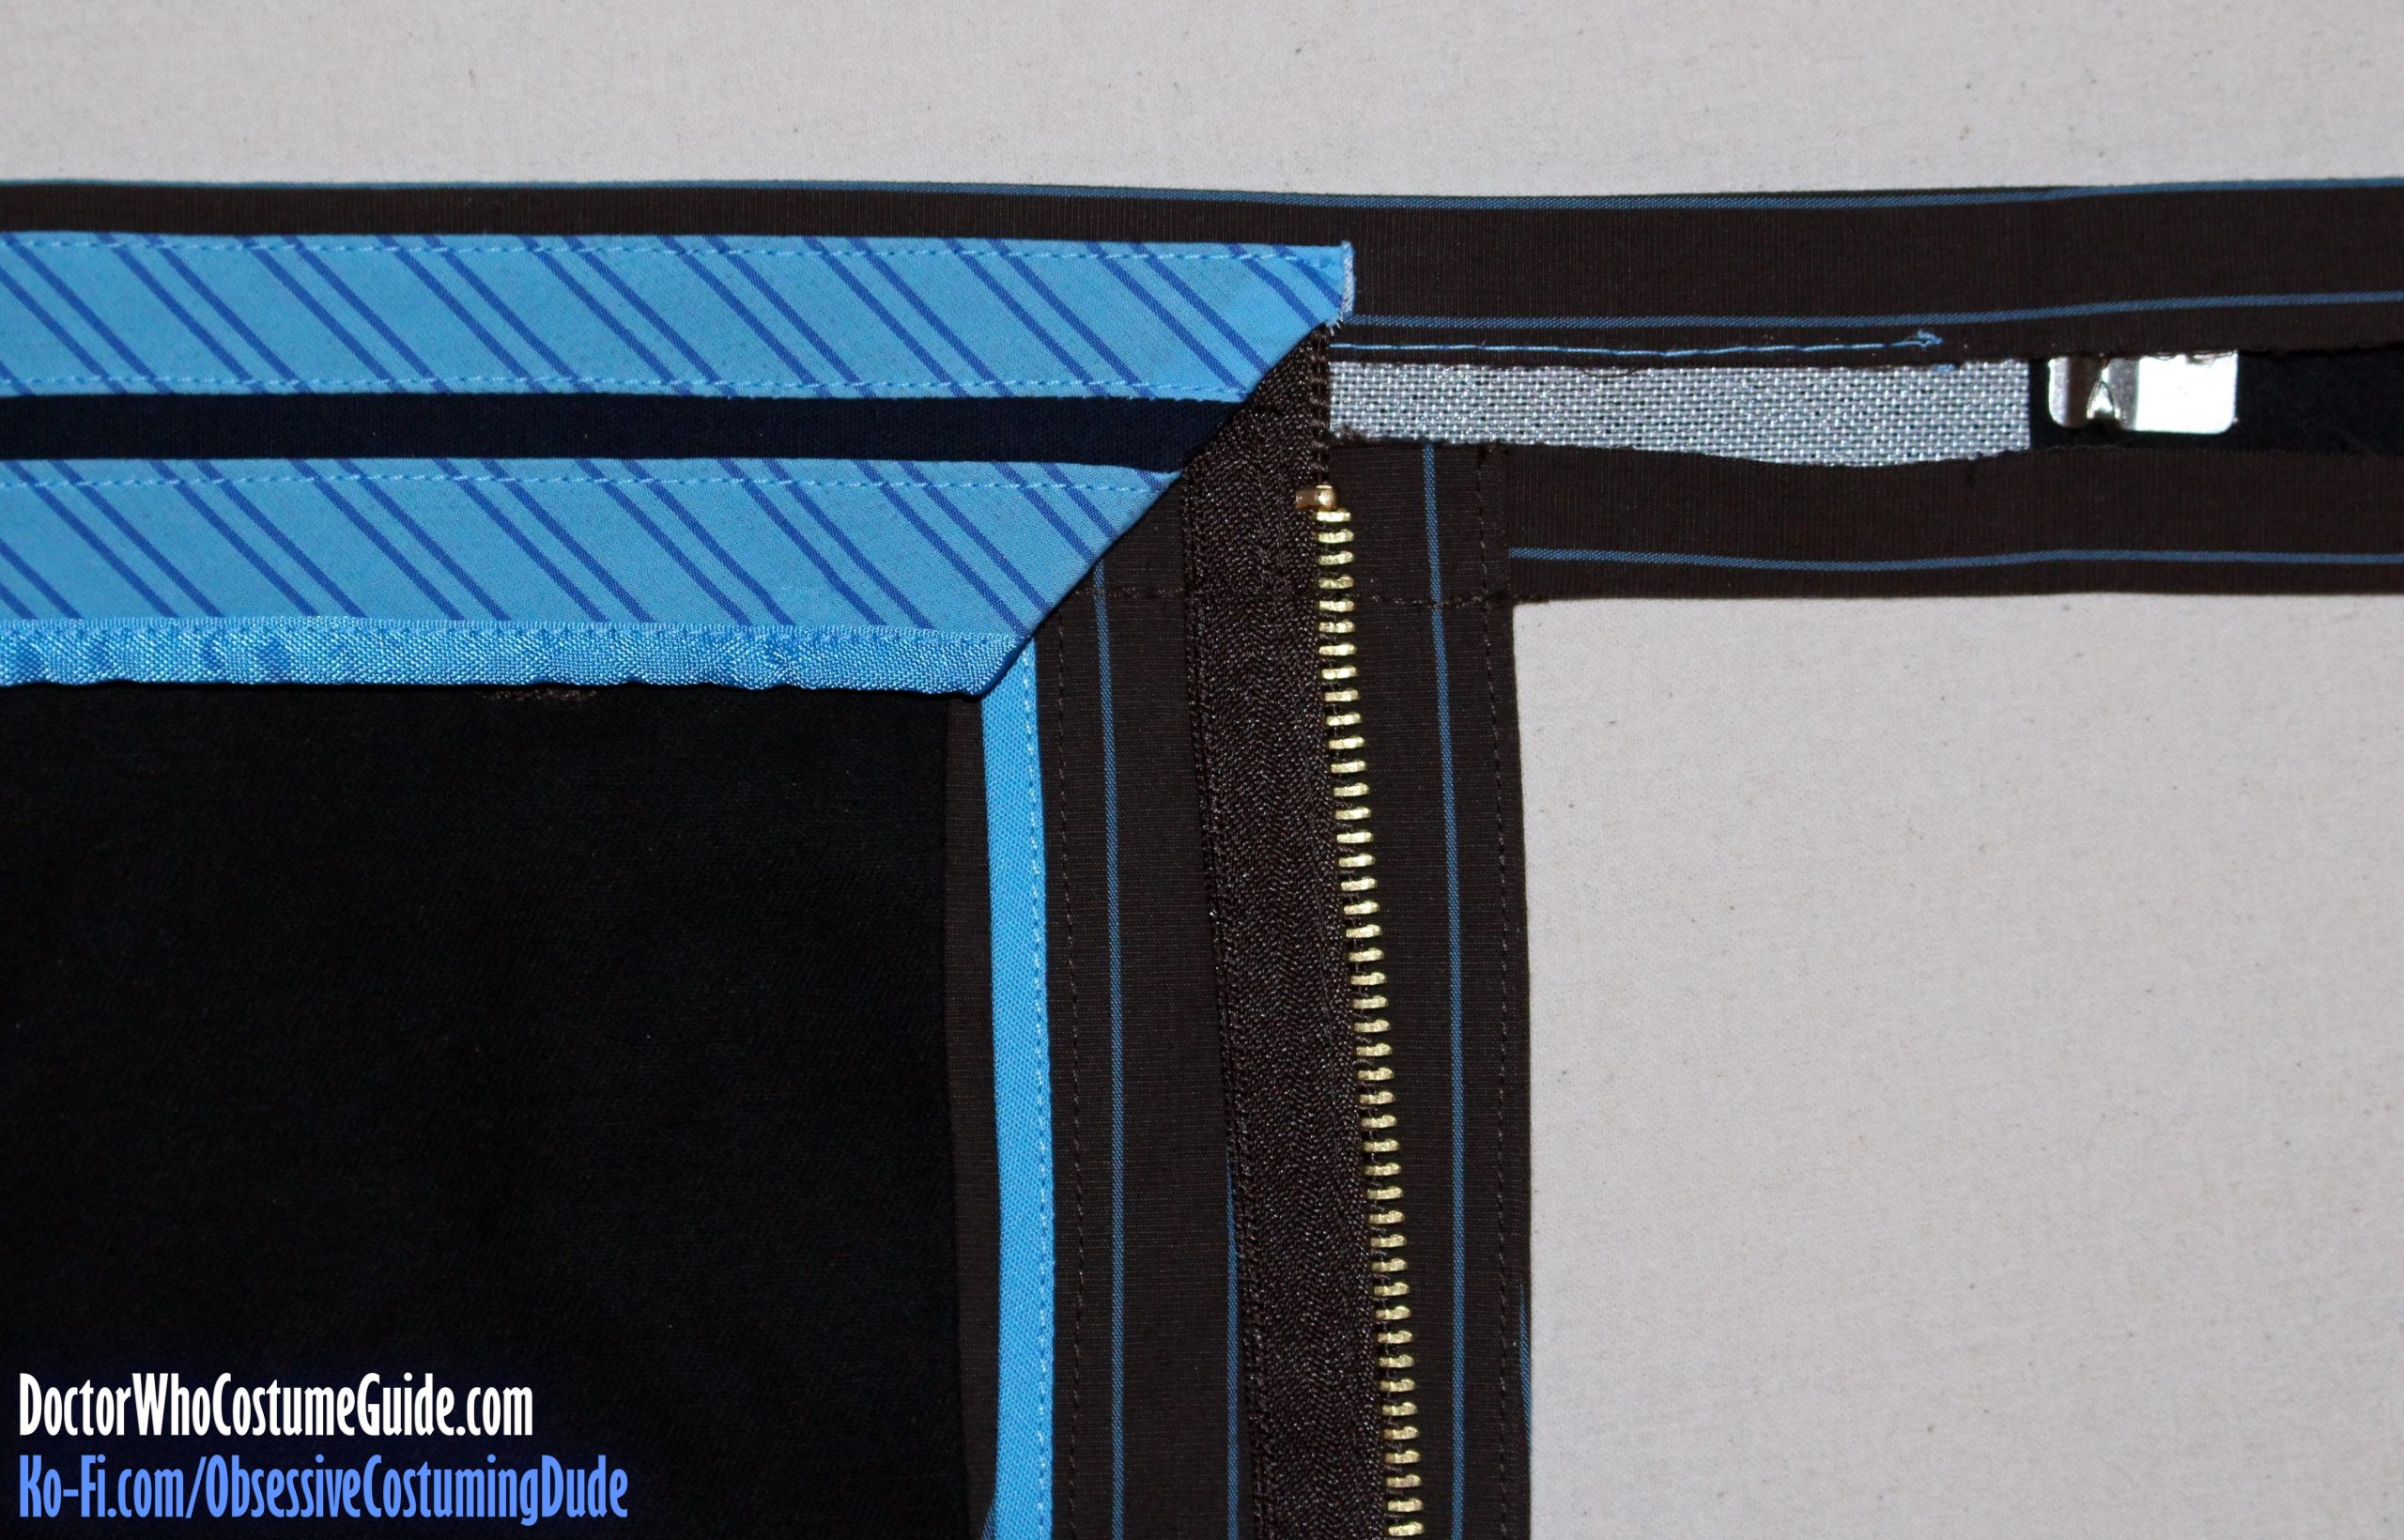
On the left front, fold the front corner of the waistband facing assembly under and press.
(I like to do it specifically so the seam binding and bias tape meet at the corner.)
Using brown thread and a blue bobbin, “stitch-in-the-ditch” around the bottom of the waistband, from the left front to the side edge of the right fly facing.