Eleventh Doctor “Scales” Waistcoat – Sewing Tutorial
FRONT ASSEMBLIES
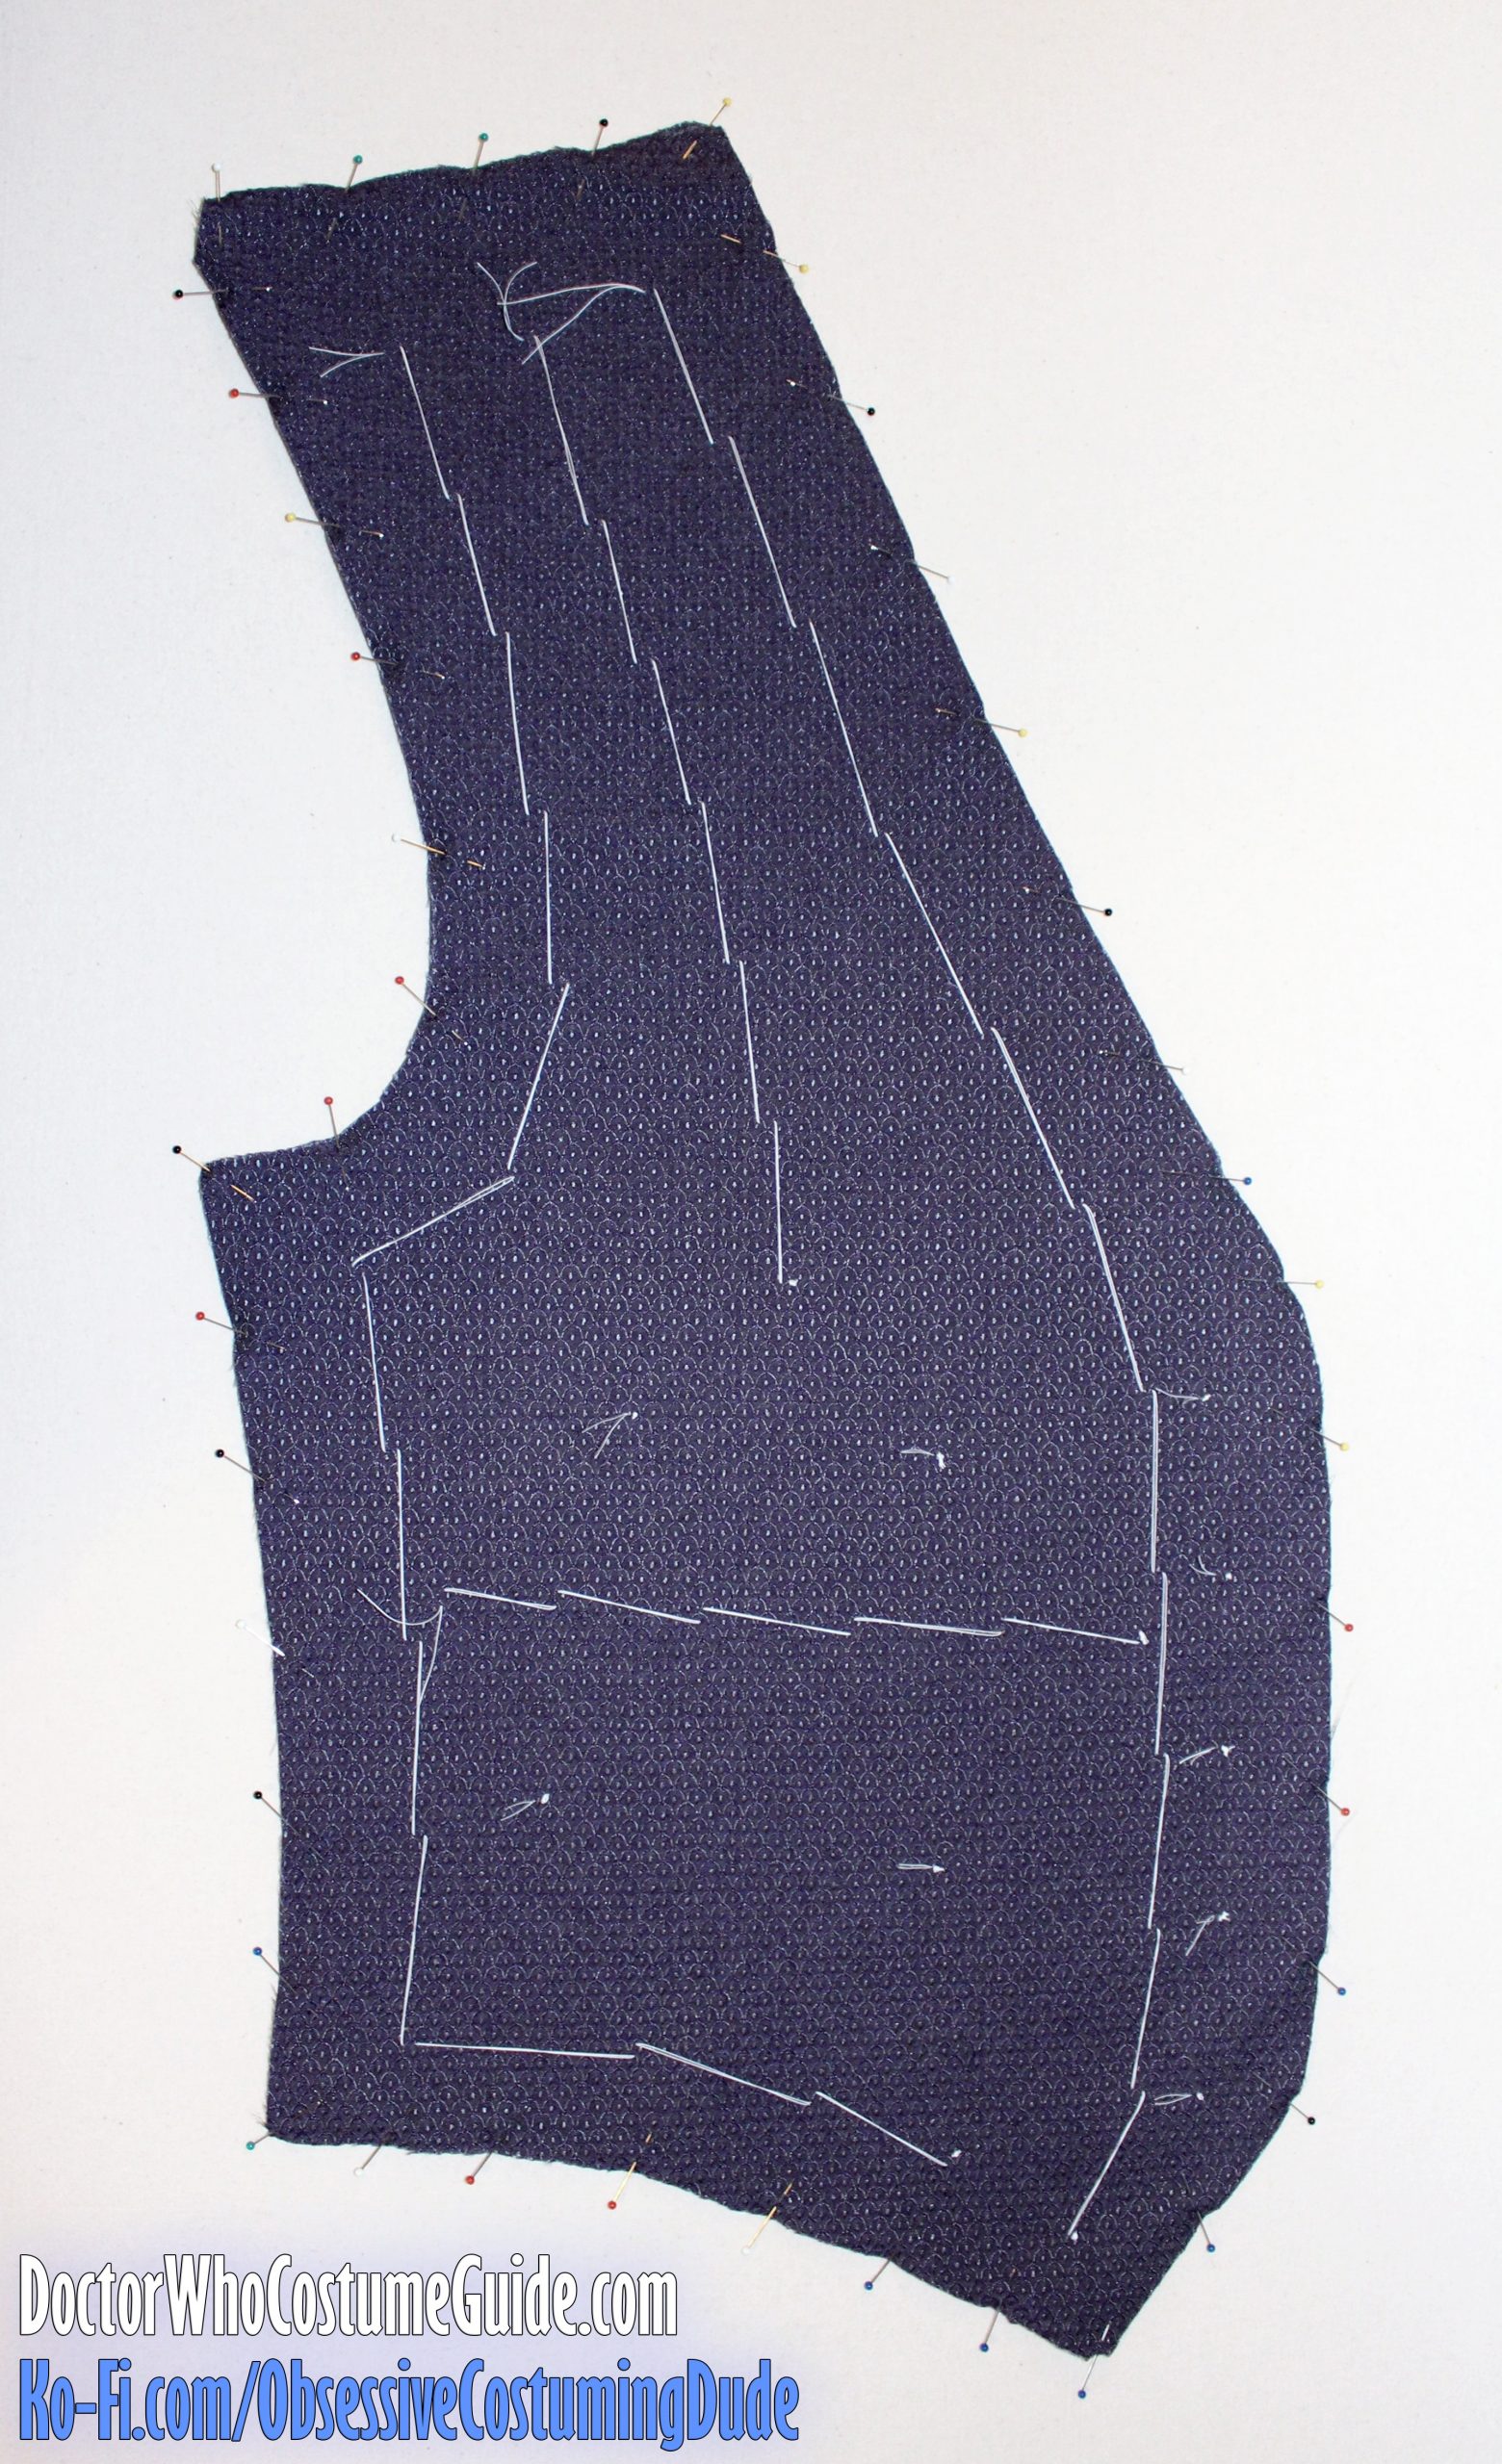
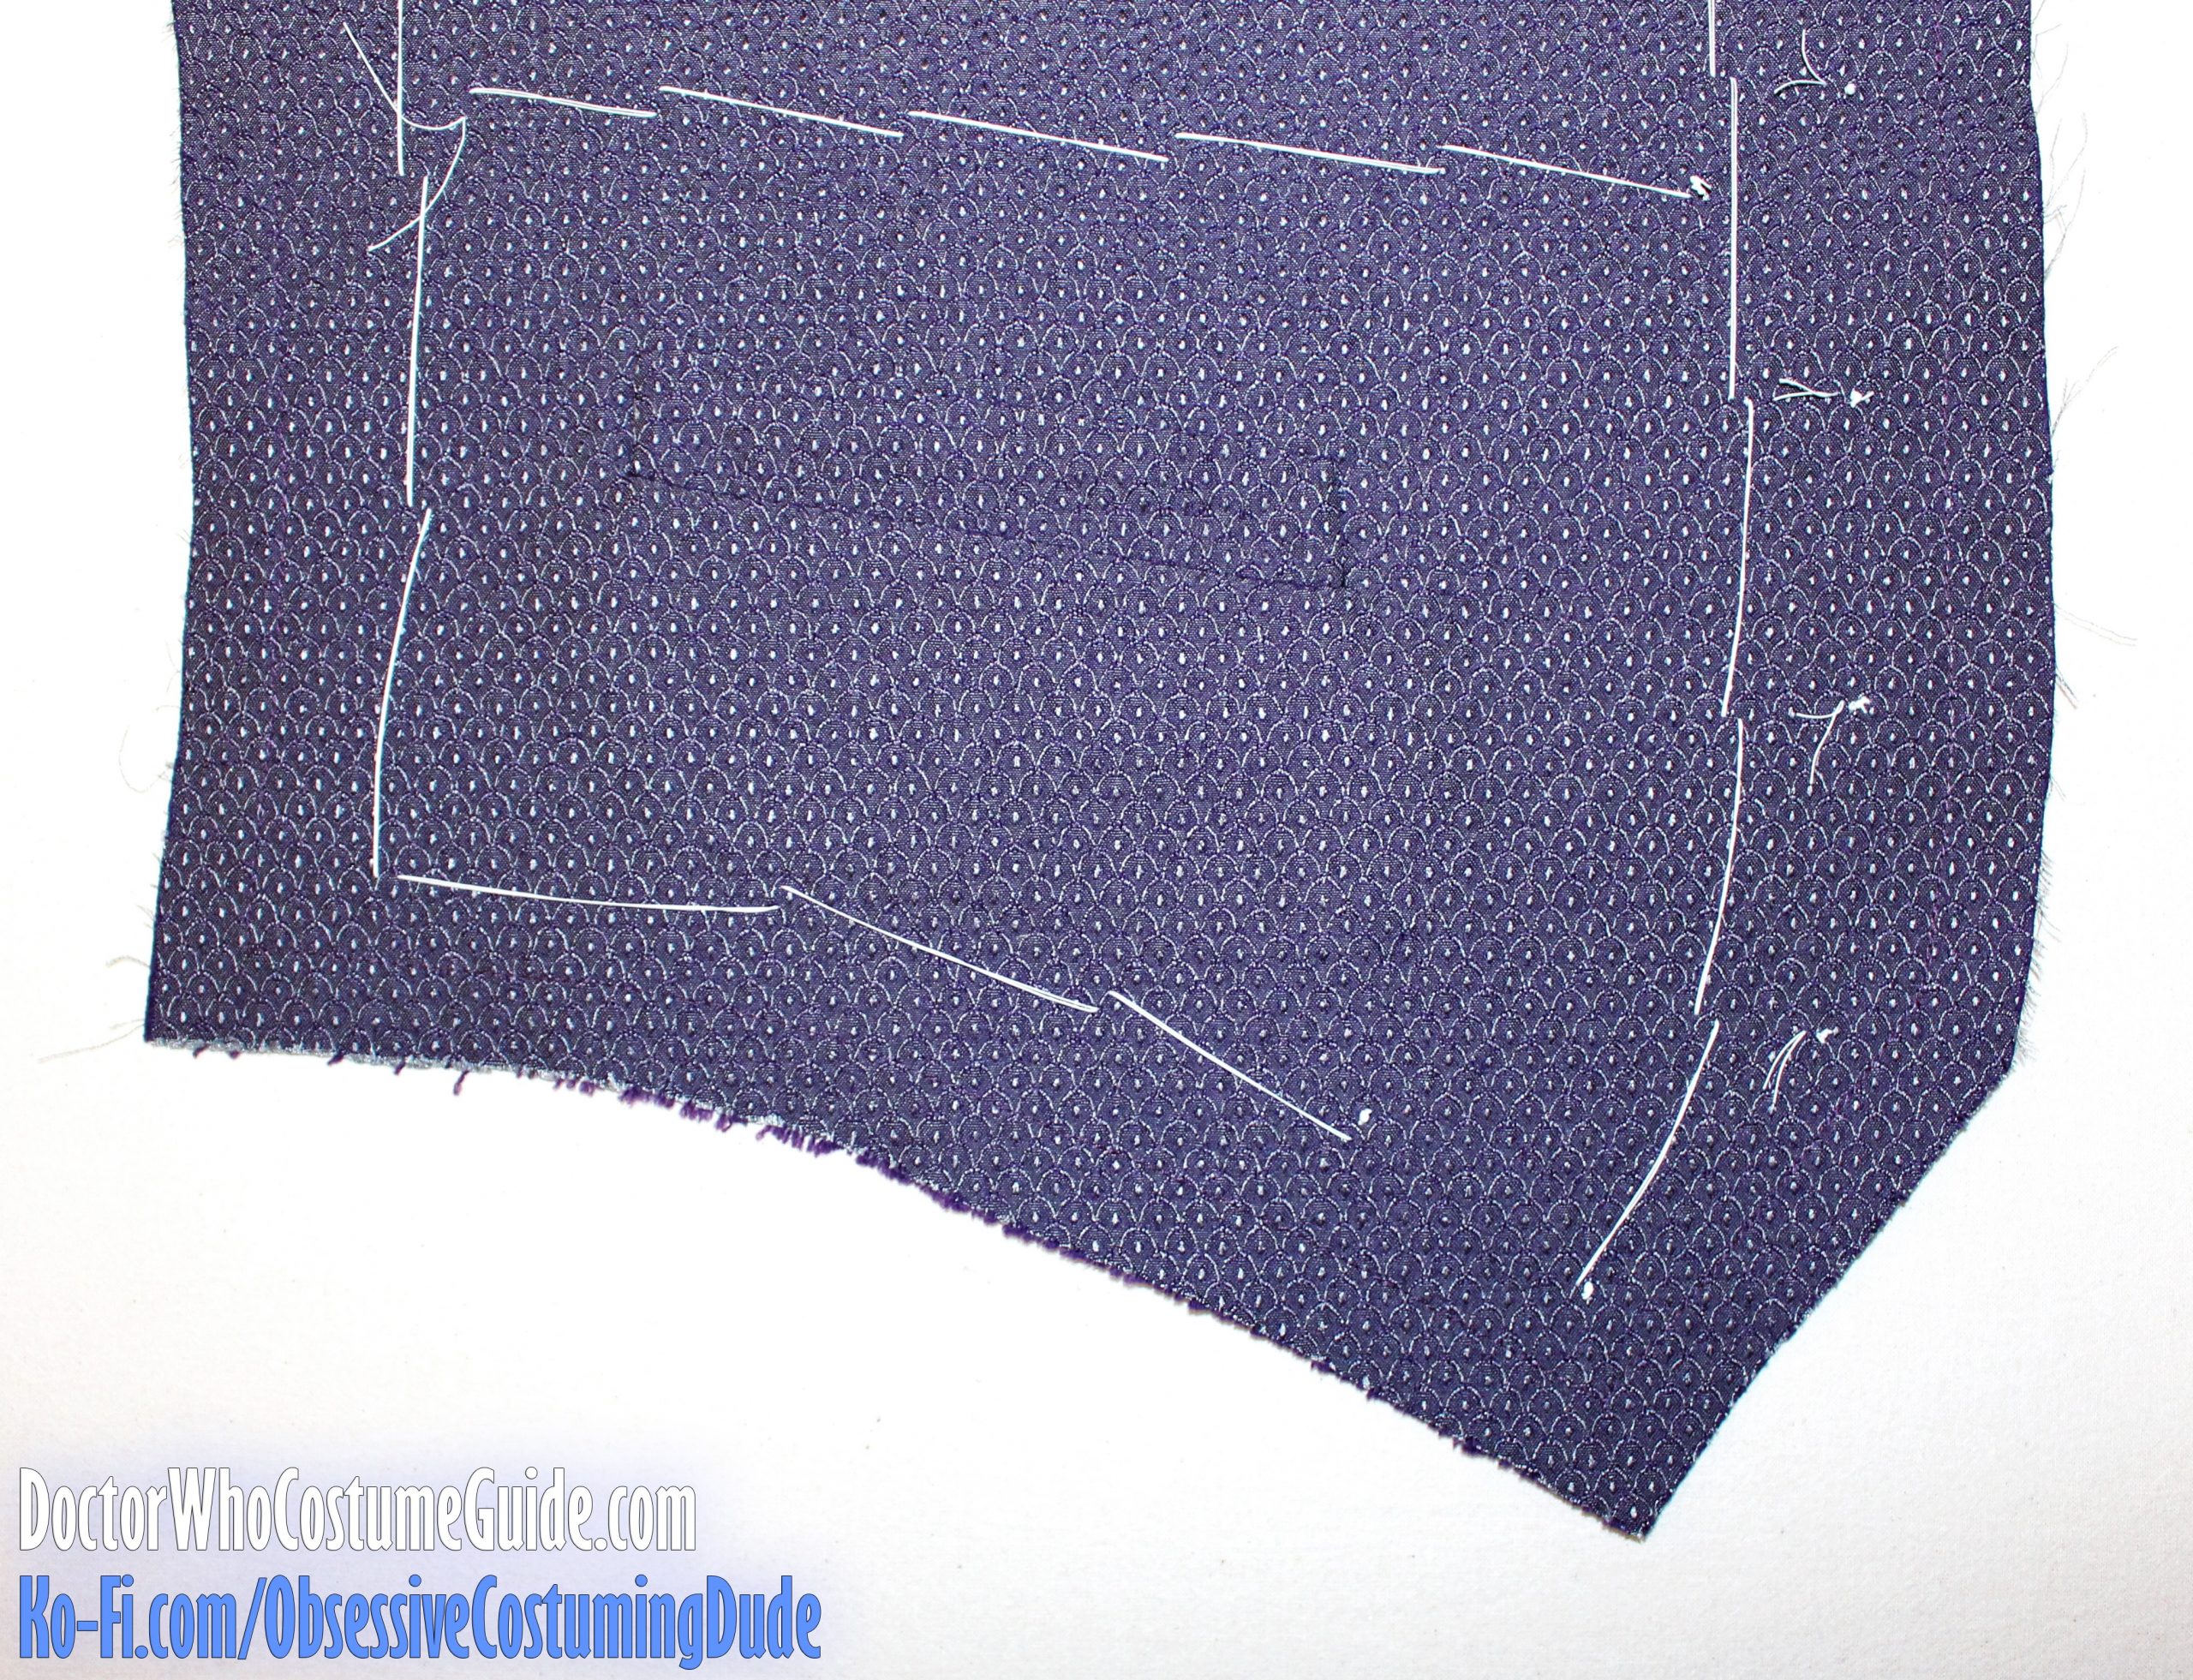
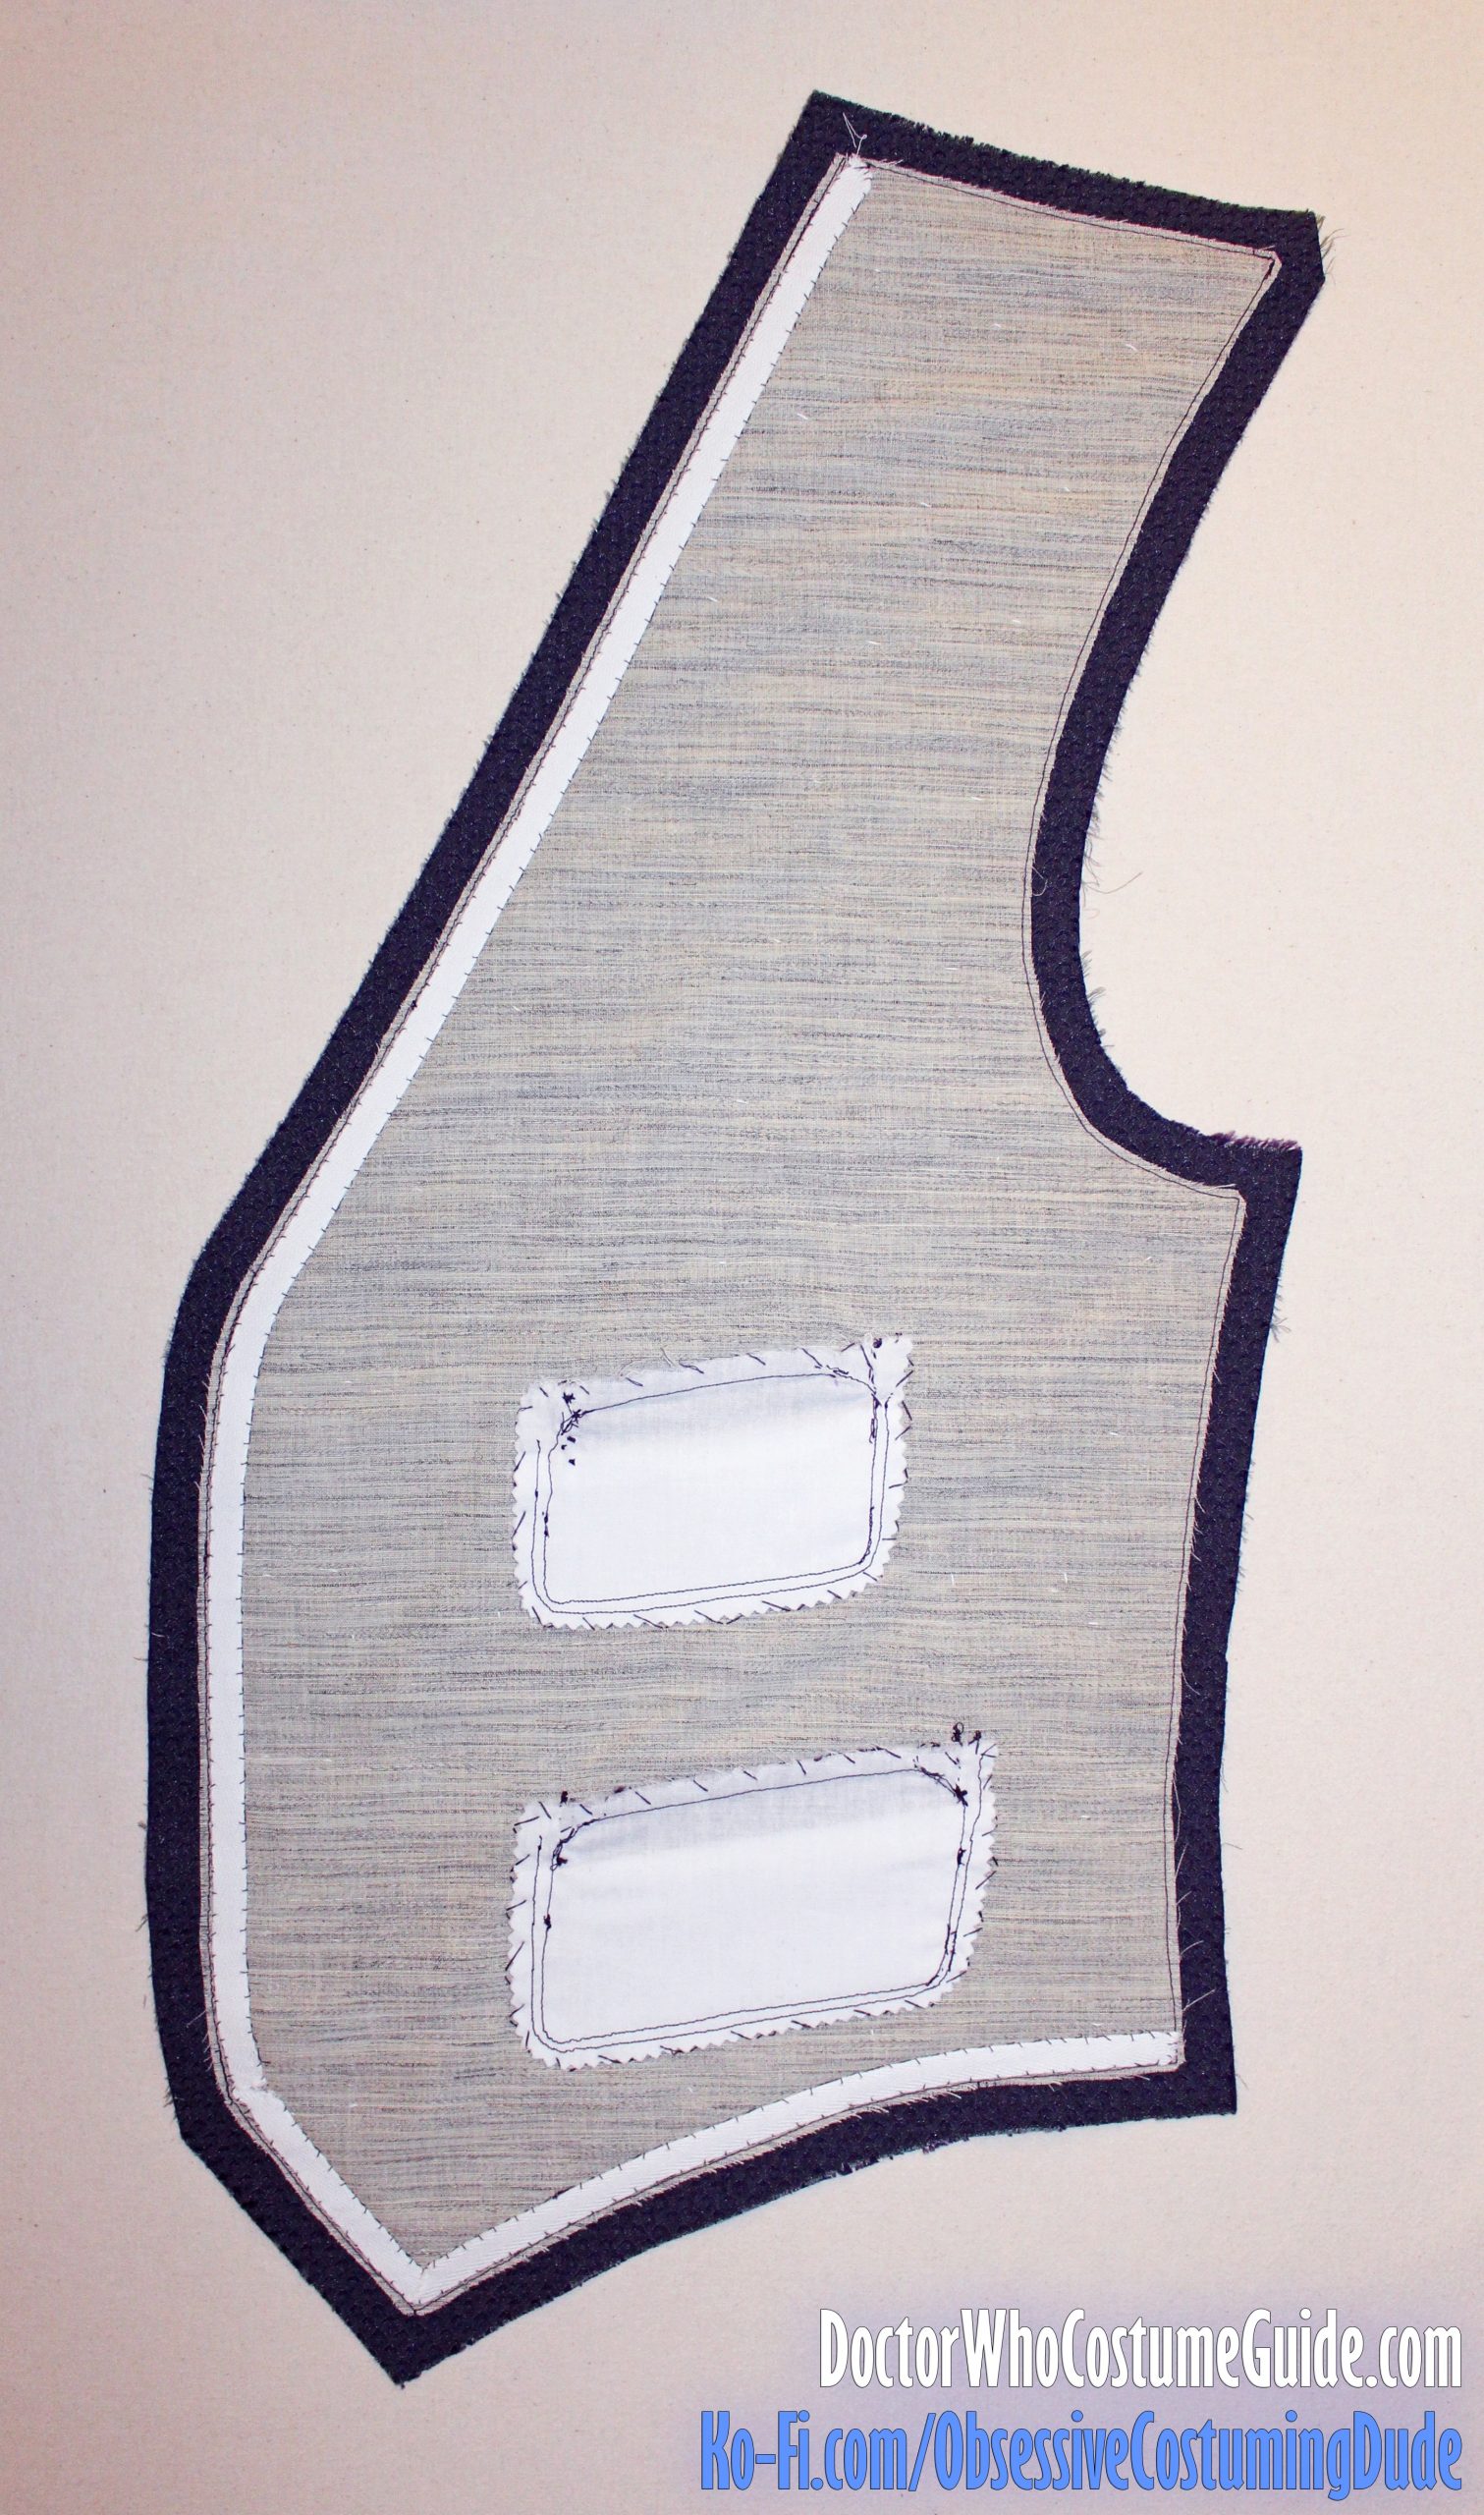
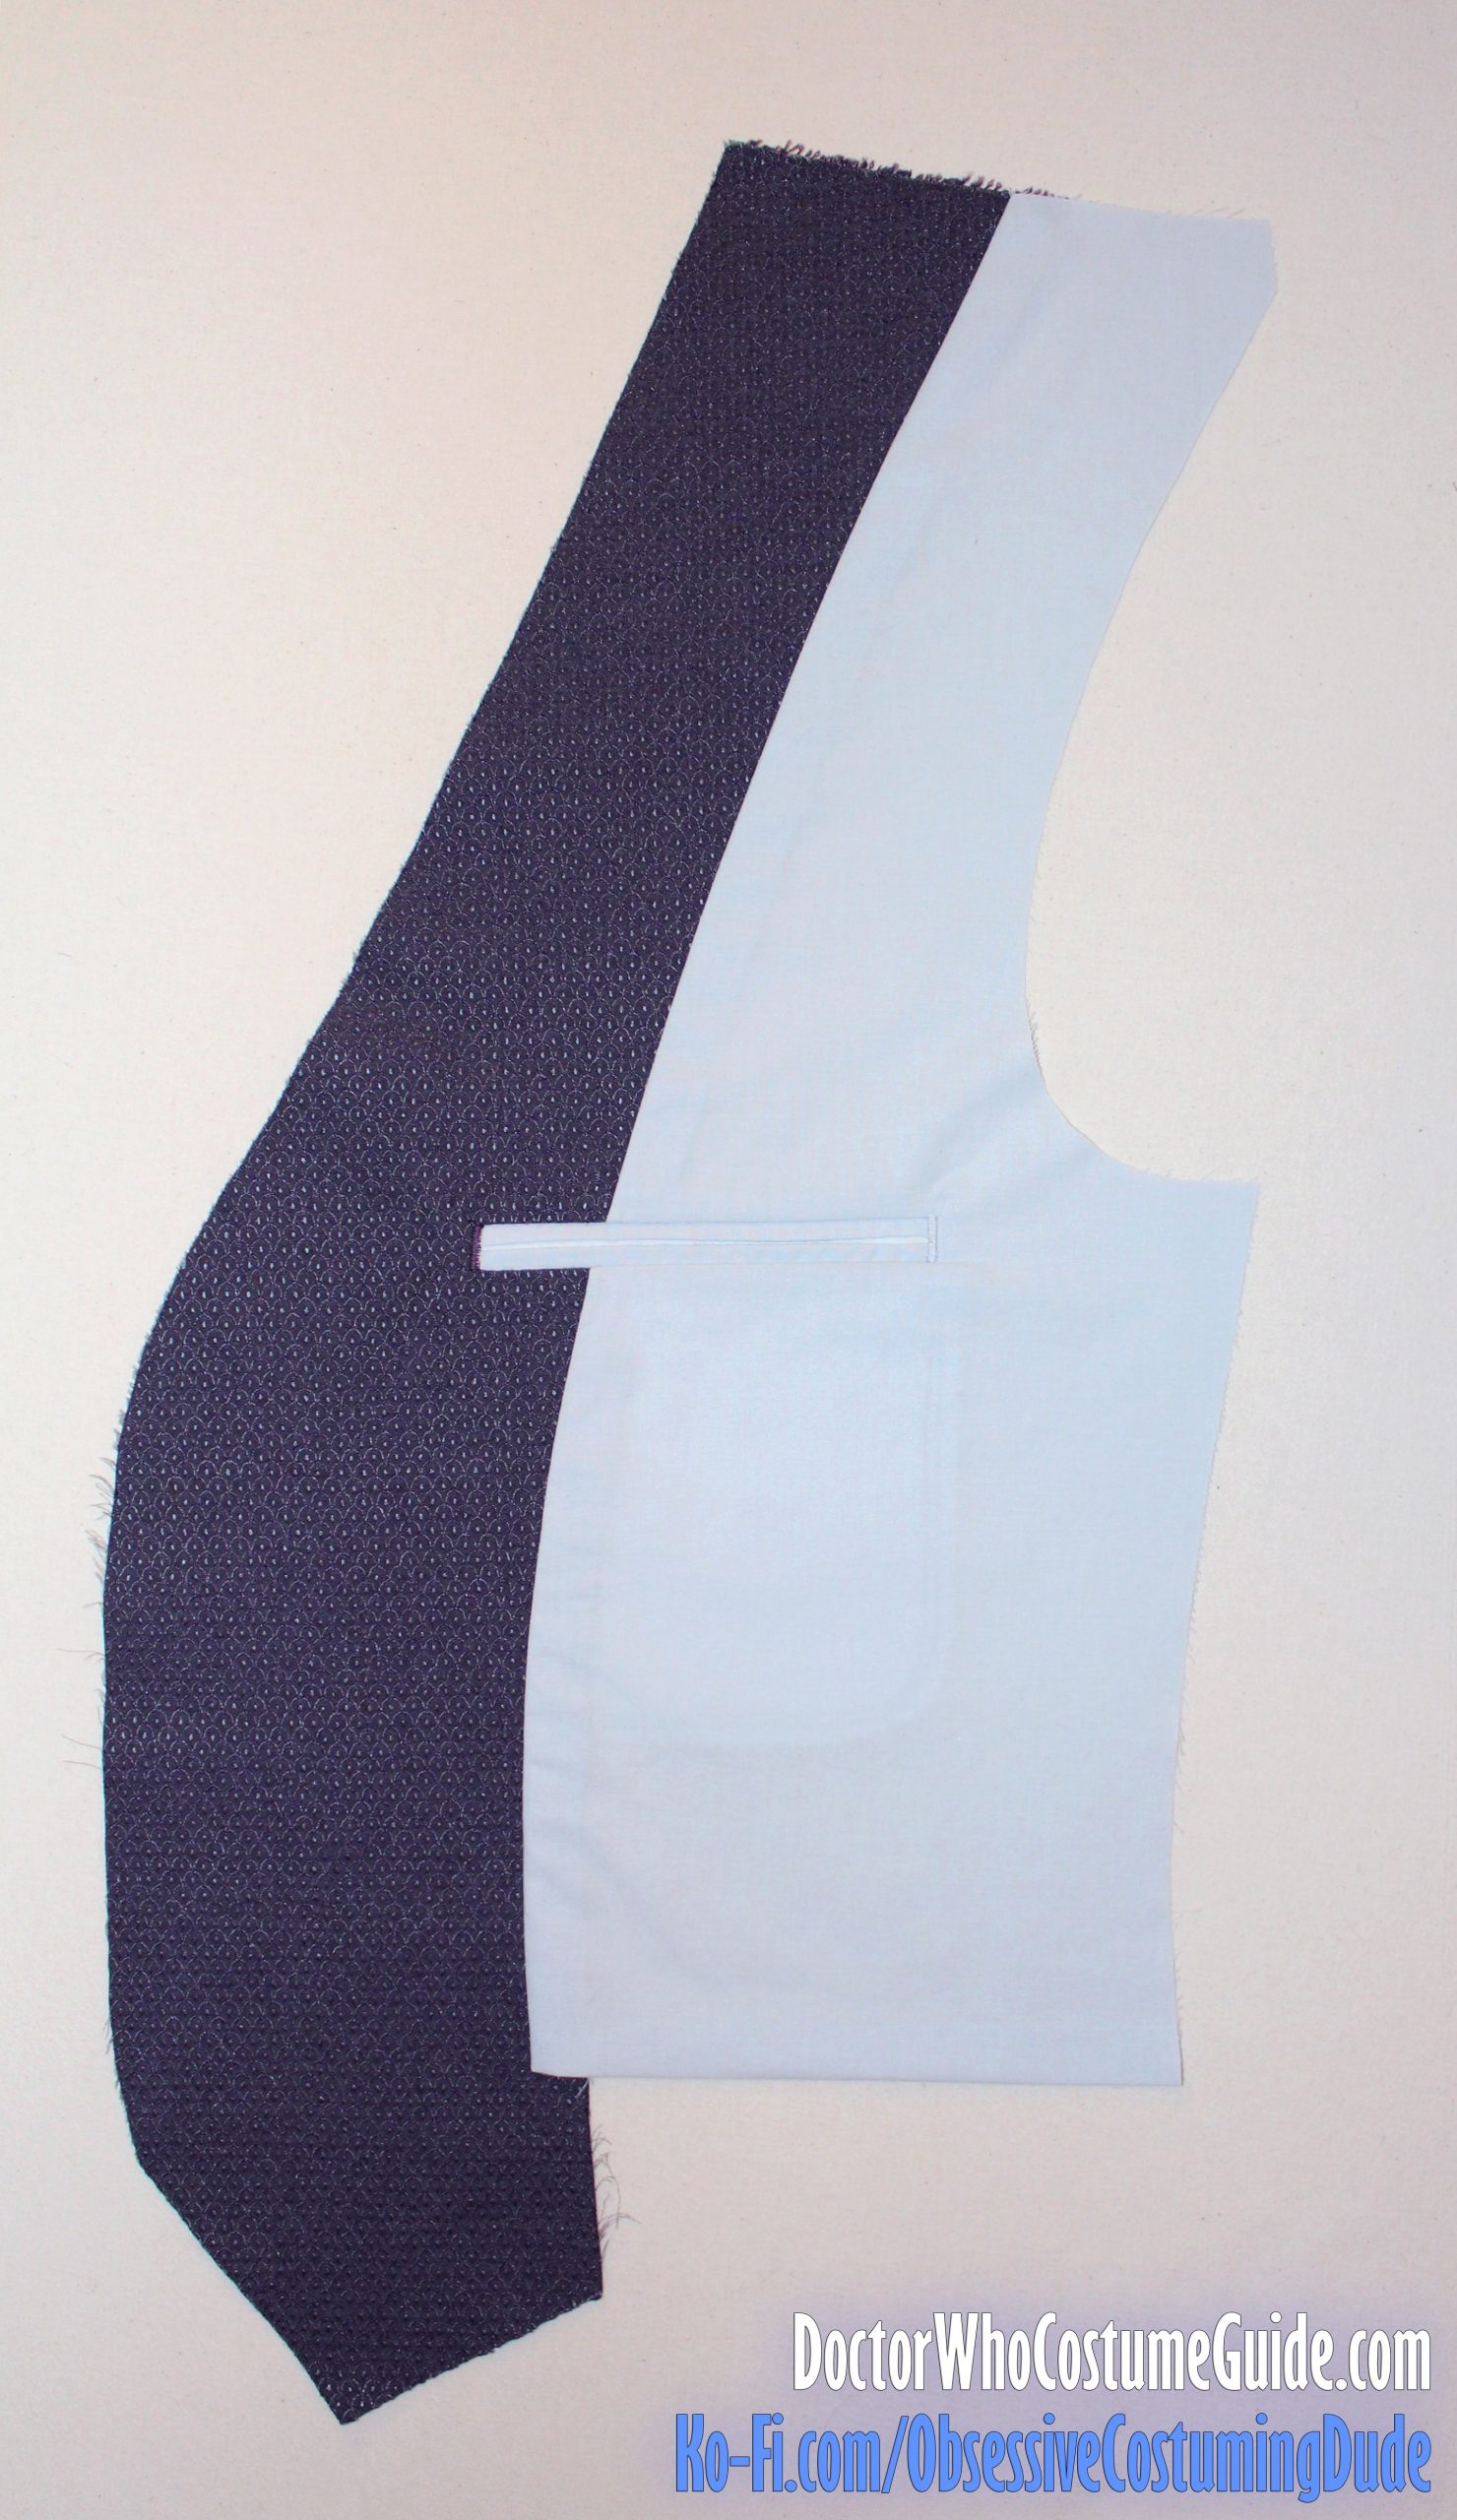
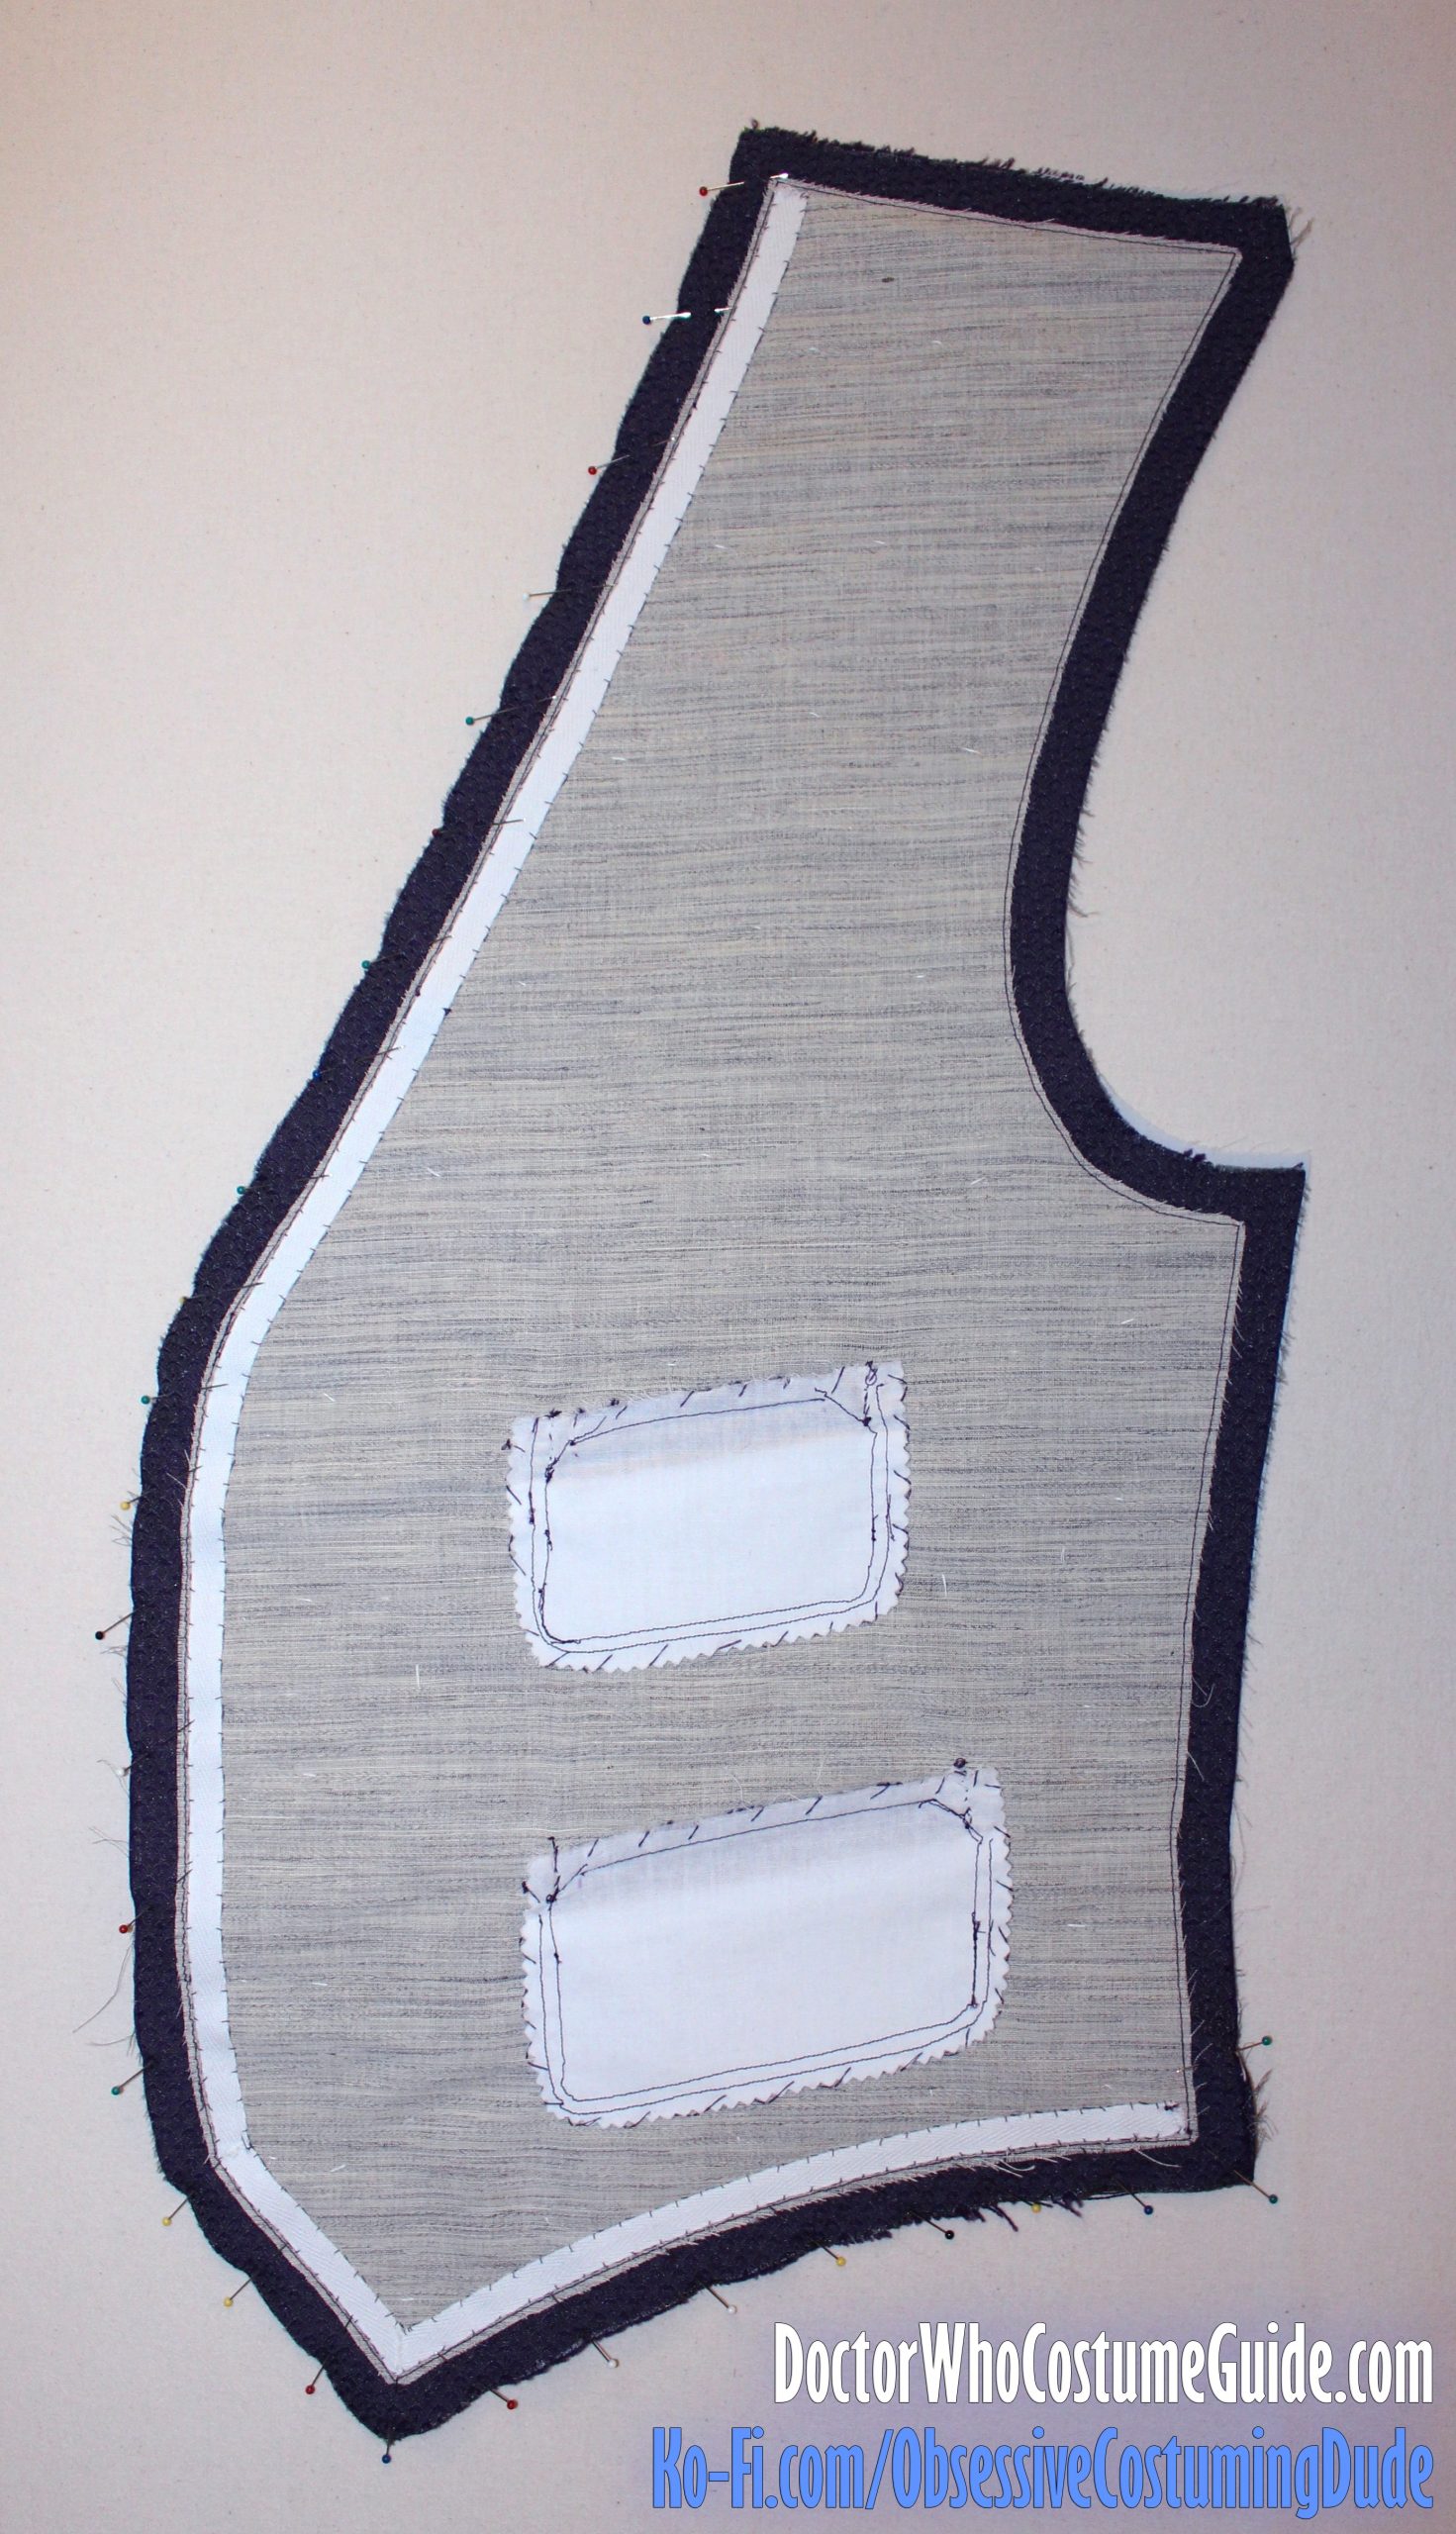
If you’re using a sew-in hair canvas, place the waistcoat front (piece A) over the corresponding piece of hair canvas interfacing on a flat surface, matching edges.
Tailor-baste the hair canvas to the waistcoat front, leaving about 1 ½” free around the edges.
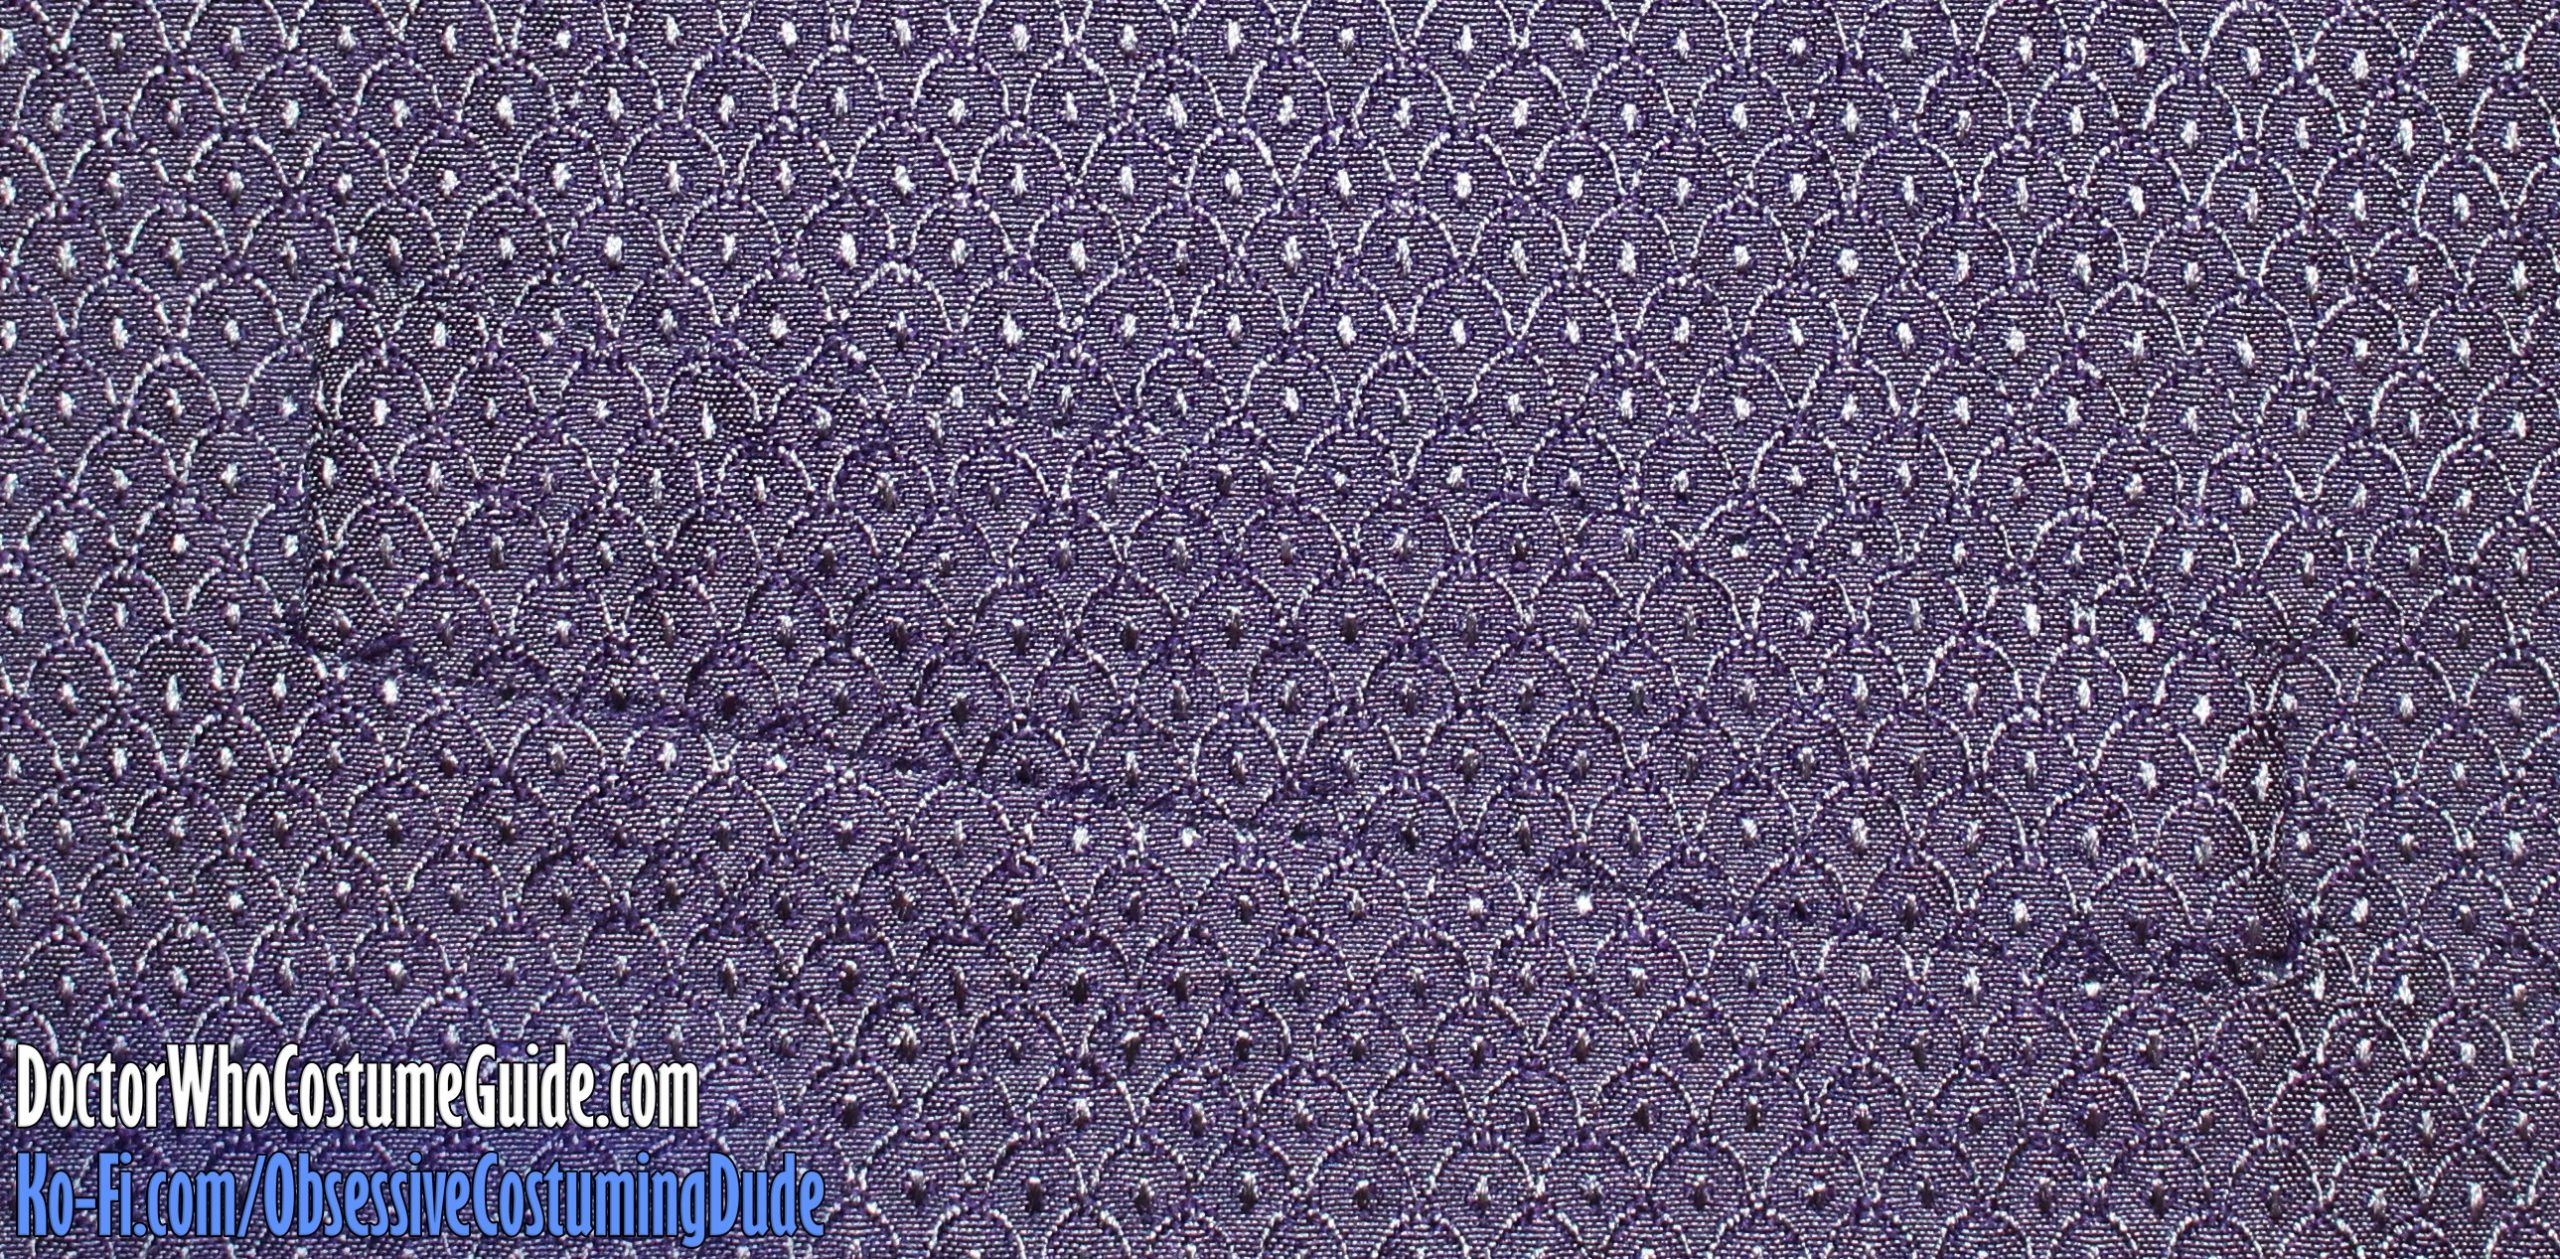
Then, pin the canvas to the “scales” fabric around the entire perimeter of the waistcoat front.
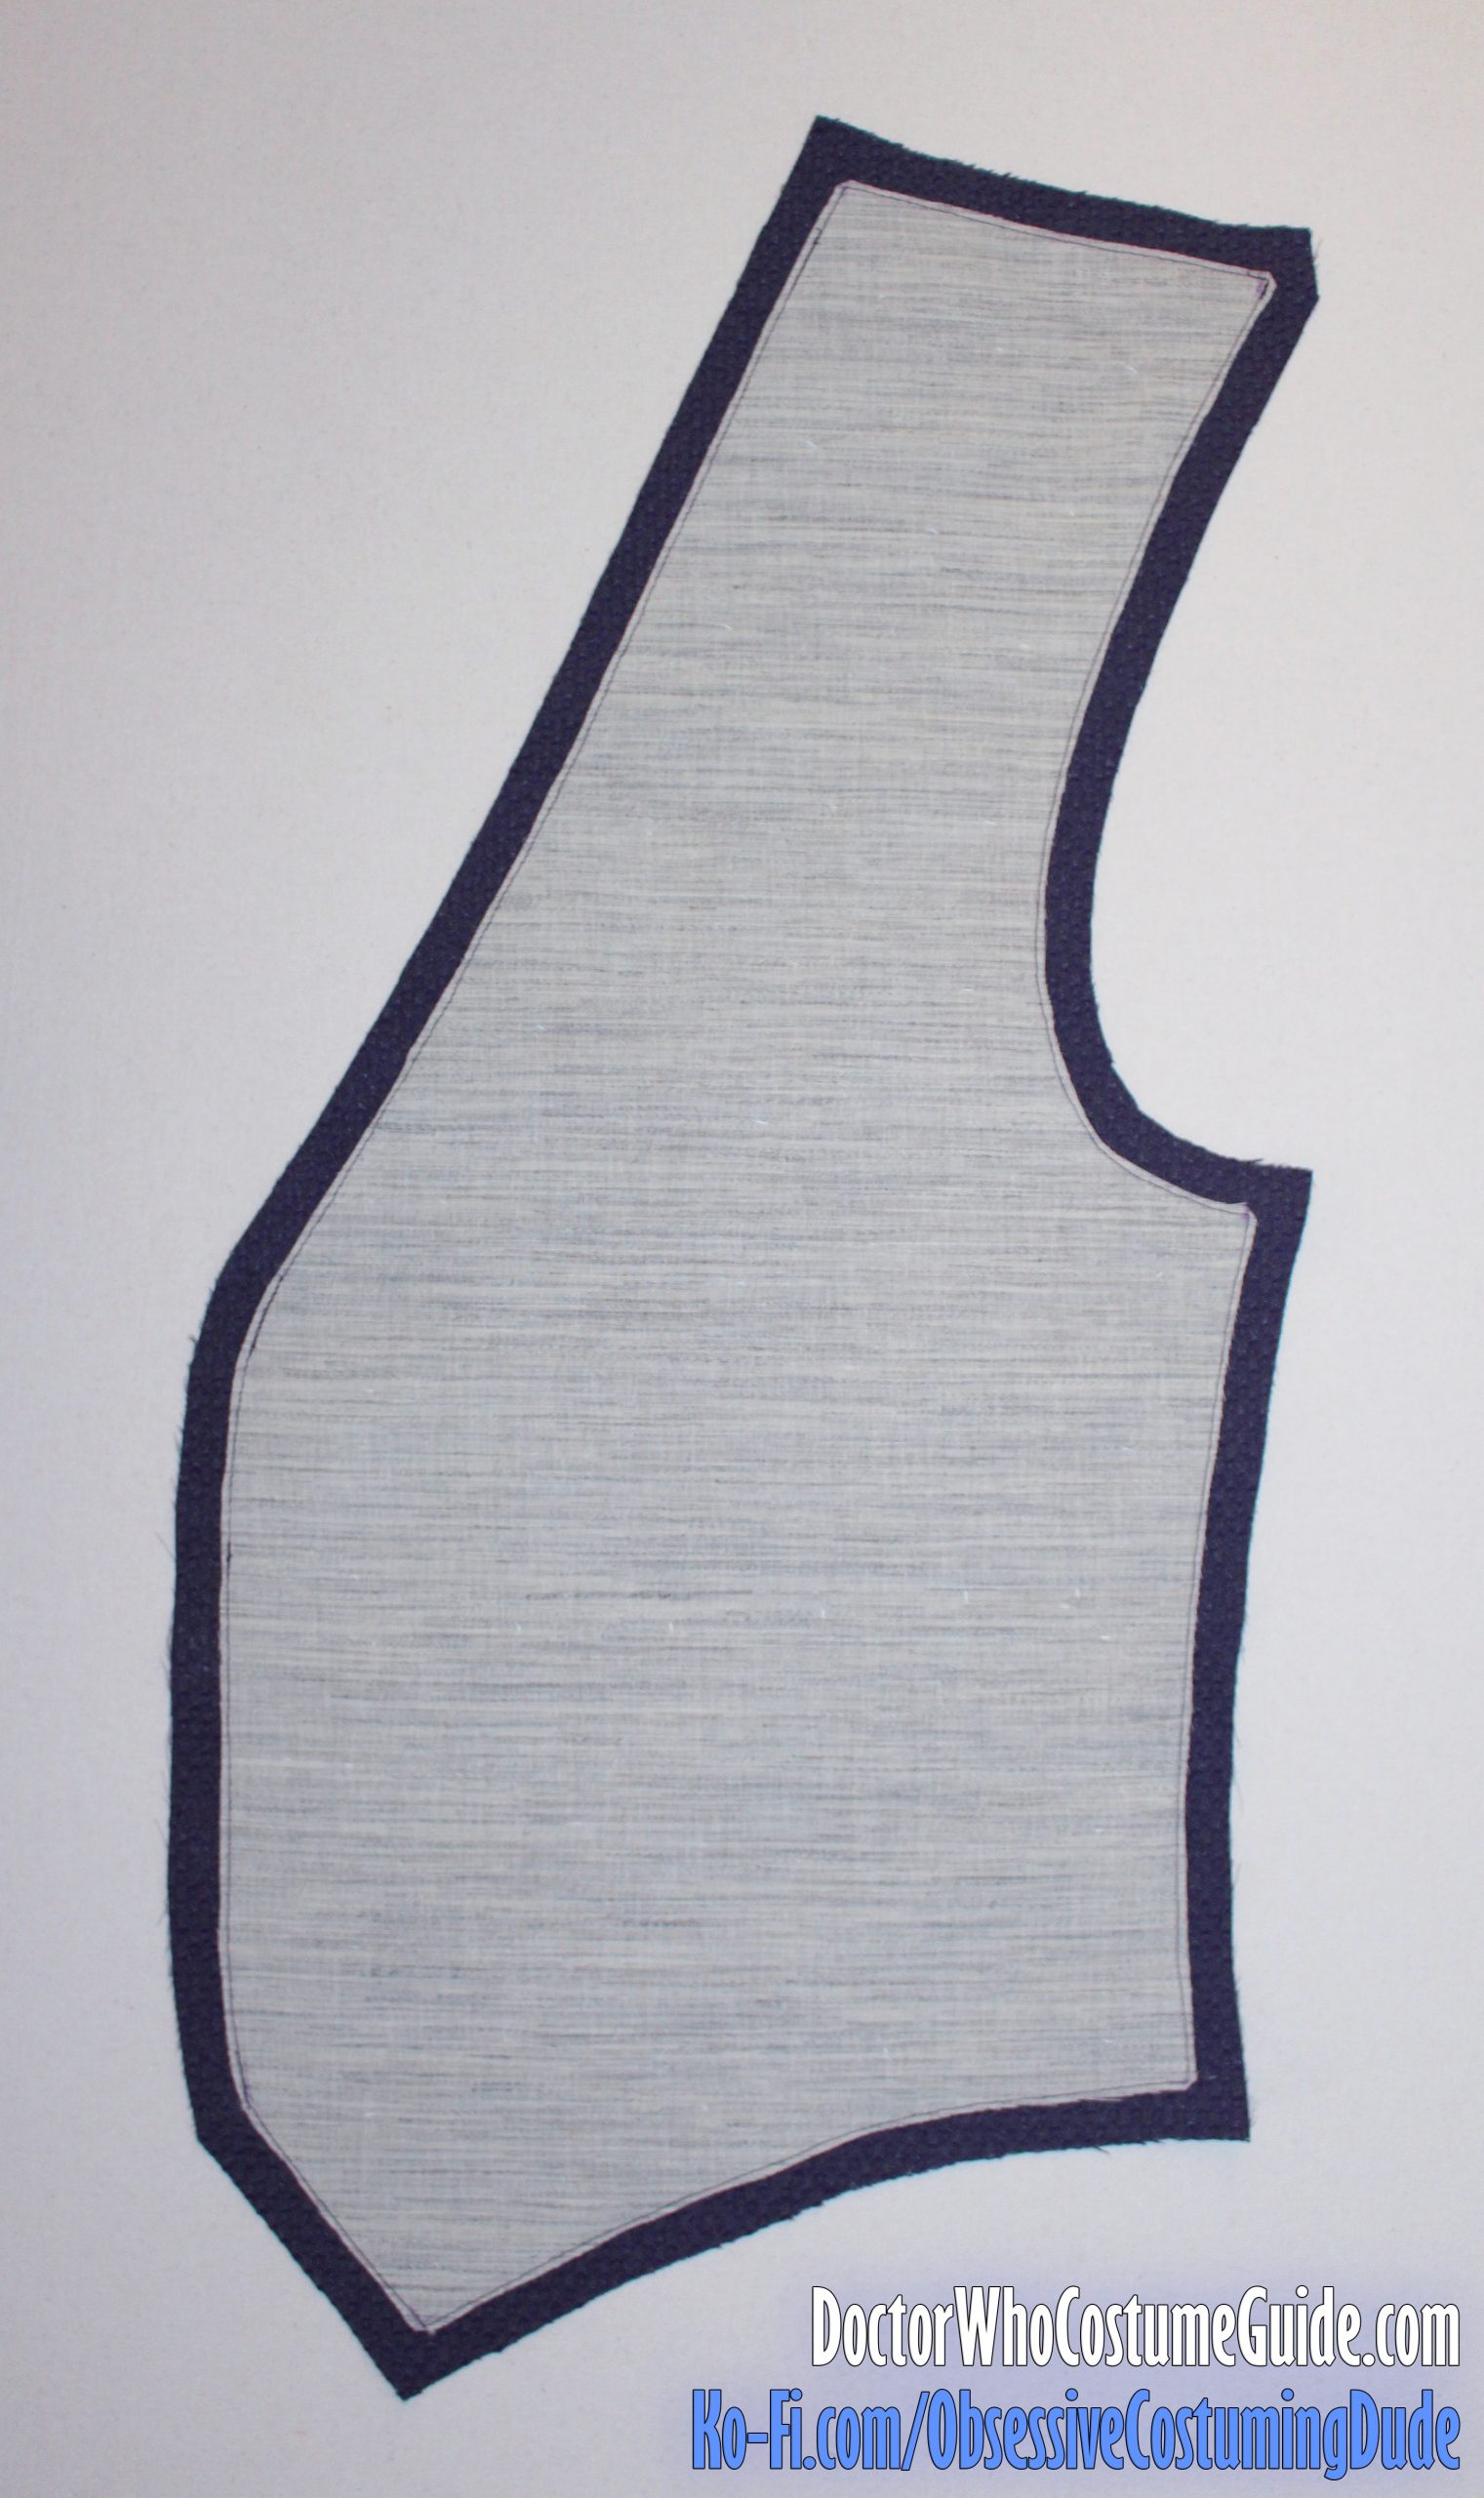
Sew the hair canvas to the waistcoat fabric around the entire perimeter of the waistcoat front, ⅝” from the edges.
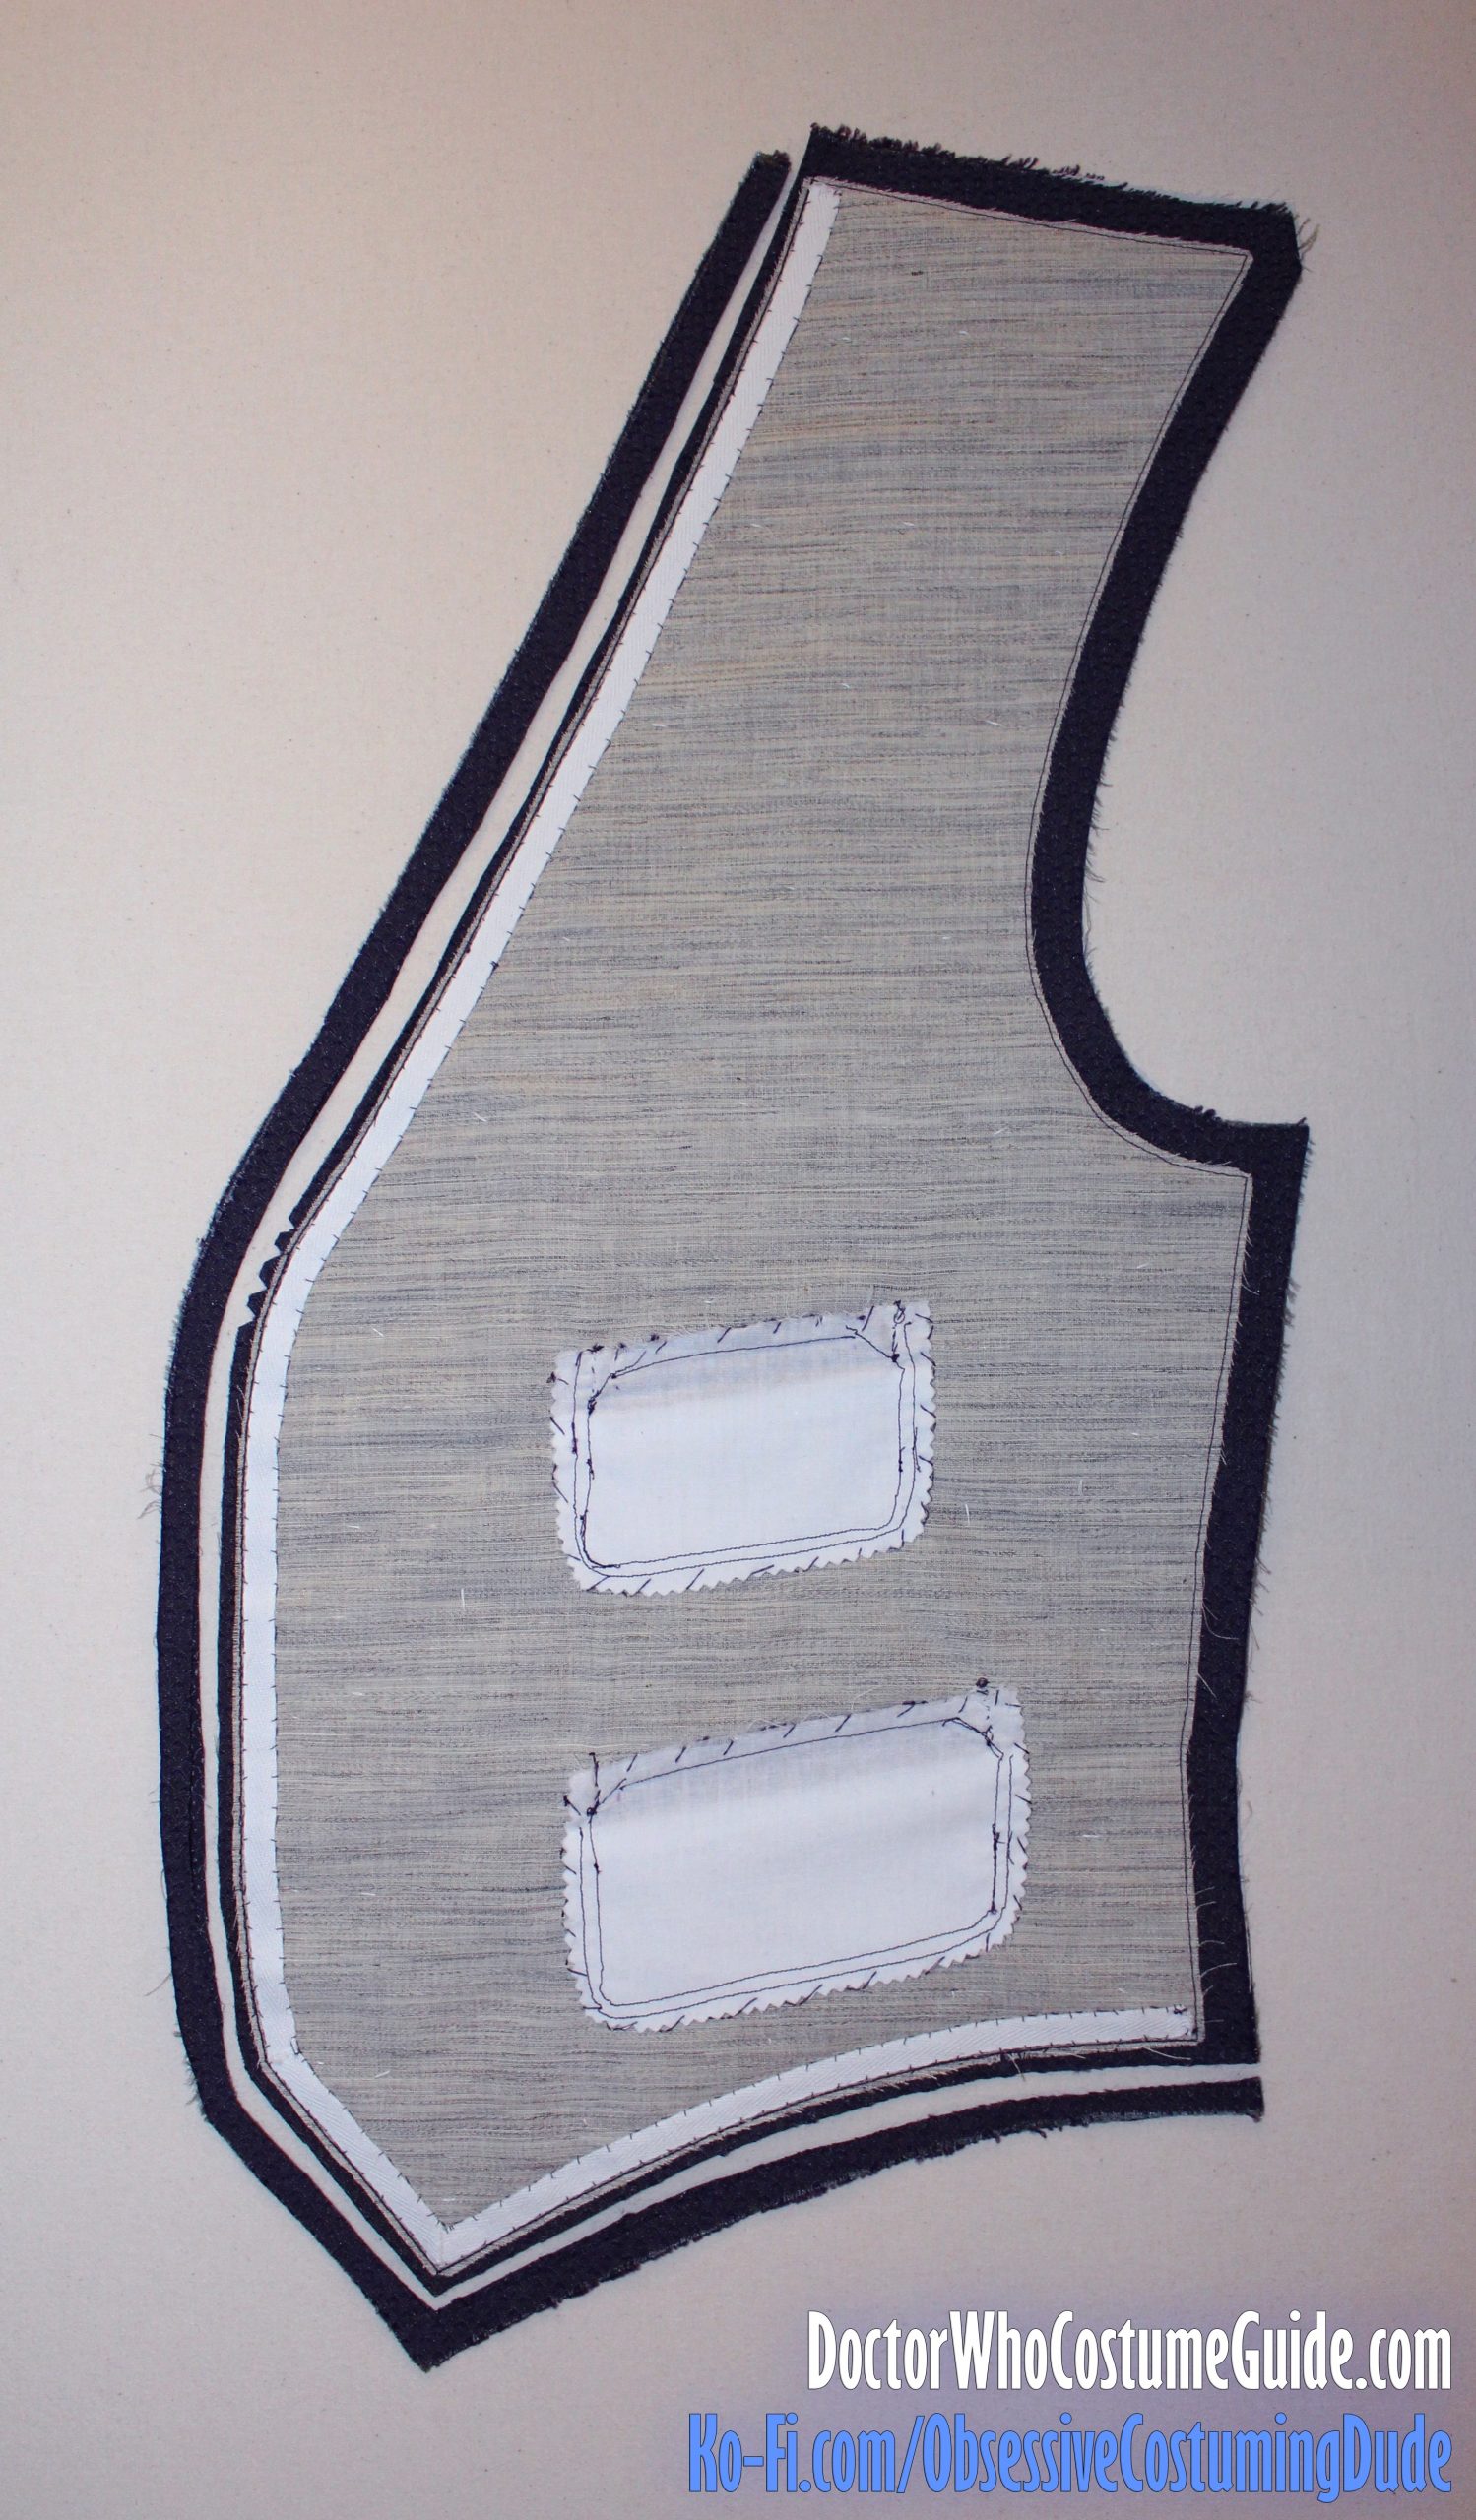
Trim away the hair canvas close to the stitching.
If you used a fusible interfacing, simply stitch around the entire perimeter of the waistcoat front, ⅝” from the edges. (Unless it’s thick and bulky – and it shouldn’t be – there’s no need to trim the fusible interfacing outside the stitching.)
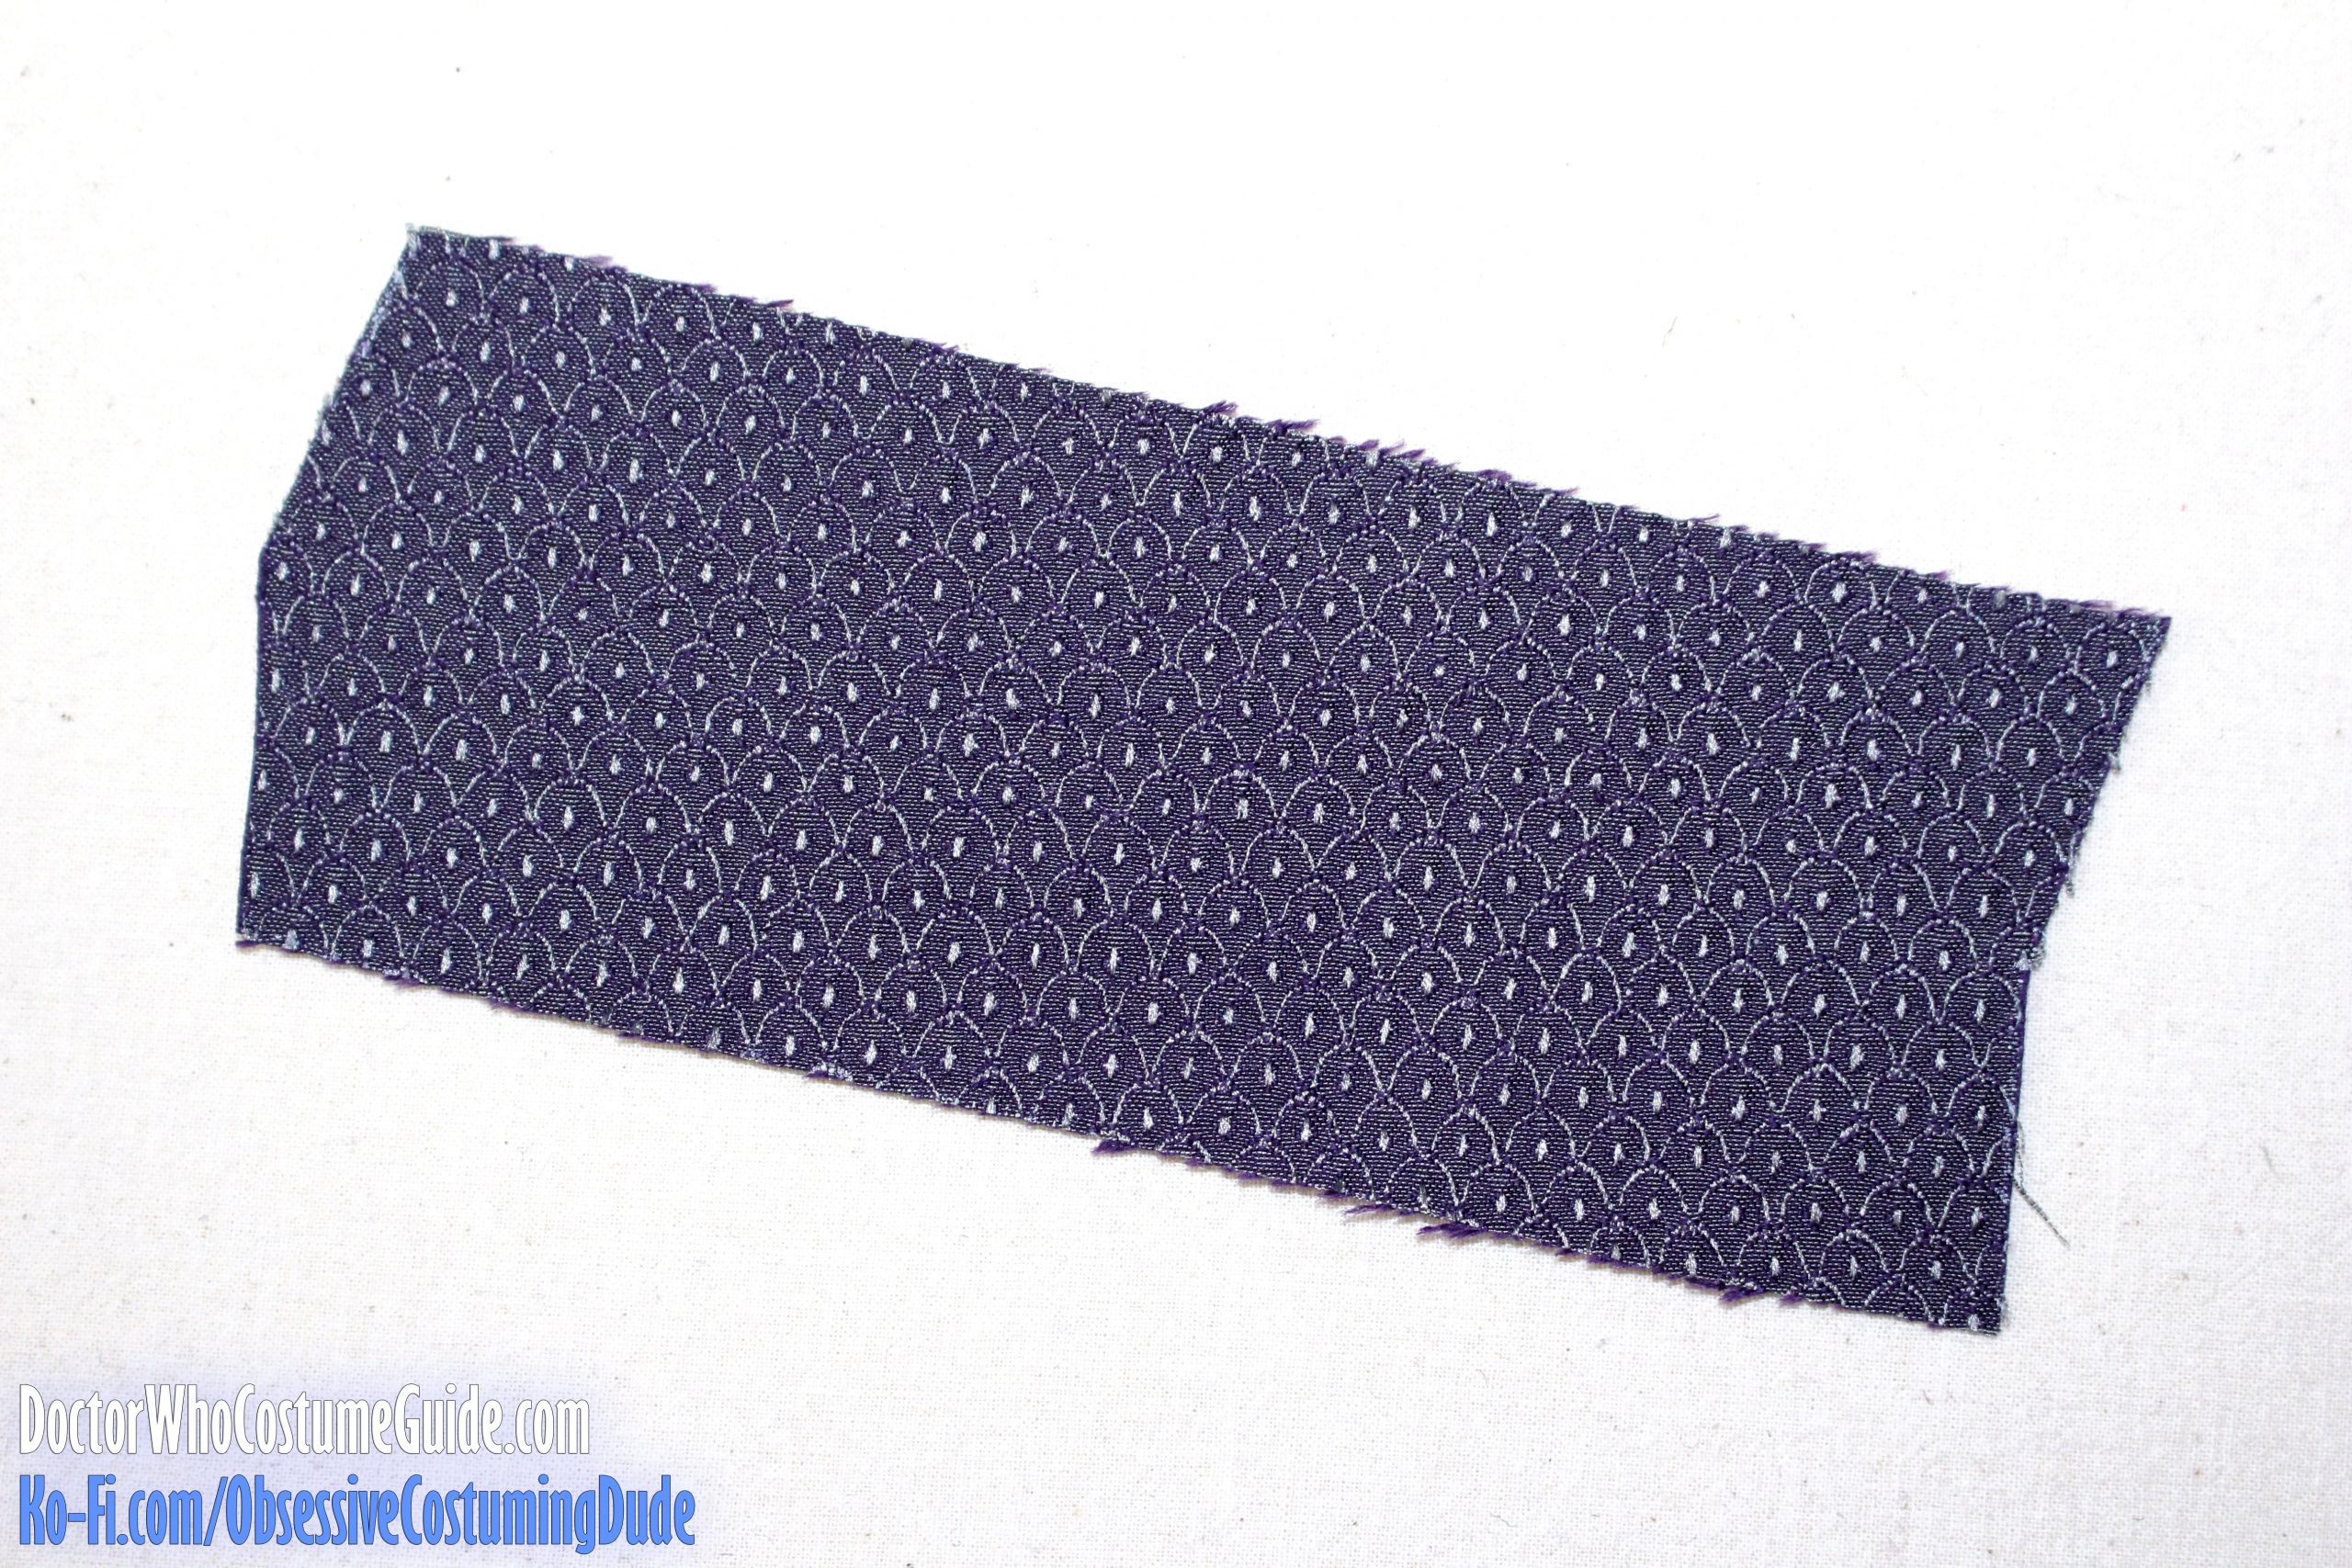
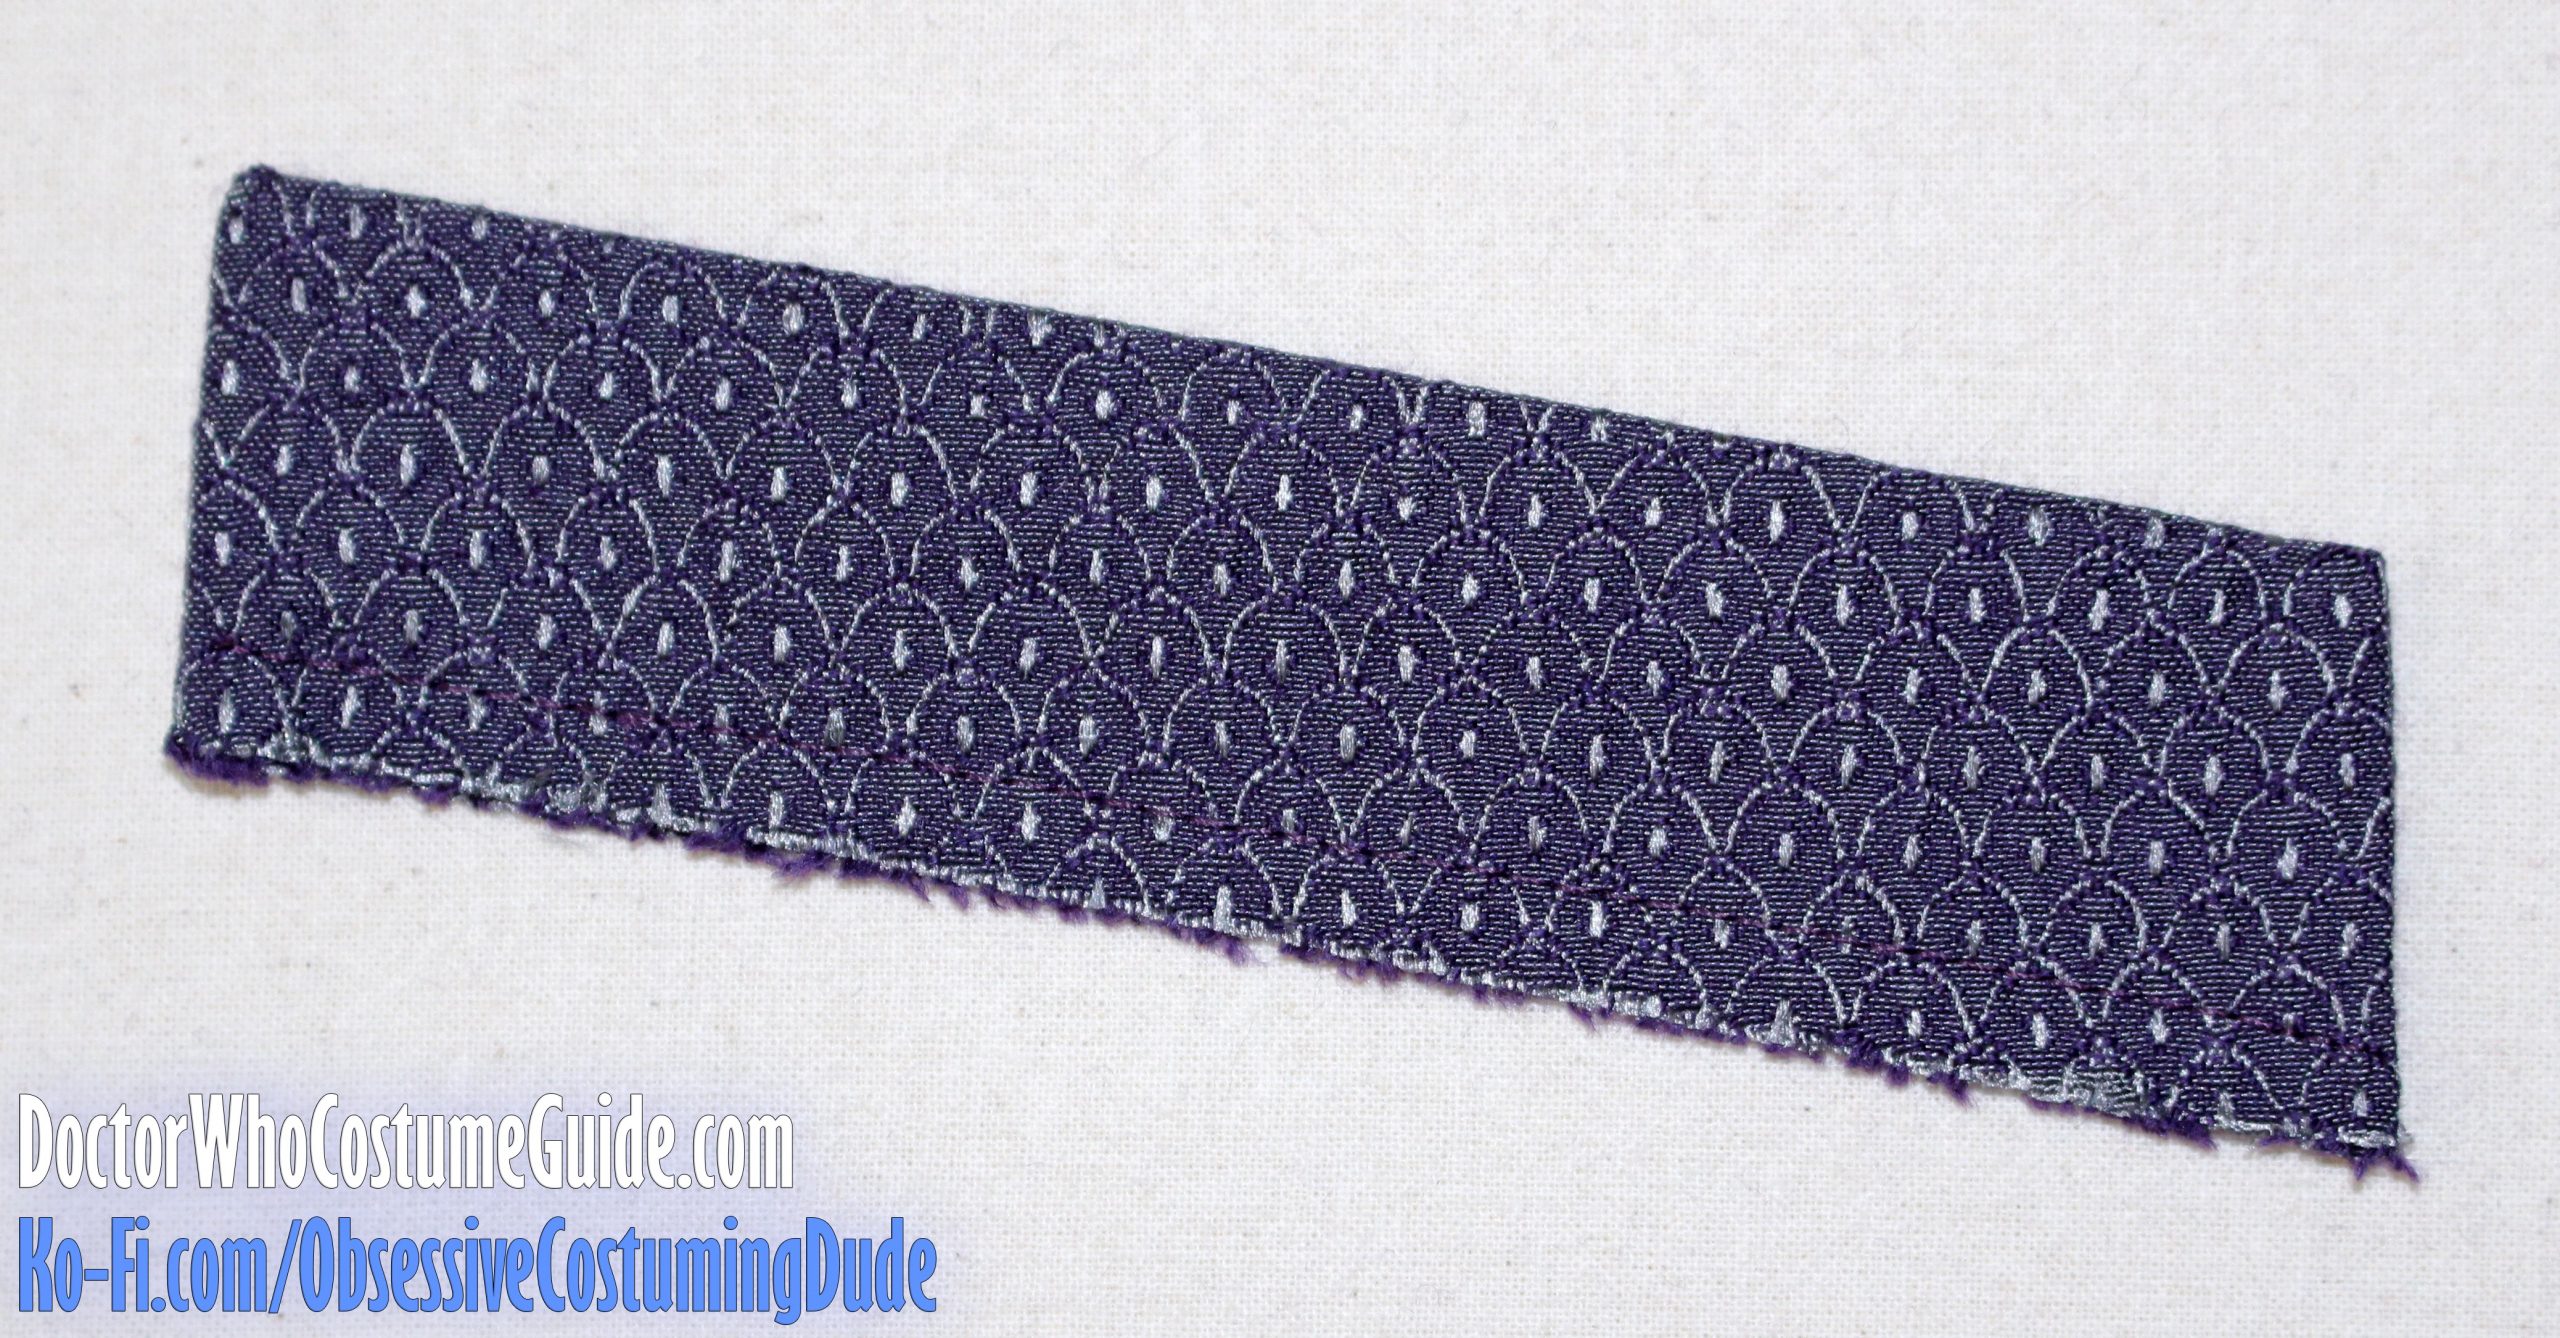
Having carefully cut your pocket welts (pieces G and H) to correspond to the pocket placements on the waistcoat fronts, make sure you know which pocket welt is for which pocket before proceeding.
Fold the pocket welt in half along the diagonal center, right sides together, matching outer and lower edges.
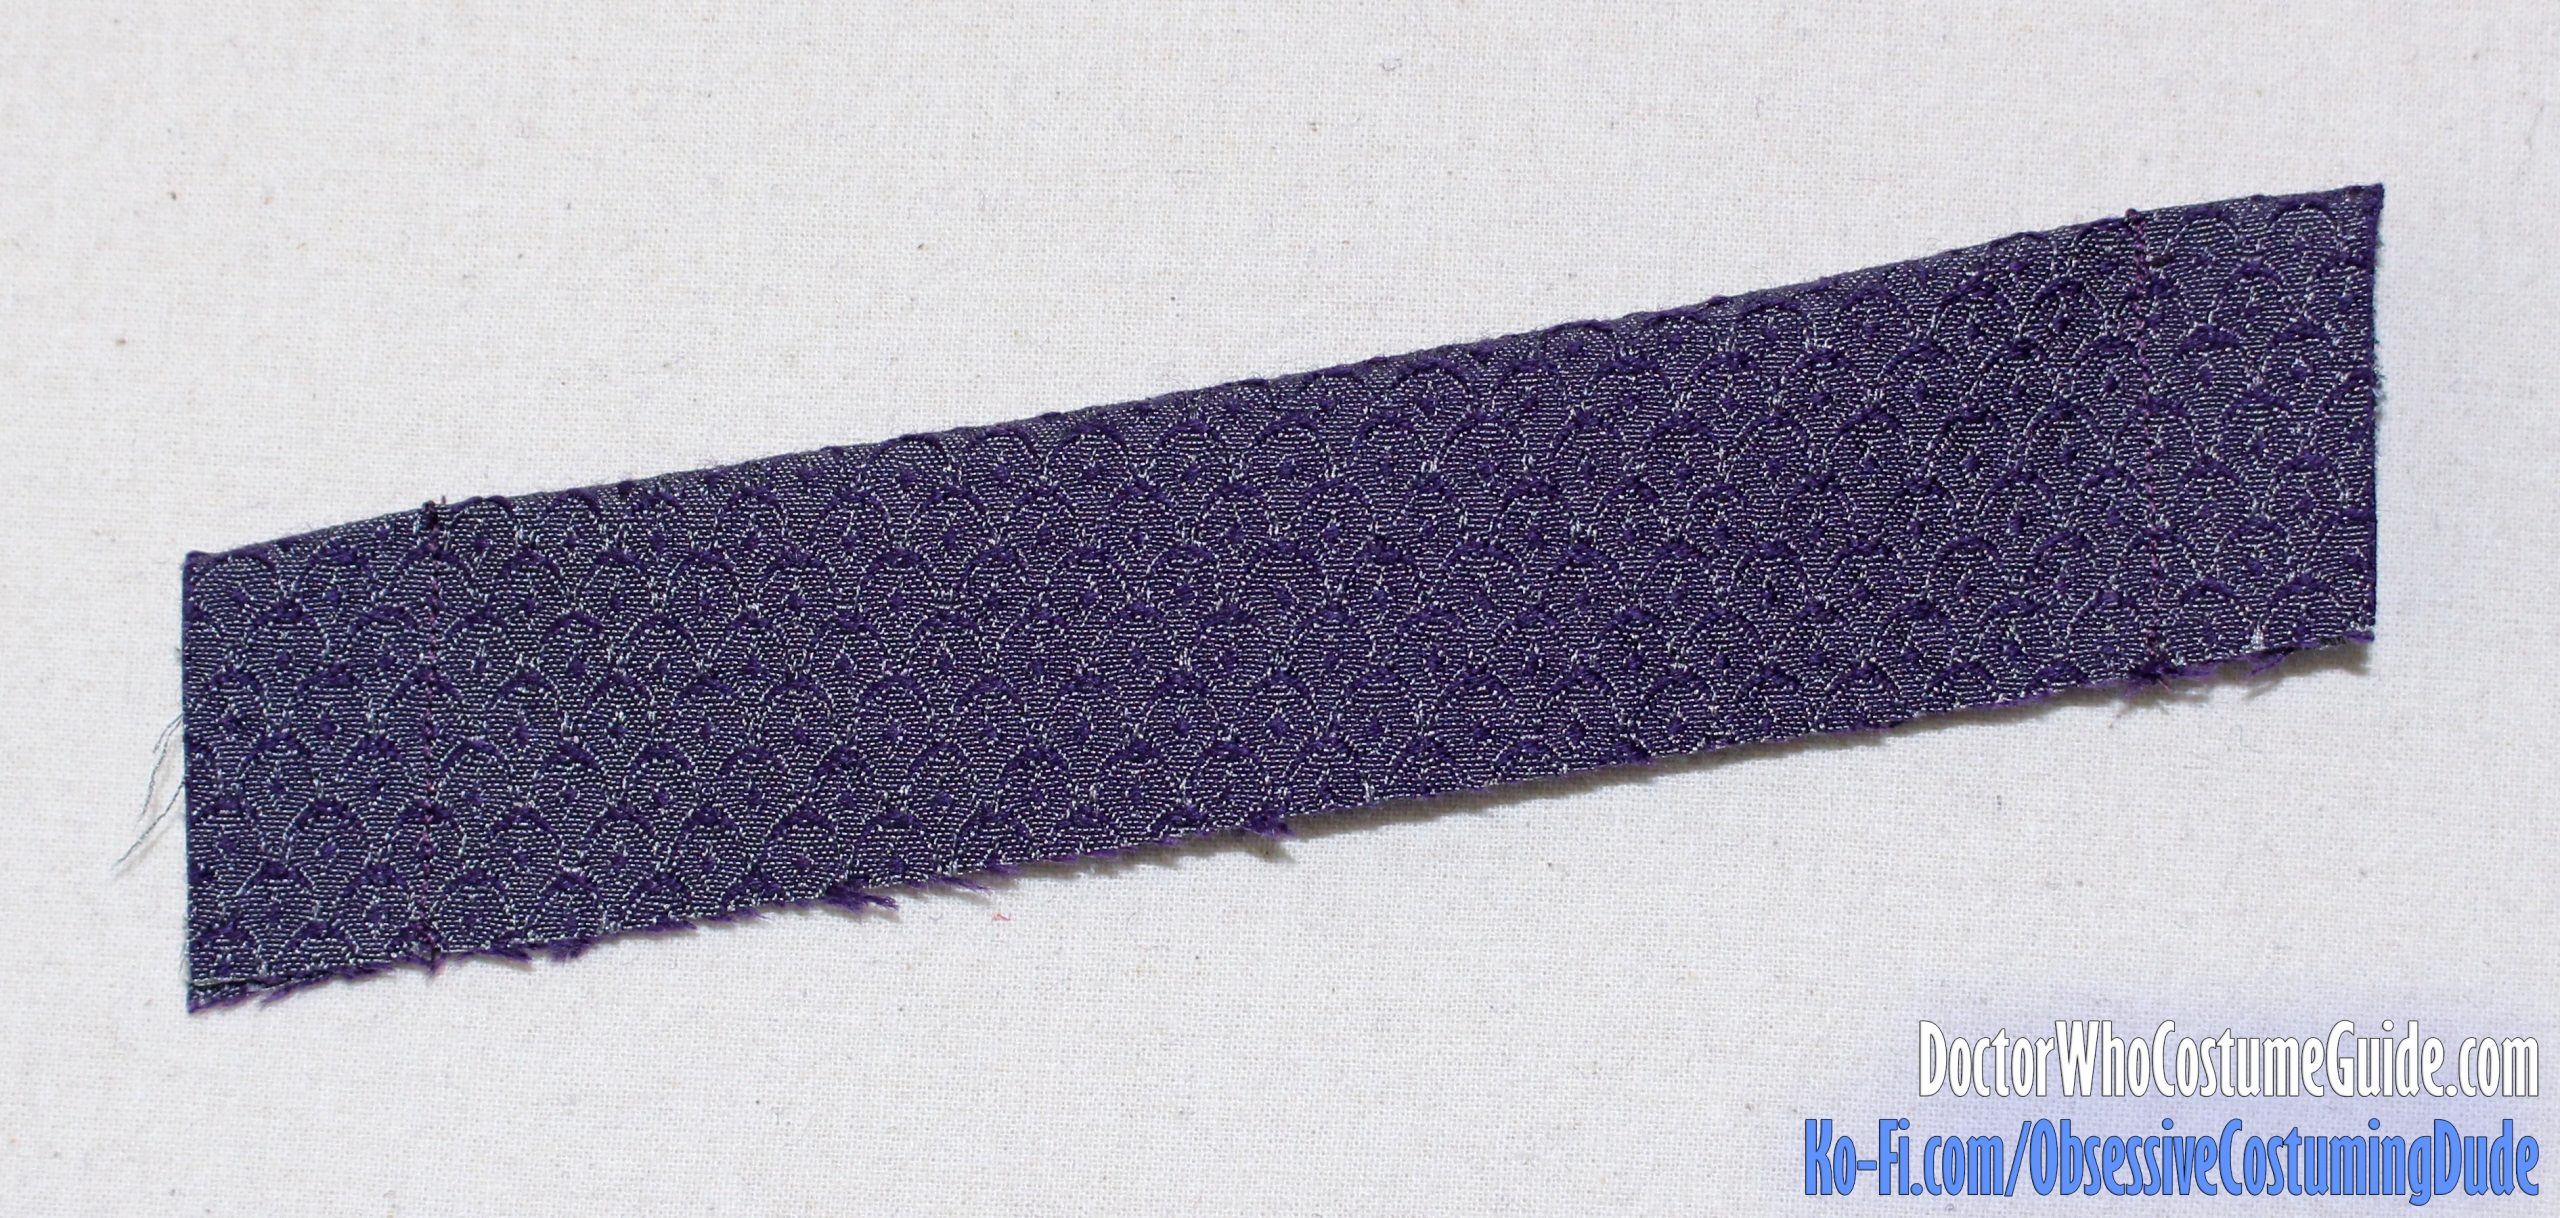
Sew the outer (short) edges closed.
Trim the outer seam allowances down to ¼”, turn the pocket welt back right-sides-out, and press.
Baste or sew the welt closed ¼” from the lower edge.
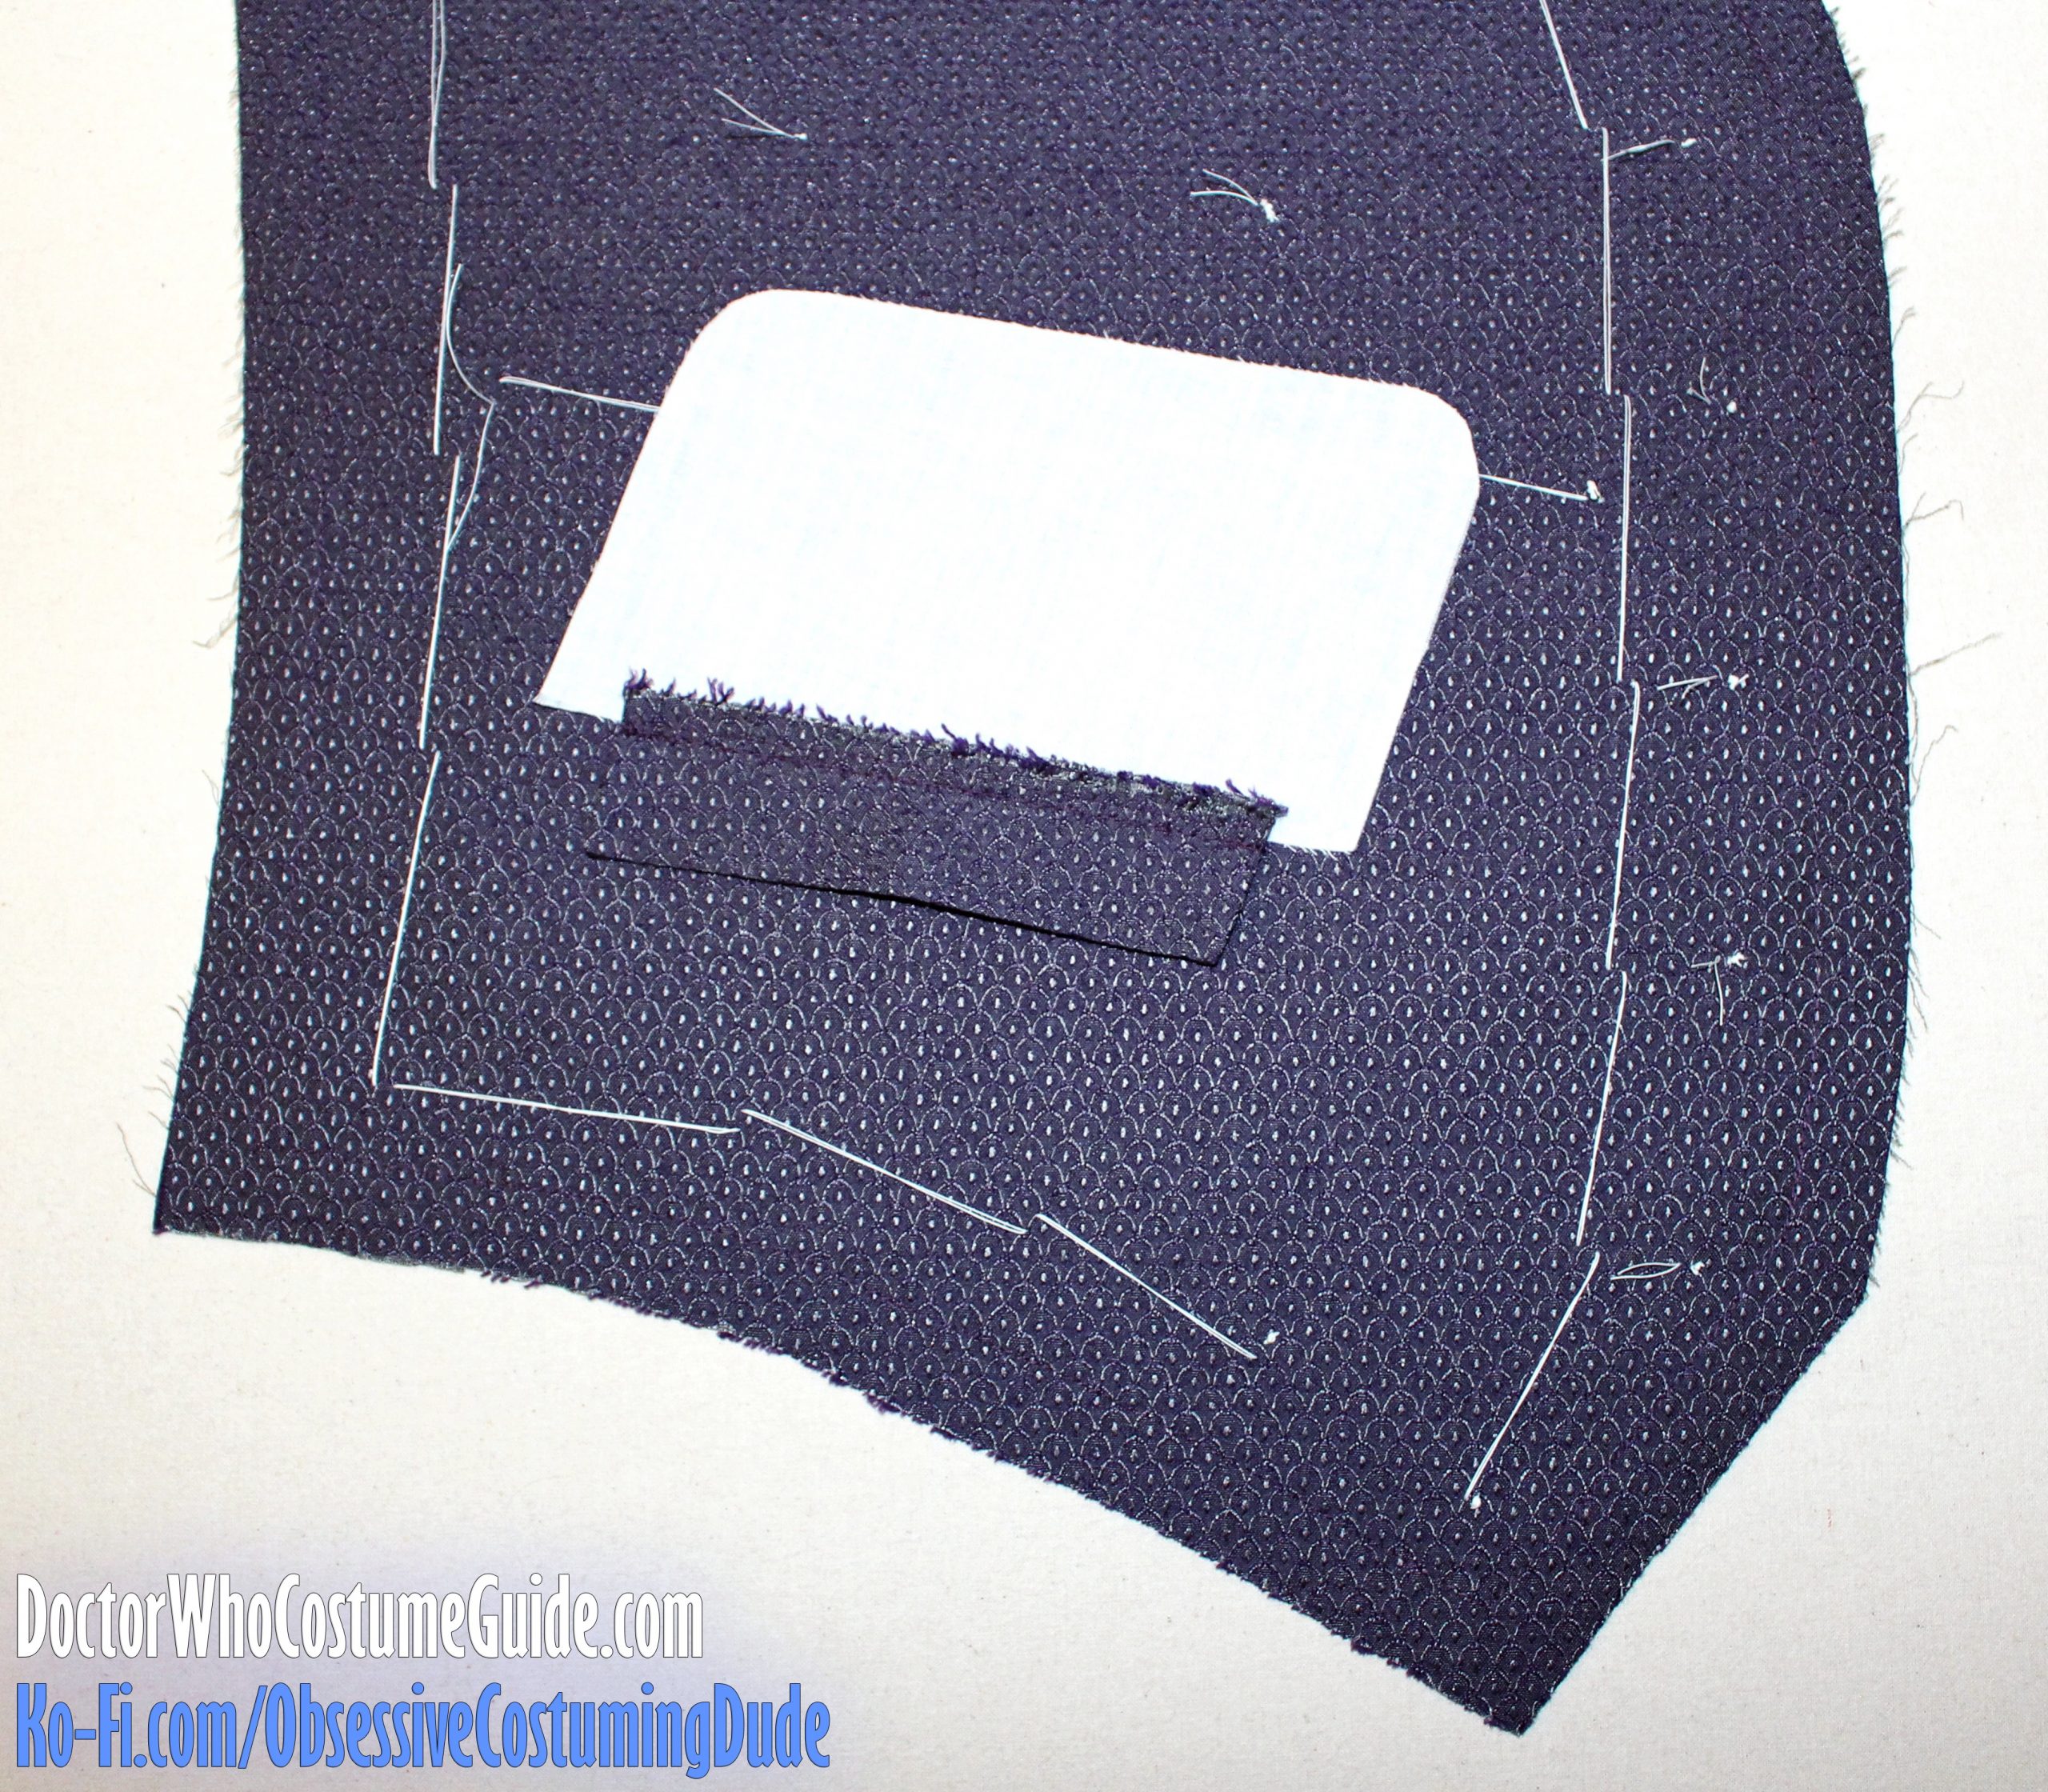
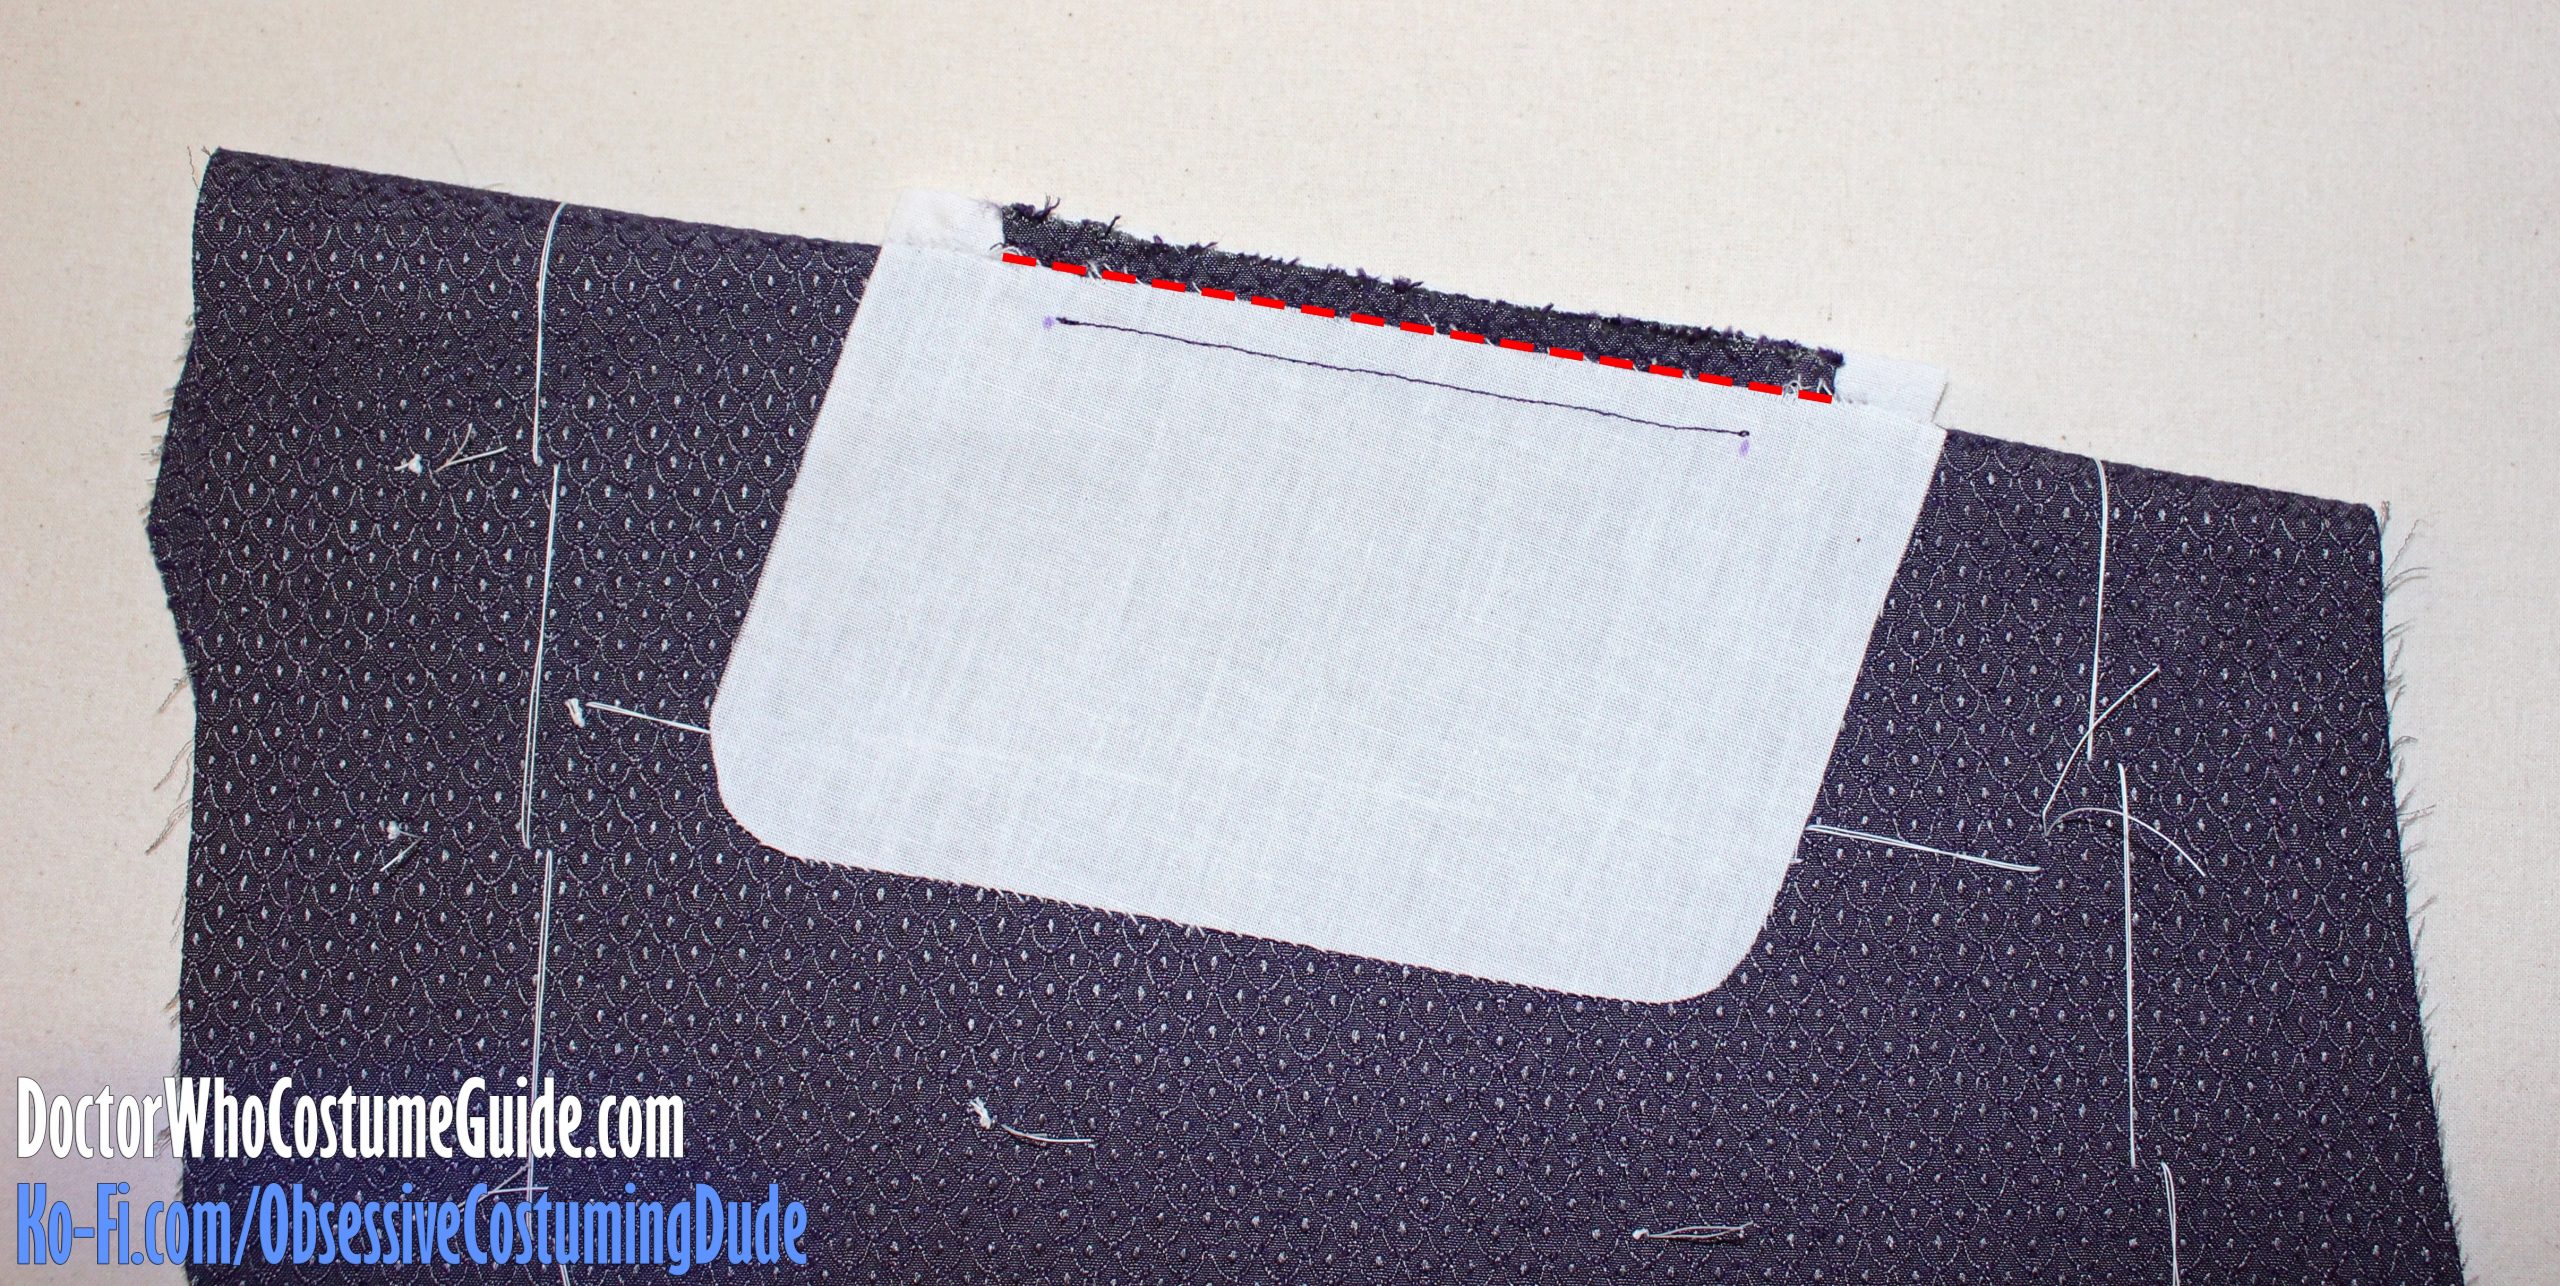
Position the welt over the waistcoat front, upside-down, matching alignment guides. (The alignment guide will become the bottom of the pocket opening later.)
Note that this means the open end of the welt will not be flush with the alignment guide on the waistcoat front, but ⅜” above it!
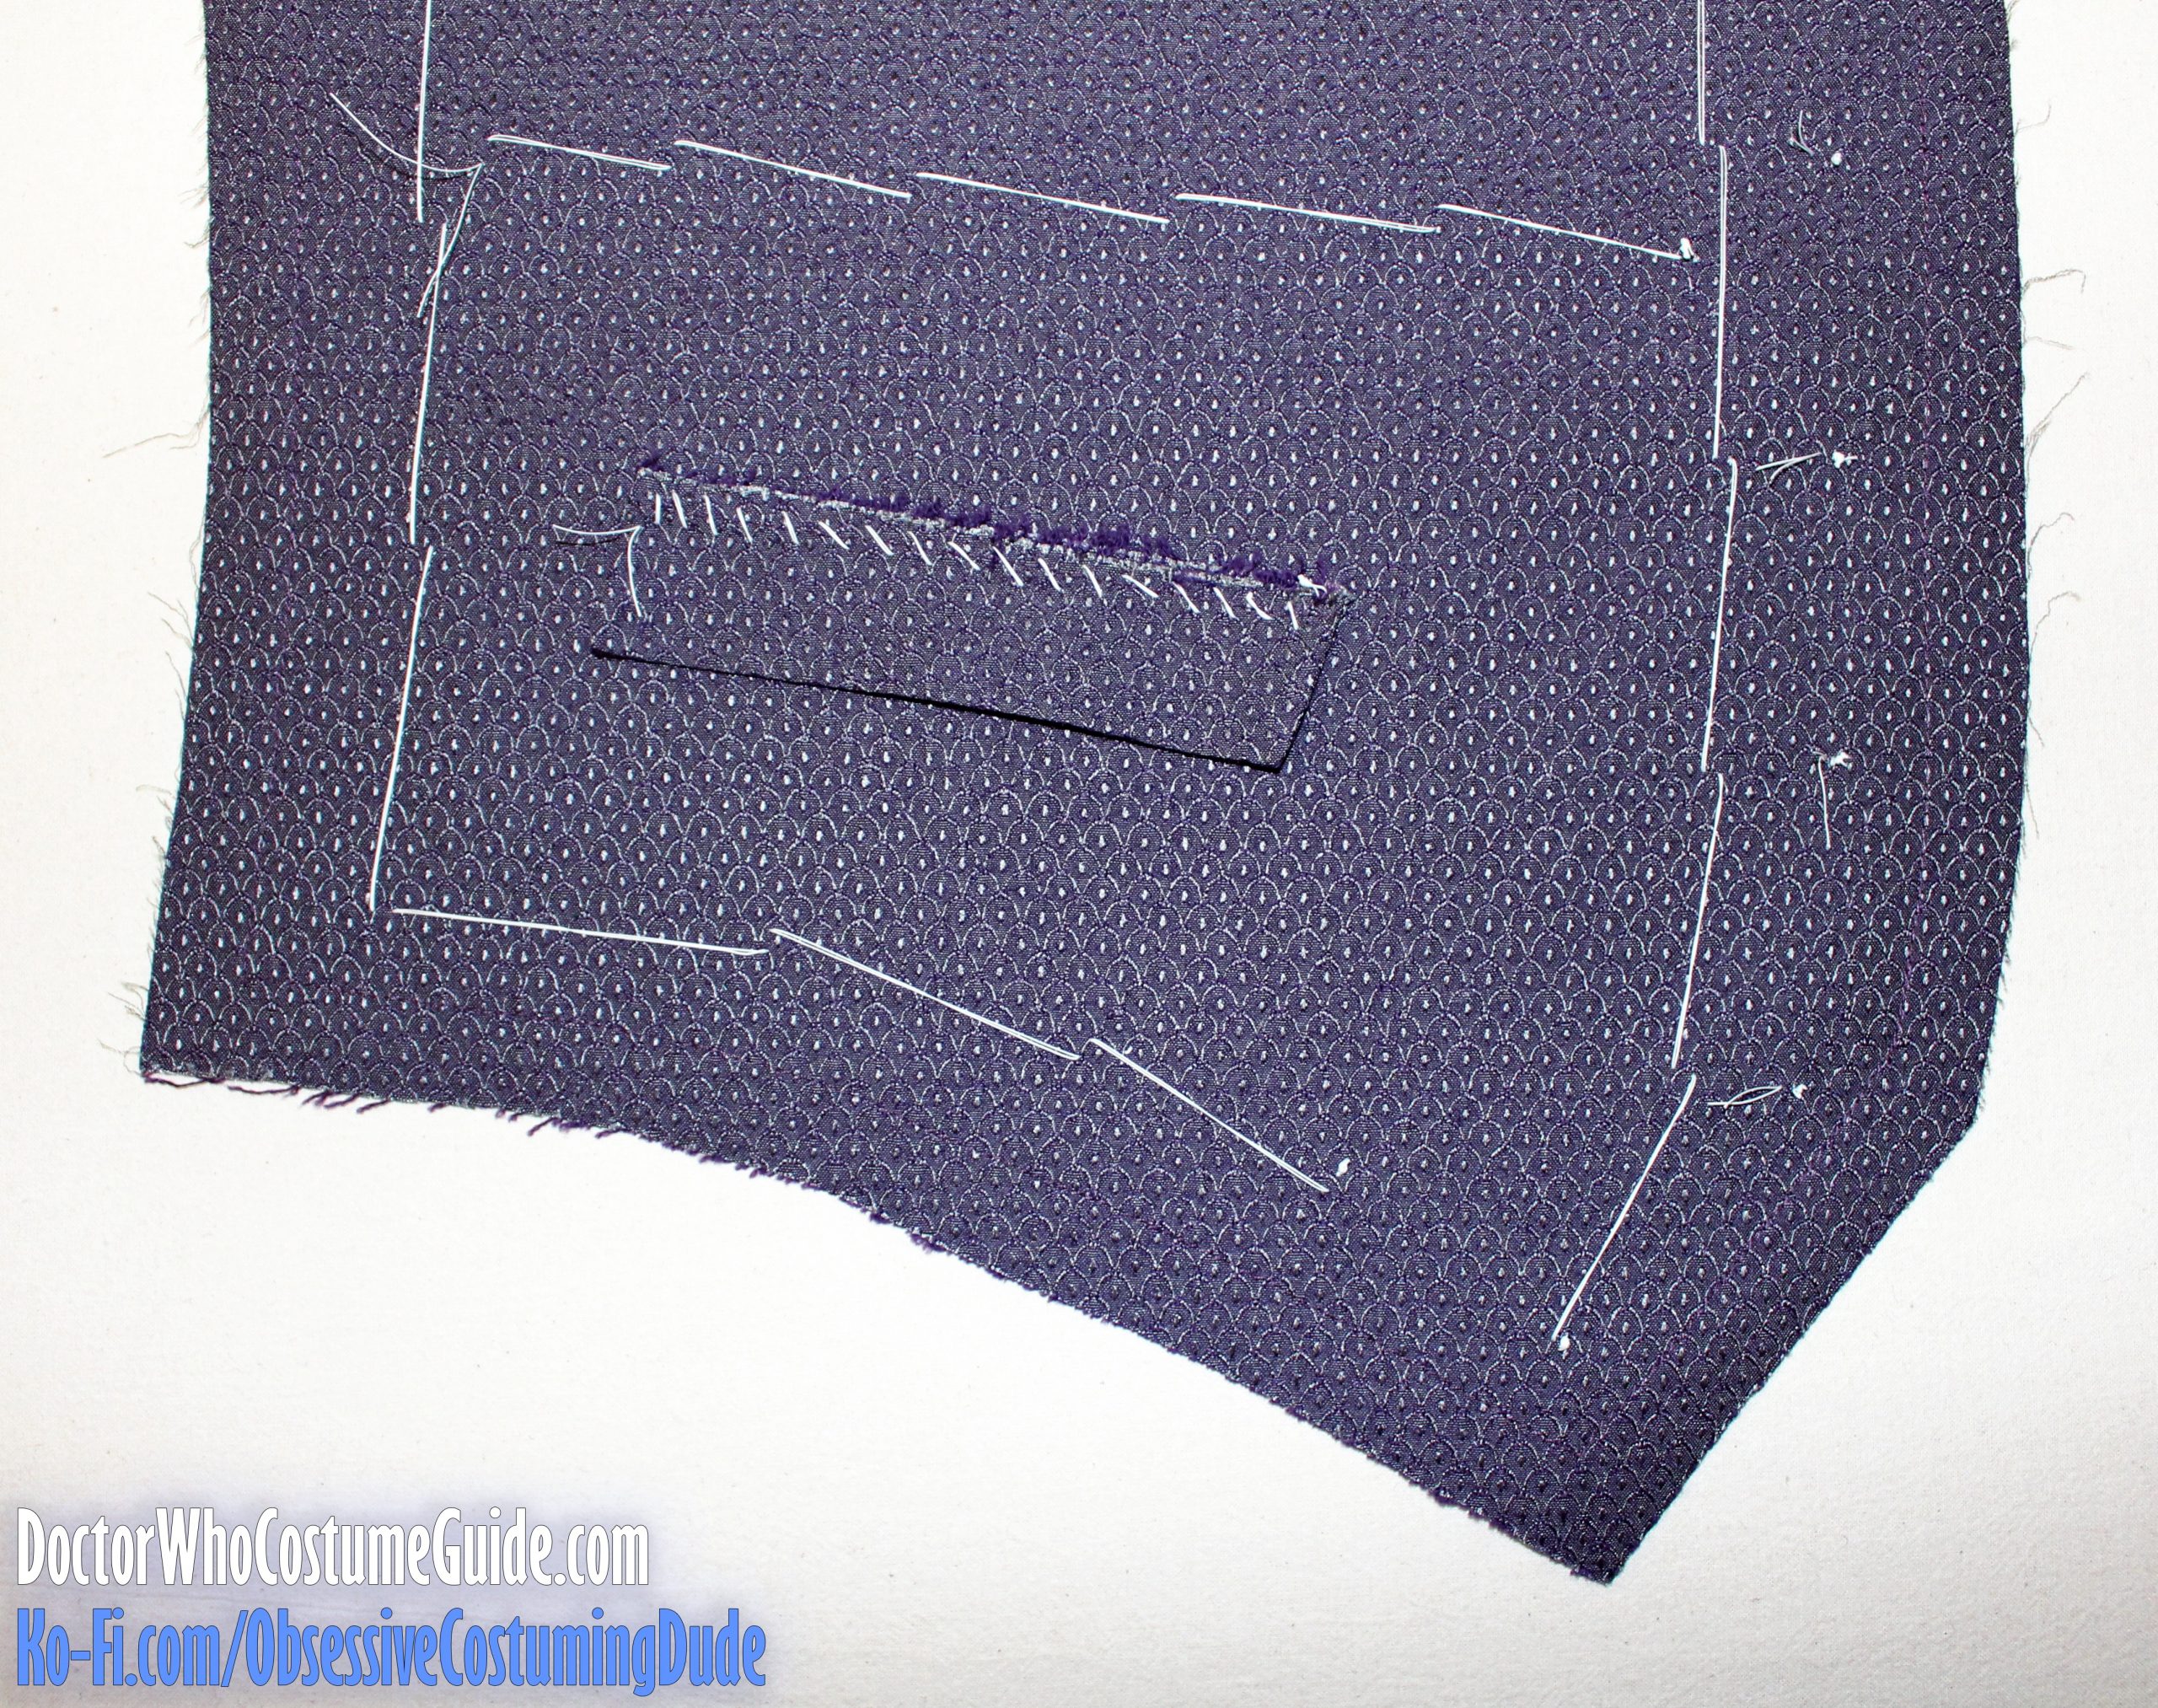
Take care to match all the little fabric “scales” on the pocket welt with those on the waistcoat front along the alignment guide (⅜” from the raw end of the pocket welt), then hand-baste the pocket welt into place.
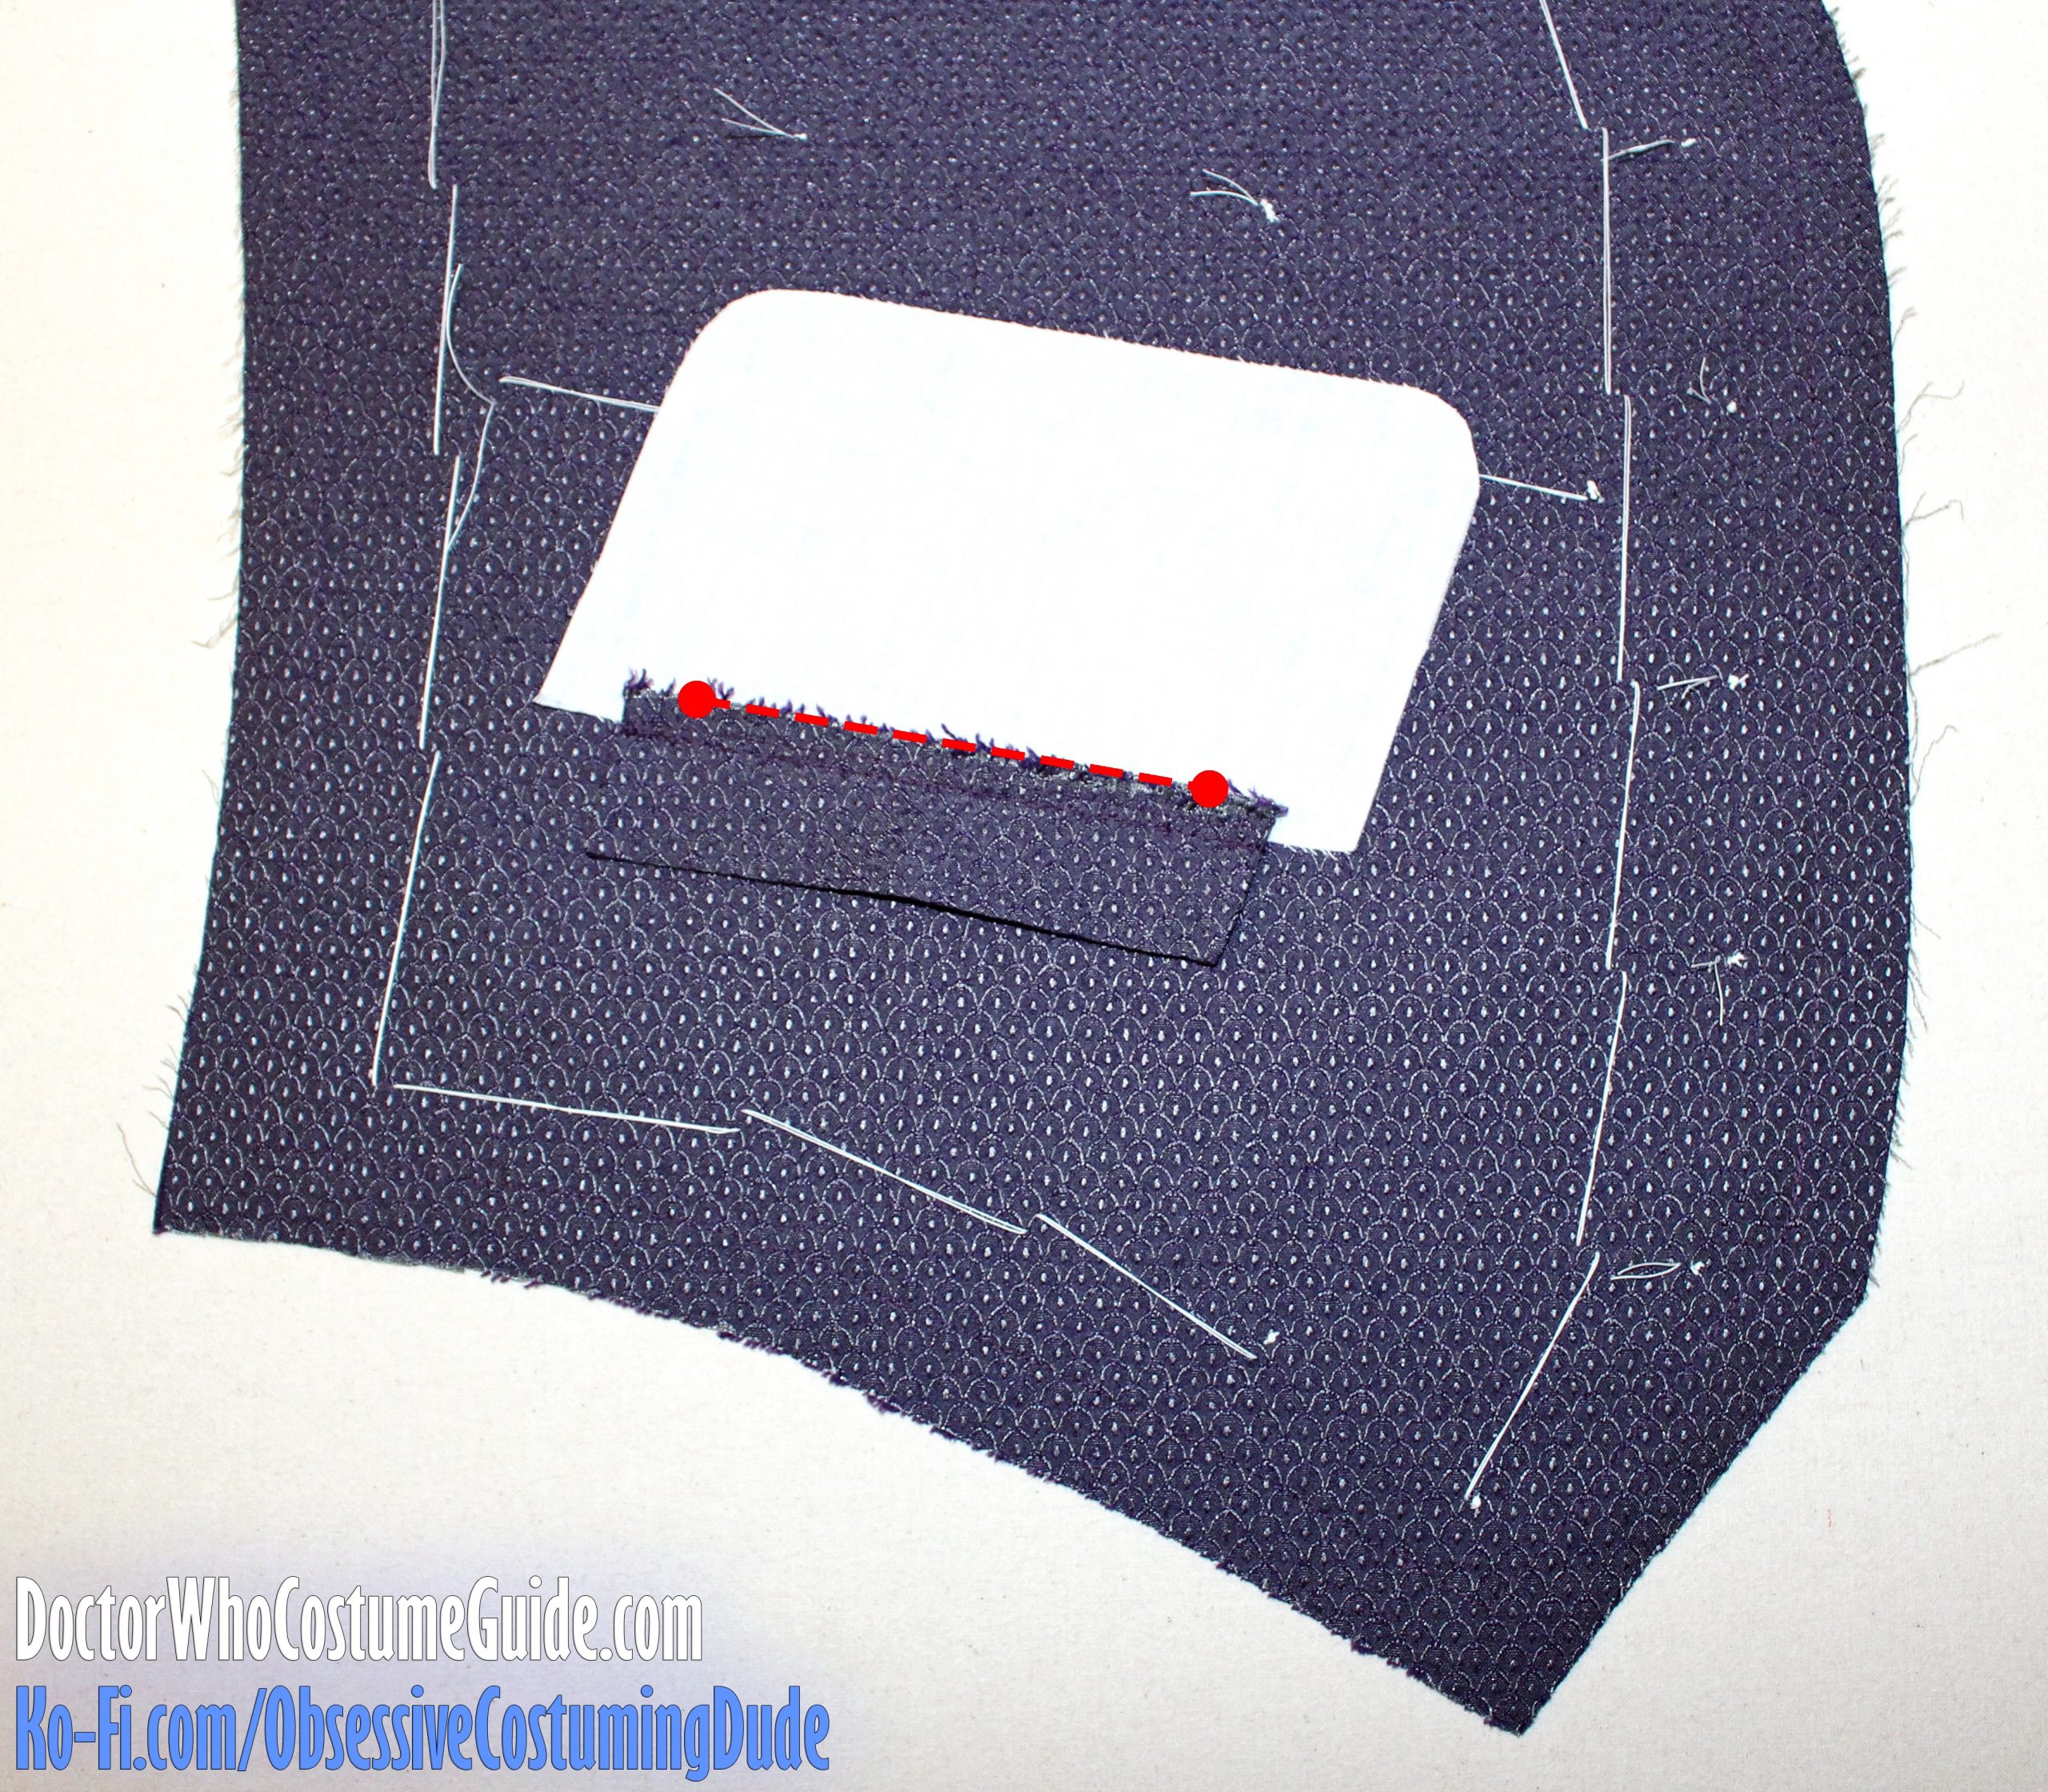
Sew the pocket welt to the waistcoat along the alignment guide (⅜” from the raw end of the pocket welt), beginning and ending your stitch exactly at the outer edges of the pocket welt and reinforcing at the ends.
TIP: Machine-baste the pocket welt to the waistcoat front before properly sewing it – even though you already hand-basted it. Check to make sure the “scales” are properly aligned on the waistcoat front and pocket welt. If they aren’t, adjust as-needed, and then sew it to the waistcoat front.
TIP: Use a quilting/walking foot to machine-baste and sew the pocket welt to the waistcoat front. Evenly feeding the layers through the machine will help keep all the layers secure and stable, the way you basted them.
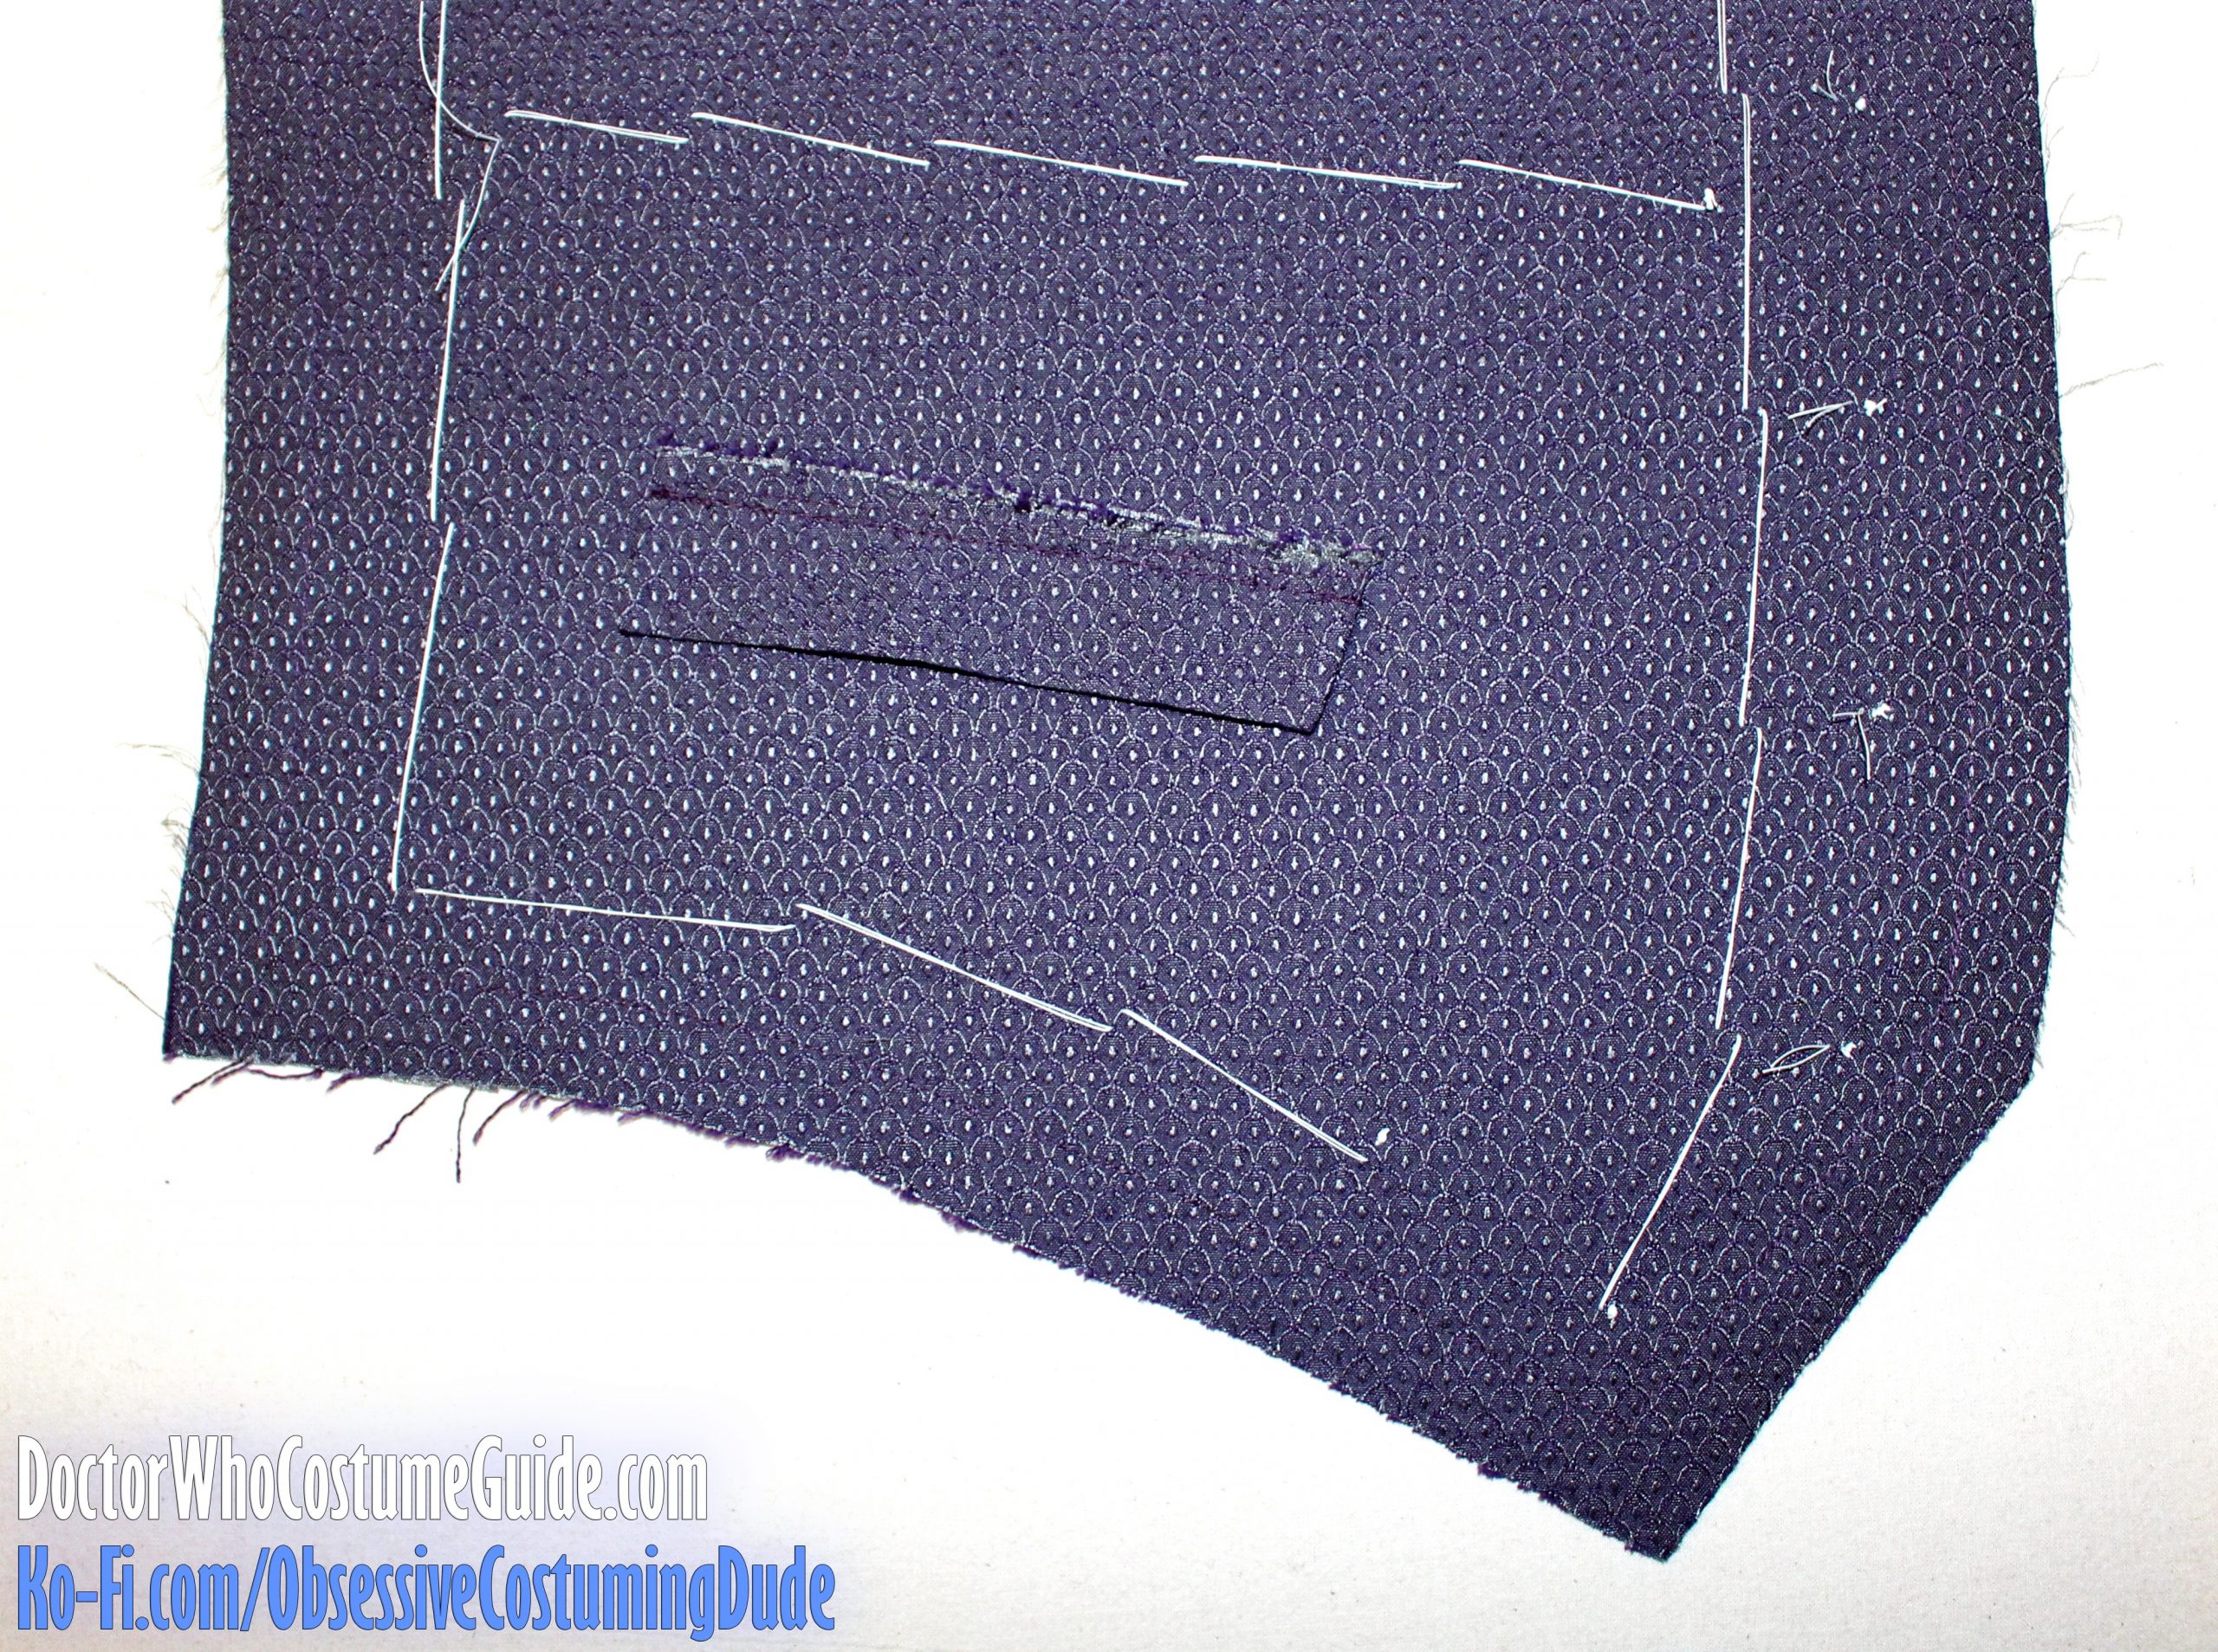
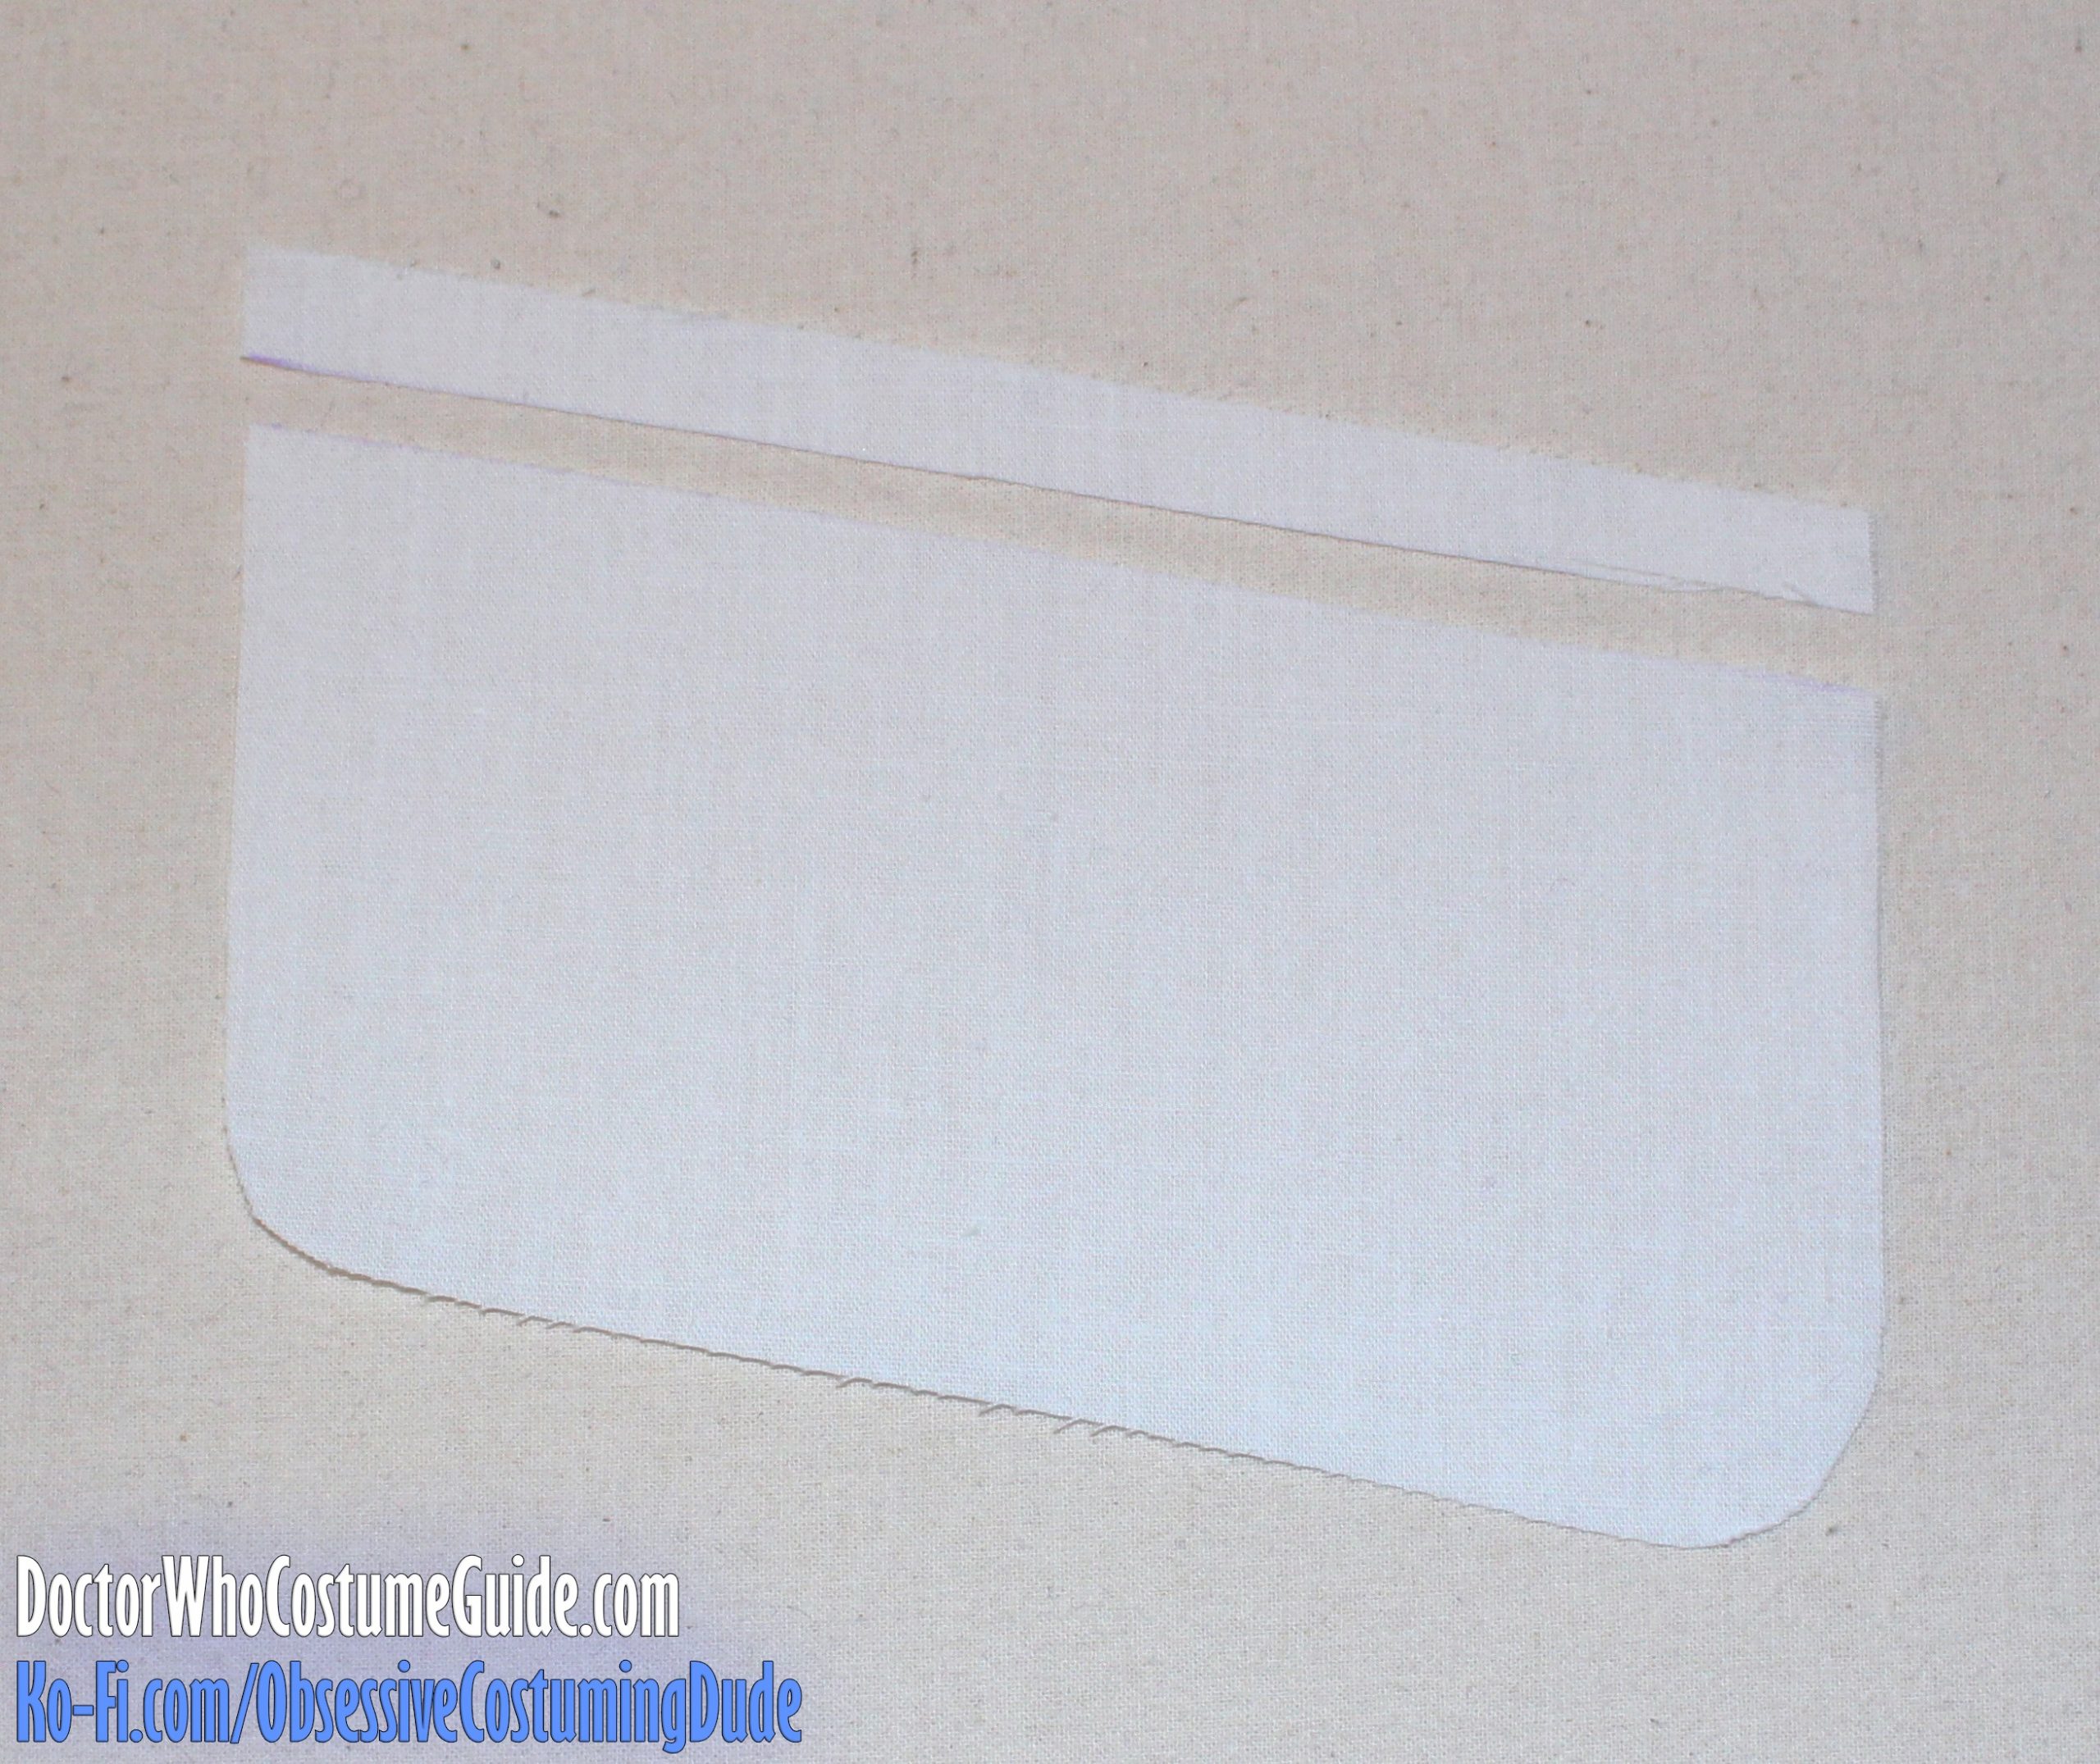
Position one piece of pocketing (piece I for the upper pockets, piece J for the lower pockets) over the pocket welt, in the direction the pocket will eventually hang, to confirm its orientation.
Flip the piece of pocketing upward (so it’s upside-down) and slide it underneath the pocket welt seam allowance, as close to the stitch line as you can manage.
Pin the pocketing to the waistcoat front.
Using a zipper/piping foot, sew the pocketing to the waistcoat along the raw end of the pocket welt, beginning and ending your stitching ⅜” from the ends of the welt.
TIP: To help you know exactly where to begin and end your stitching, lightly mark the pocketing with white tailor’s chalk ⅜” from each end of the pocket welt.
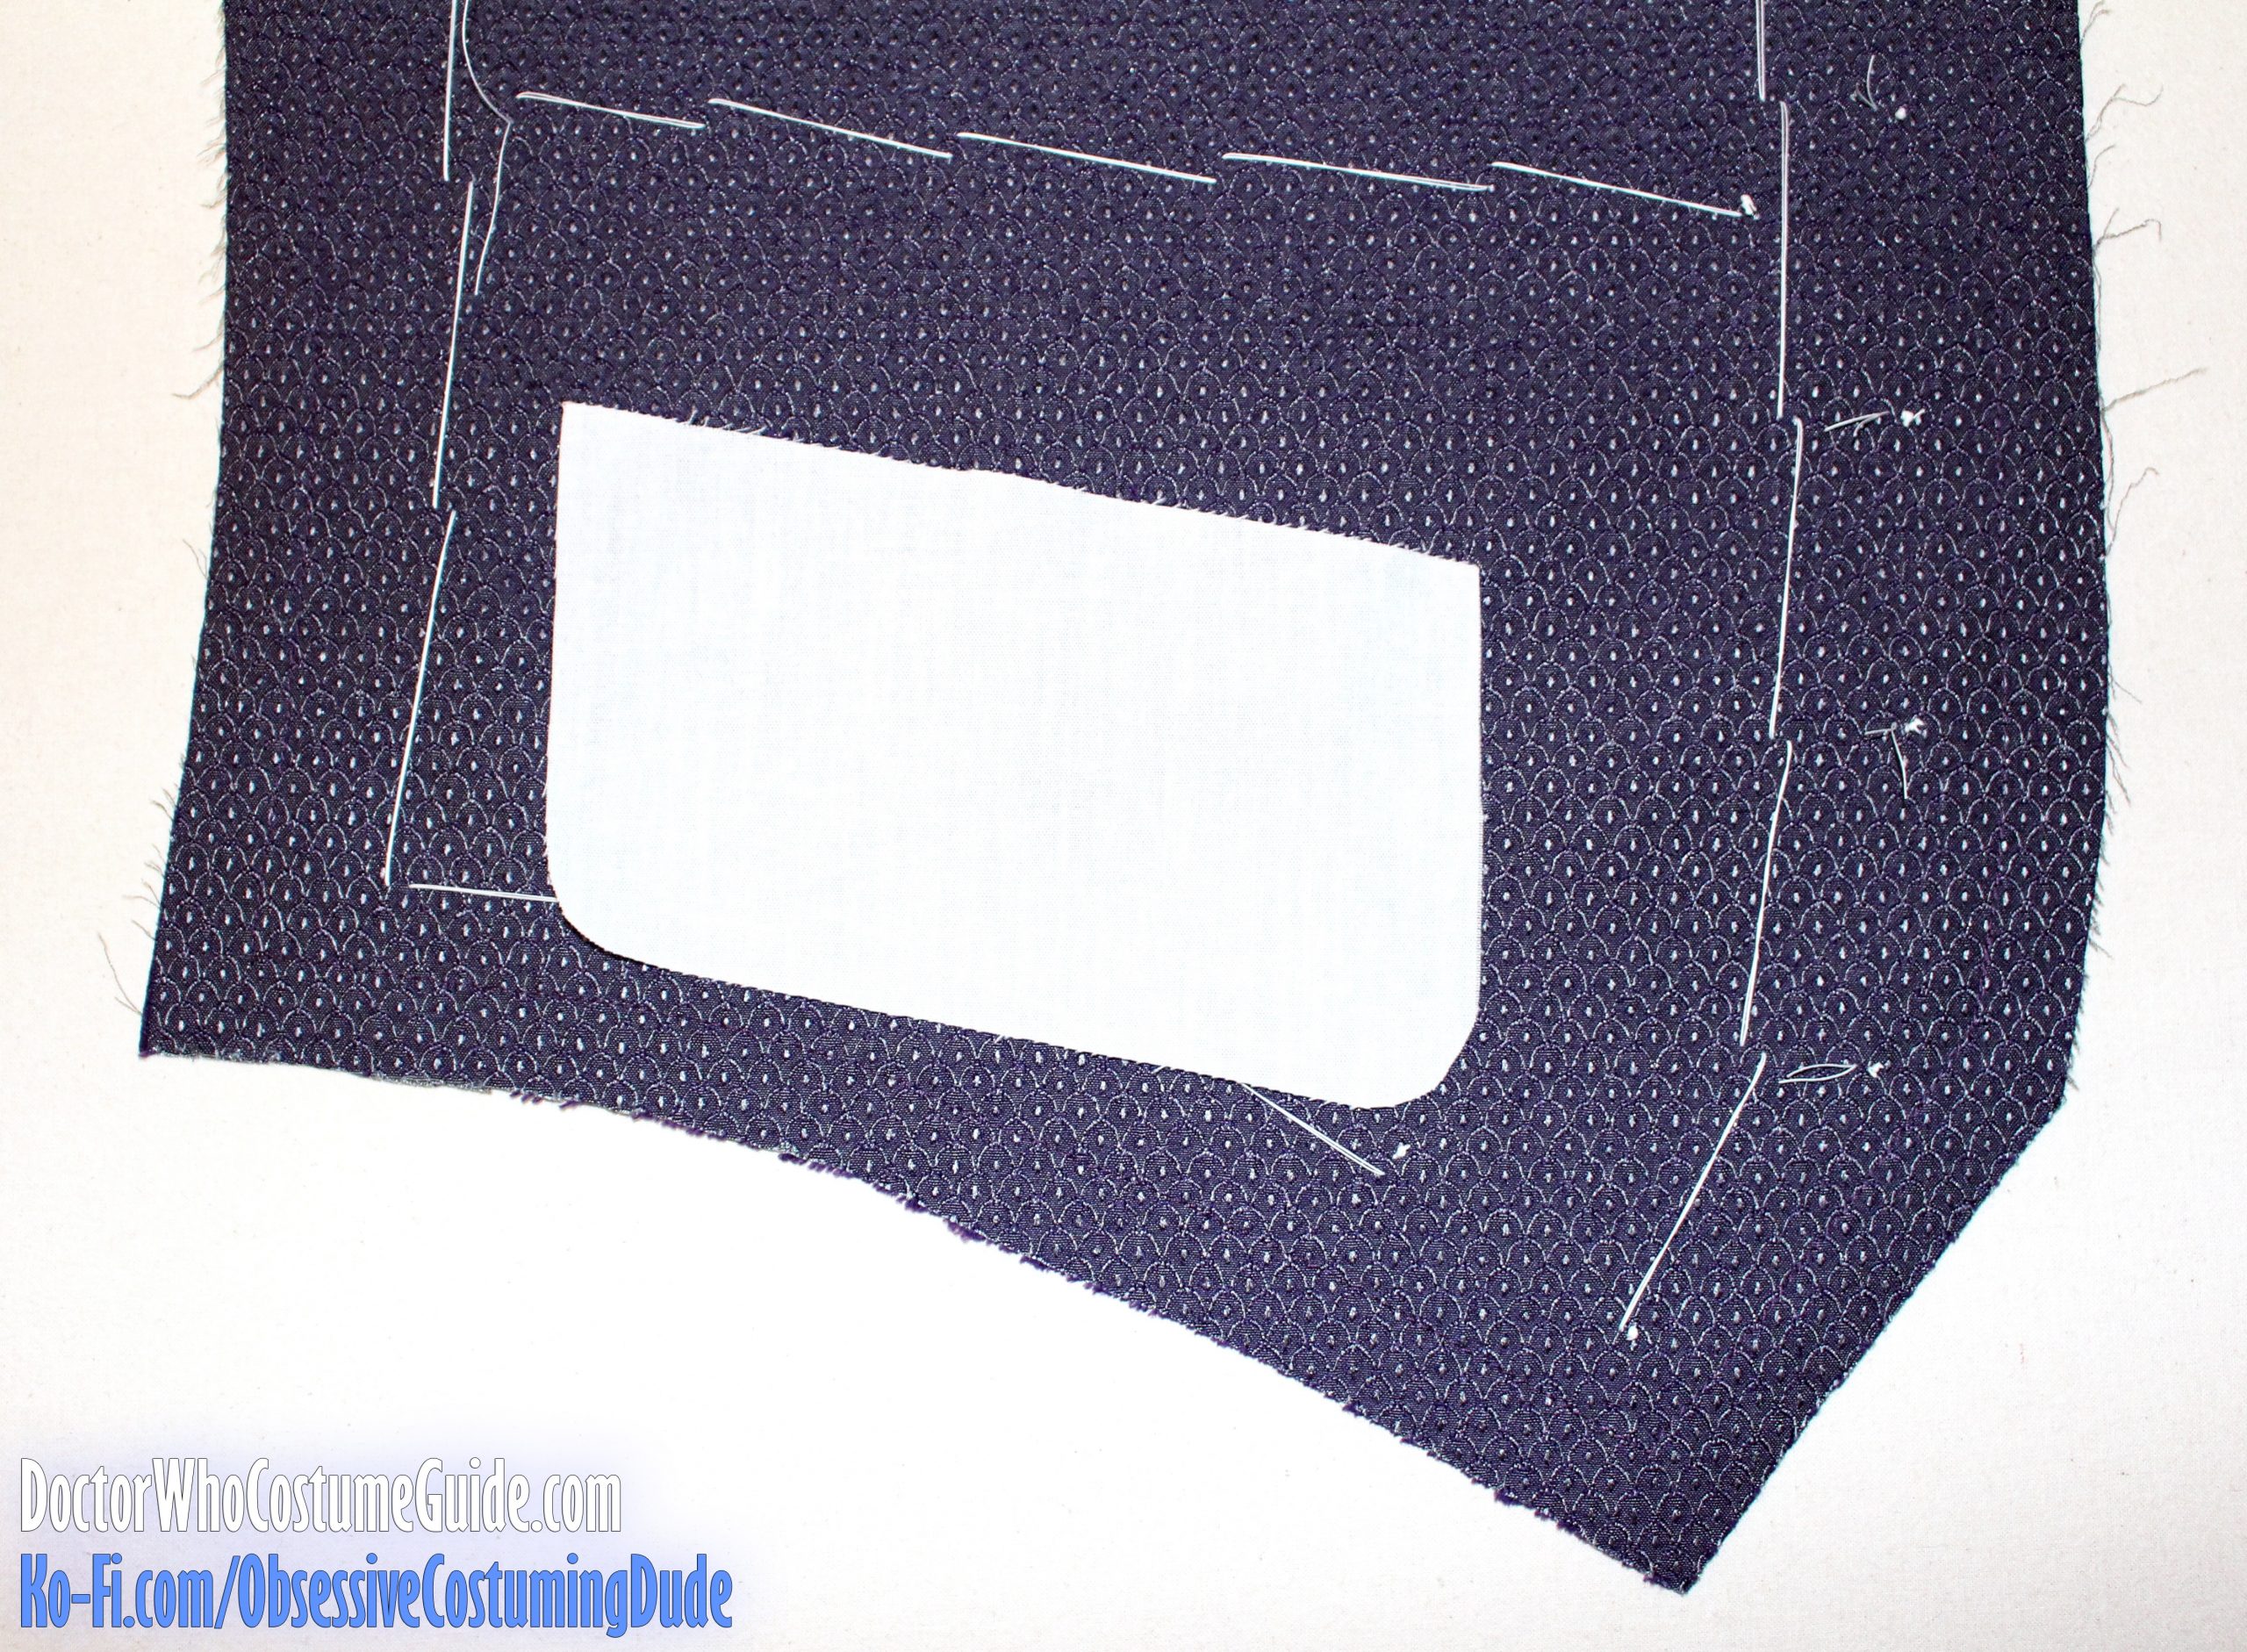
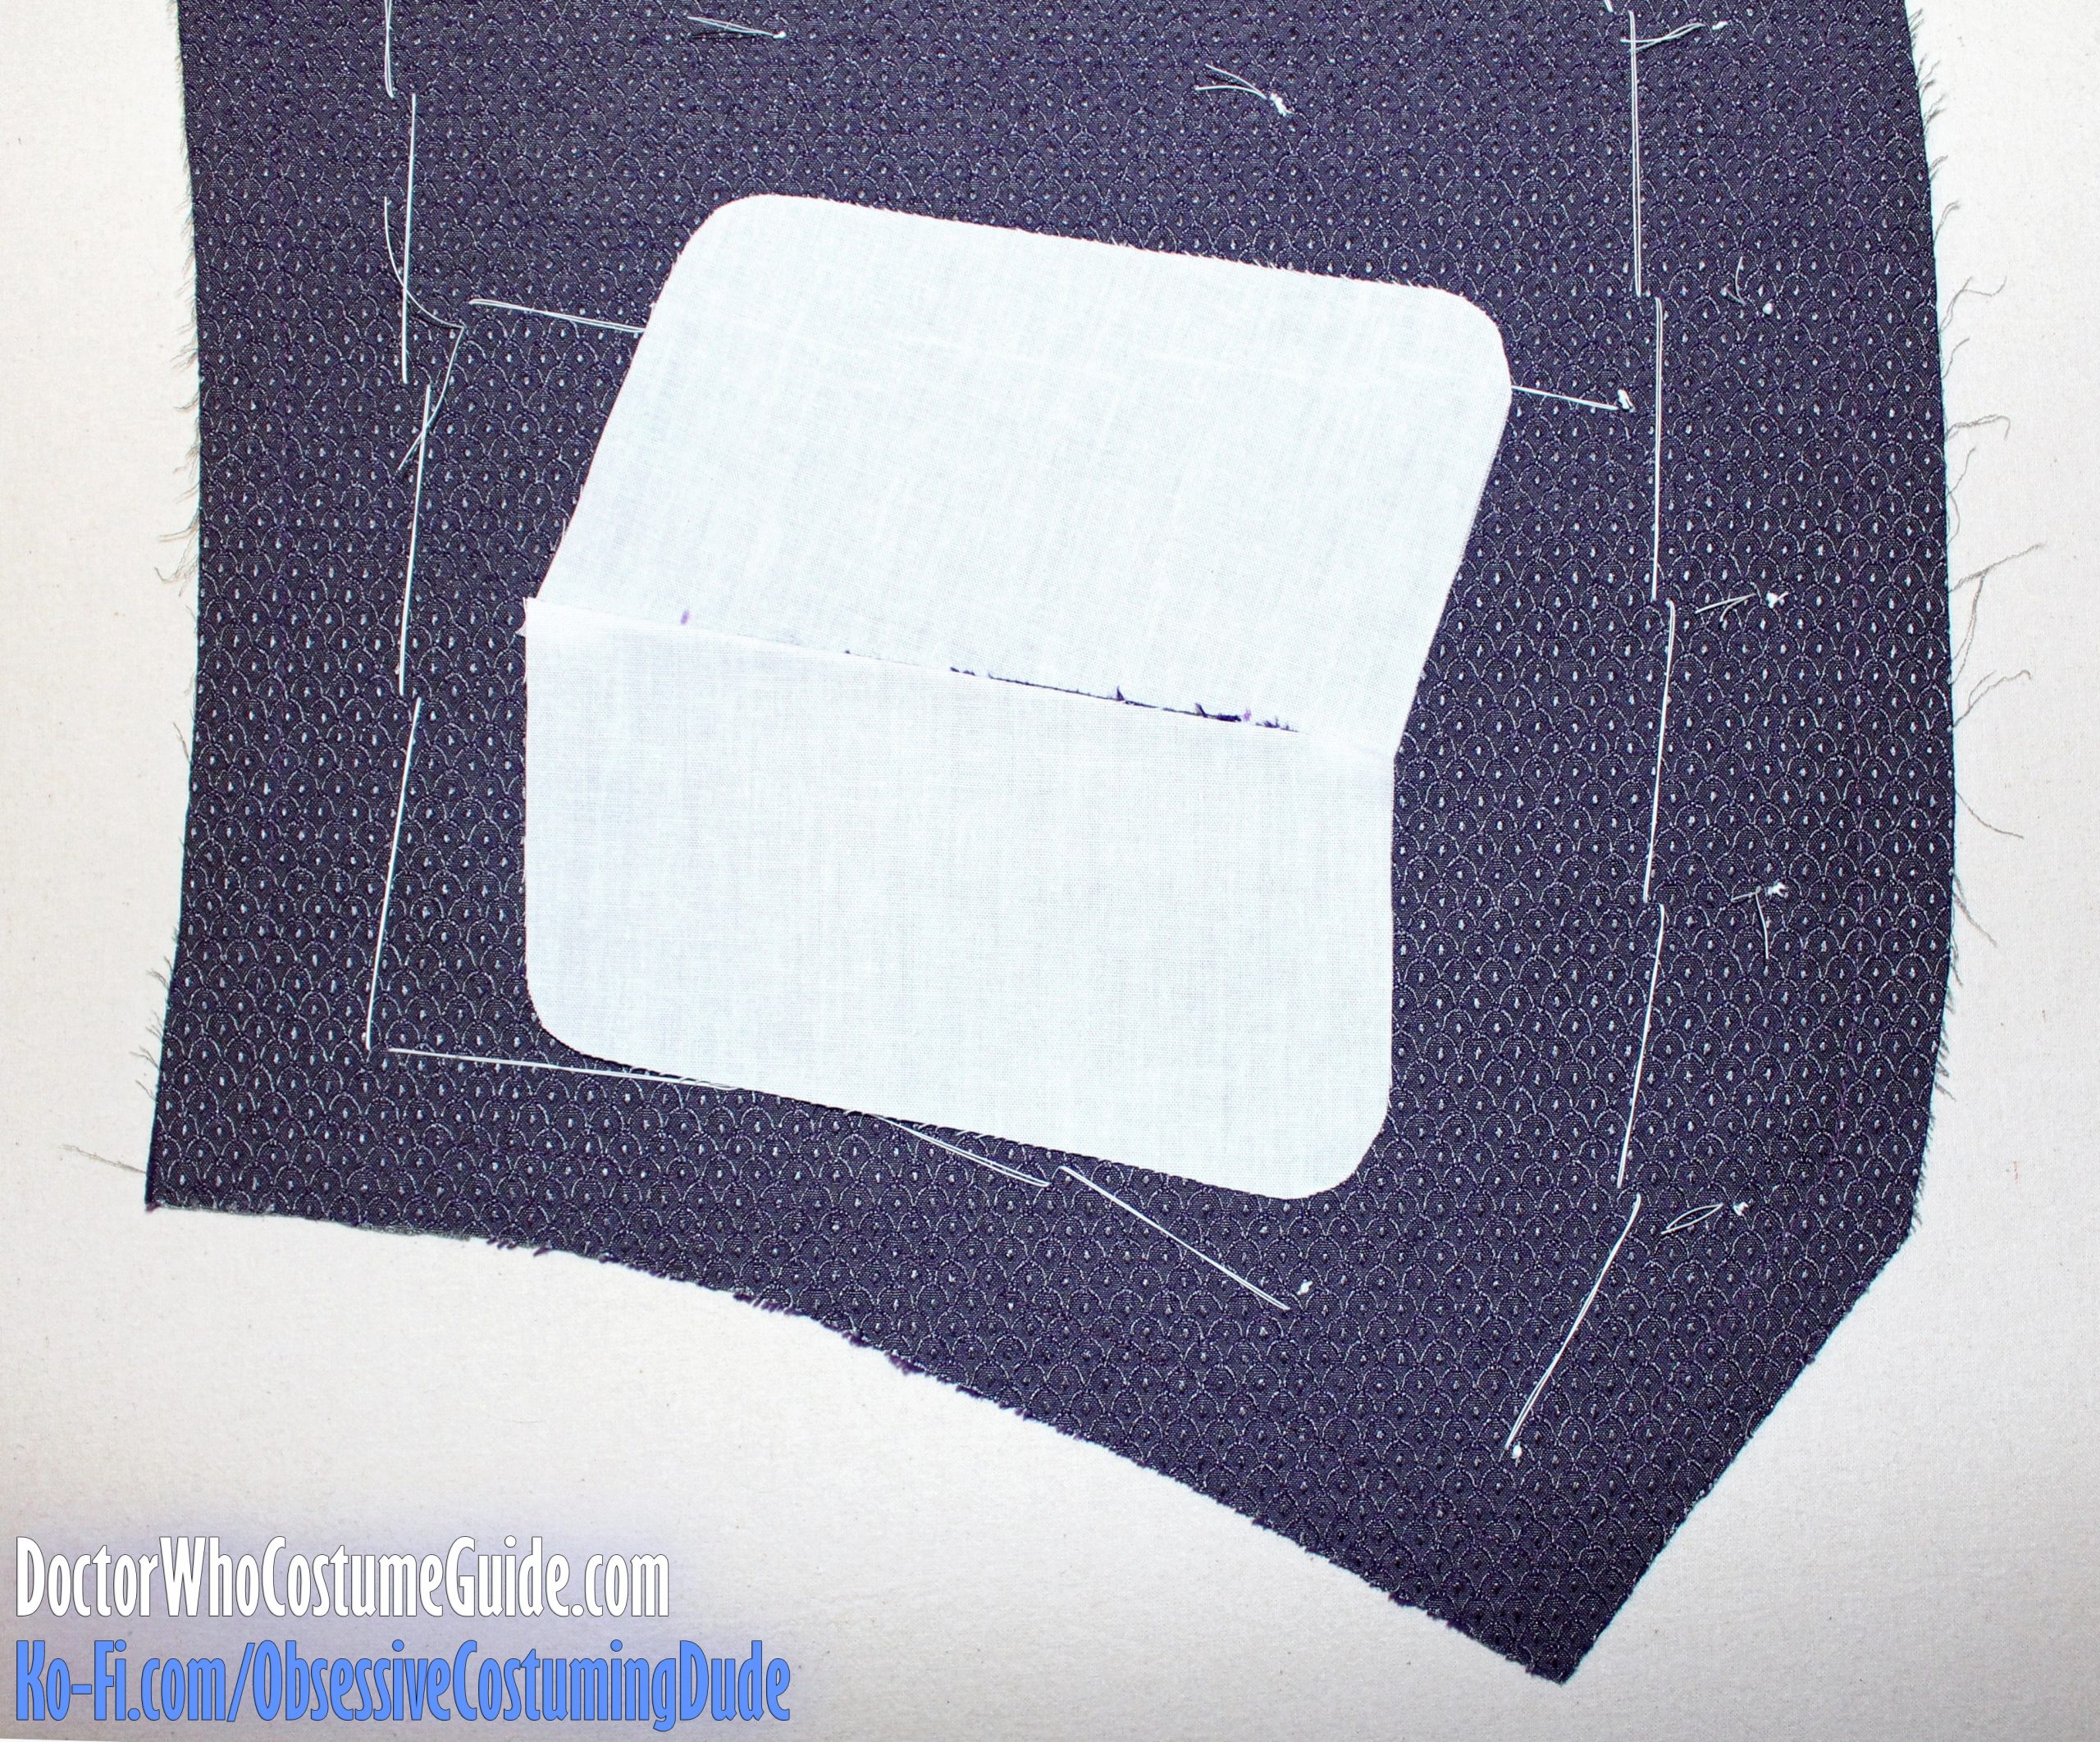
Trim away ⅜” from the upper edge of the second piece of pocketing.
Position the second piece of pocketing over the pocket welt so the upper edge of the pocketing is flush with the raw end of the welt.
Pin the second piece of pocketing to the pocket welt’s seam allowance, then fold the upper front of the waistcoat out of the way.
Again using your zipper/piping foot, sew the pocketing to the pocket welt as close to the first stitch line as you can manage – across the whole pocket welt this time (don’t leave ⅜” free on each end like you did with the first piece of pocketing).
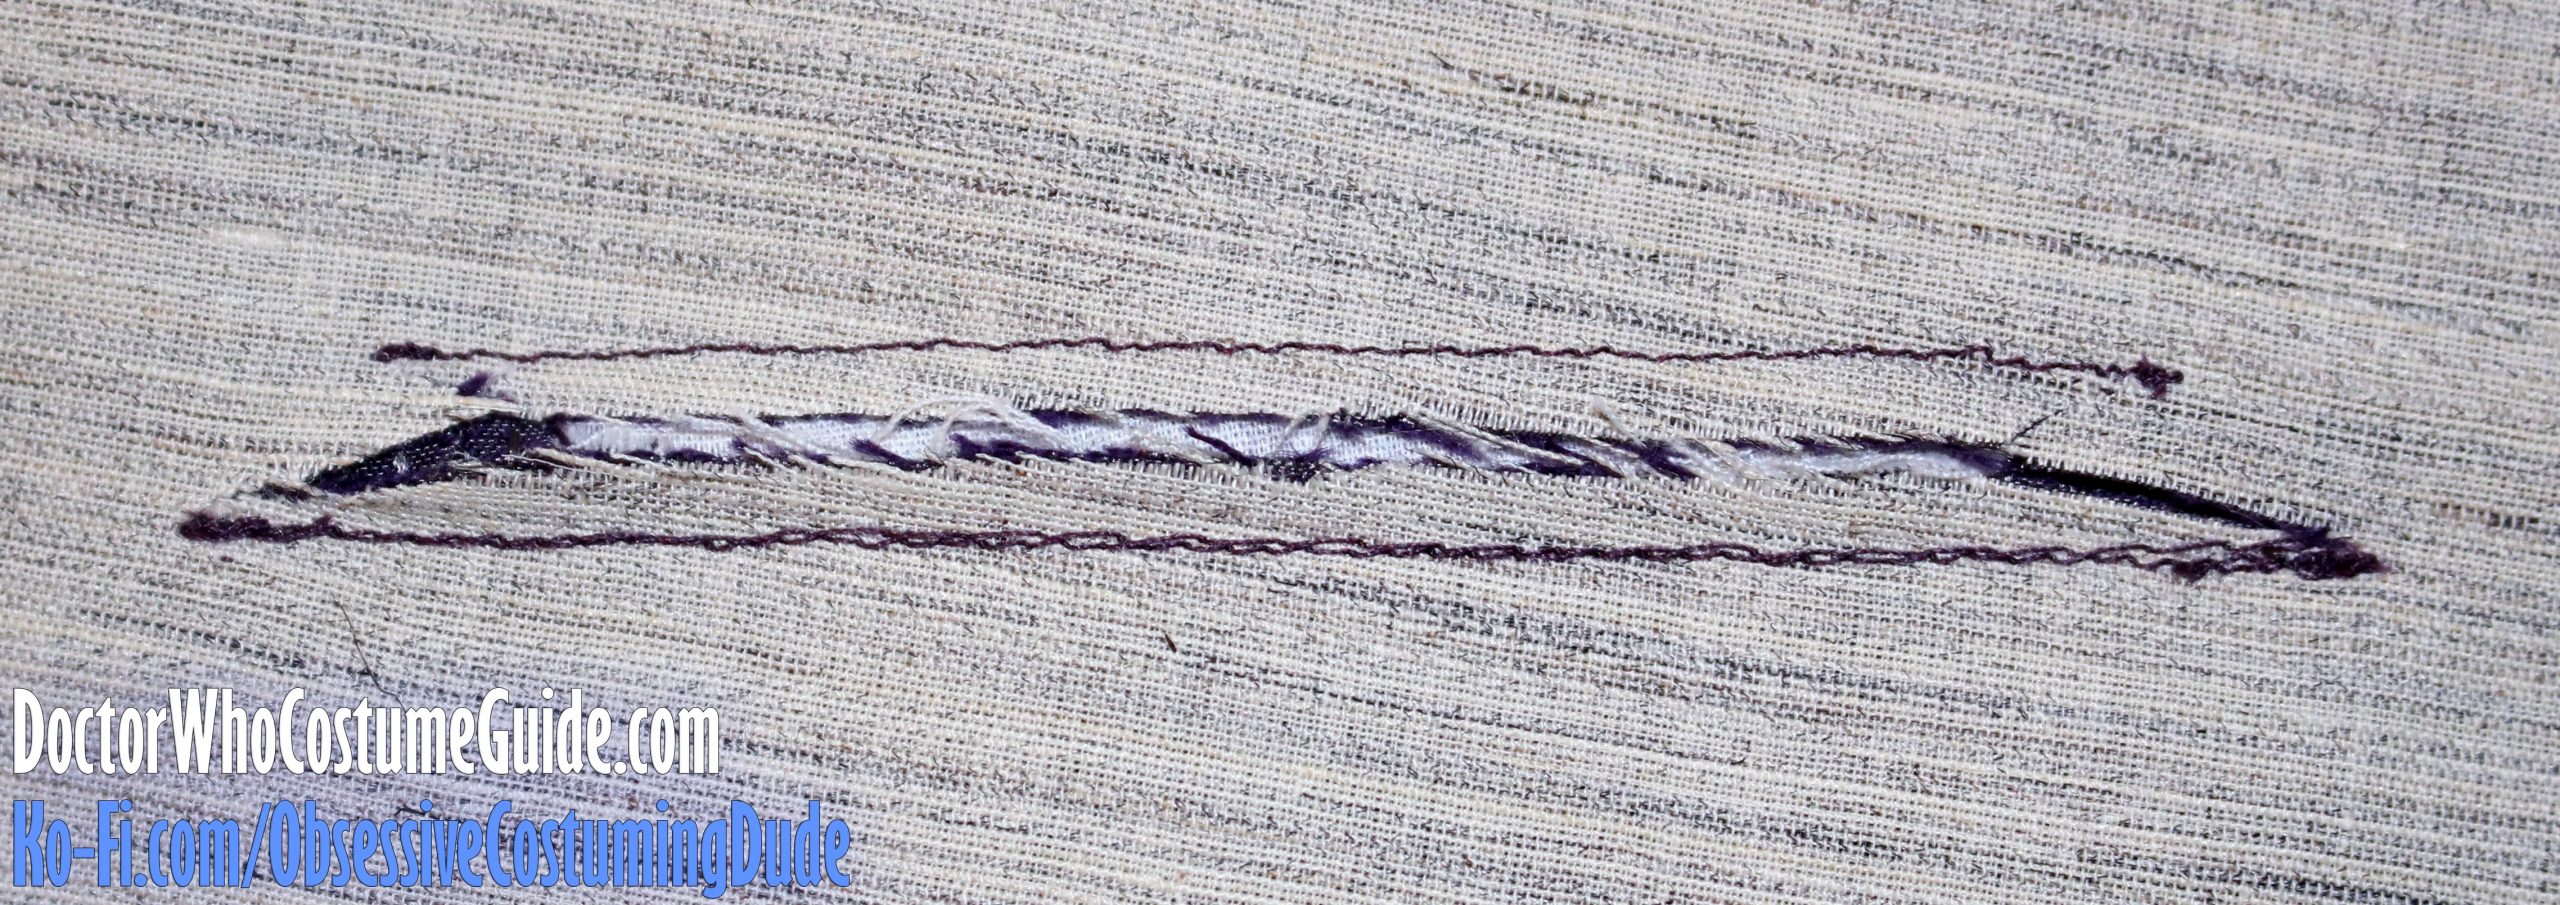
Slash the pocket opening halfway between the two stitch lines, taking care to only cut through the waistcoat front and hair canvas (not the pocket welt or pocketing). Approximately ⅜” from the end of the upper, shorter stitch line, pivot and clip diagonally to the very last stitch. Repeat for the lower stitch line.
TIP: Use sharp scissors for this.
TIP: Be sure to clip exactly to the last stitch in each corner! If you don’t get all the way to the last stitch, there will be a little fold or pucker in the corner of the finished pocket – but if you go too far, there will be a little hole.
Pull the pocketing through the pocket opening to the underside.
Pull the lower pocketing downward and press the front/pocket welt/lower pocketing seam allowances flat.
Press the front/upper pocketing seam allowances upward.
OPTIONAL: Trim some bulk out of the seam allowances, especially the lower ones, so everything will lie flatter.
From the right side, press the pocket welt upward.
Pull the little triangular “prongs” on the sides of the pocket opening to the underside (I find tweezers helpful for this) and press.
Pin the pocket welt closed, matching outer and lower edges.
Using your zipper/piping foot, sew the triangular prongs to the pocket pouch, closing the pocket opening.
Using a regular sewing foot, sew the pocket pouch closed along the outer and lower edges.
OPTIONAL: Stitch again ⅛” from the first stitch line, or ½” from the edges.
OPTIONAL: Trim the outer edges of the pocket pouch with pinking shears, to minimize its impression on the outside of the waistcoat front.
OPTIONAL: Loosely hand-sew the pocket pouch to the hair canvas to anchor and stabilize it, taking care to only stitch through the hair canvas, and not the “scales” fabric!
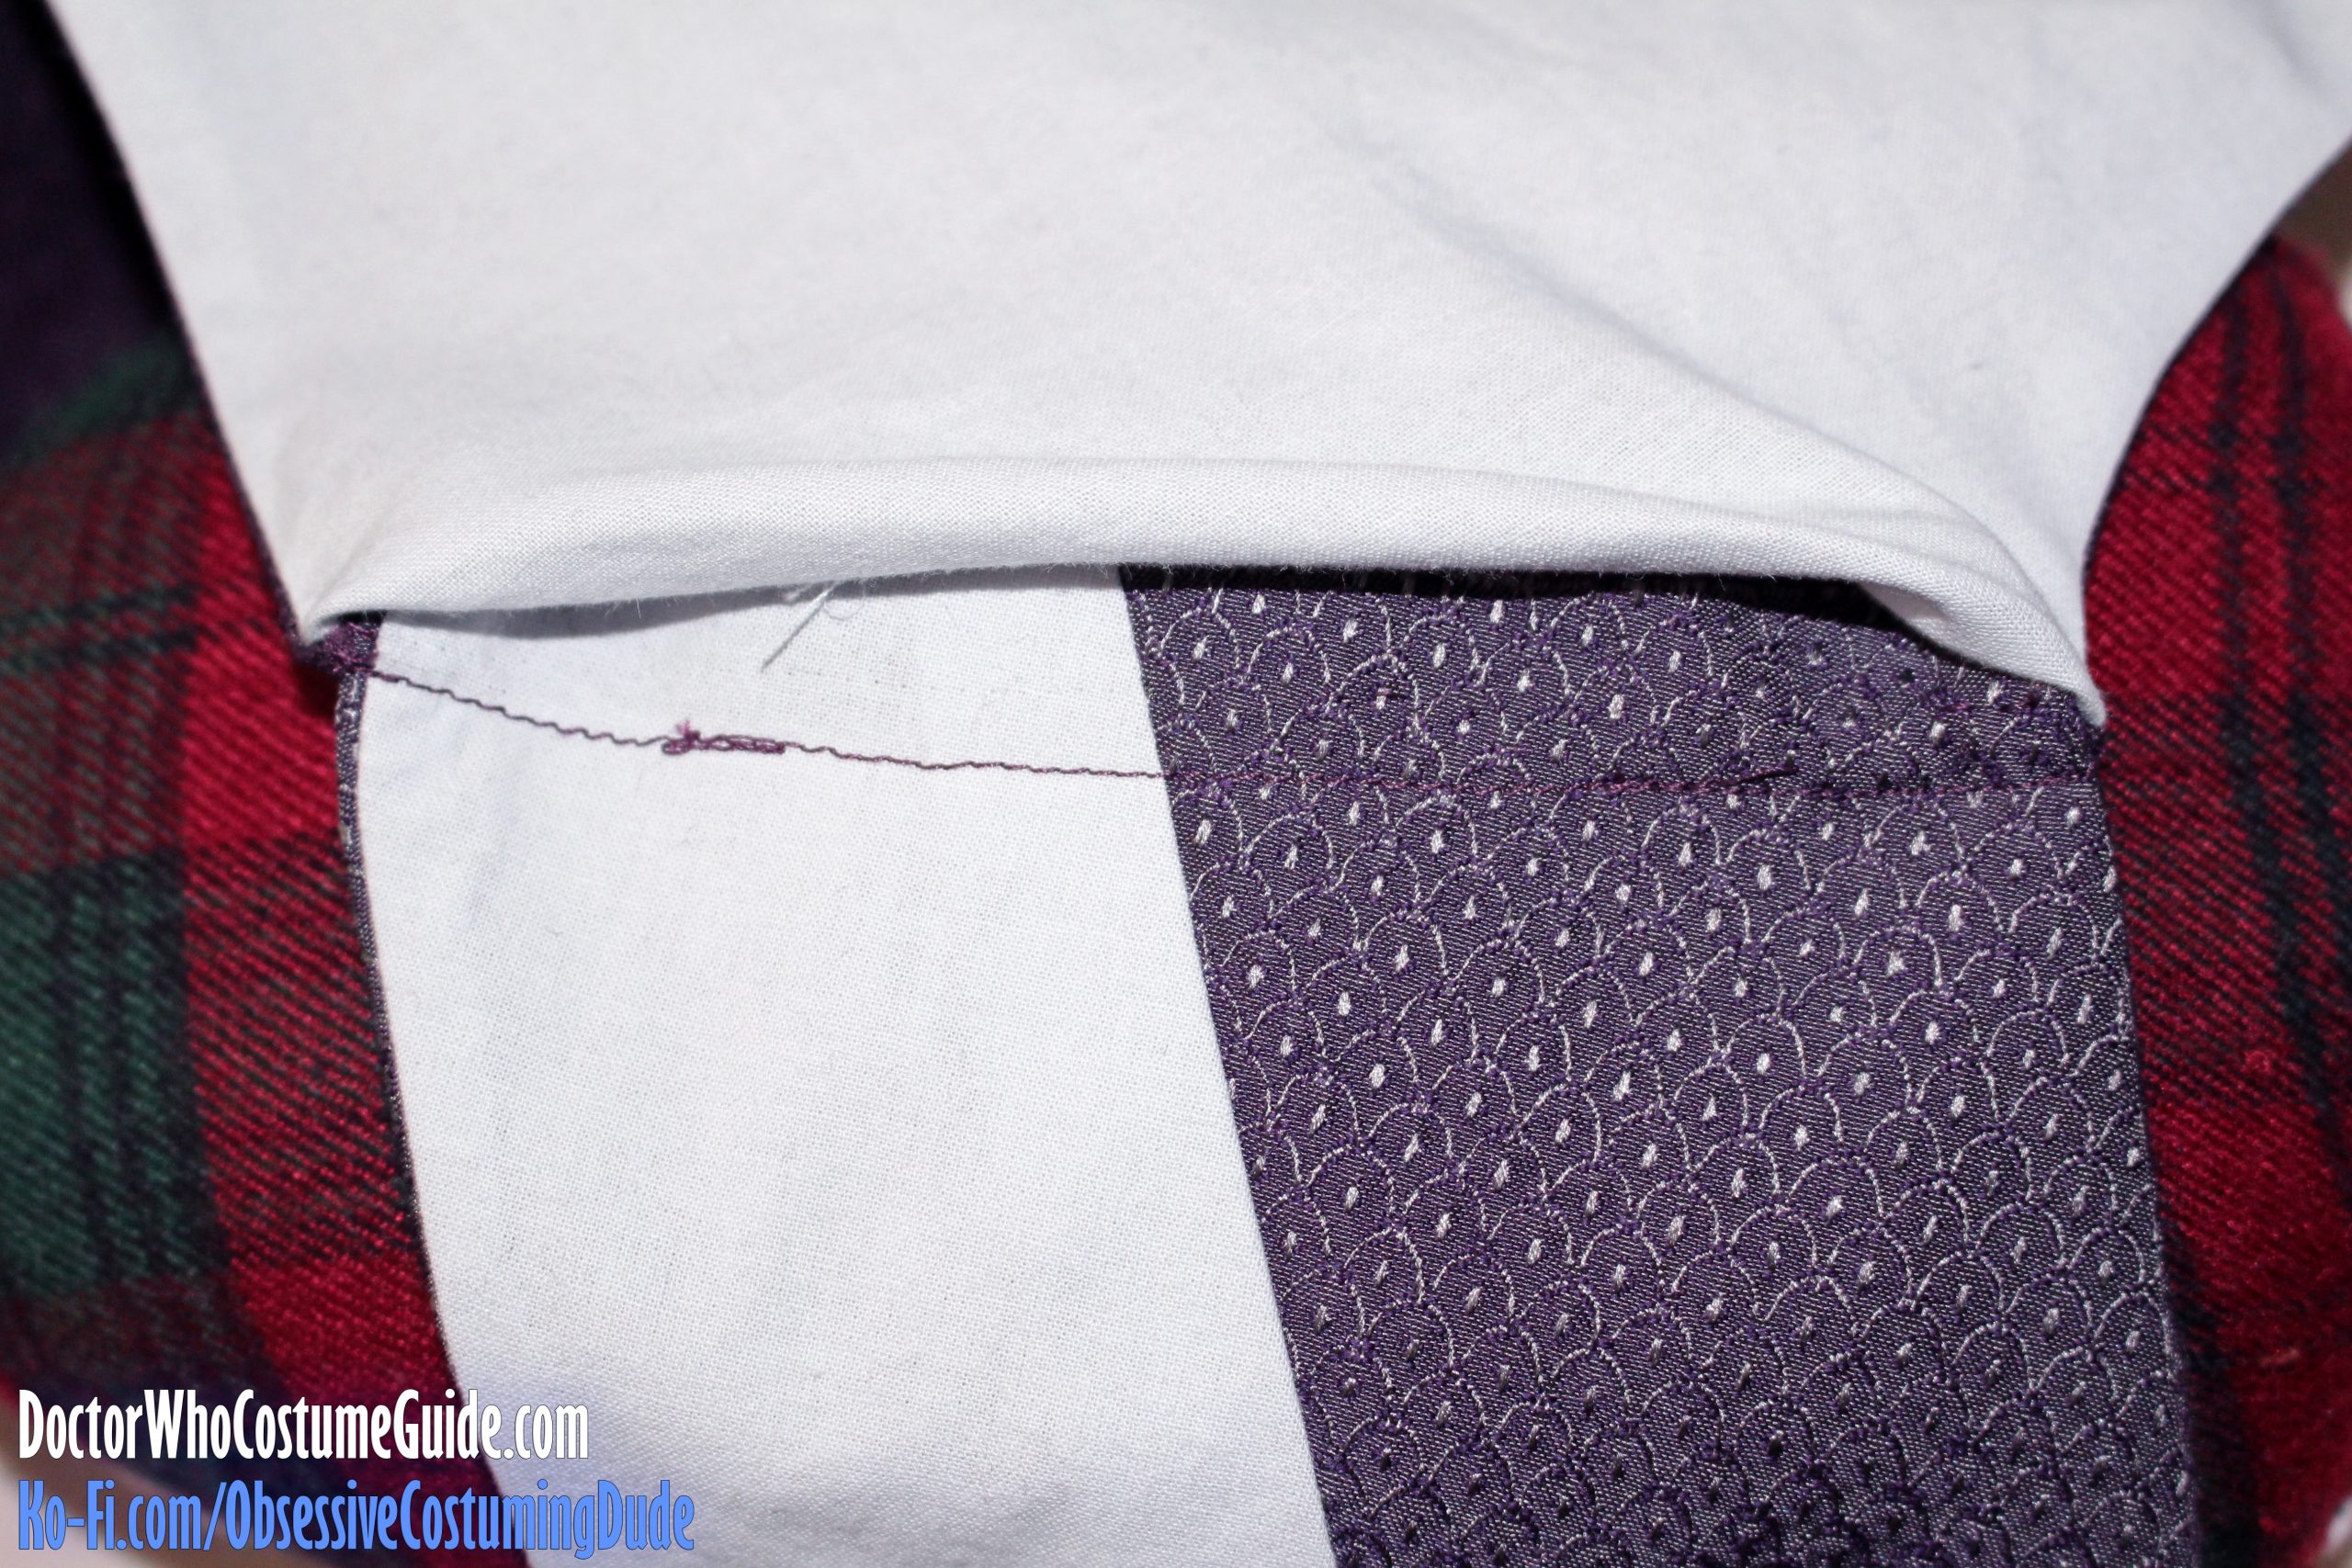
Tack the sides of the pocket welt to the waistcoat front from the underside by hand.
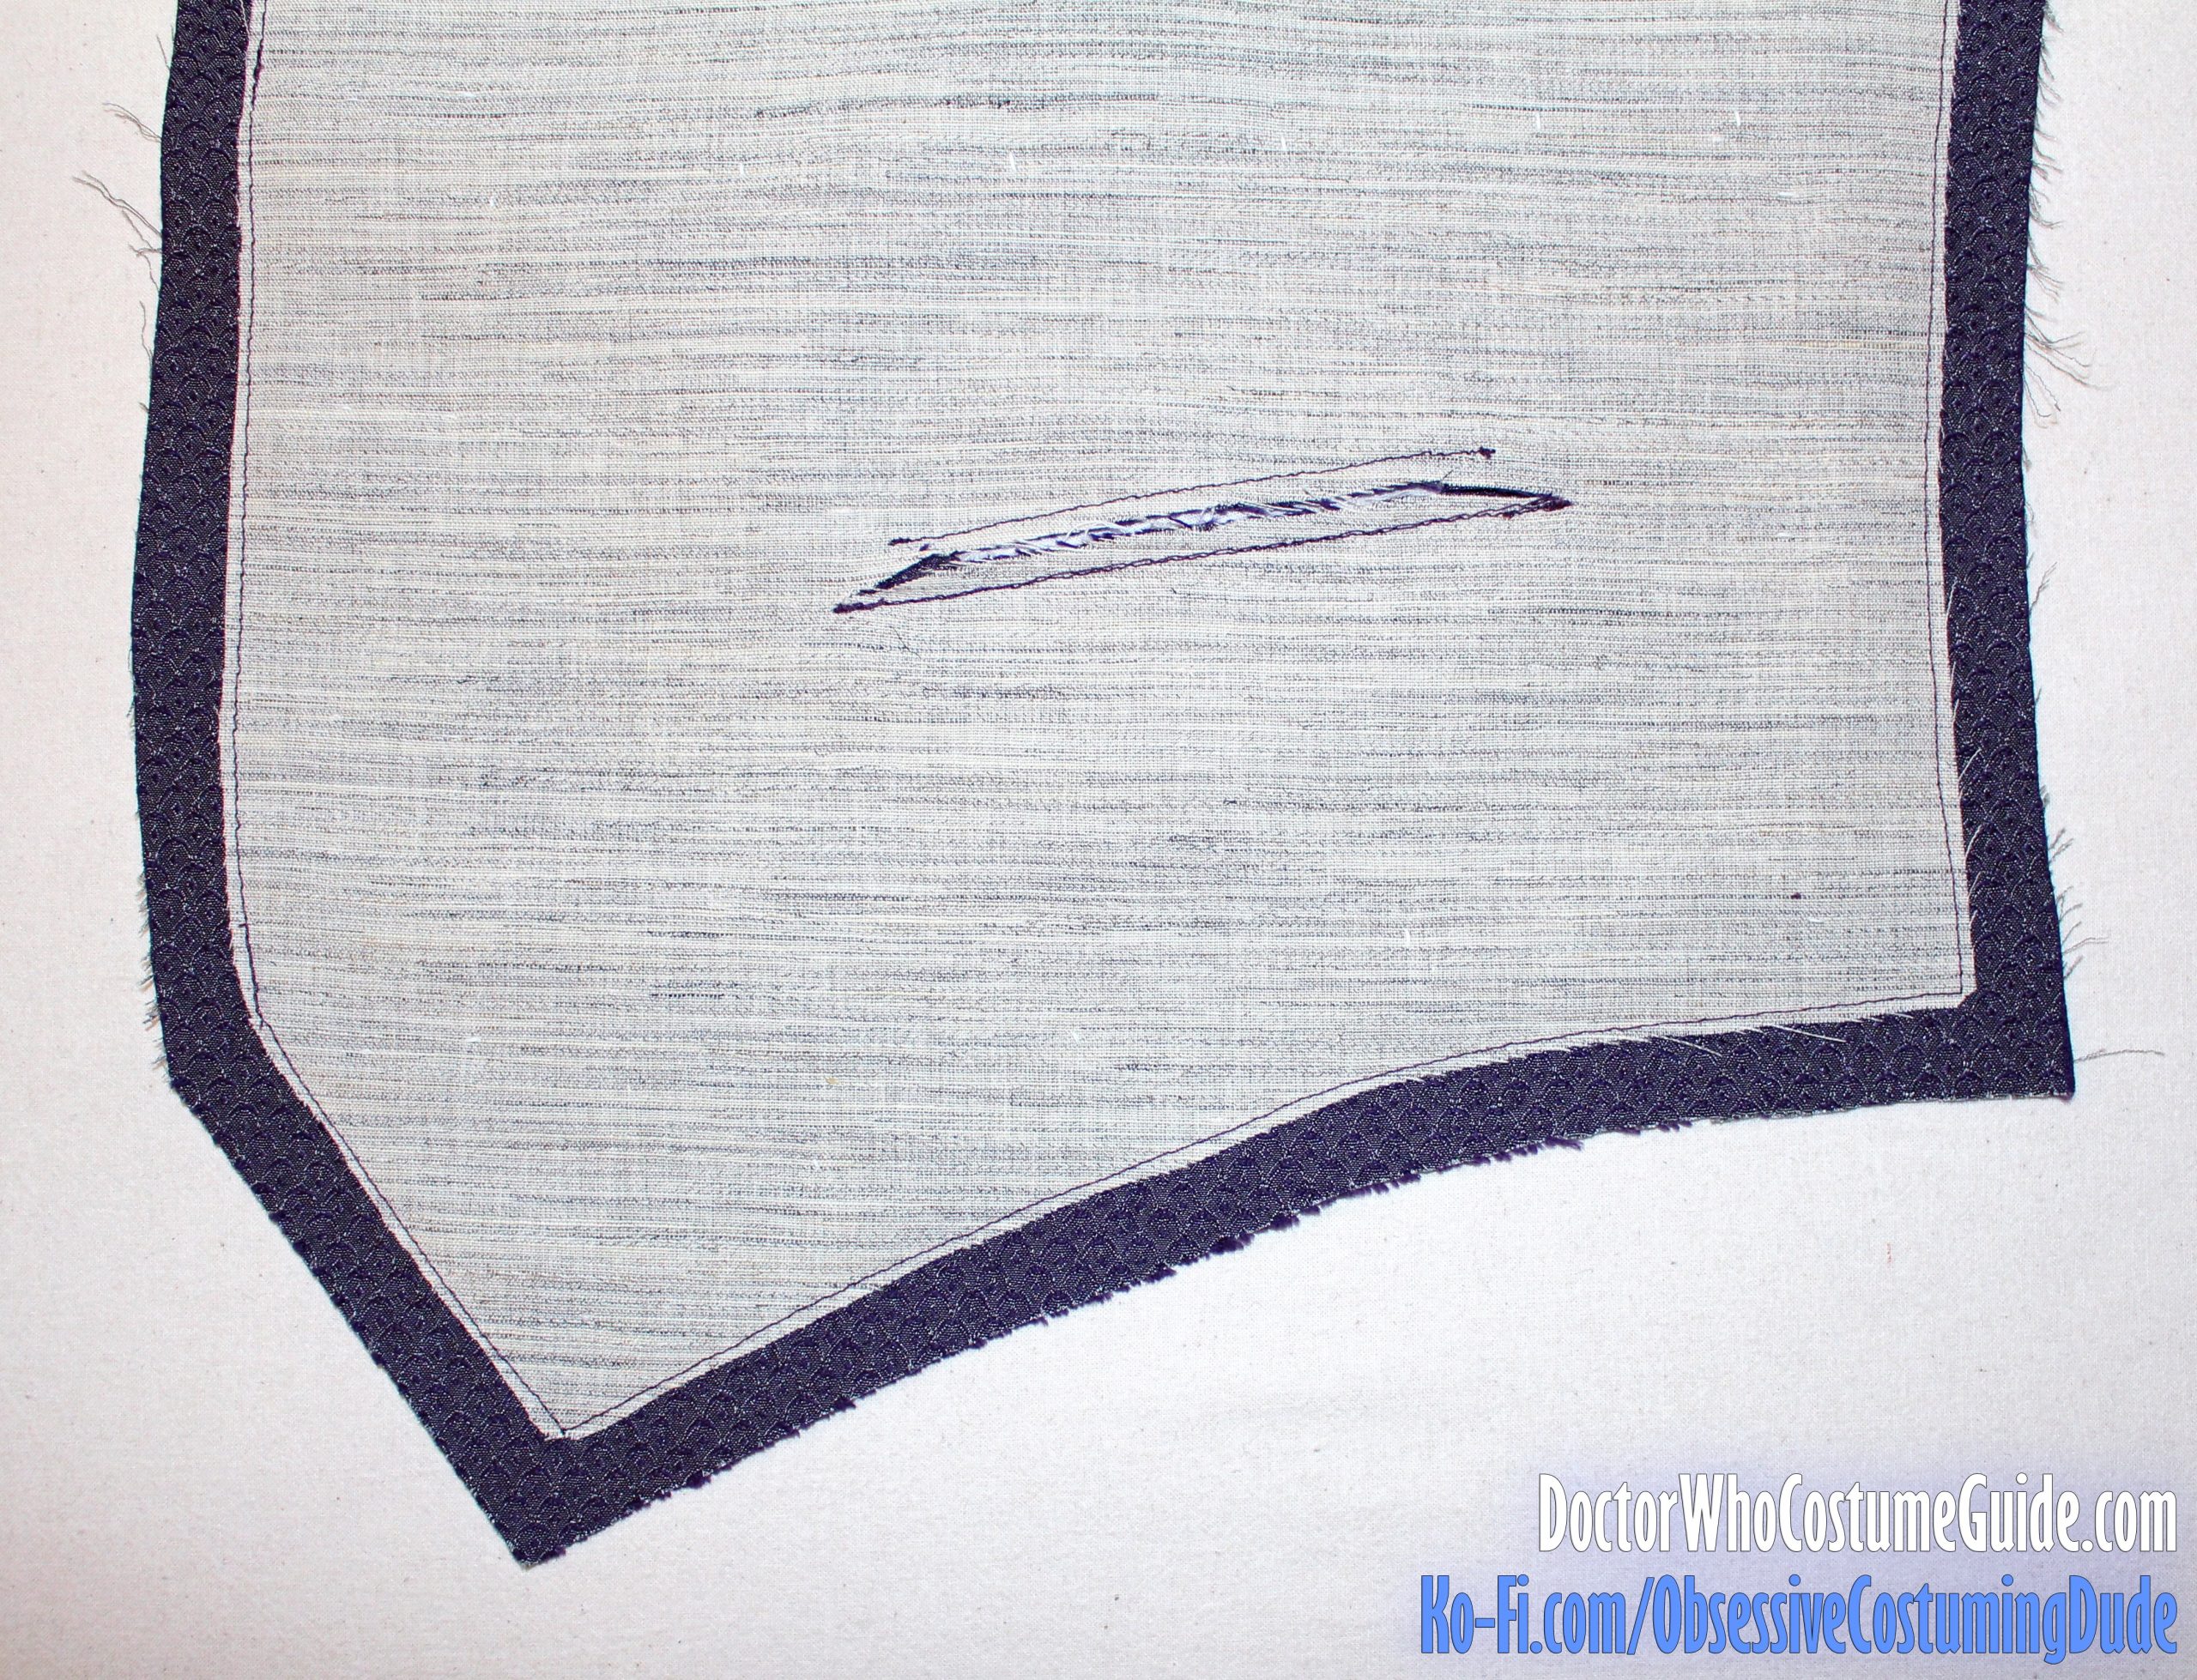
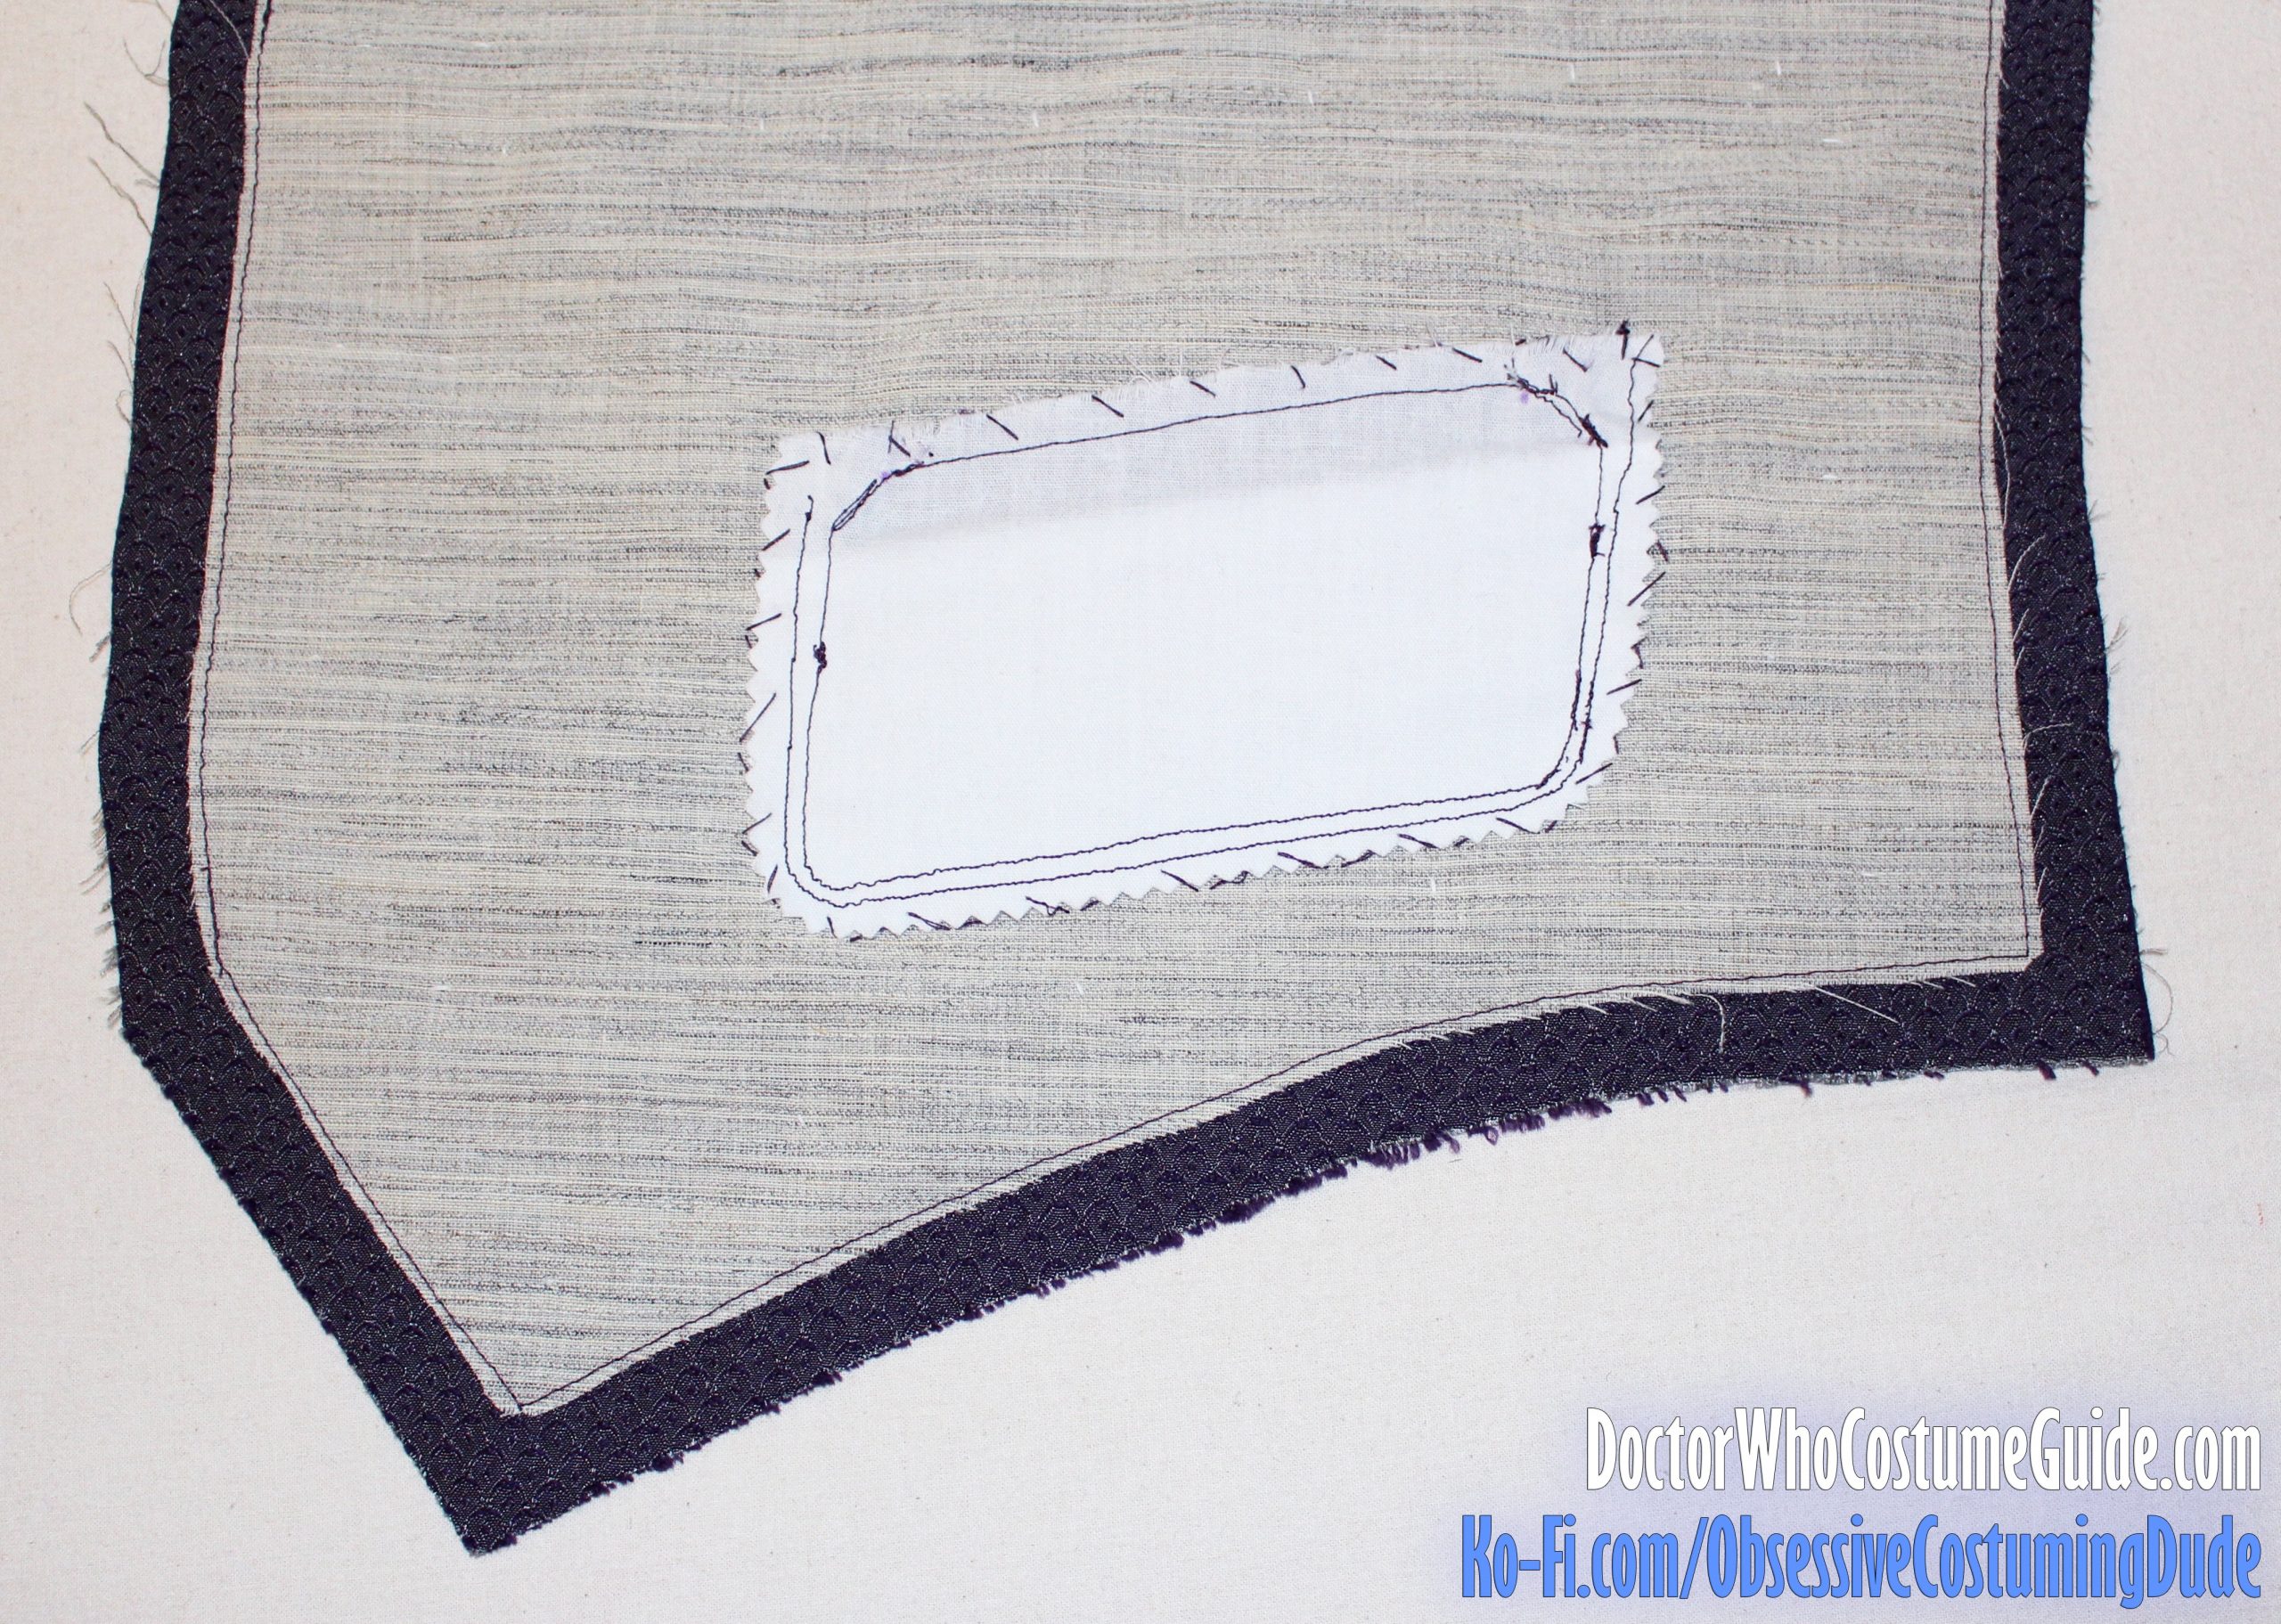
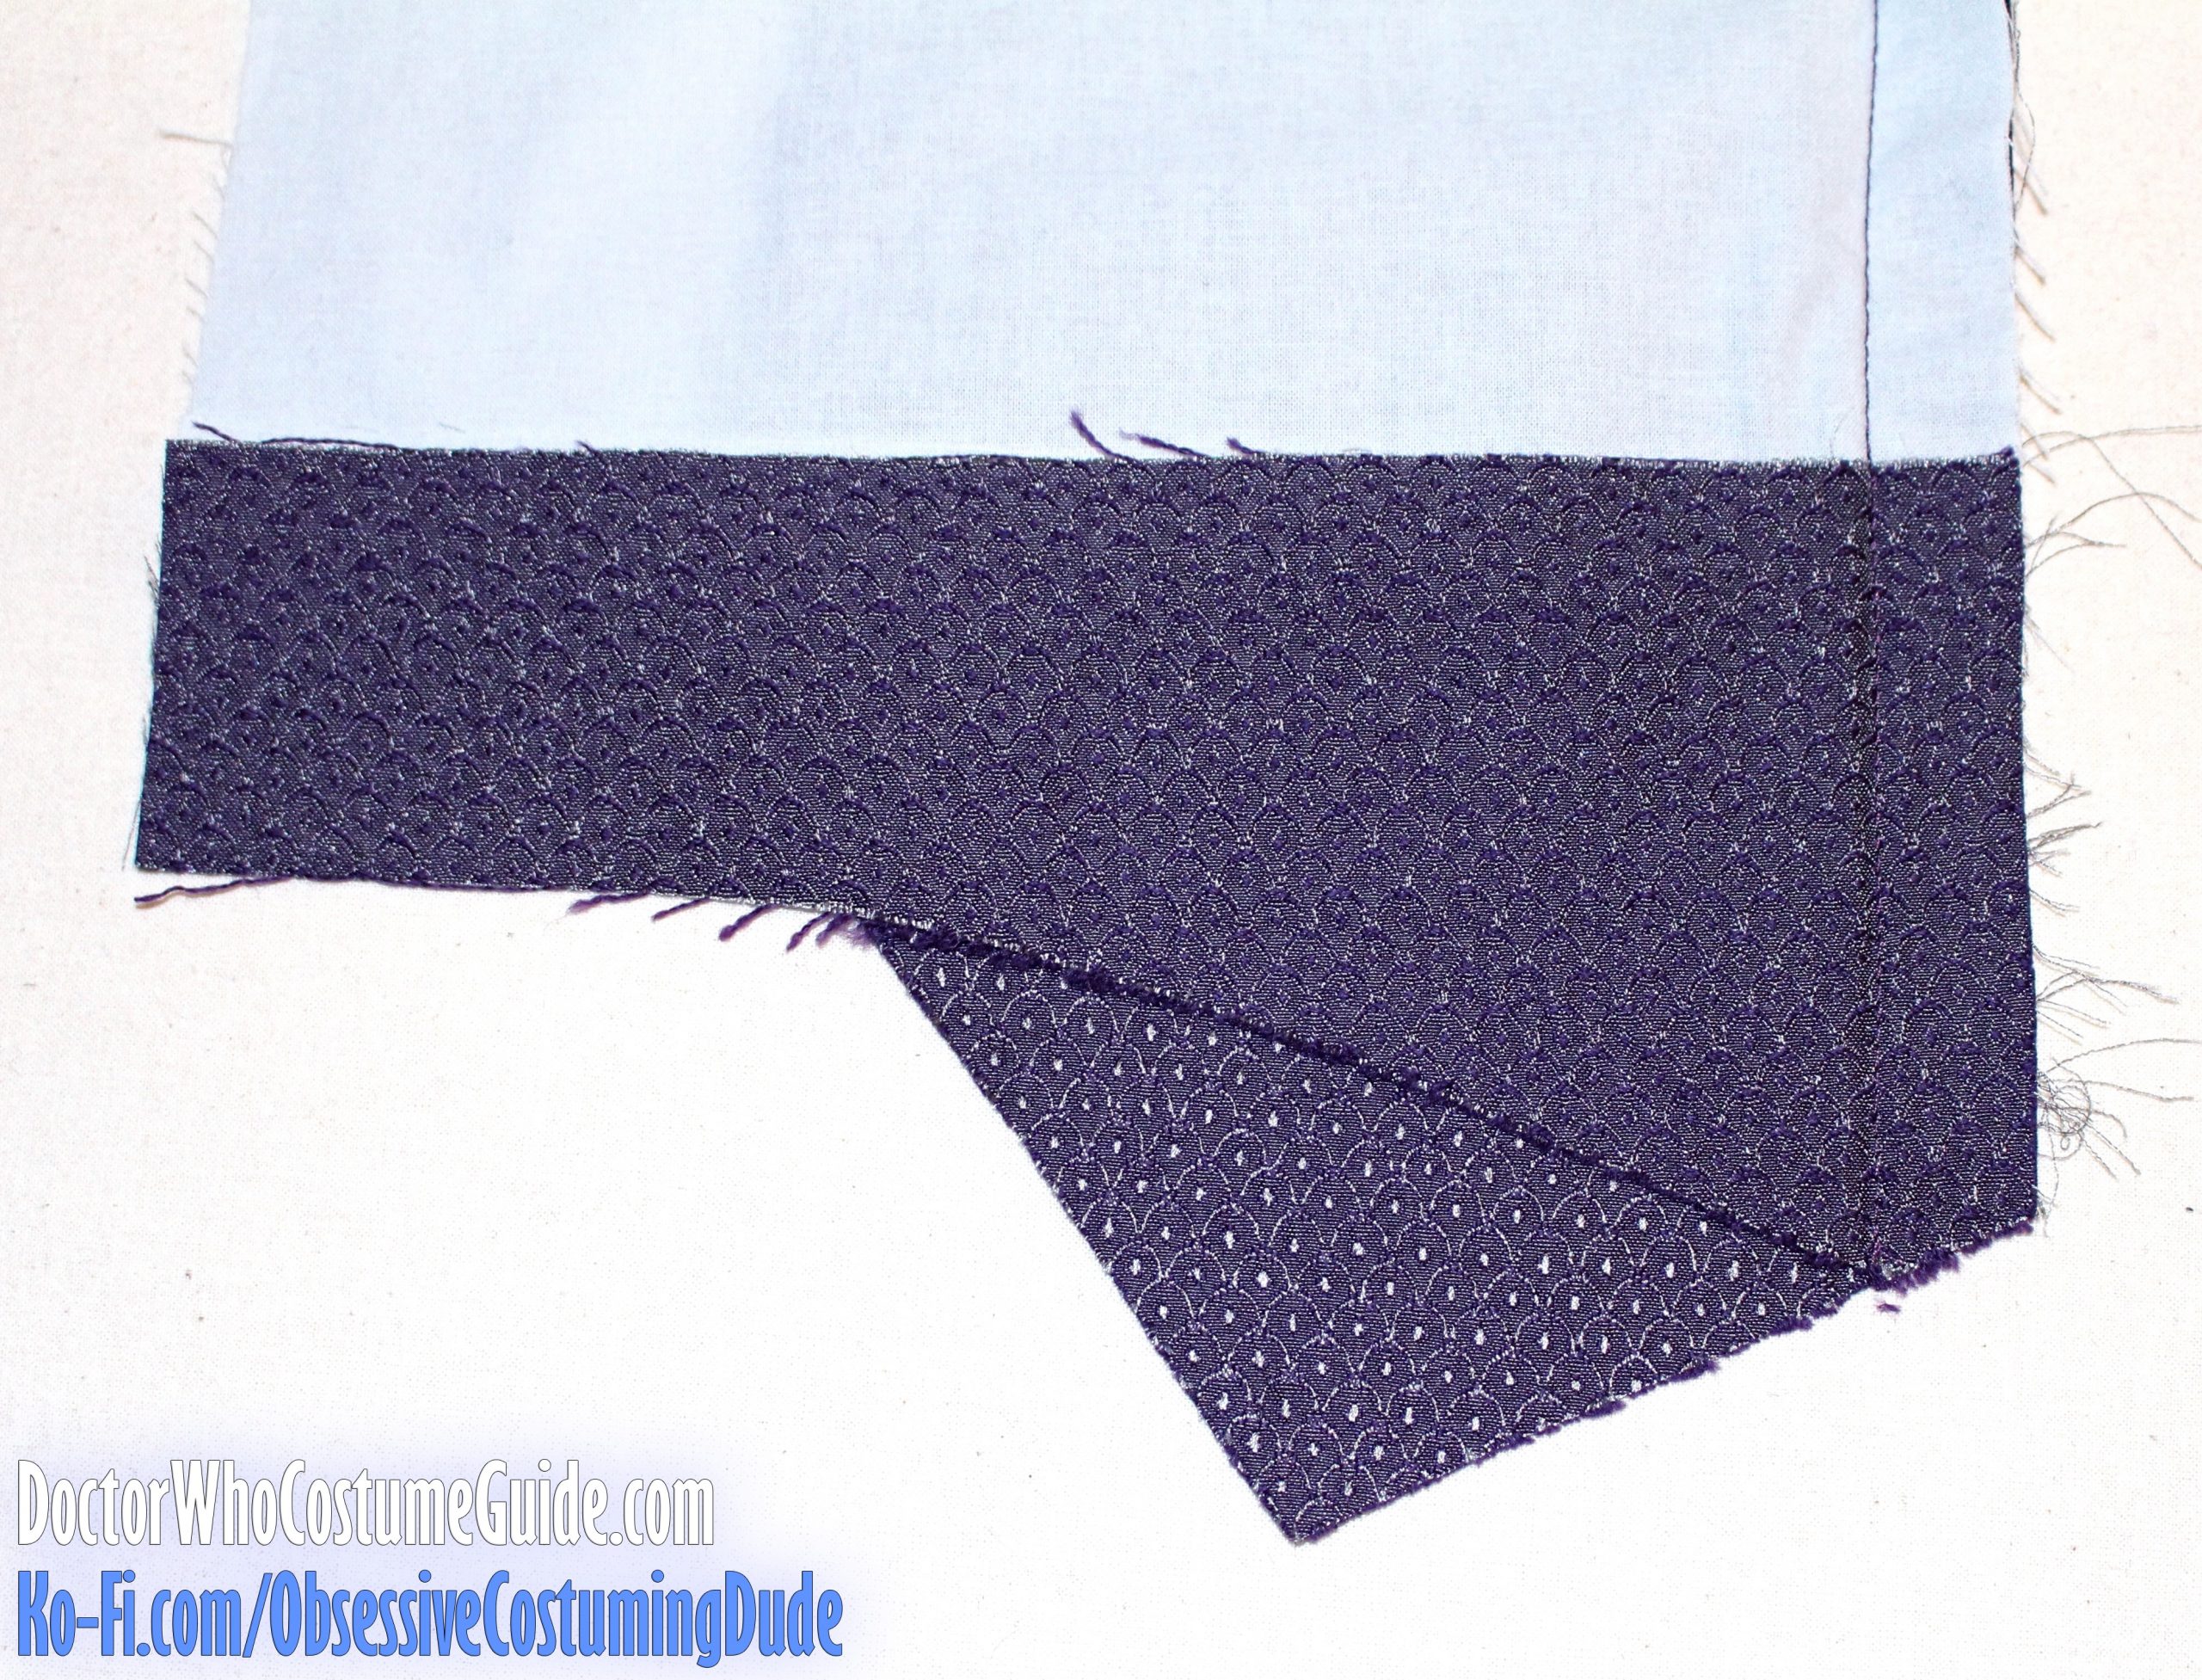
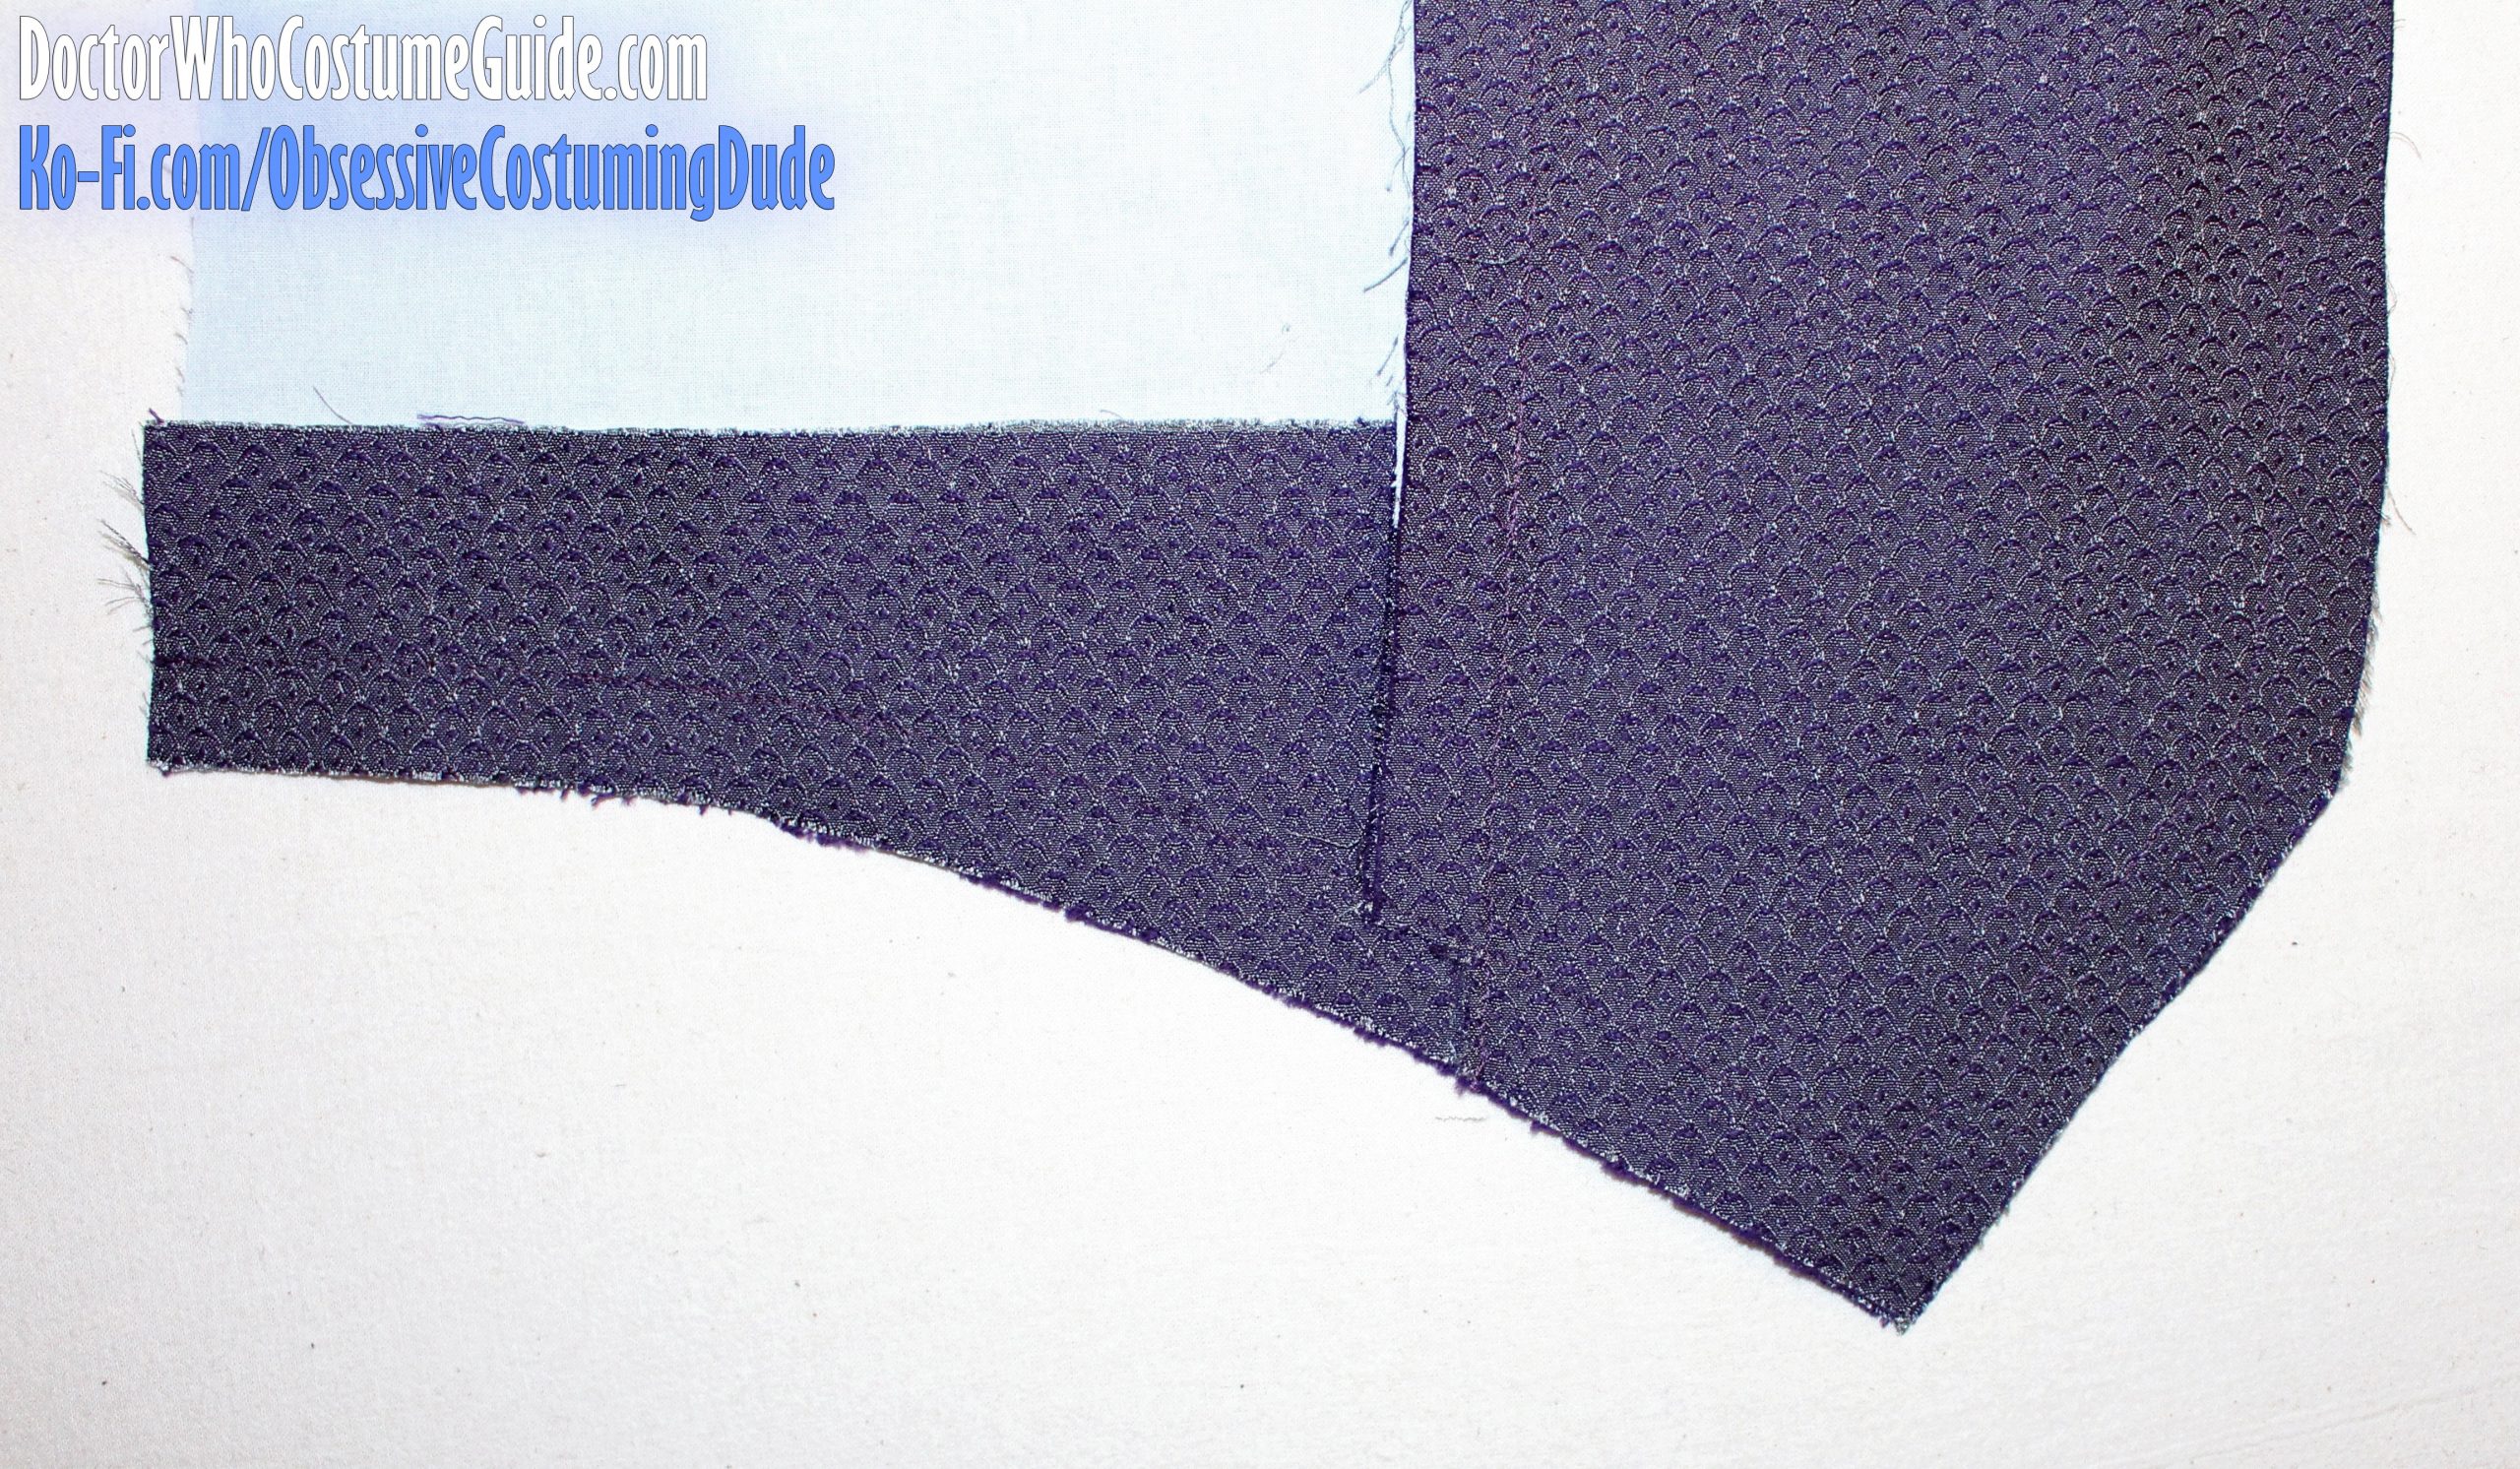
The underside of the pocket should look something like this:
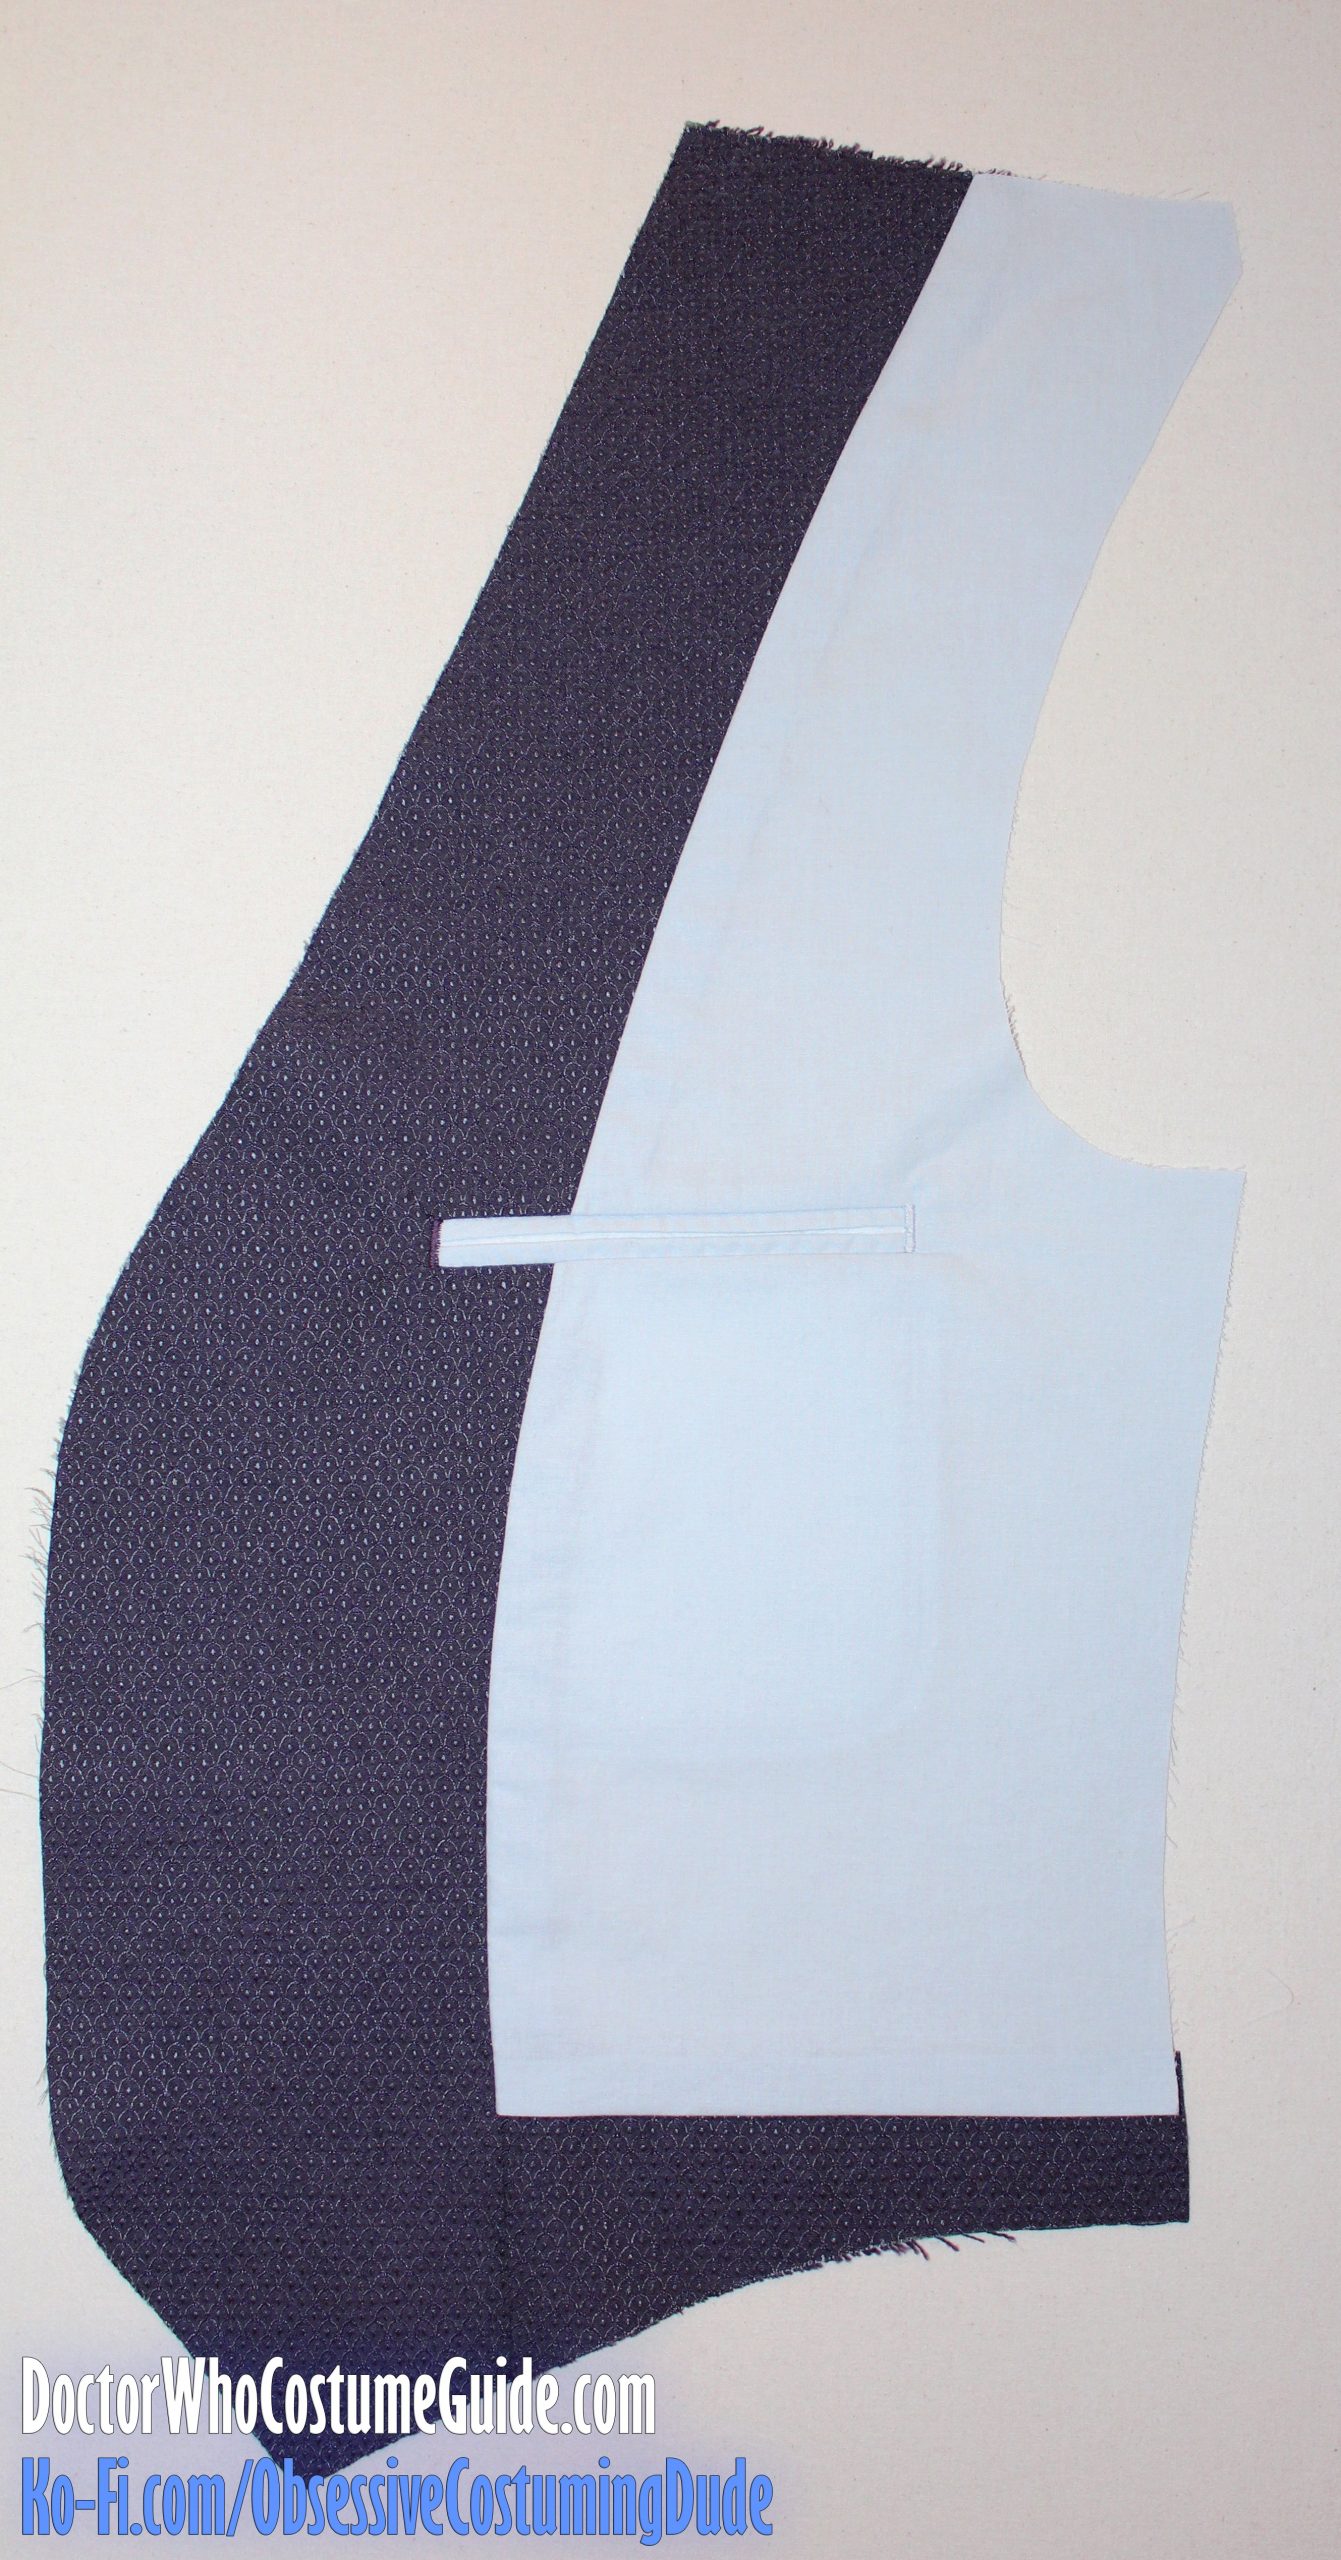
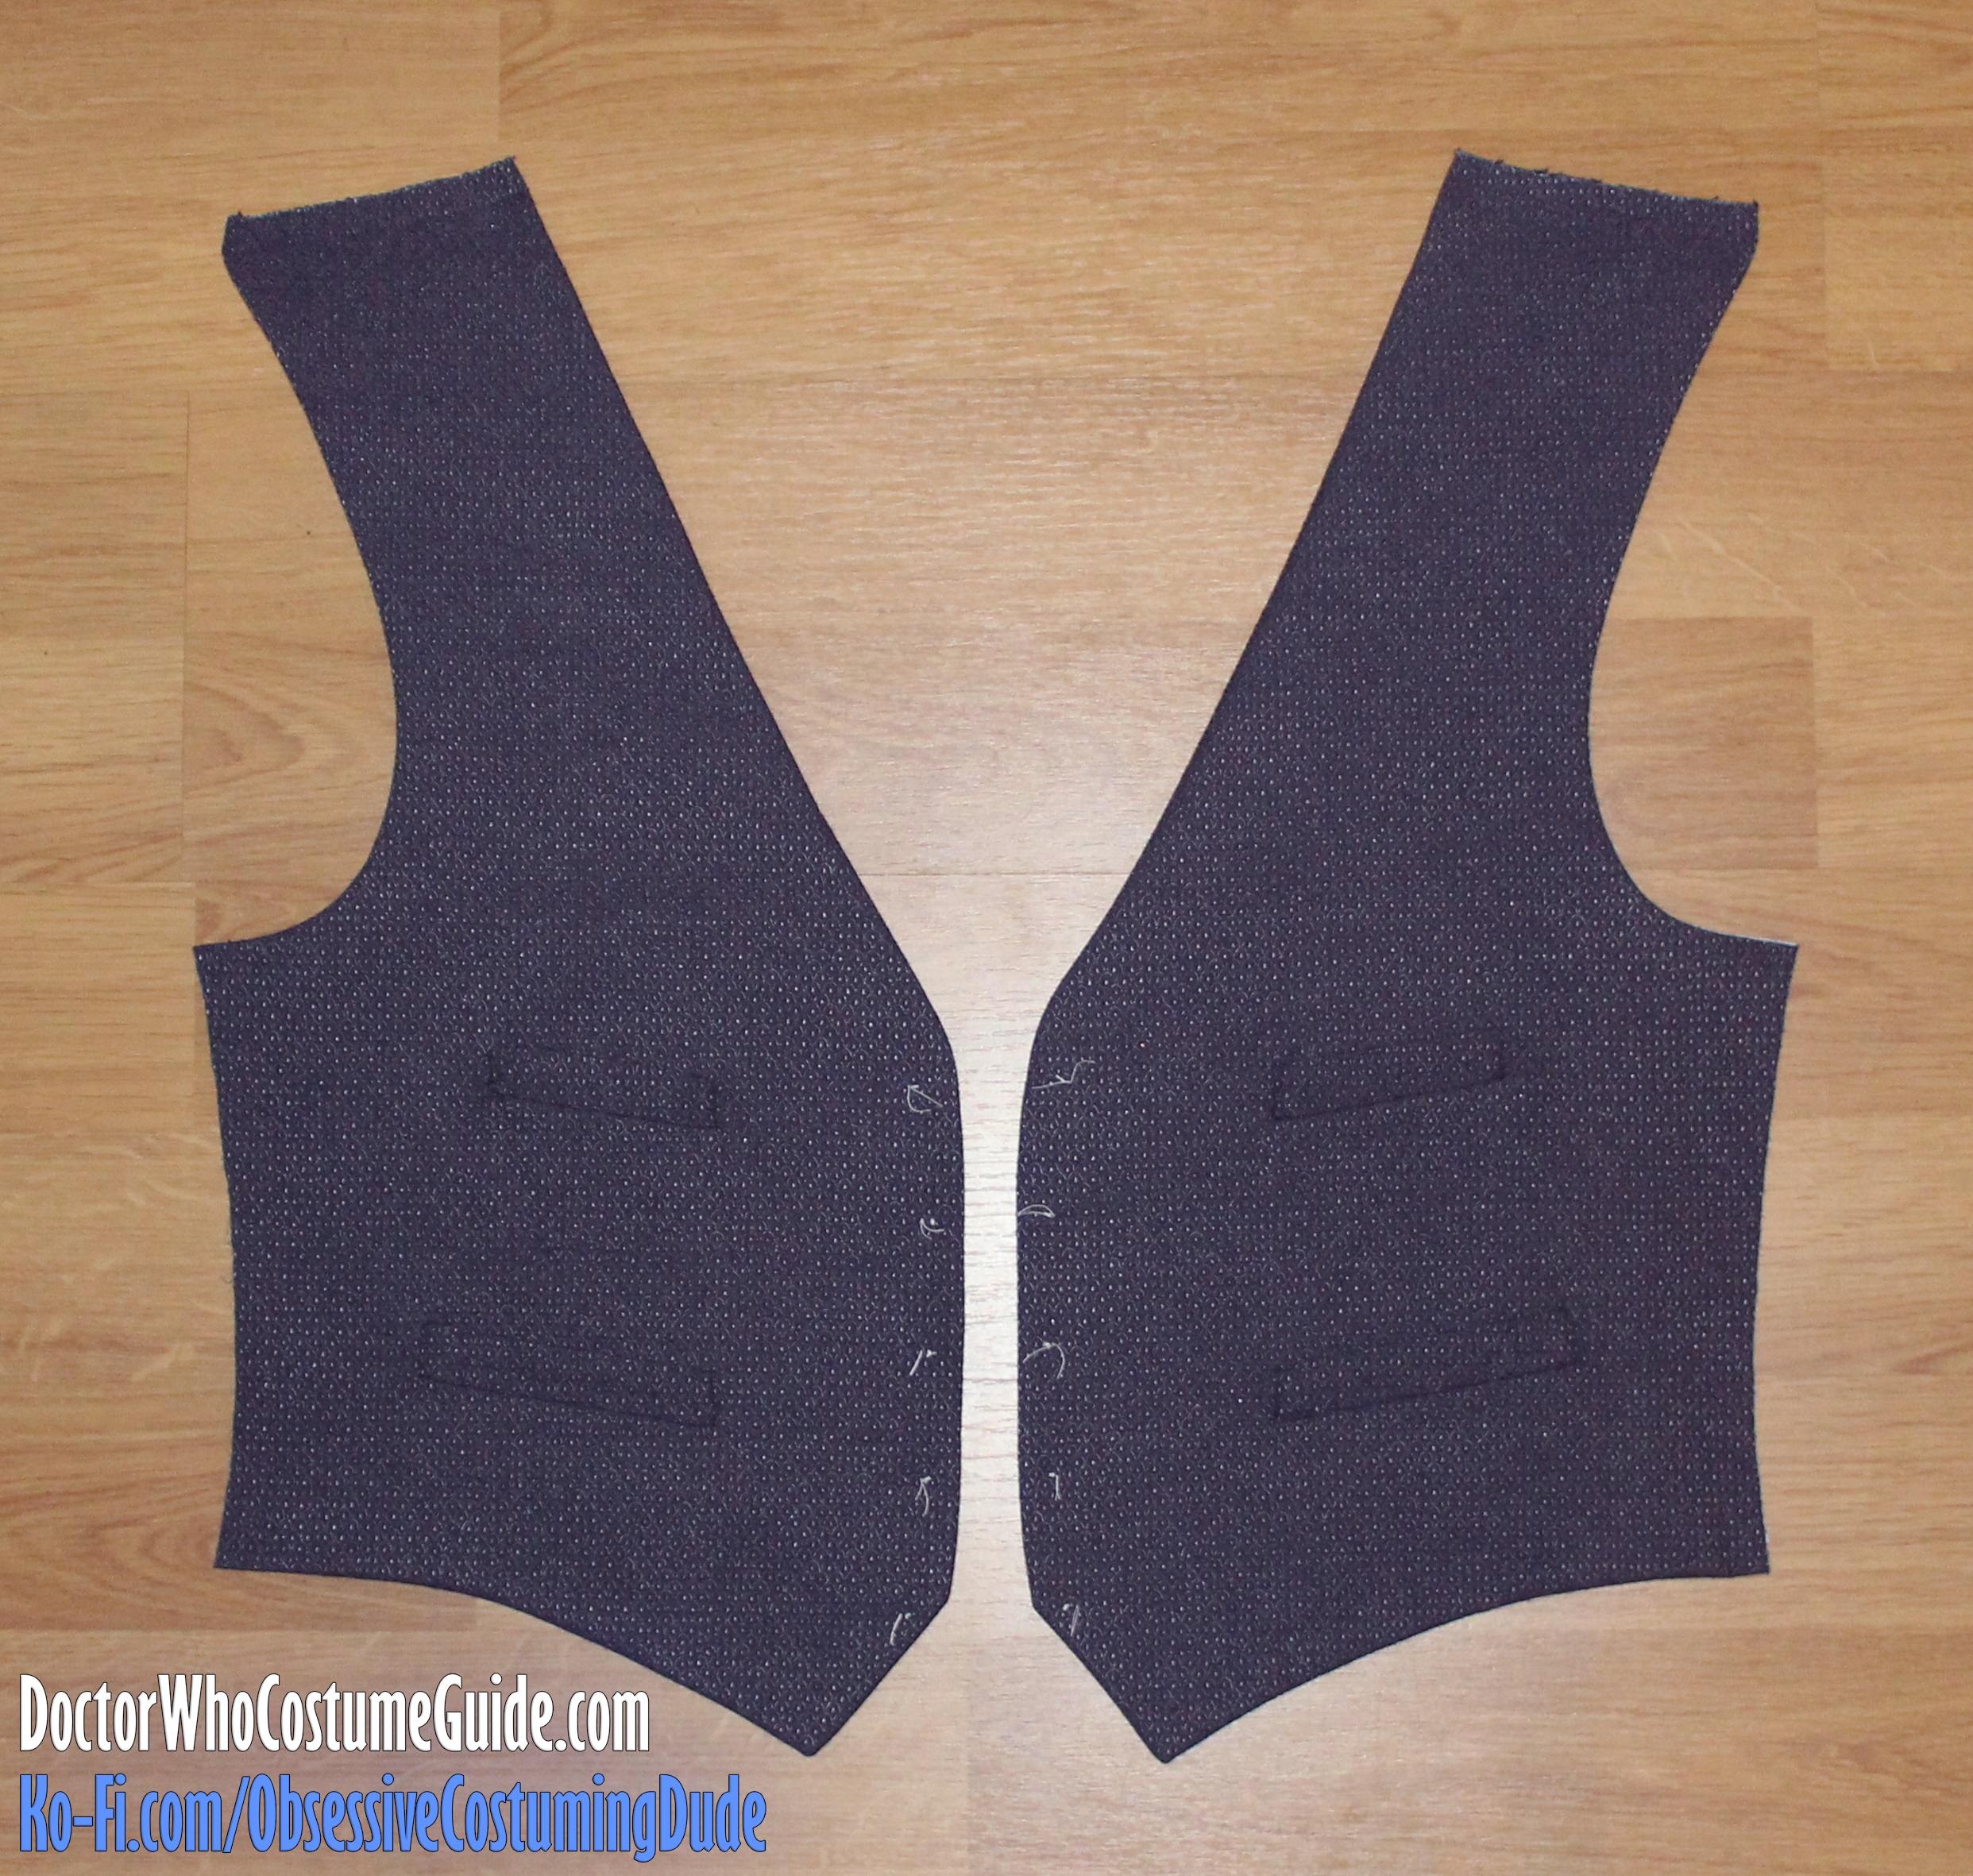
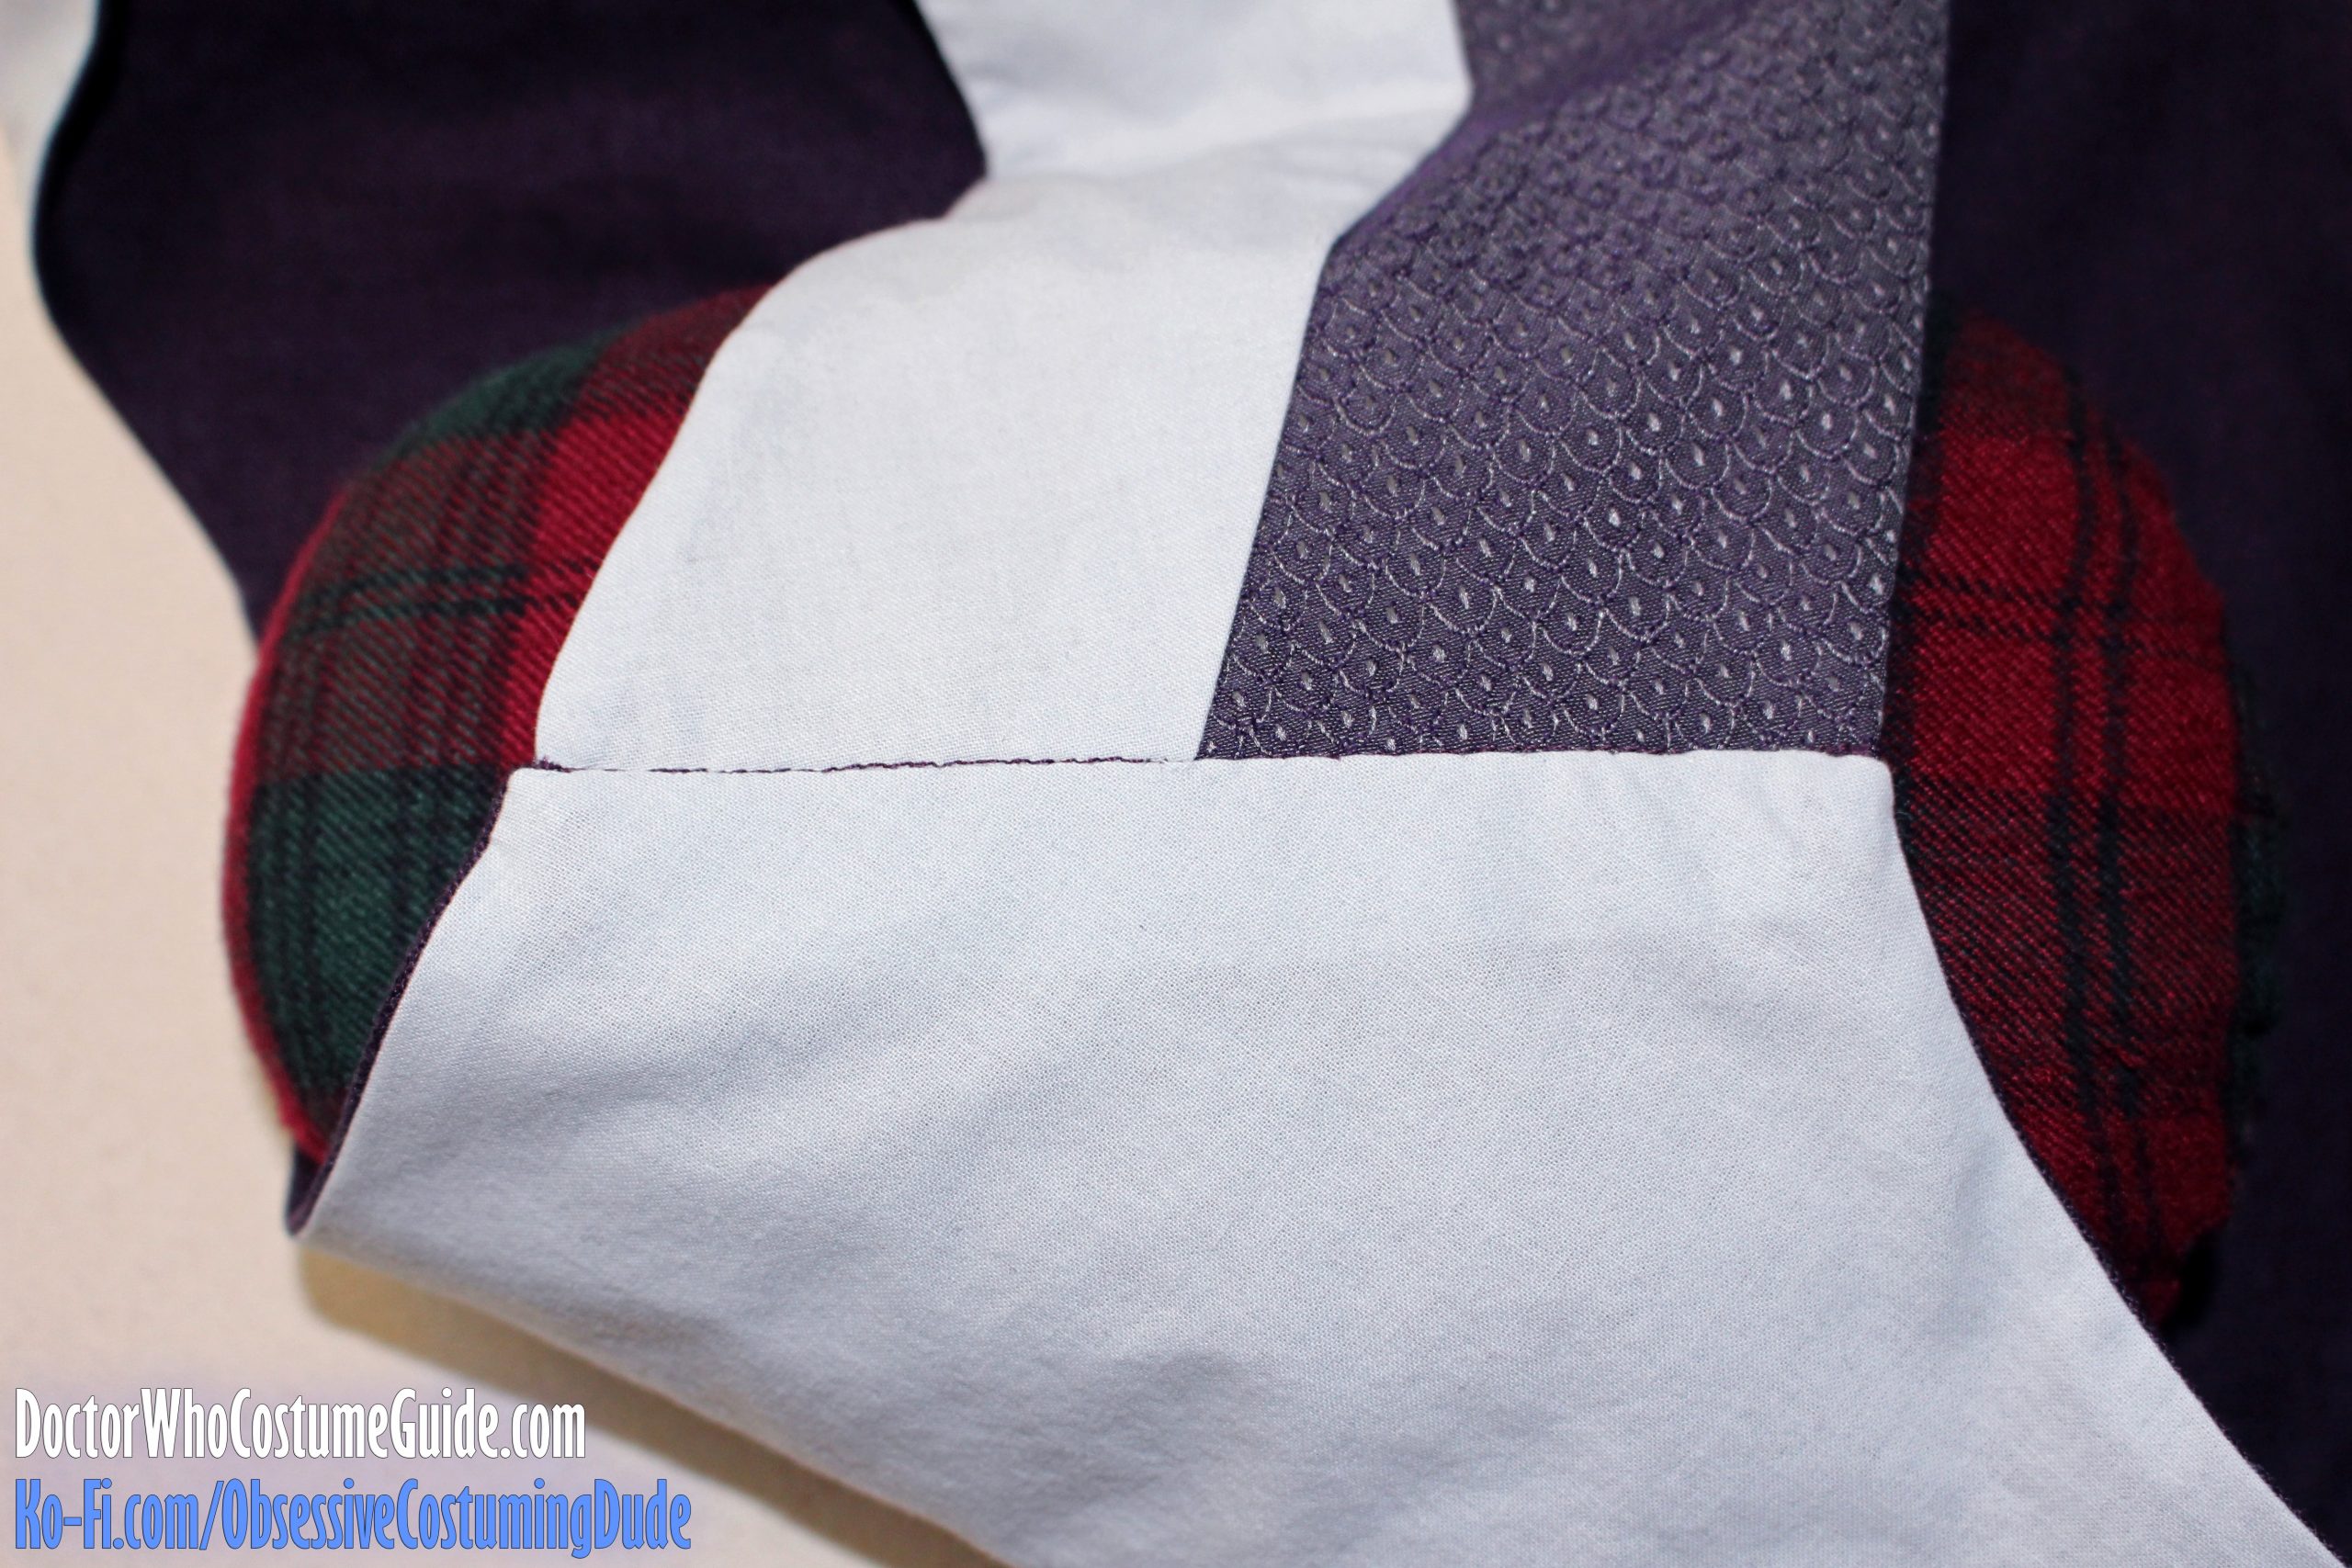
On the front of the waistcoat, the finished pocket should look like this:
Repeat for the other pocket.
Properly aligning the “scales” on the pocket welts with those on the waistcoat front can be tedious and time-consuming, but the end result is sssoooo satisfying to successfully accomplish!
Cut a length of pre-shrunk cotton twill stay tape longer than the waistcoat front and lower edges and pin it into place, so its outer edge is just inside the previous stitch lines, following the curves and pivoting at the corners.
Pull the tape just a little tight along the upper front opening; this will stabilize the area and prevent it from stretching out of place over time where the fabric is cut on the diagonal.
Fell-stitch the stay tape to the hair canvas, taking care to only stitch through the interfacing and not the “scales” fabric itself.
Repeat for the other waistcoat front.
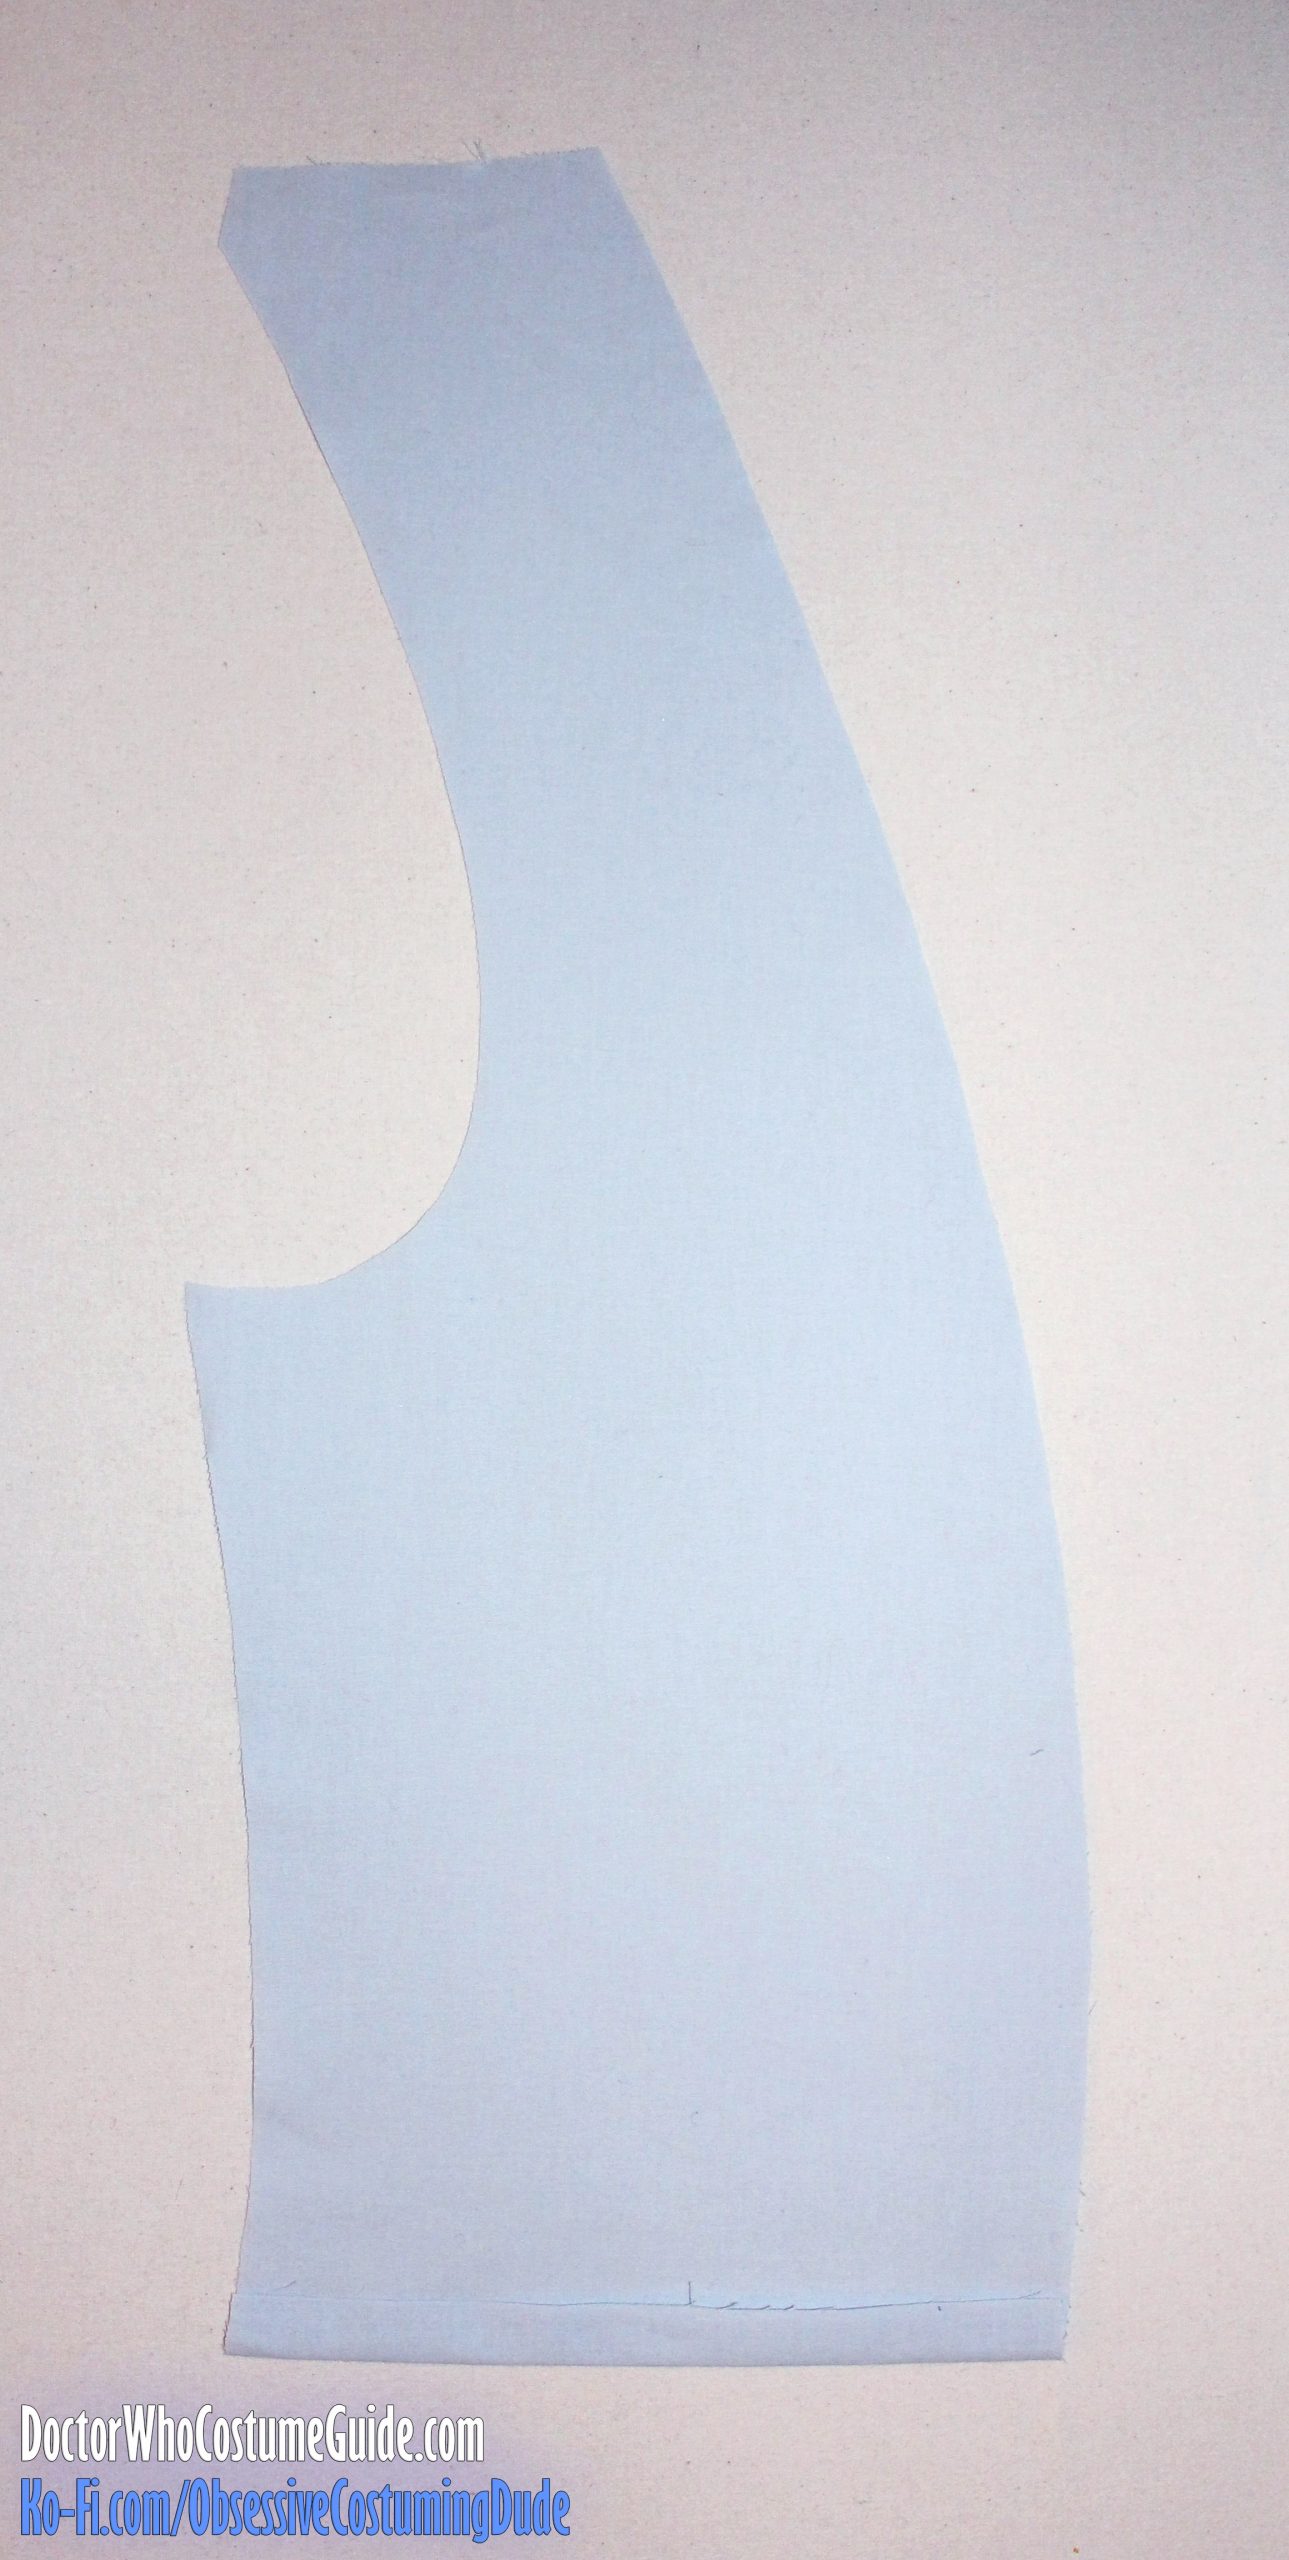
Press the ⅝” hem allowance upward on the front lining (piece D).
On the printed pattern, there is a small dot on the front facing (piece C), front lining (piece D), and front hem facing (piece E). These are to help you properly align the pieces in the lower front corner.
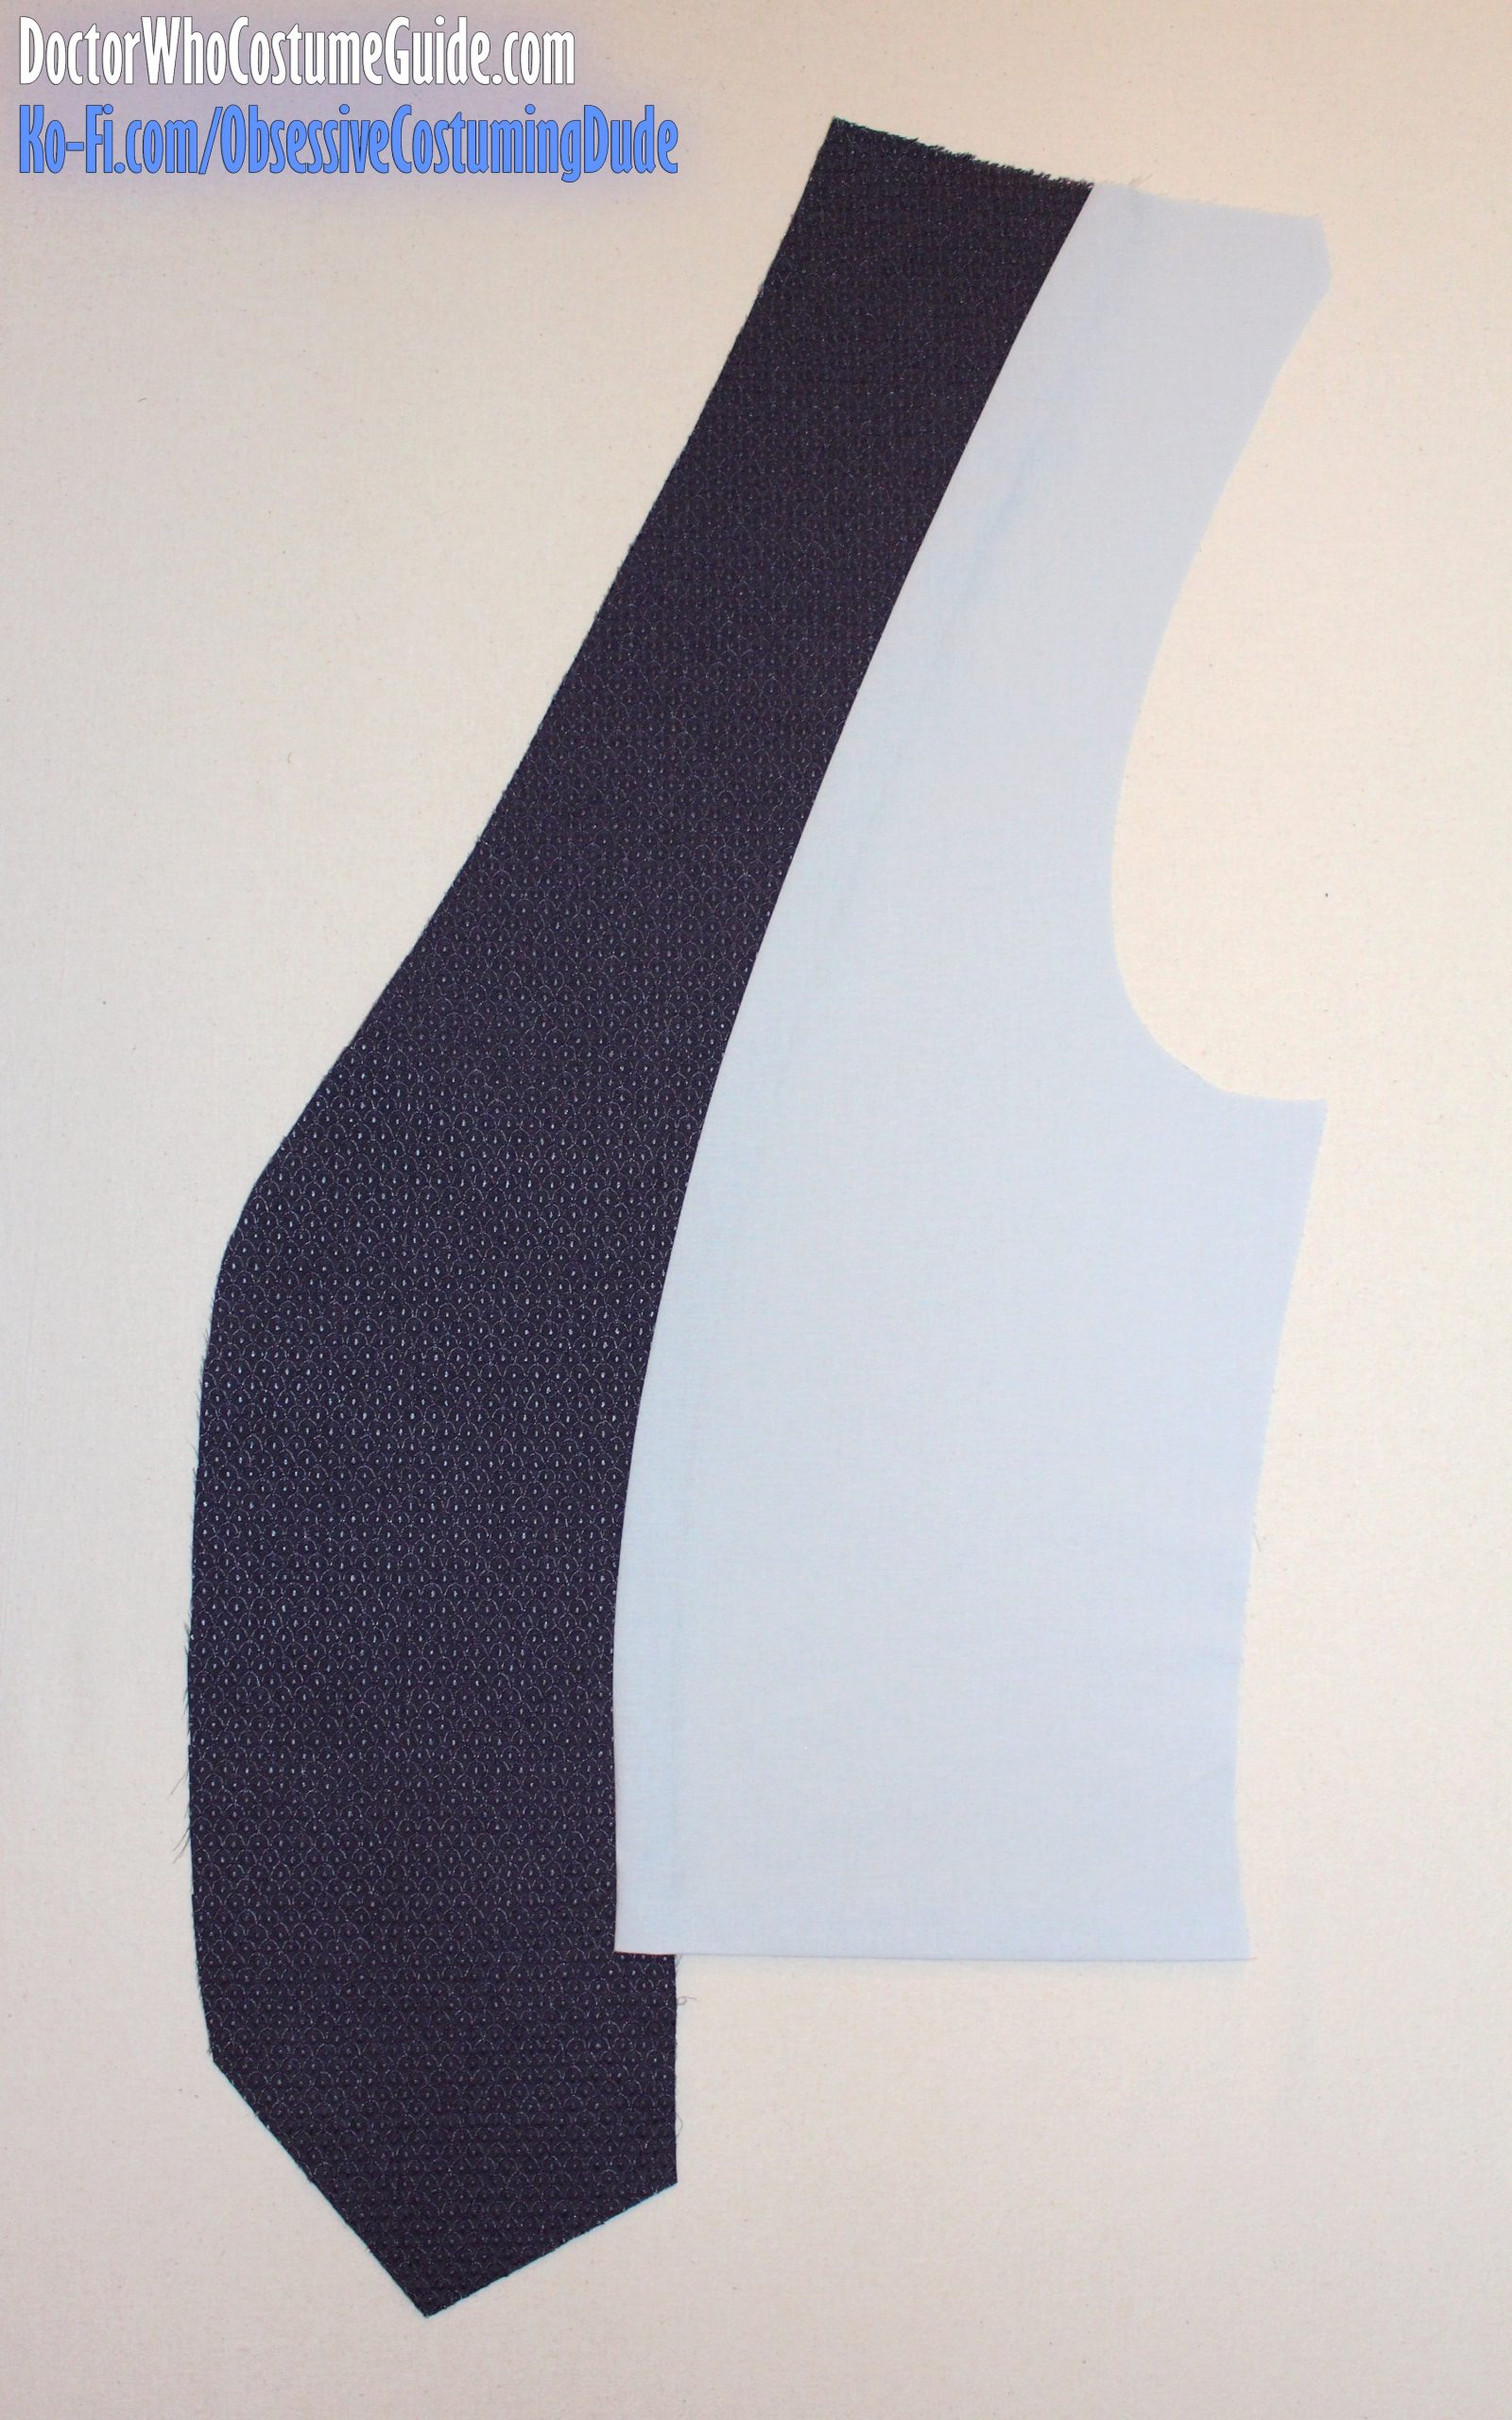
Pin, then sew the front facing (piece C) to the front lining (piece D), positioning the bottom, folded edge of the lining even with the dot on the front facing.
Press the seam allowances away from center, toward the lining.
At this point, you may add interior waistcoat pocket(s) if you wish, using the method of your choice.
If you do so, I recommend trimming away the front facing/lining seam allowances and reinforcing the area with a white piece of fusible interfacing (“pinked” around the edges, of course), before installing the pocket.
Trim away ½” off the top of one piece of pocketing (piece L) to use for the lower pocket pouch.
Fold the lining back toward the front facing and position the hem facing (piece E) over the front facing, right sides together and edges flush. (The top edge of the hem facing should be flush with the upper edge of the lining’s lower hem allowance.)
Pin the hem facing into place.
Sew the hem facing to the front facing/lining, continuing the previous stitch line.
Press the seam allowance back away from center (toward the lining and hem facing).
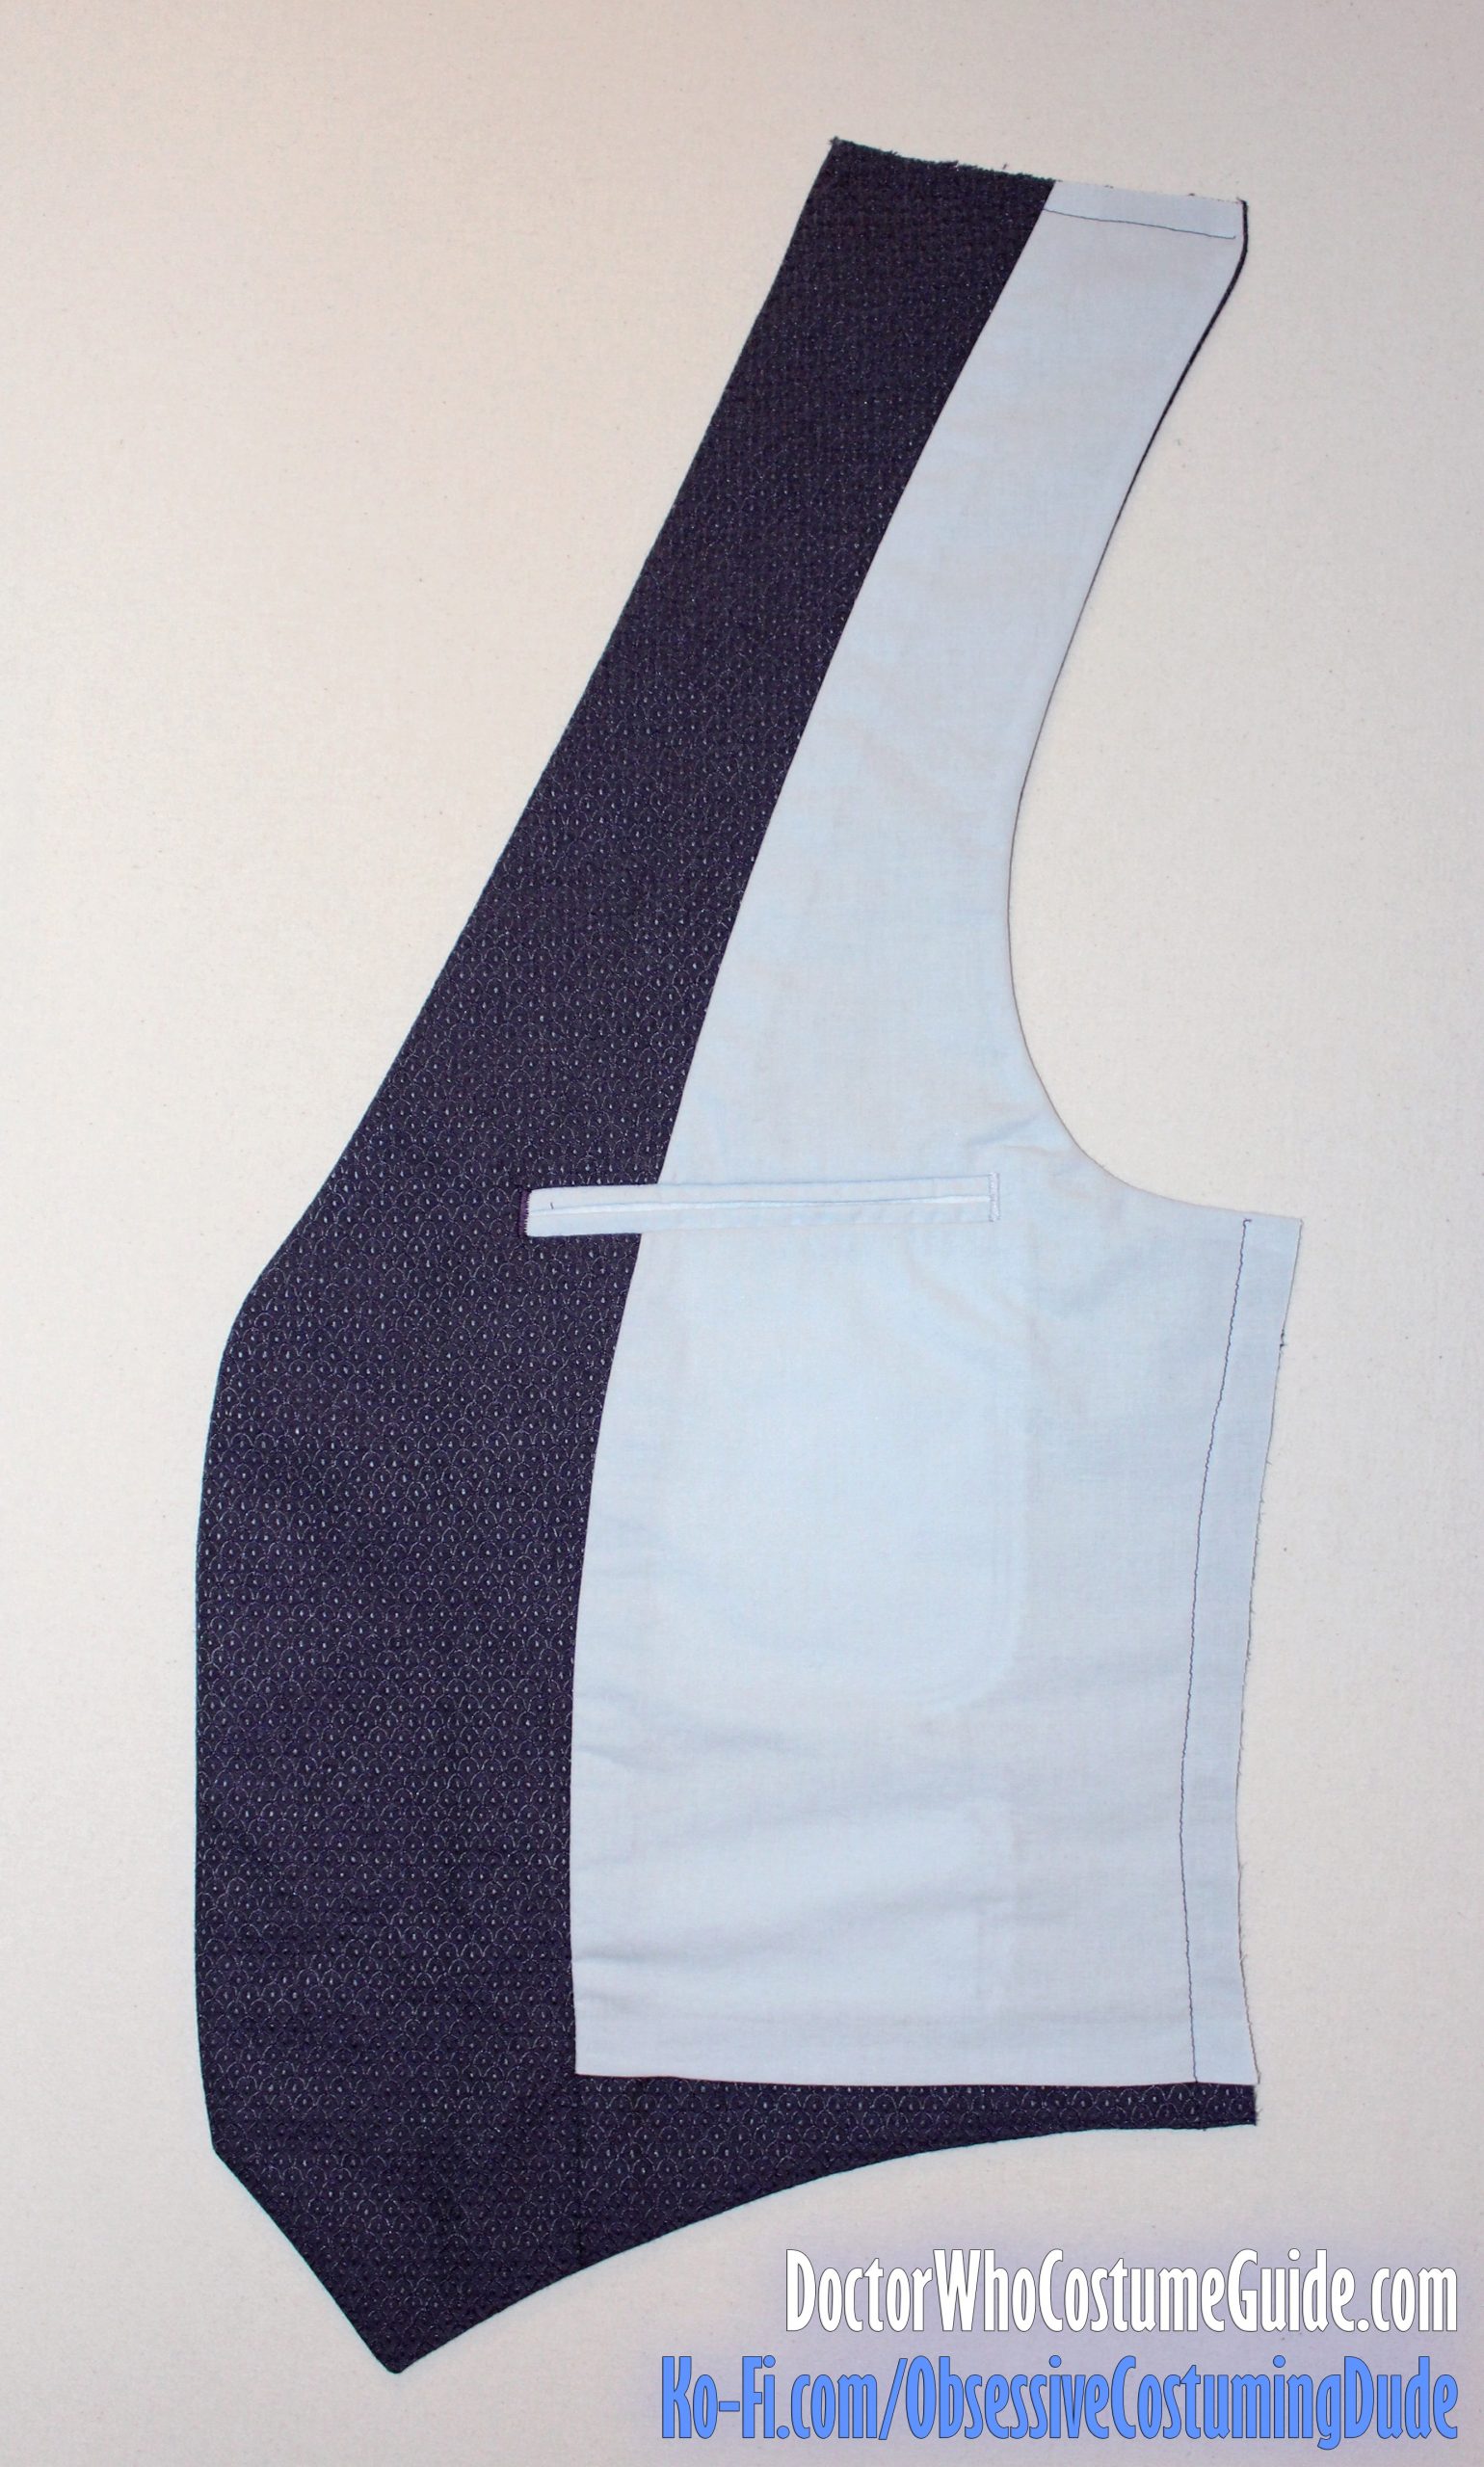
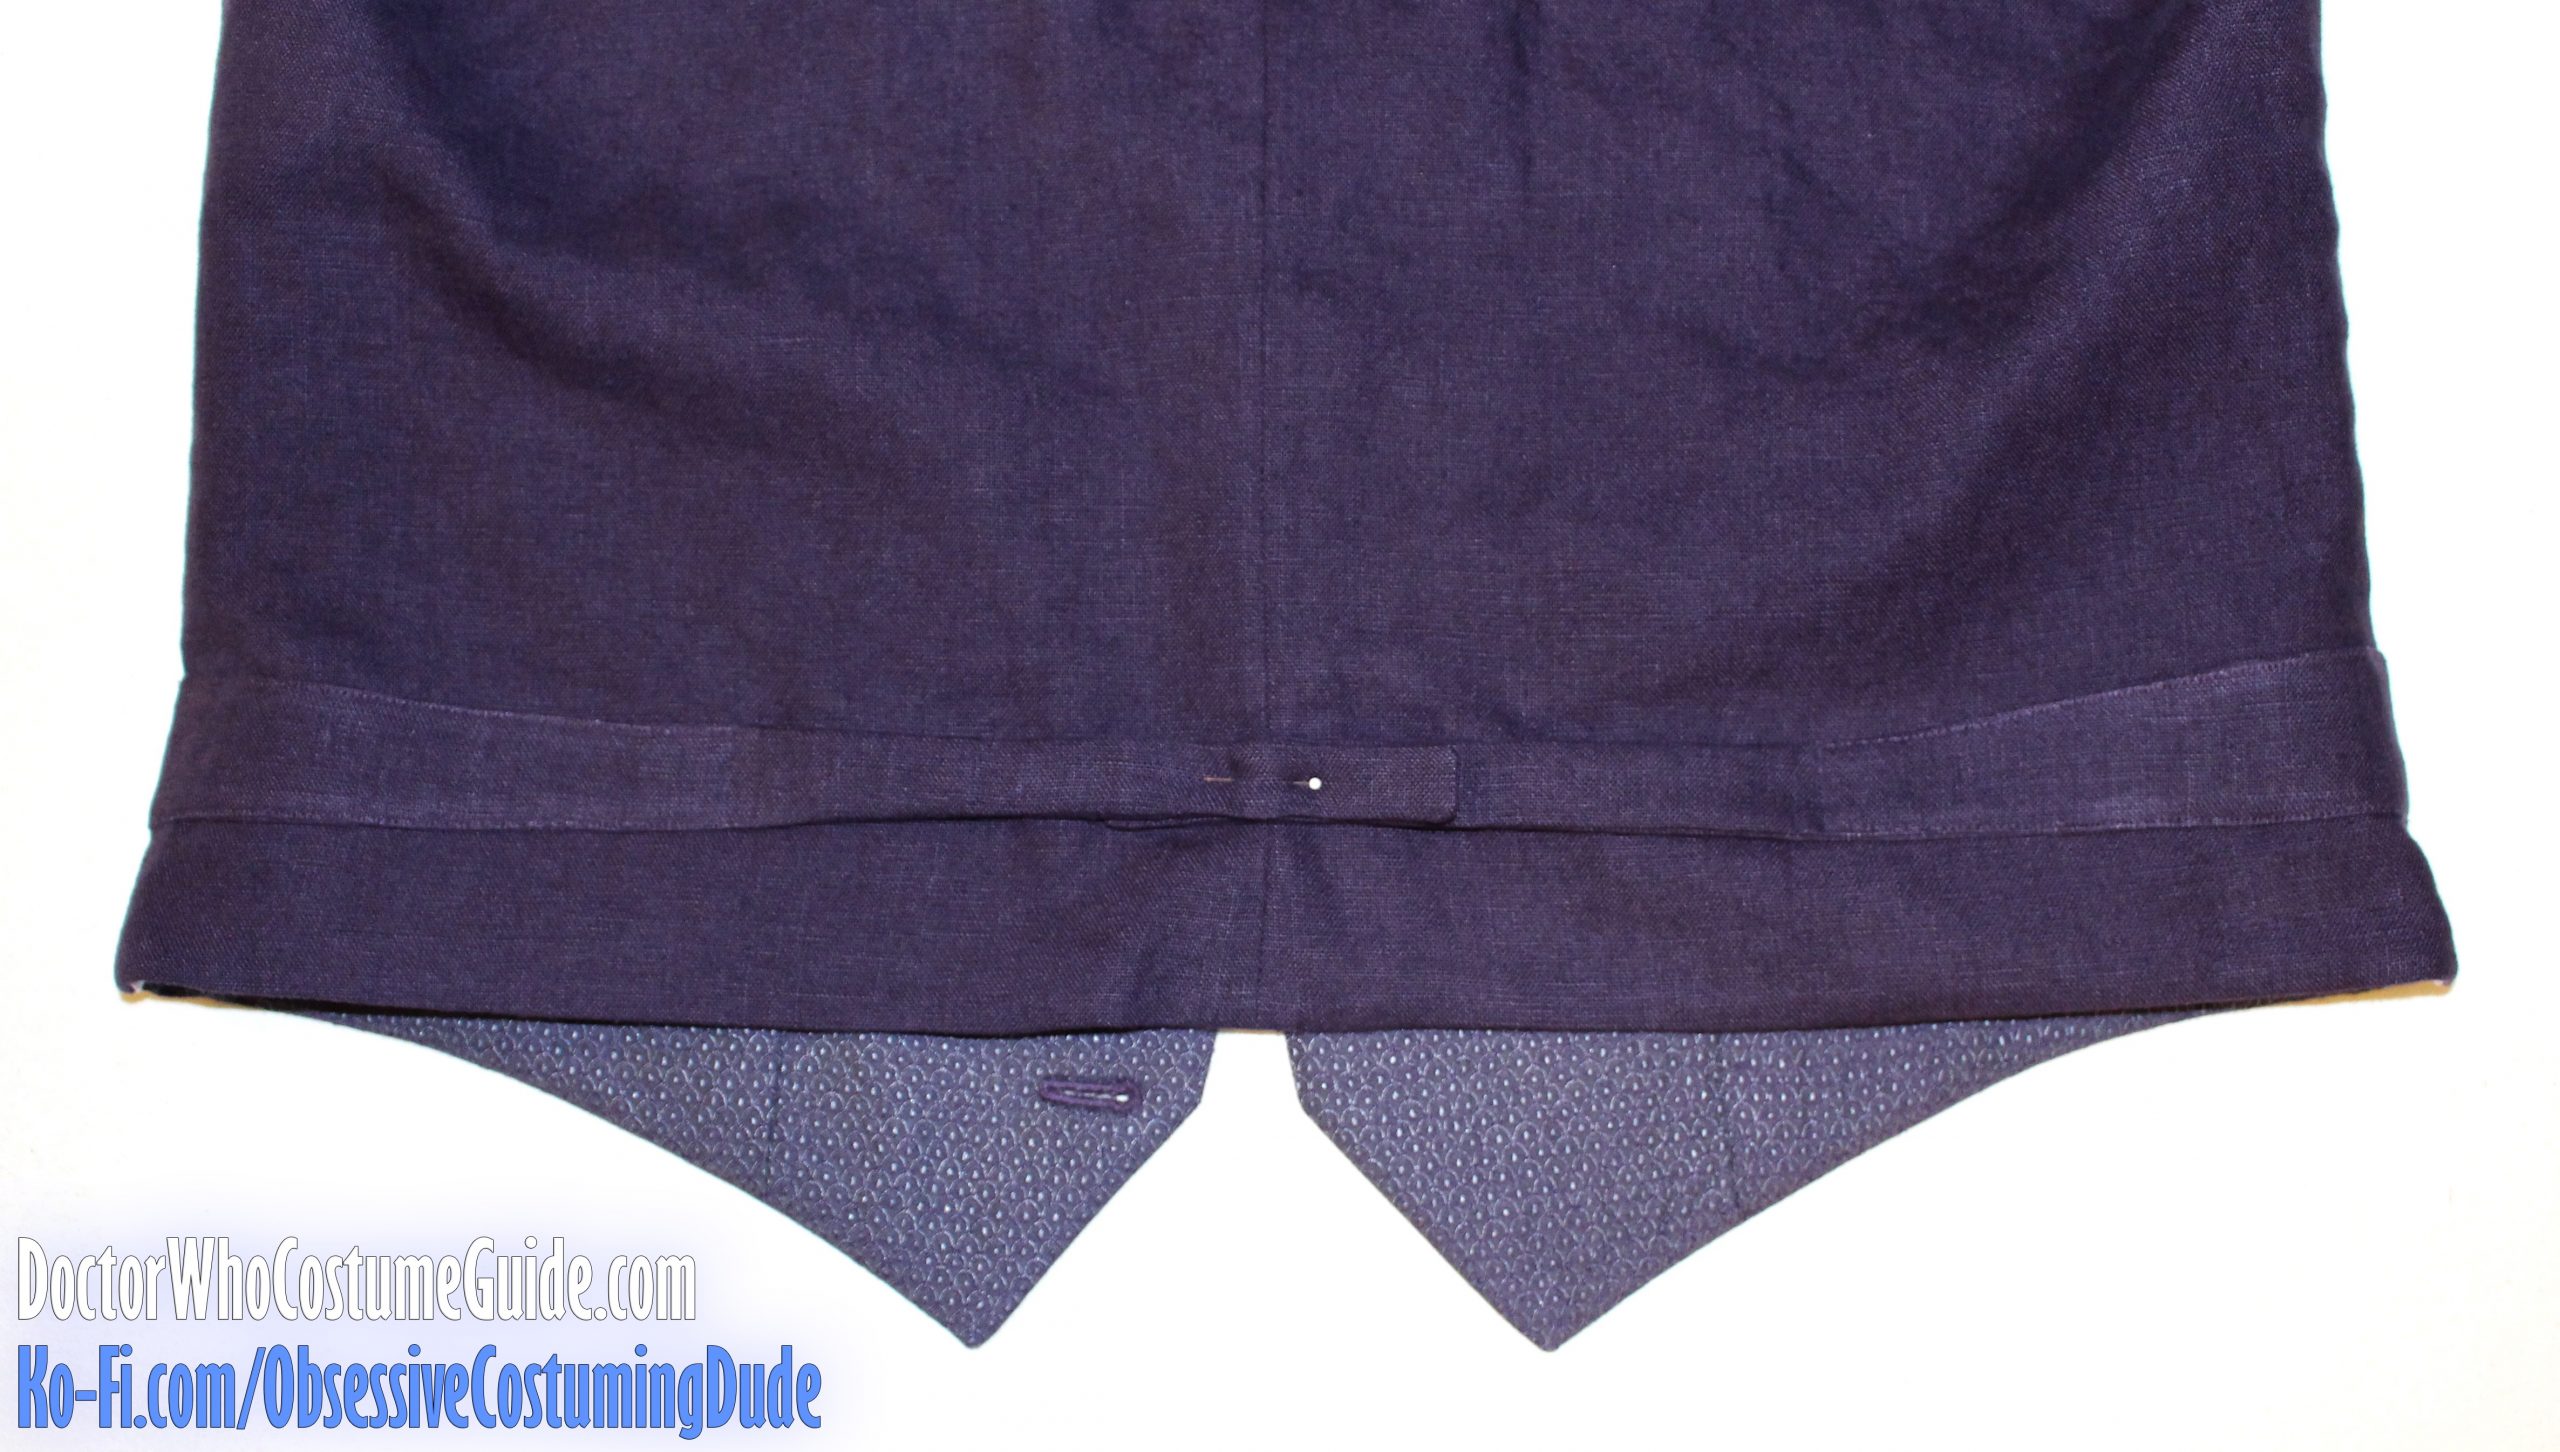
Leave the upper edge of the hem facing and the bottom of the front lining hanging free for now.
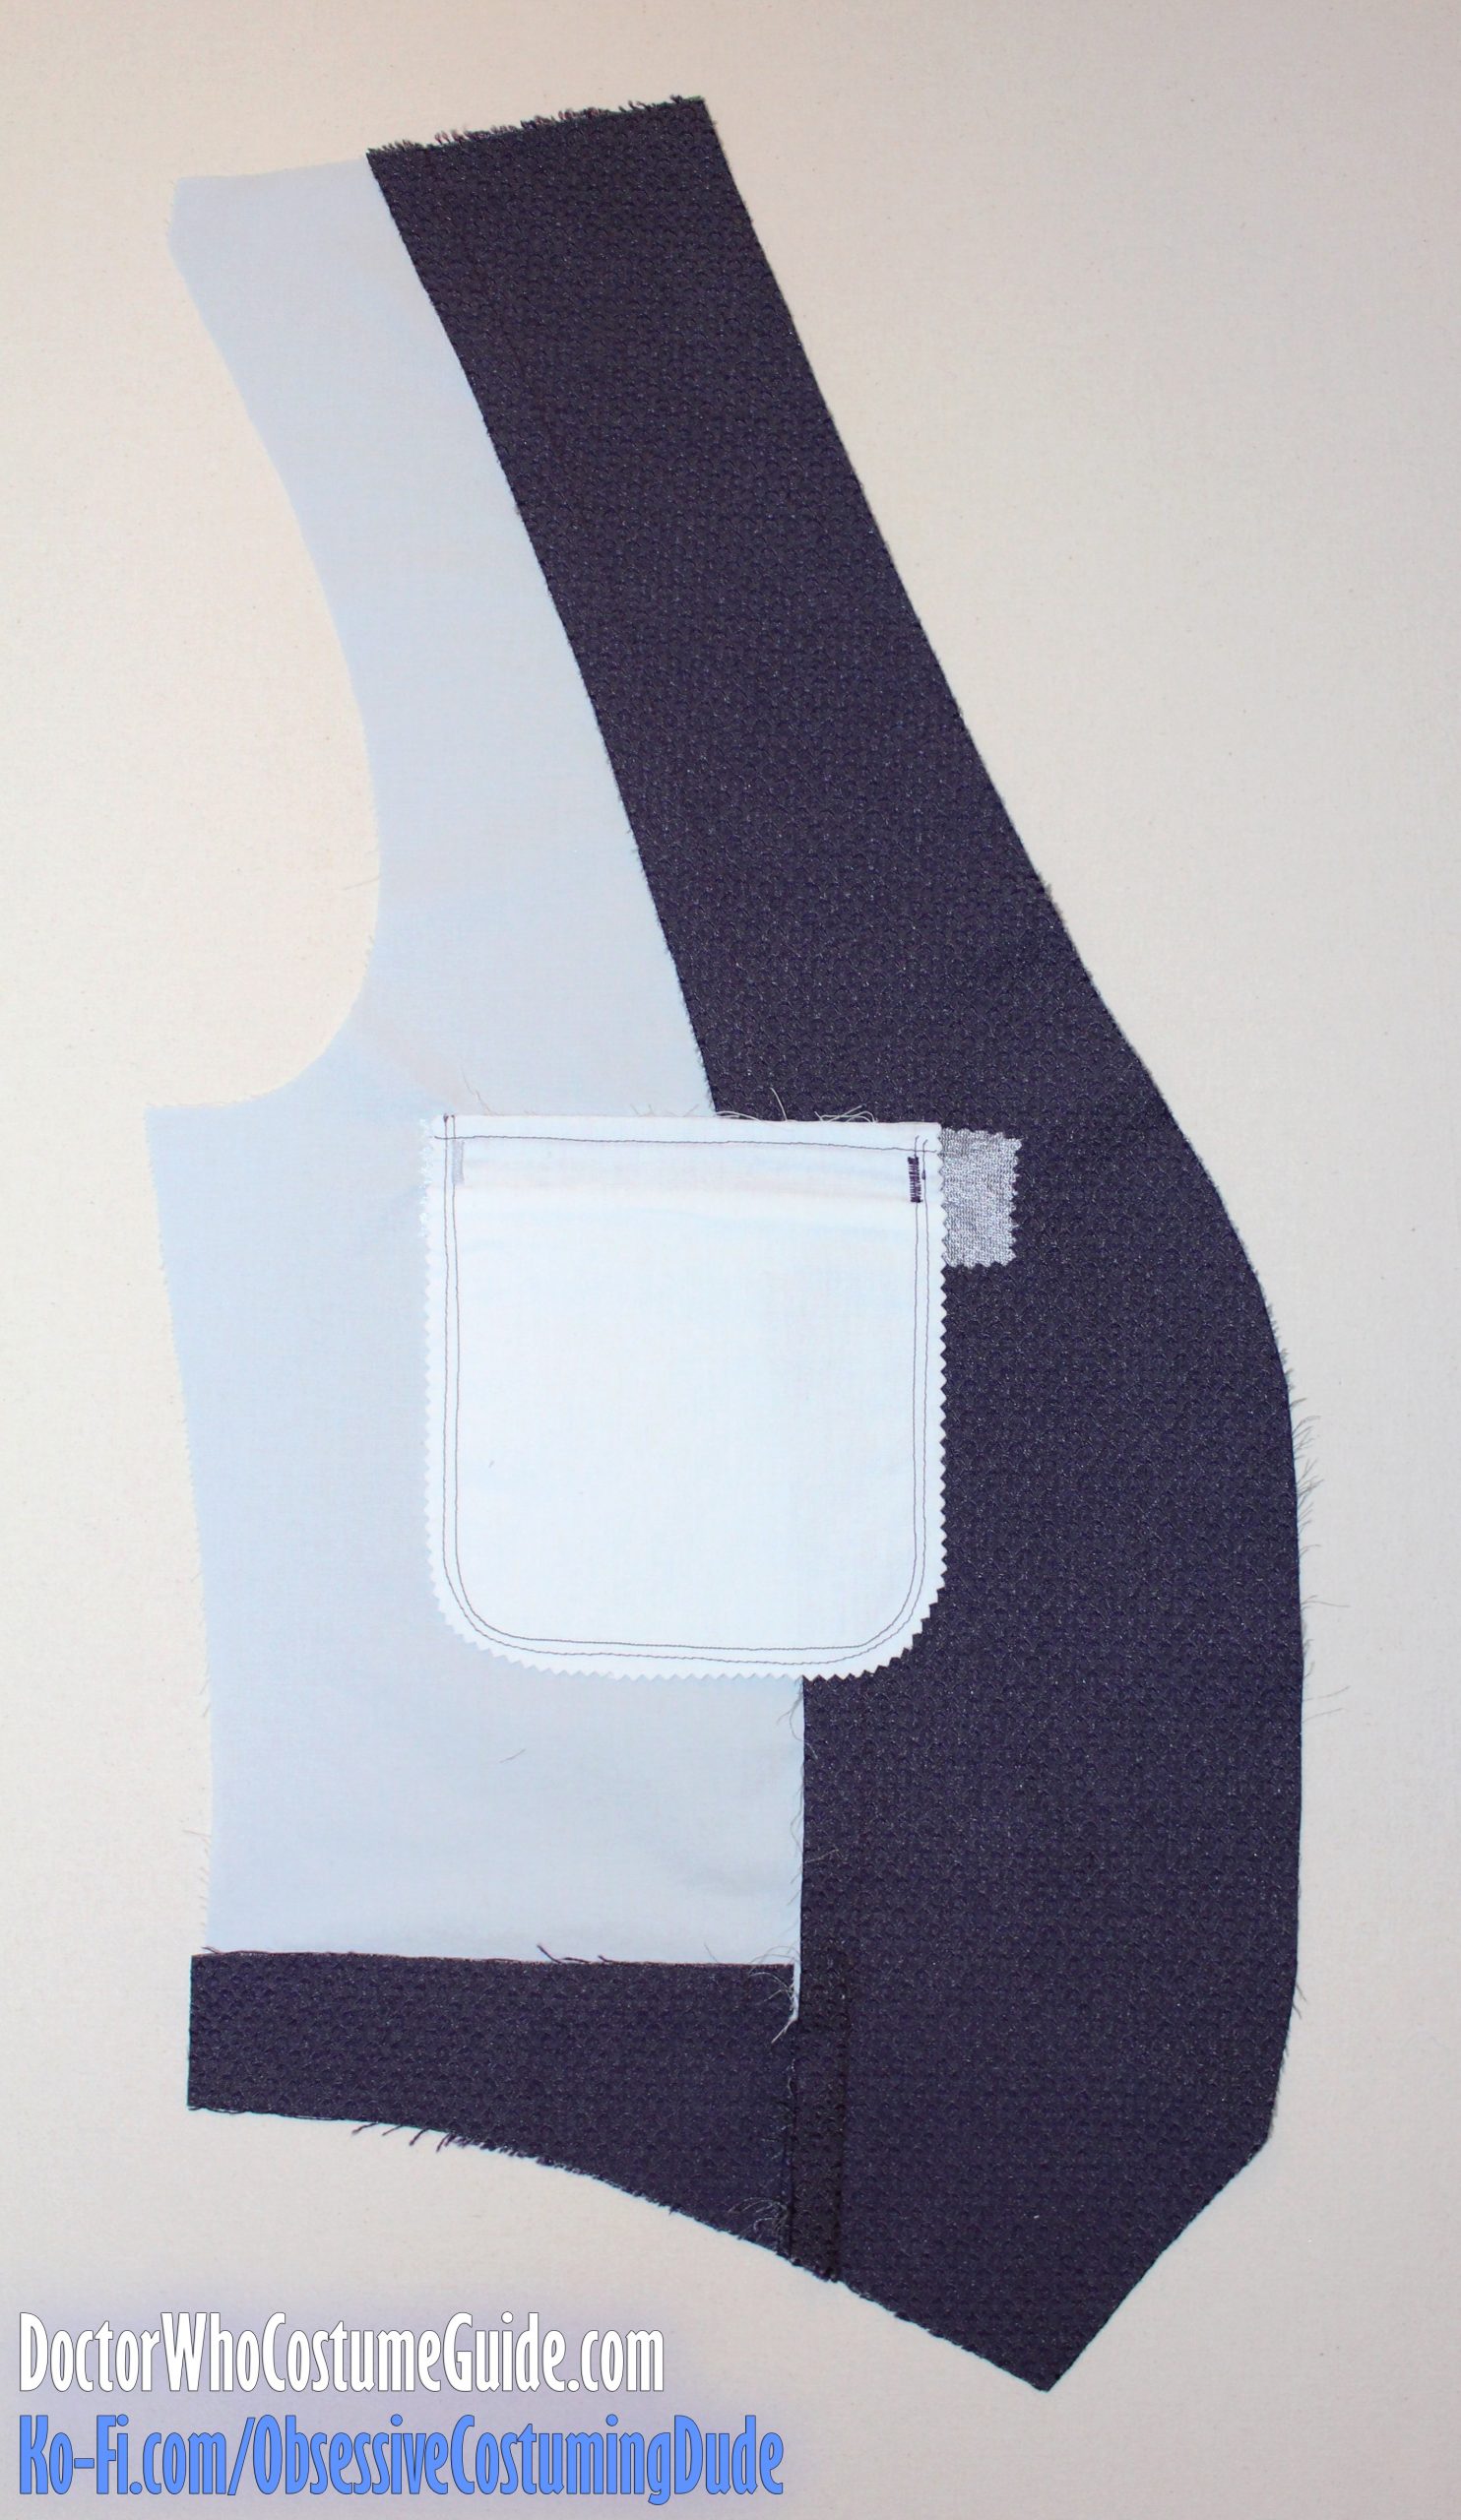
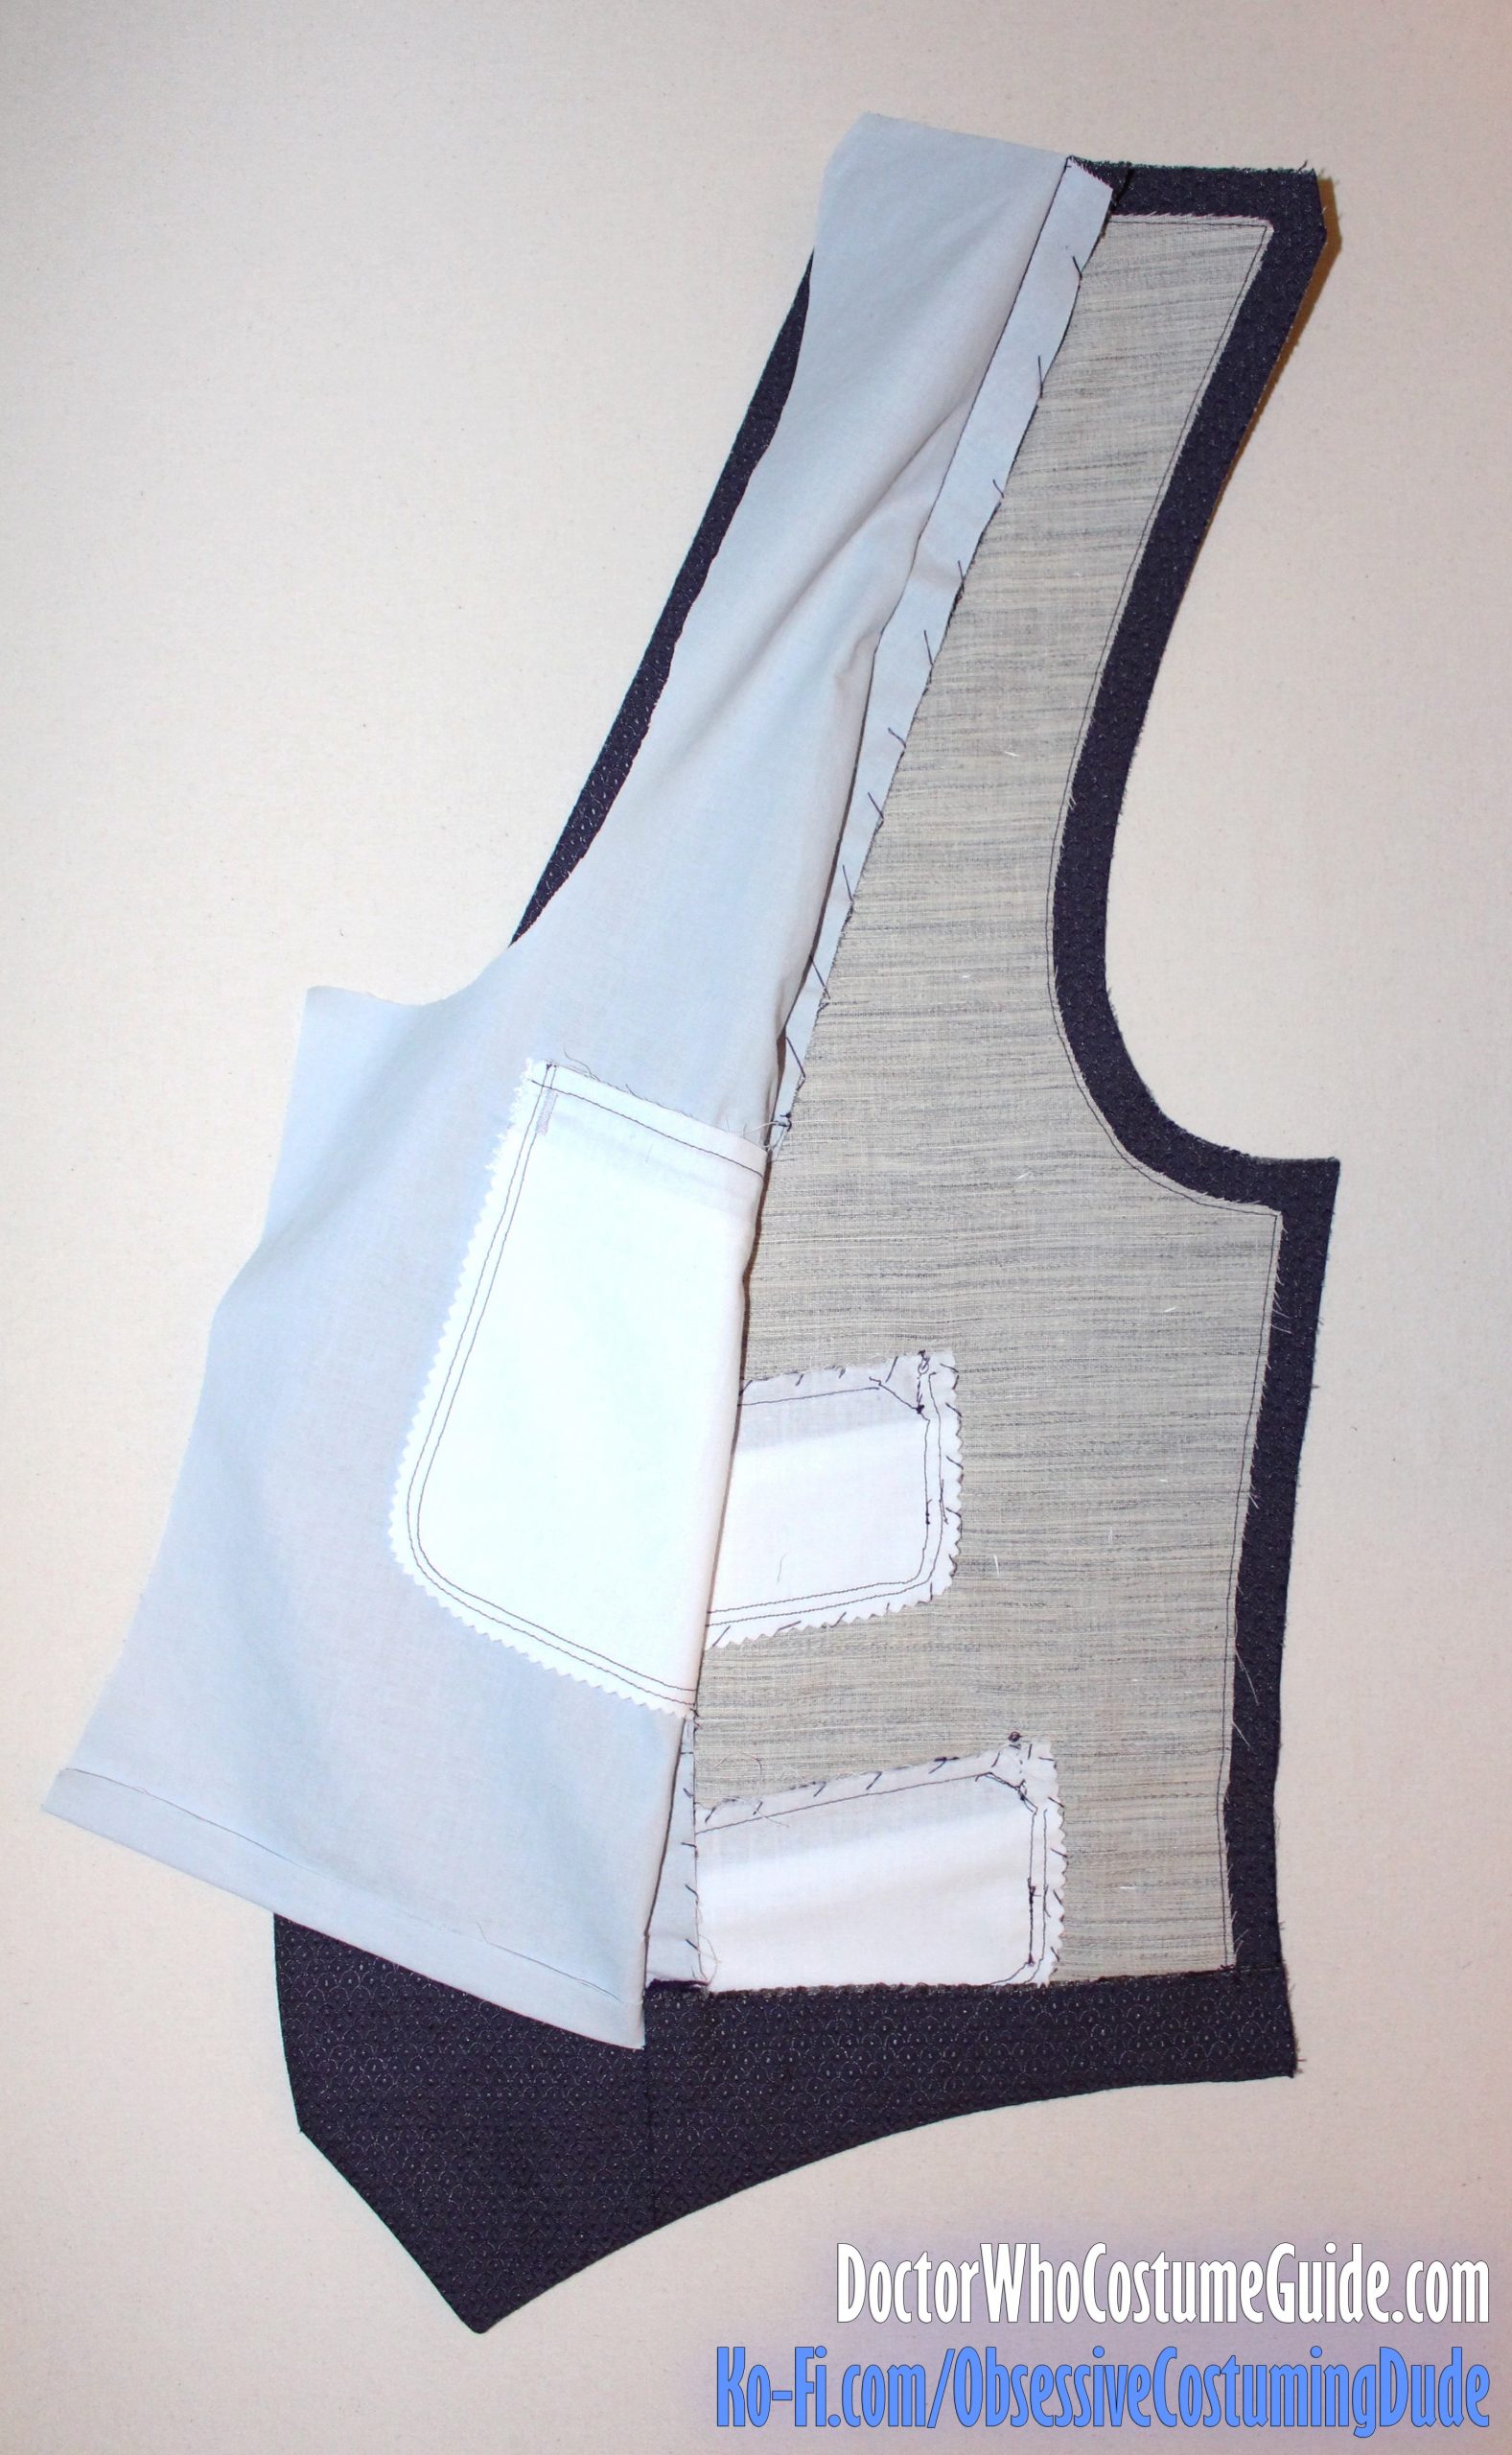
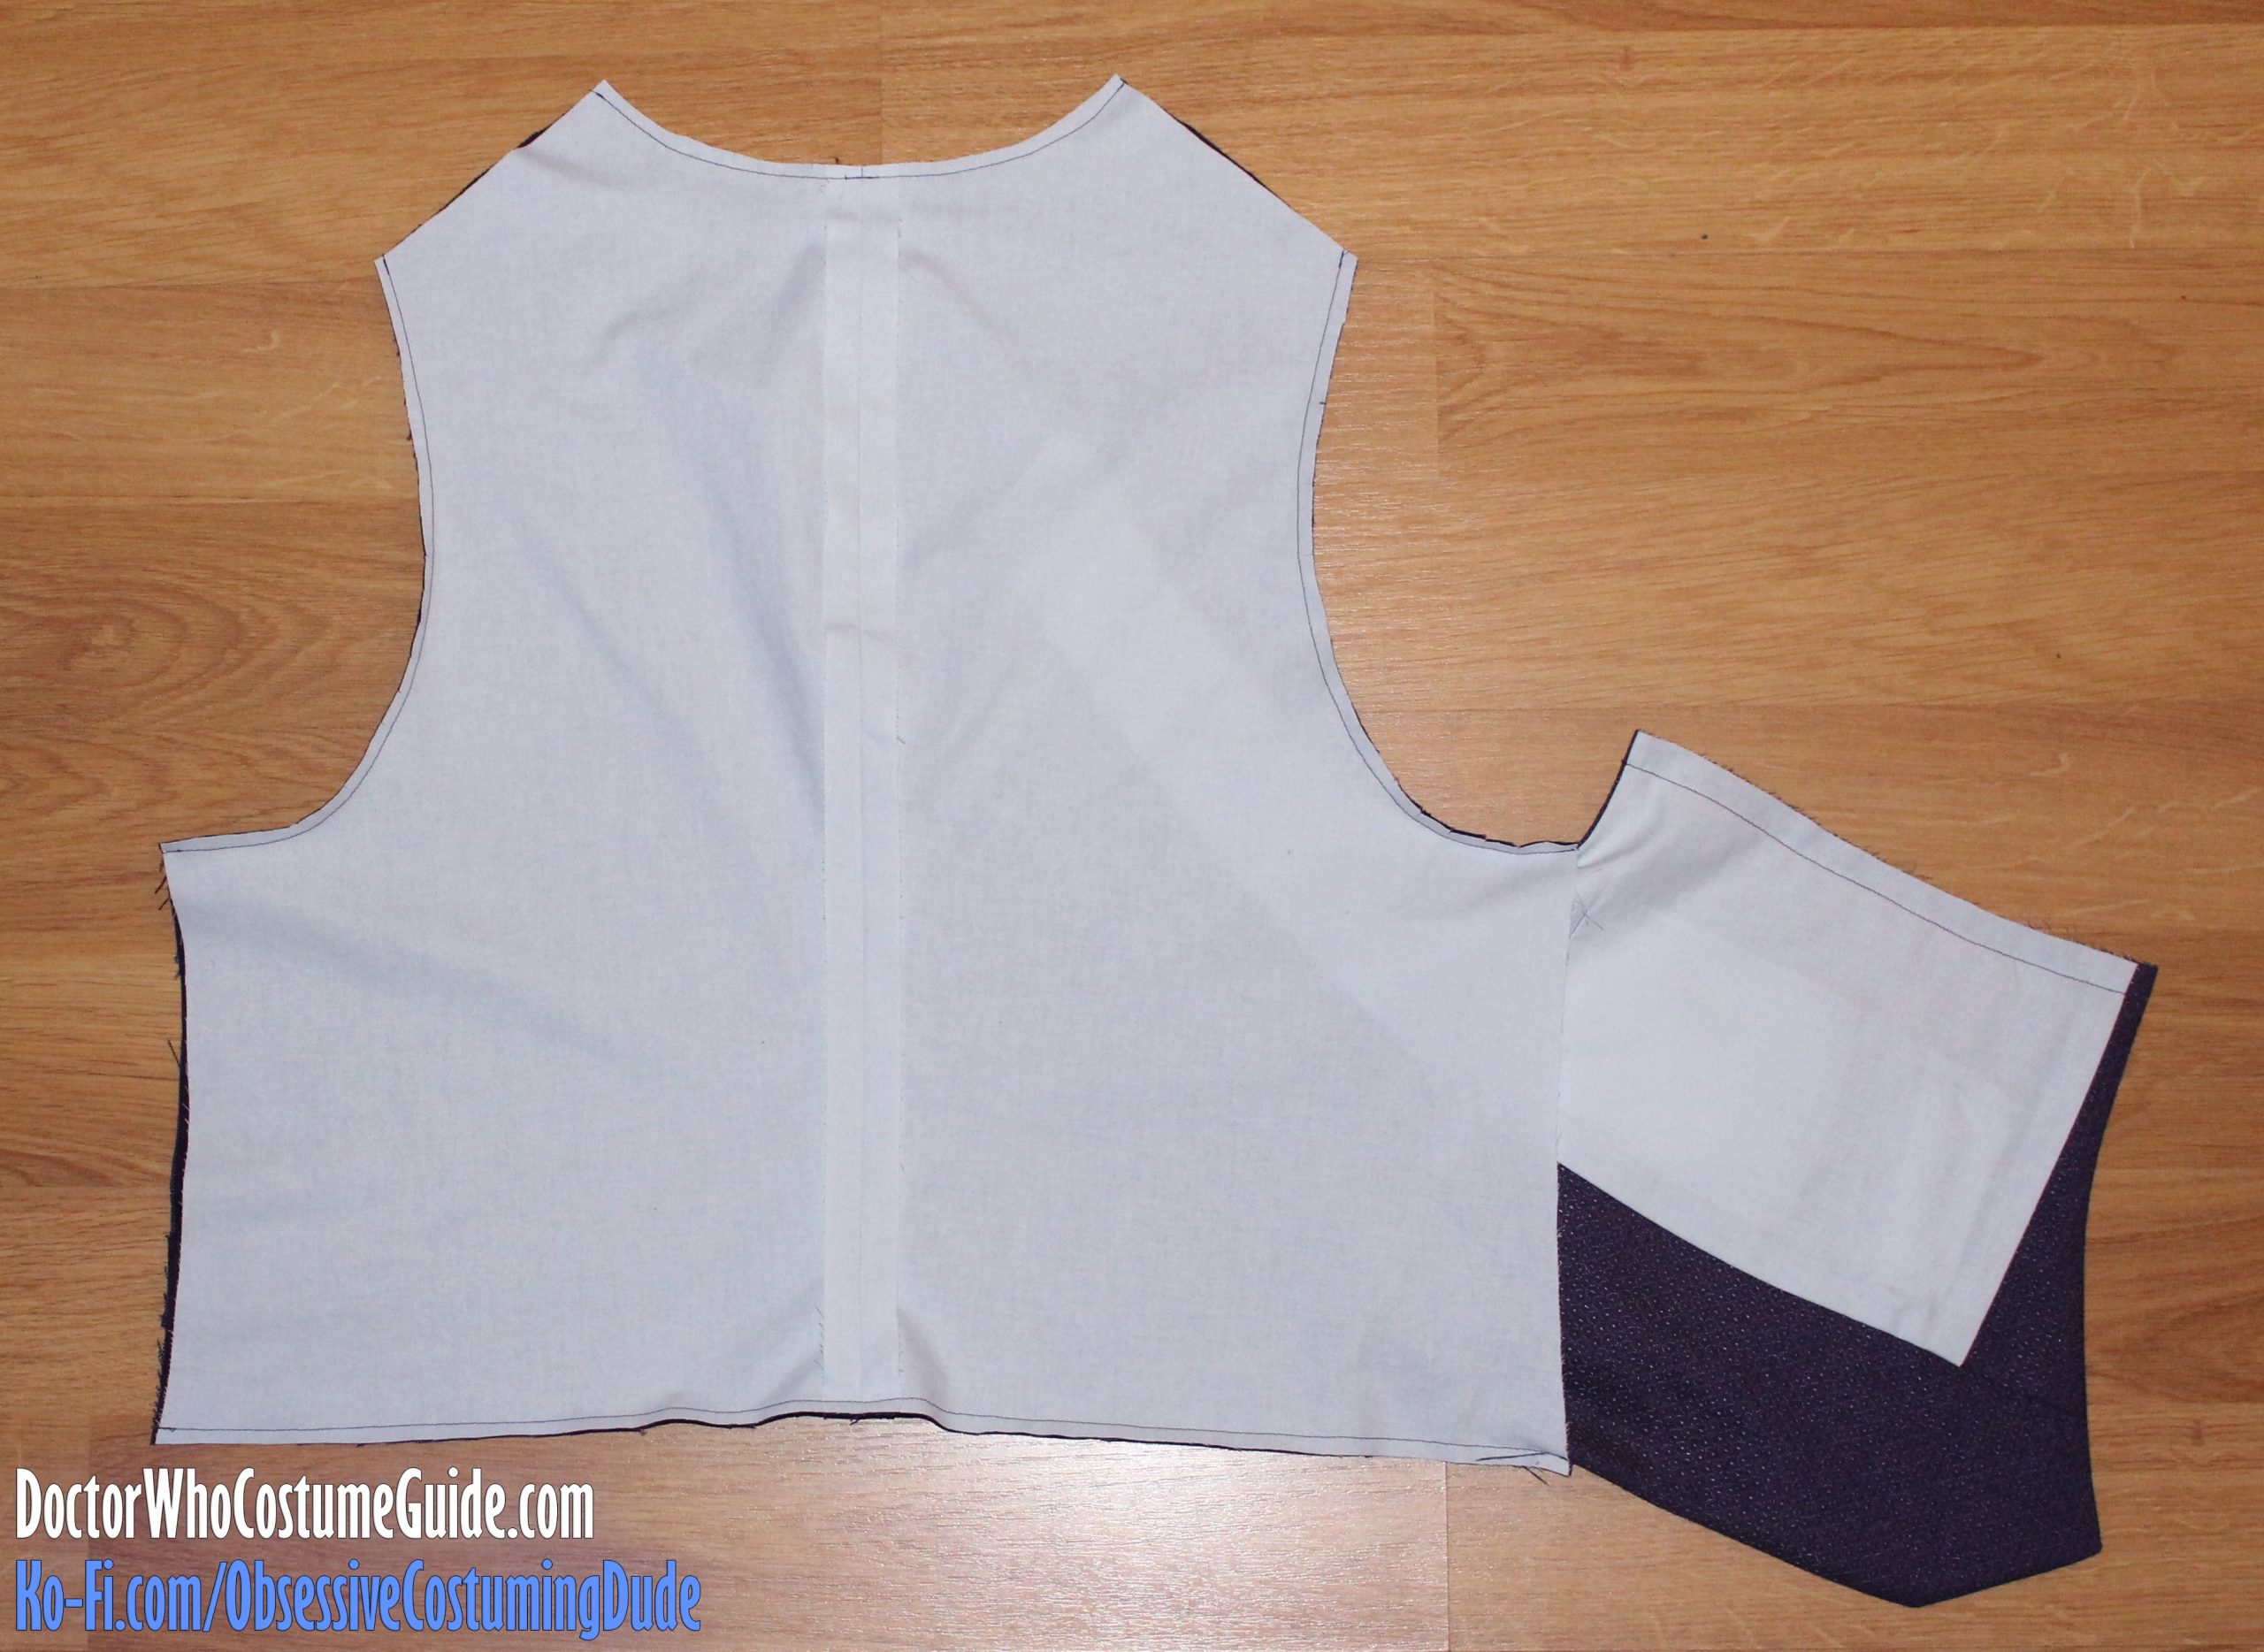
Your front interior assembly should now look like this:
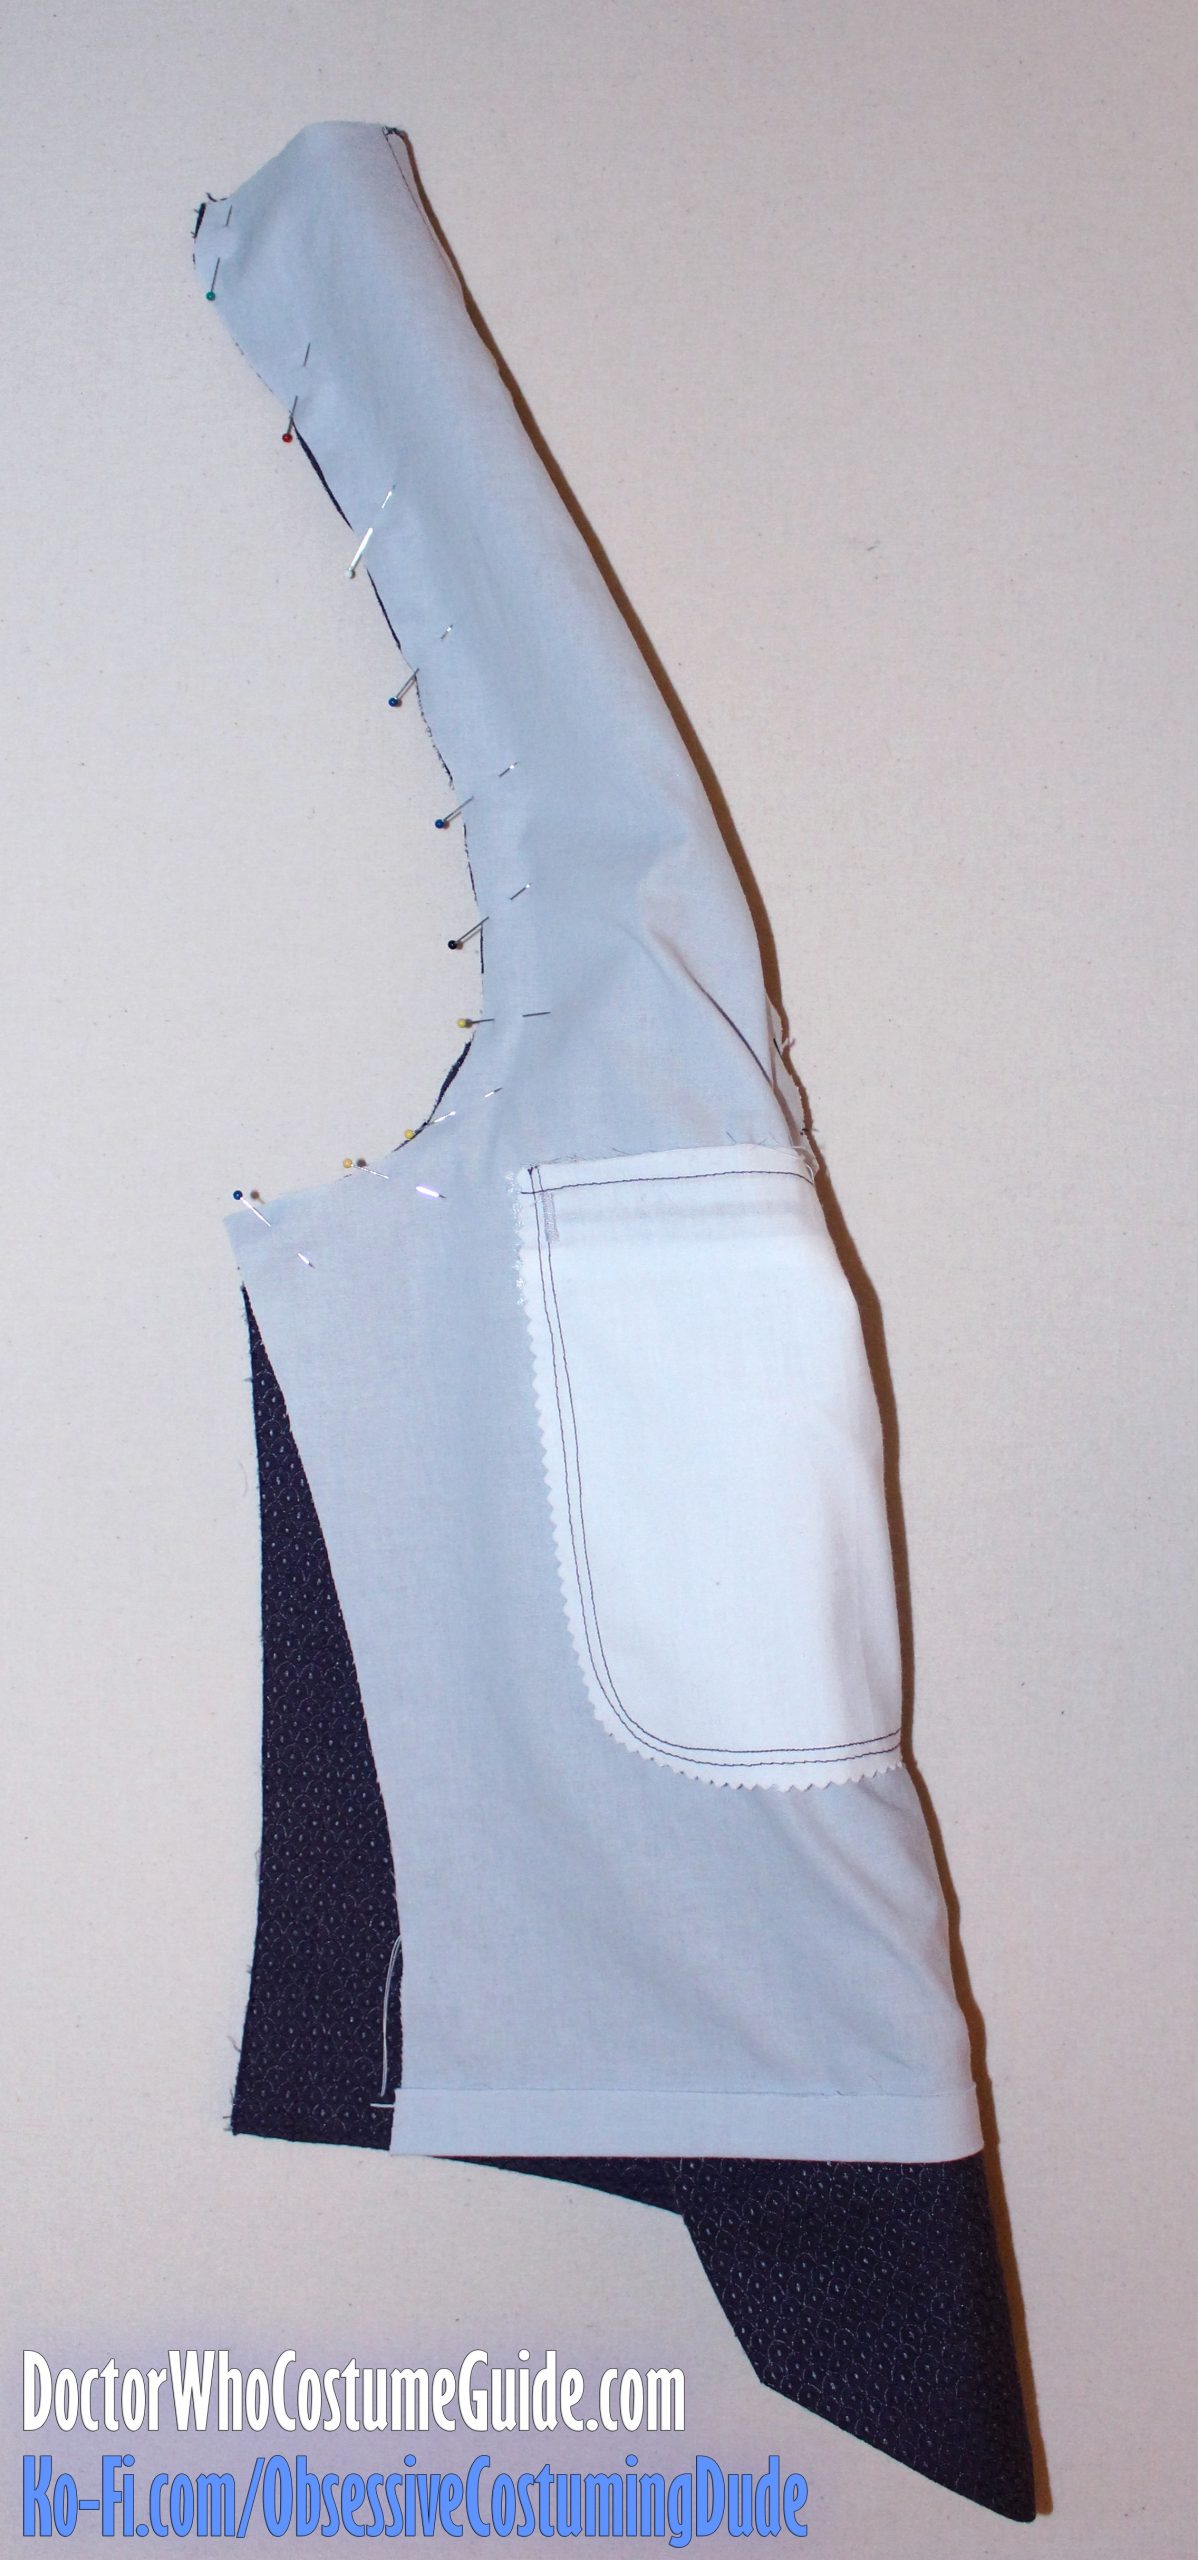
Pin the waistcoat front to the front interior assembly along the front and lower edges, right sides together.
Sew the waistcoat front to the front interior along the front and lower edges, stitching exactly over the previous stitch line.
Clip out as much bulk as you can inside of the stitching, where the front and hem facings were sewn together.
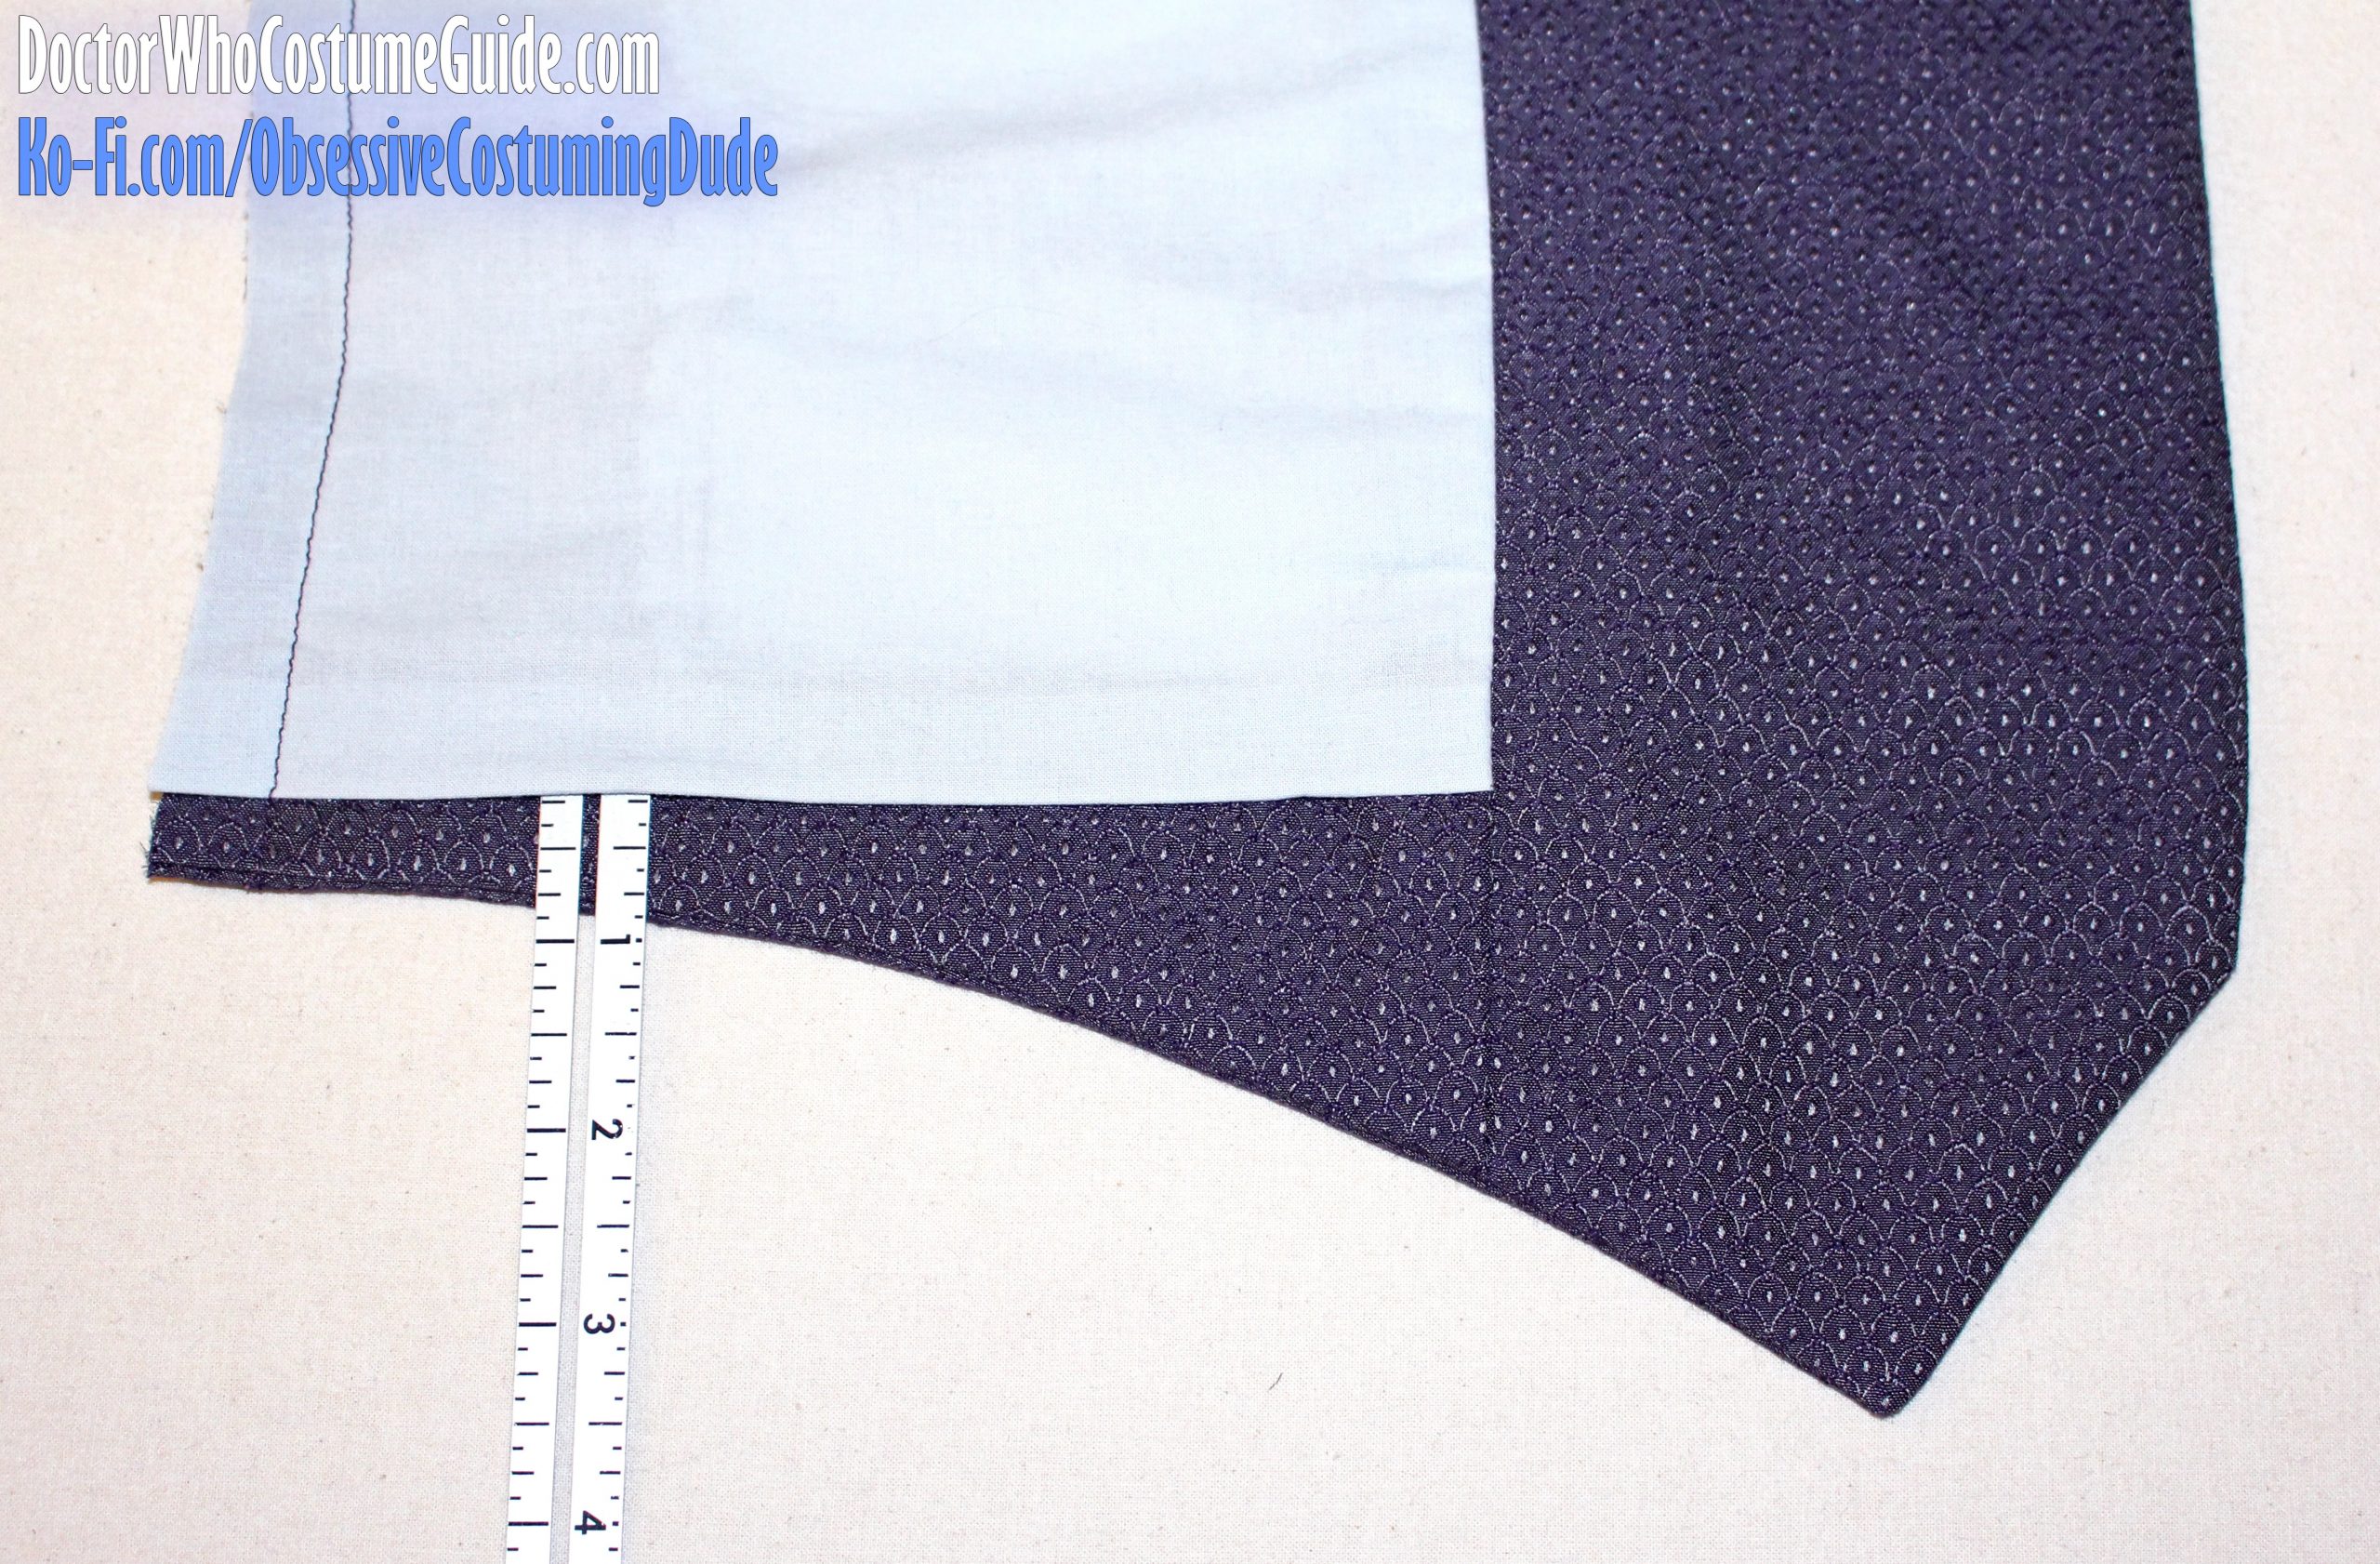
Trim the front and lower seam allowances down to ¼”.
Clip the lower seam allowance, and notch the seam allowance along the upper front curve.
Turn the front interior assembly to the underside.
Press the front and lower seams.
While the front assembly is lying flat, pin or baste the front facing down through all layers along its outer edge.
Carefully pull the lining back and loosely anchor it to the hair canvas by hand, taking care to only stitch through the interfacing, and not the “scales” fabric itself! Also, over the front pocket pouches, be sure to only catch a single layer of pocketing; you don’t want to accidentally sew your pocket closed. (If you included an interior pocket, just work around the pocket pouch as best you can.)
Hand-sew the upper edge of the hem facing to the hair canvas (and one layer of pocketing, where applicable.)
Fold the outside of the lining back around to the front of the waistcoat, then pin it into place around the armhole, matching edges.
Sew the lining to the waistcoat front along the armhole exactly over the previous stitch line, taking care to only stitch through those two layers.
Trim the armhole seam allowances down to ¼” and clip them close to the stitching around the curve.
Turn the lining back to the underside through the sort of “tube” shape and press the armhole nice and flat.
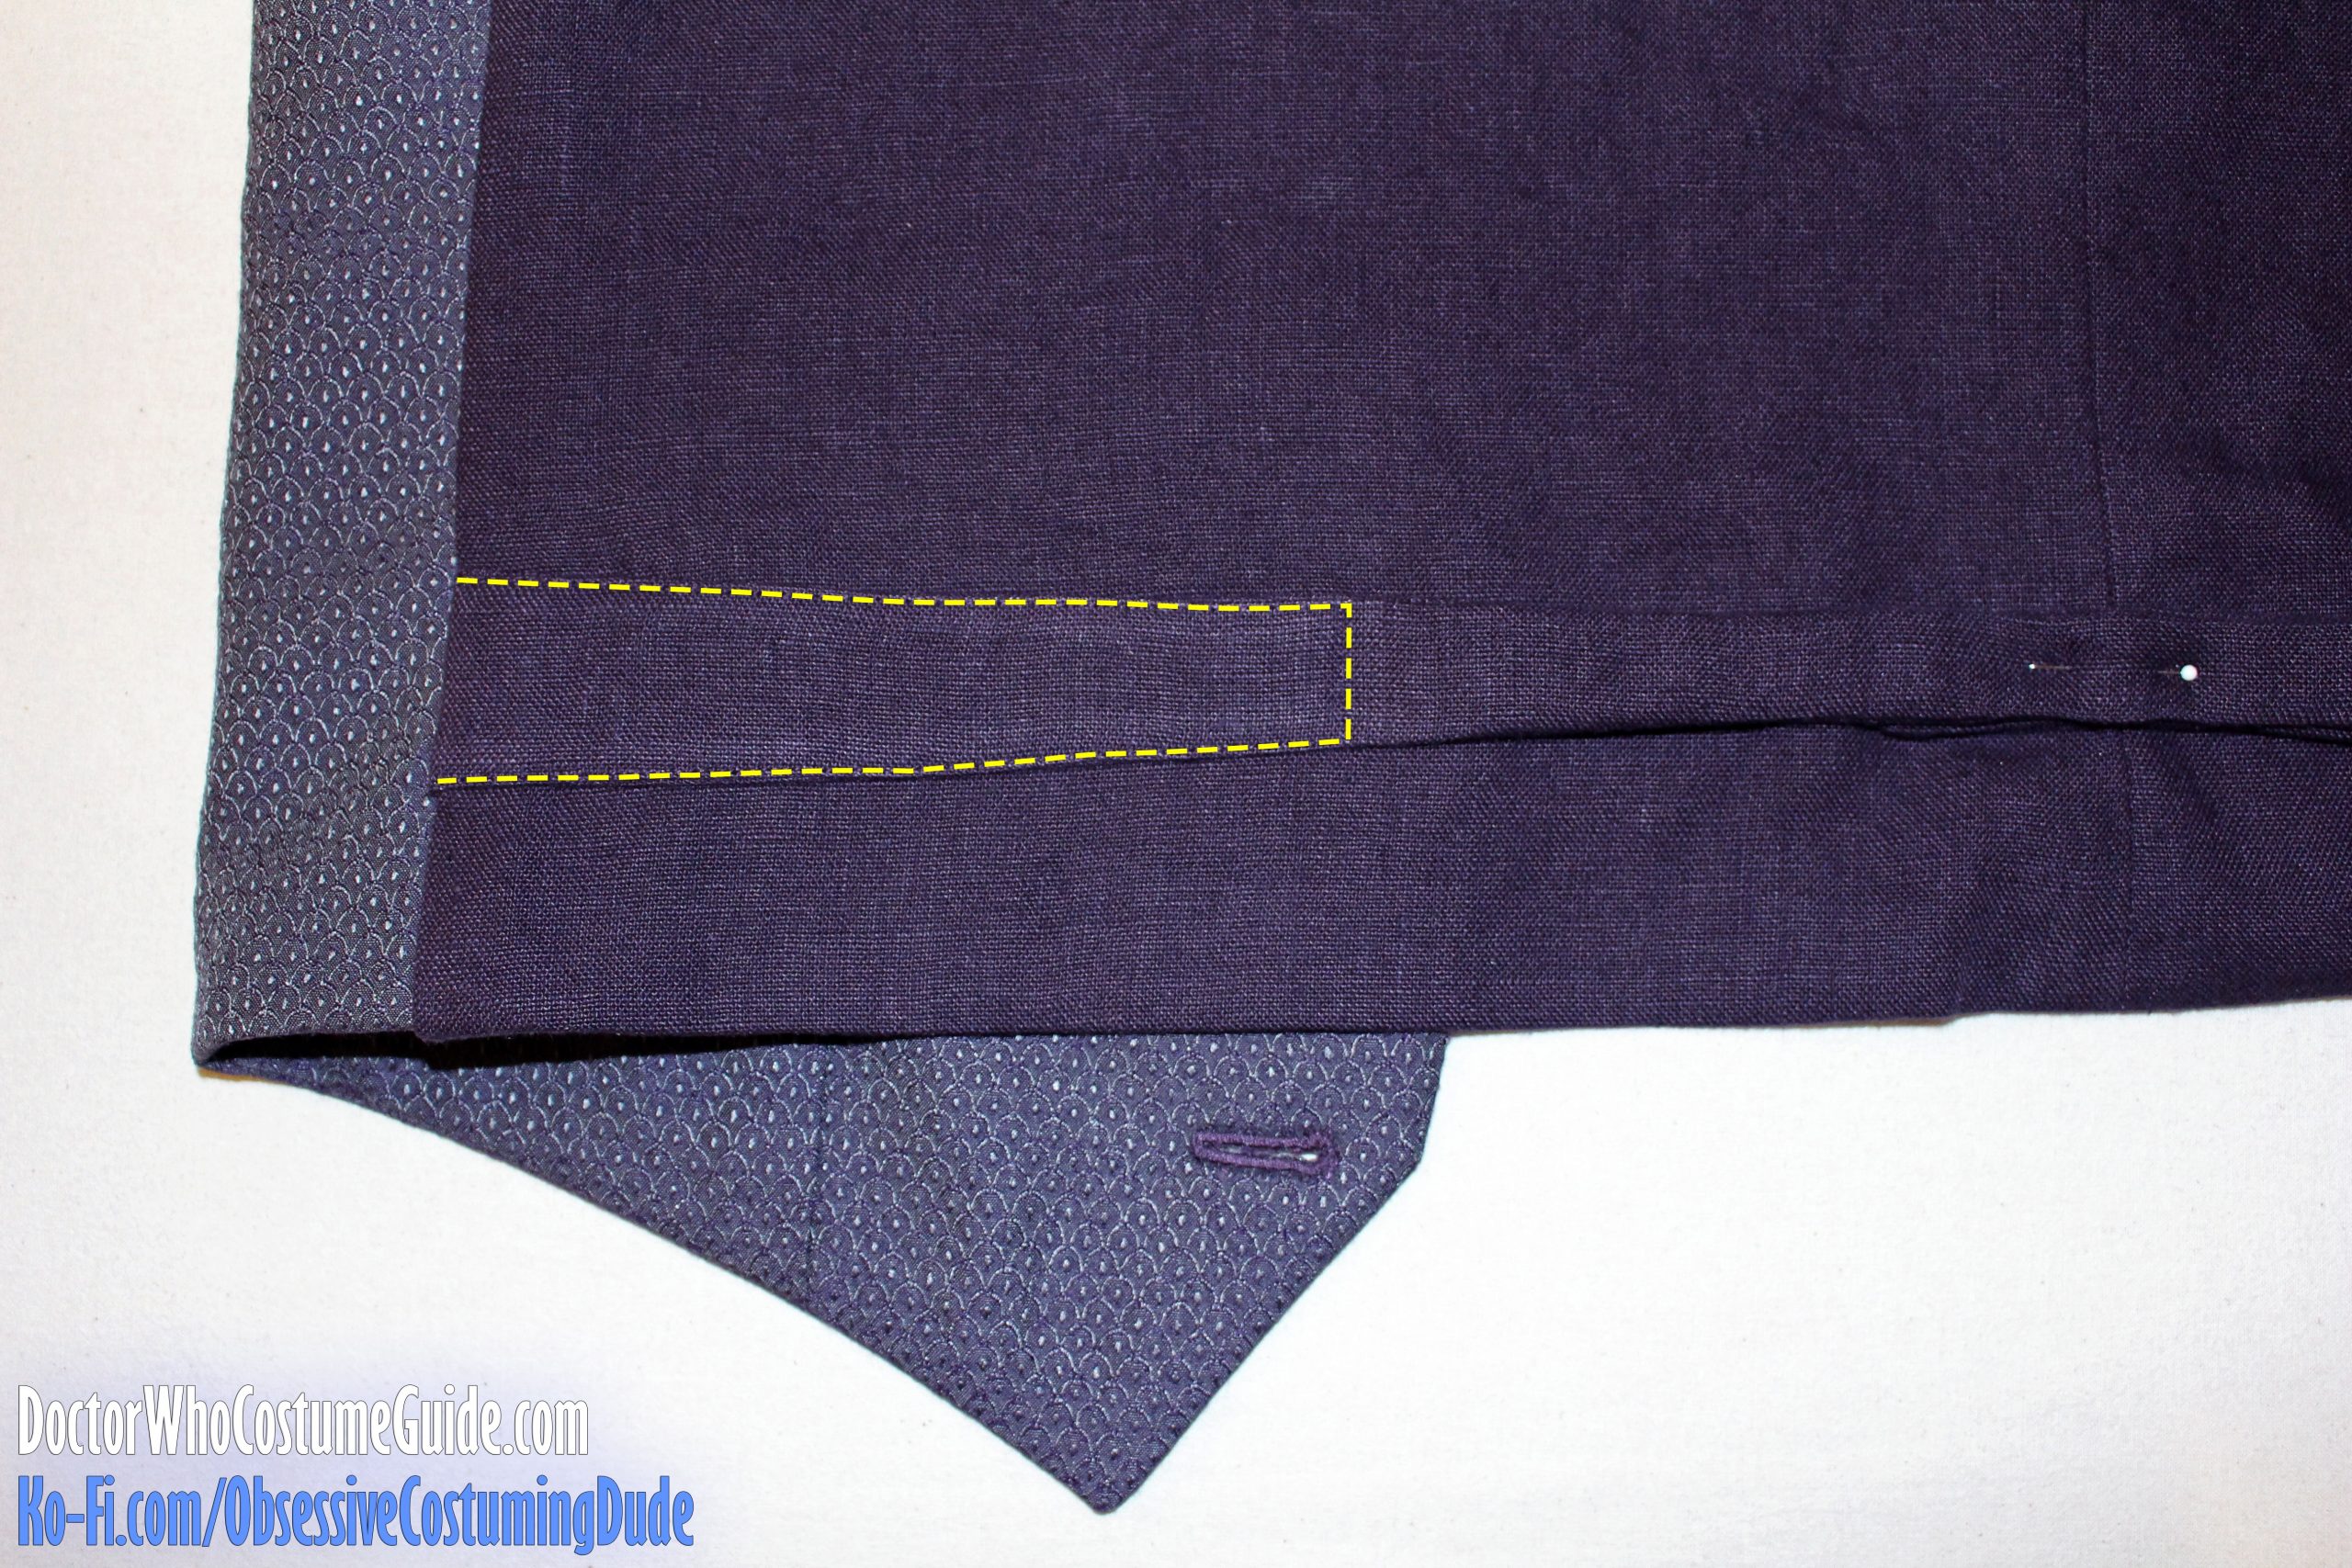
Hand-sew the lining to the hem facing about ⅜” to ¼” above the lower, folded edge, forming a small jump pleat for wearing ease.
Sew or baste the side and shoulder edges of the waistcoat closed.
TIP: If you’re not including an interior pocket on your waistcoat, it’s much easier to sew the hem facing to the front facing, sew that to the front, turn it under, and tack those edges to the hair canvas without the lining in the way.
Then sew the lining to the front around the armhole, turn it under, and hand-sew the front edge of the lining to the front facing, and the lower edge to the hem facing.
That saves you from having to do that weird “tube” thing.
Repeat for the other front assembly.
TIP: At this point, I like to go ahead and make the buttonholes on the left waistcoat front, because I find it easier to do before the back and other front assembly are attached.
BACK ASSEMBLY
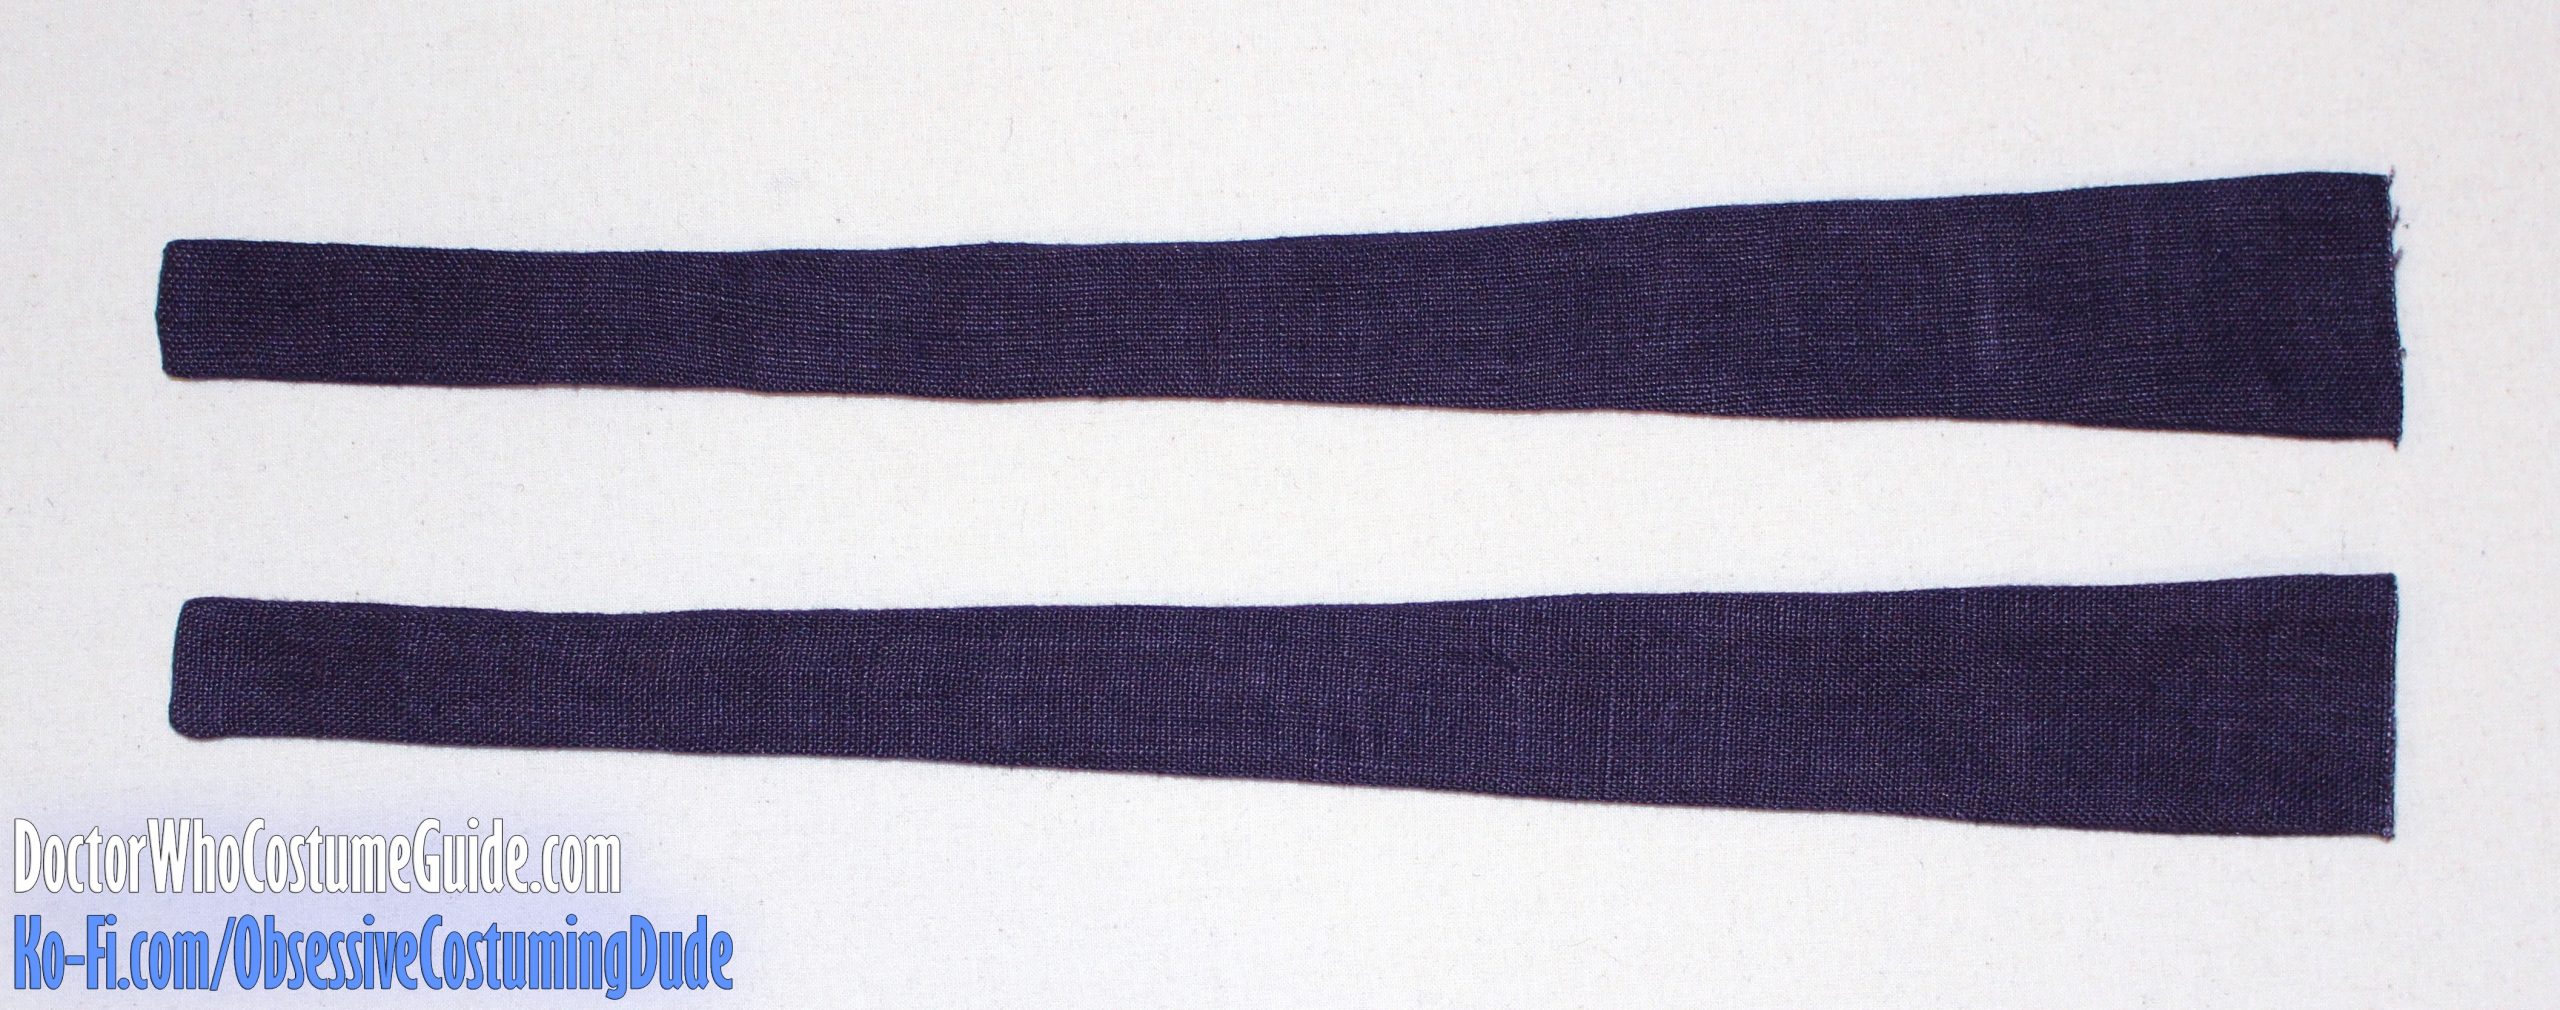
Sew two of the back strap pieces (piece F) together along the upper, lower, and centermost (longest and shortest) edges with ¼” seam allowance.
Turn the strap right-sides-out and press.
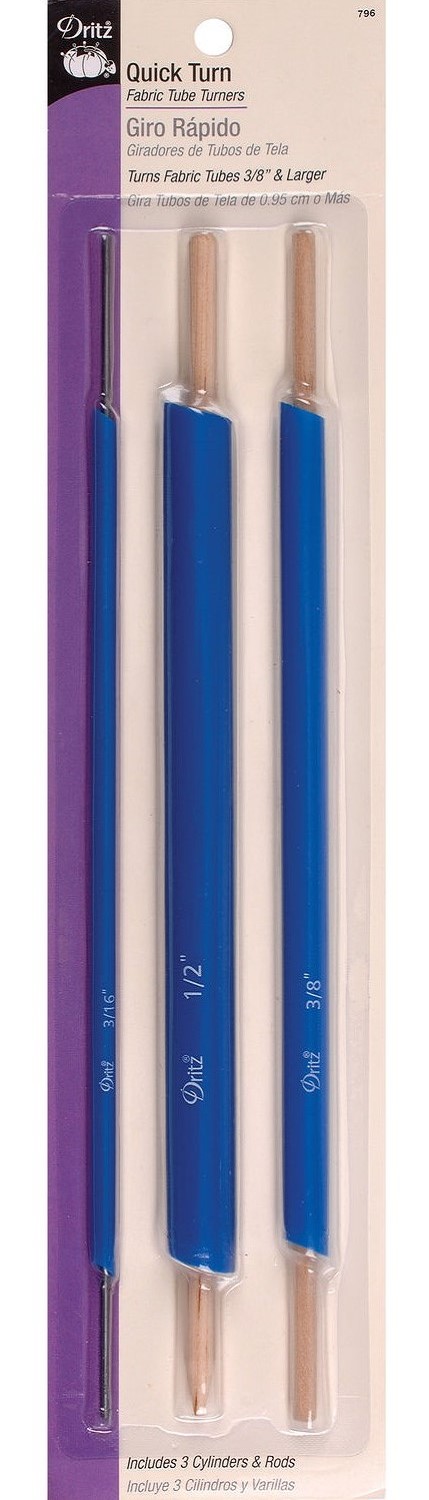
TIP: To help turn the strap right-side-out, I like to use a handy tool called the Dritz Quick Turn (see right).
Repeat for the other strap.
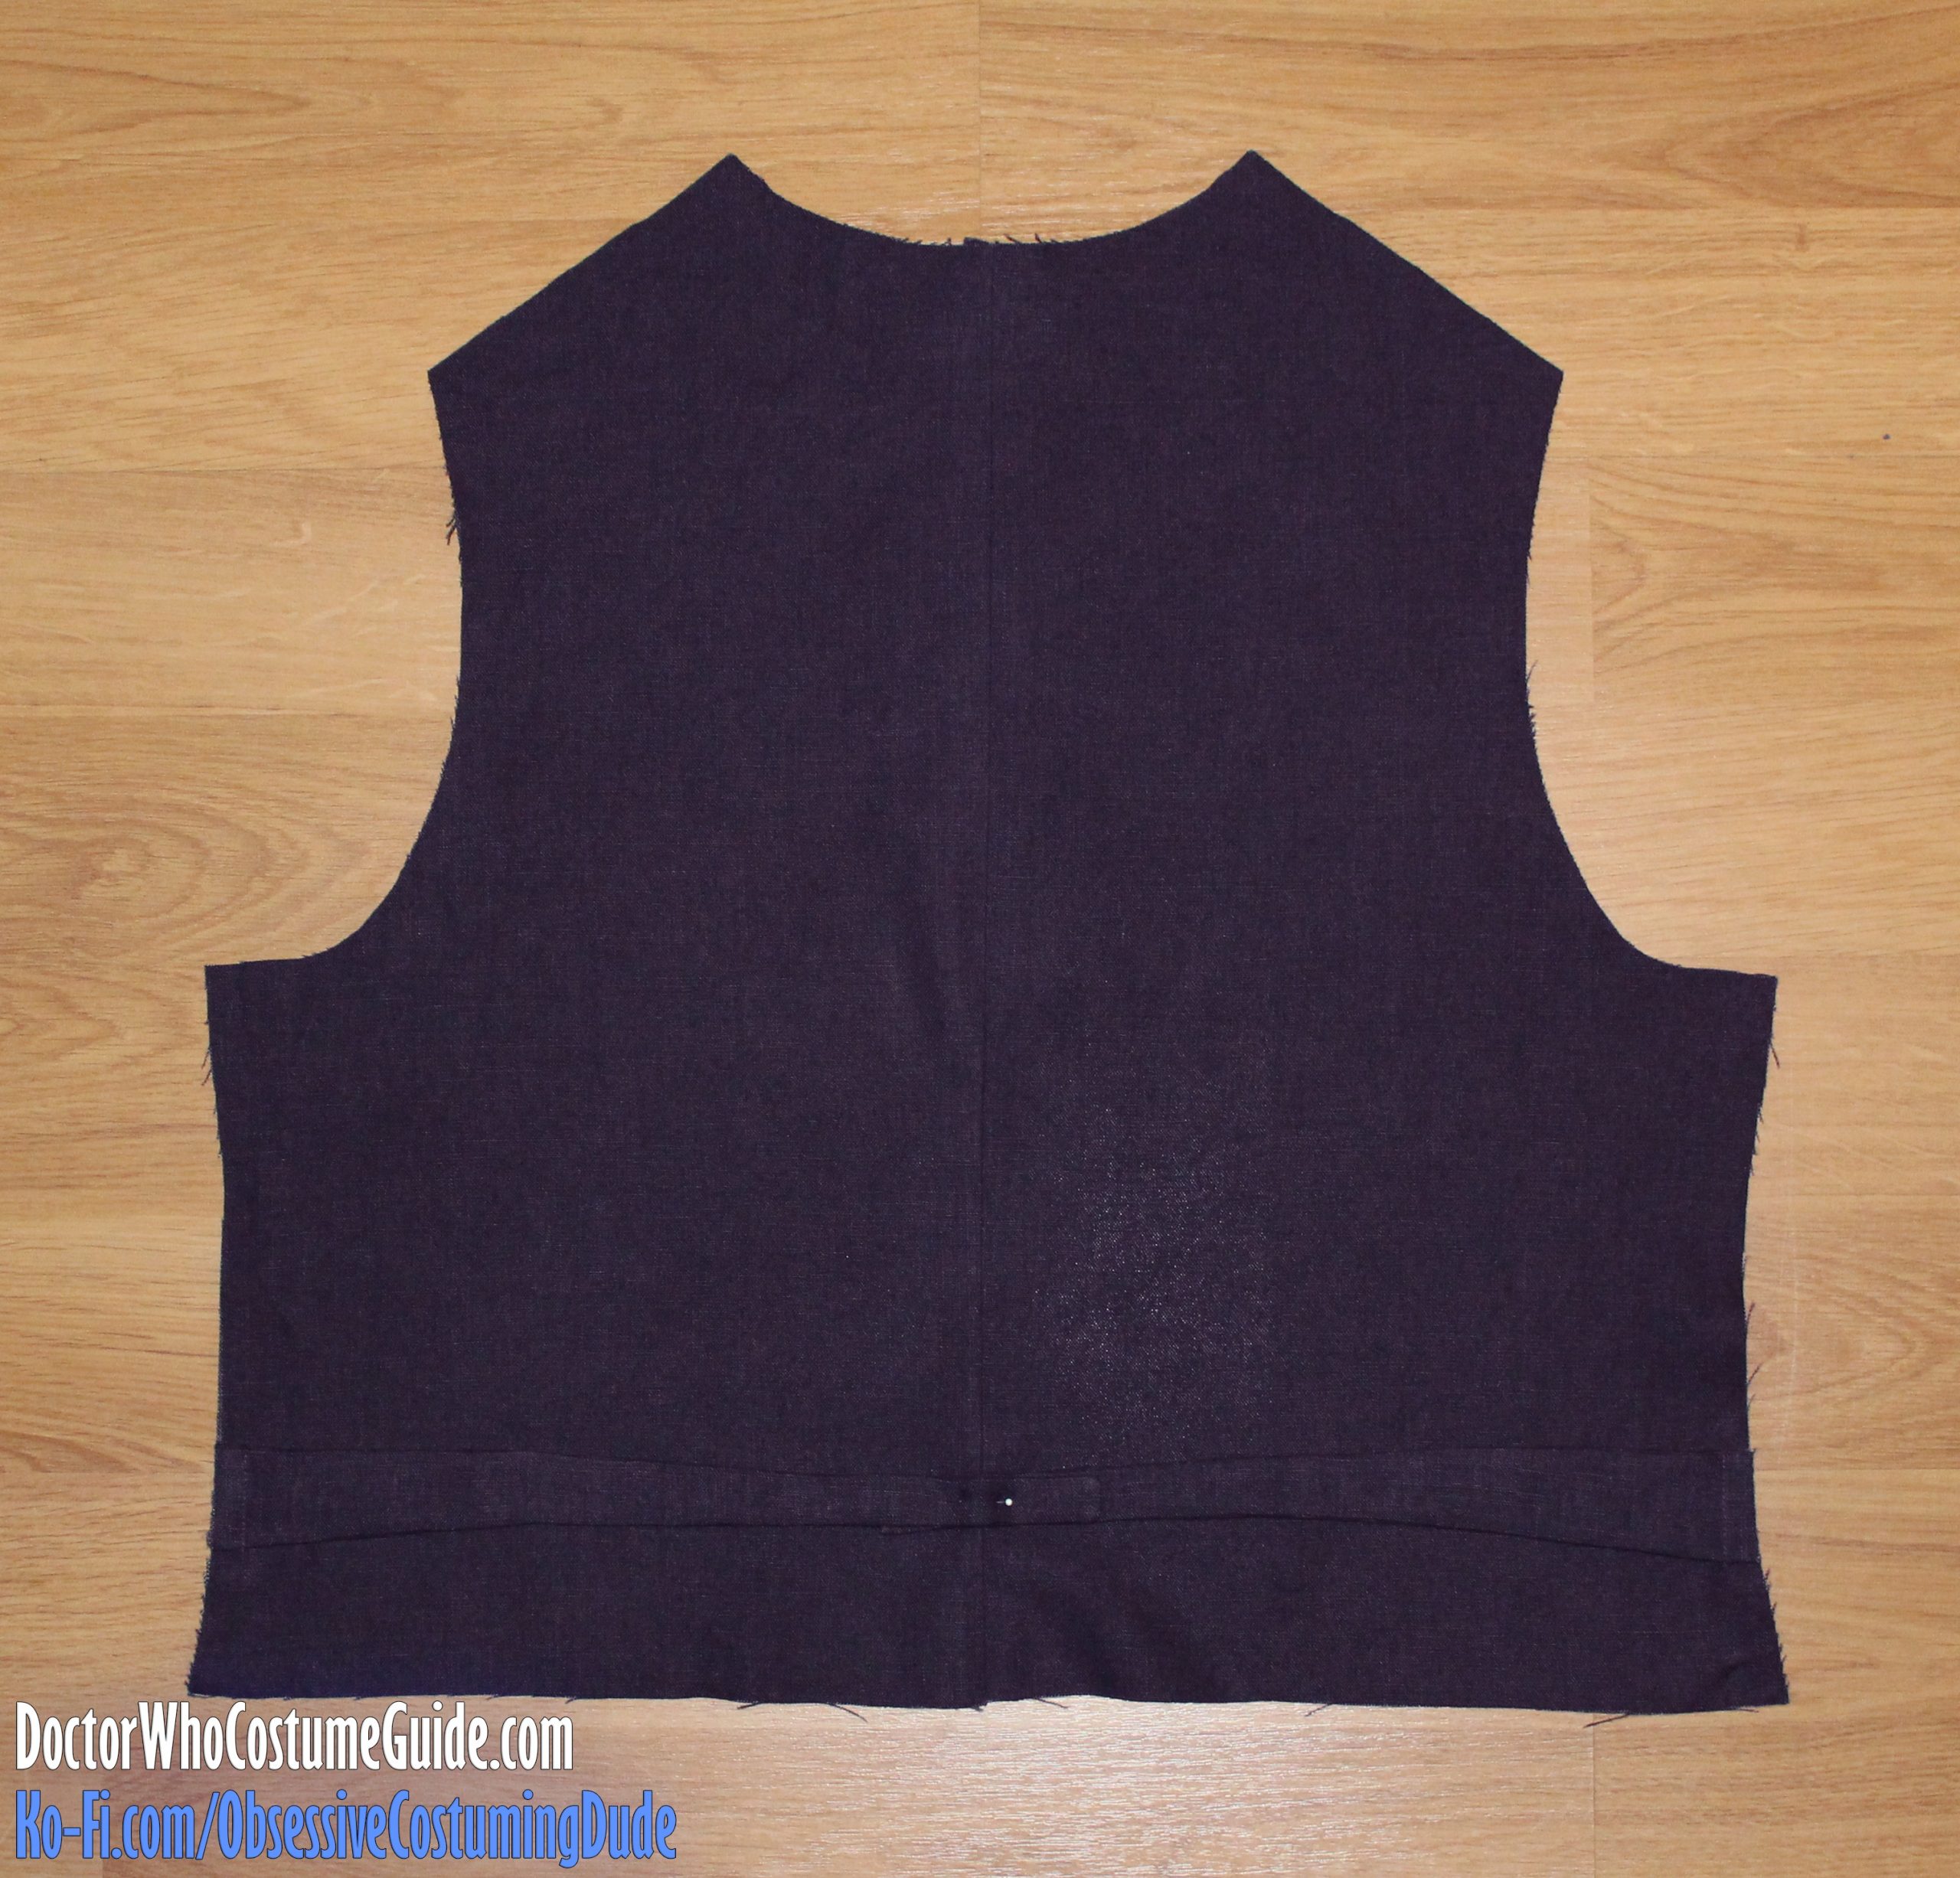
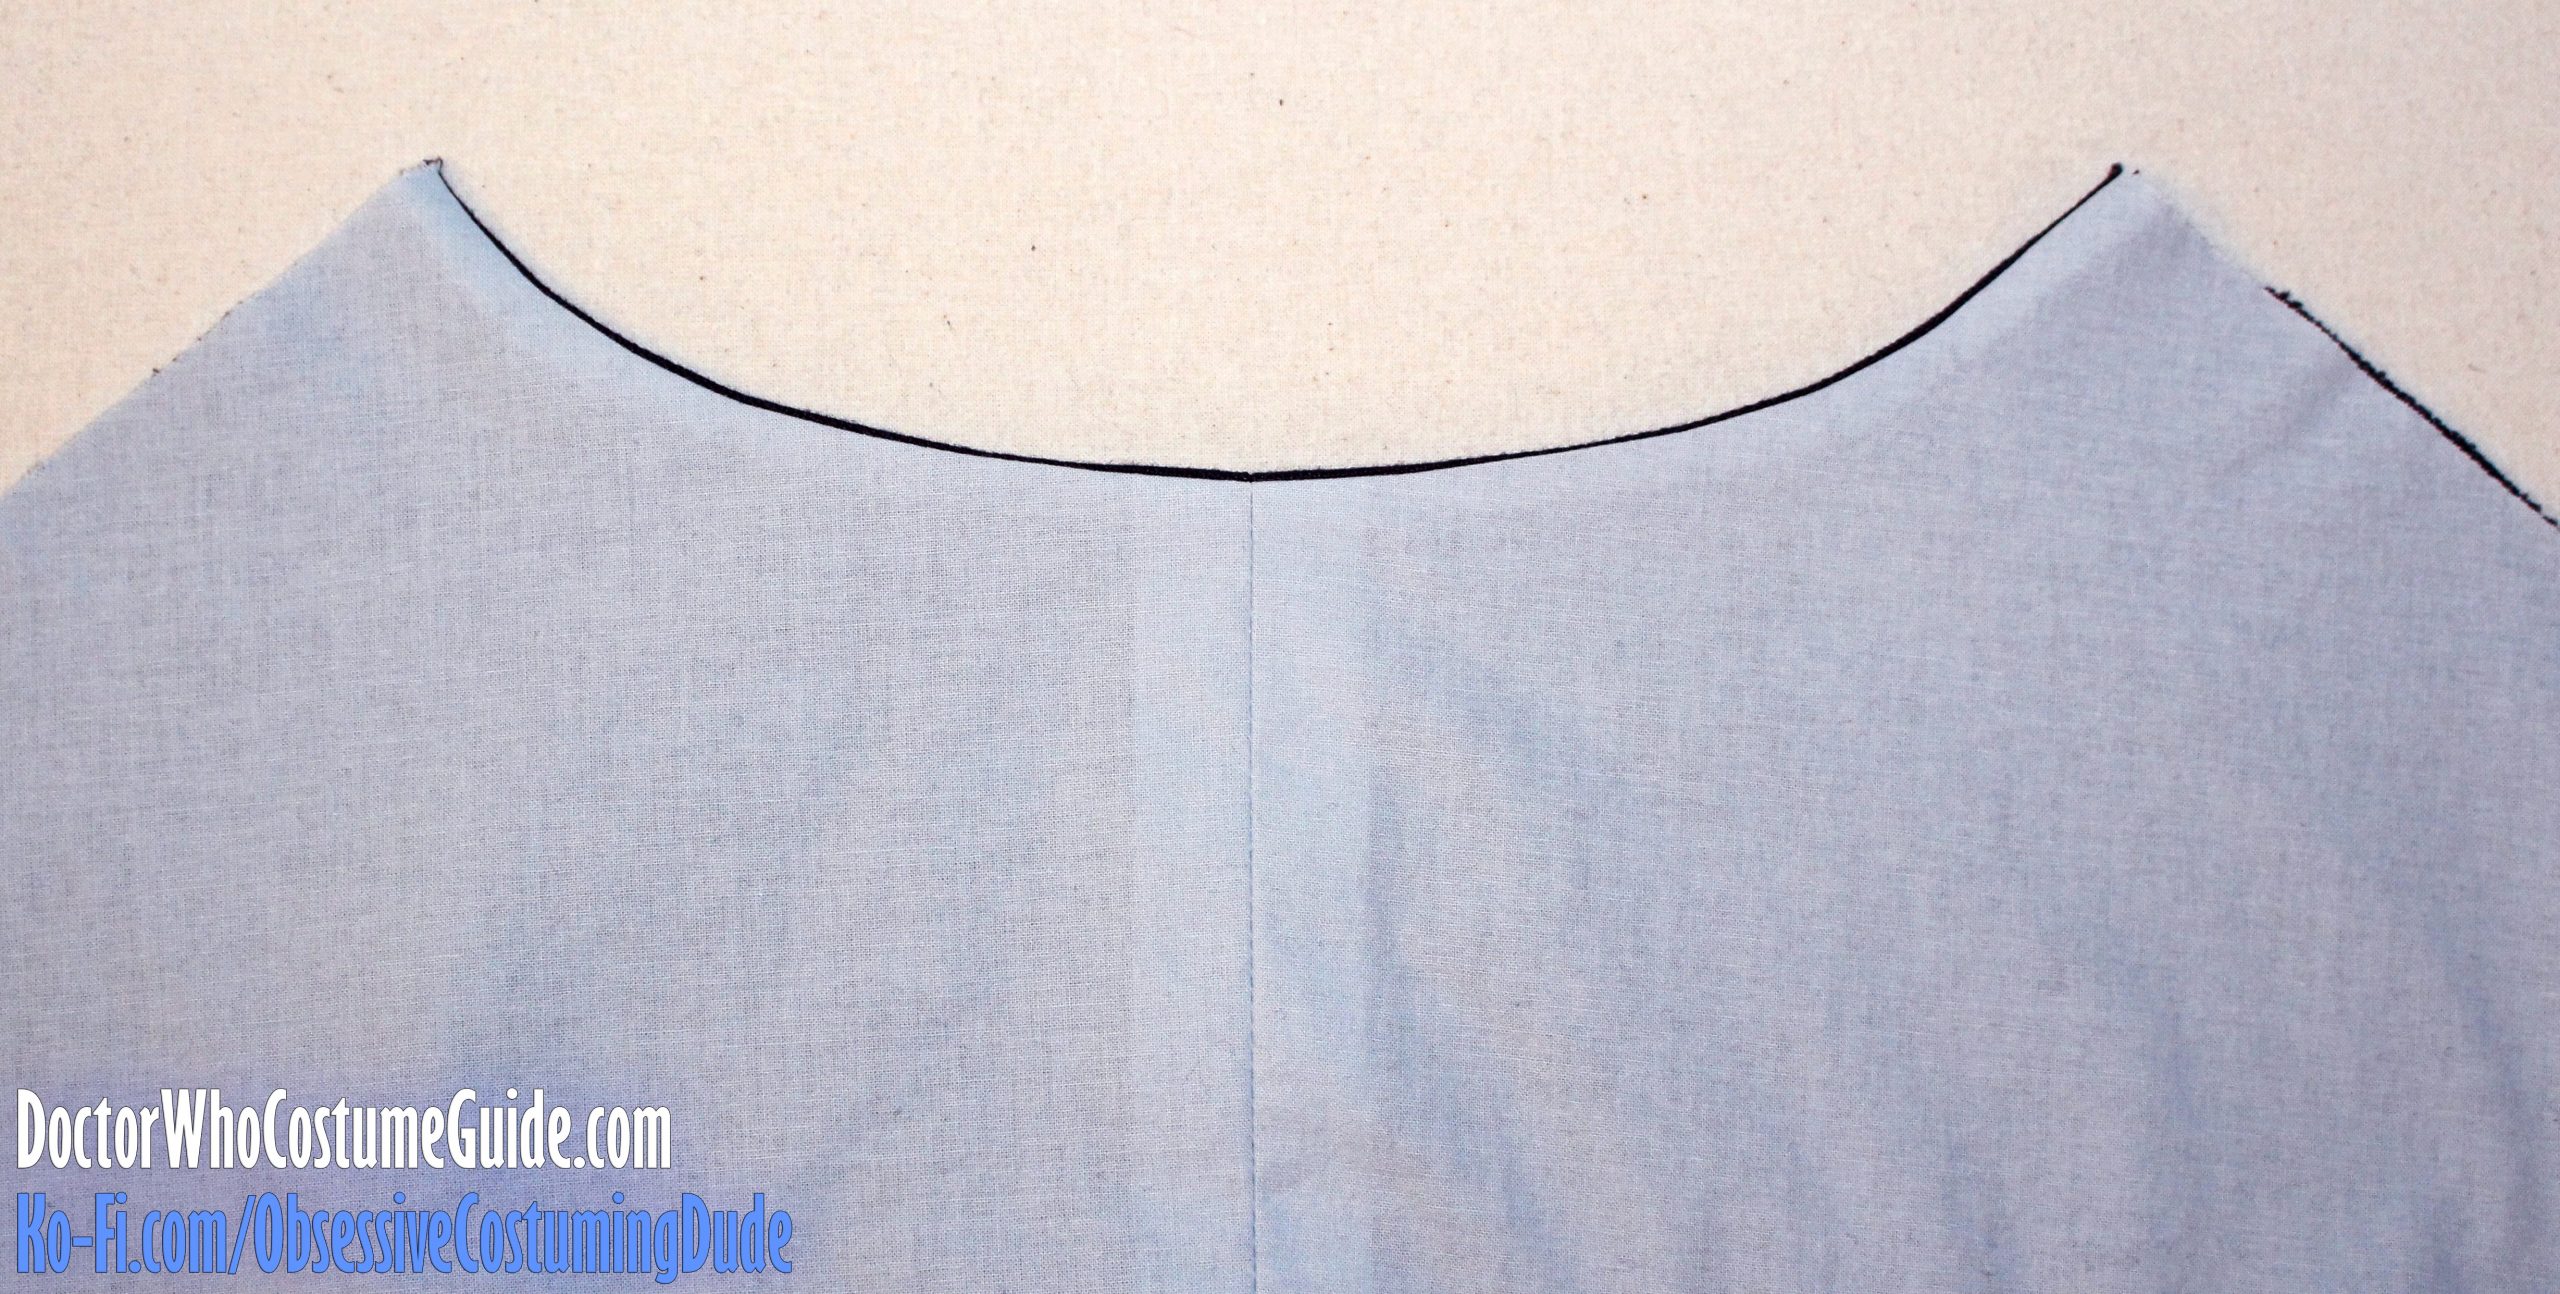
Sew the two waistcoat backs (piece B) together along the center back.
Press the seam allowances open.
Sew or baste the back straps to the back sides, using the marks on the printed pattern as guides.
TIP: Pin the straps down in the middle to keep them out of the way until the back assembly is finished.
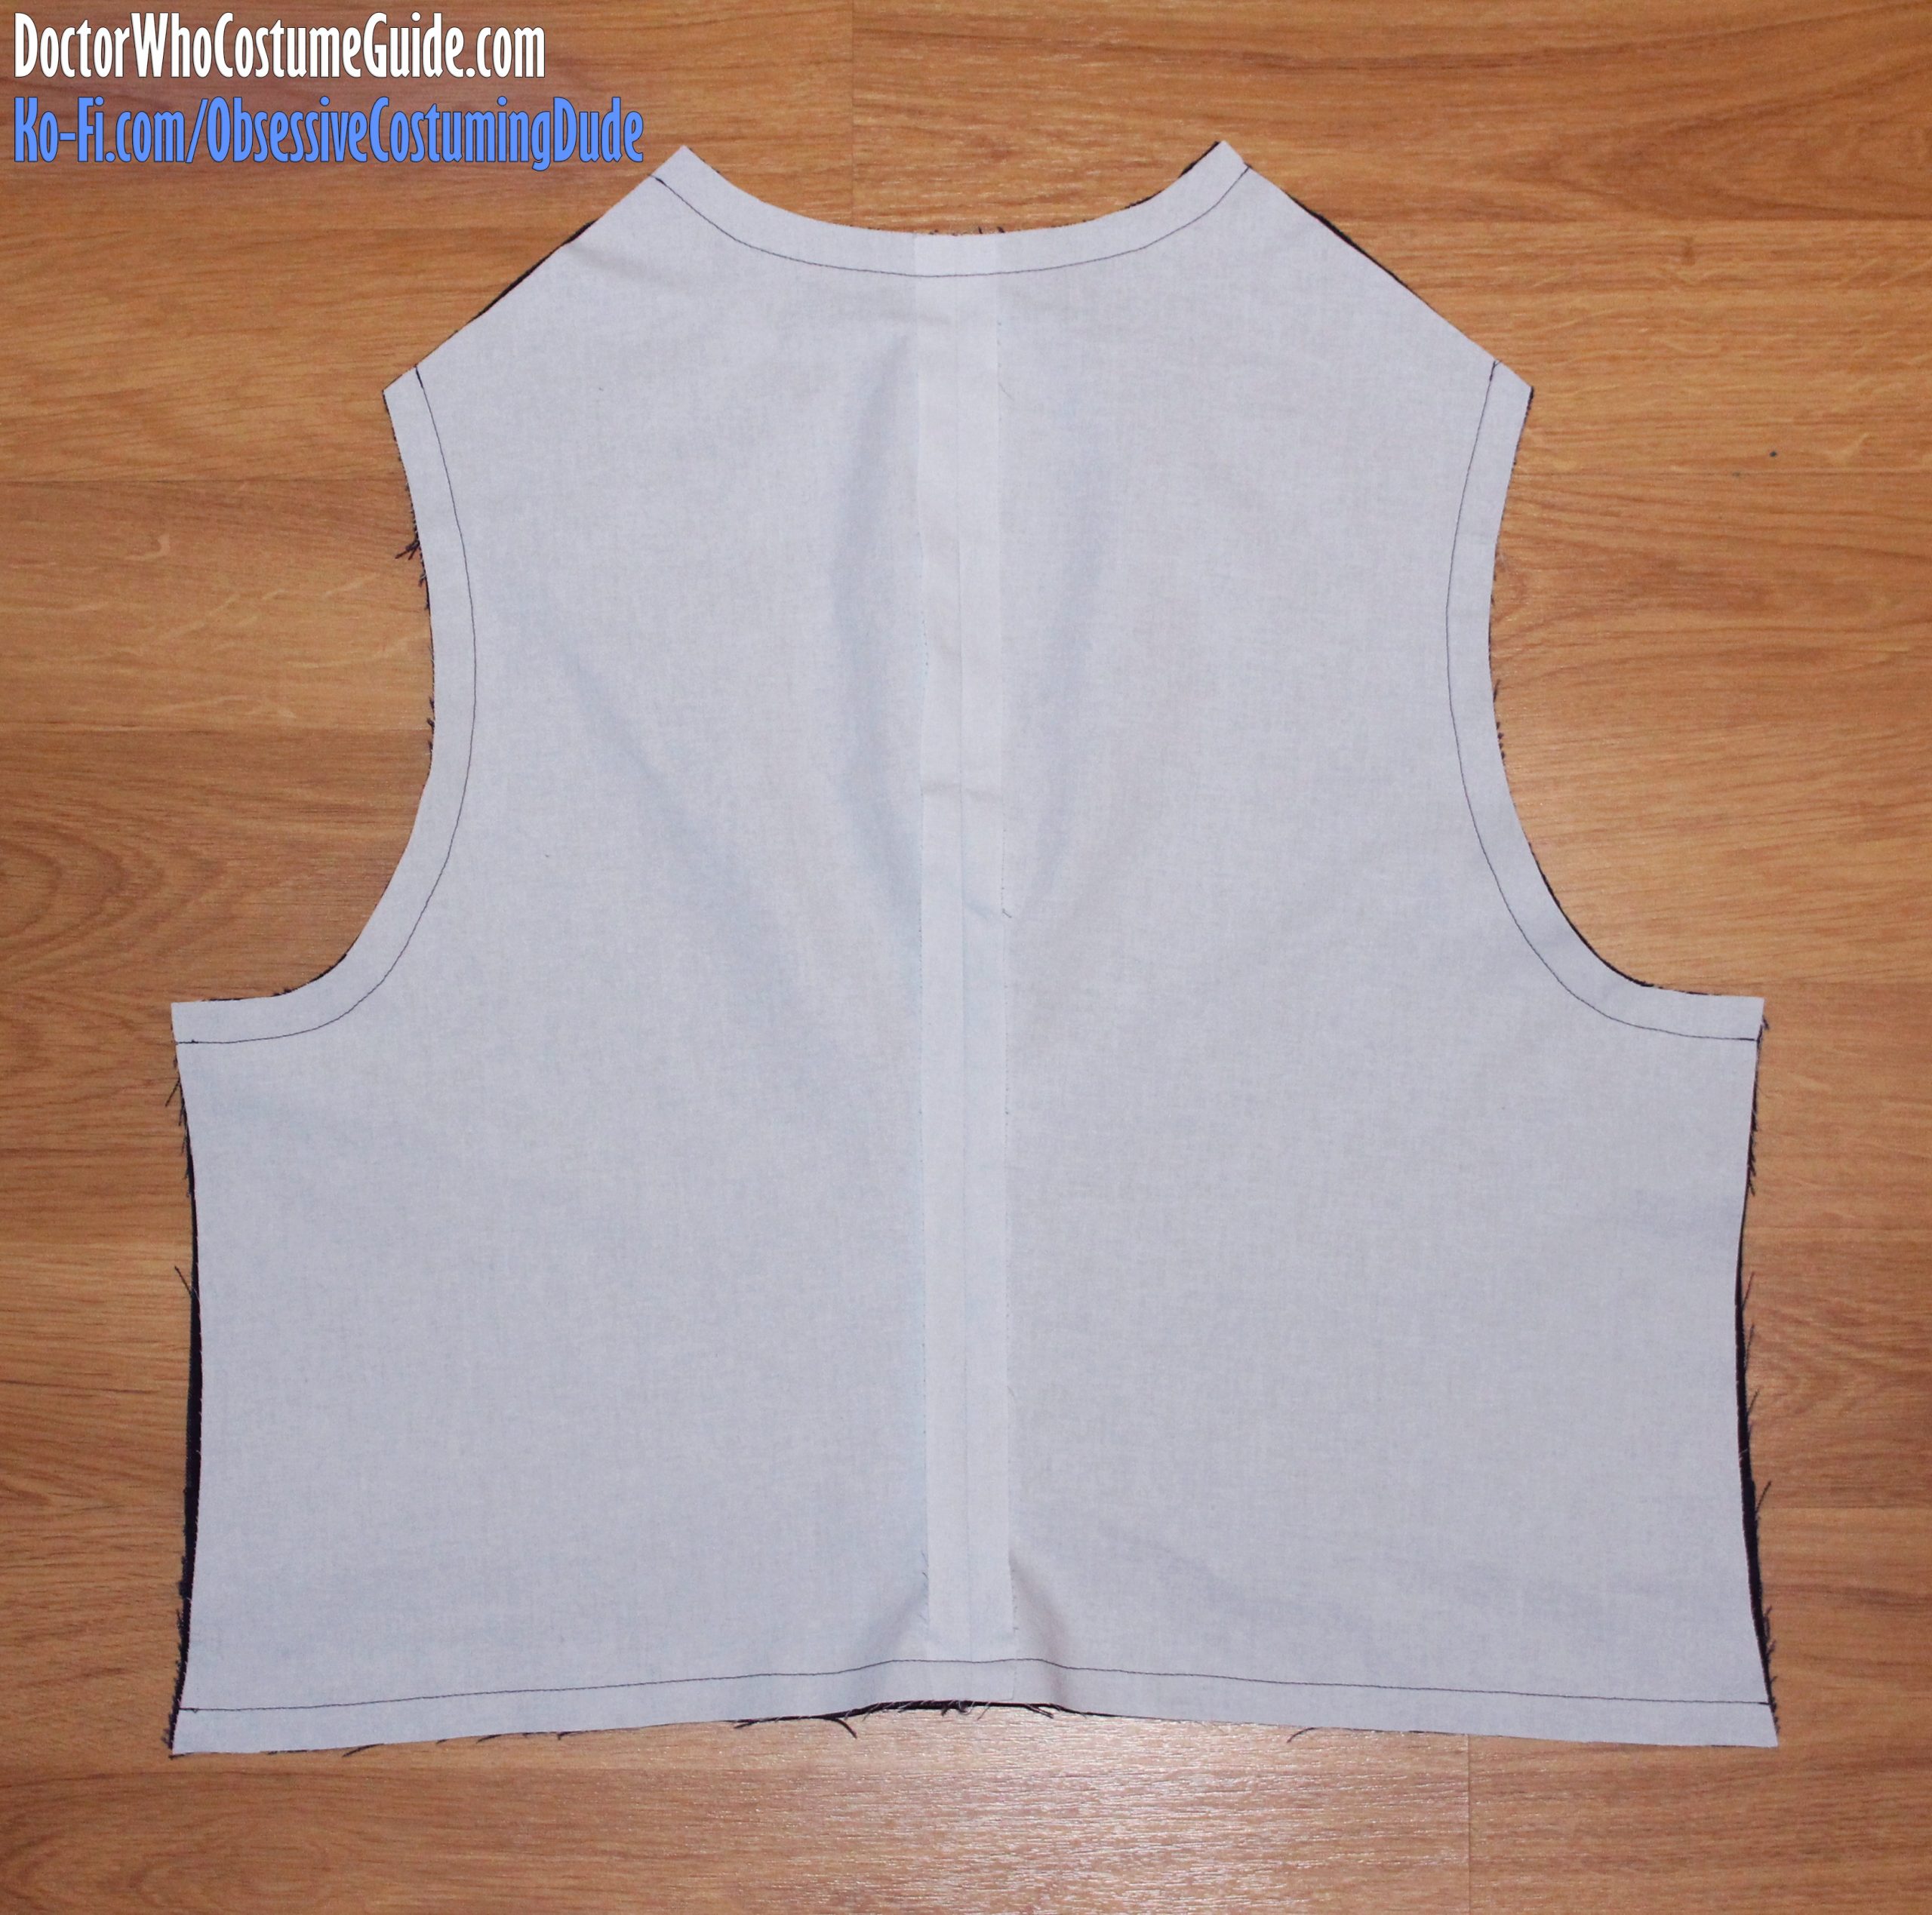
Sew the two back lining pieces together along the center back.
Press the seam allowances open.
Position the back and back lining assemblies right sides together and matching edges.
Sew the back lining to the back assembly along the neckline, armholes, and bottom edge. (Leave the shoulders and sides open for now.)
Trim the aforementioned seam allowances down to ¼”, and clip them close to the stitching around the neckline and armholes.
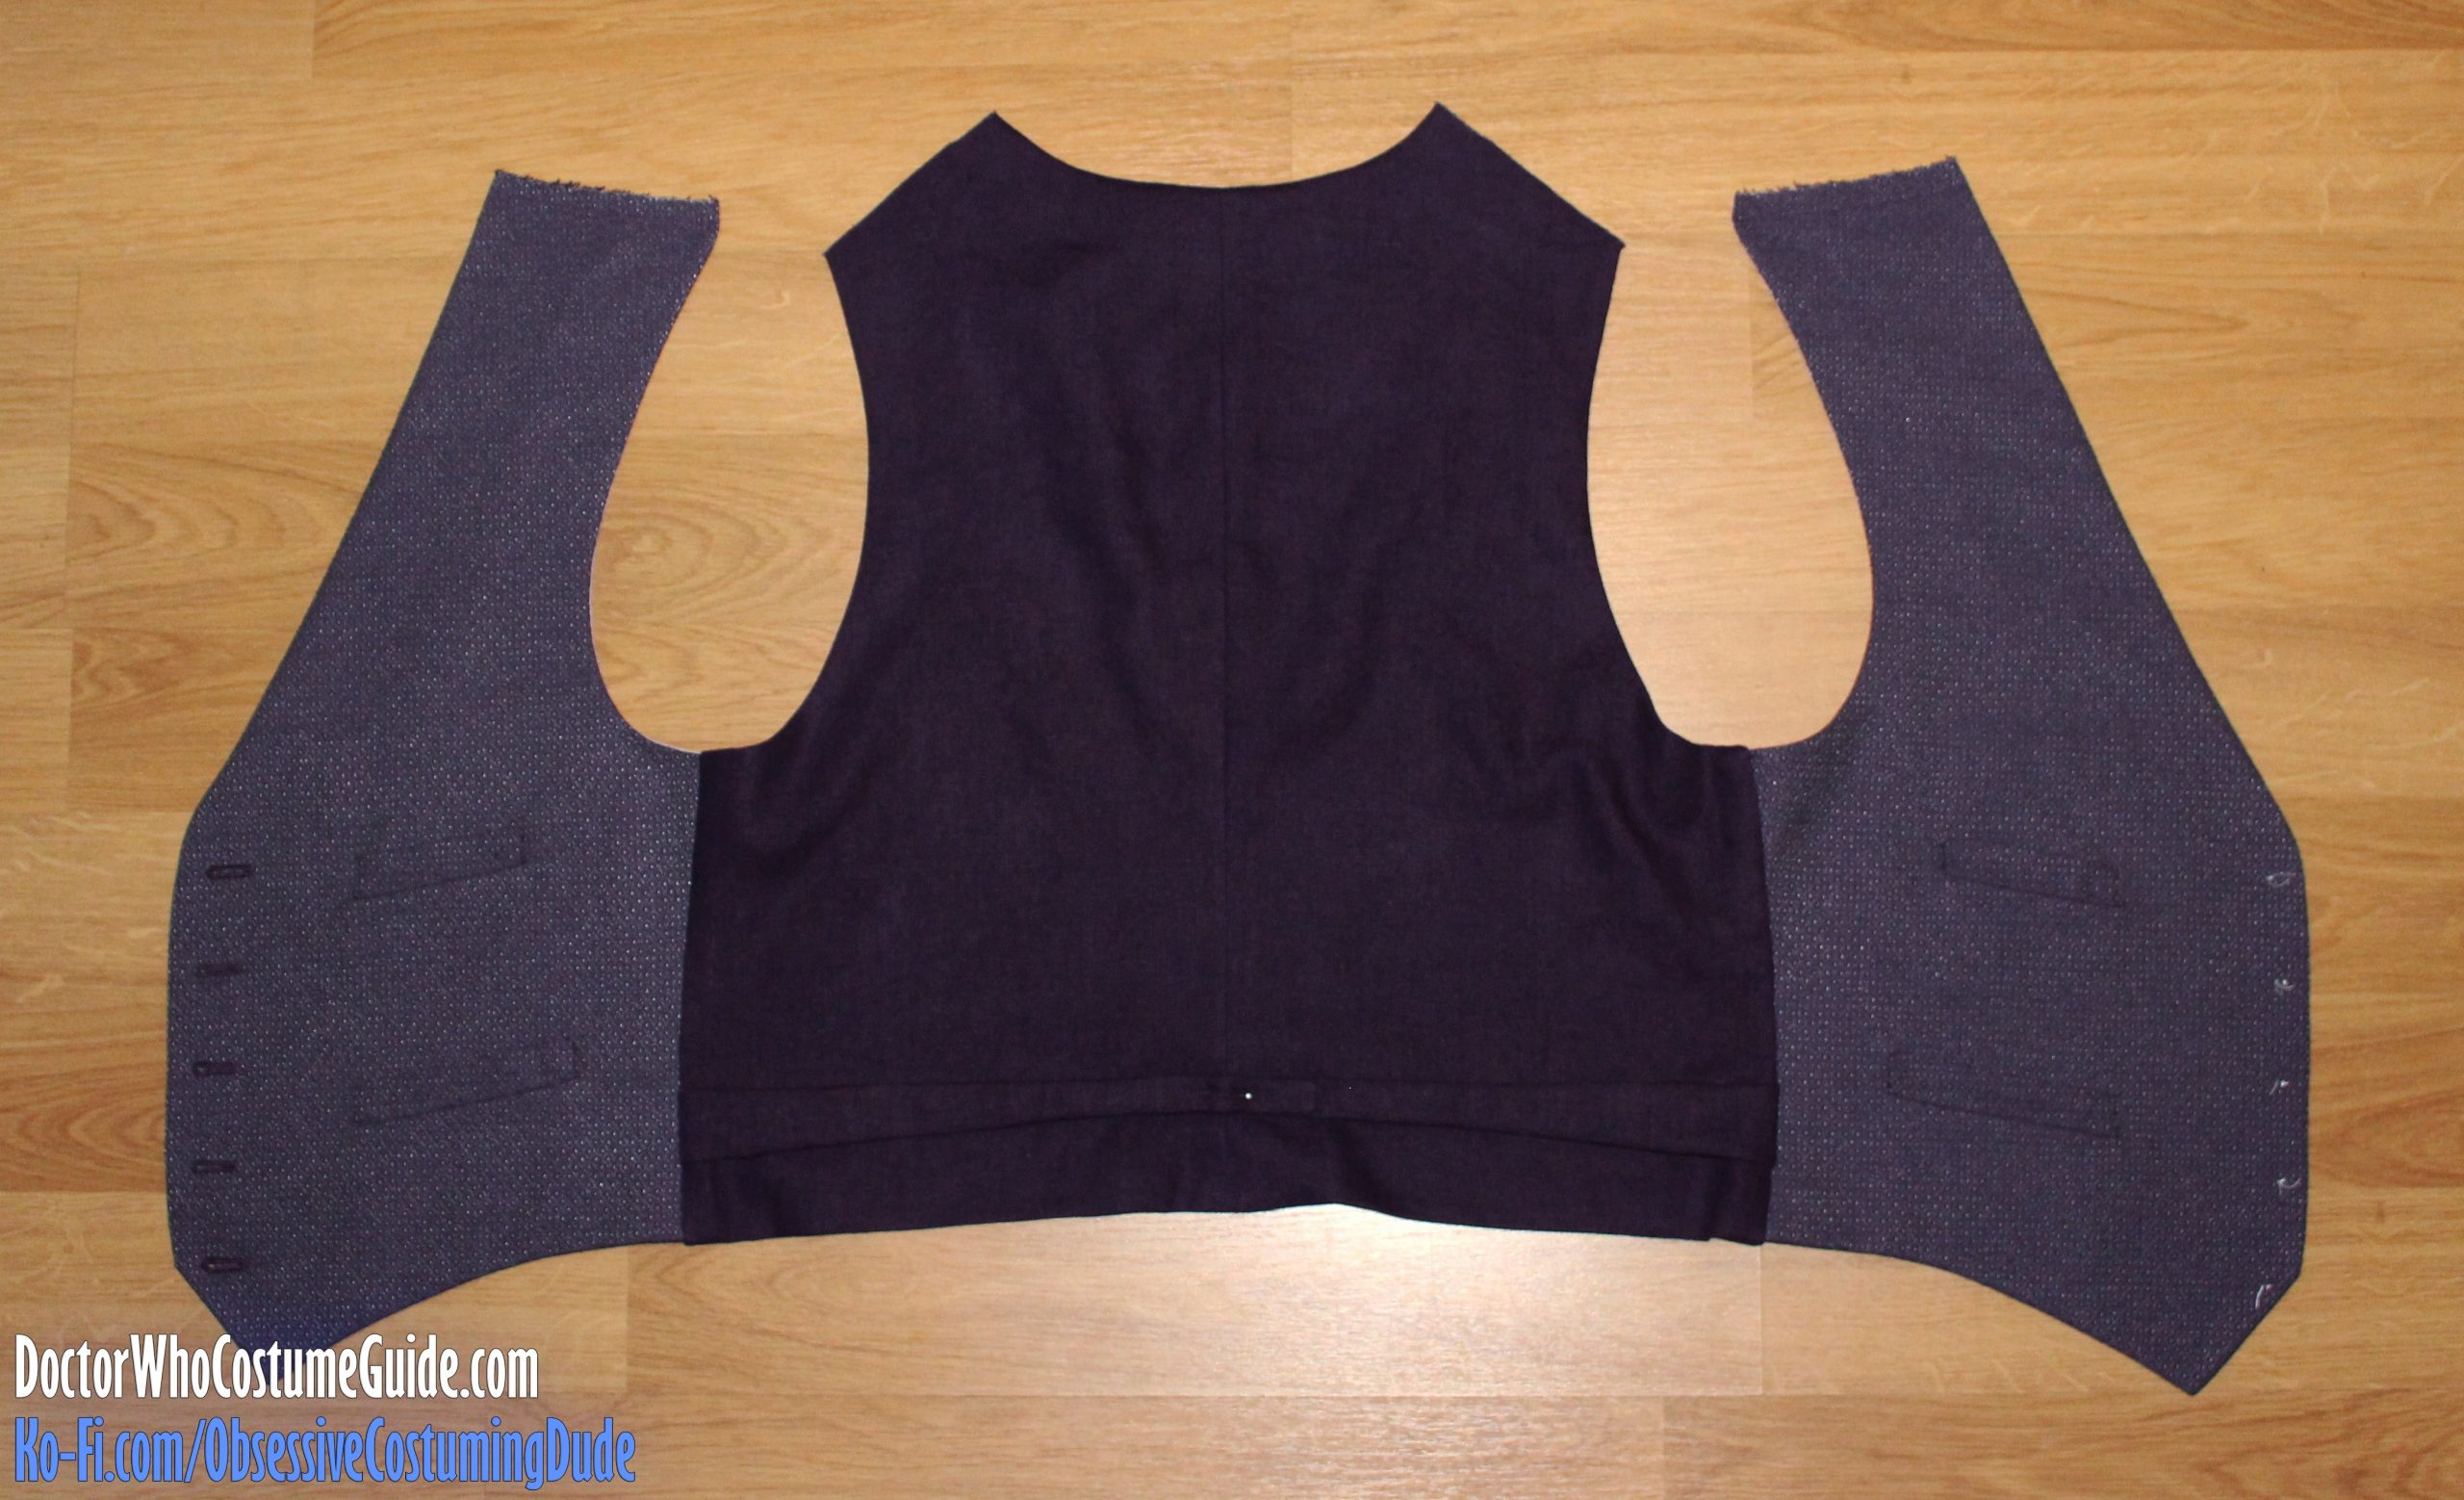
FINISHING
Time to “marry” the front and back assemblies!
To do this, first position the back assembly (still inside-out) so the lining is right-side-up, and the front assembly face down.
Open the back side and insert the front assembly top-first into the opening.
The front side edge should just barely fit inside the back side edges, extending from seam line to seam line.
Pin, then sew the front assembly to the back assembly along the side, matching edges.
TIP: Use a quilting/walking foot to sew the front and back assemblies together along the sides. This will help feed all the layers through the machine more evenly.
Repeat for the other side.
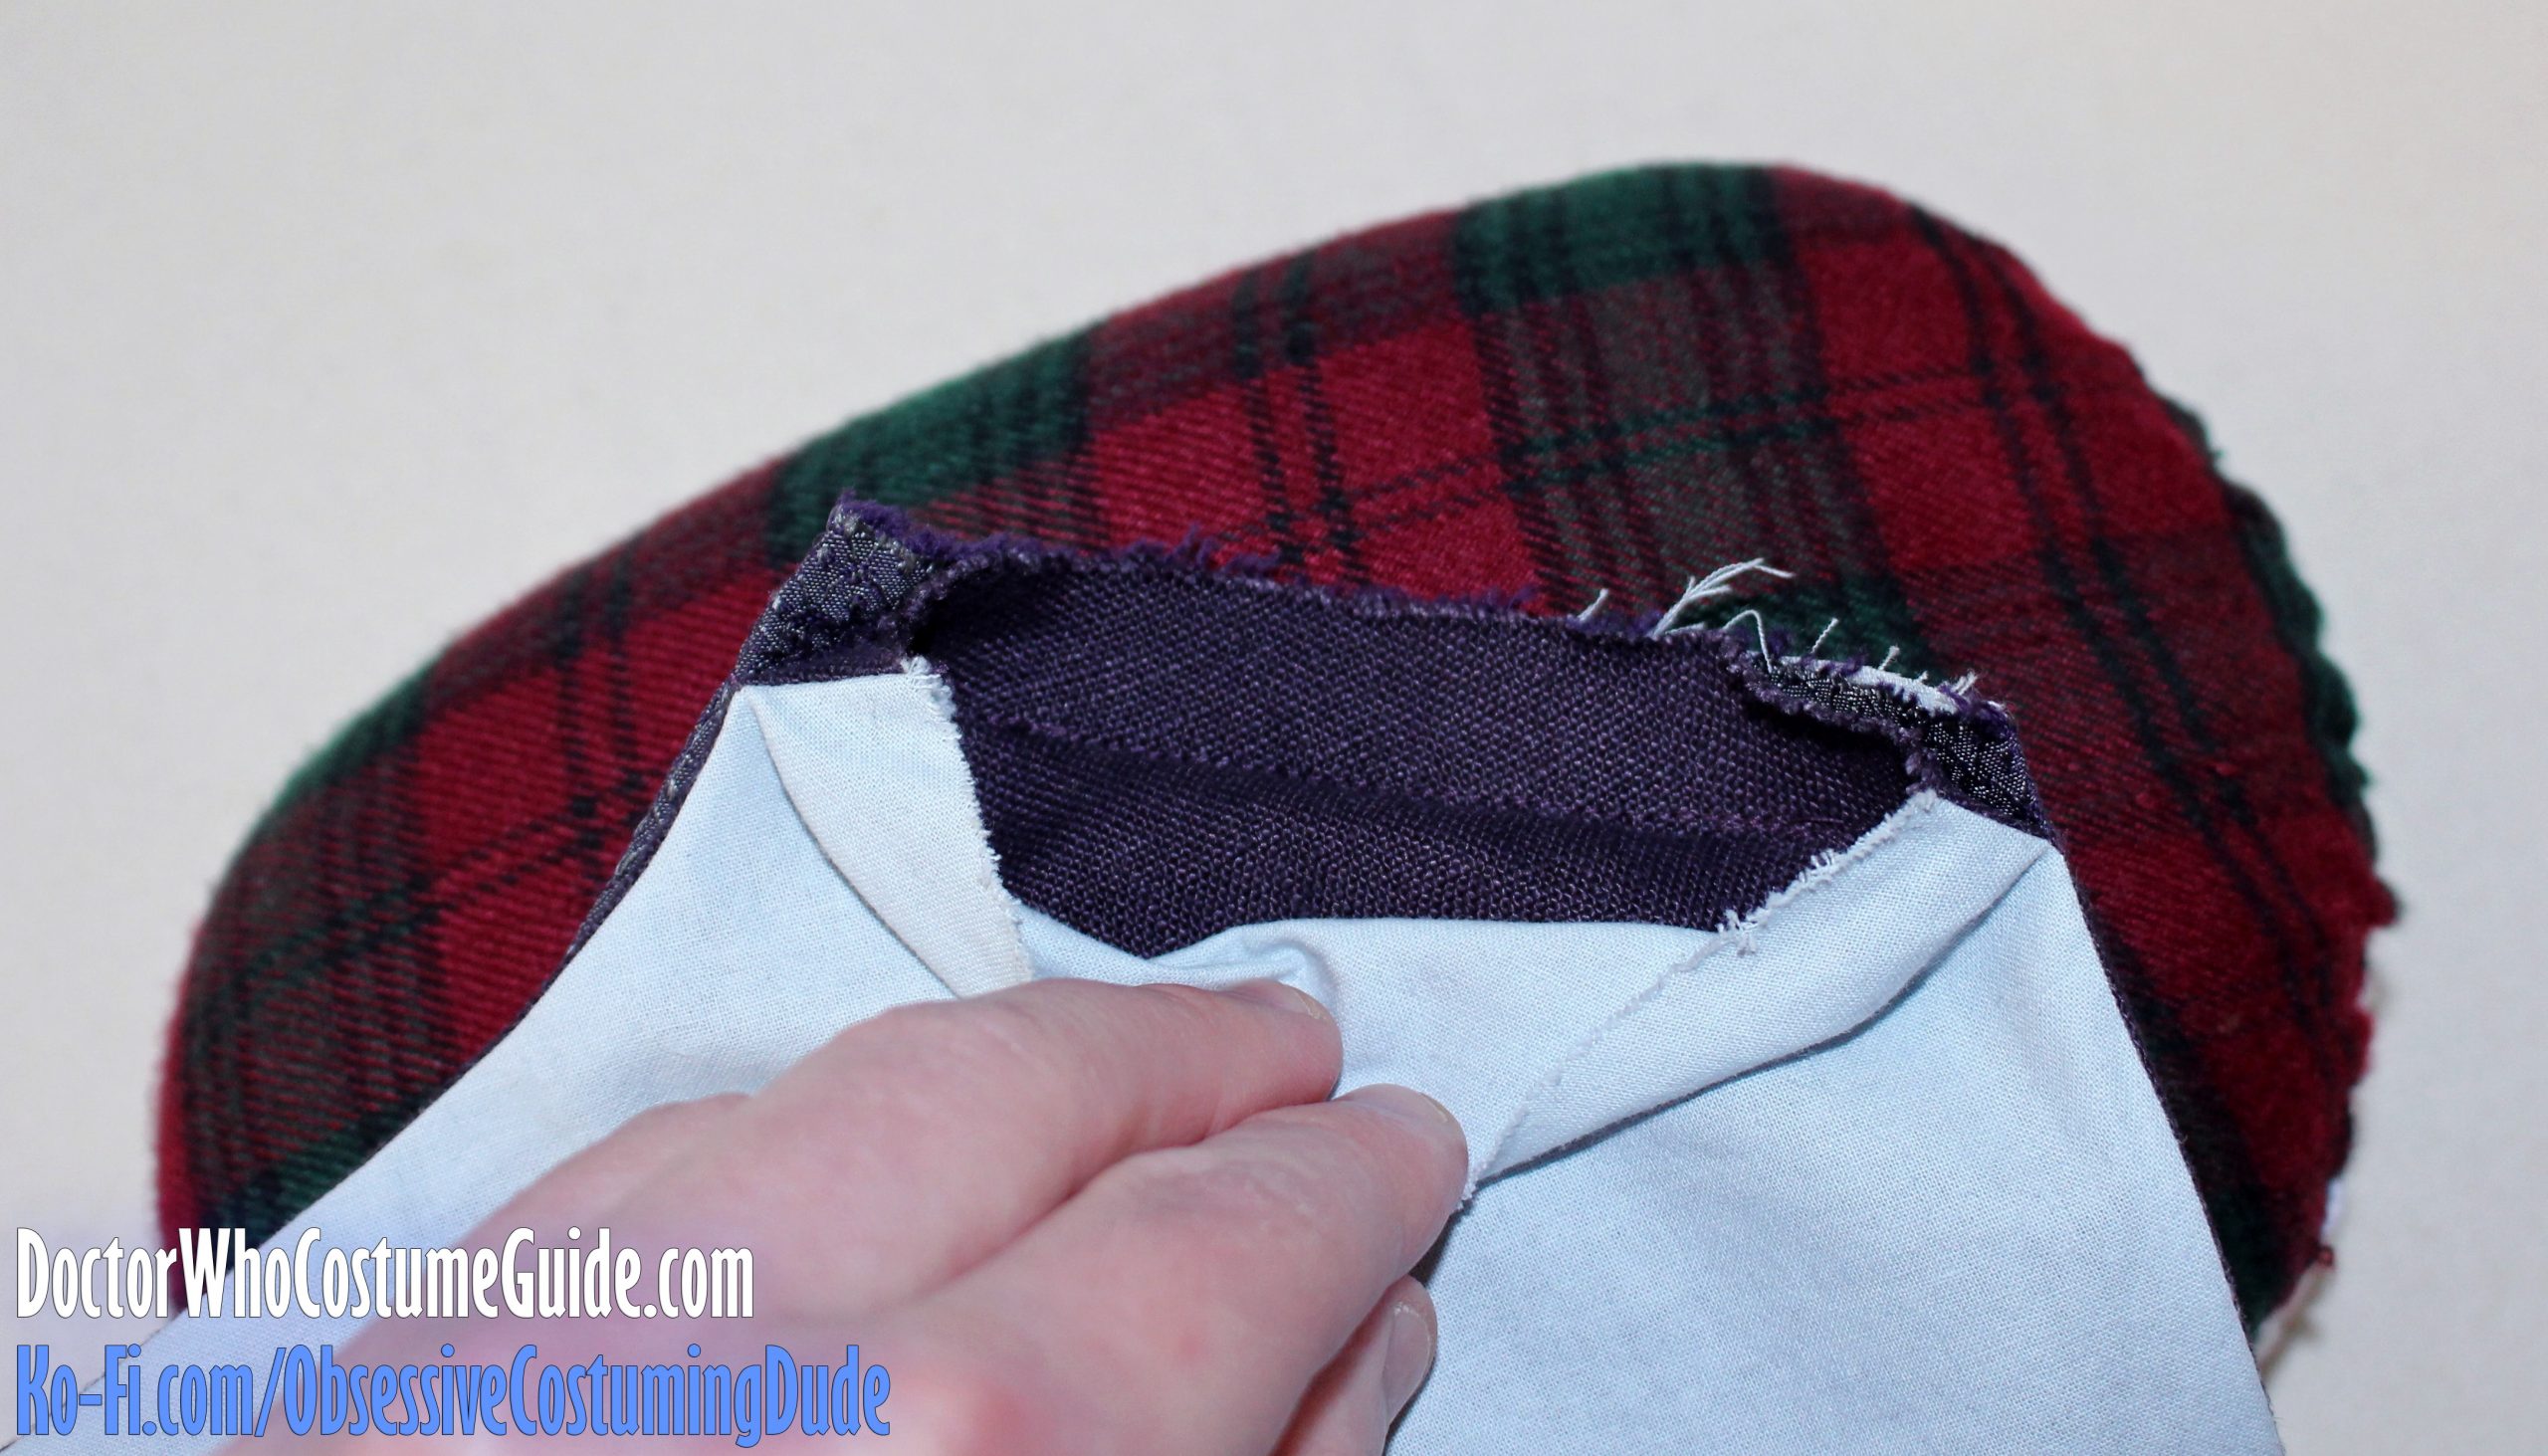
Reach through one of the back’s open shoulders and gently turn the waistcoat right-side-out.
Press the neckline, armhole, side, and lower back.
TIP: When pressing the neckline and armhole seams, roll the seam line slightly to the underside, to minimize any unwelcome “peek-a-boo” from the lining.
Open the back shoulders and pull the back lining out of the way.
Pin the back shoulder to the front shoulder, matching neckline and armhole seam lines.
Sew the back to the front along the shoulder, again pulling the back lining out of the way.
TIP: Use a quilting/walking foot to sew the front and back assemblies together along the shoulder.
Press the shoulder seam allowances toward the back.
Press the back lining seam allowance under and slip-stitch the back lining to the front facing/lining assembly.
Edge-stitch the back straps down from the side seam to approximately halfway to the center back seam, pivoting and stitching vertically around the halfway point.
TIP: Use a quilting/walking foot to topstitch down the back straps.
Attach the back buckle, attach the buttons, and you’re finished!