Eleventh Doctor “Snowmen” Trousers – Sewing Tutorial
ALL SEAM ALLOWANCES ARE ⅝” UNLESS OTHERWISE SPECIFIED!
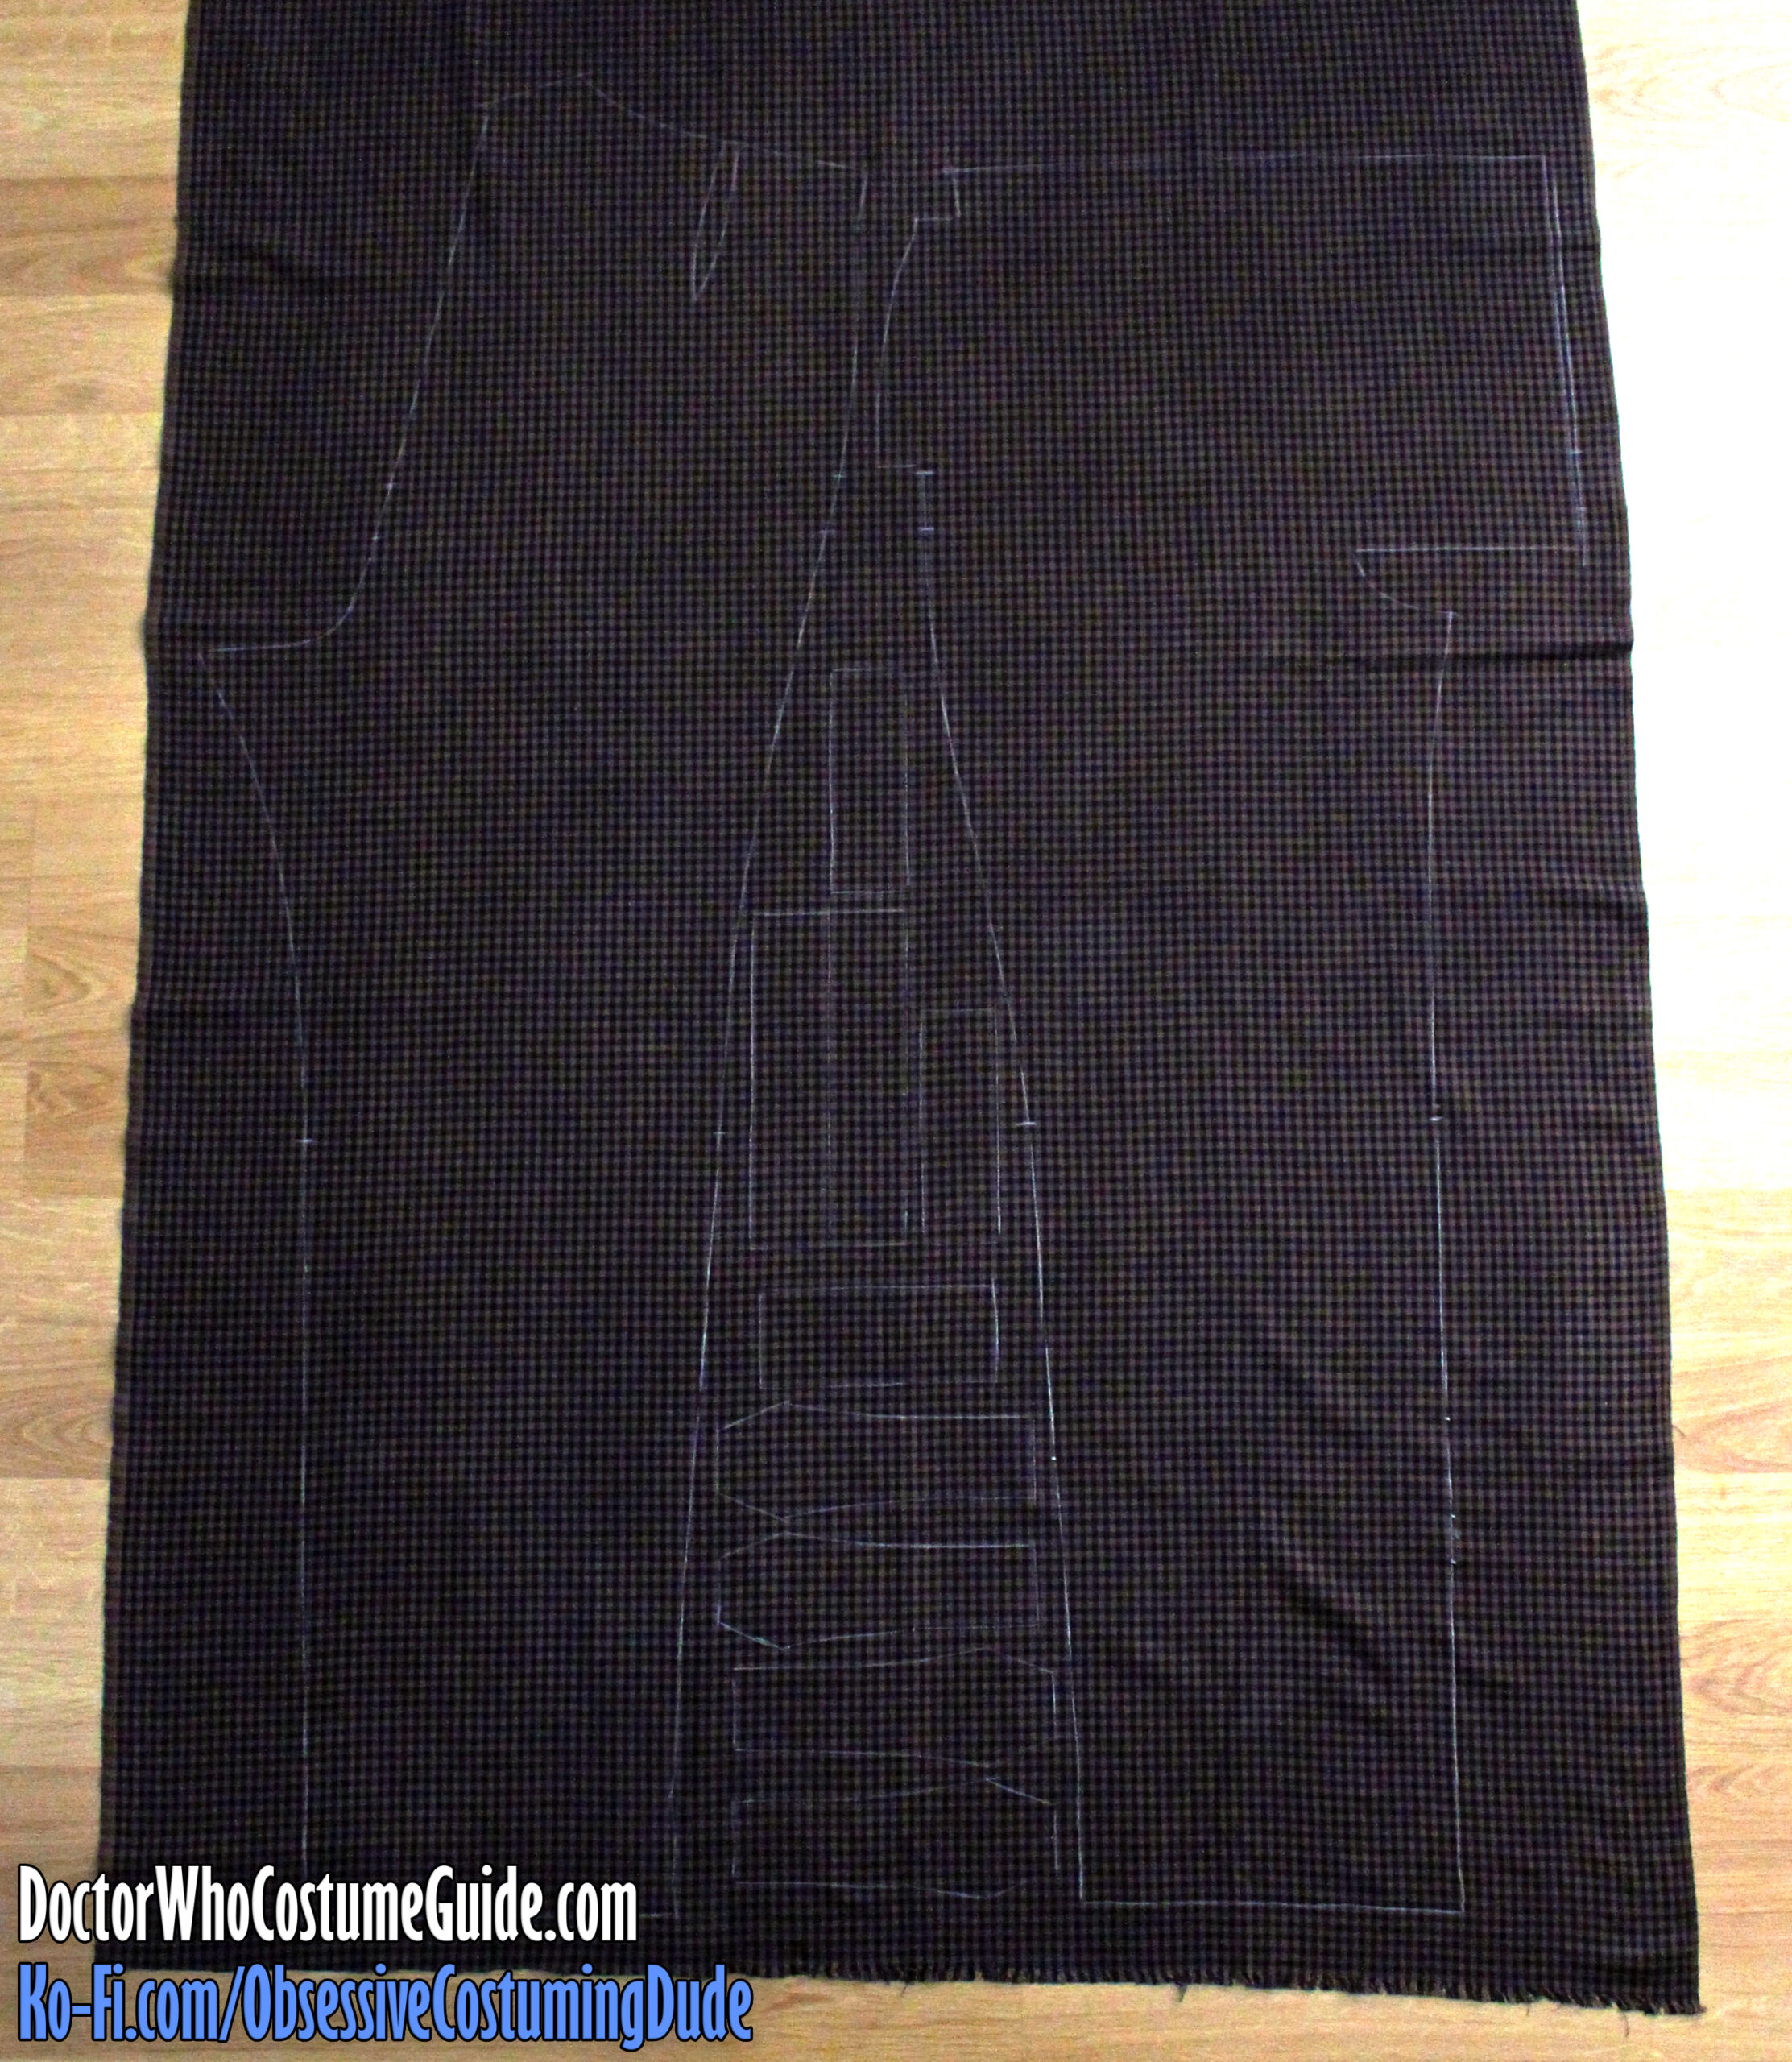
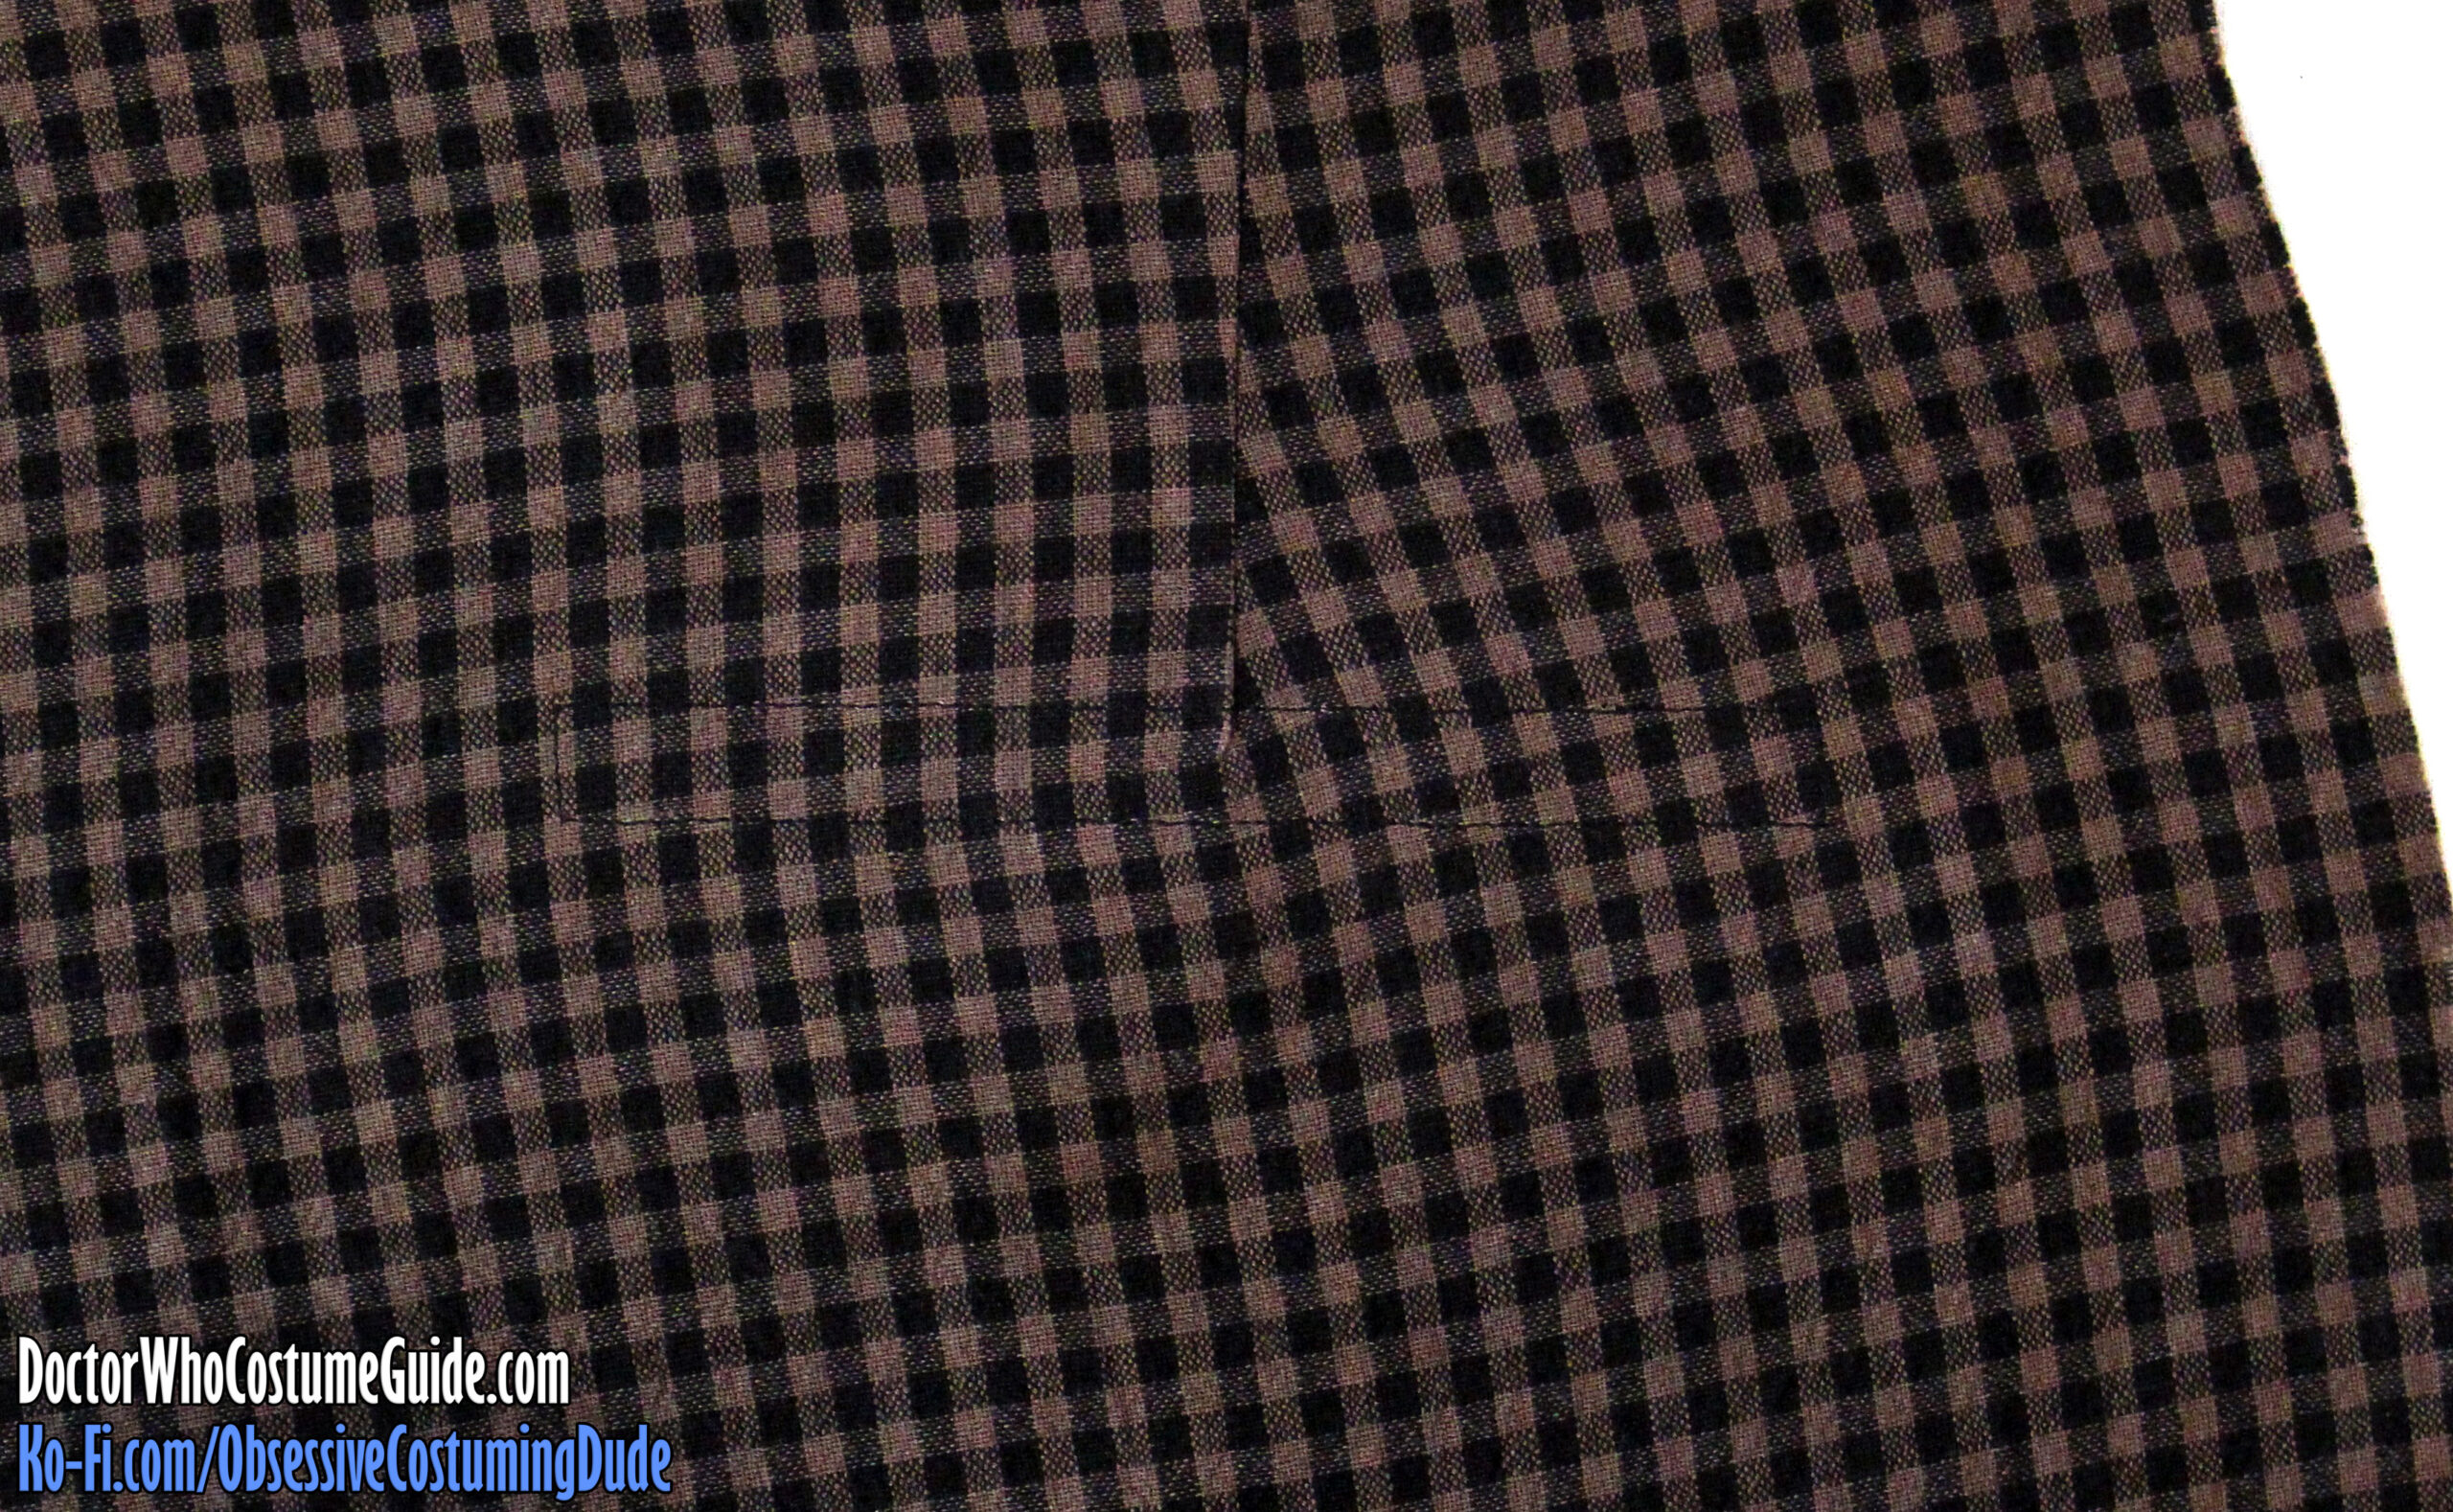
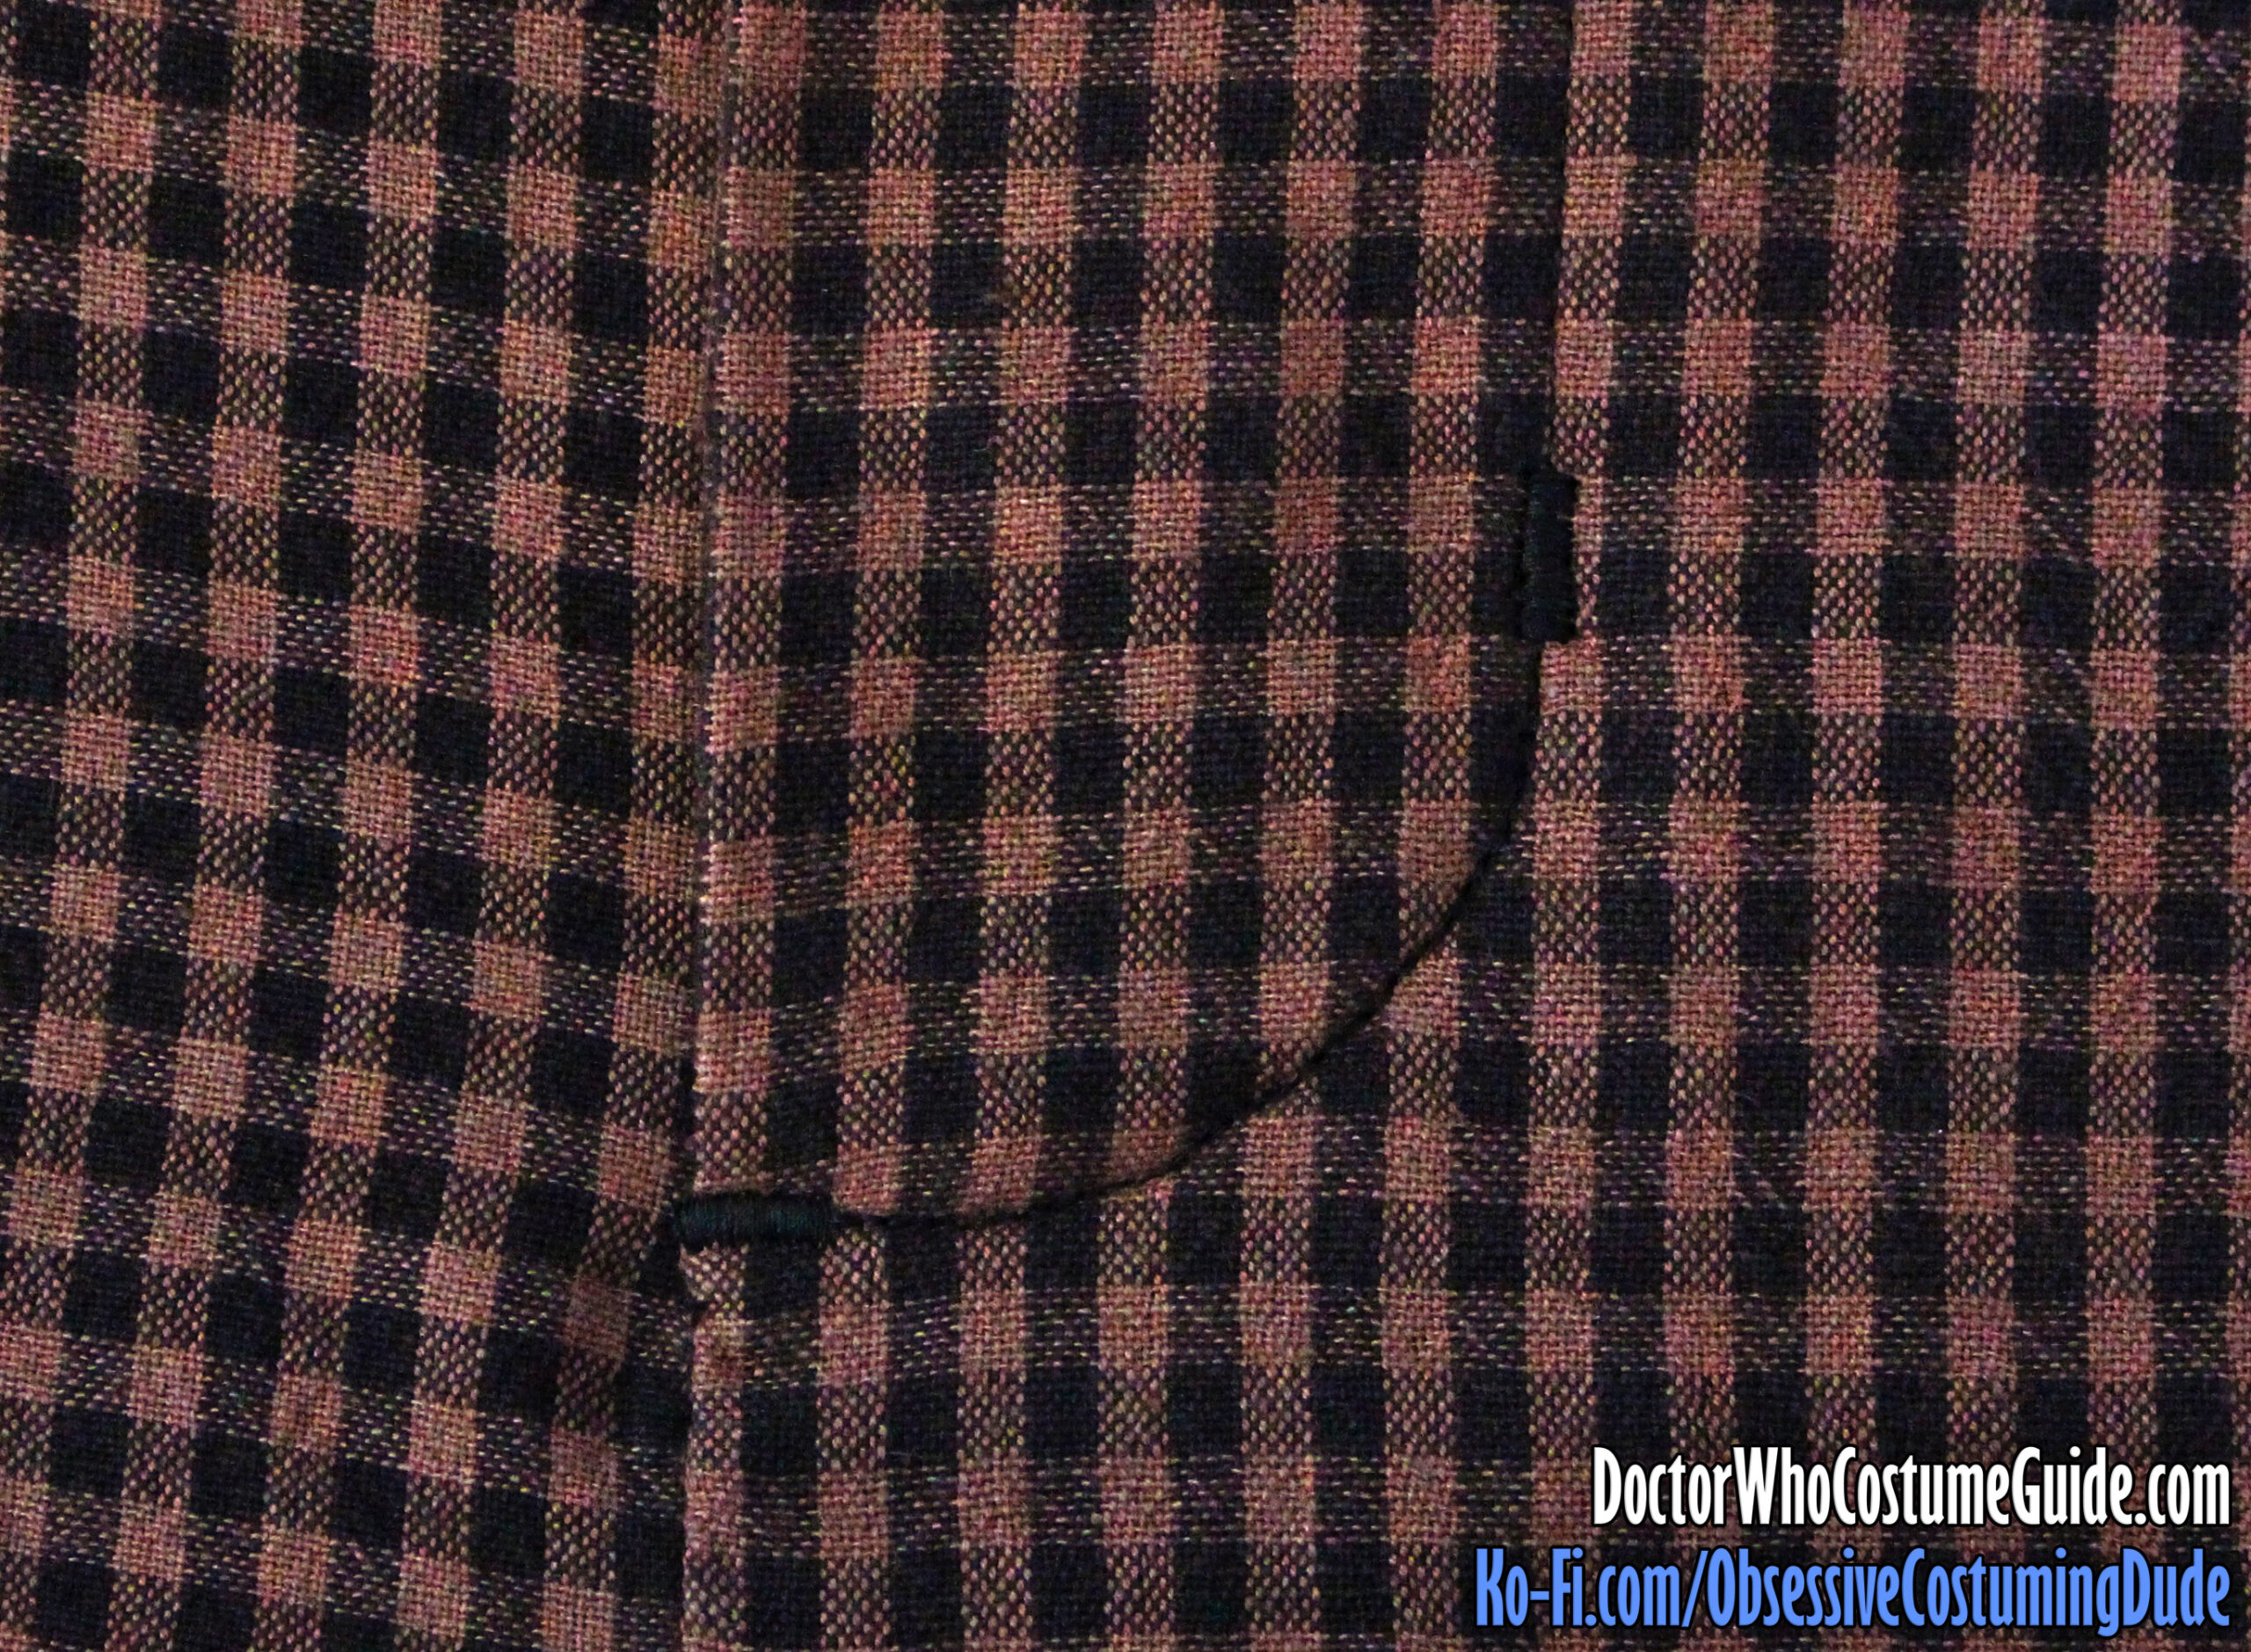
When cutting out your pattern pieces, pay close attention to the grain line markings in relation to the fabric’s check pattern. You can also use the lengthen/shorten lines as horizontal alignment guides to ensure the trousers panels are all properly matched and symmetrical.
Remember to cut your fly and pocket welt/facing pieces so they properly match the check pattern as well.
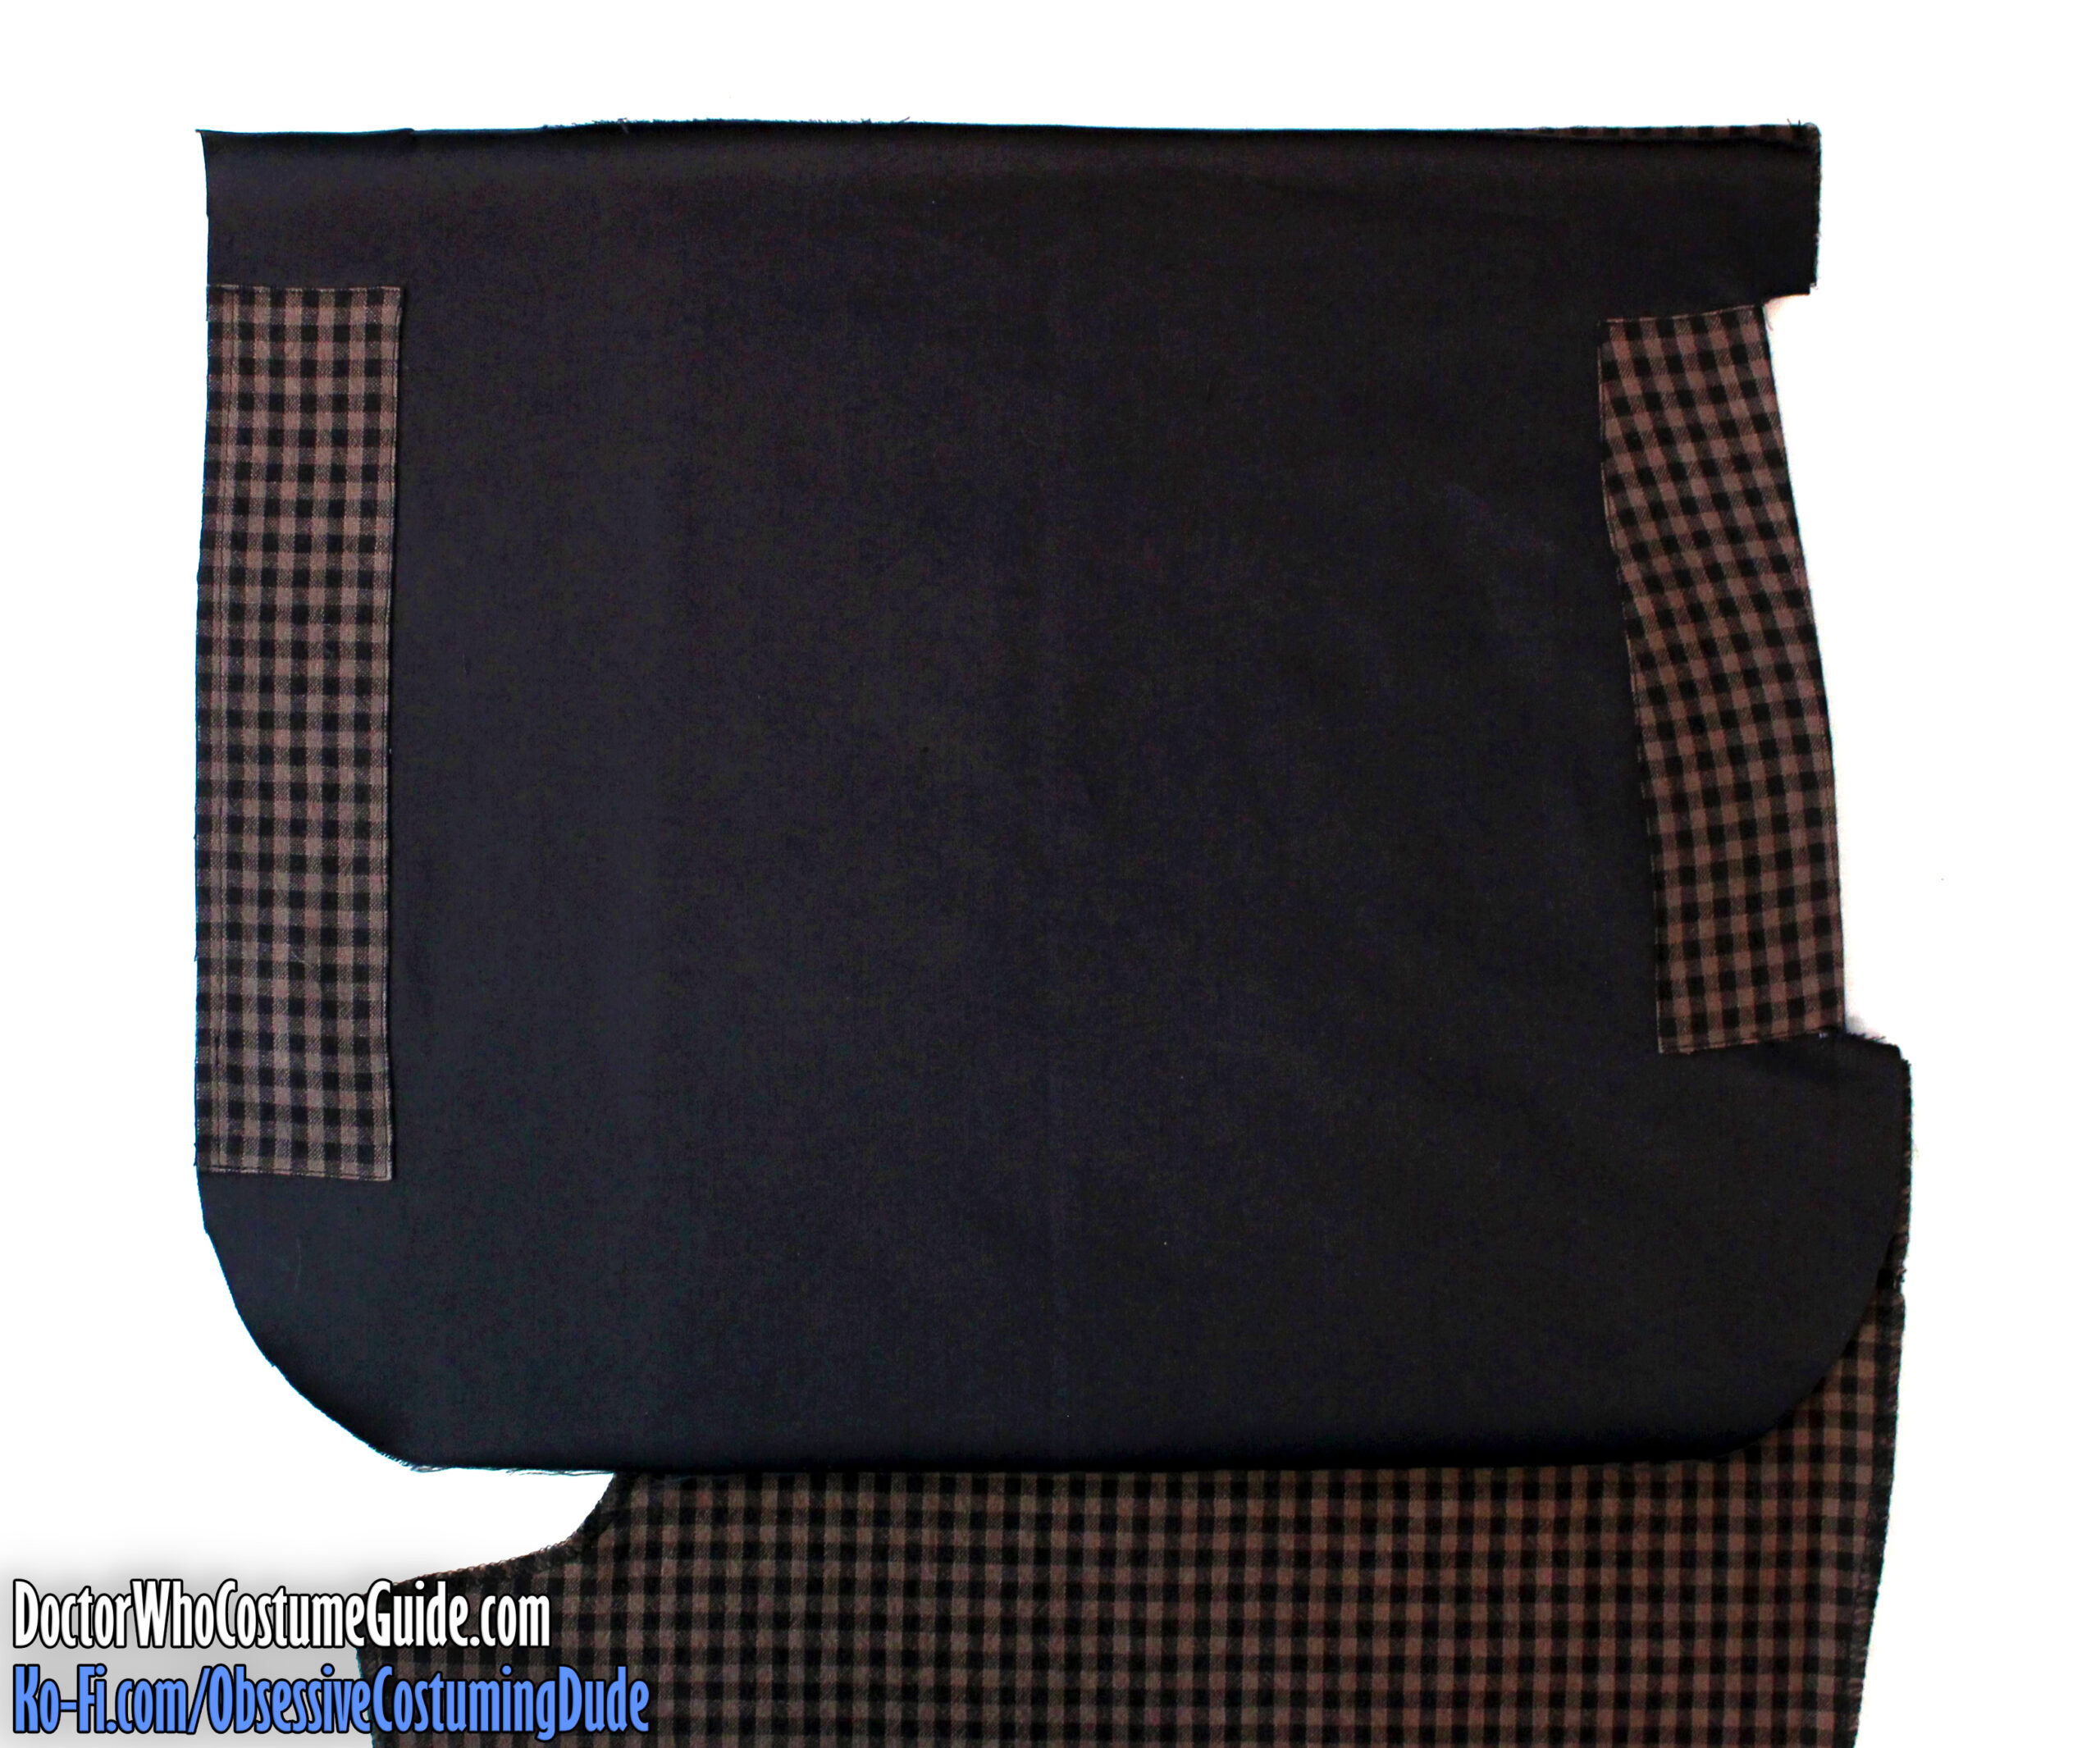
The trousers have cut-on (“grown-on”) side pocket facings.
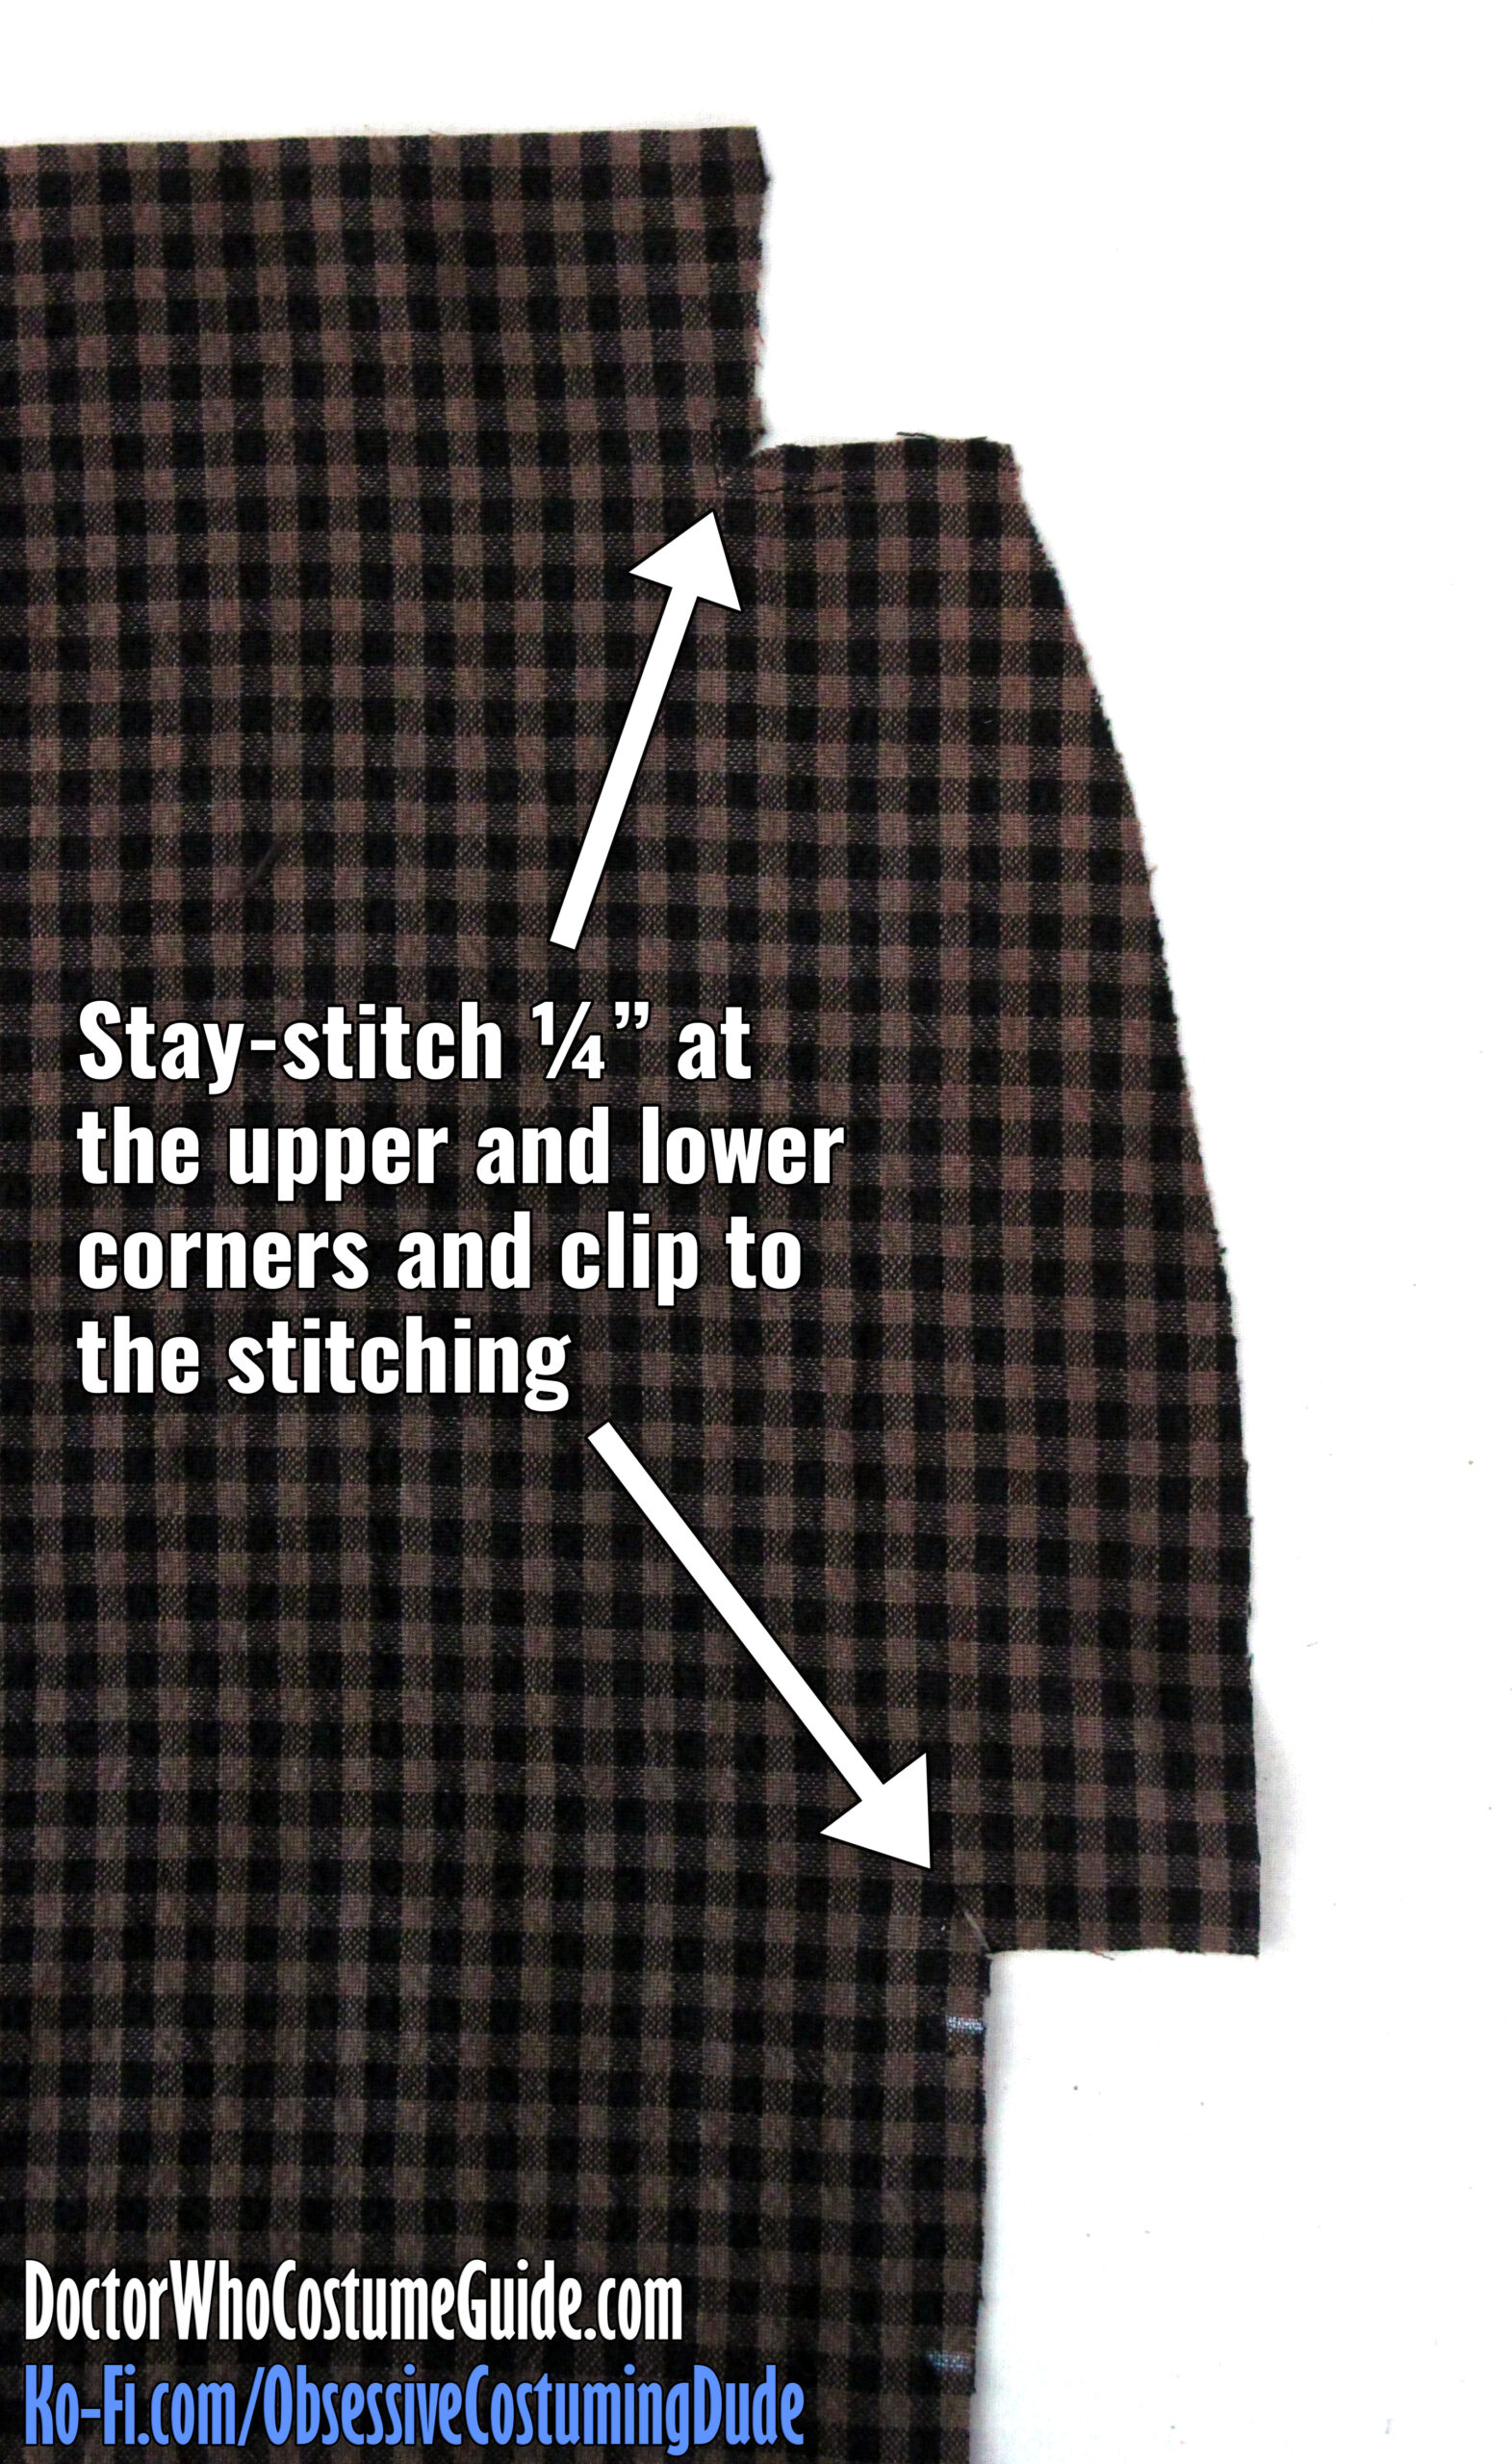
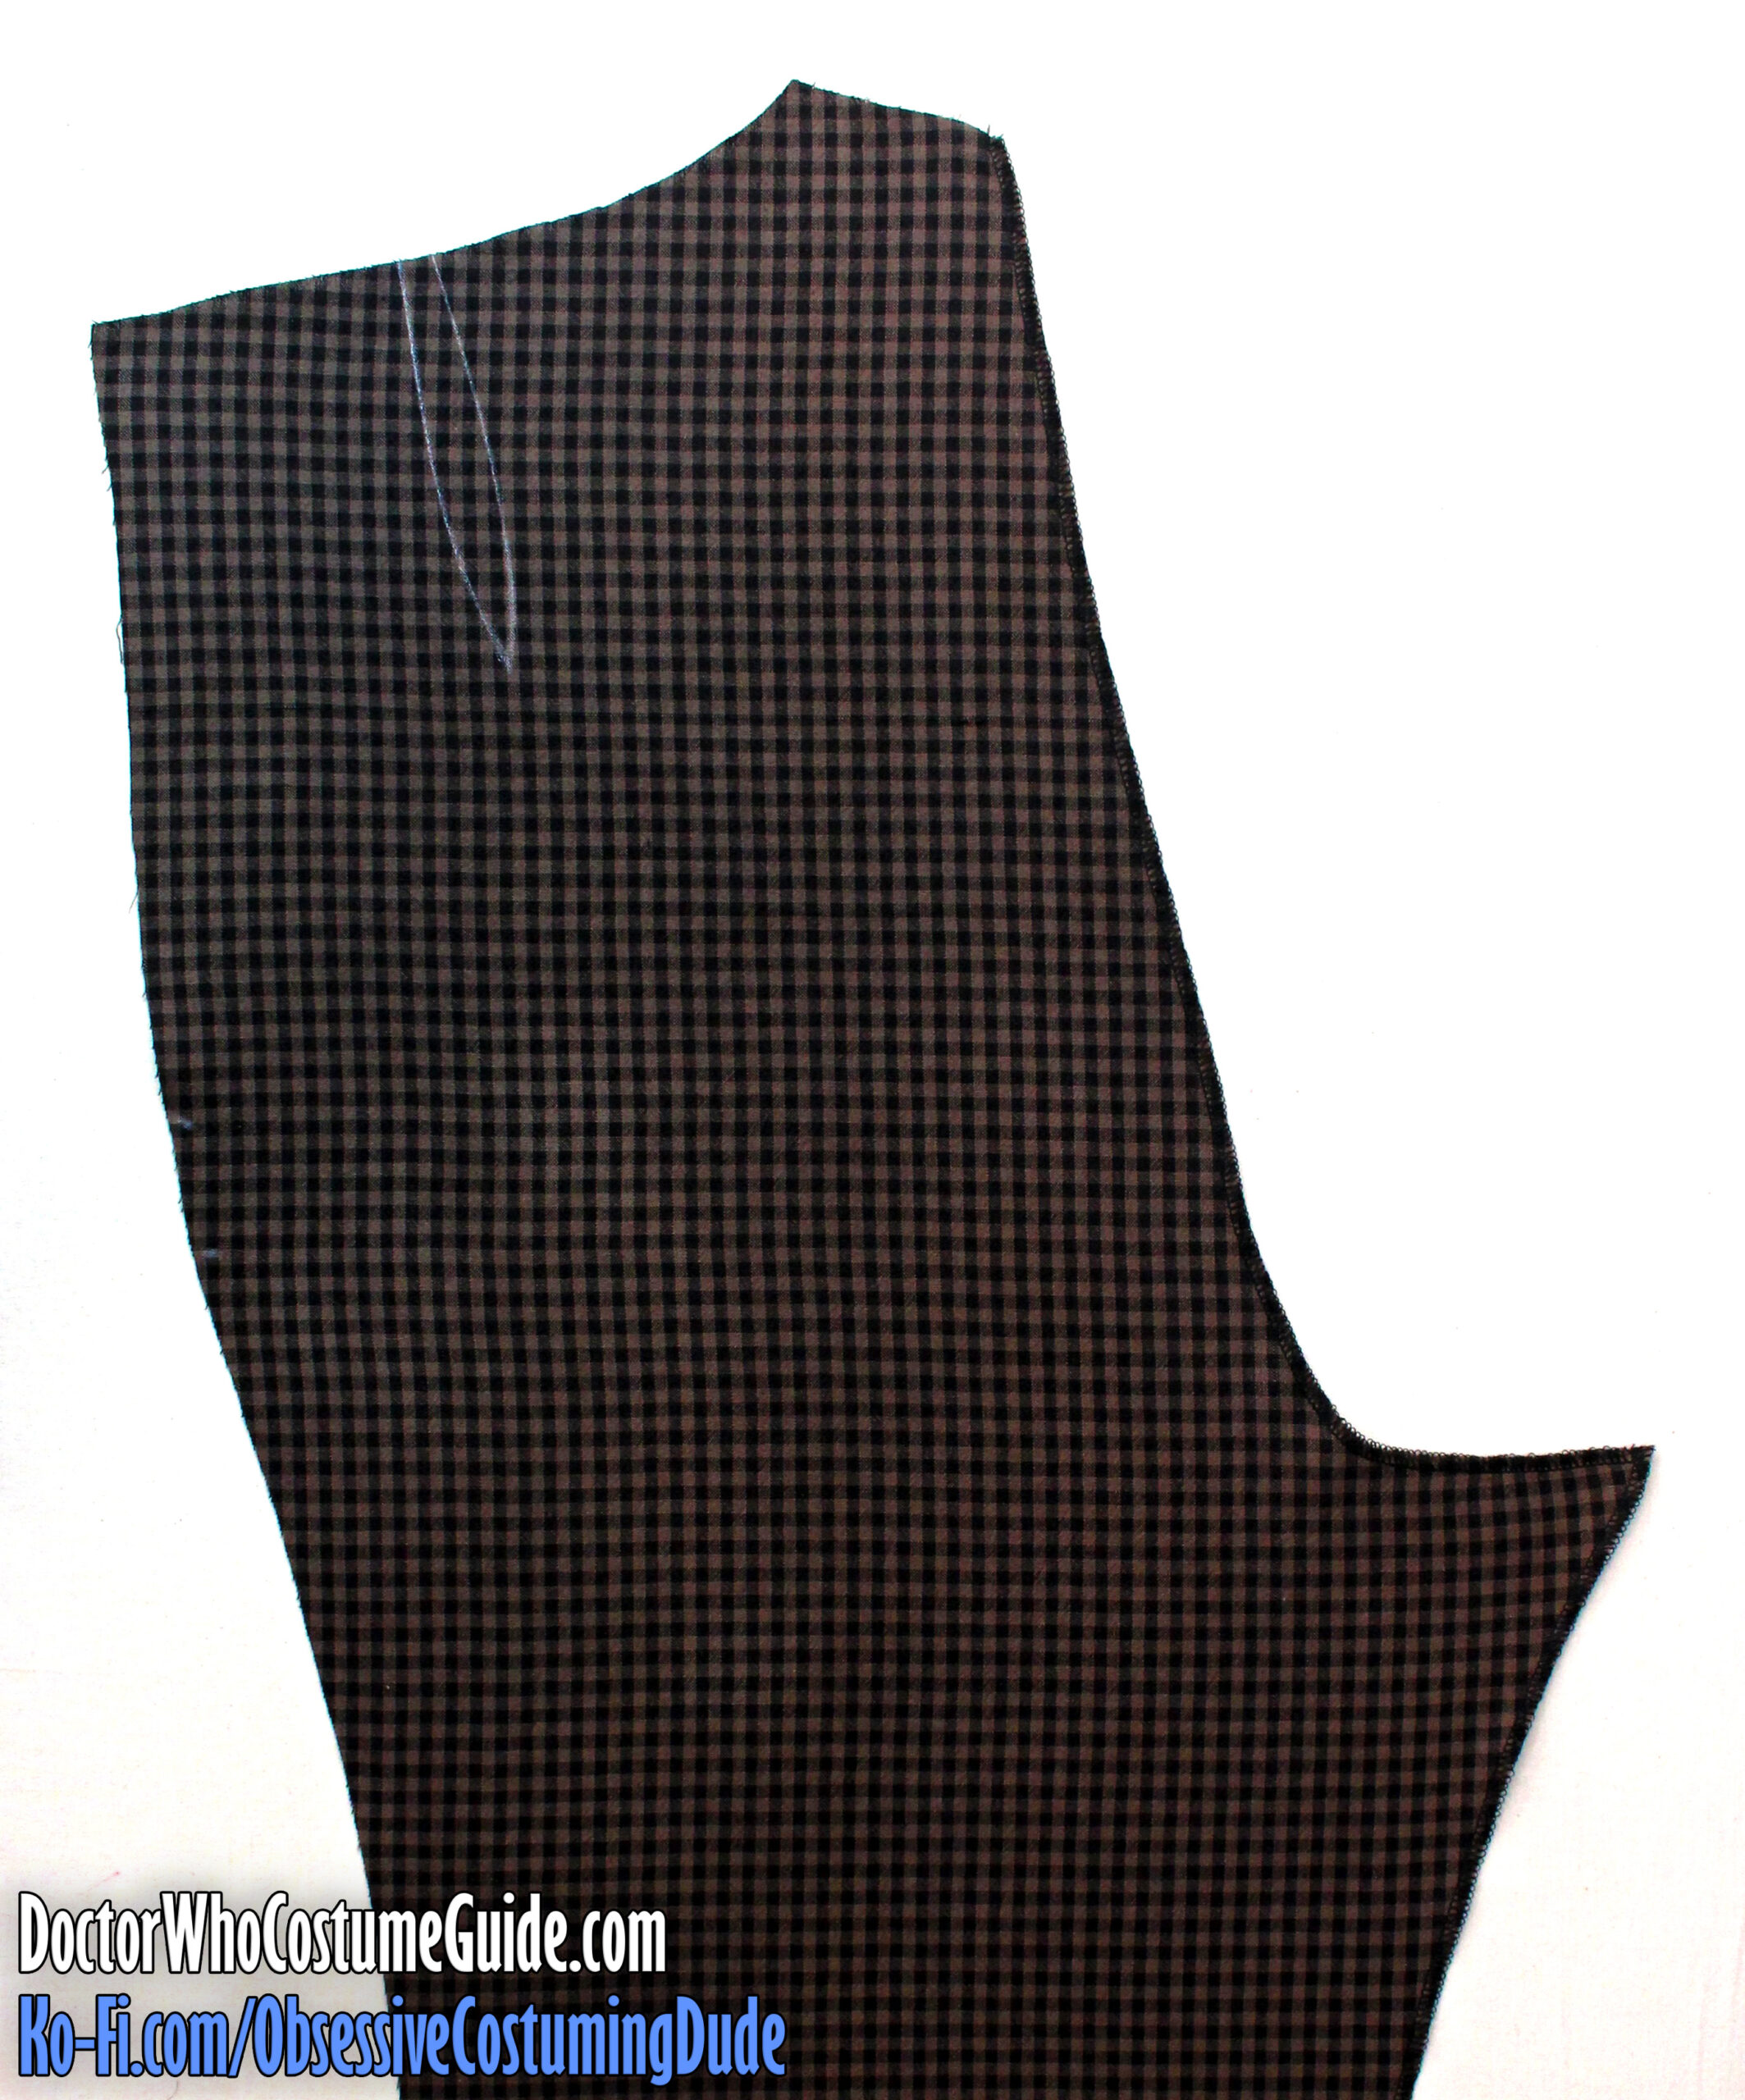
On the fronts (piece A), stay-stitch the upper and lower corners of the pocket facing extension ¼” from the edges, then clip to the stitching.
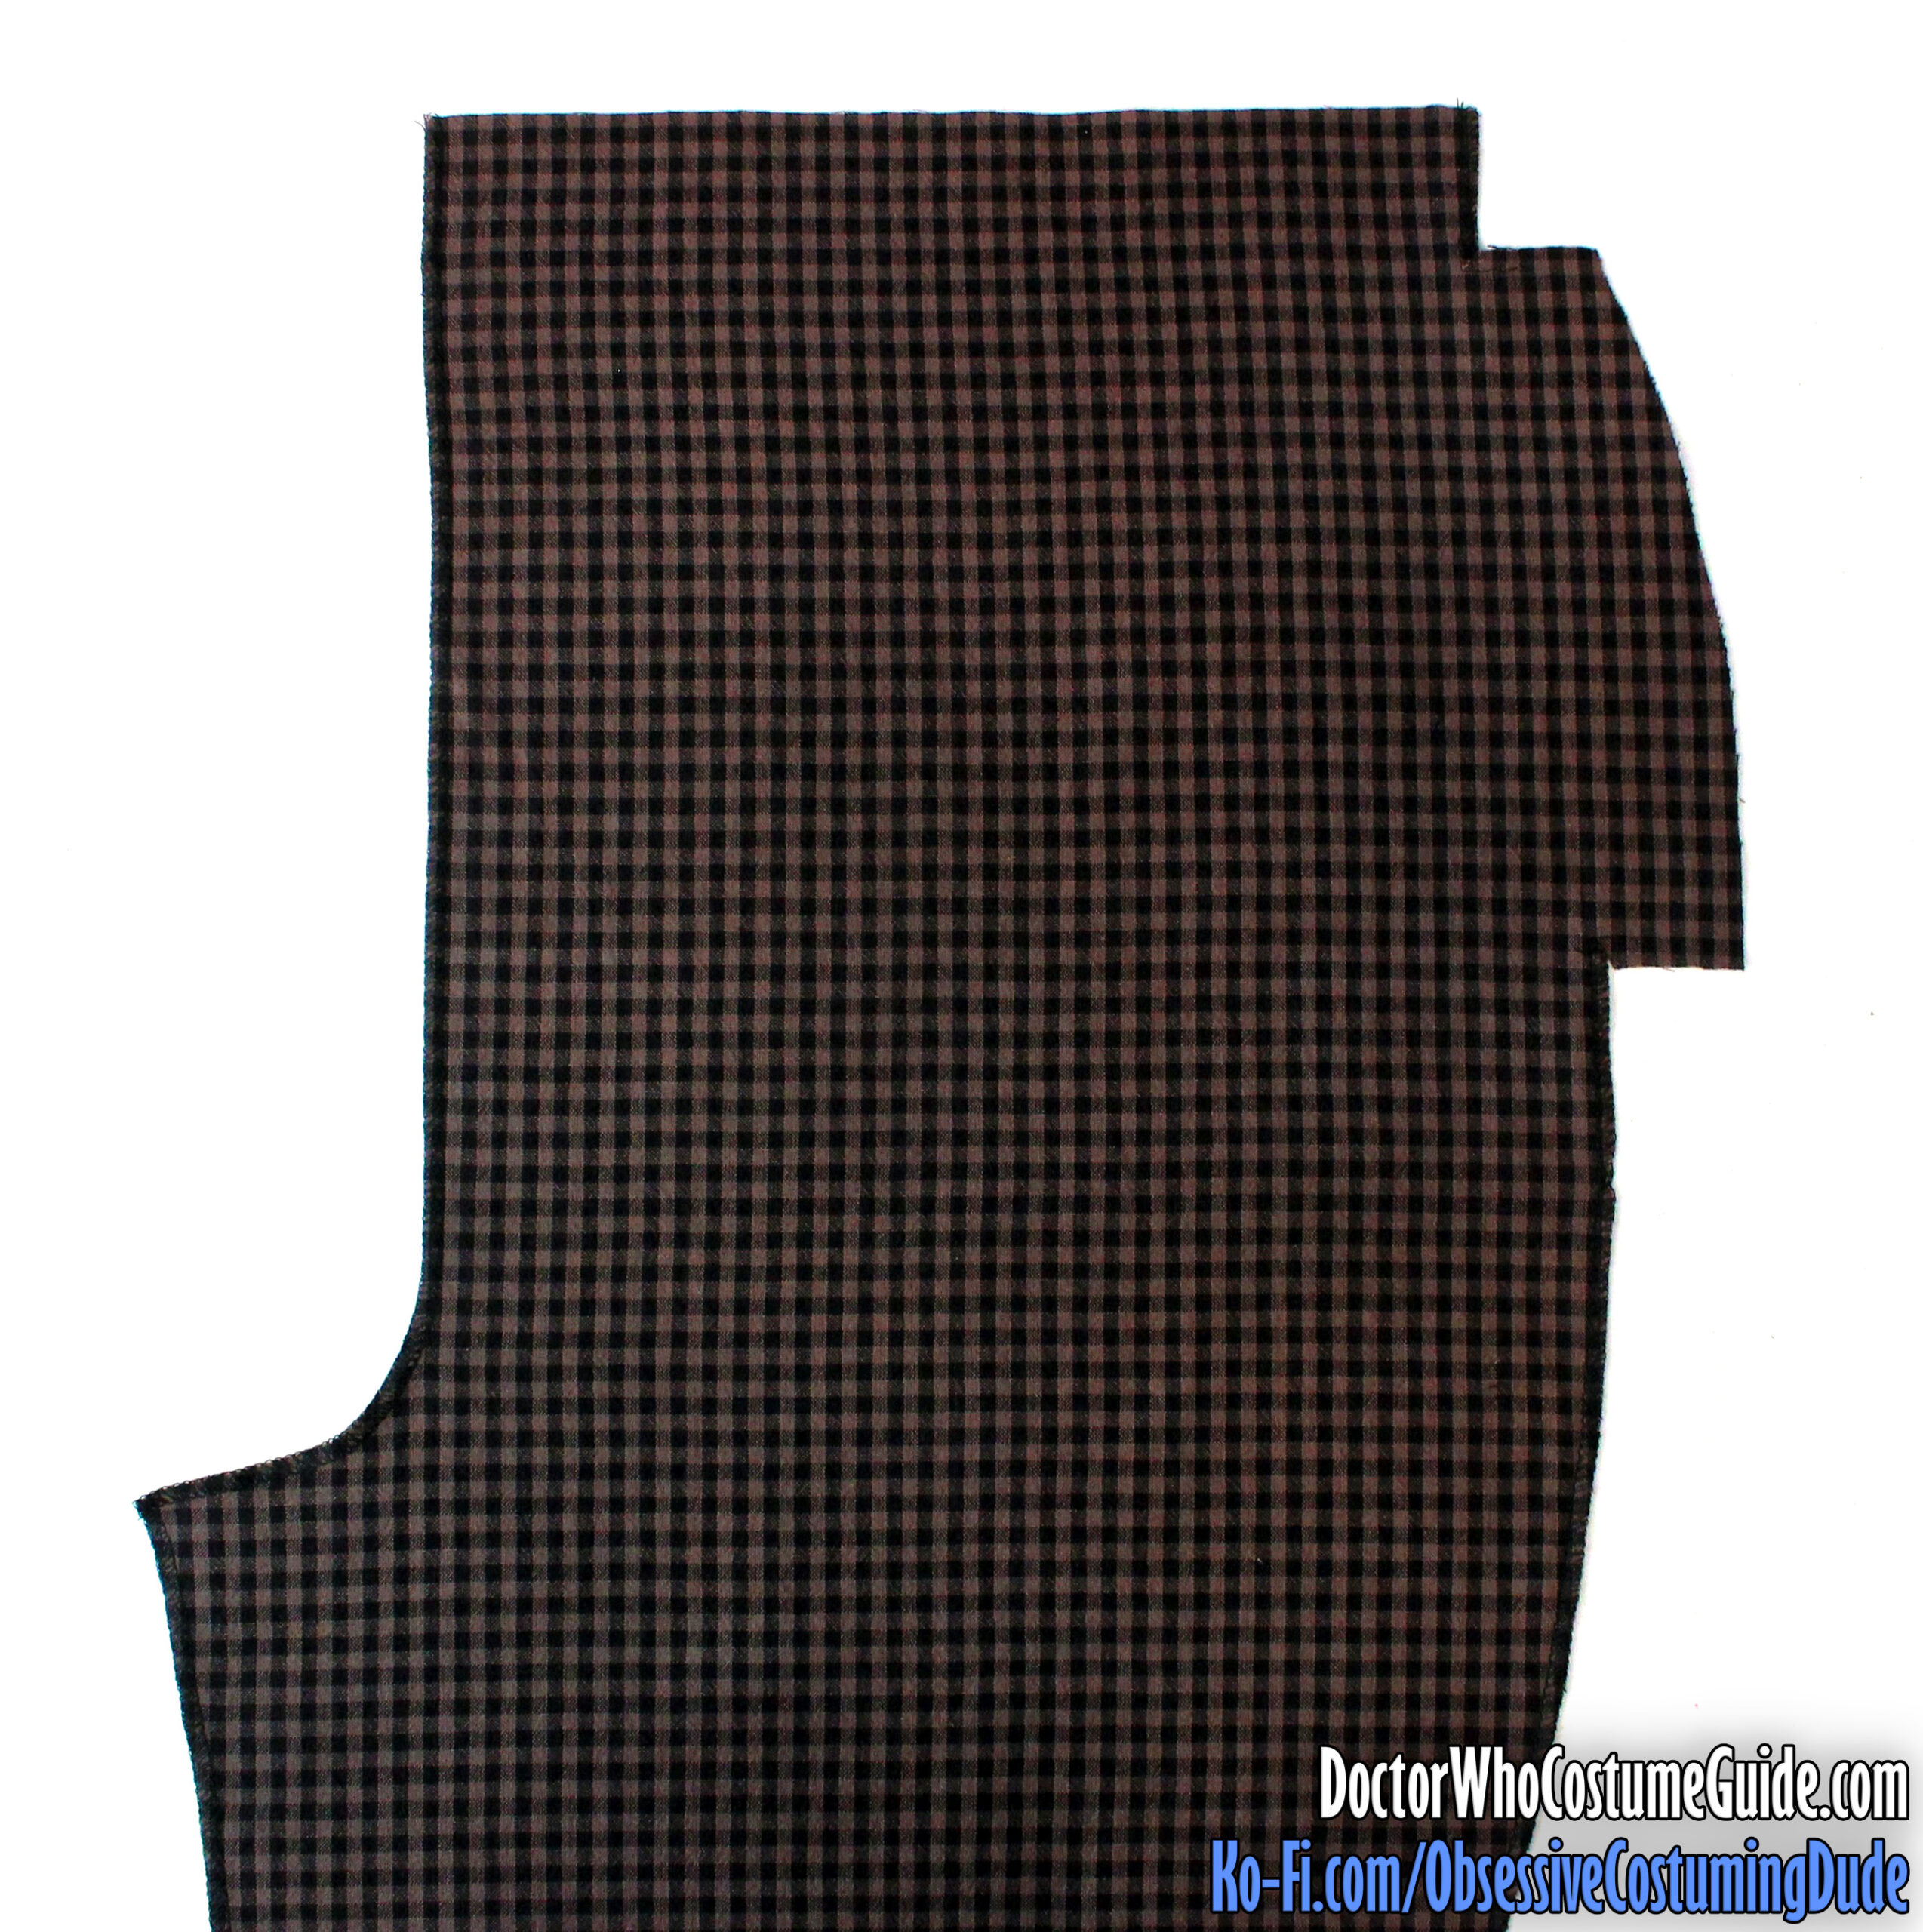
Serge the front, crotch, inseam, side, and lower edges of the right front (piece A).
(Don’t bother serging the edges of the pocket facing, because those edges will be turned under and stitched to the pocket bag.)
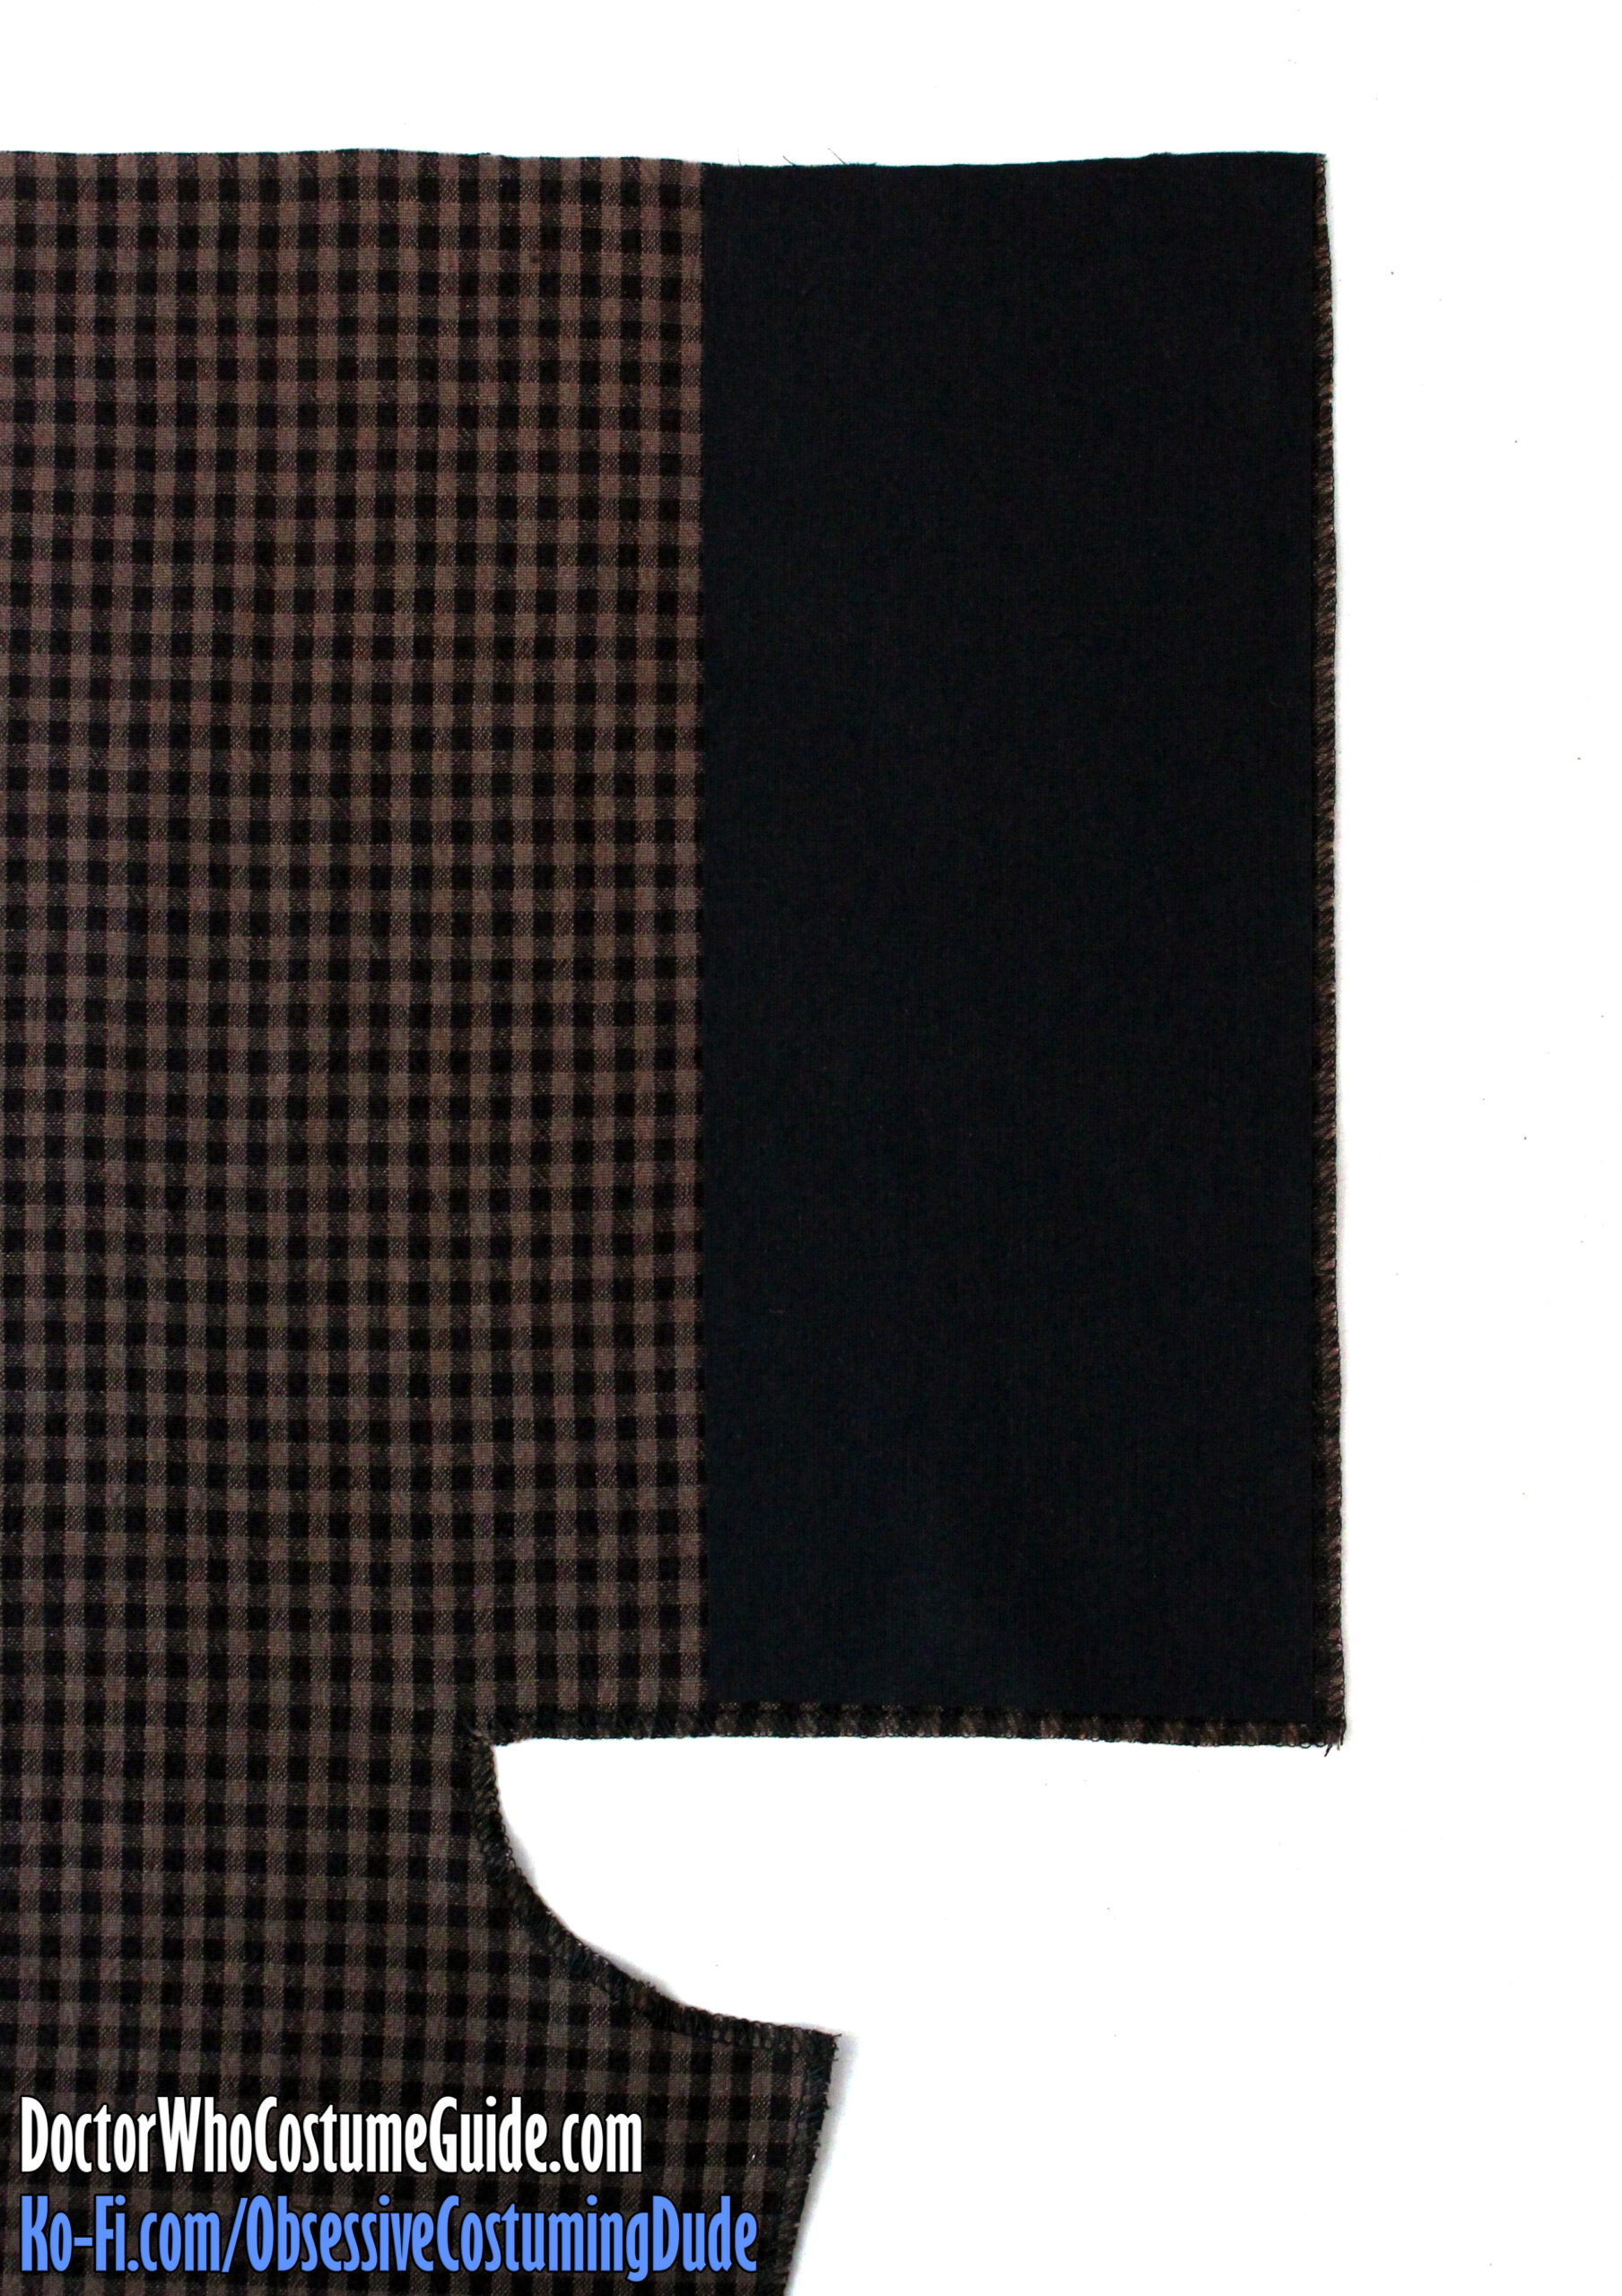
The left front trousers panel also has a cut-on (“grown-on”) fly facing extension at the front.
Serge the front, crotch, fly extension, side, and lower edges of the left front (piece A).
I suggest applying a layer of fusible interfacing to the outermost 4 ½” or so of the underside of the left fly extension, to bolster the area for the buttonholes.
Serge the center back, inseam, and lower edges of the back panels (piece B).
(The side edges will be serged later, when finishing the side pocket.)
Sew the upper back dart closed, and press the dart toward the center back.
I suggest applying a small rectangle of “pinked” fusible interfacing to the underside of the right back pocket area.
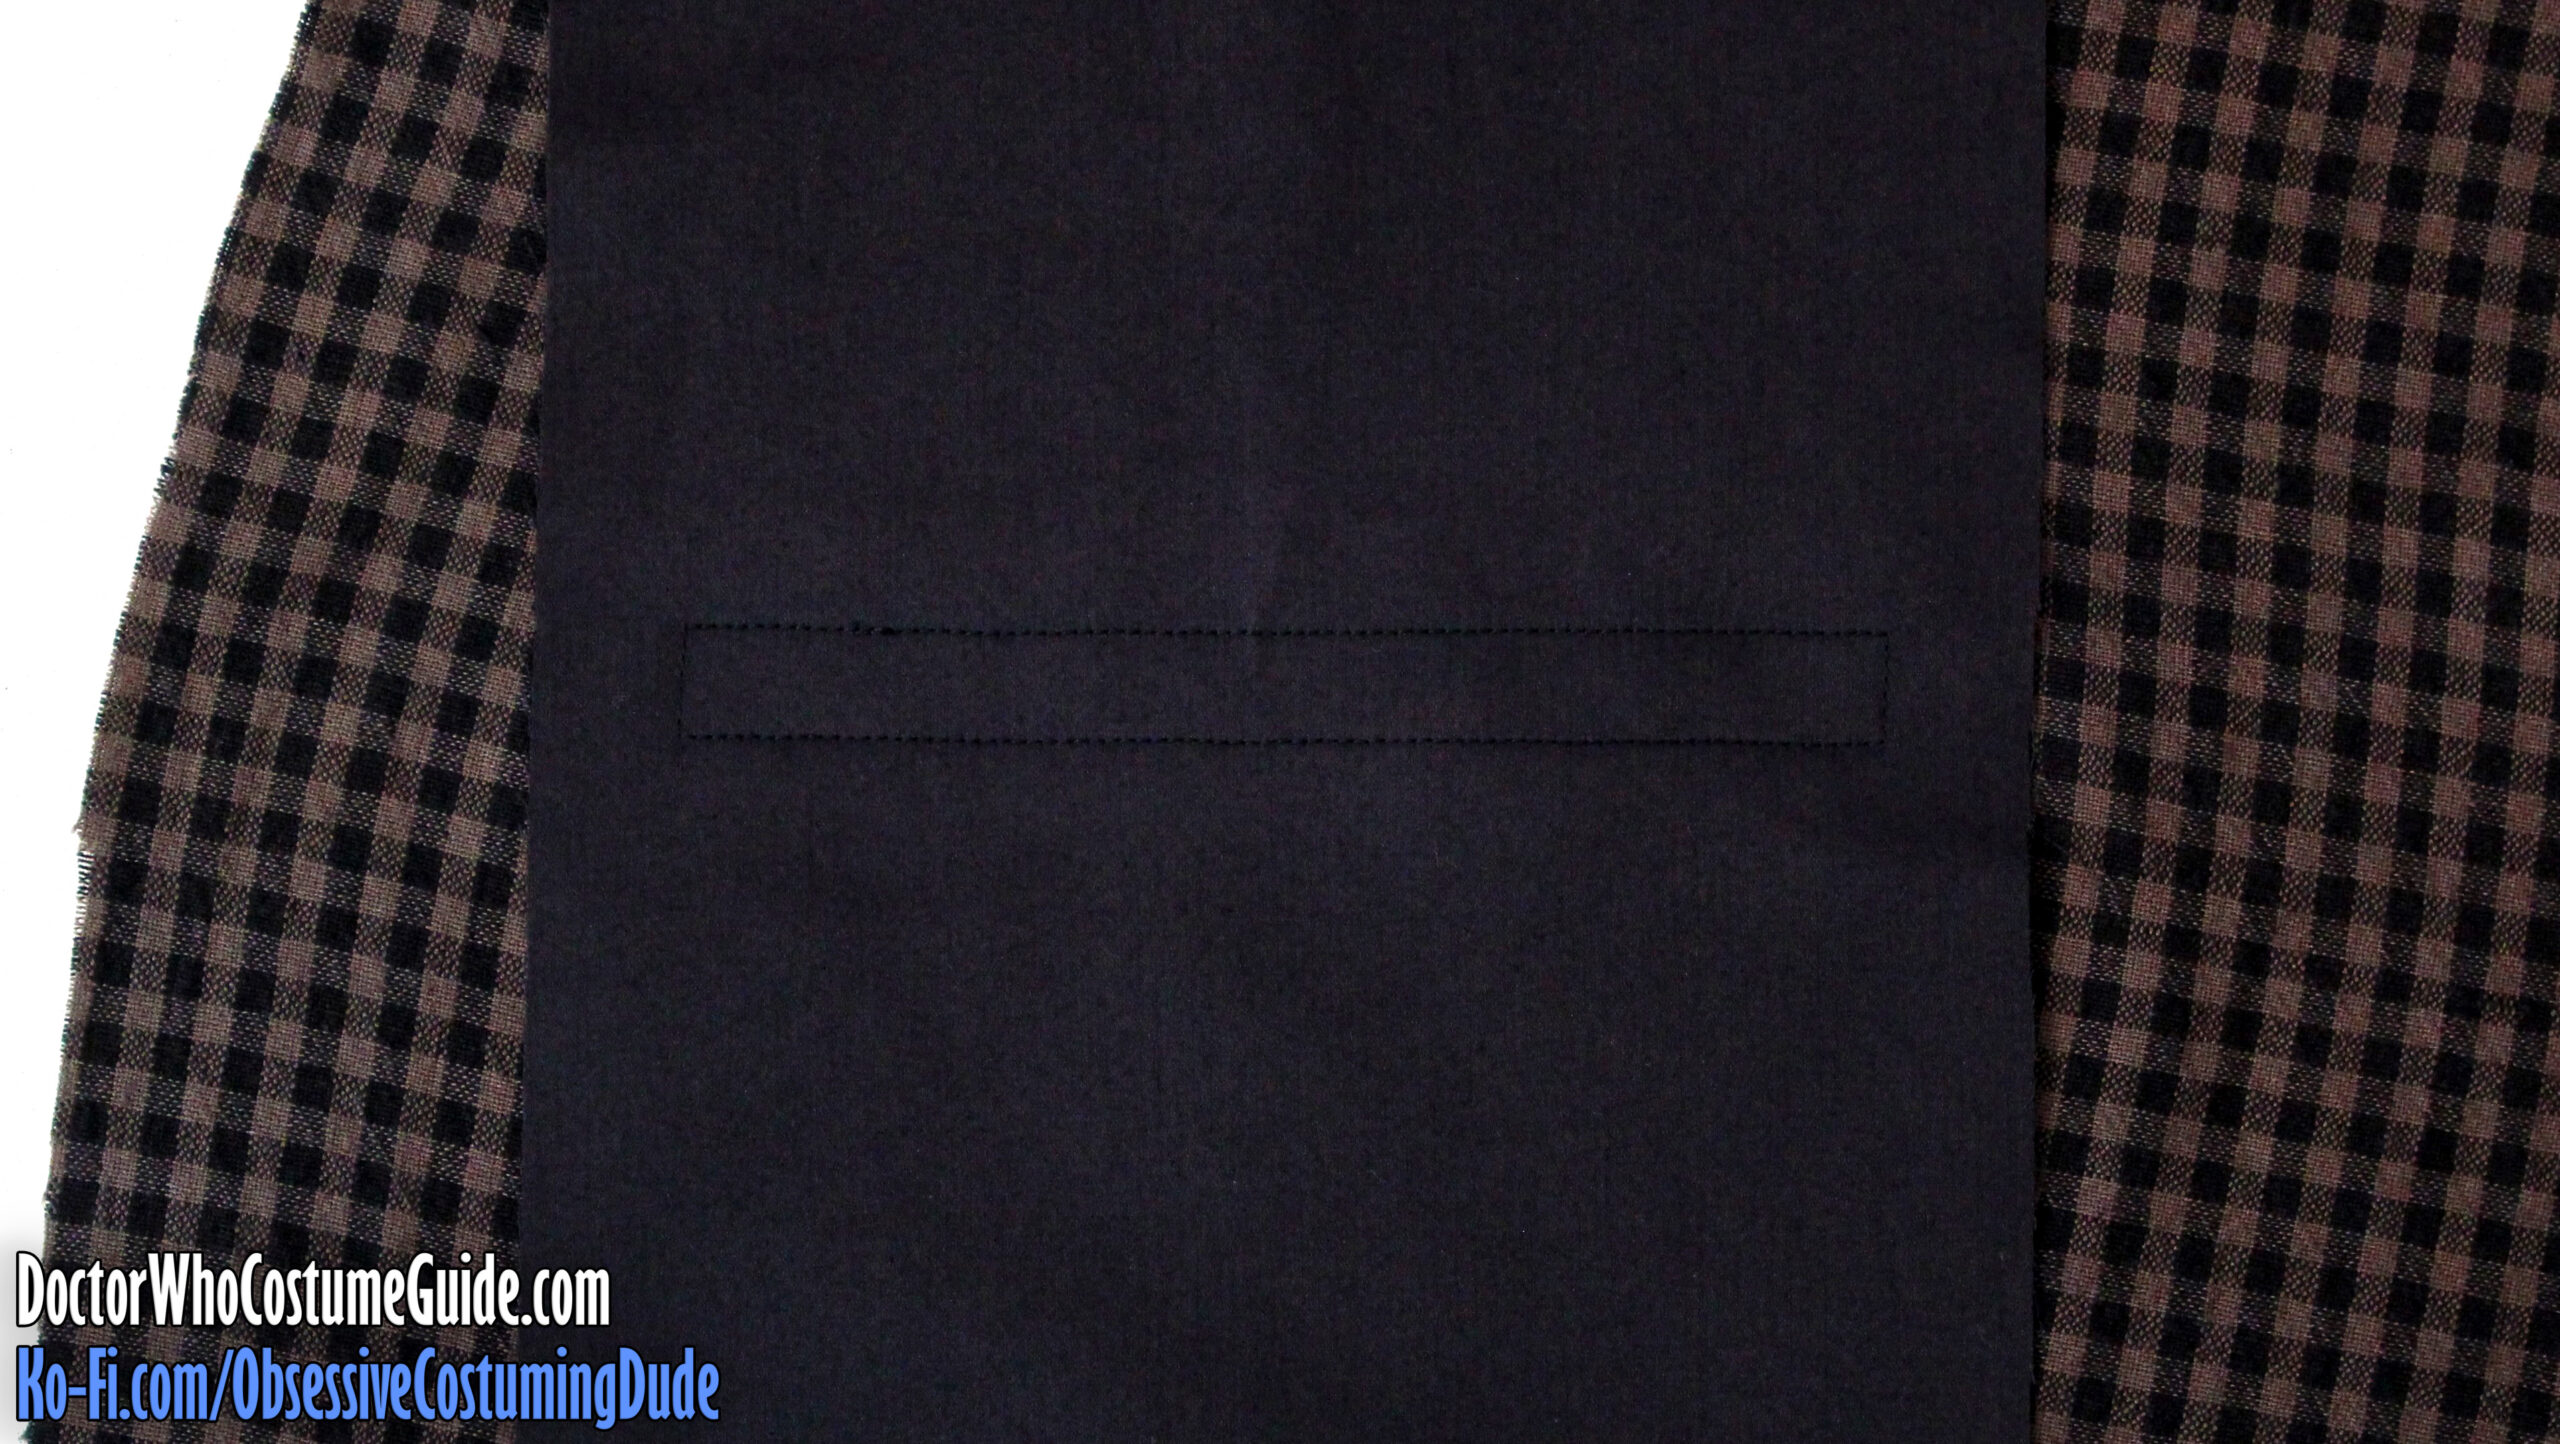
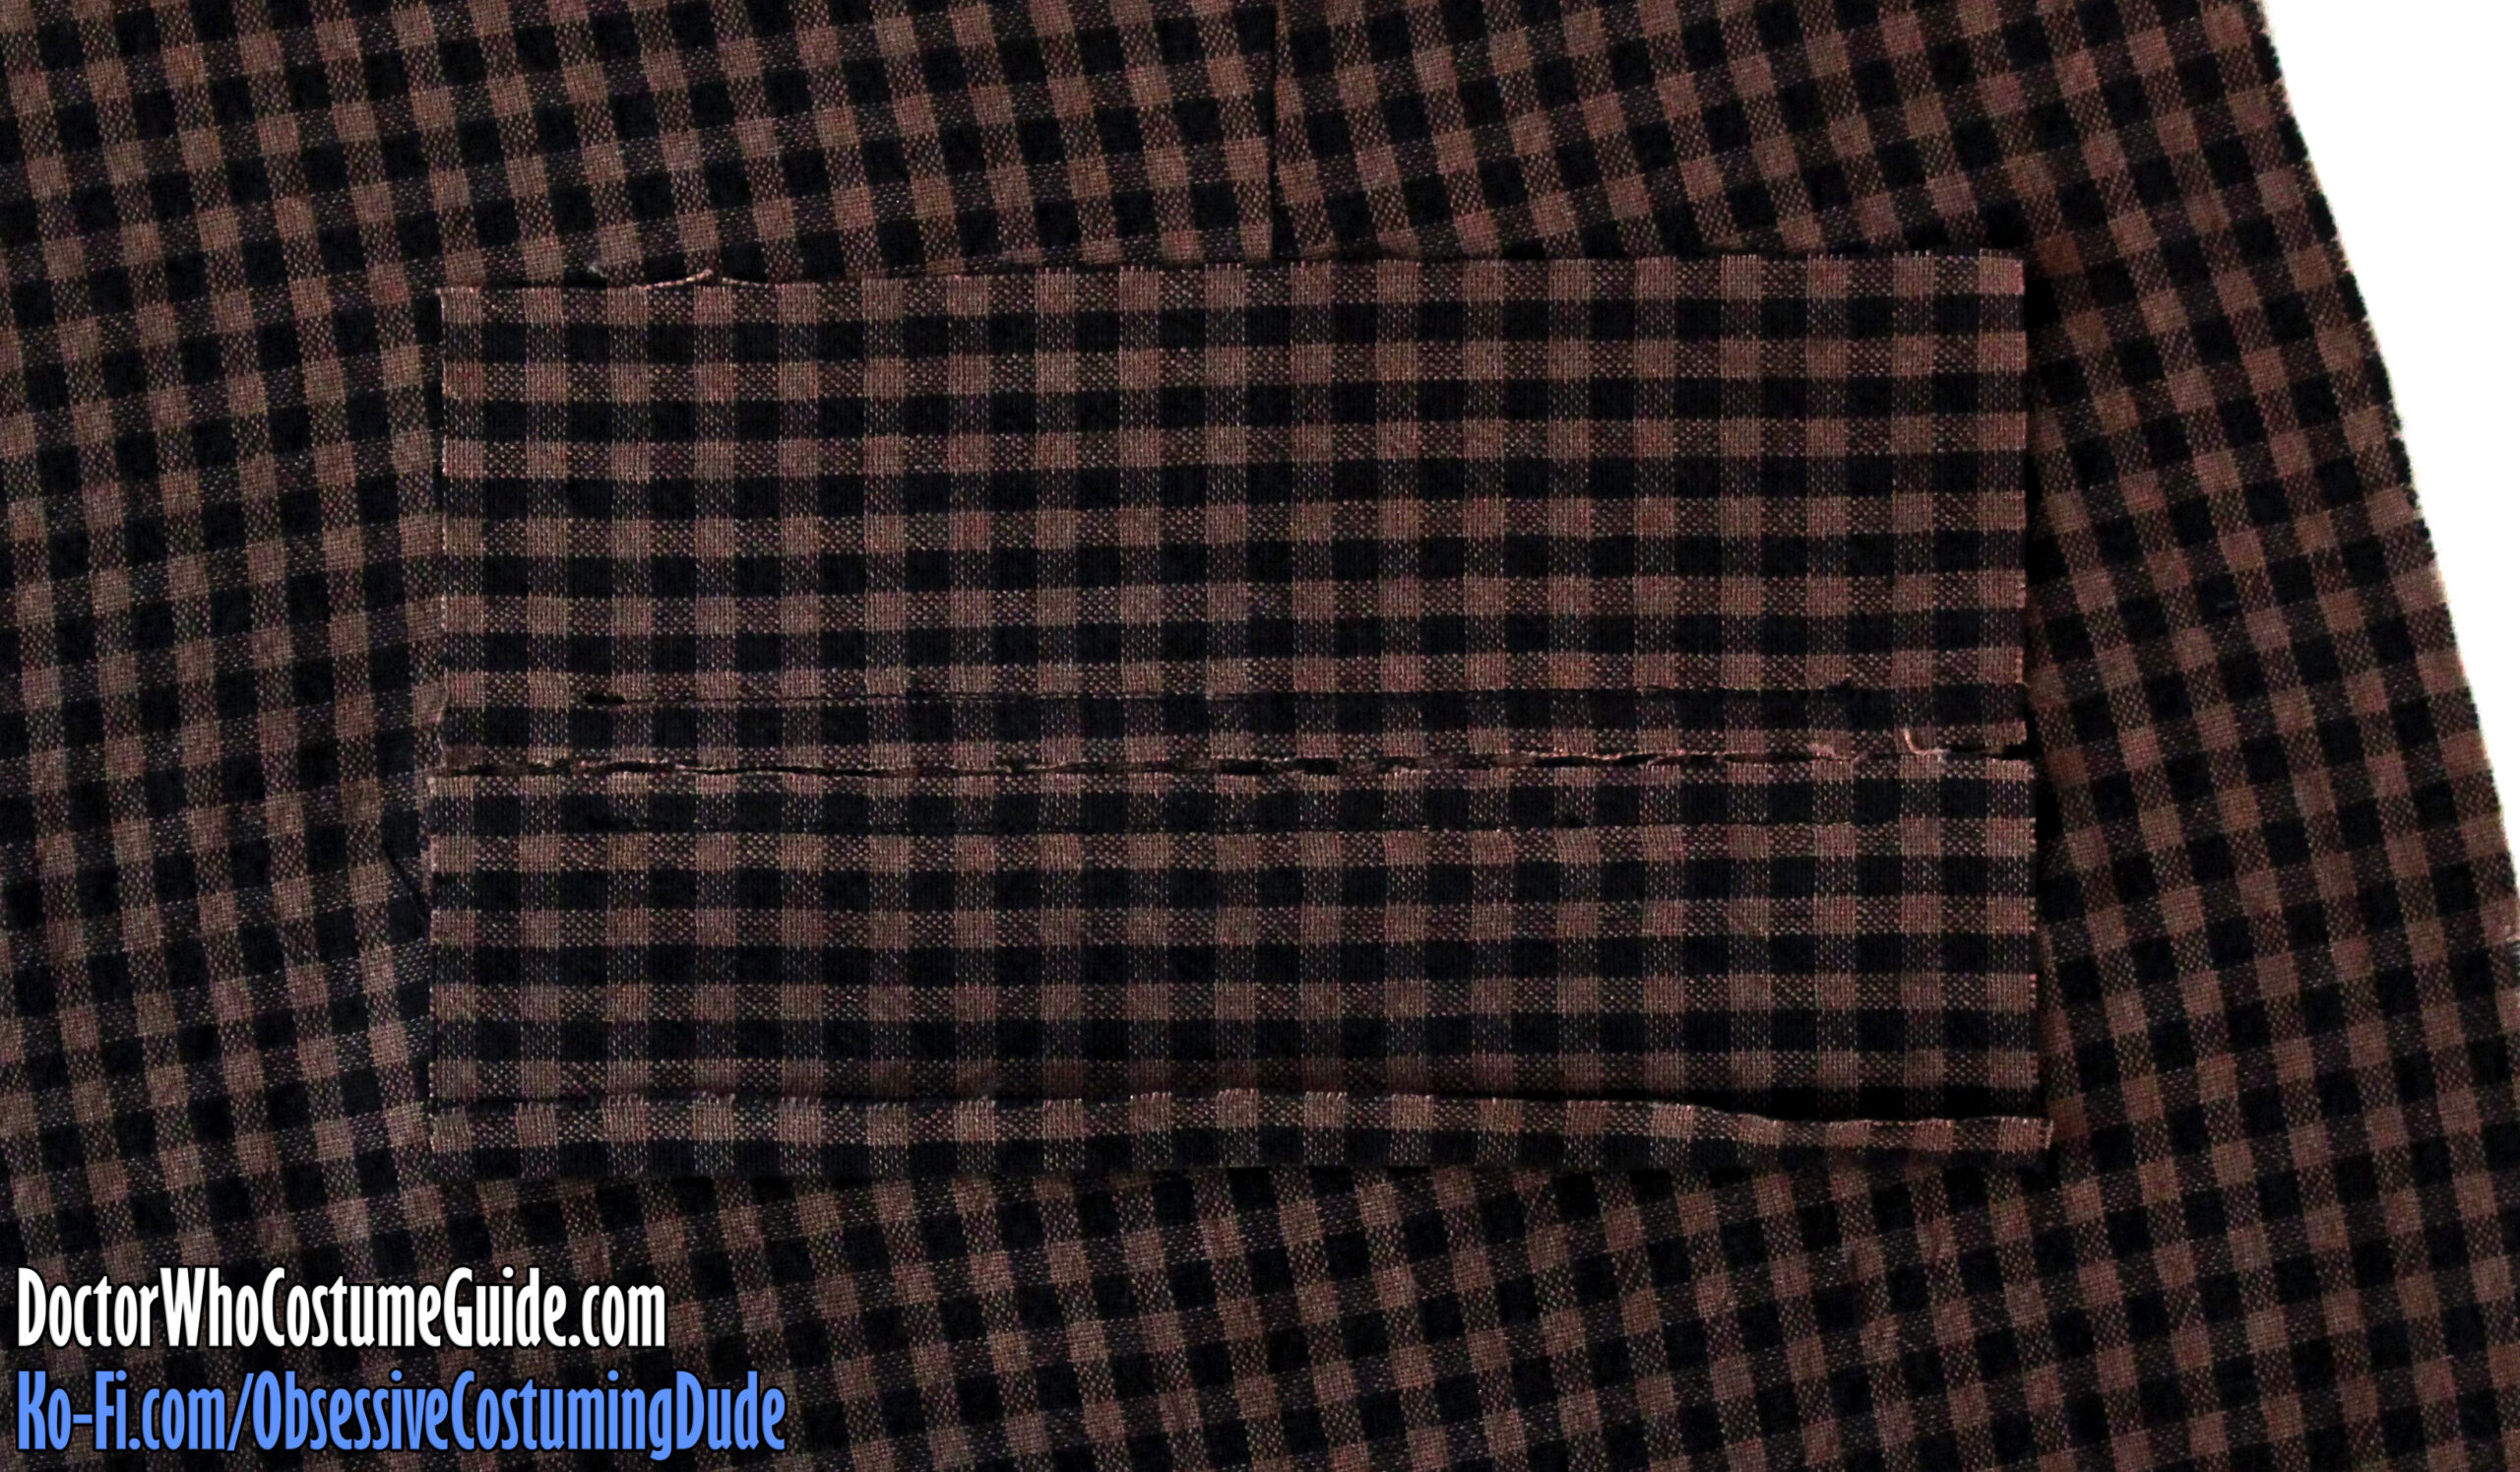
Pin one back pocket bag (piece I) to the underside of the right back, matching pocket openings and upper edges.
Topstitch the perimeter of the pocket opening, shortening your stitch length toward the corners.
Using disappearing tailor’s chalk, draw a horizontal line across the center of the pocket opening.
Press the lower ¼” upward toward the underside of one back pocket welt (piece H).
This will be the lower pocket welt.
On the right side (outside), center the welts over the pocket opening and pin them into place.
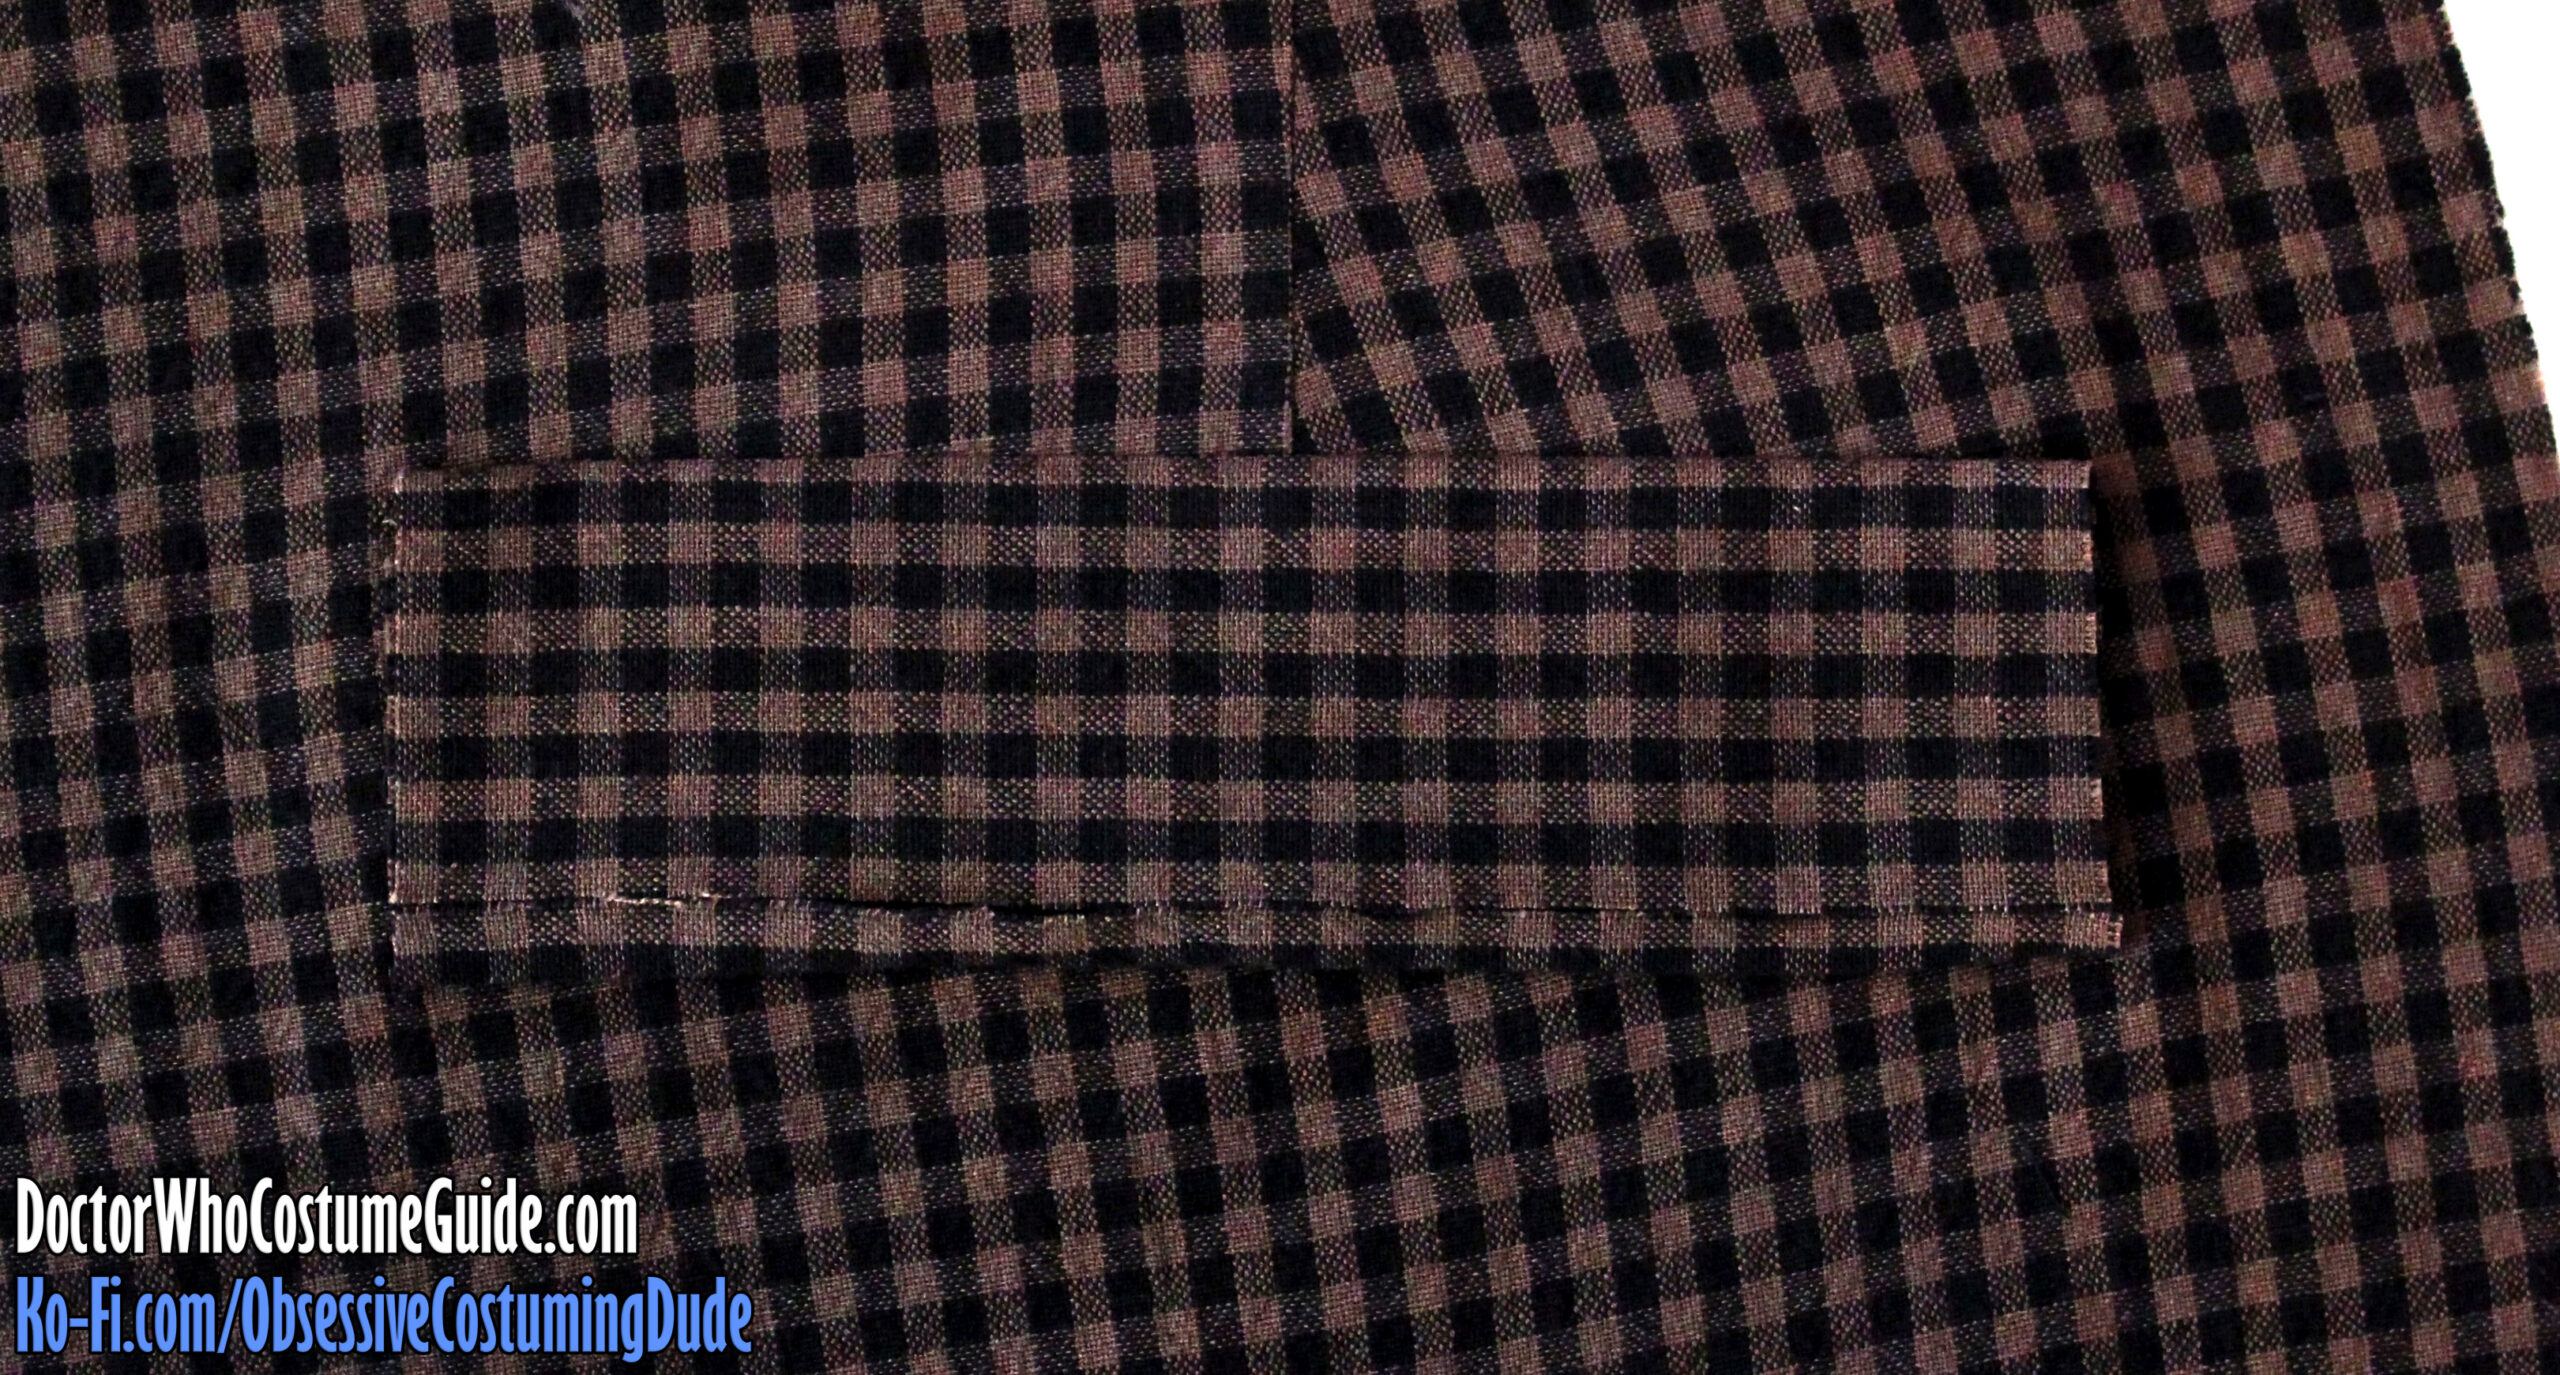
From the underside, stitch over the upper and lower (long) edges of the pocket opening again, beginning and ending exactly at the corners of the pocket opening.
Press the upper welt downward along the stitch line.
Unfold the upper welt and press the lower welt upward along the stitch line.
Unfold the pocket welts.
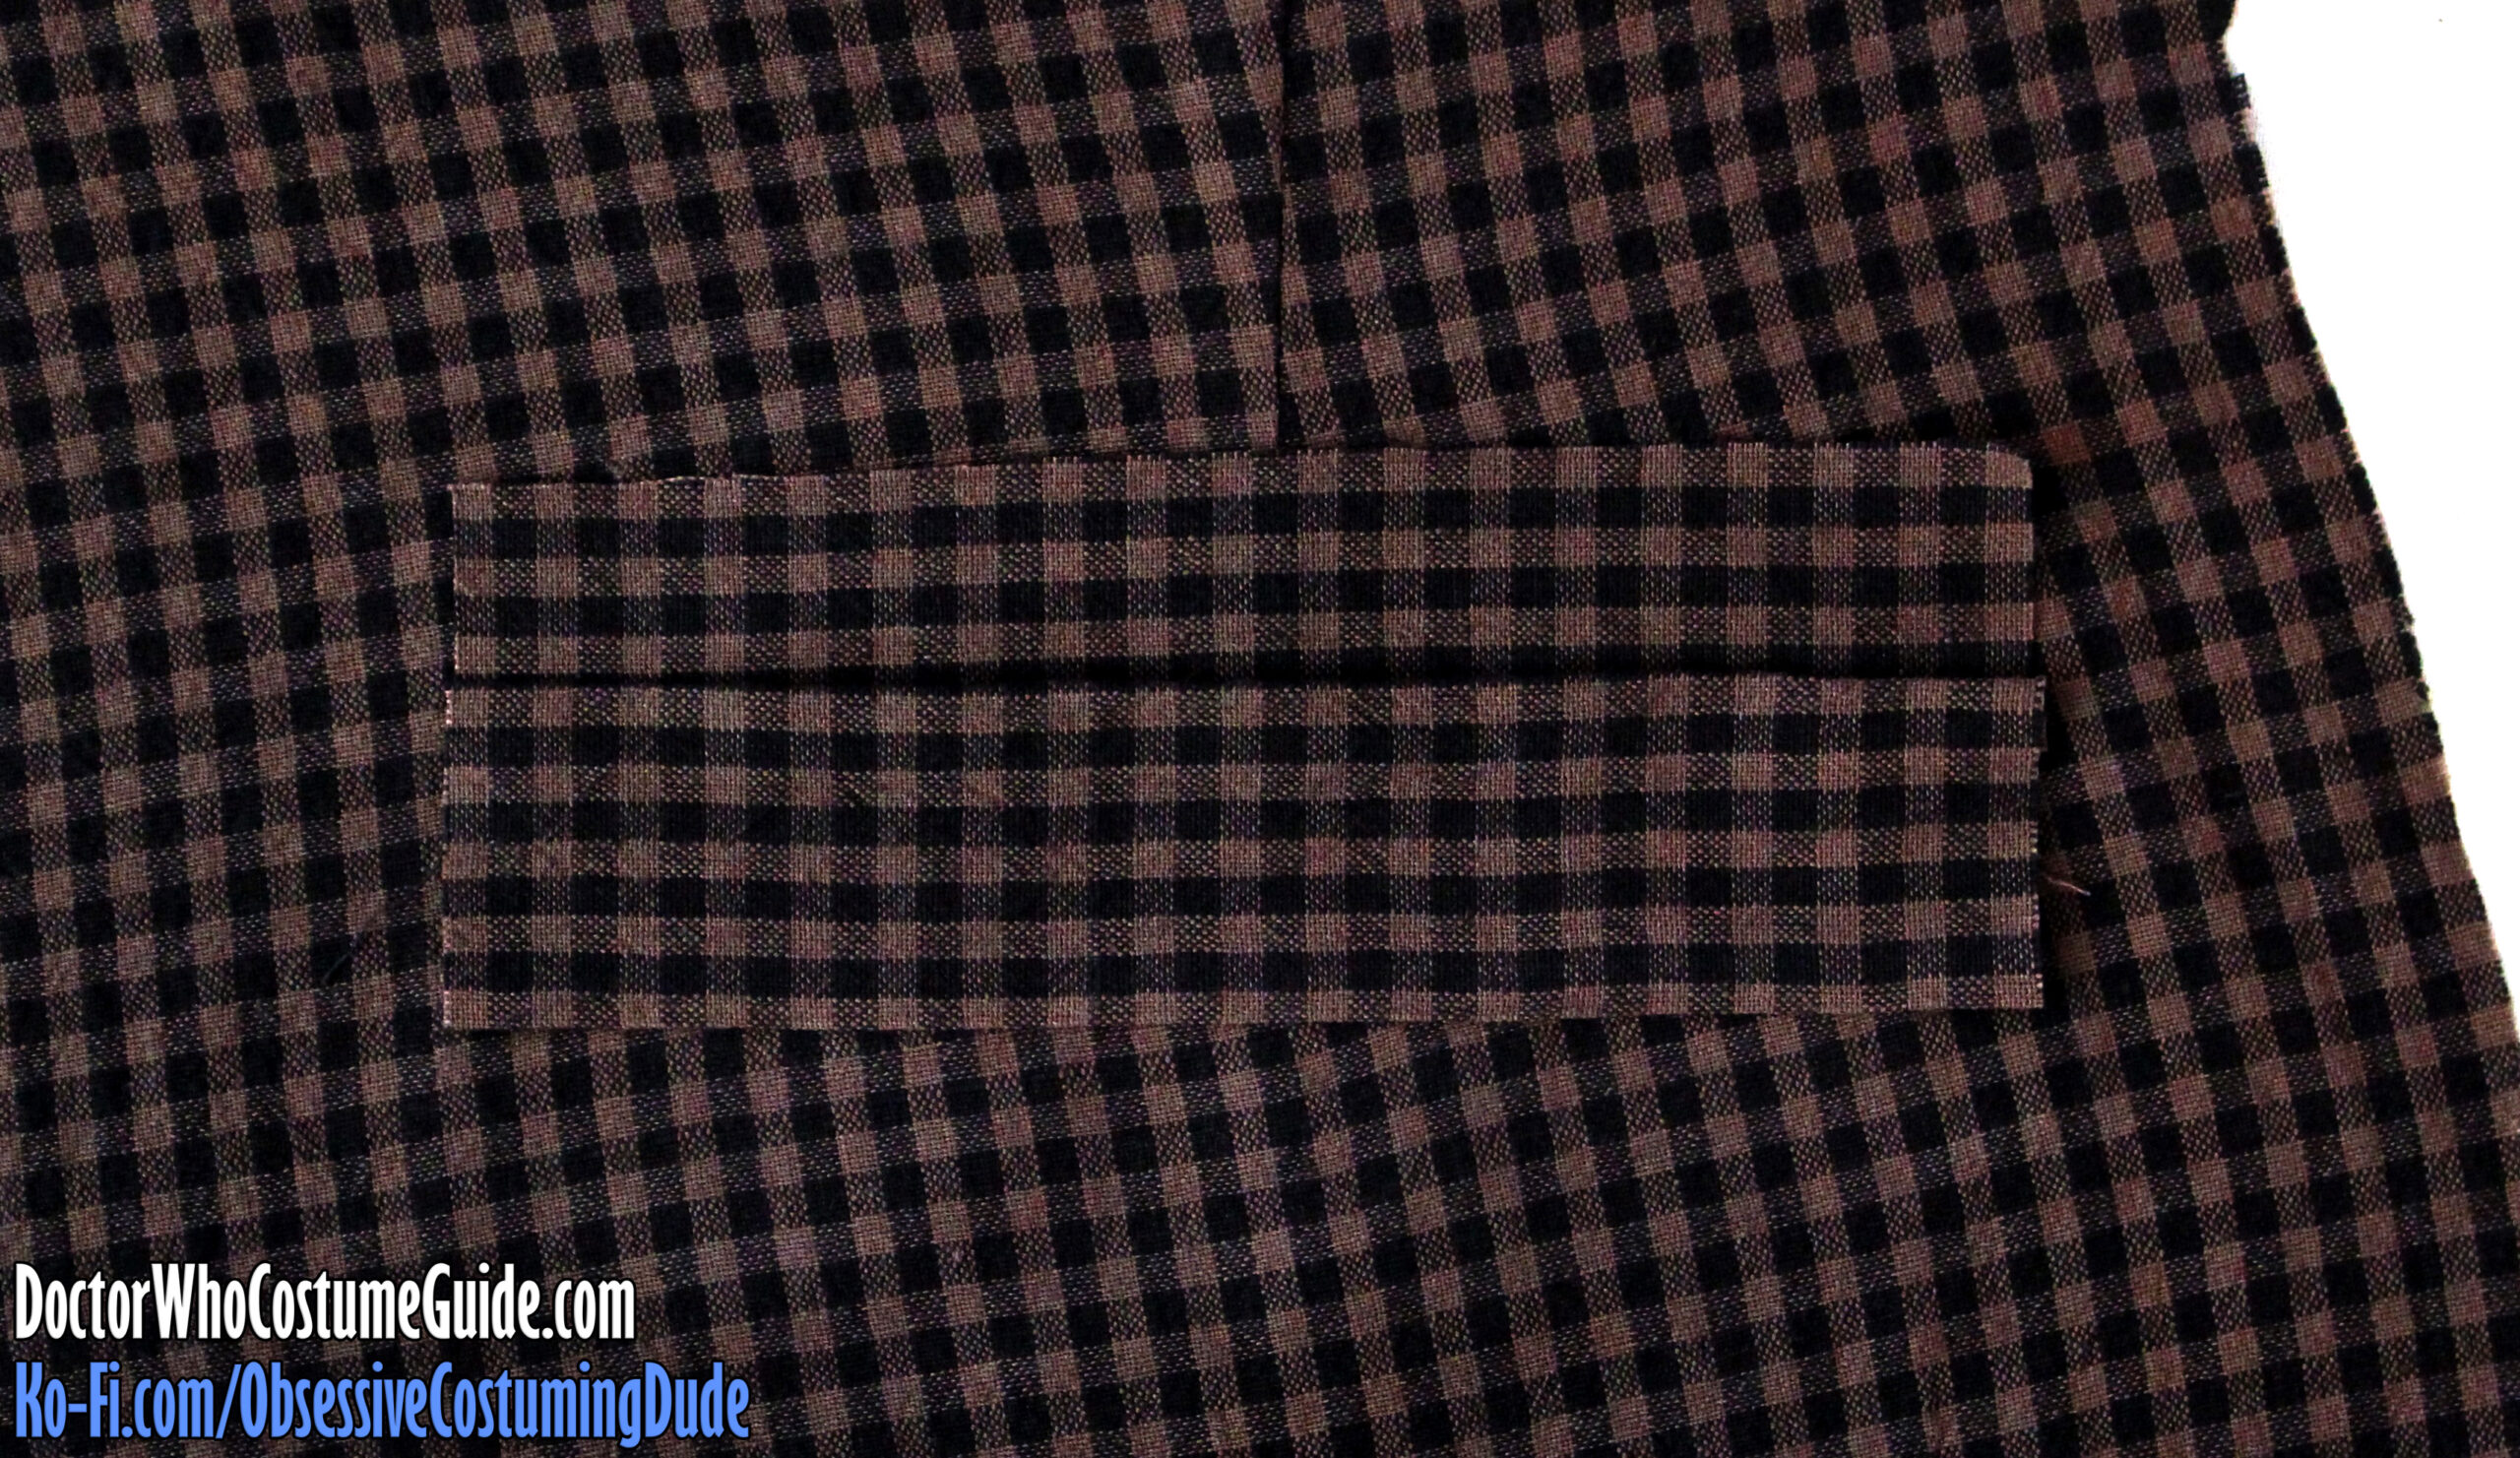
Slash the pocket opening across the center, stopping about ⅜” from the ends and snipping a “Y” shape to the corners on each side.
Be sure to only cut into the garment and pocketing fabric, not the pocket welts.
Also be sure to clip all the way to the corners, but not past them!
Turn the welts to the underside and press.
From the right side, “stitch-in-the-ditch” through all layers along the upper and lower edges of the pocket opening.
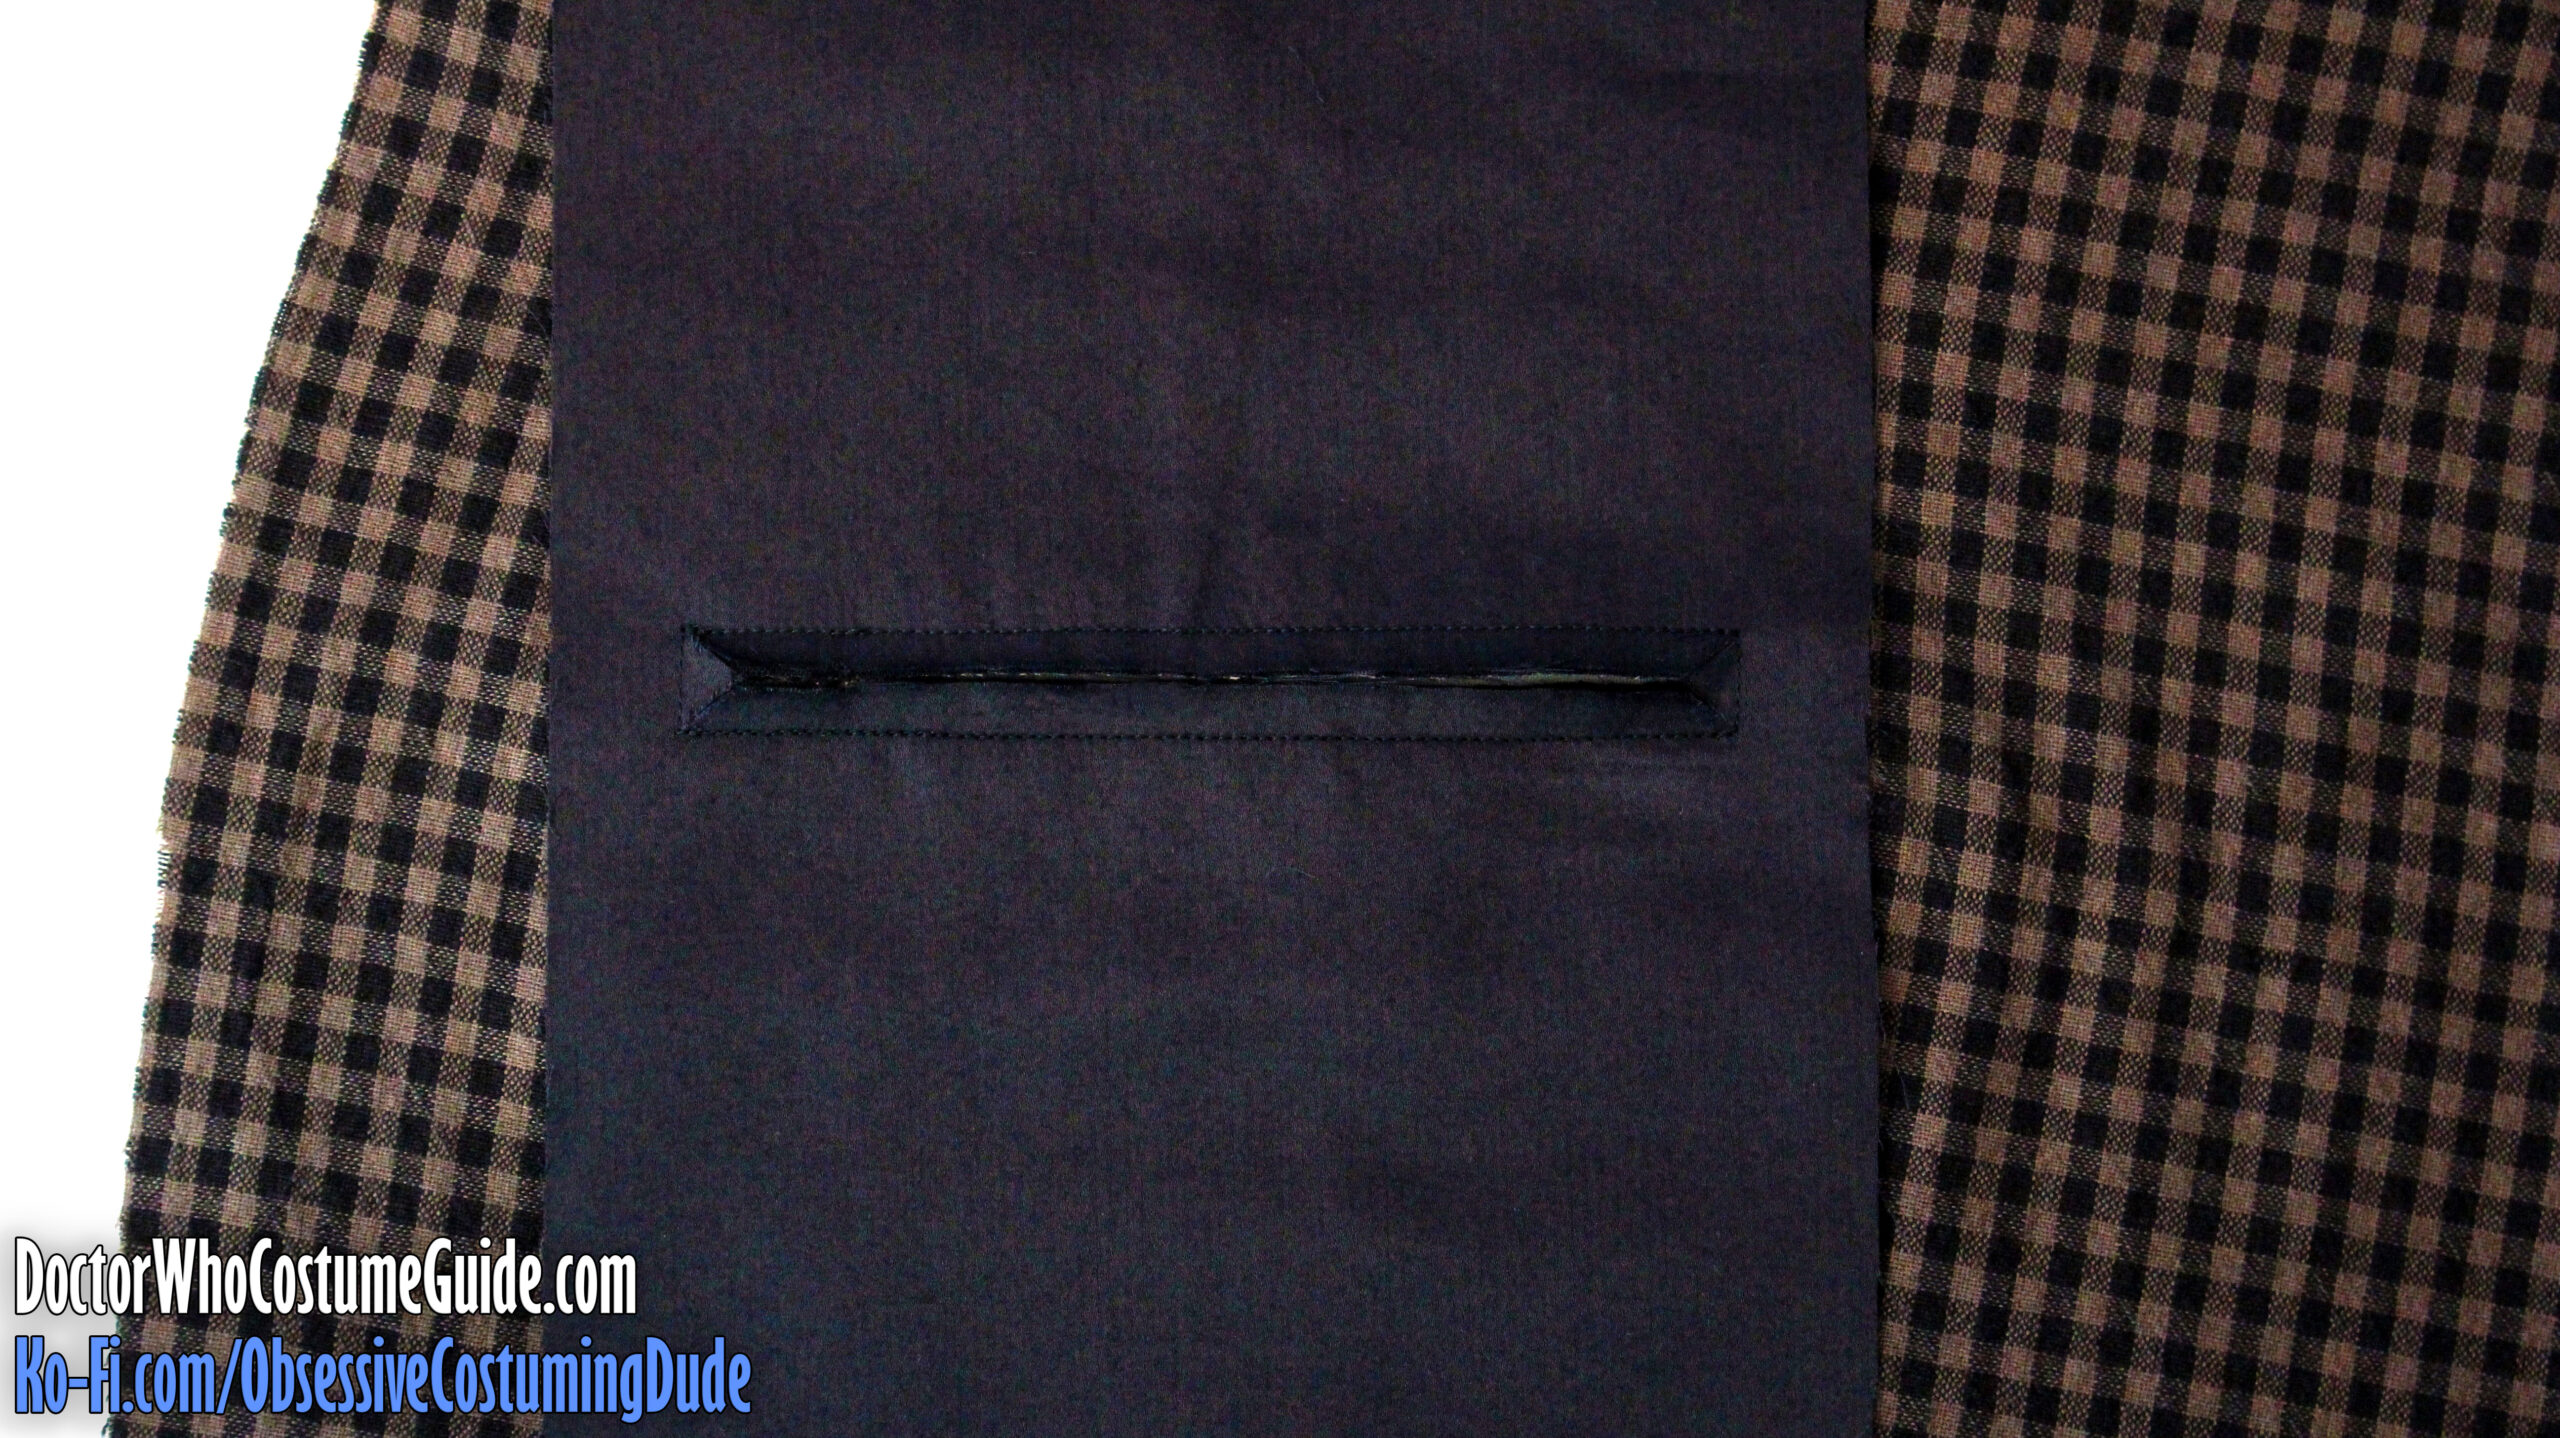
At the sides of the pocket opening, carefully pull the triangular “prongs” to the underside along the stitch line. (I find tweezers helpful for this.)
From the right side (outside), fold the trousers and pocket bag out of the way so the triangular “prong” and welt edges are visible.
Stitch the triangular “prongs” to the welt allowances.
From the underside, again pull the trousers out of the way.
Topstitch the upper welt to the pocketing about ⅛” to ¼” from the upper edge.
Edge-stitch the lower (folded) edge of the lower welt to the pocketing.
Press one long edge of the back pocket facing (piece J) upward ¼”.
Pin the back pocket facing into place on the second pocket bag.
Edge-stitch the pocket facing to the second pocket bag along its entire perimeter.
To enclose the edges of the pocket pouch in a French seam, first place the trousers right side upward (with the pocket bag on the underside), then pull the trousers up and out of the way so the bottom and sides of the pocket bag are visible.
Place the second pocket bag (with the facing attached) on top of the first, wrong sides together.
Pin the two pocket bags together along the side and lower edges.
Sew the two pocket pouches together along the side and lower edges with ¼” seam allowance.
Trim the seam allowances down to ⅛”.
Turn the pocket “right-sides-out” and press.
Topstitch around the side and bottom of the pocket bag ¼” from the edge, completing the French seam.
Sew or baste the pocket bag to the trousers ½” from the upper edge.
From the right side, “stitch-in-the-ditch” across the upper edge one final time to secure the pocket bag.
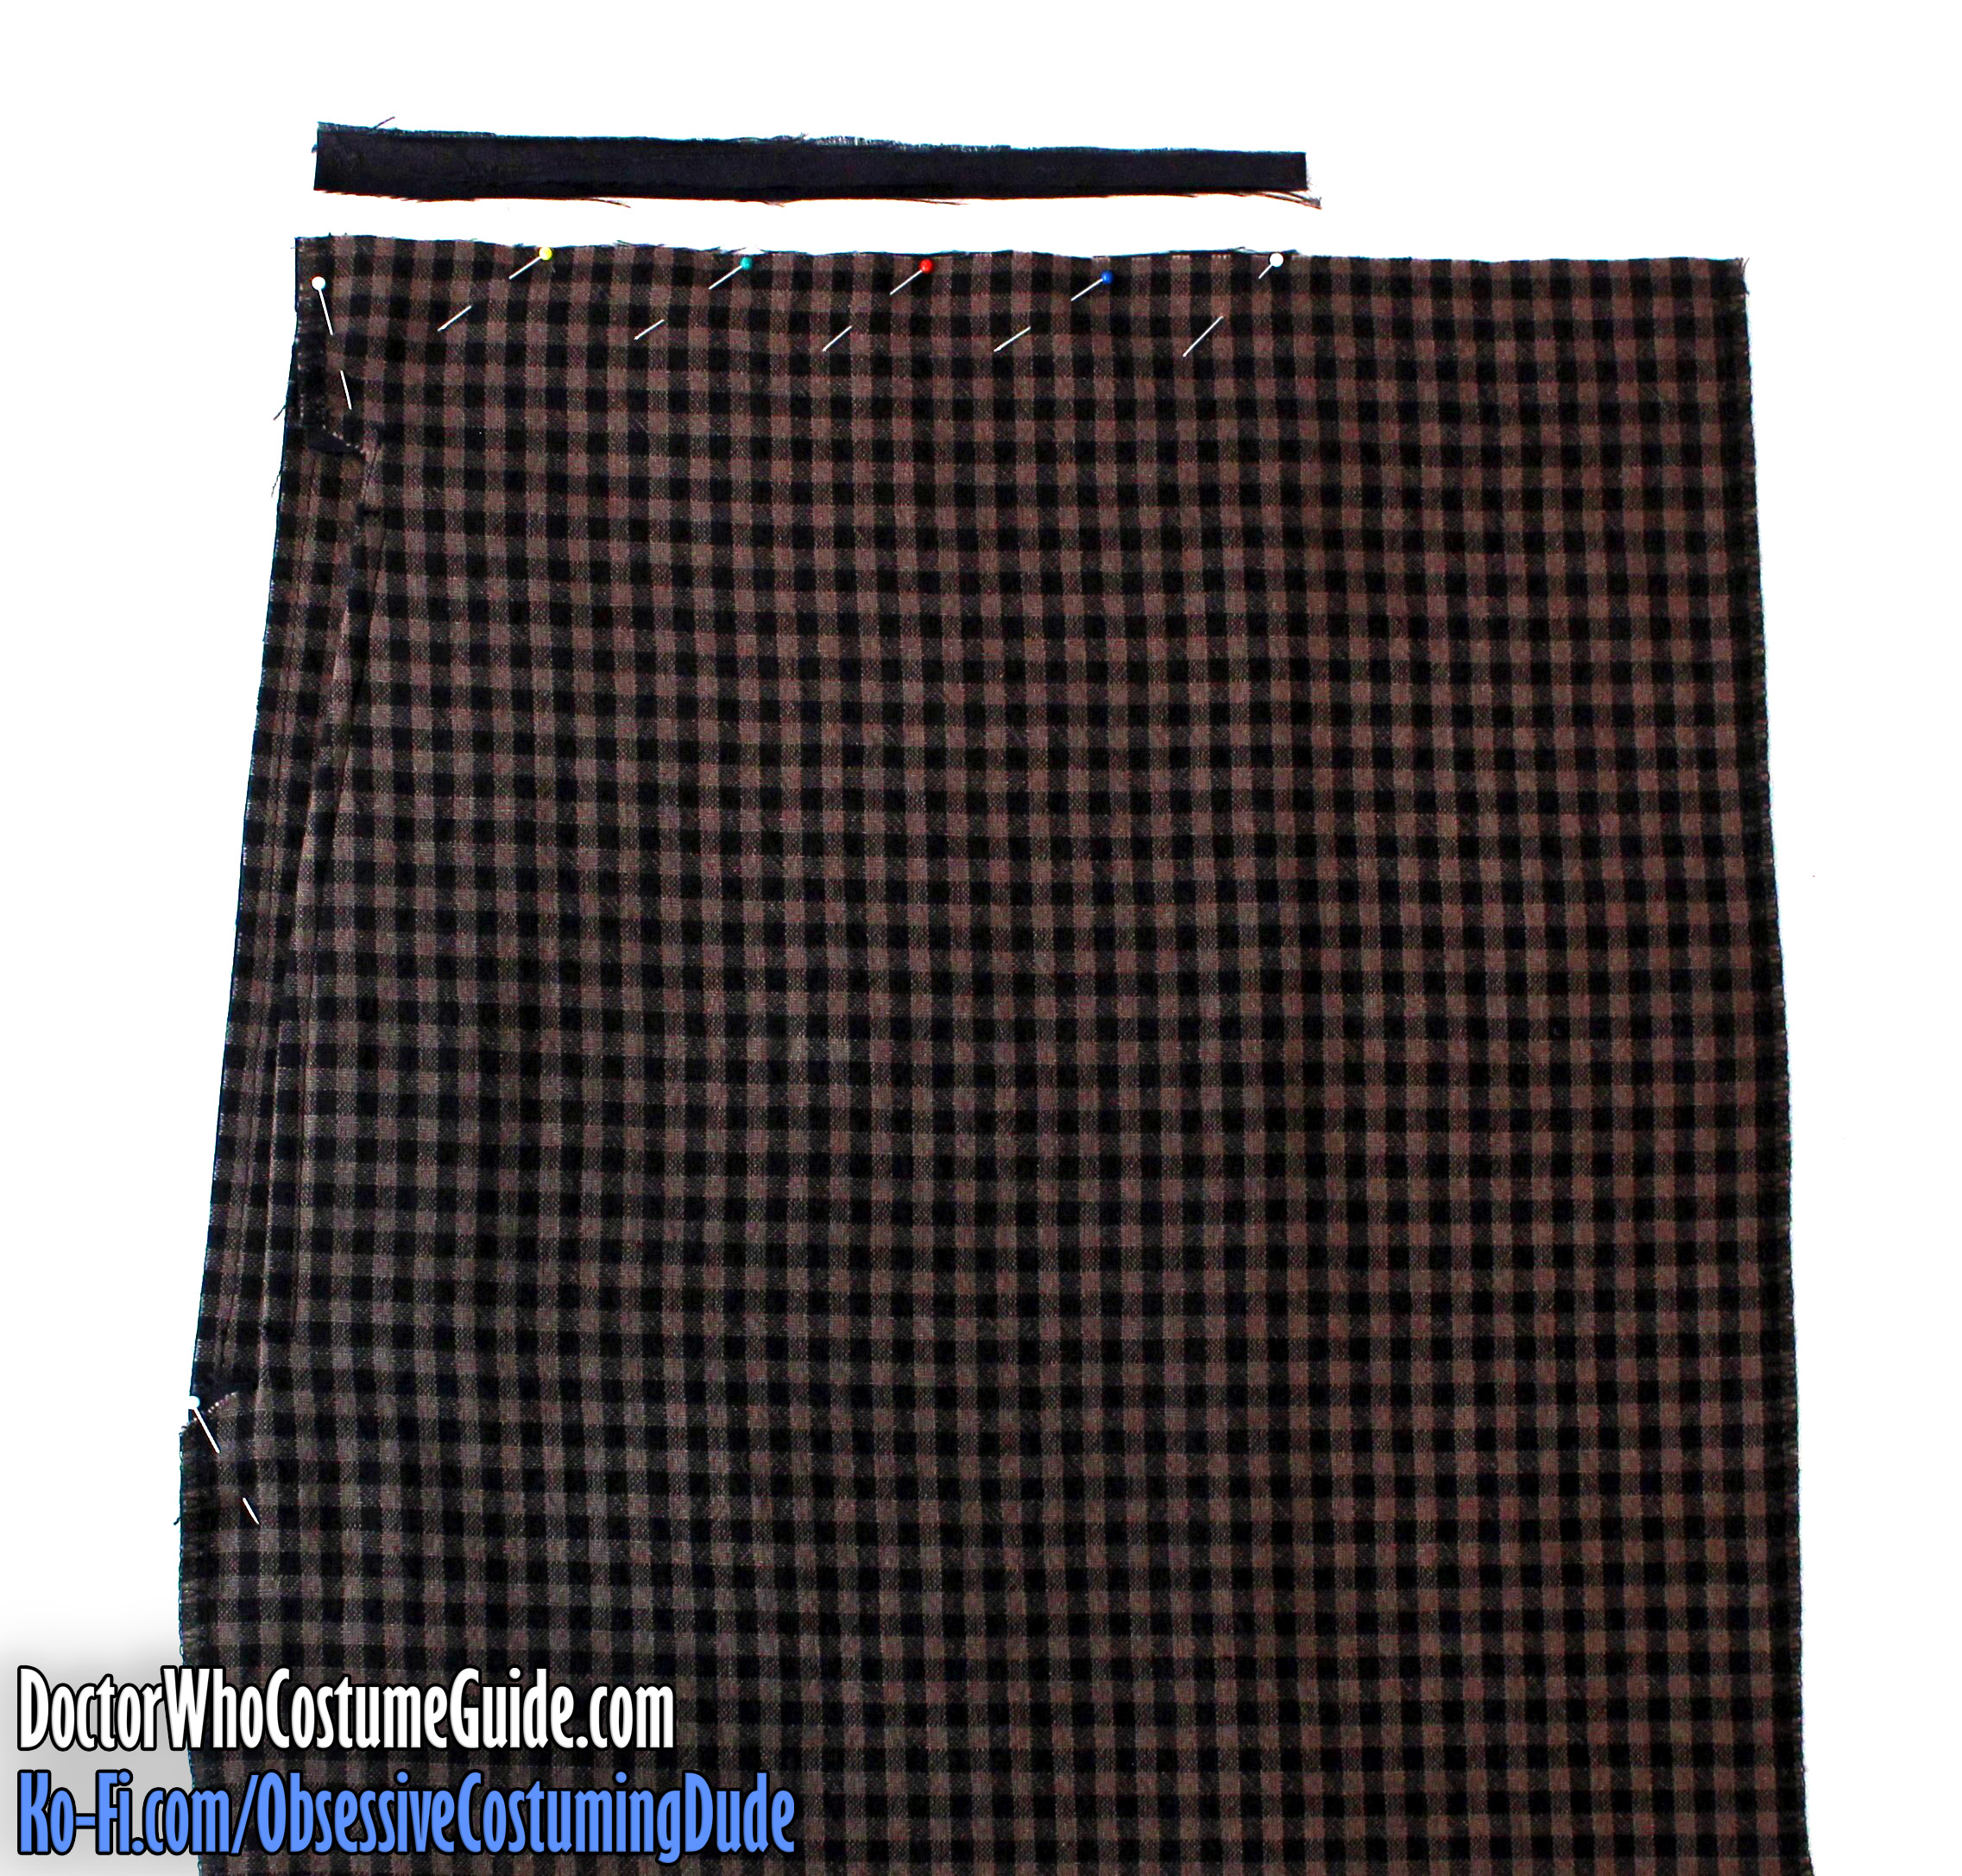
Pin the pocket bag to the trousers along the upper edges.
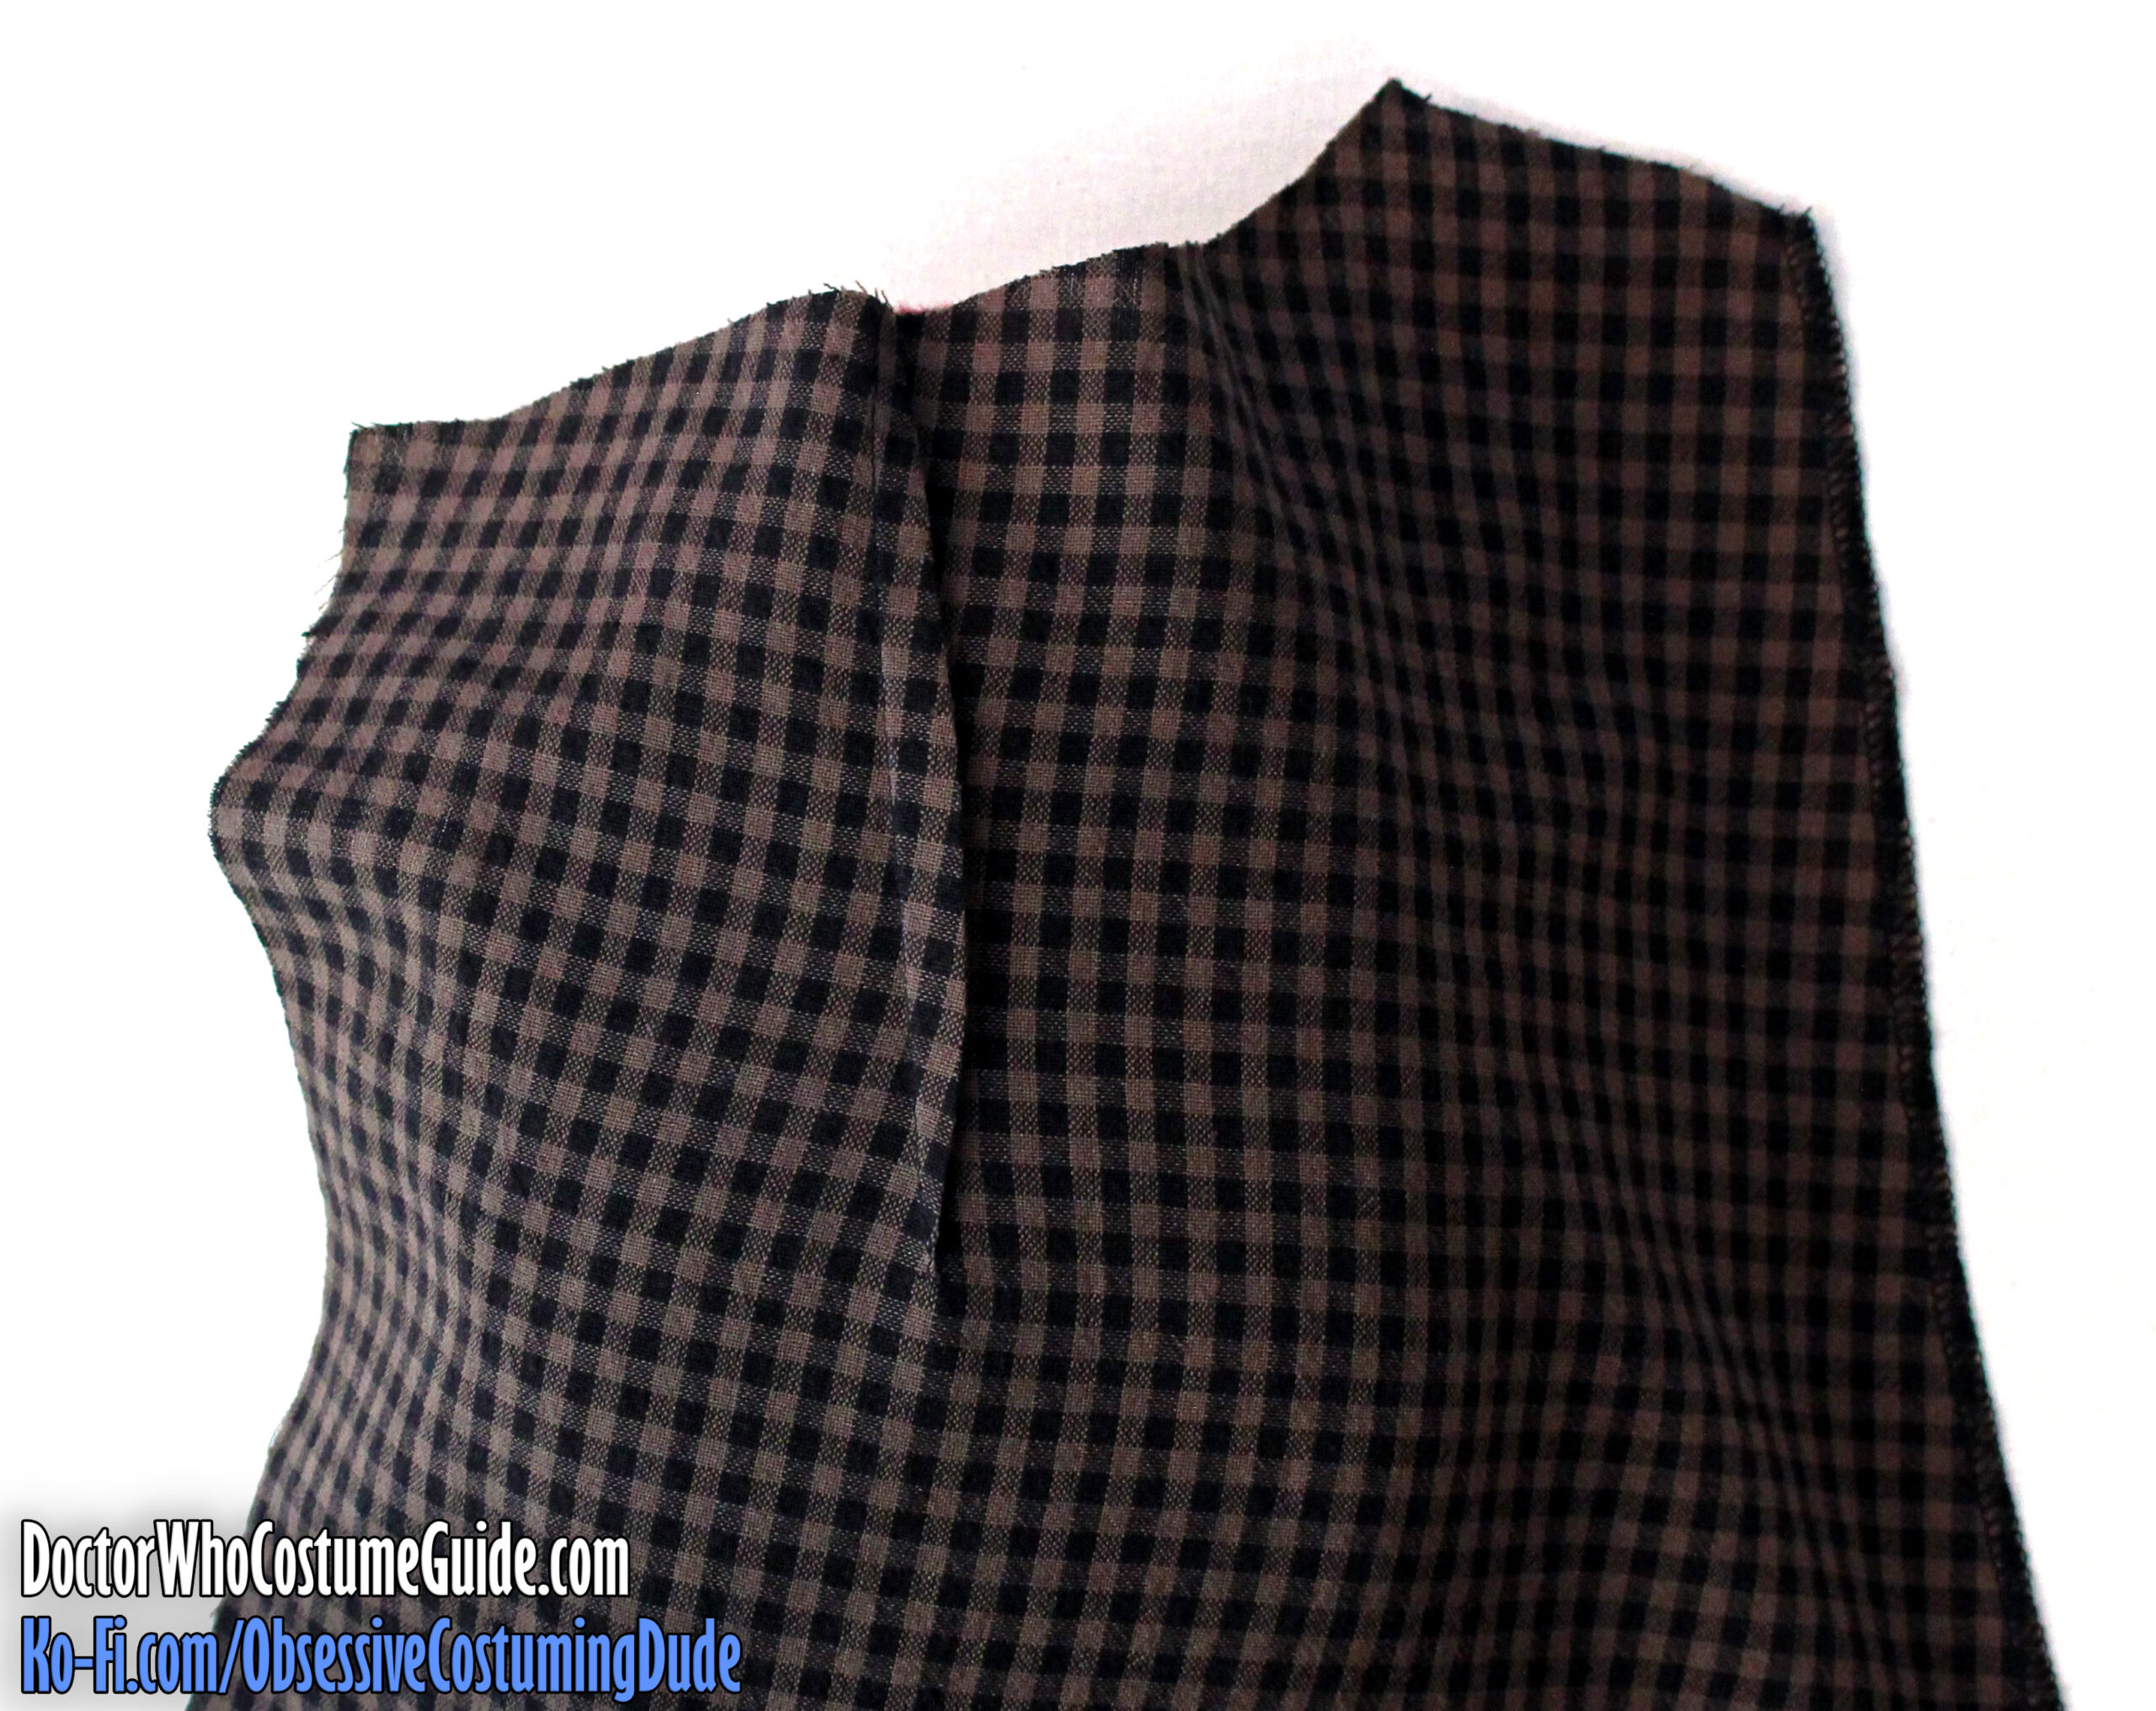
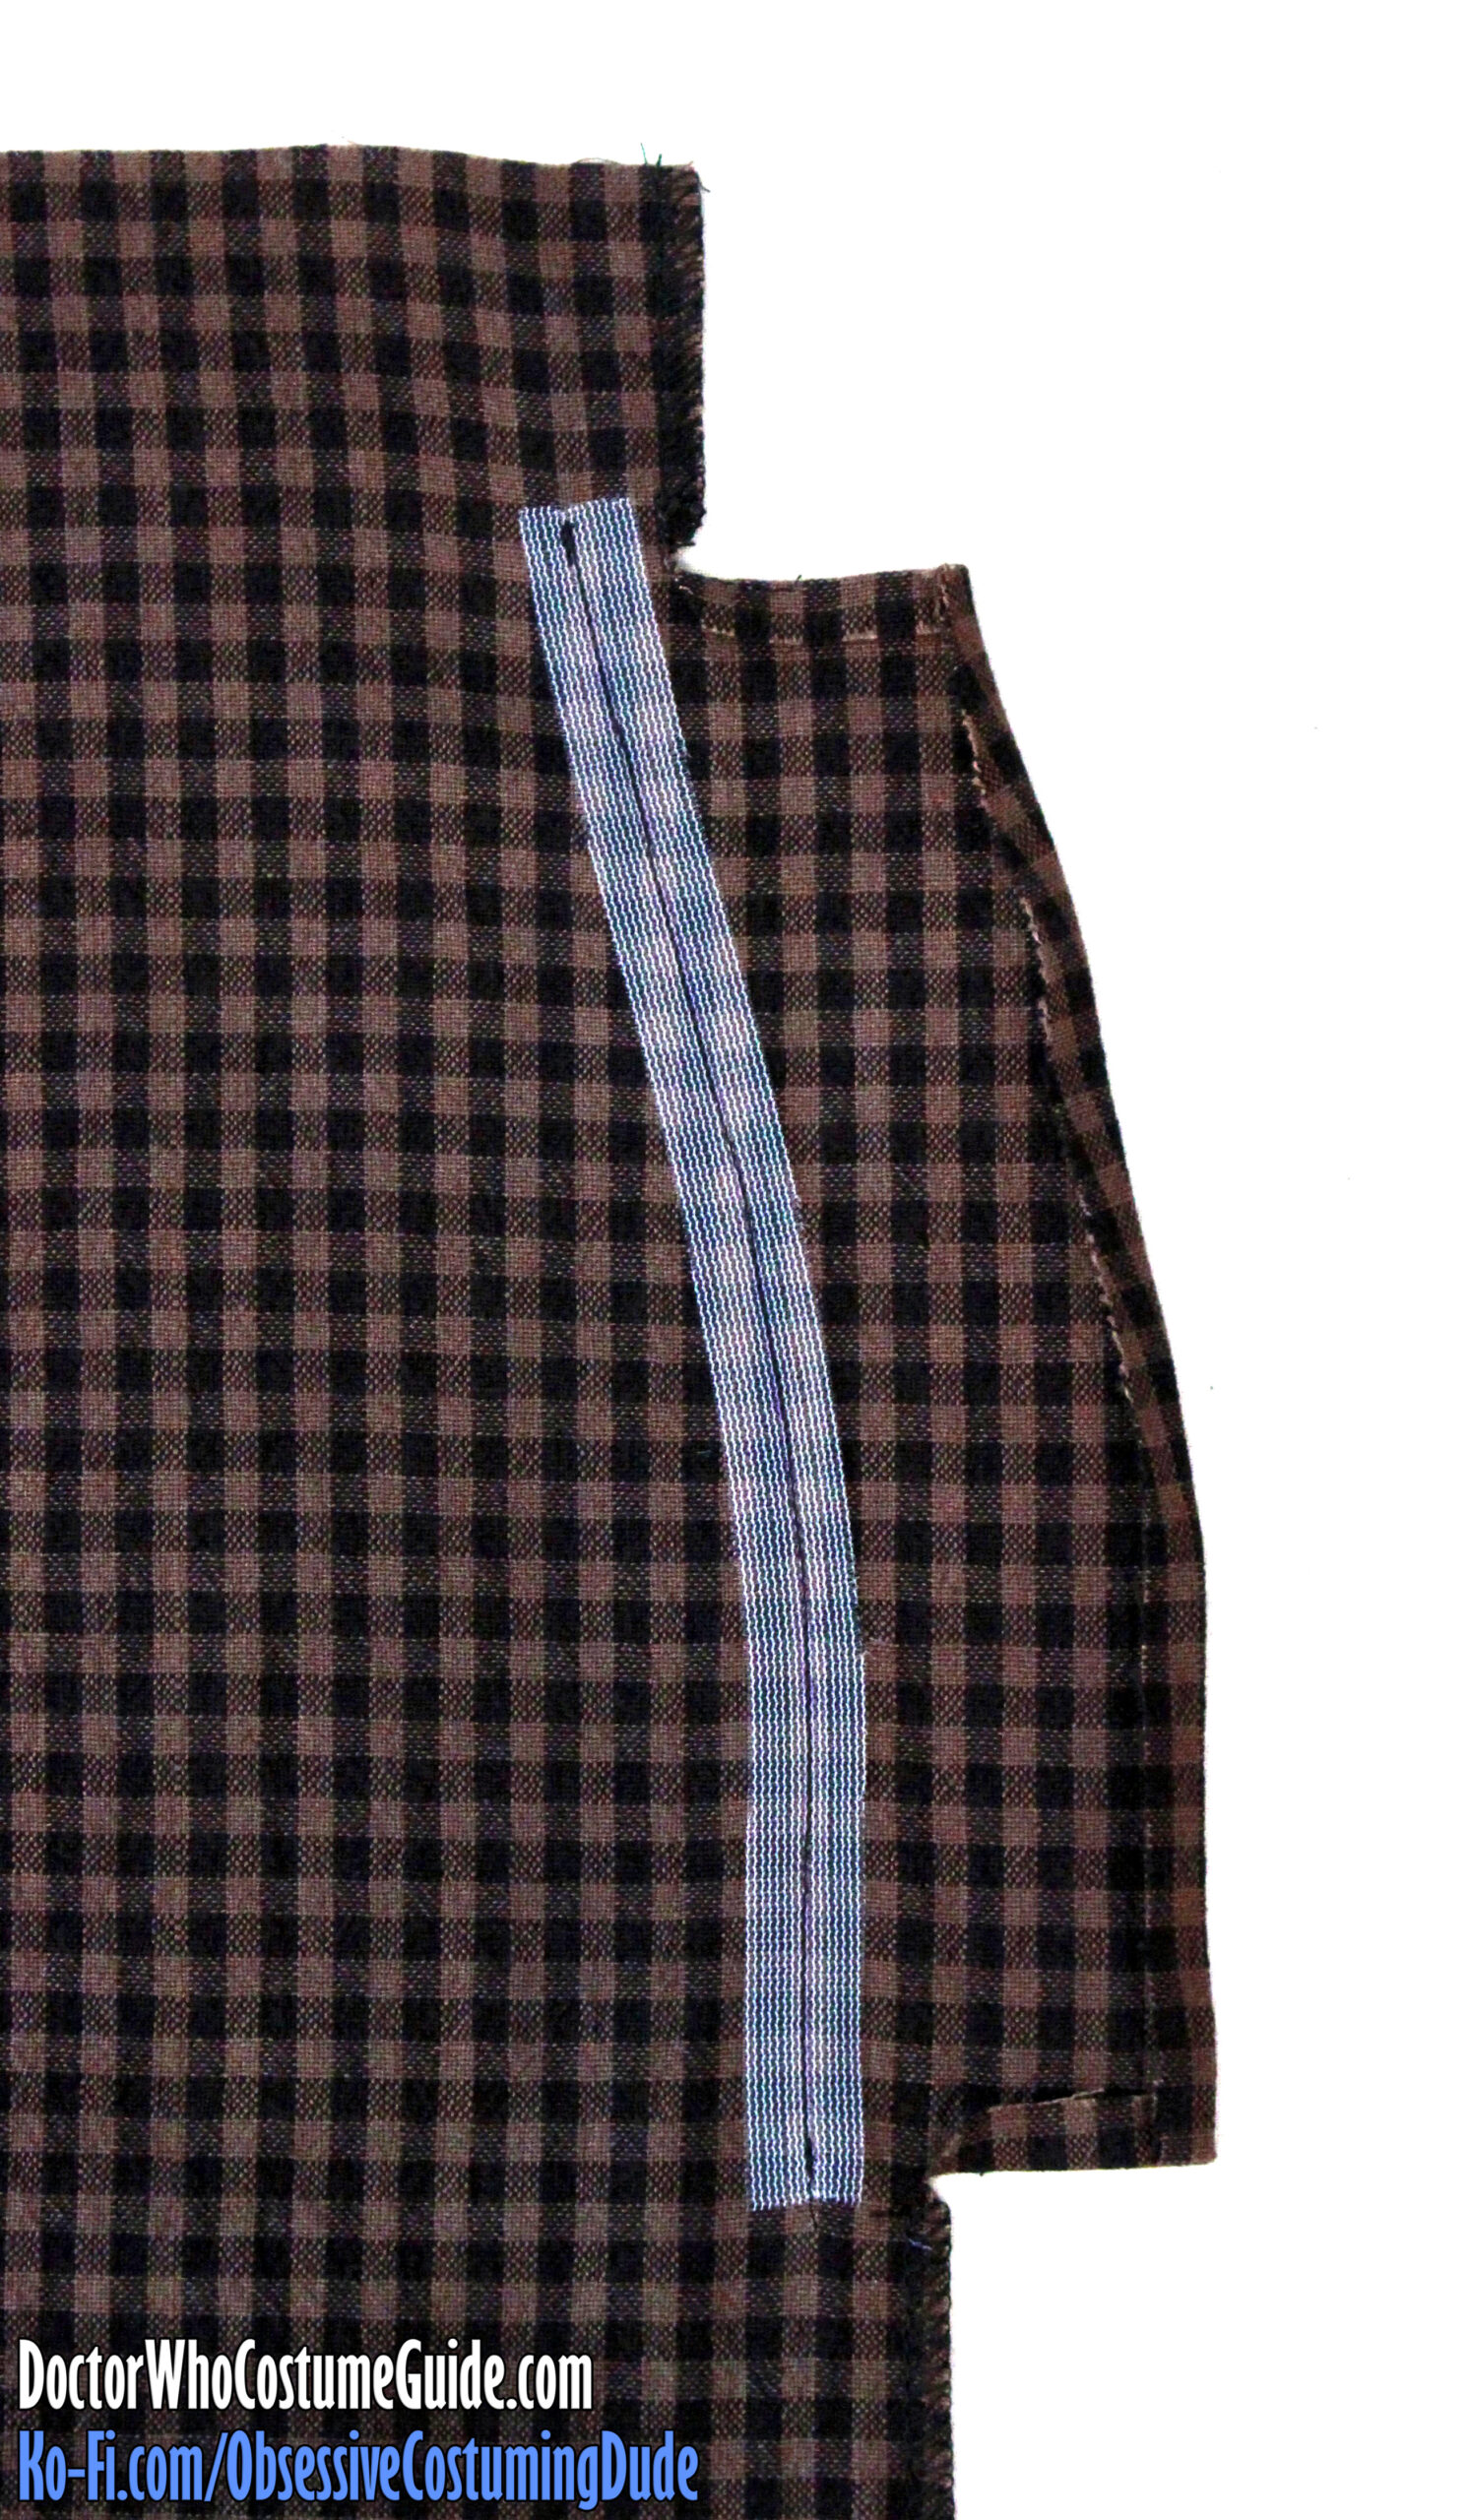
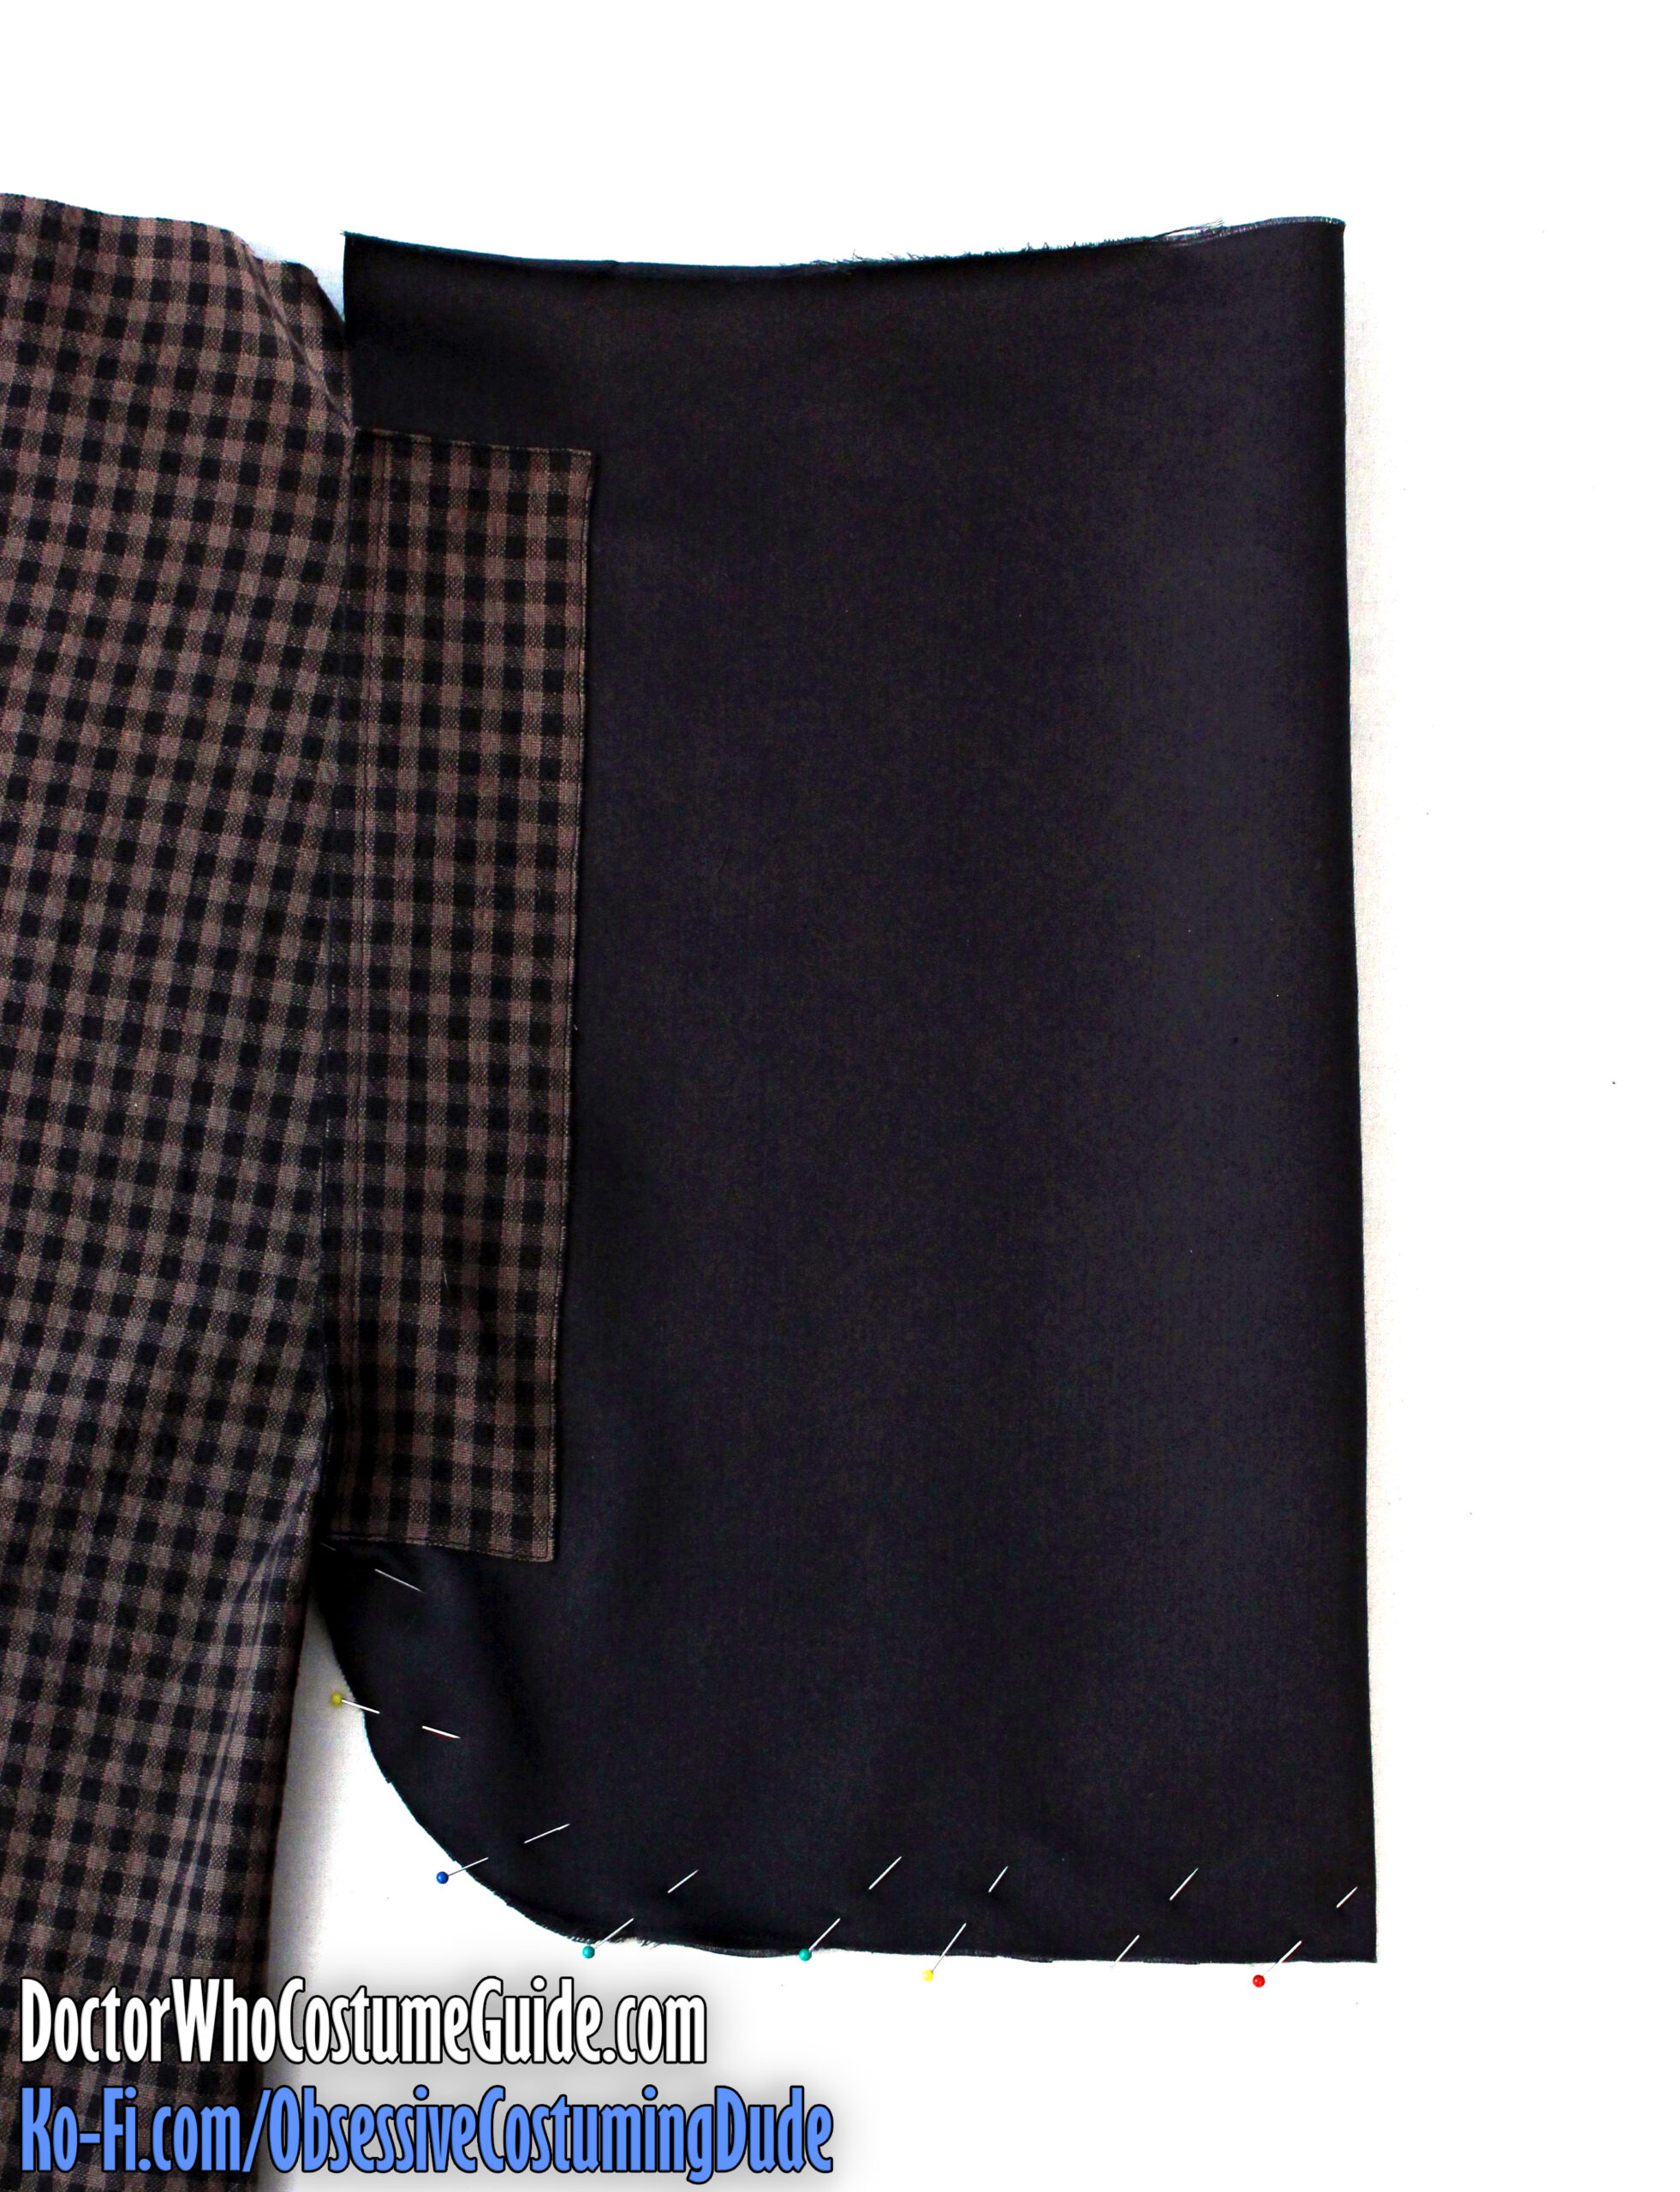
On the underside of the front, mark the side seam line inside the pocket opening.
(This is 1 ⅞” from the edge of the cut-on facing extension.)
Stabilize the front edge of the pocket opening by topstitching a length of stay tape onto the underside along the seam line.
(This will help prevent the pocket opening from stretching out over time.)
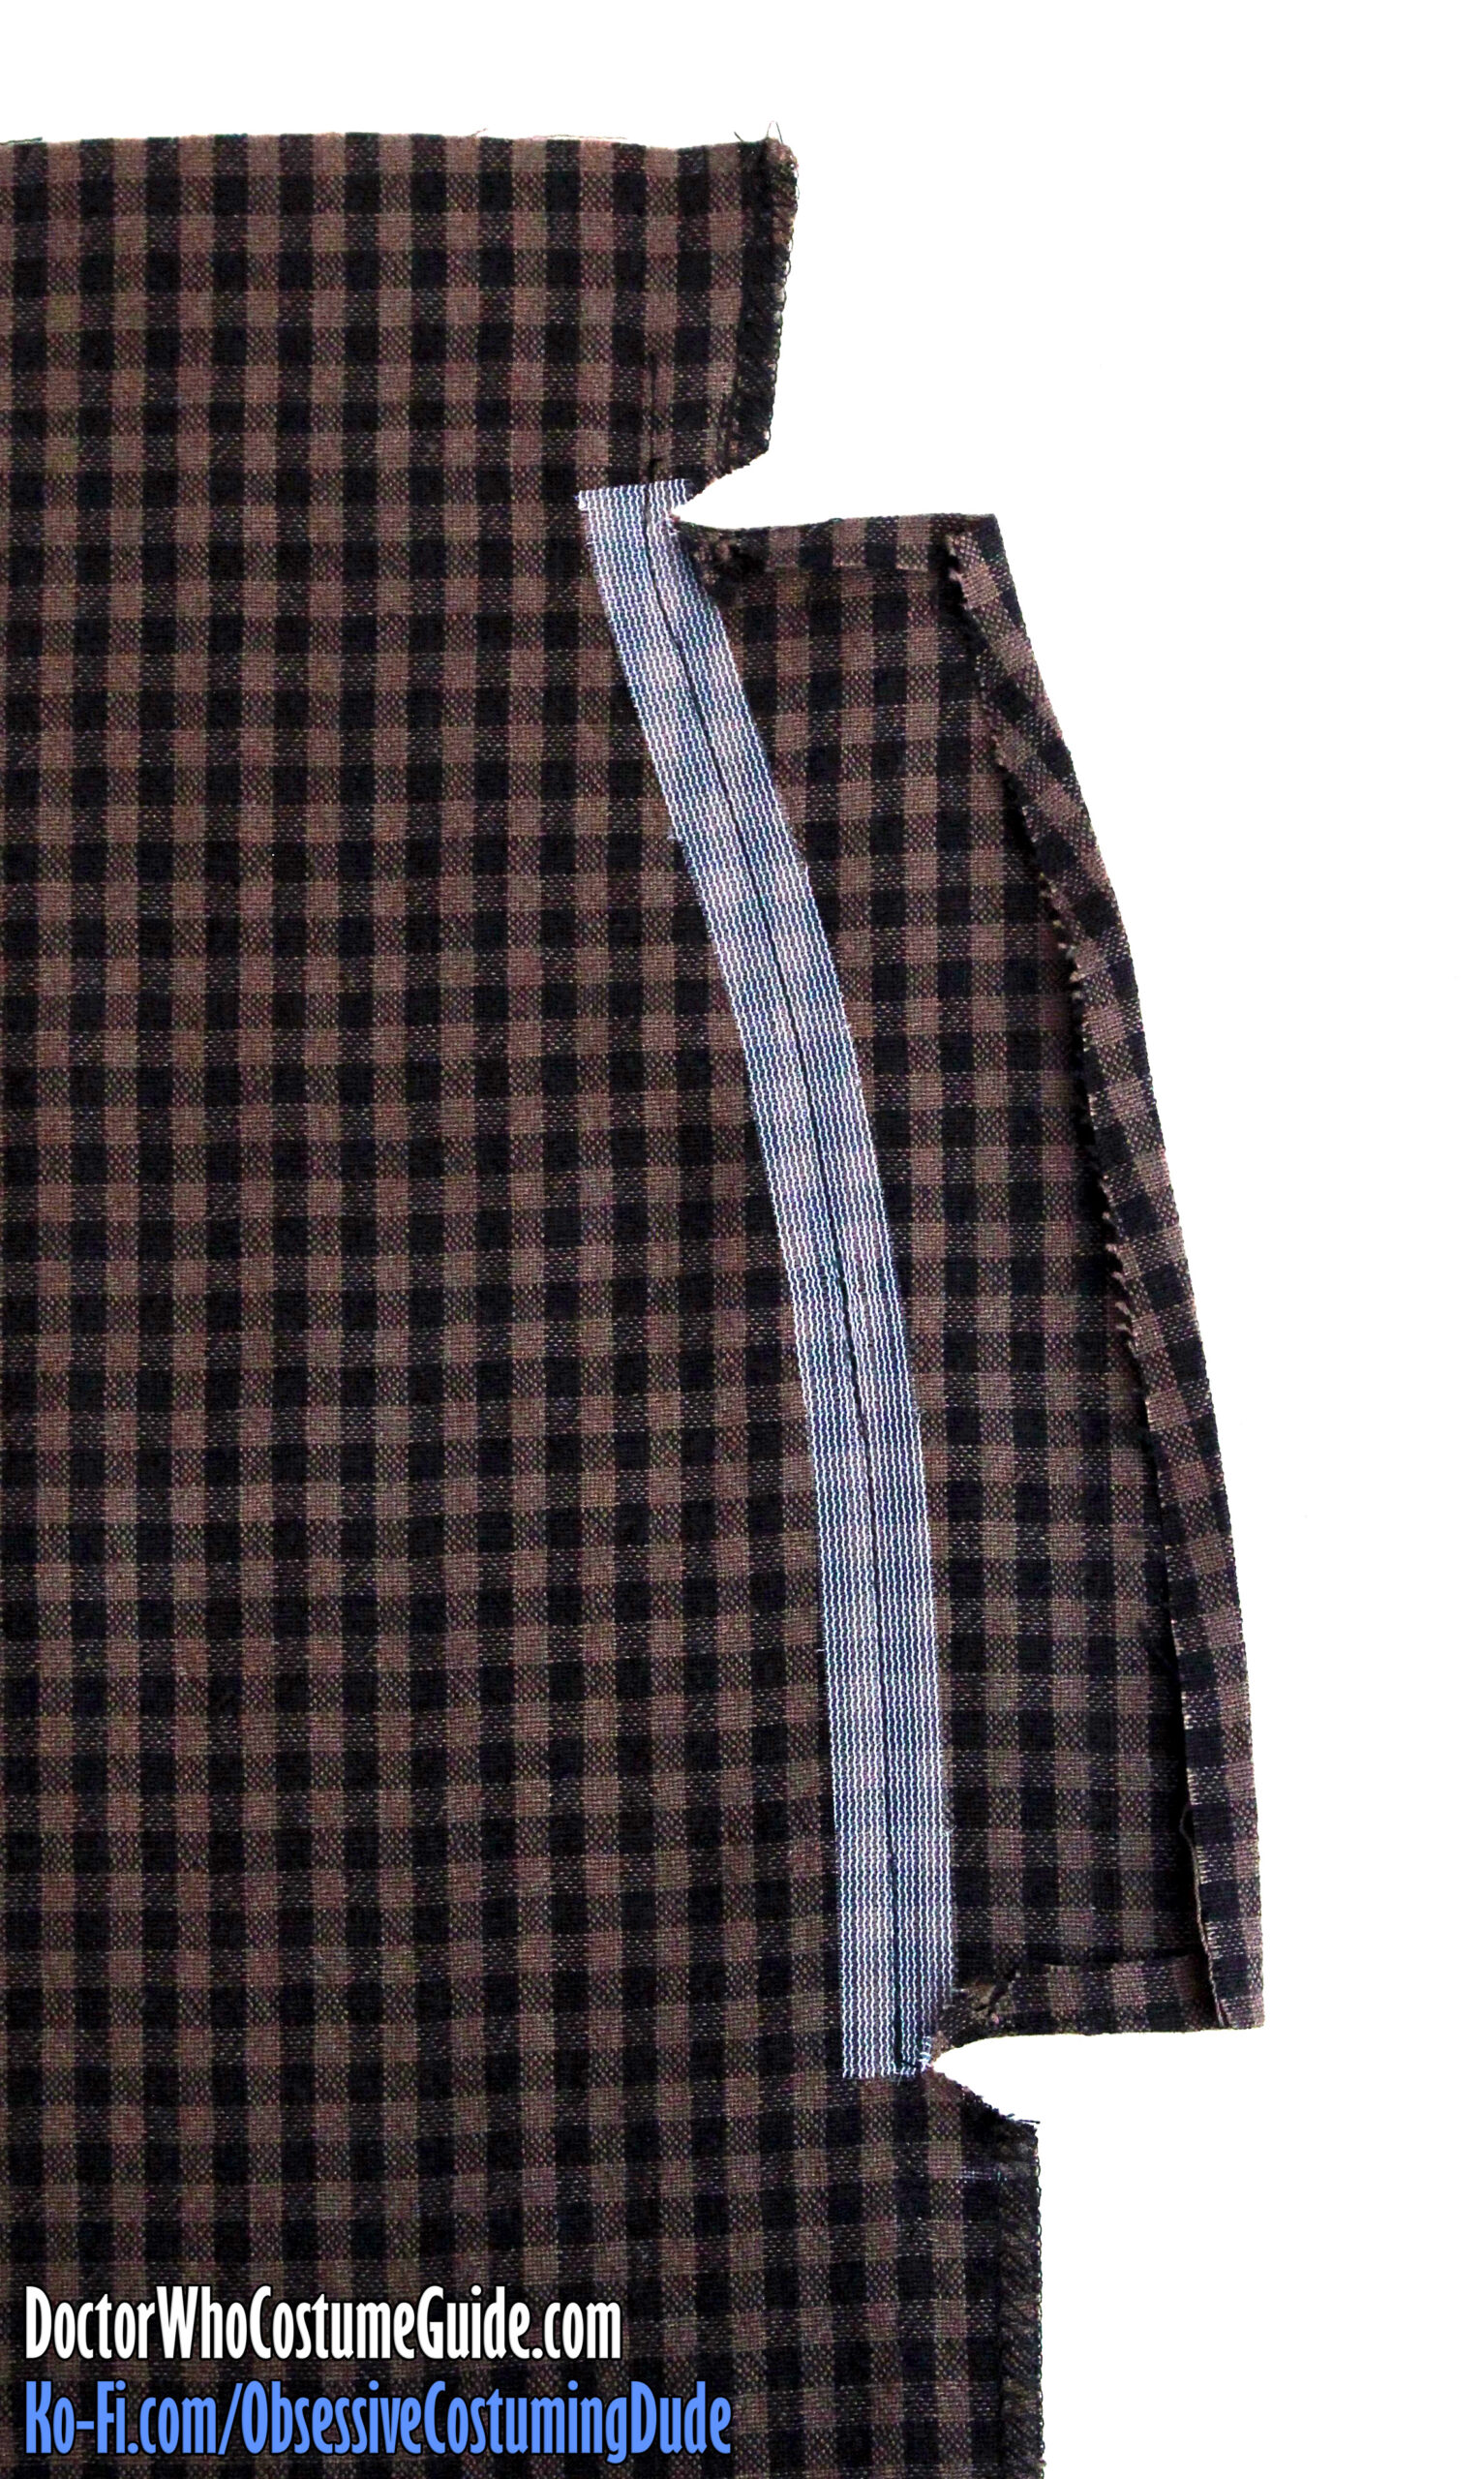
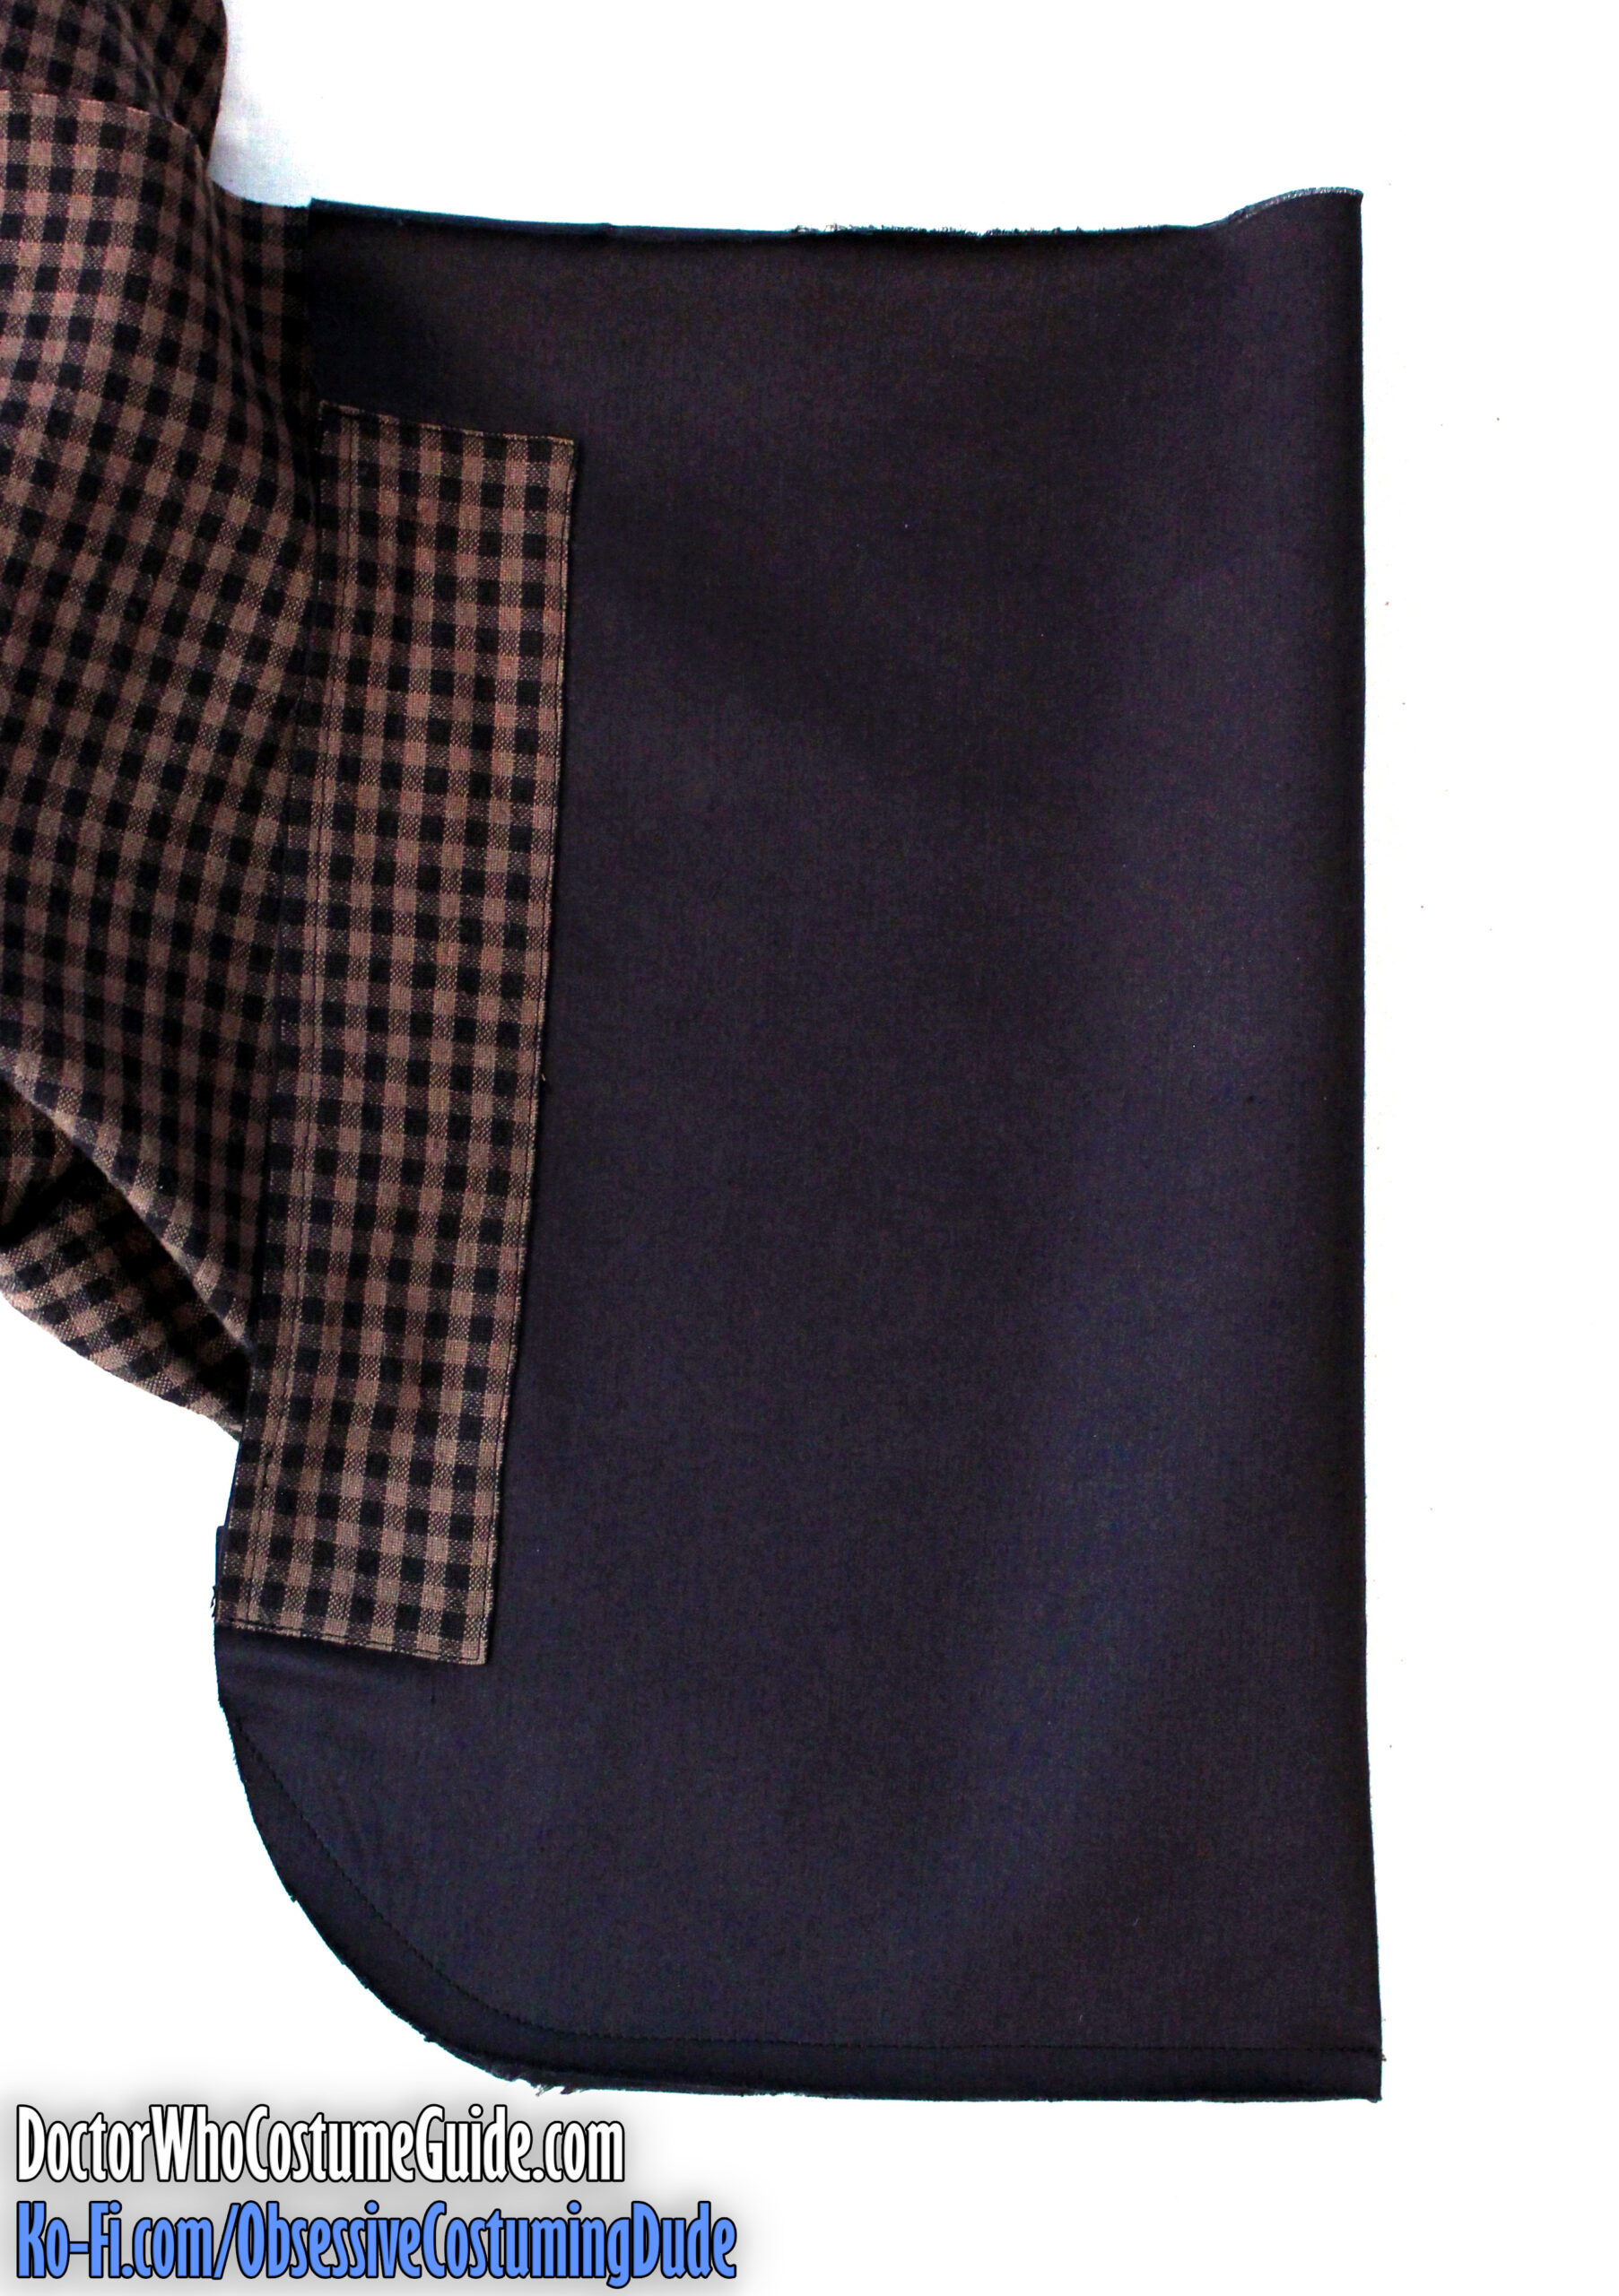
Diagonally clip the side allowances to the corners of the facing extension.
Press the upper, side, and lower edges of the pocket facing under ¼”.
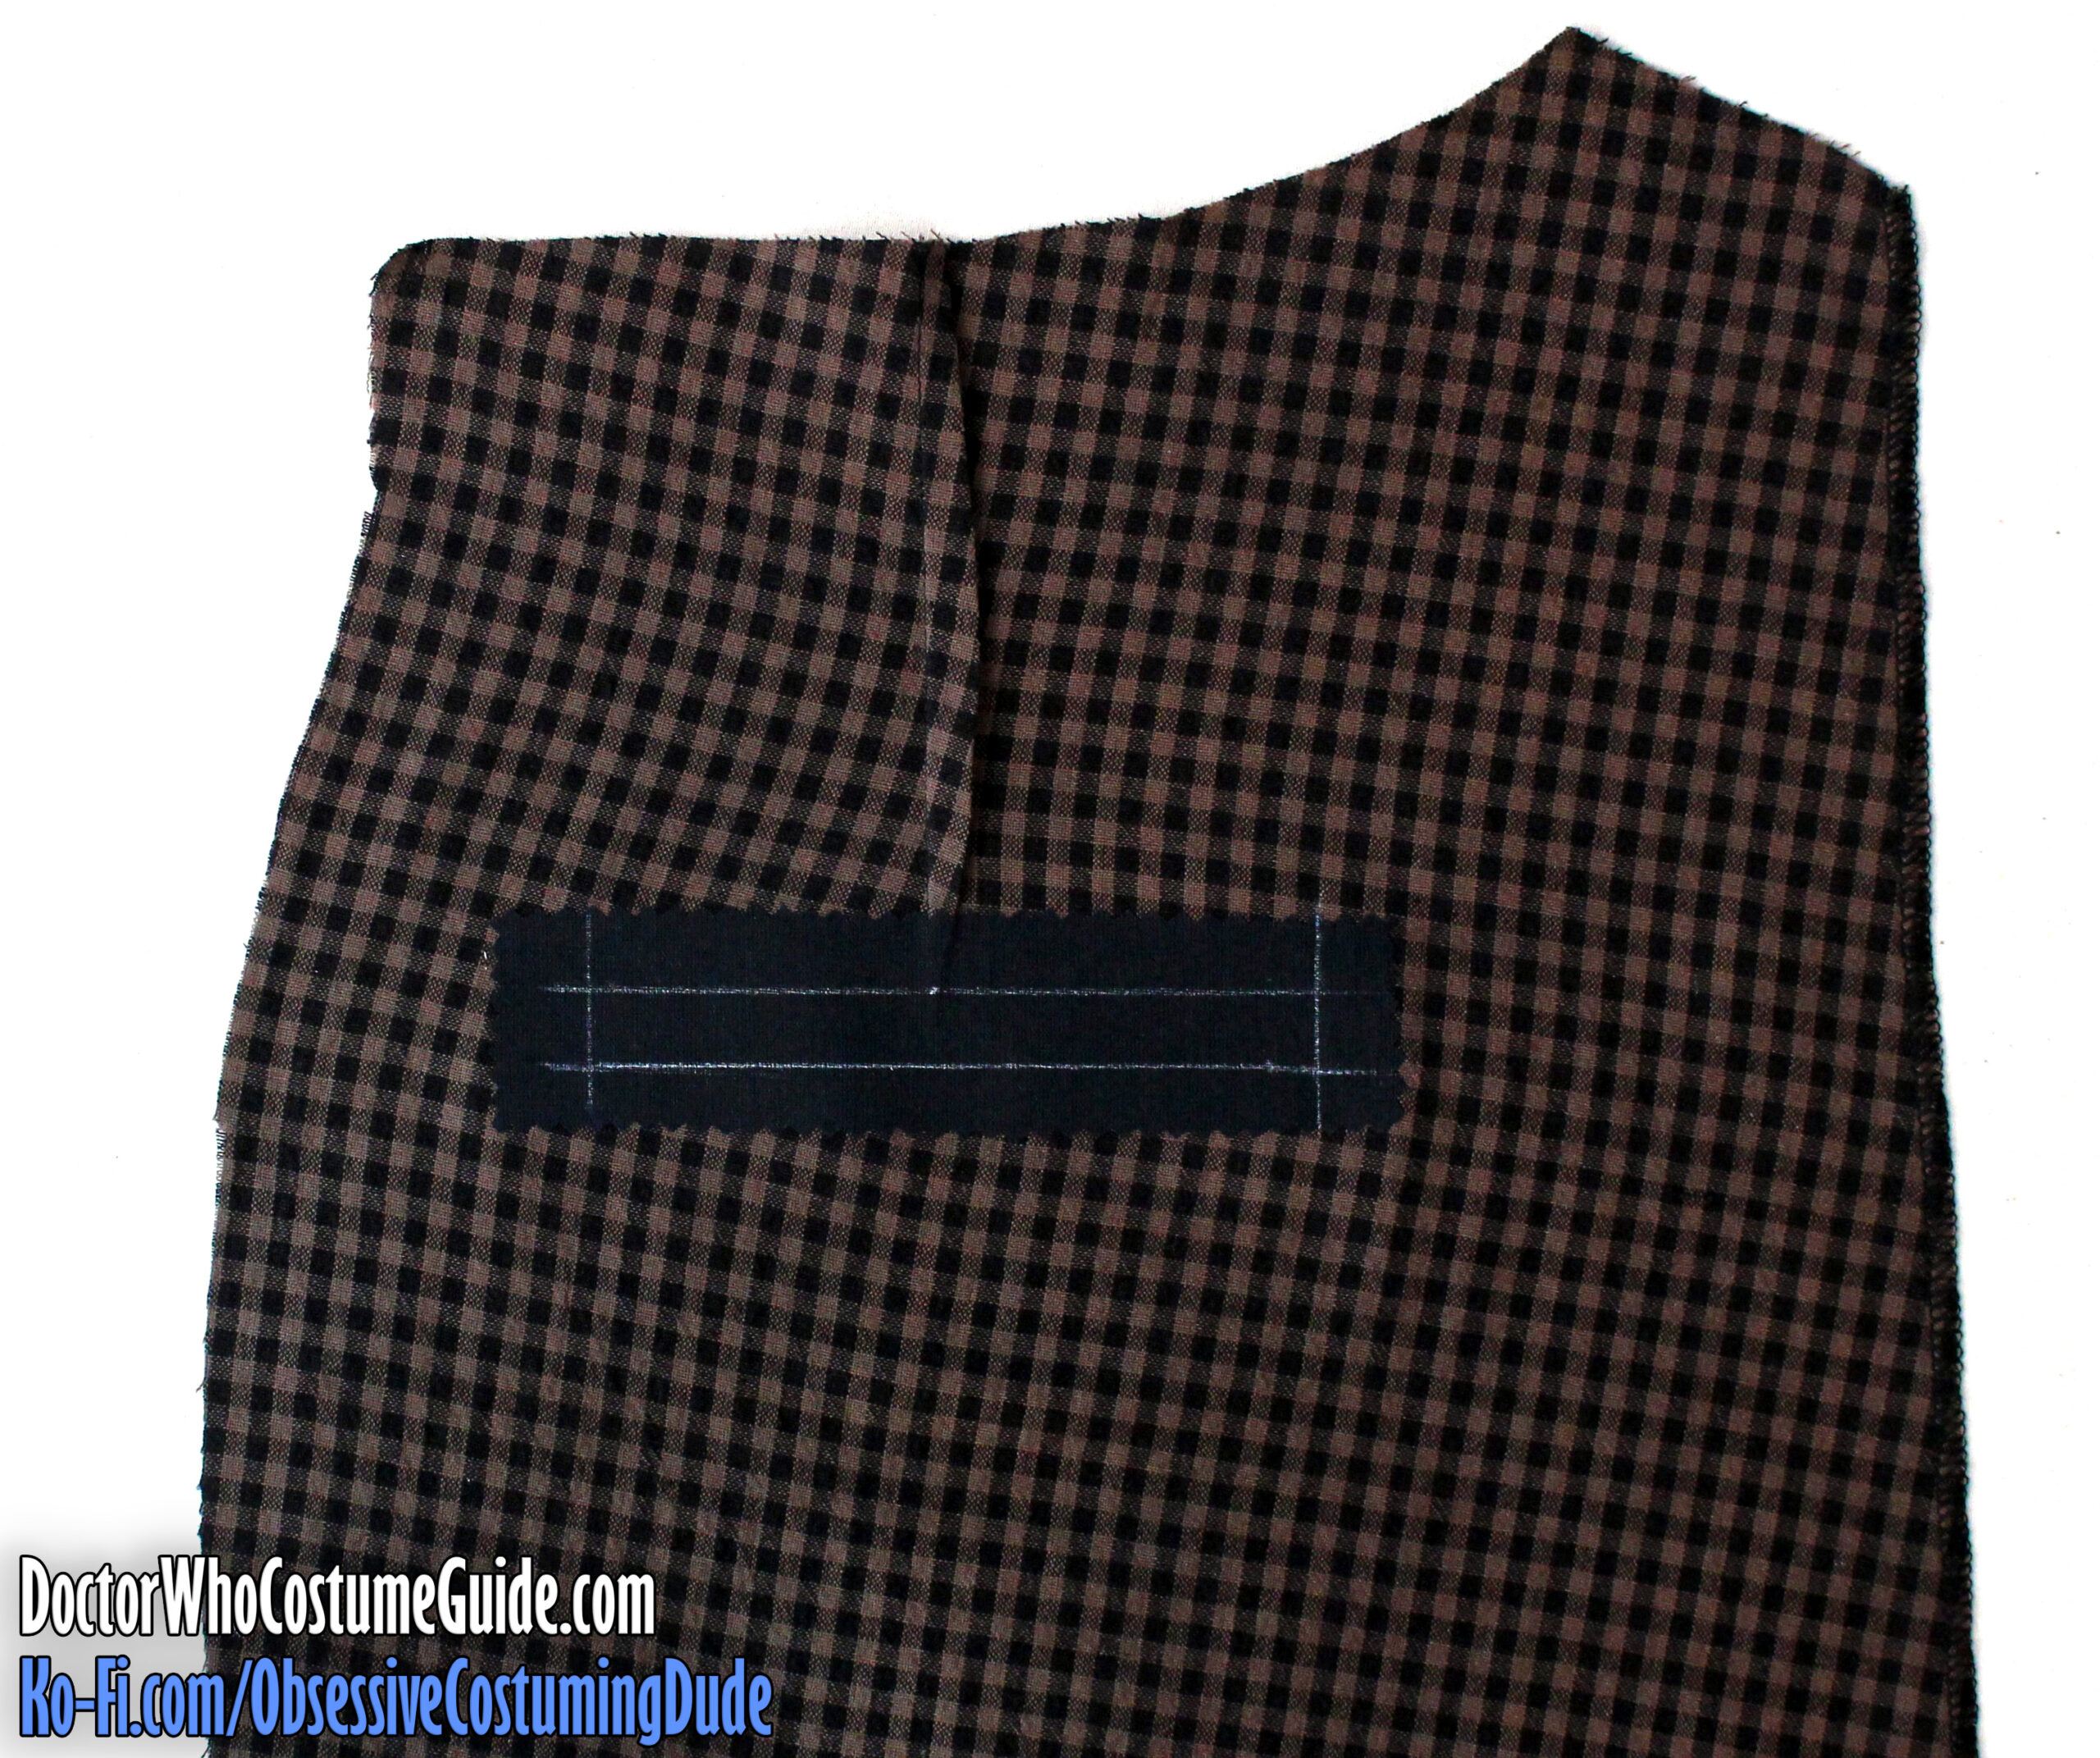
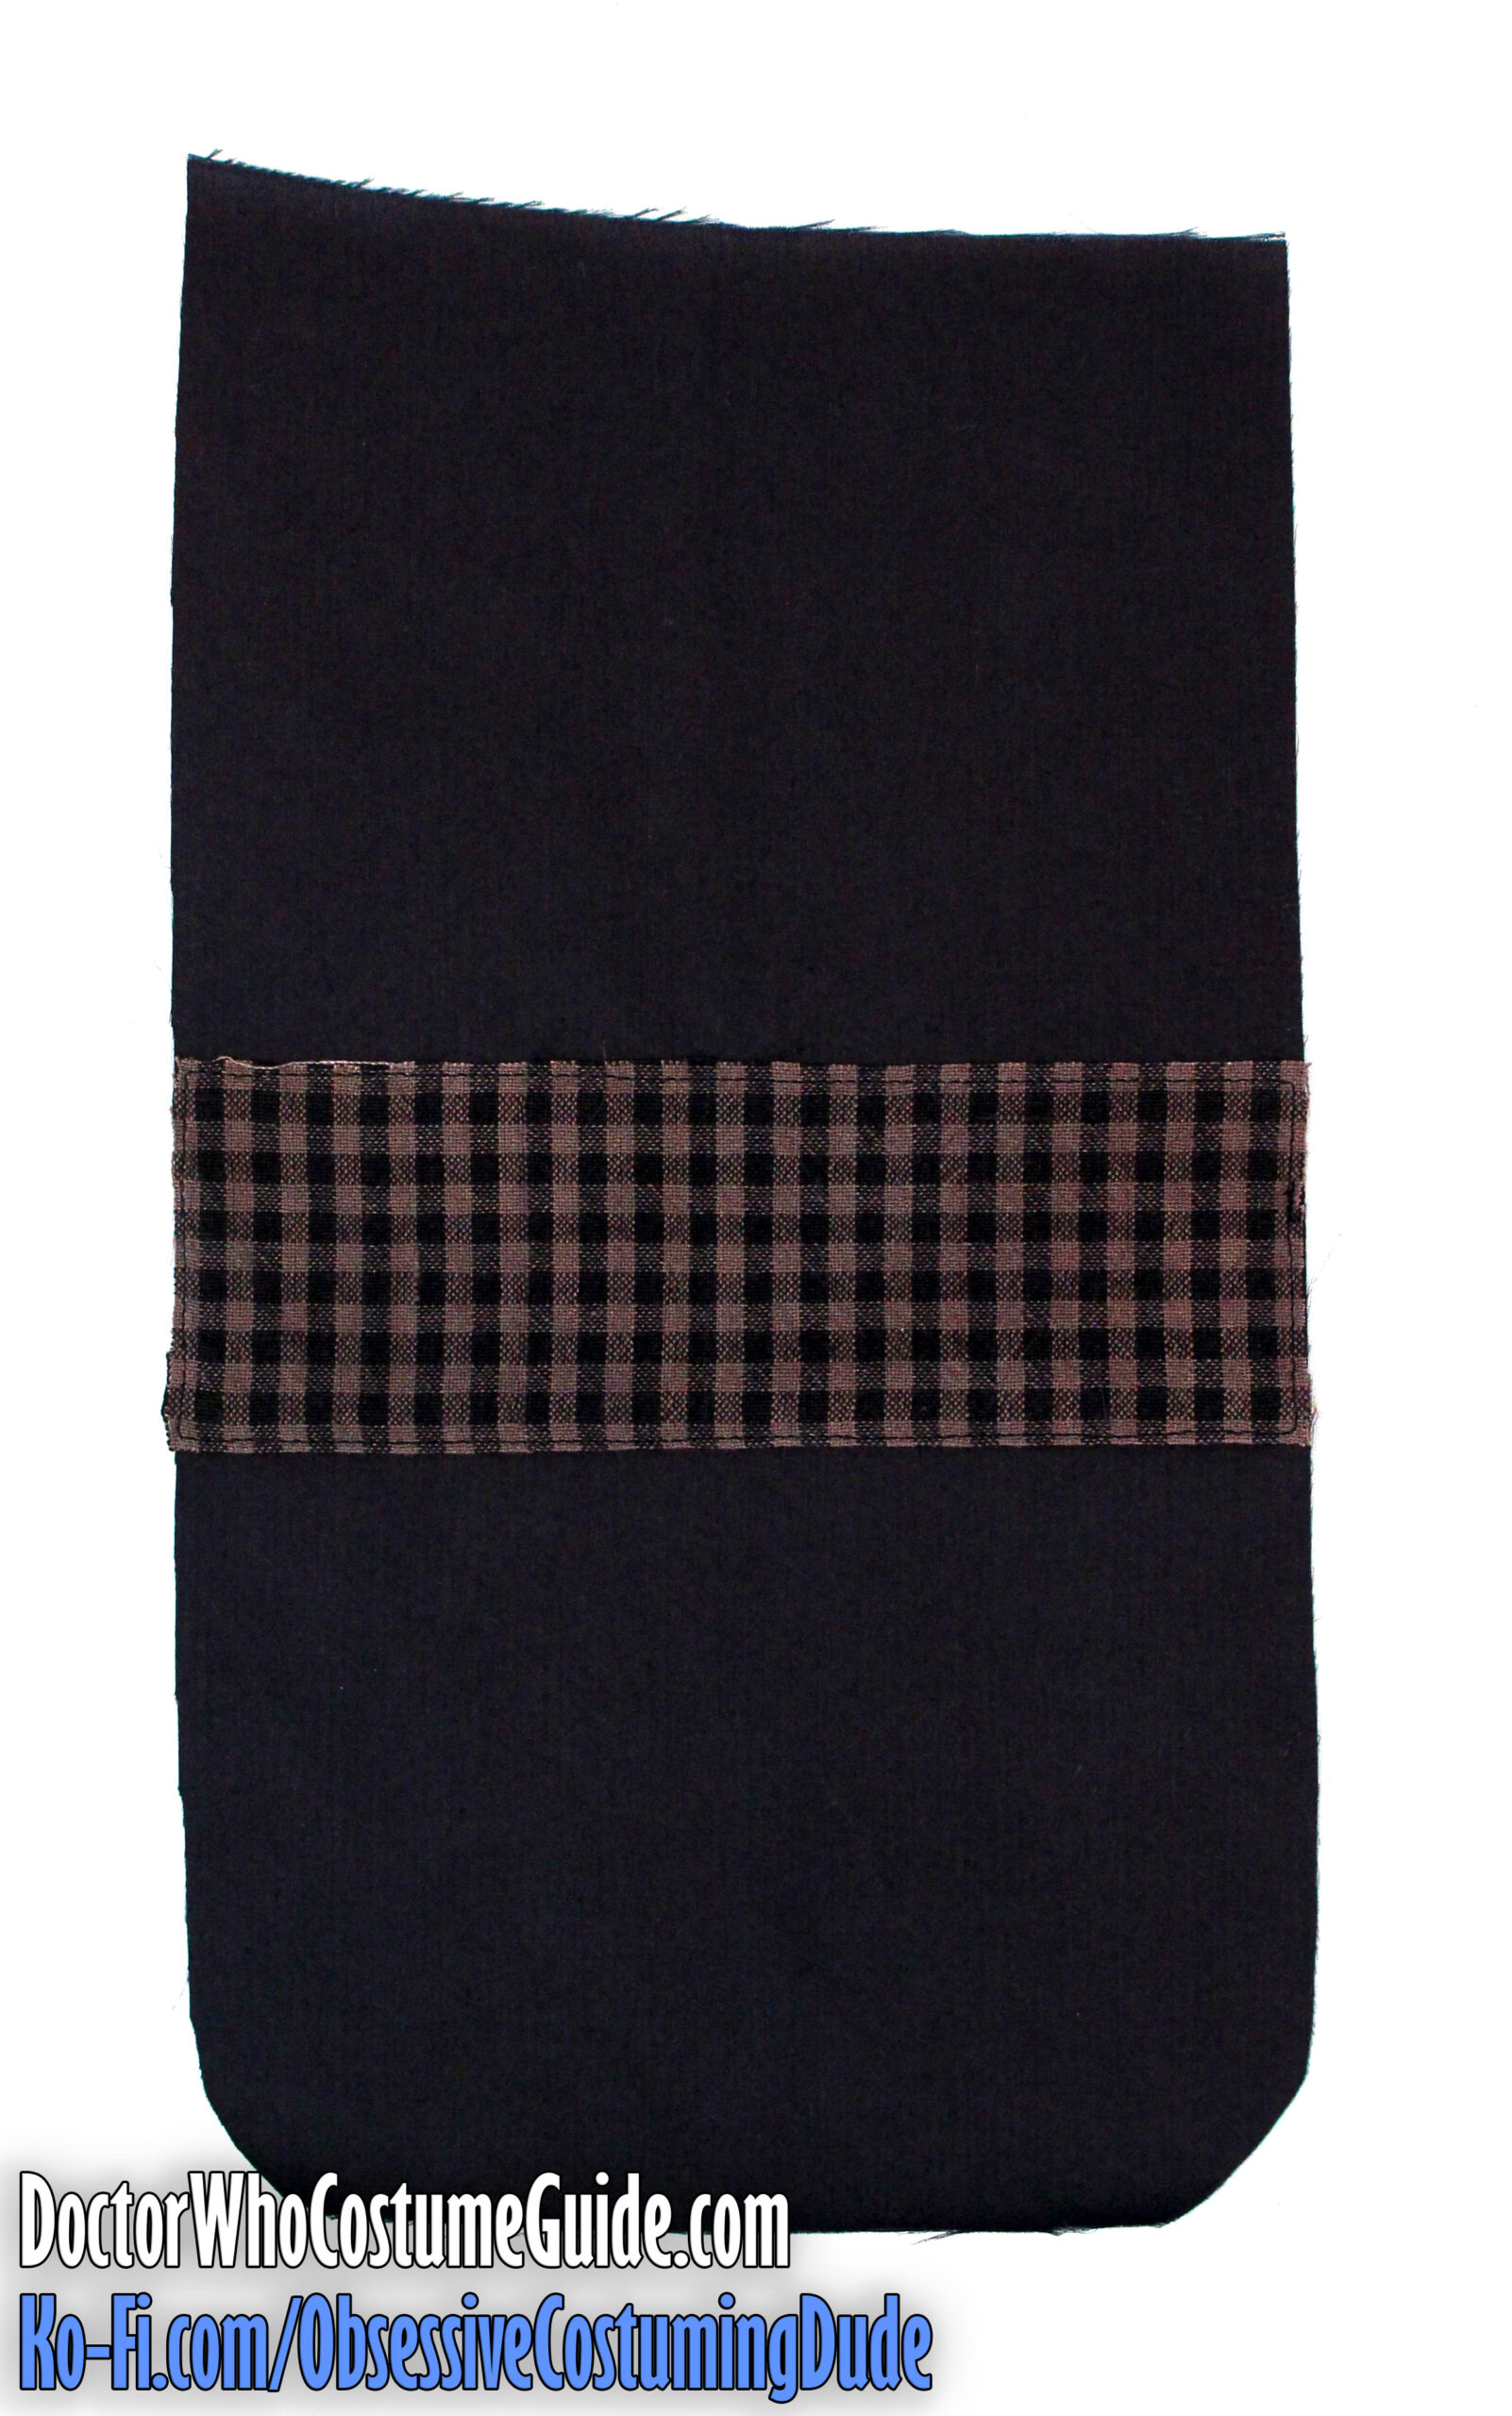
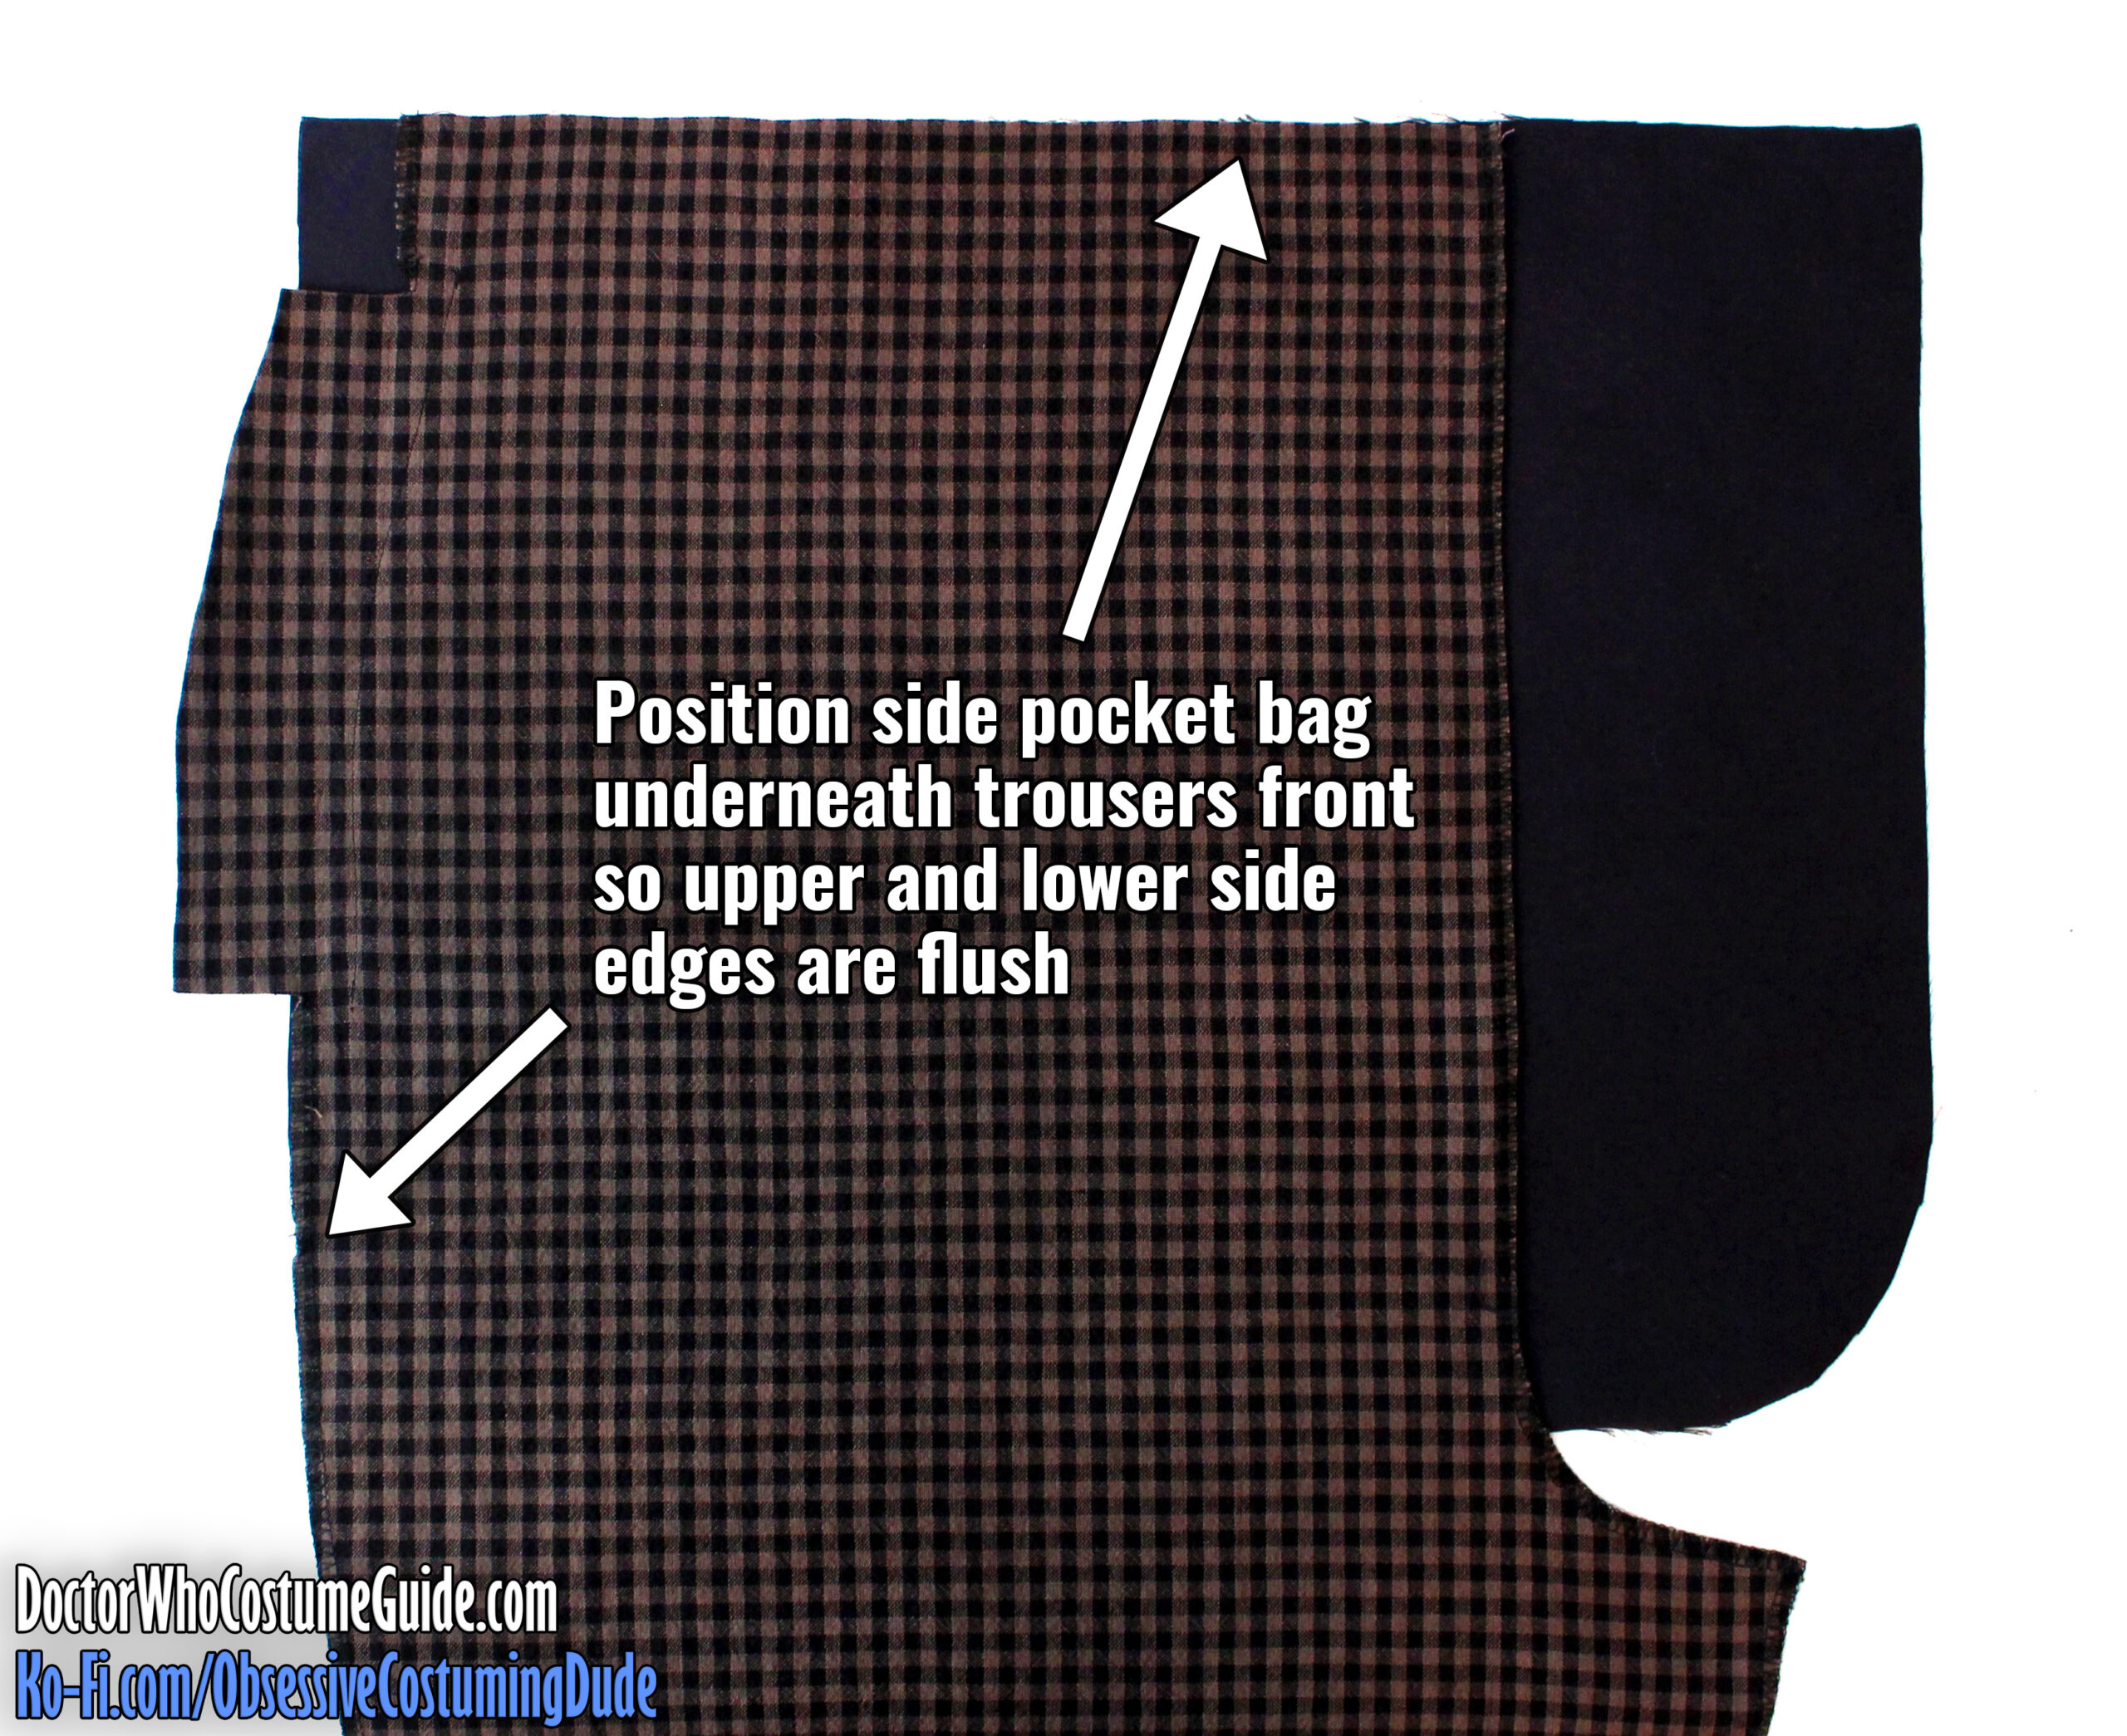
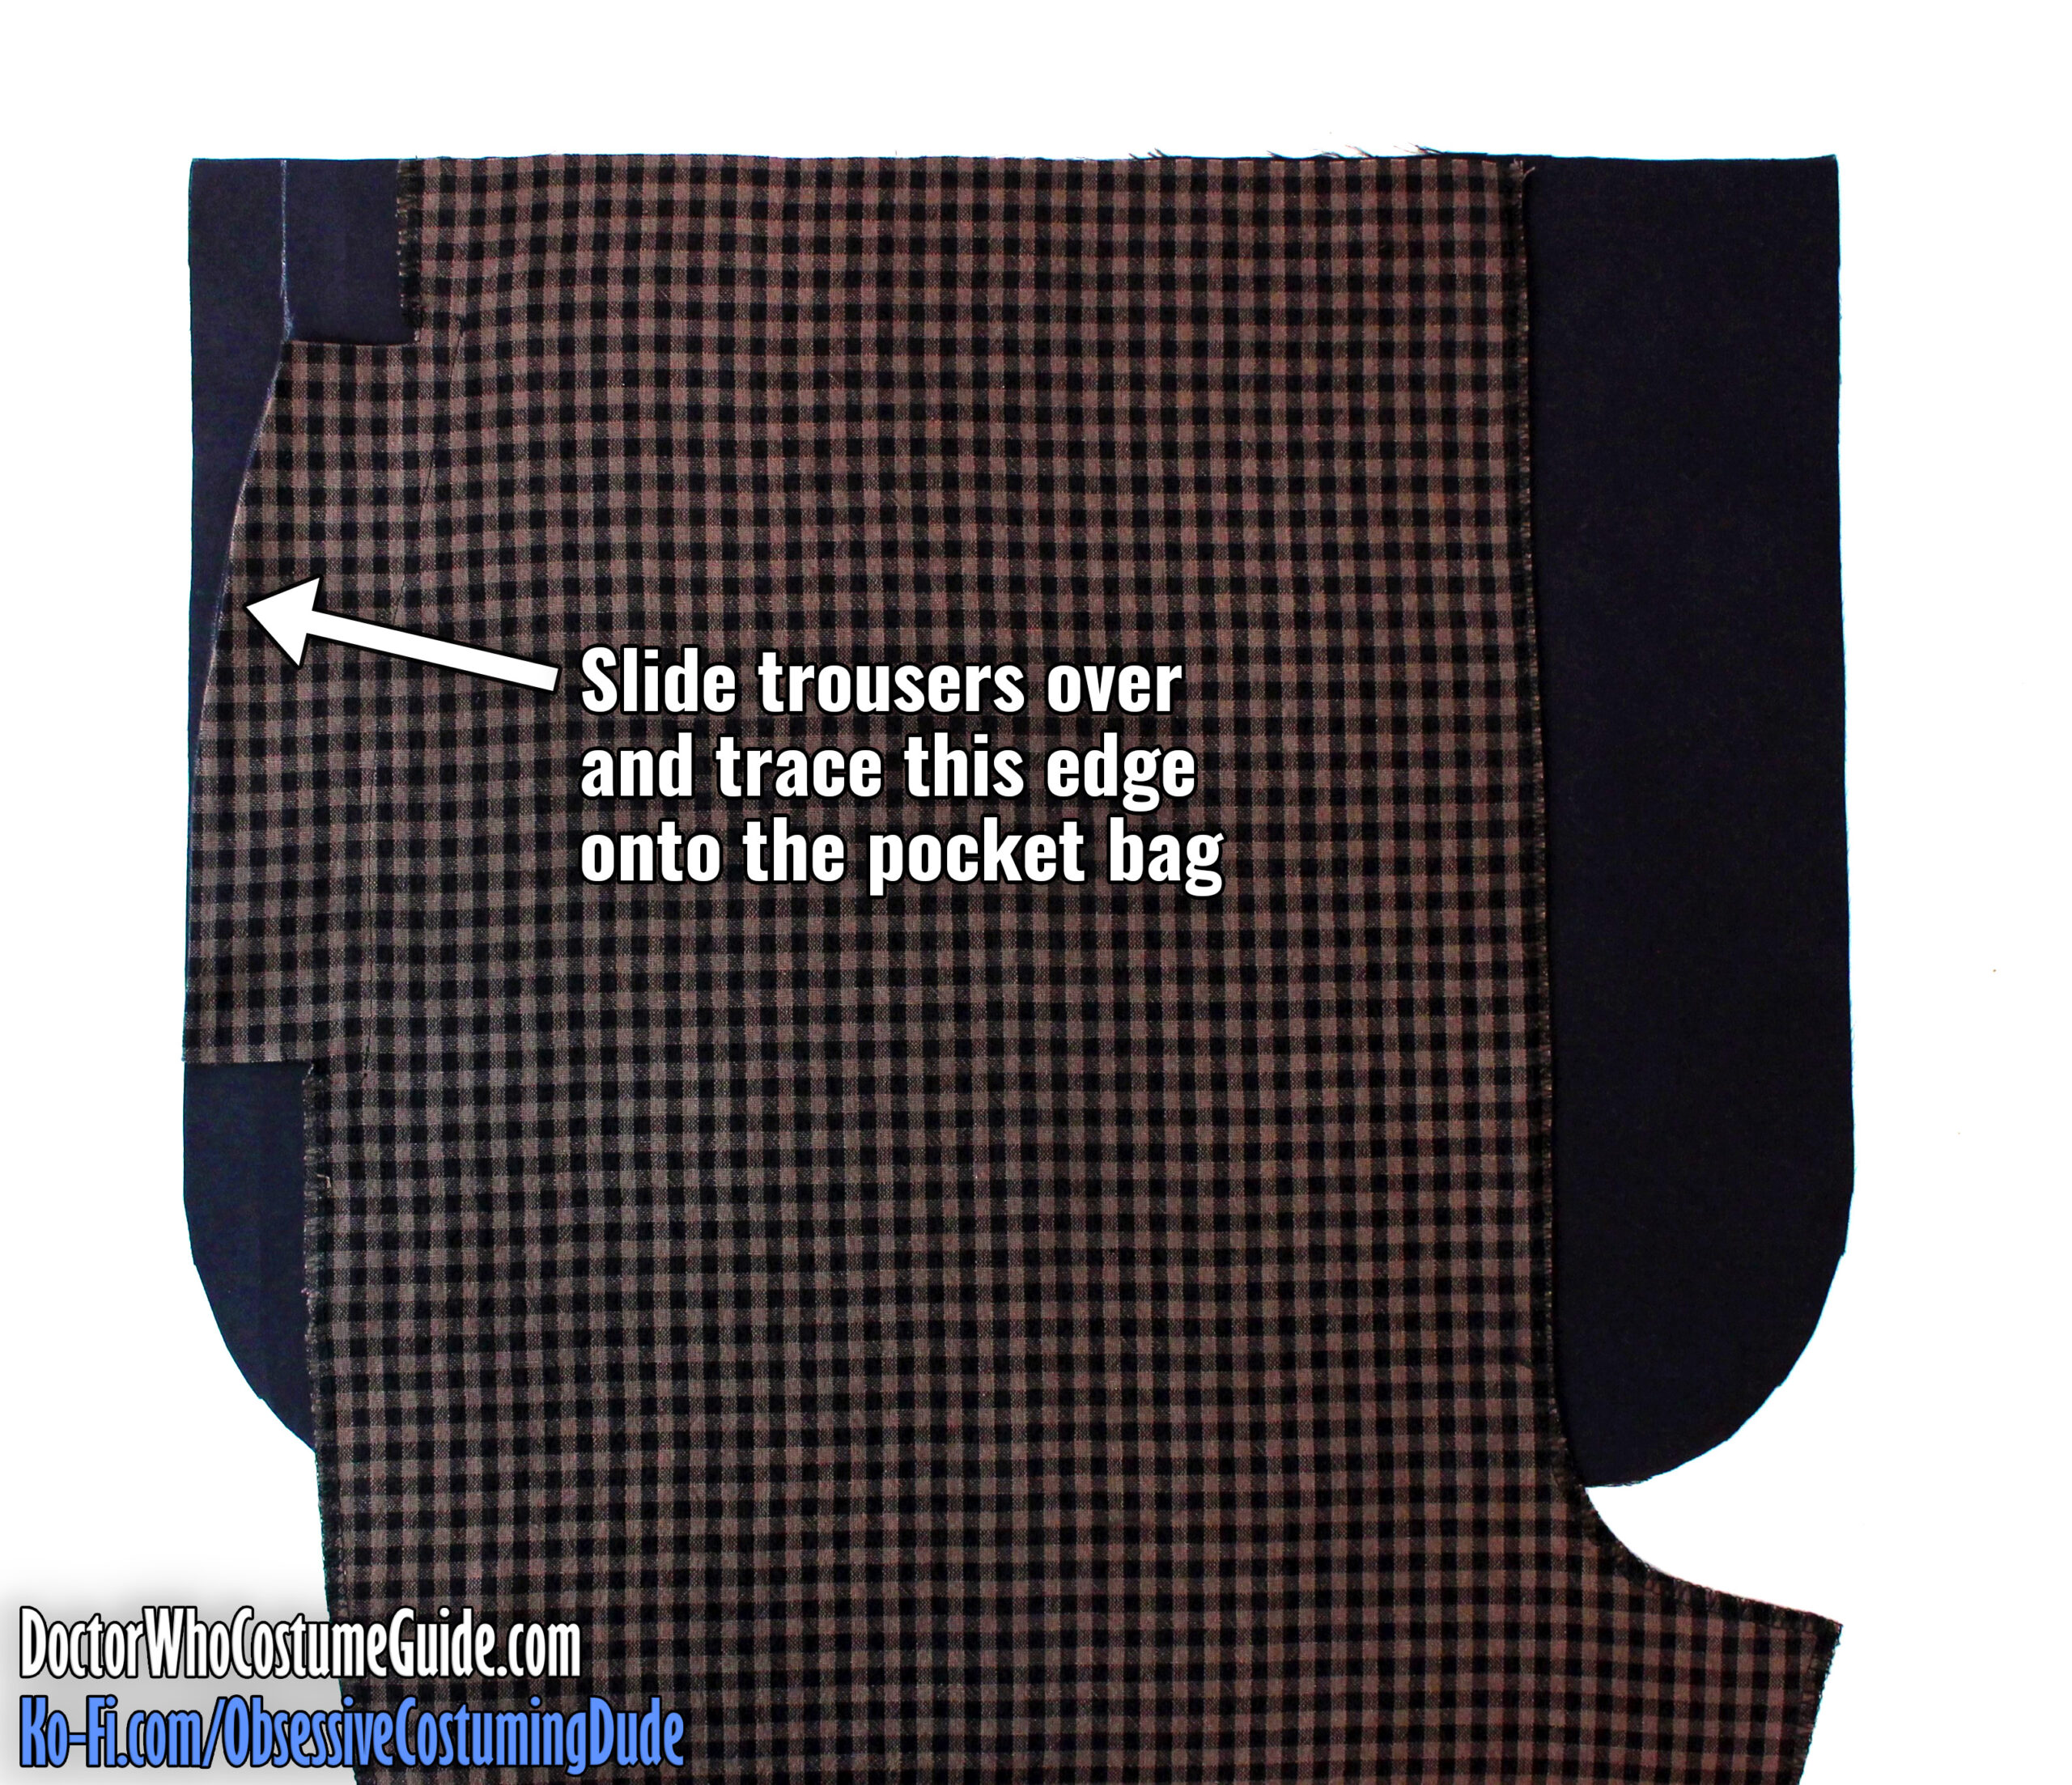
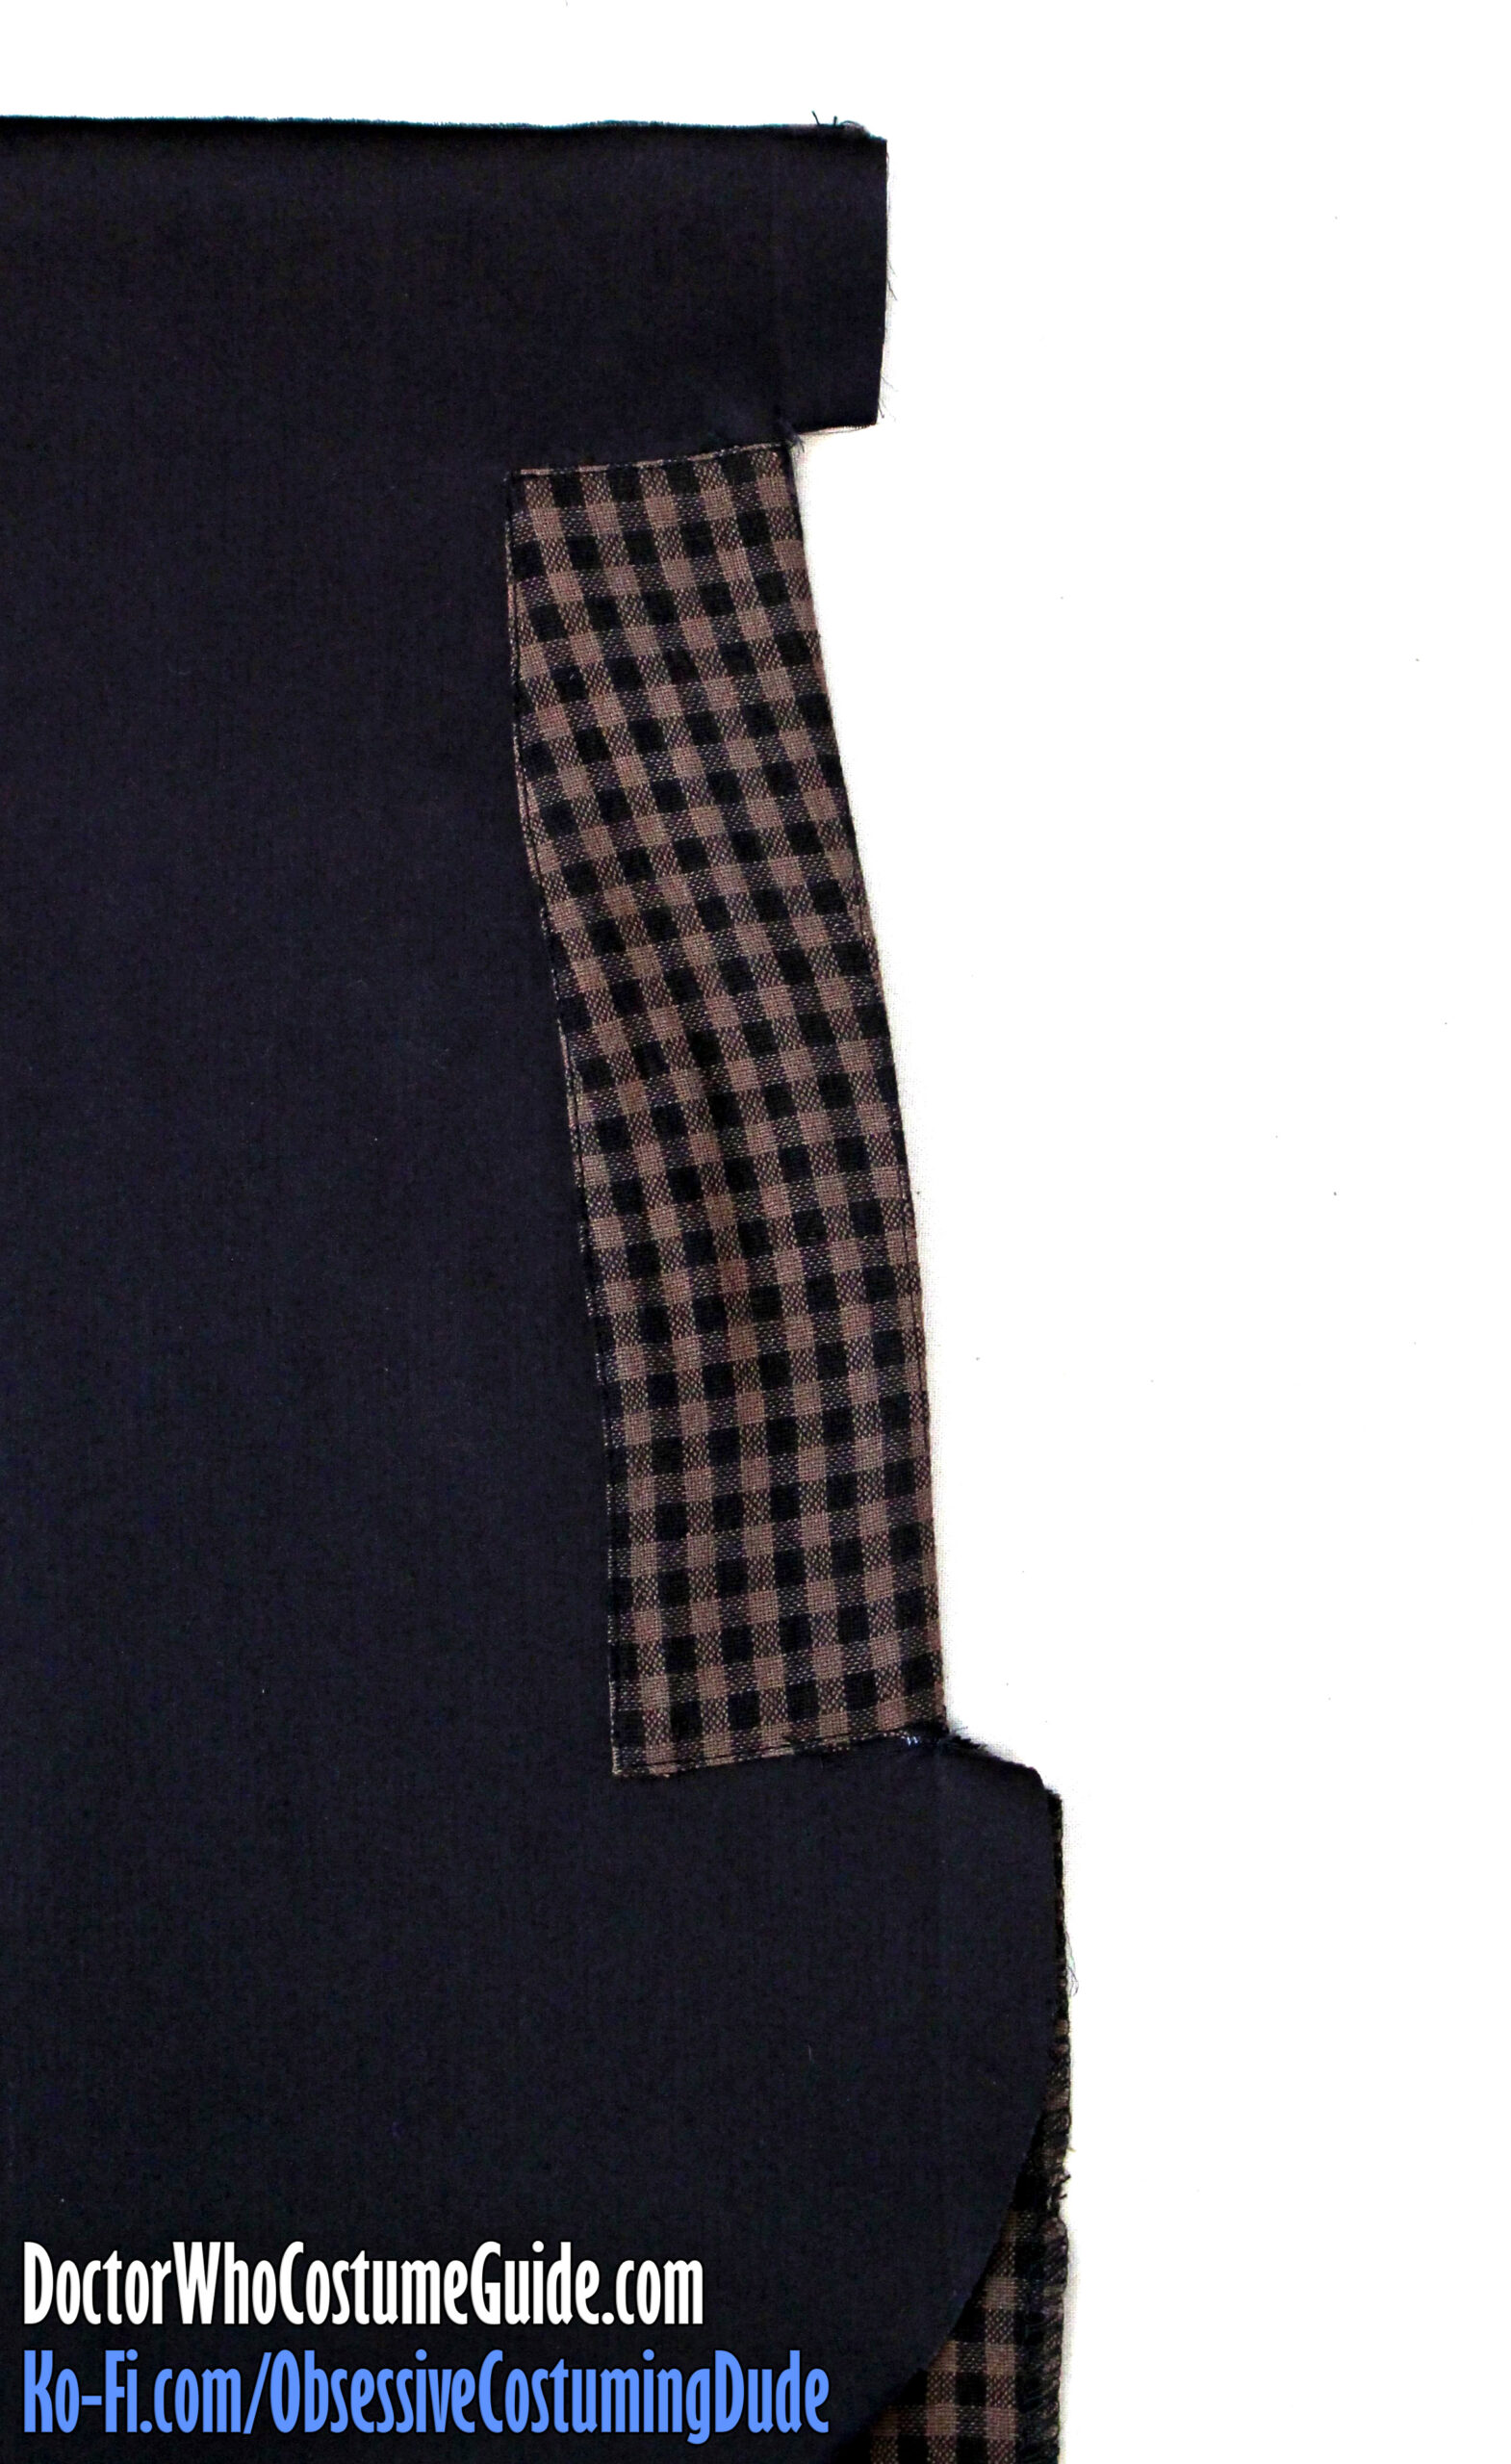
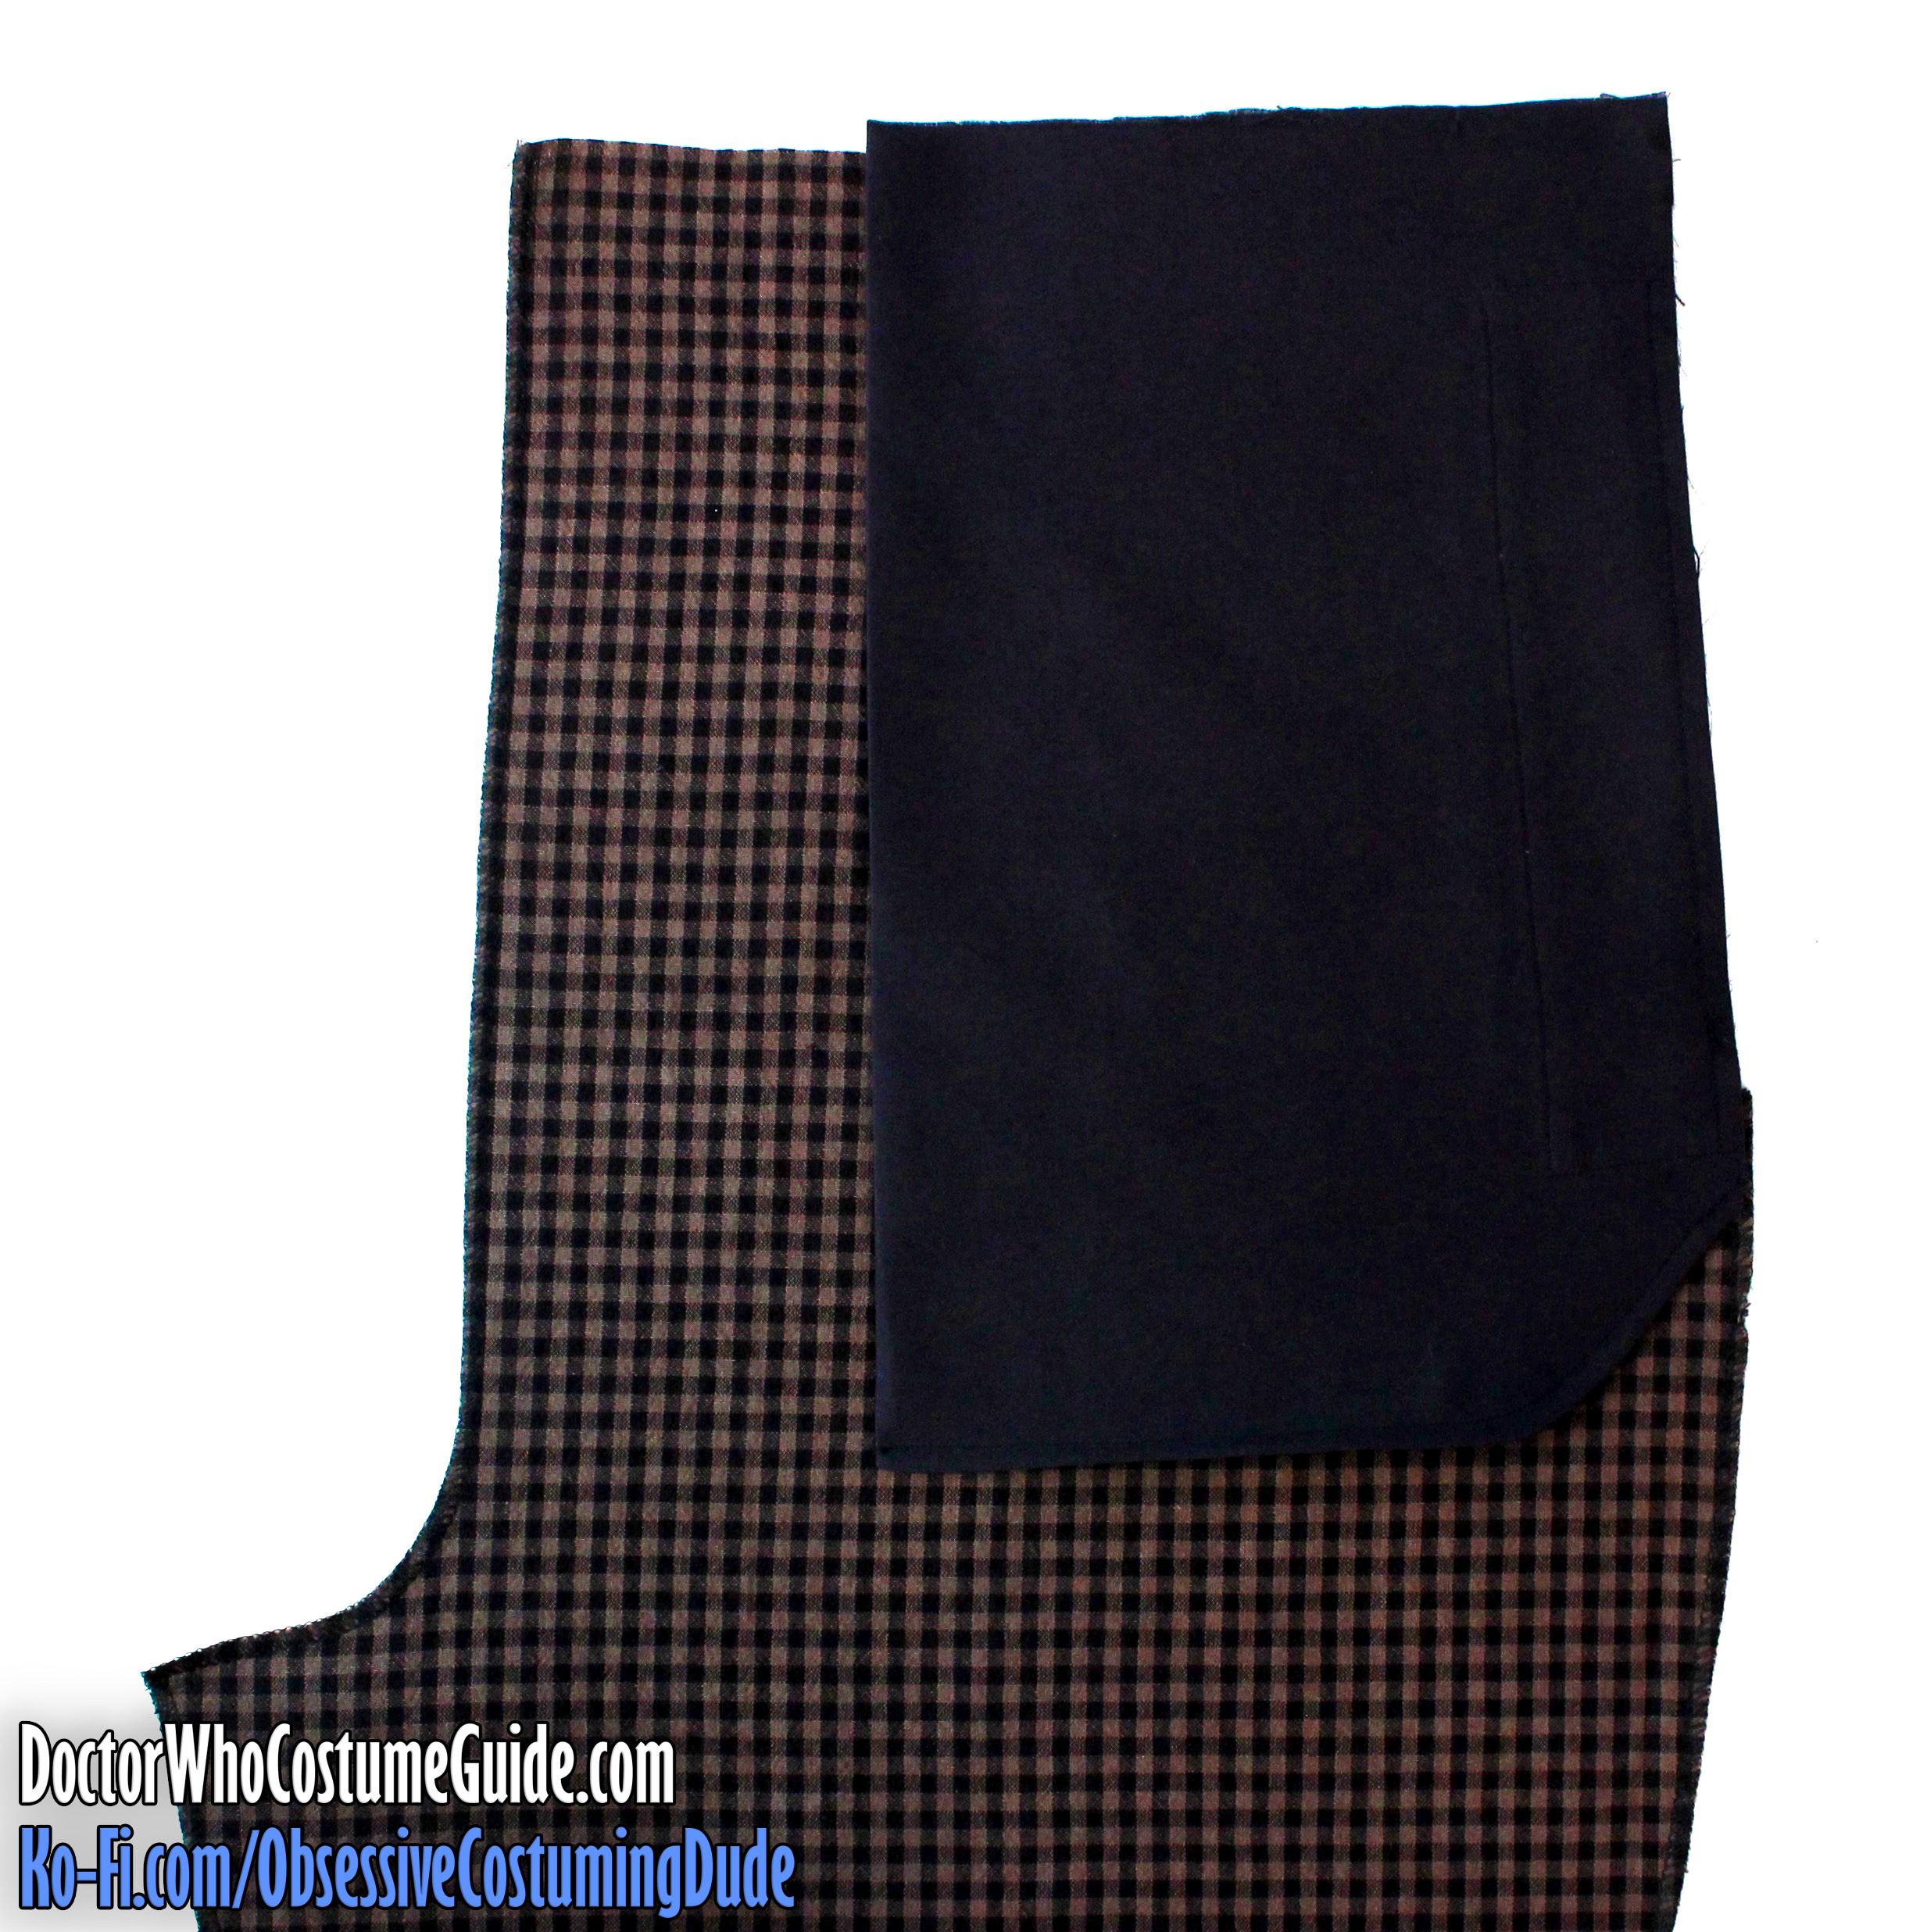
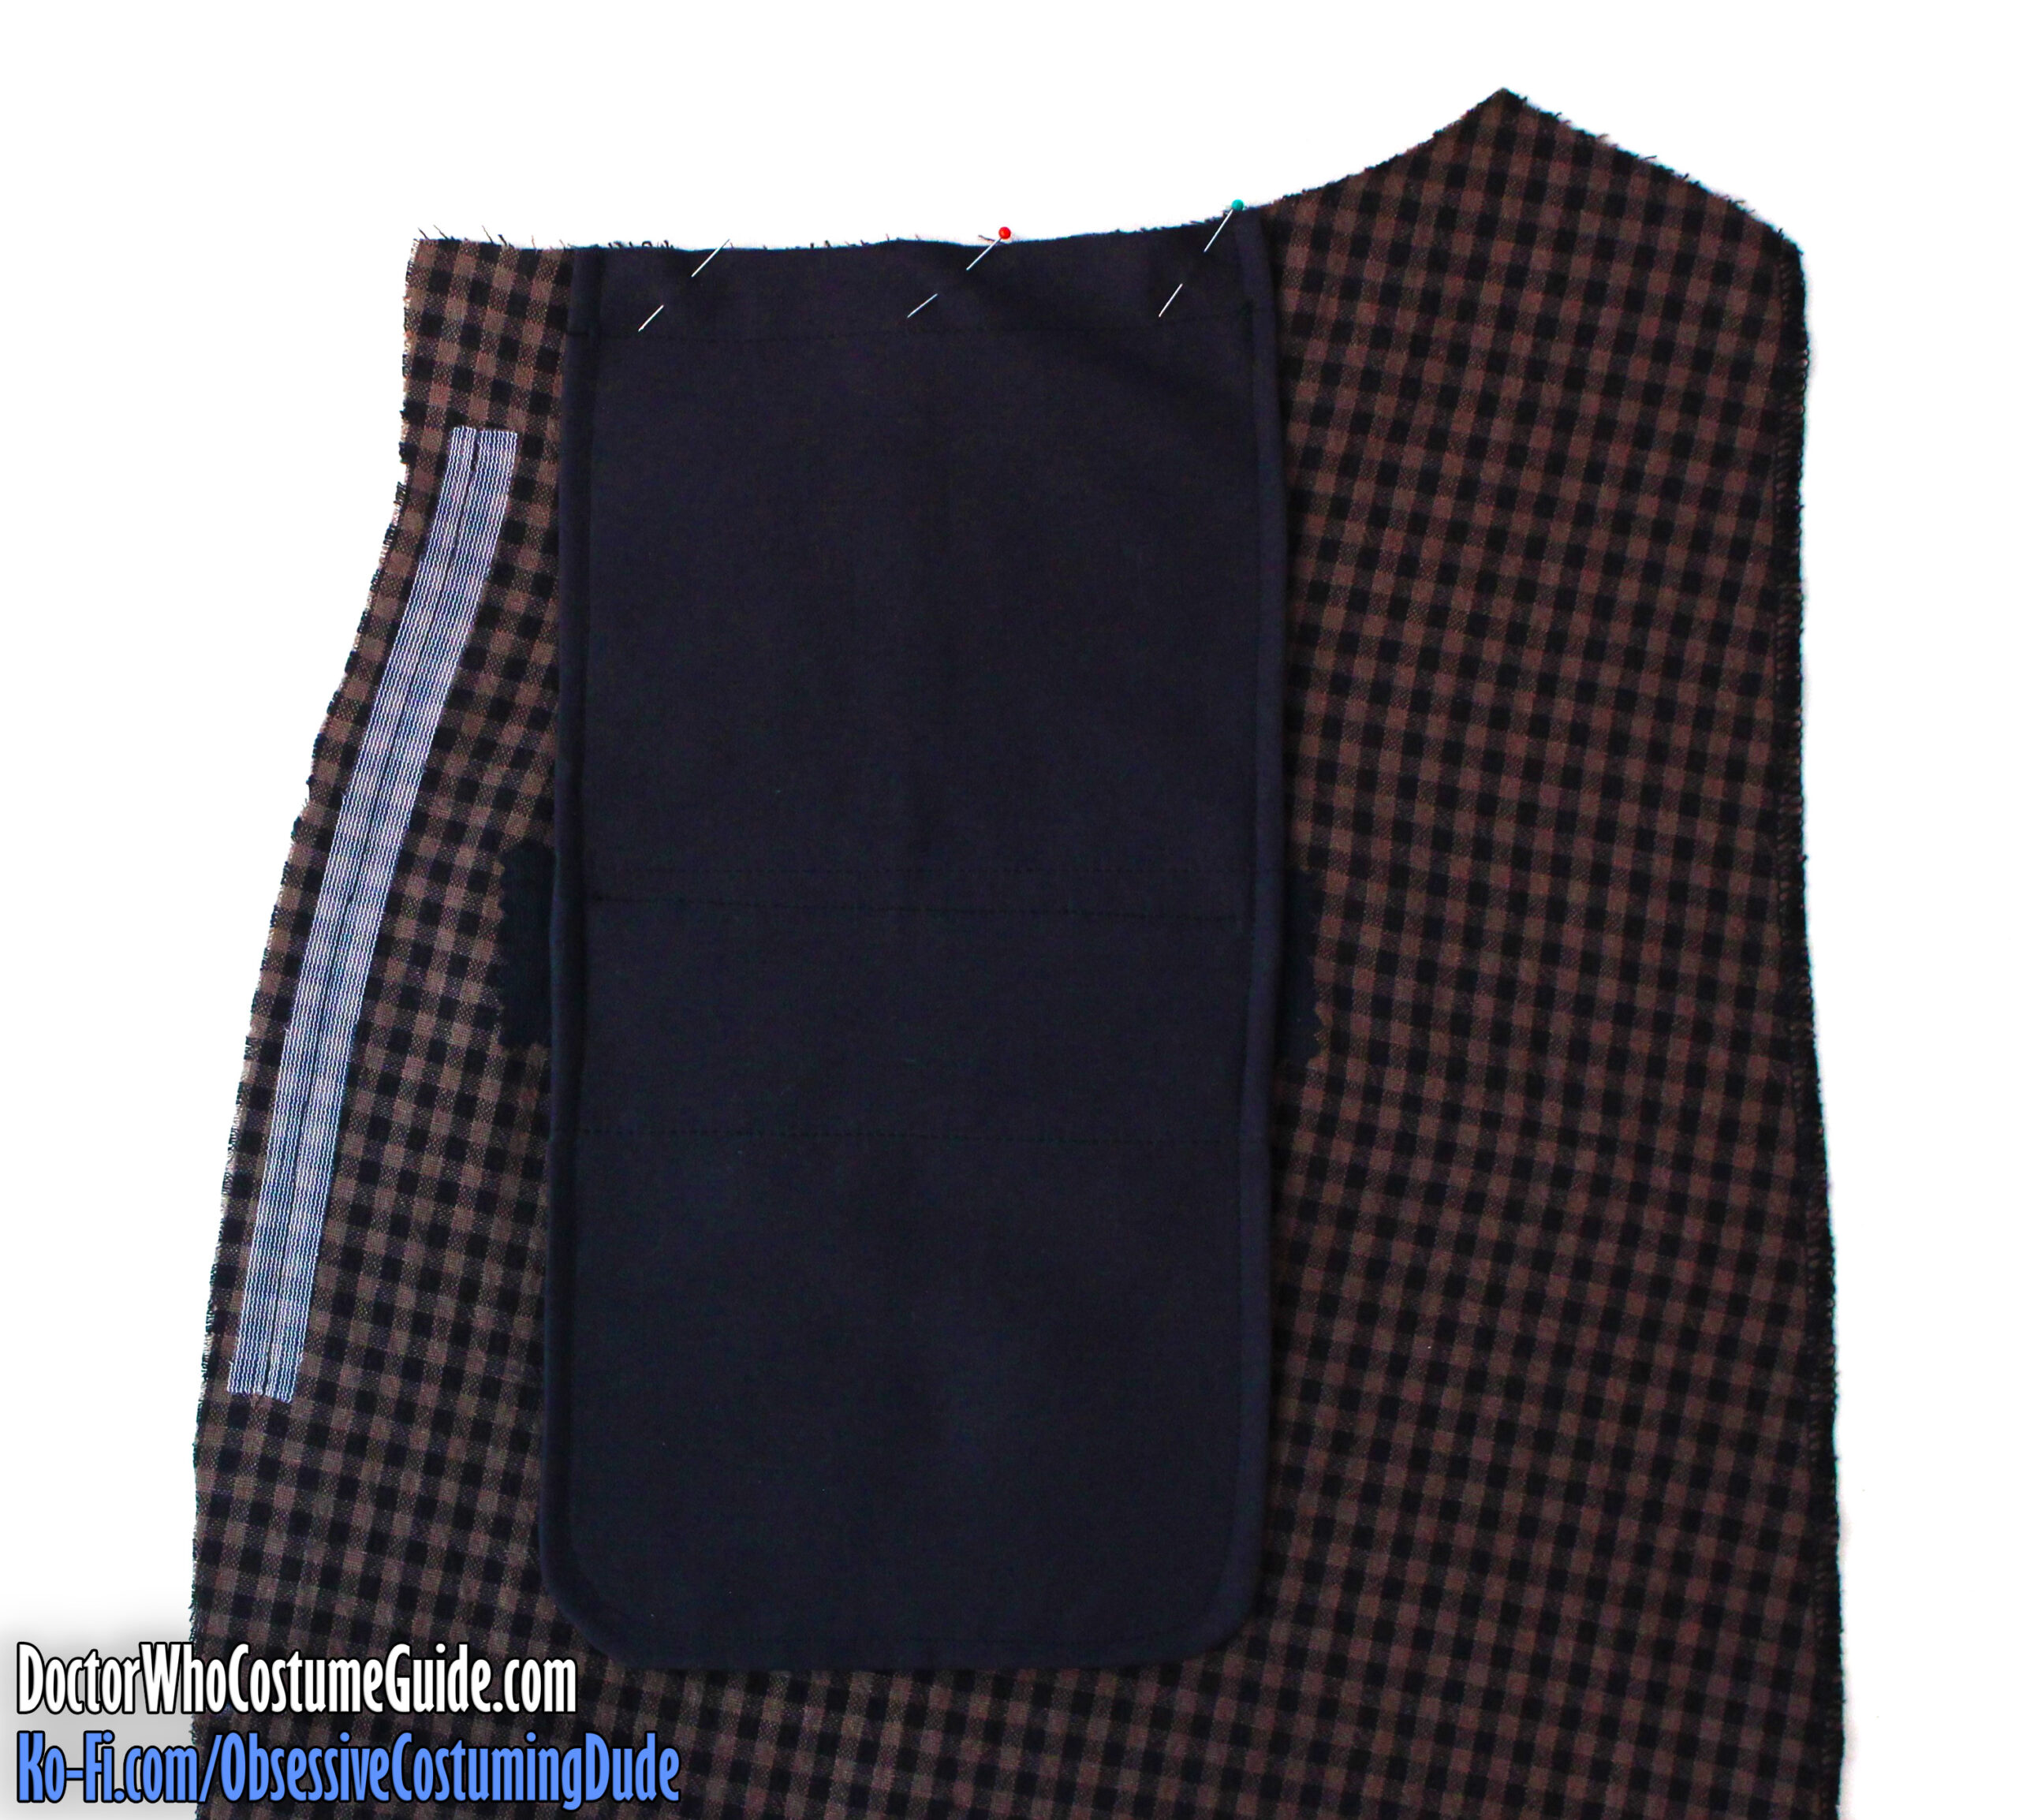
Position the side pocket bag (piece F) underneath the trousers front so its upper edge is flush with the top of the trousers, and lower side edge is flush with the trousers below the cut-on pocket facing.
A small rectangle of pocket bag should be visible at the upper side corner.
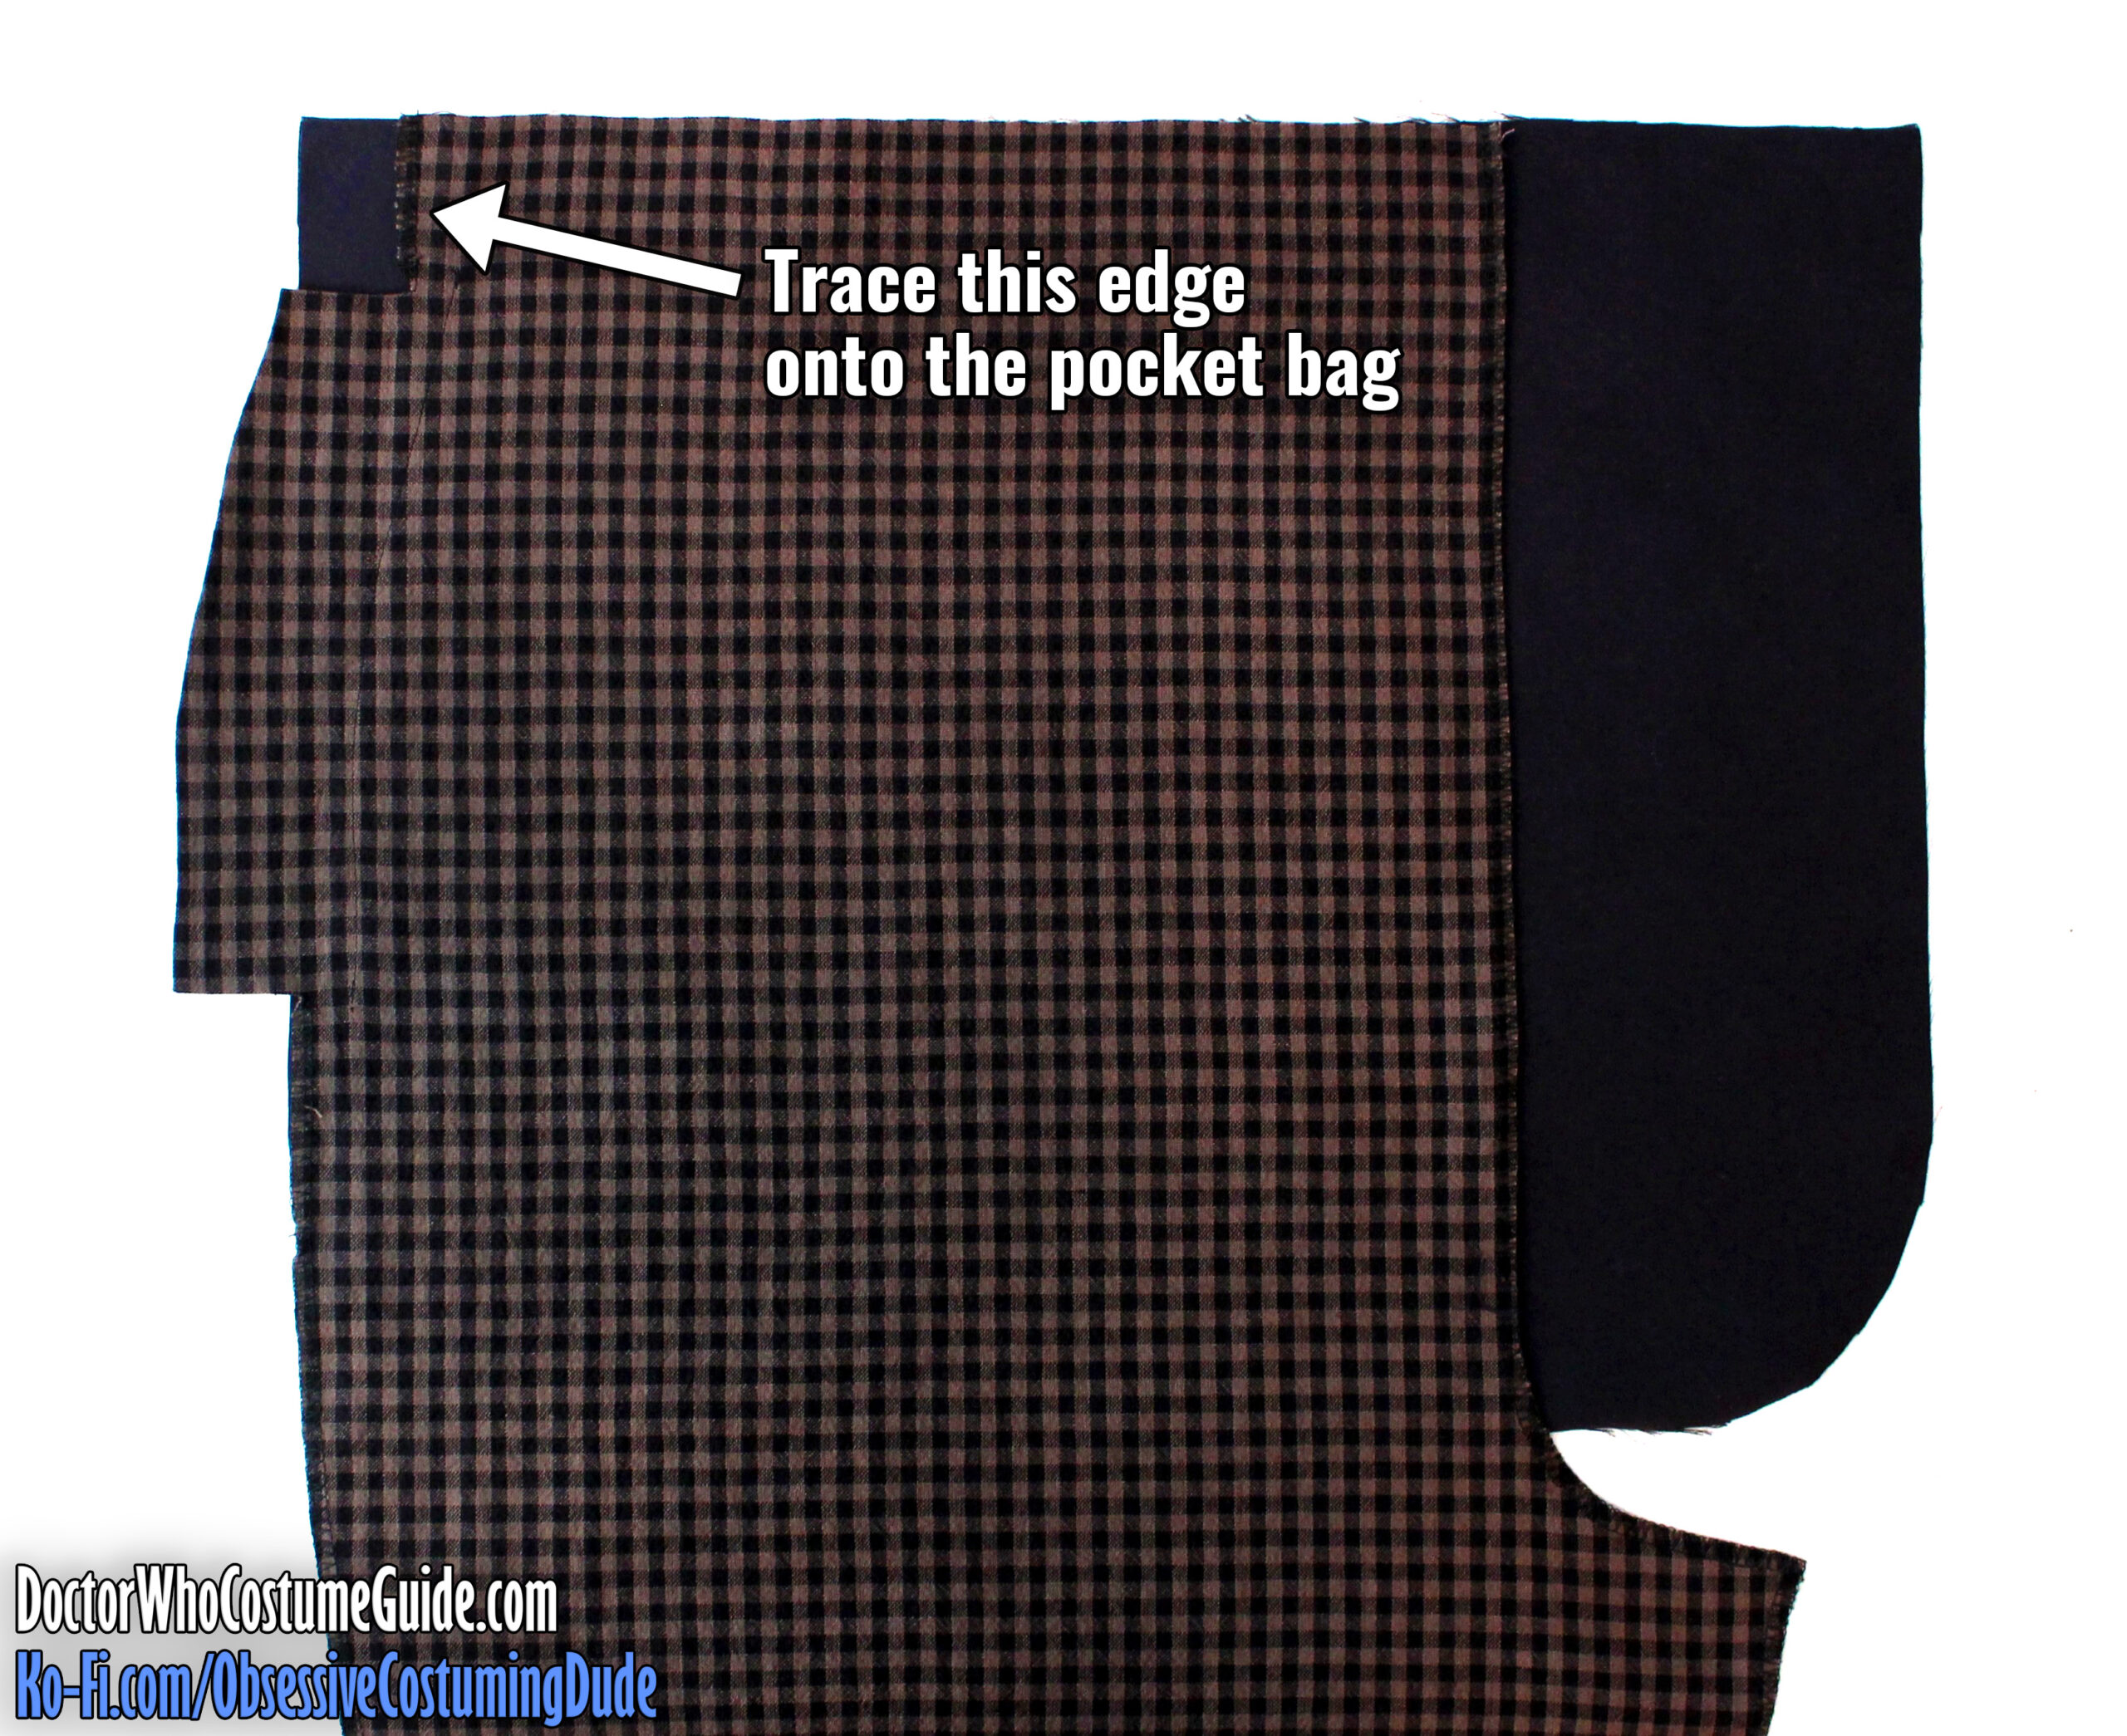
Chalk-mark the upper side edge of the trousers onto the pocket bag.
Slide the trousers over until the chalk mark is flush with the upper corner of the pocket facing extension, then chalk-mark the side edge of the facing onto the pocket bag until it meets the existing edge.
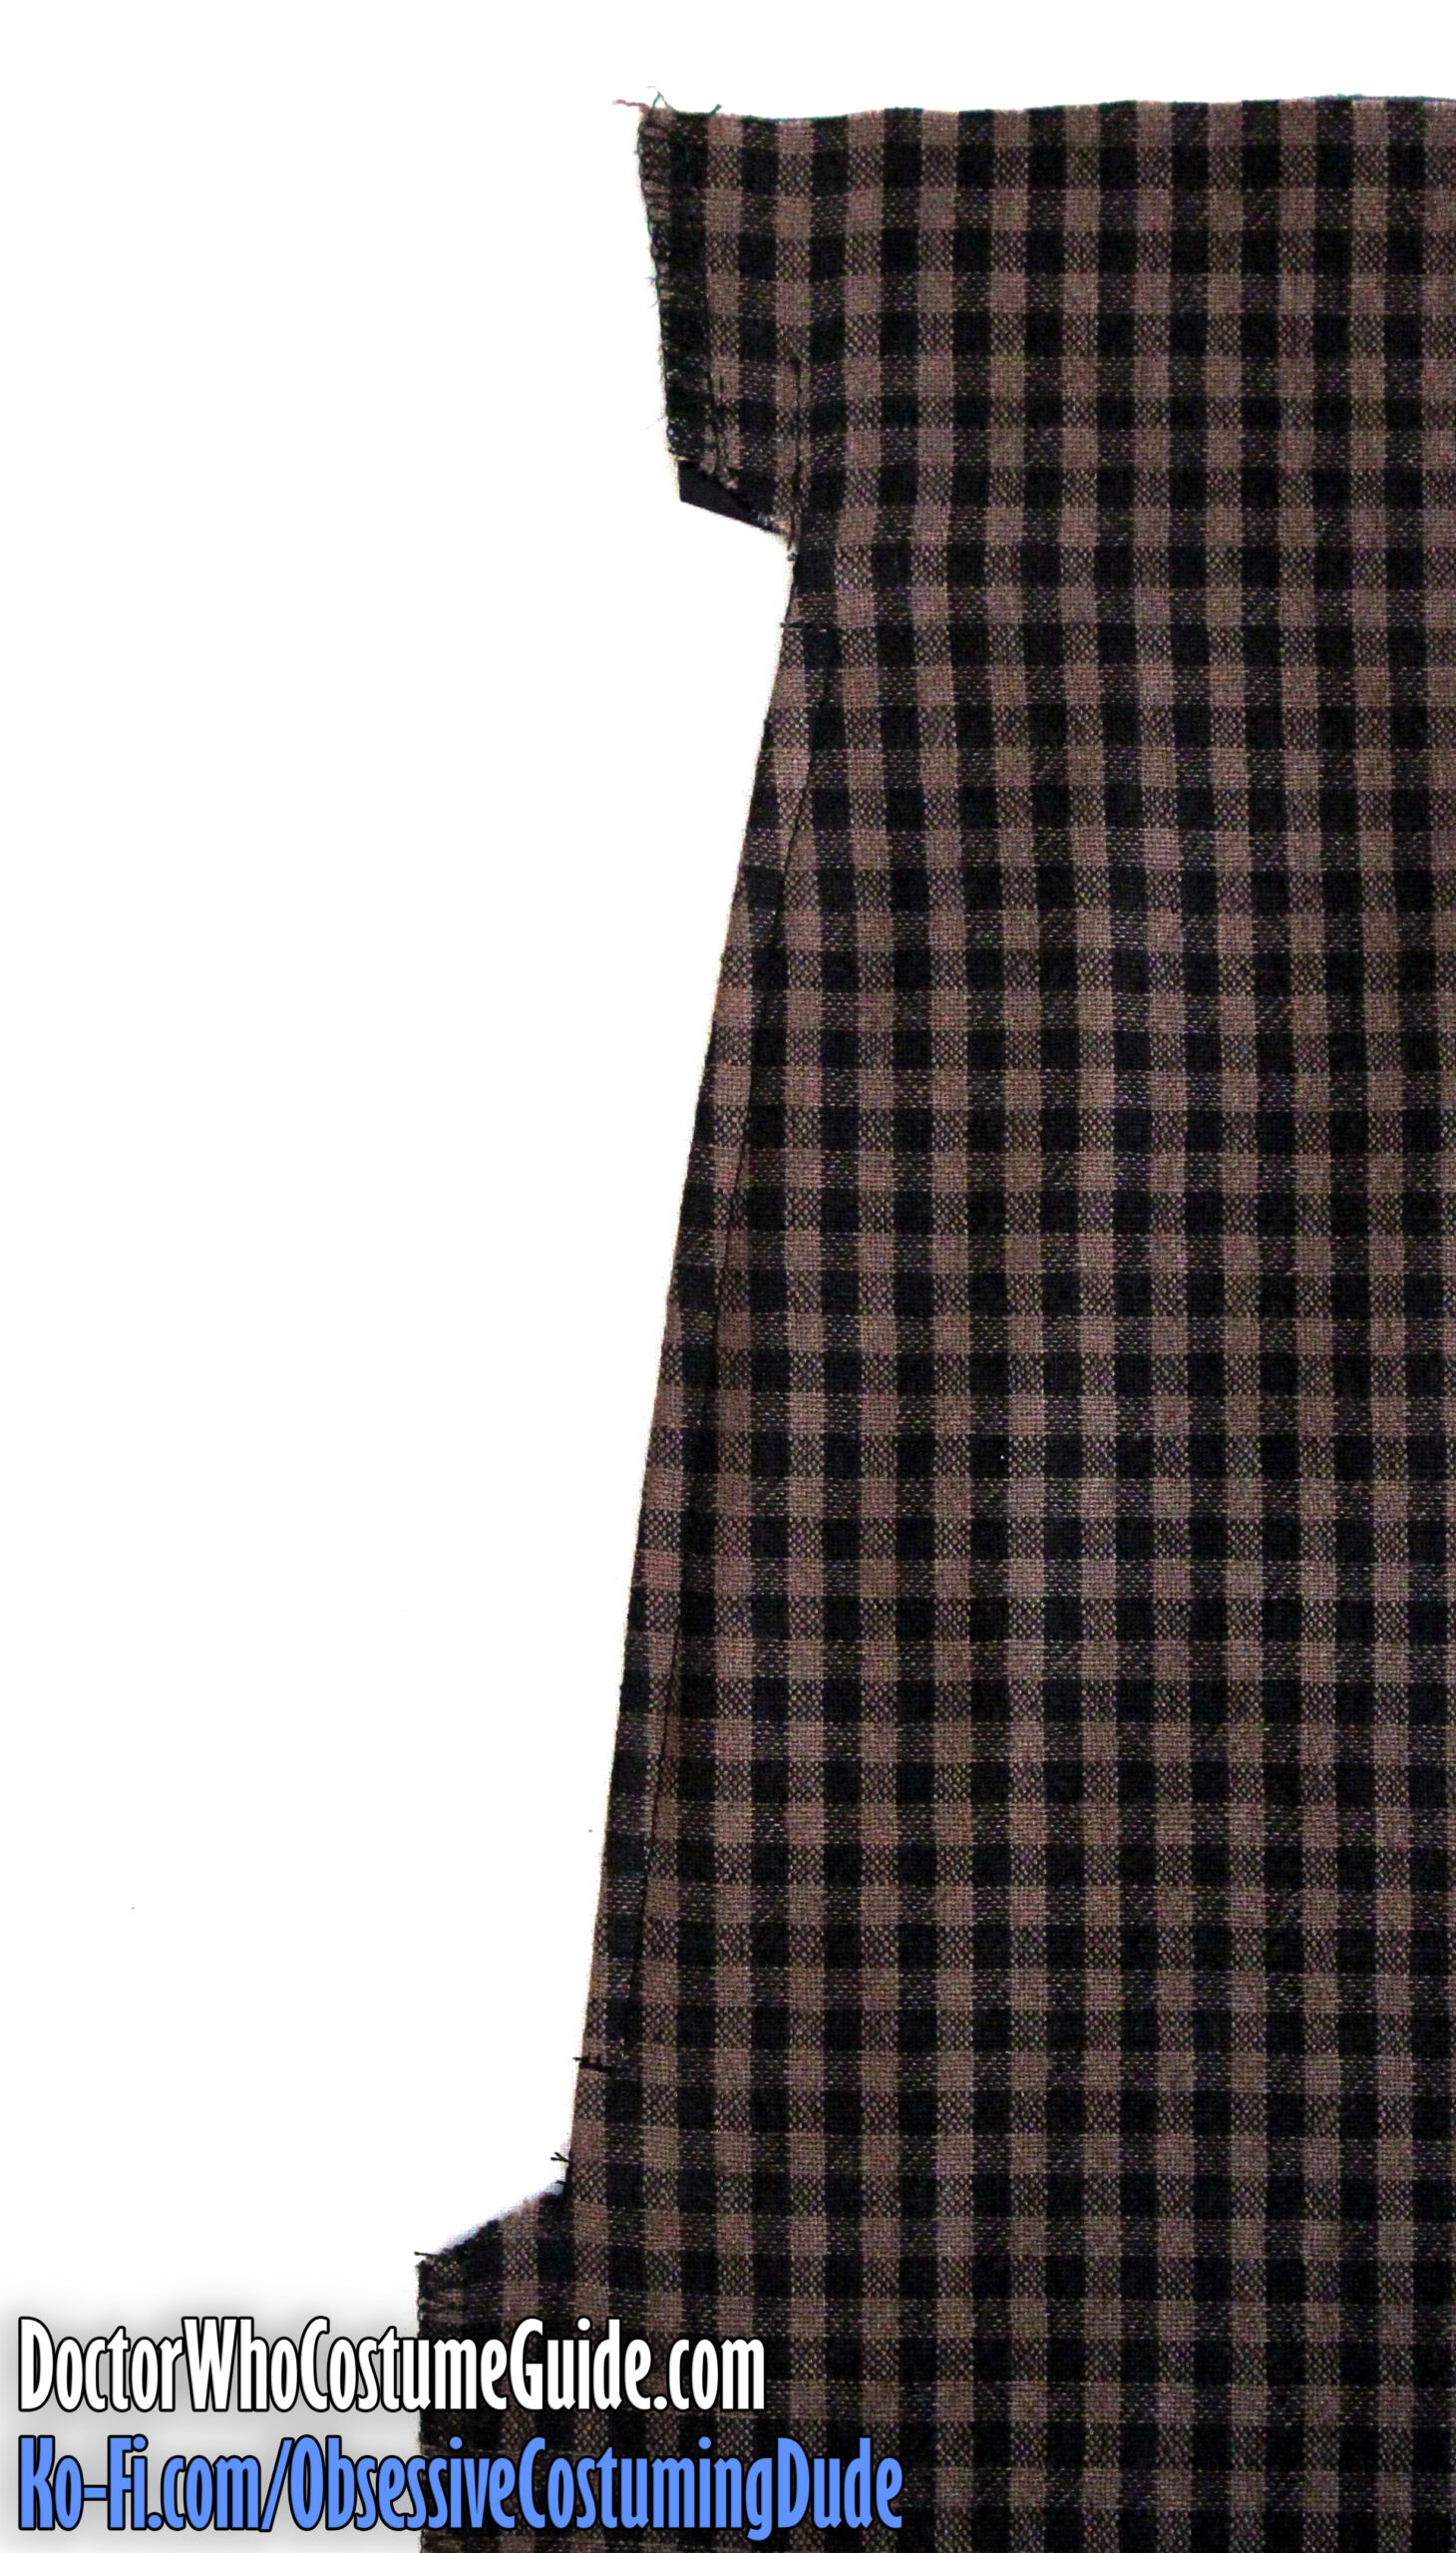
Trim away the outer (side) area of the pocket bag along the chalk mark.
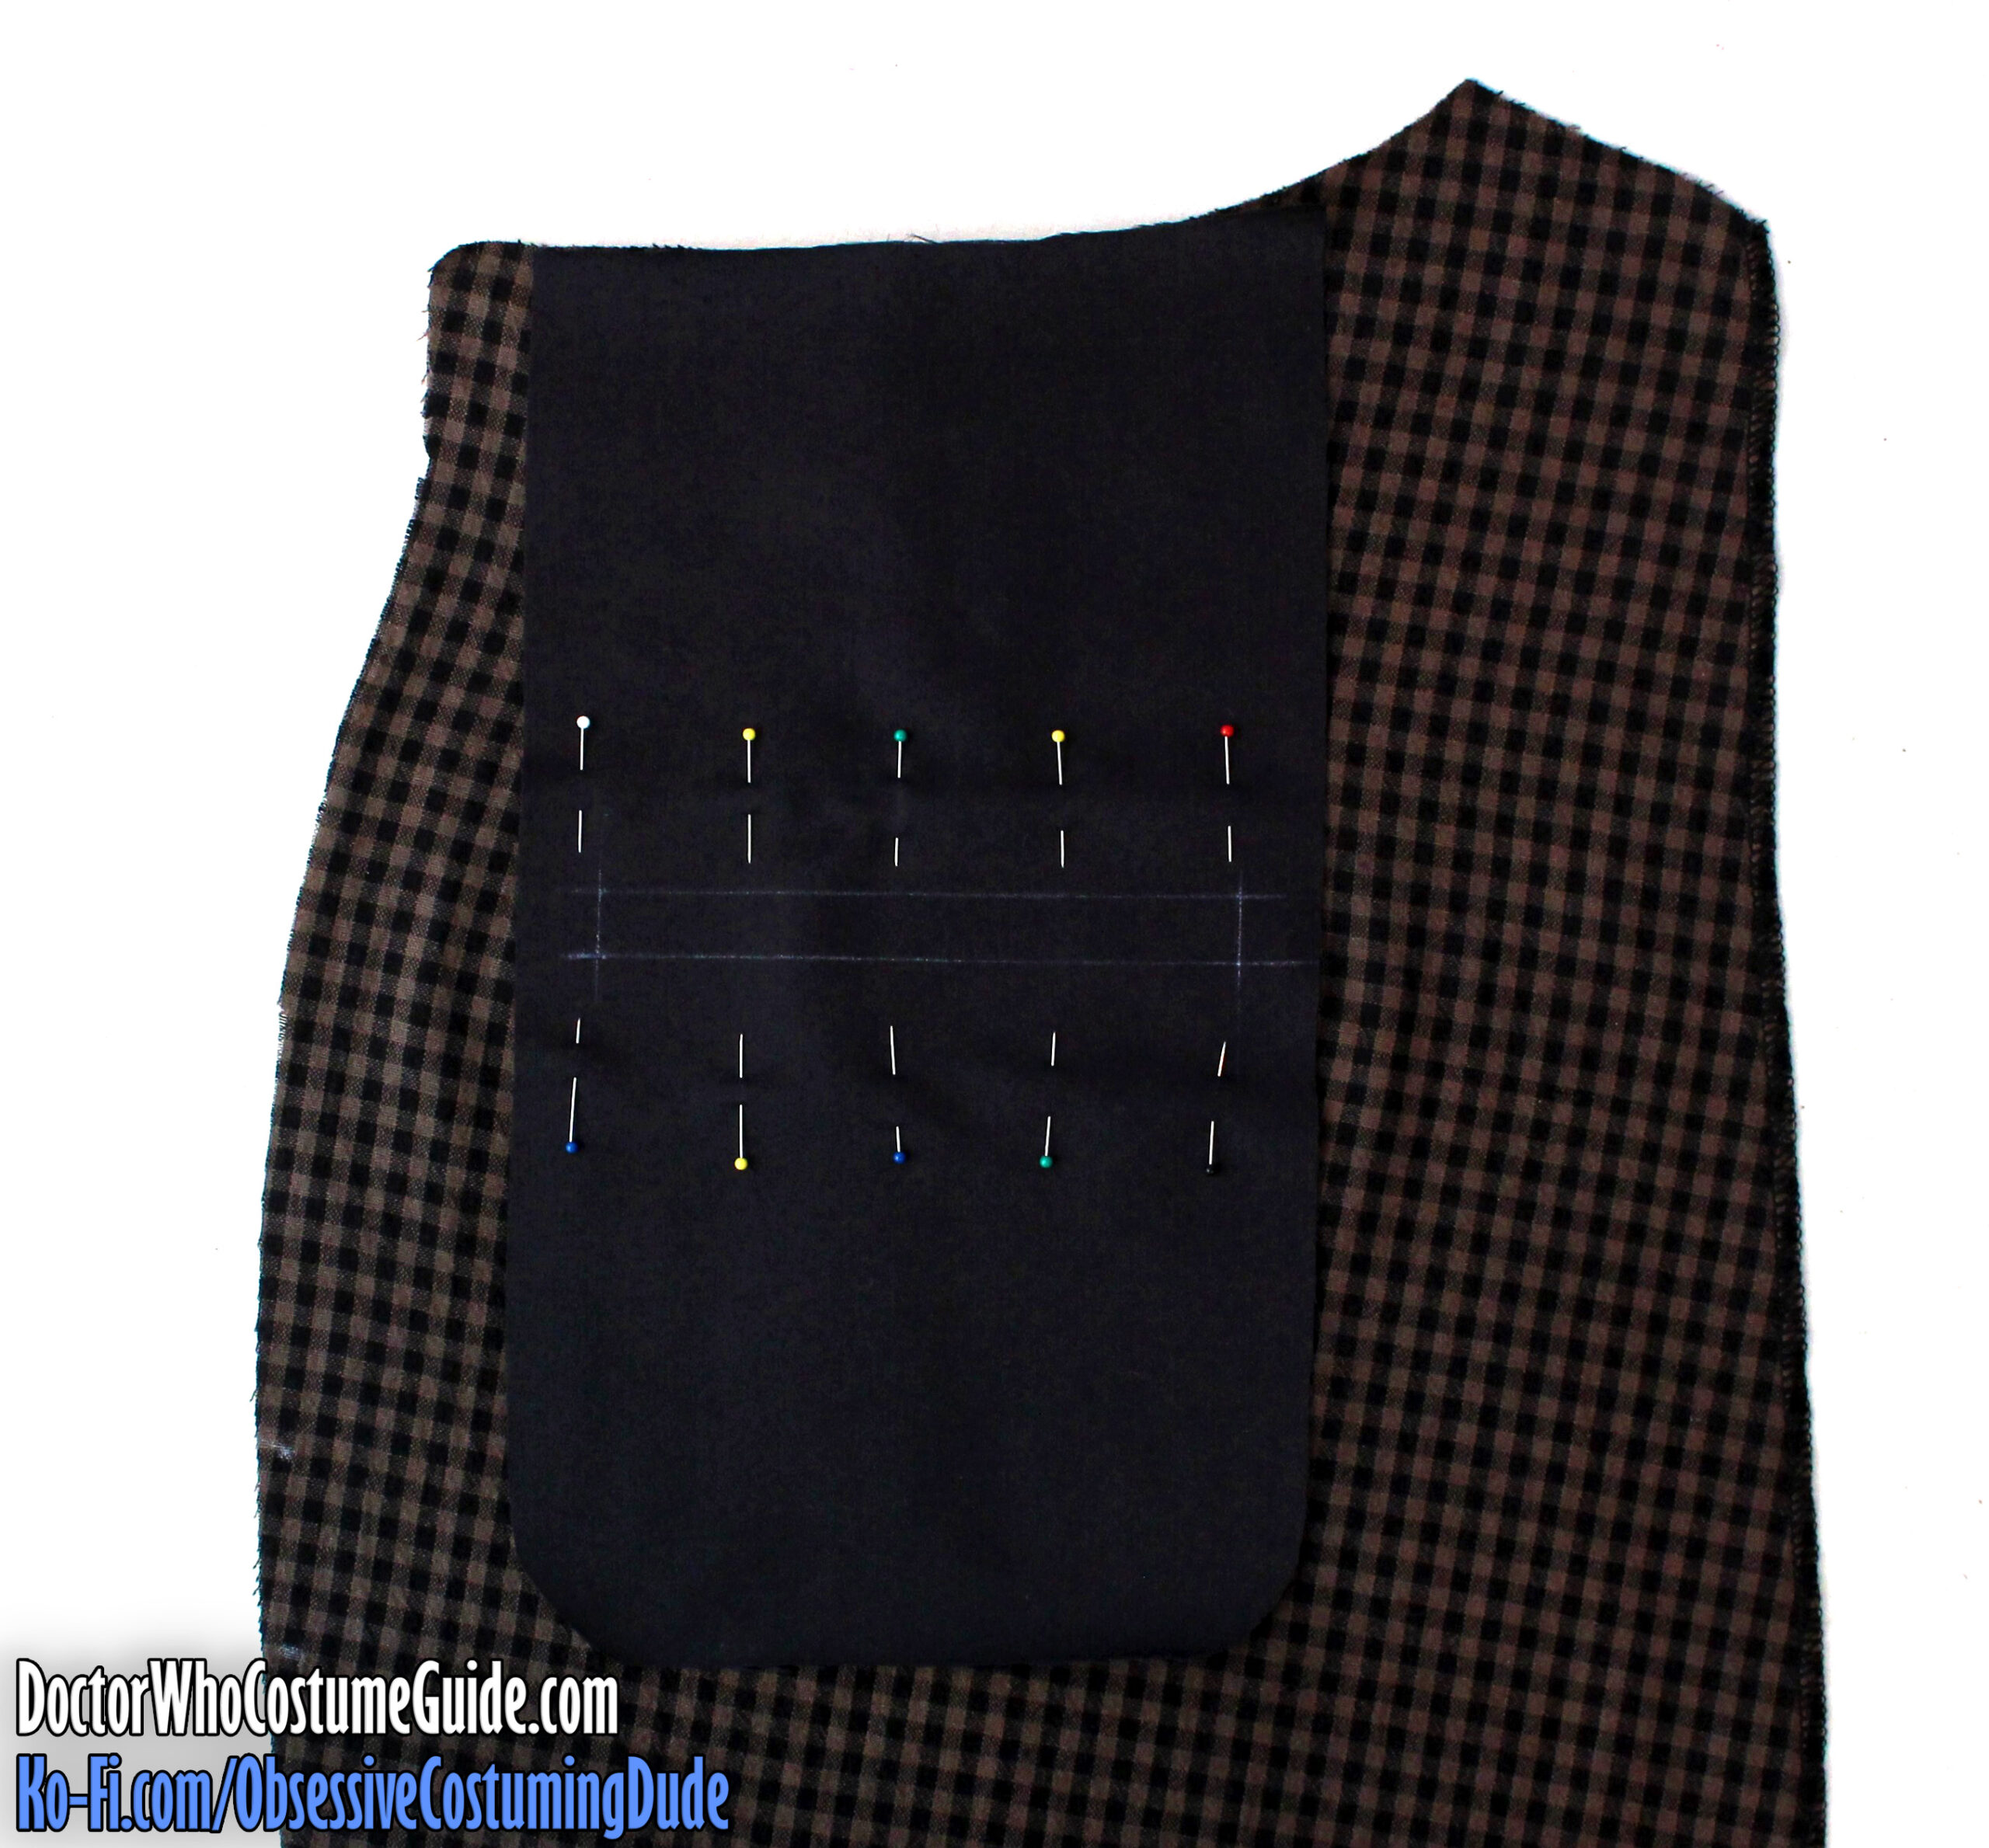
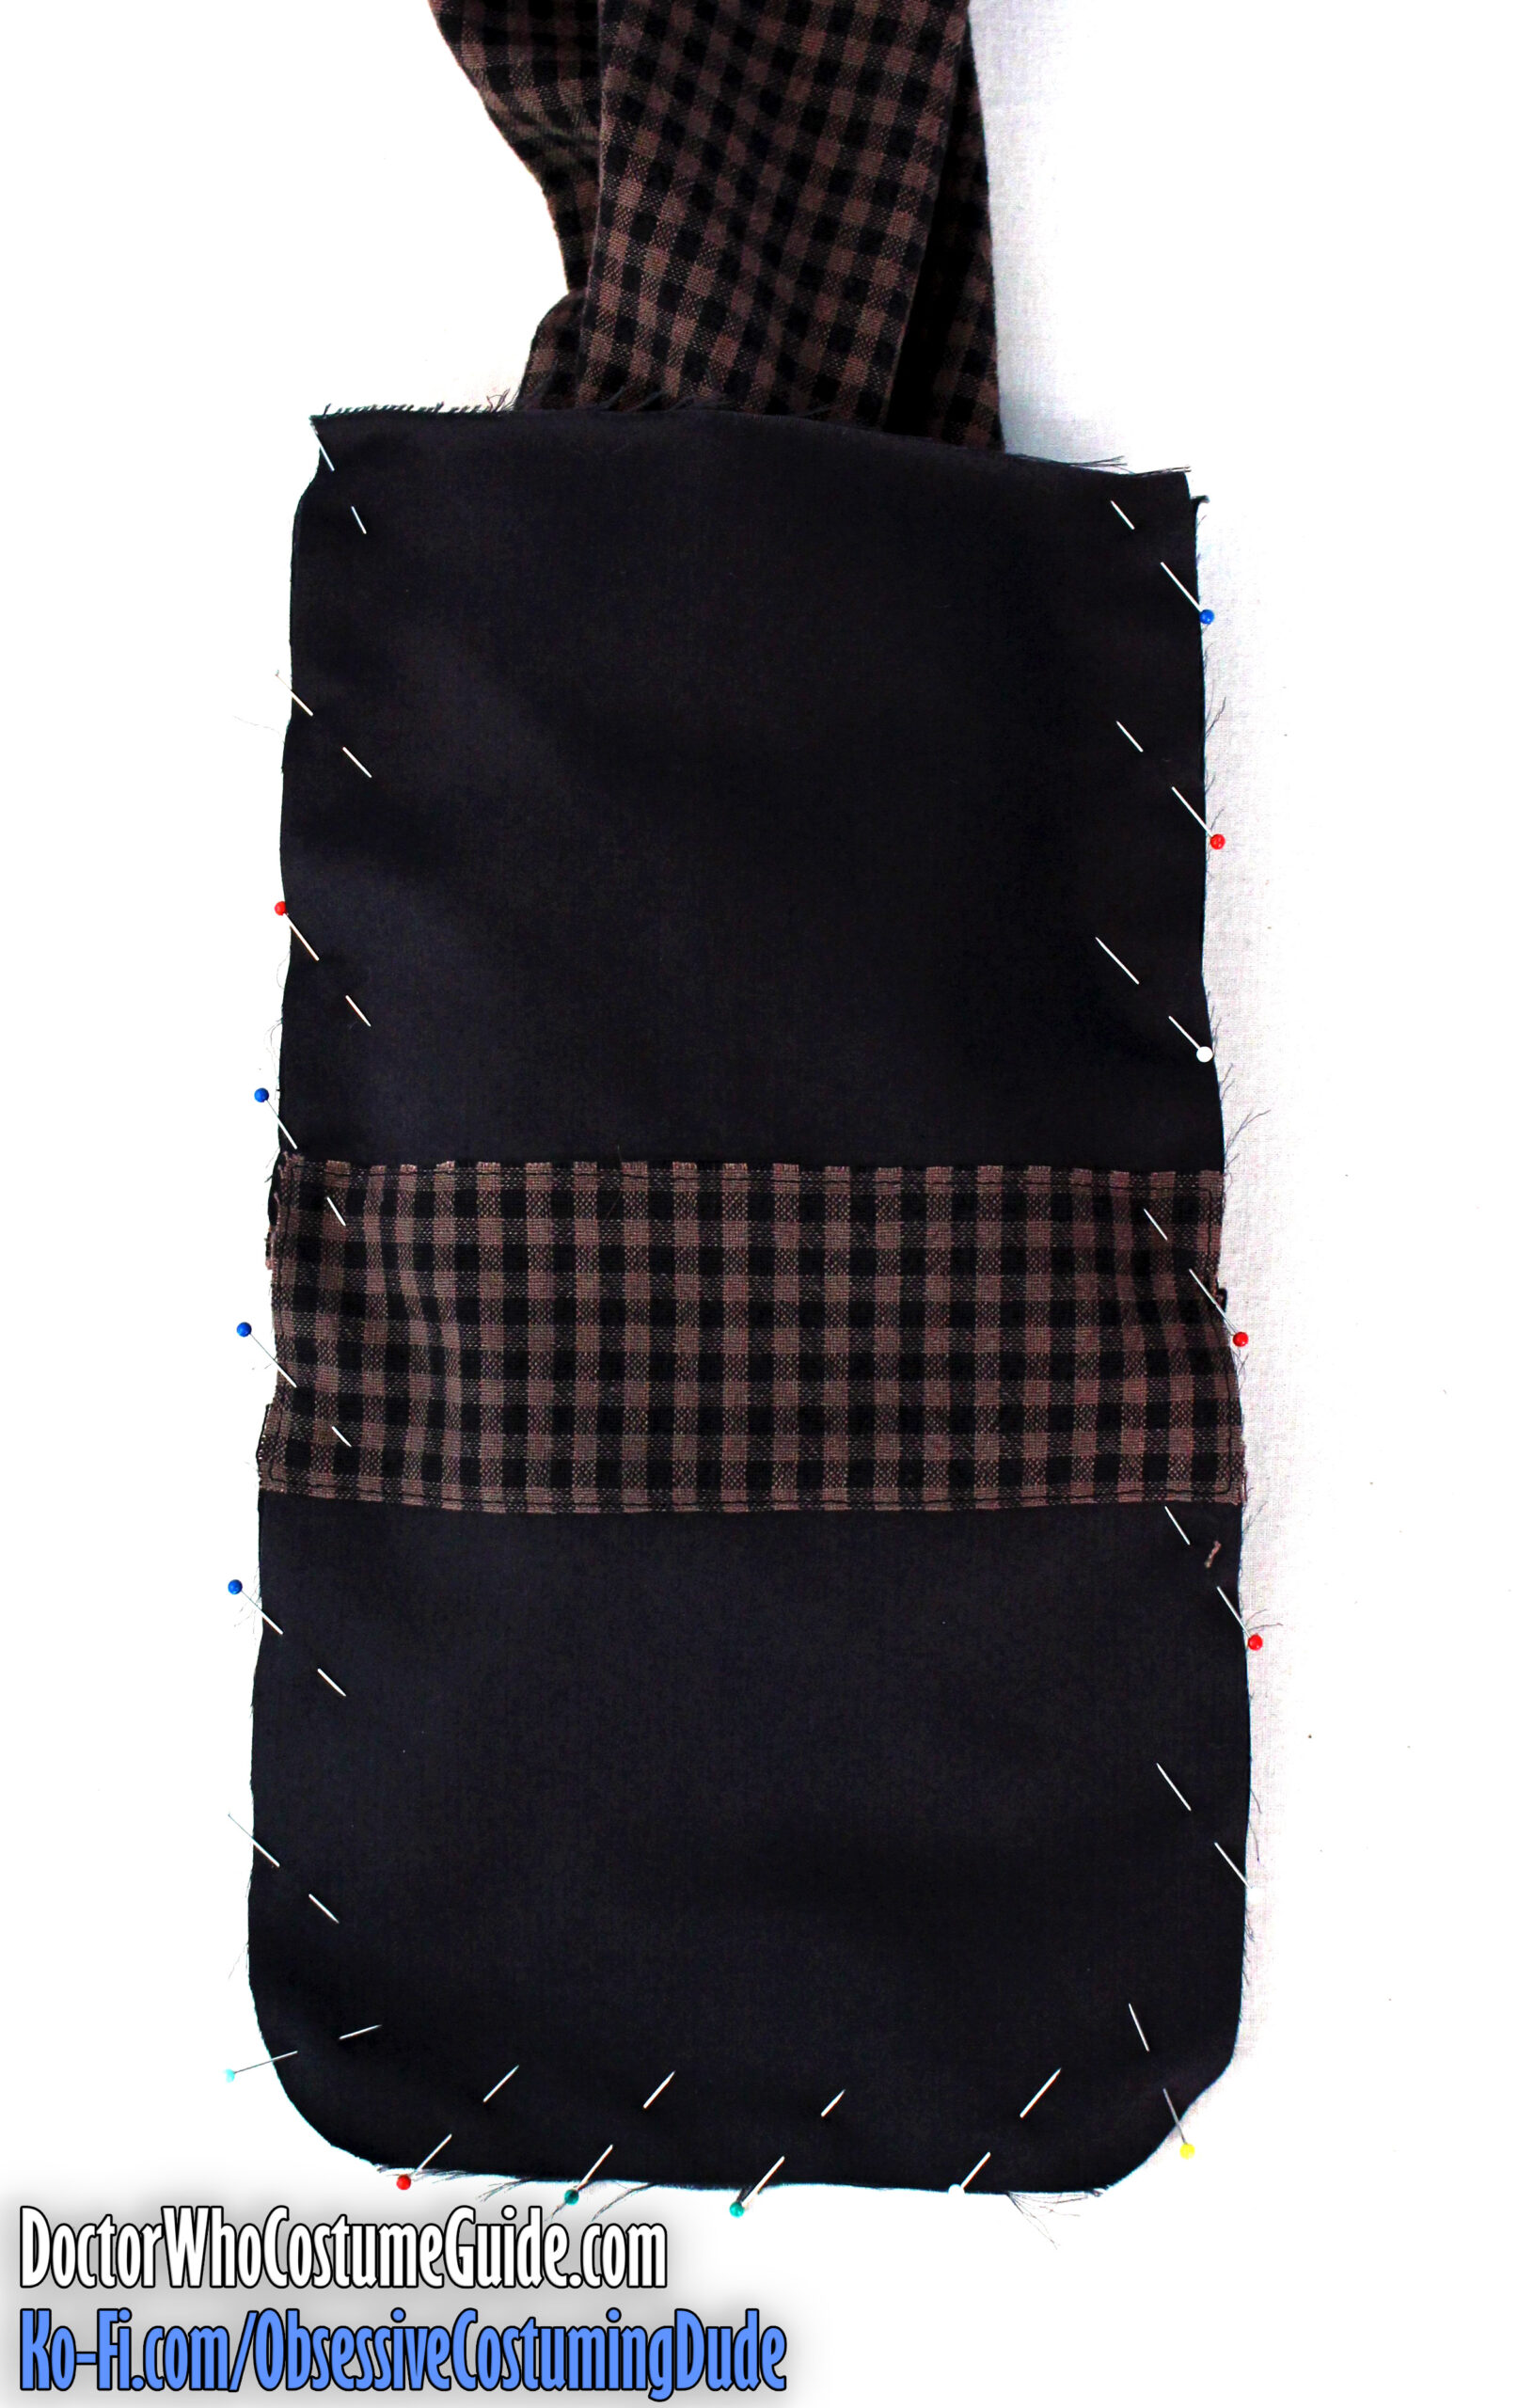
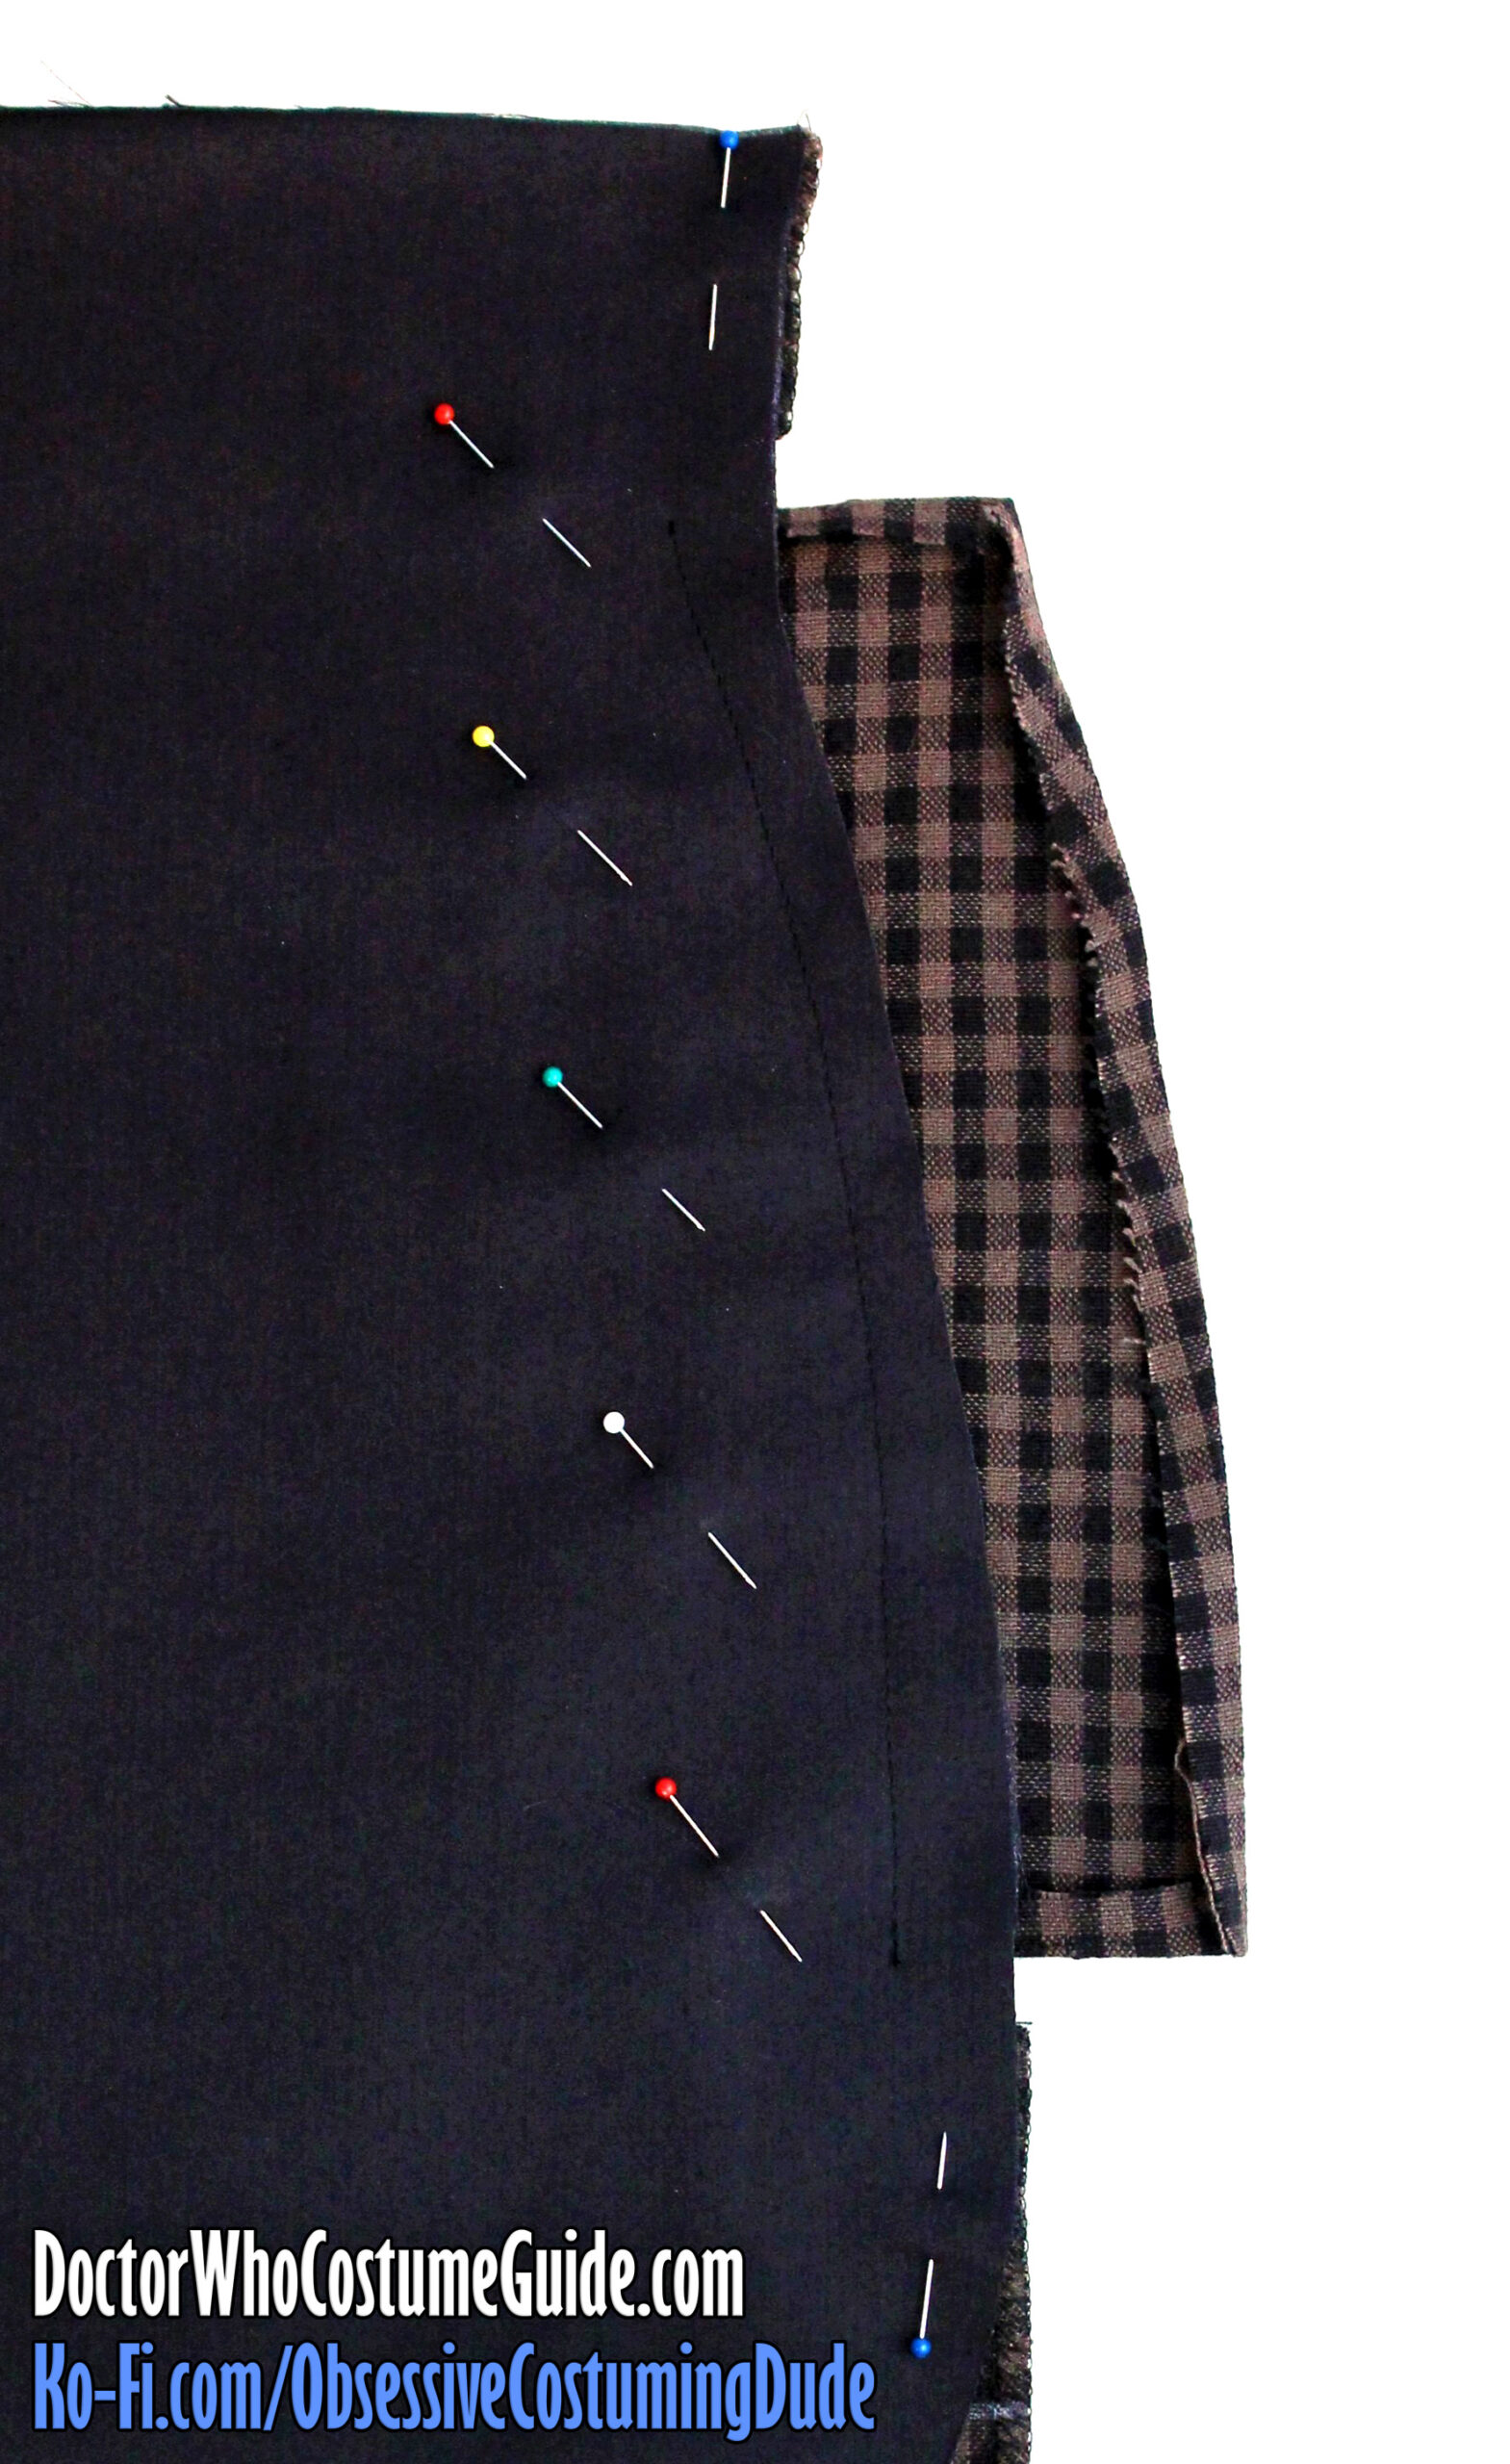
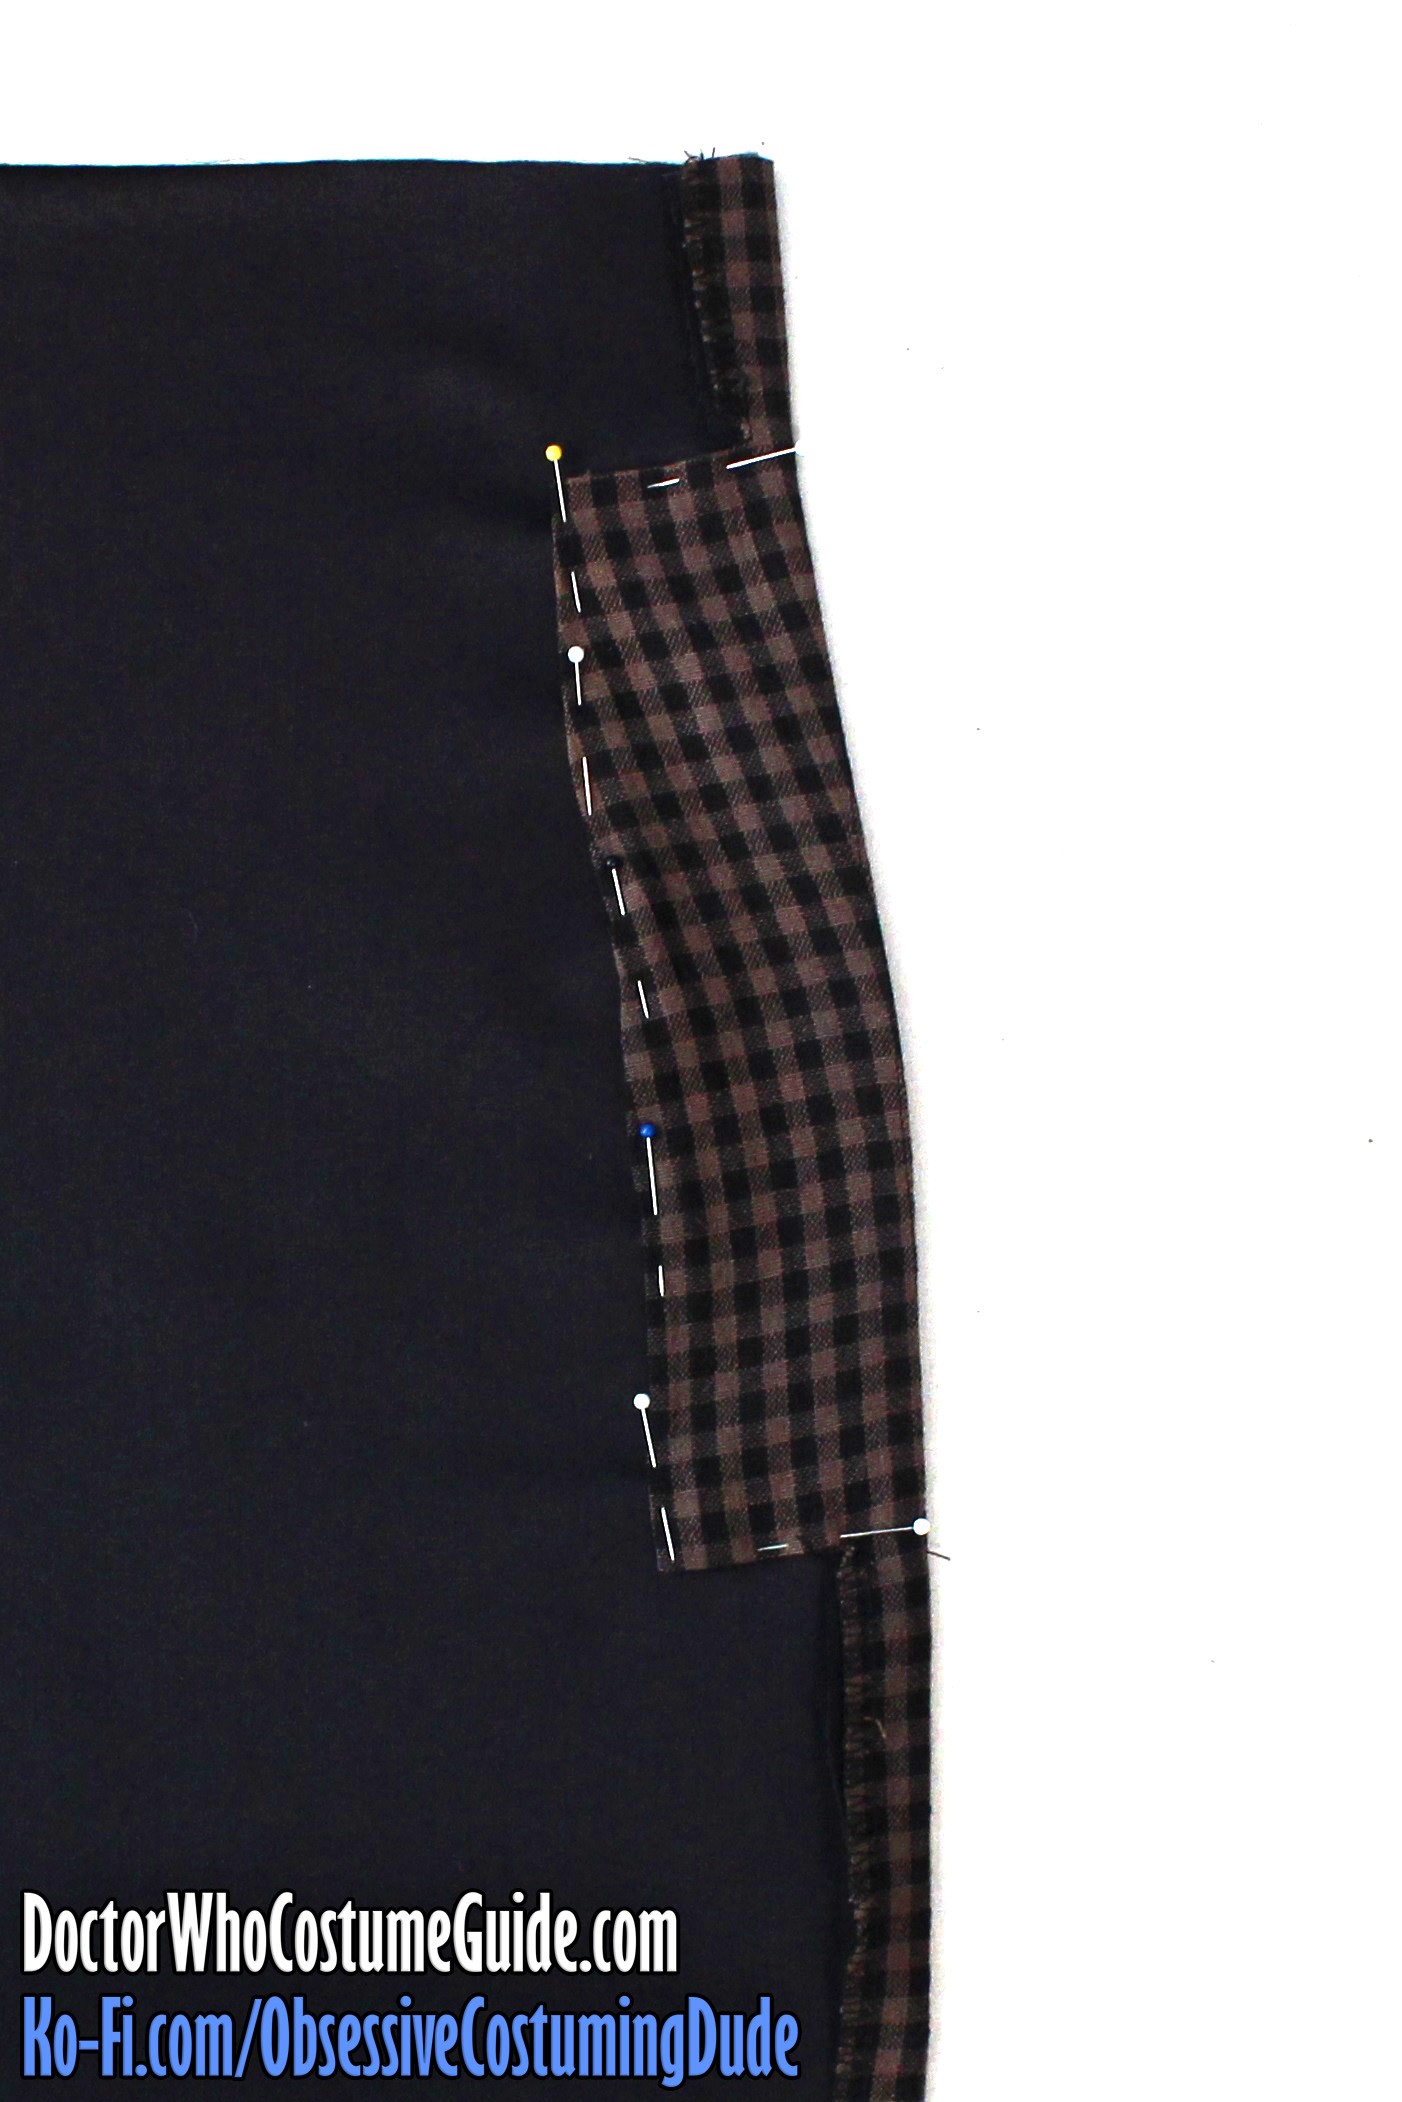
Position the pocket bag onto the underside of the trousers front so its upper and side edges are flush with the corresponding edges of the trousers.
Pin the pocket bag into place.
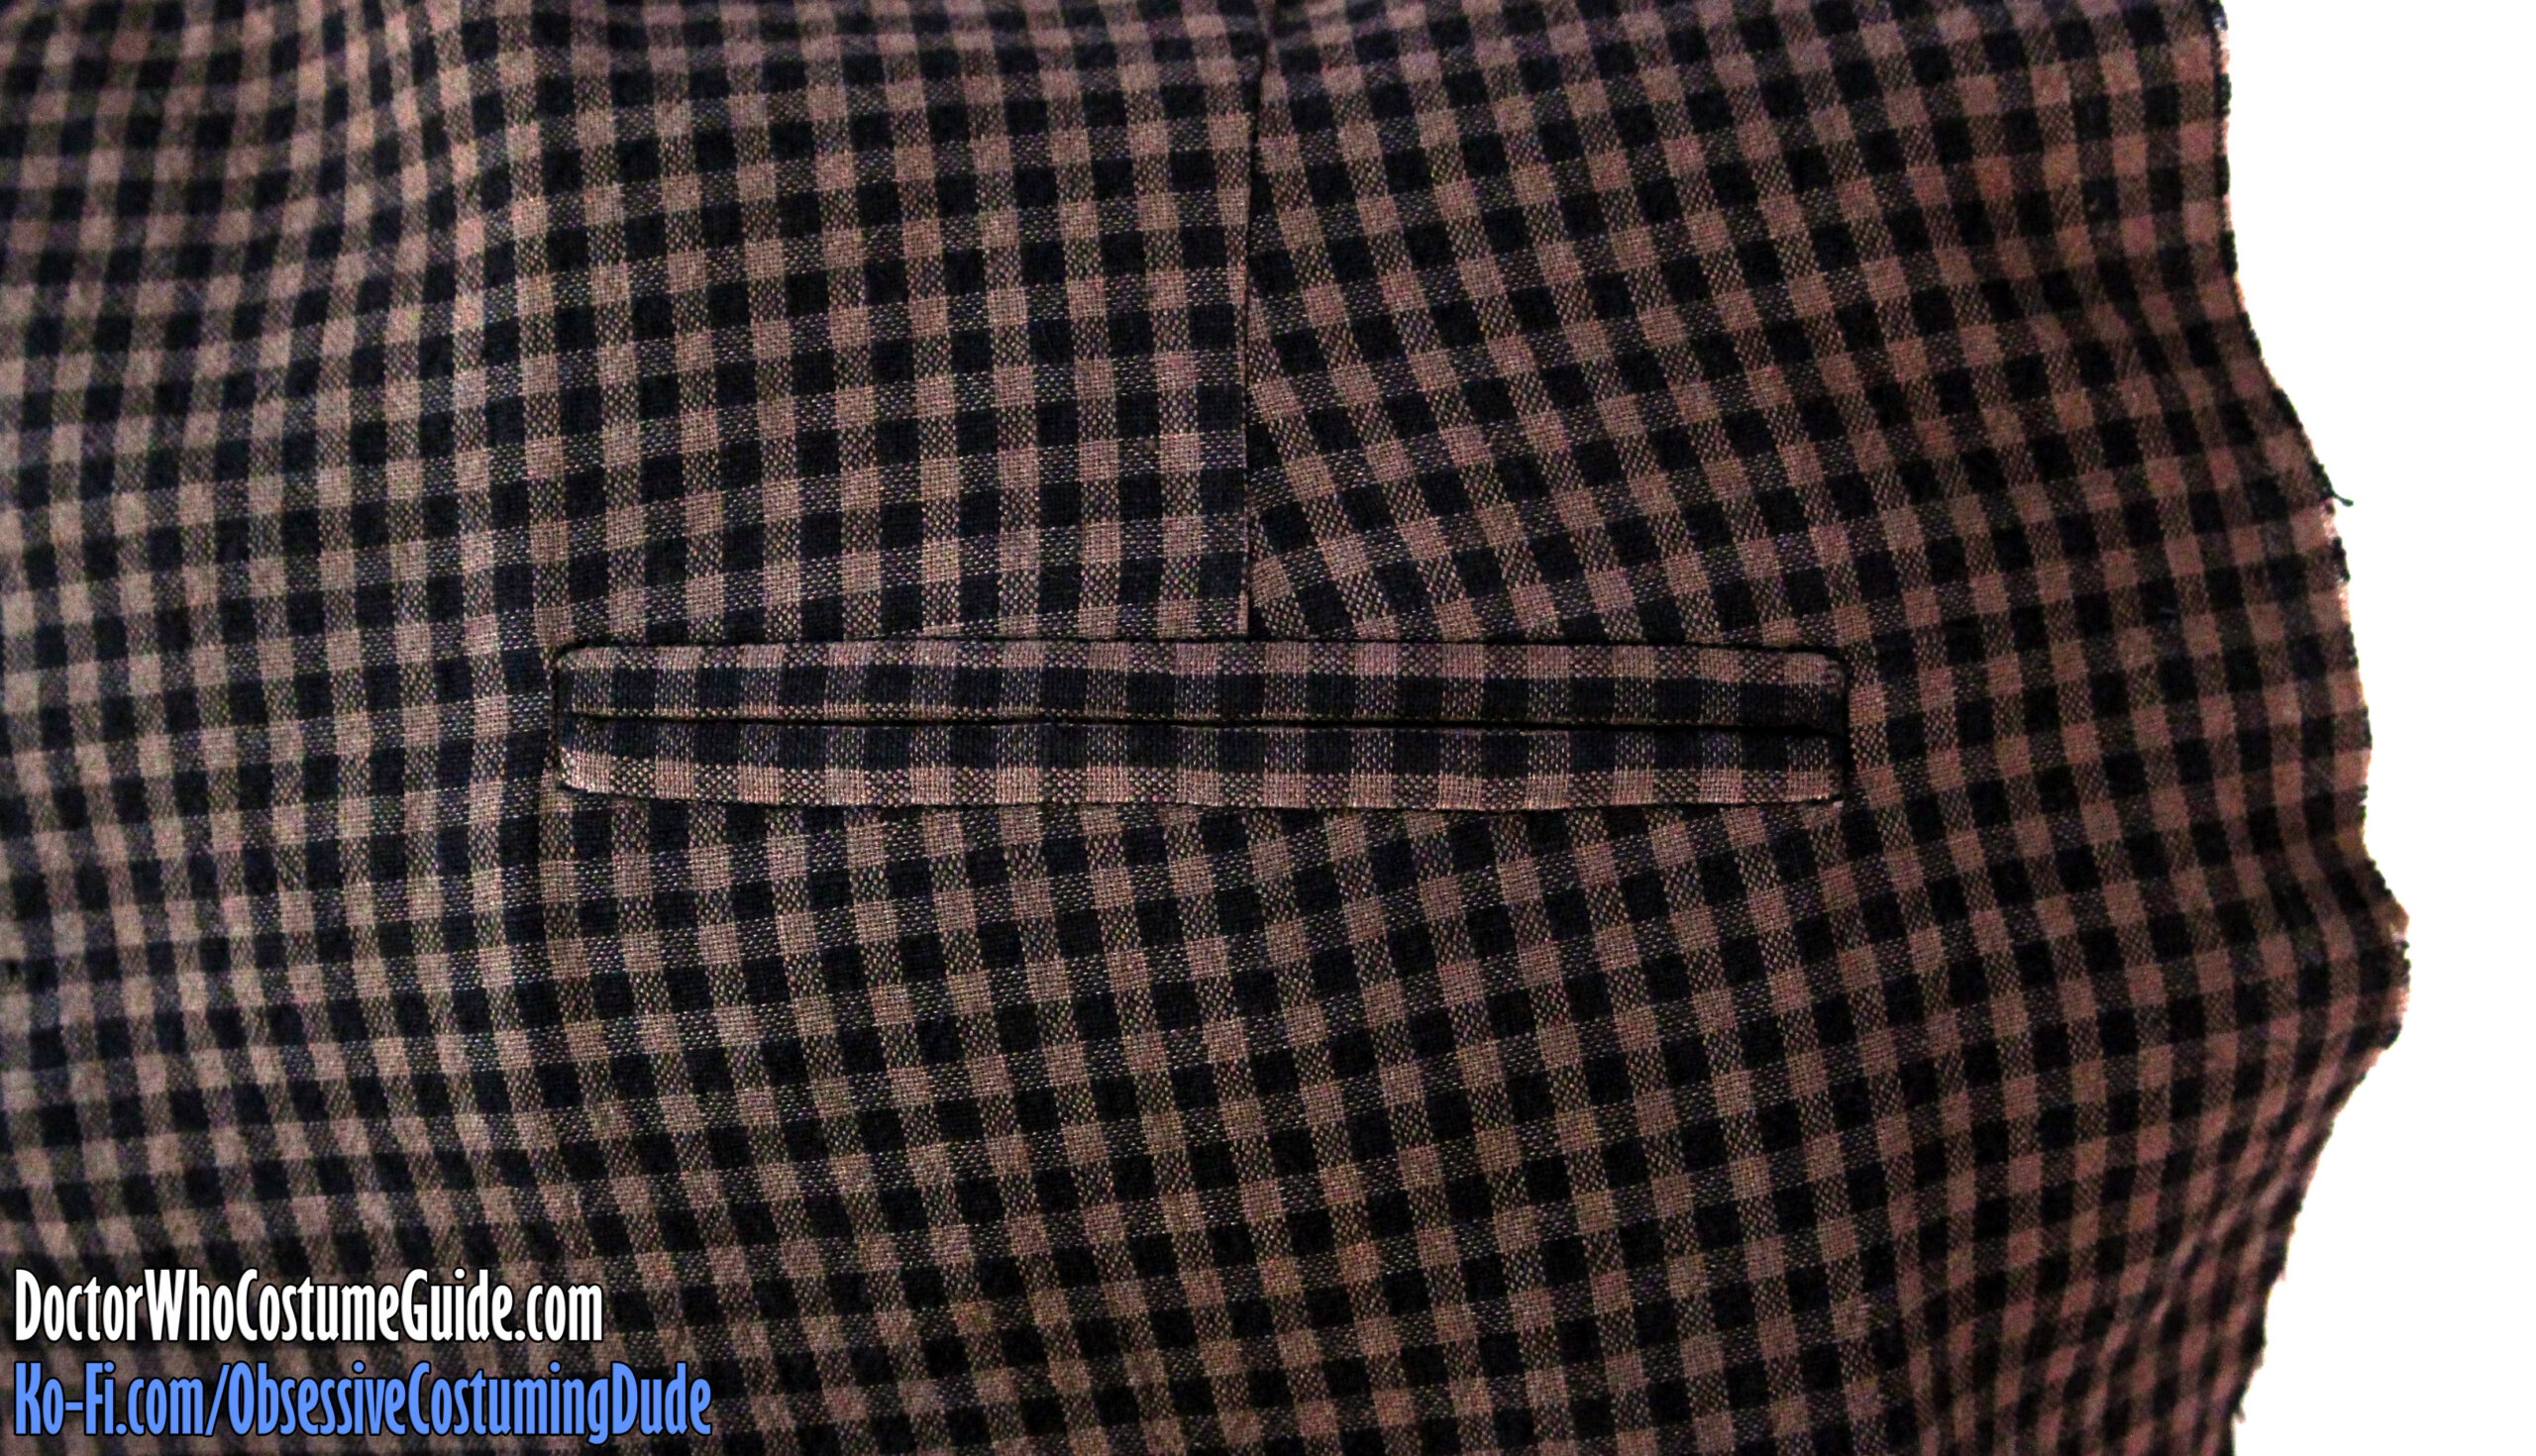
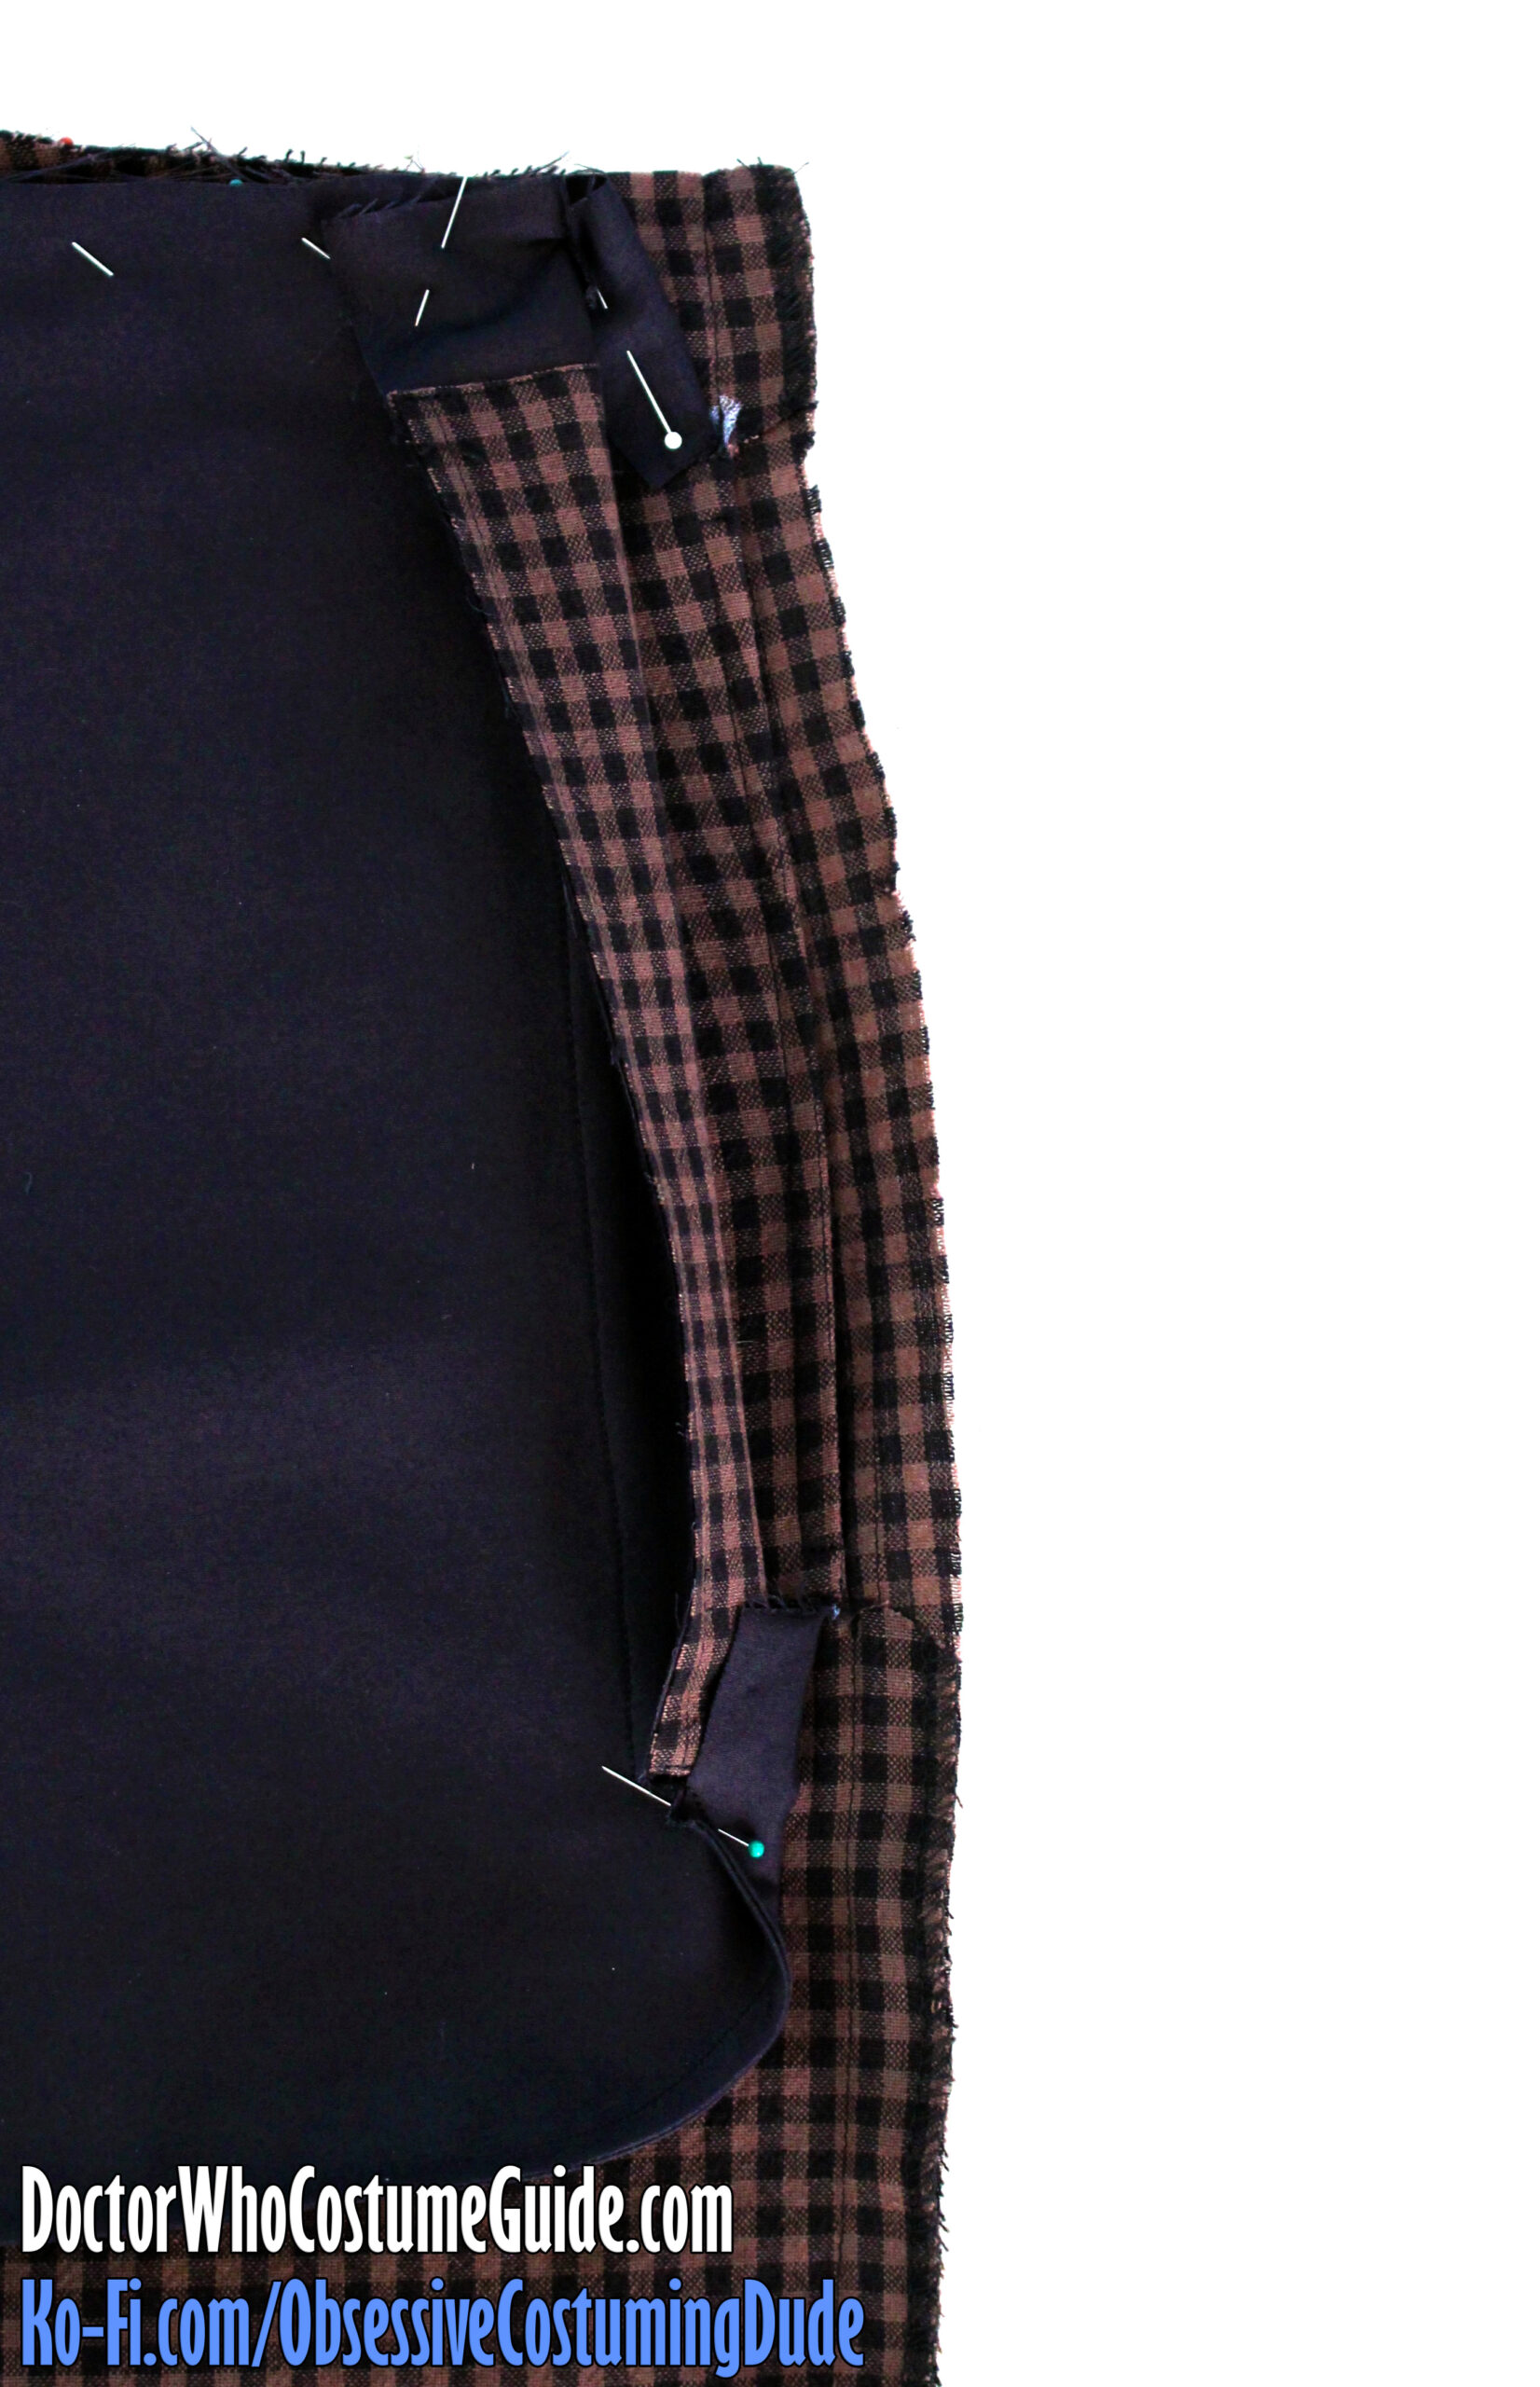
From the right side (outside), stitch again over the seam line along the pocket opening.
Turn the pocket facing under along the stitch line and press.
Pin the facing to the pocket bag (but not the outer trousers fabric) along the edges.
Edge-stitch the facing to the pocket bag along the upper, front, and lower edges.
Clip the allowances to the stitching above and below the pocket opening and unfold them.
Press the entire area again.
Topstitch all the layers together ¼” along the edge of the pocket opening, squaring out from the folded edge.
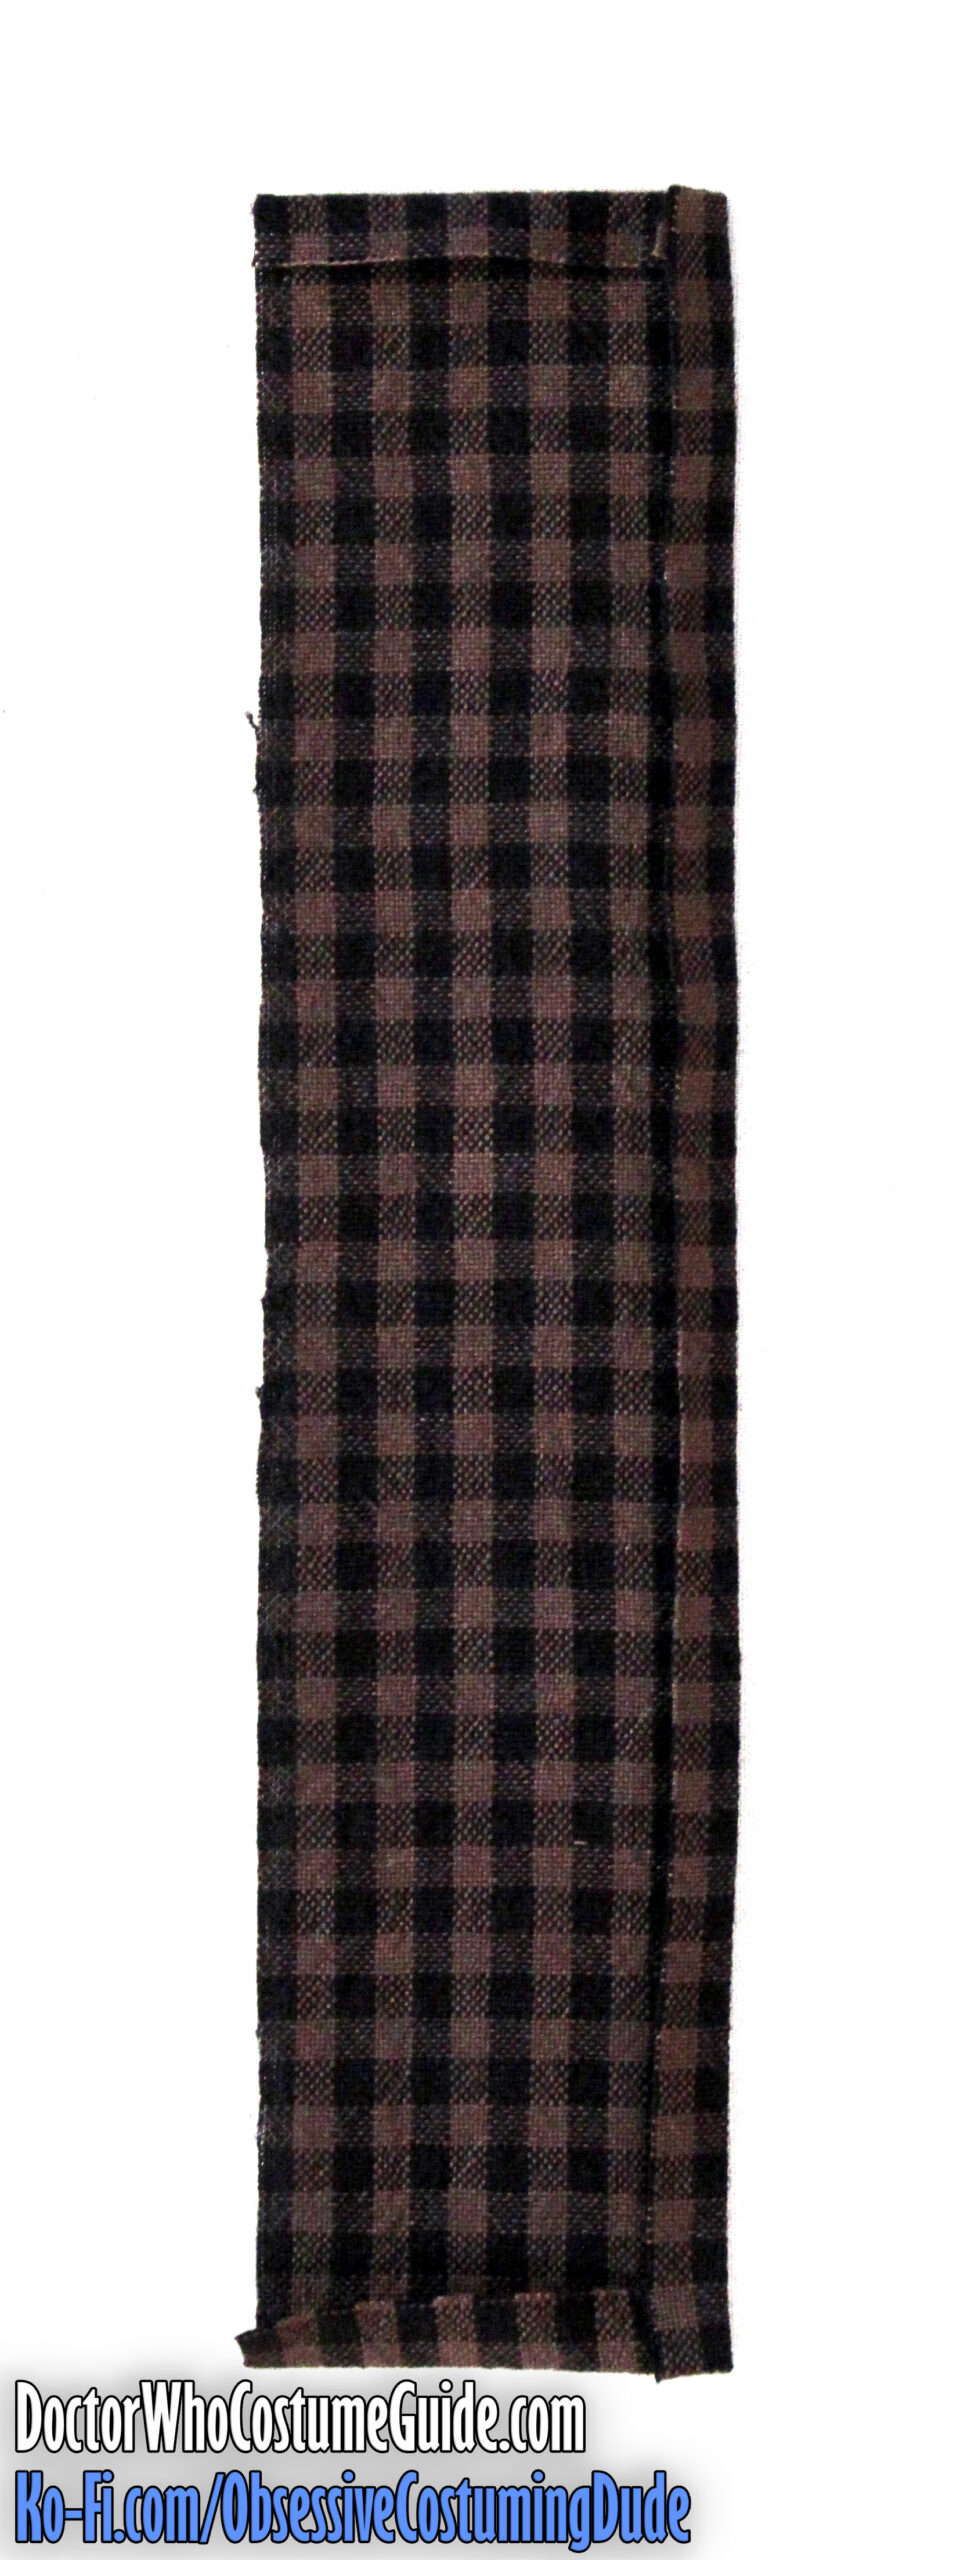
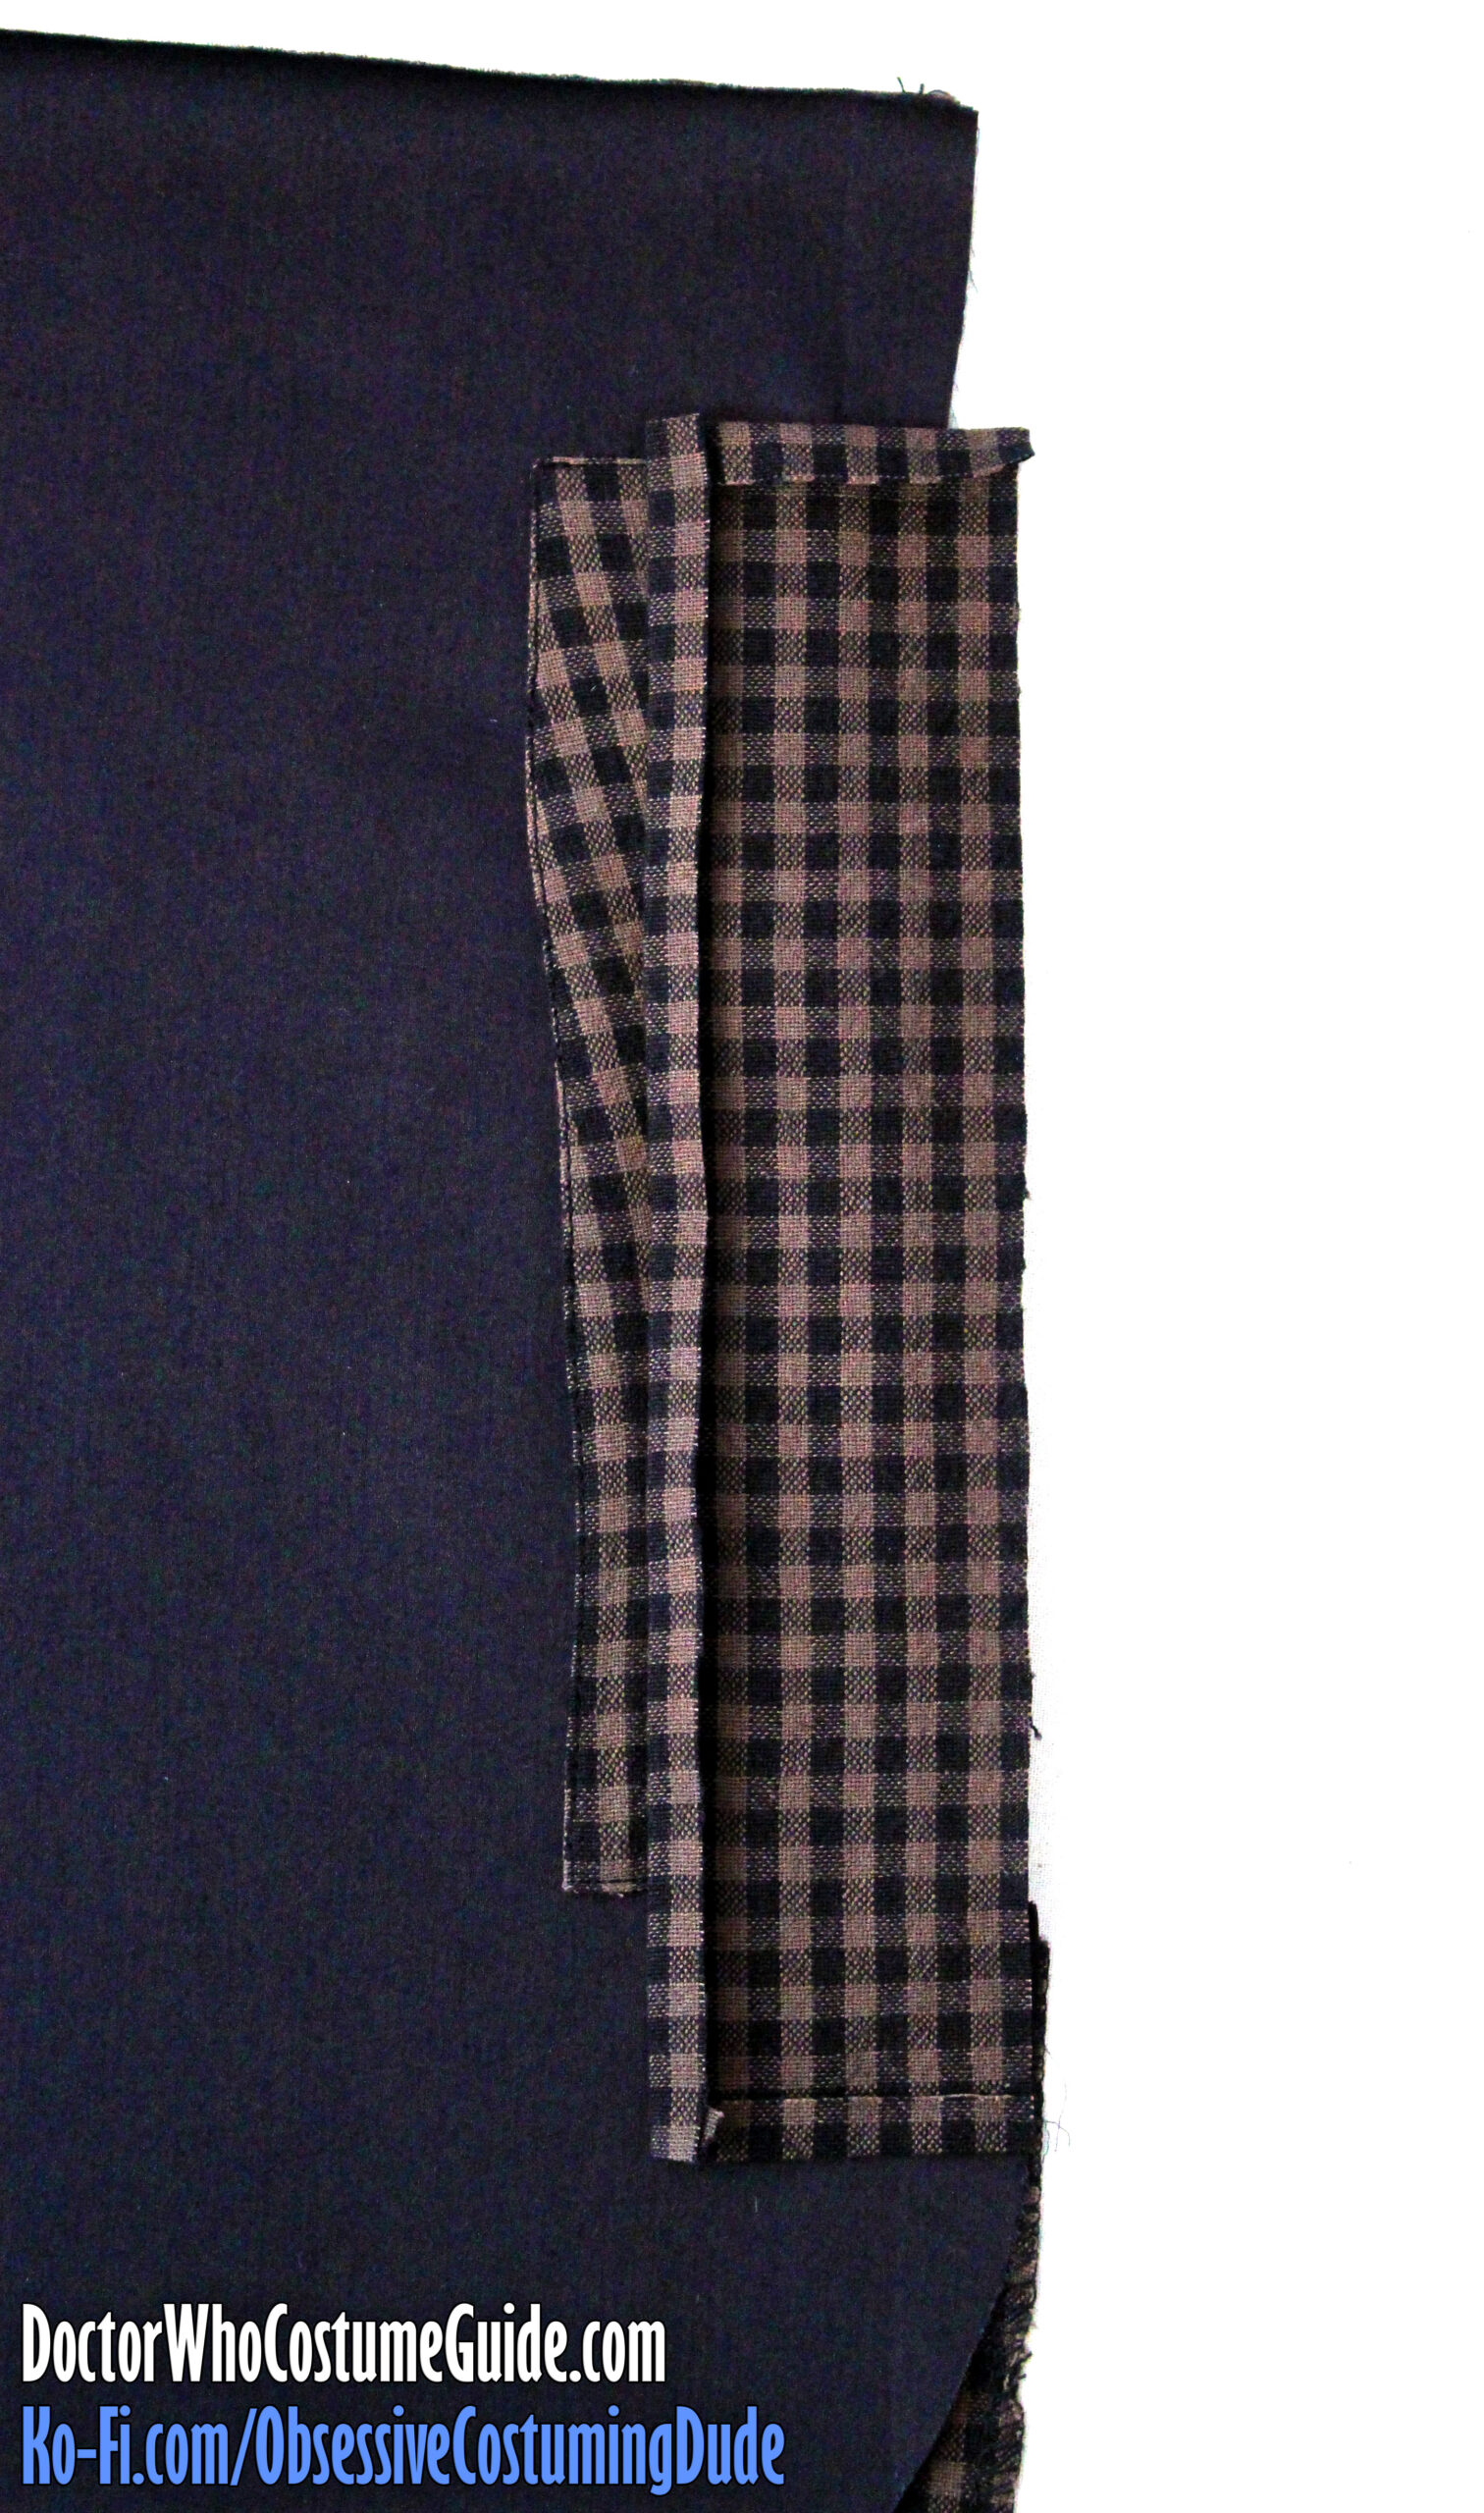
Press the upper, side, and lower edges of the side pocket facing (piece G) under ¼”.
Position this second pocket facing onto the underside of the pocket opening so it extends about ¼” above and 1” beneath the first (cut-on) facing.
Note that the folded edge is on a slight curve, but this second edge is straight. Simply position them as flush as possible.
Fold the pocket bag in half toward the back, covering the second (separate) facing.
Pin the second facing into place on the pocket bag.
Unfold the pocket bag and edge-stitch the second facing to the pocket bag.
The bottom of the pocket bag is enclosed in a French seam.
Fold the pocket bag assembly back in half on itself, wrong sides together, so the lower edges are flush.
Pin the lower edges of the pocket bag together.
Sew the bottom of the pocket bag closed ¼” from the lower edges, tapering off the fabric about an inch below the pocket facing.
Trim the lower pocket bag allowances down to ⅛”.
Turn the pocket bag right-sides-out and press the lower edge.
To complete the French seam, sew the bottom of the pocket bag closed ¼” from the lower edge.
Press the front, folded edge of the pocket bag.
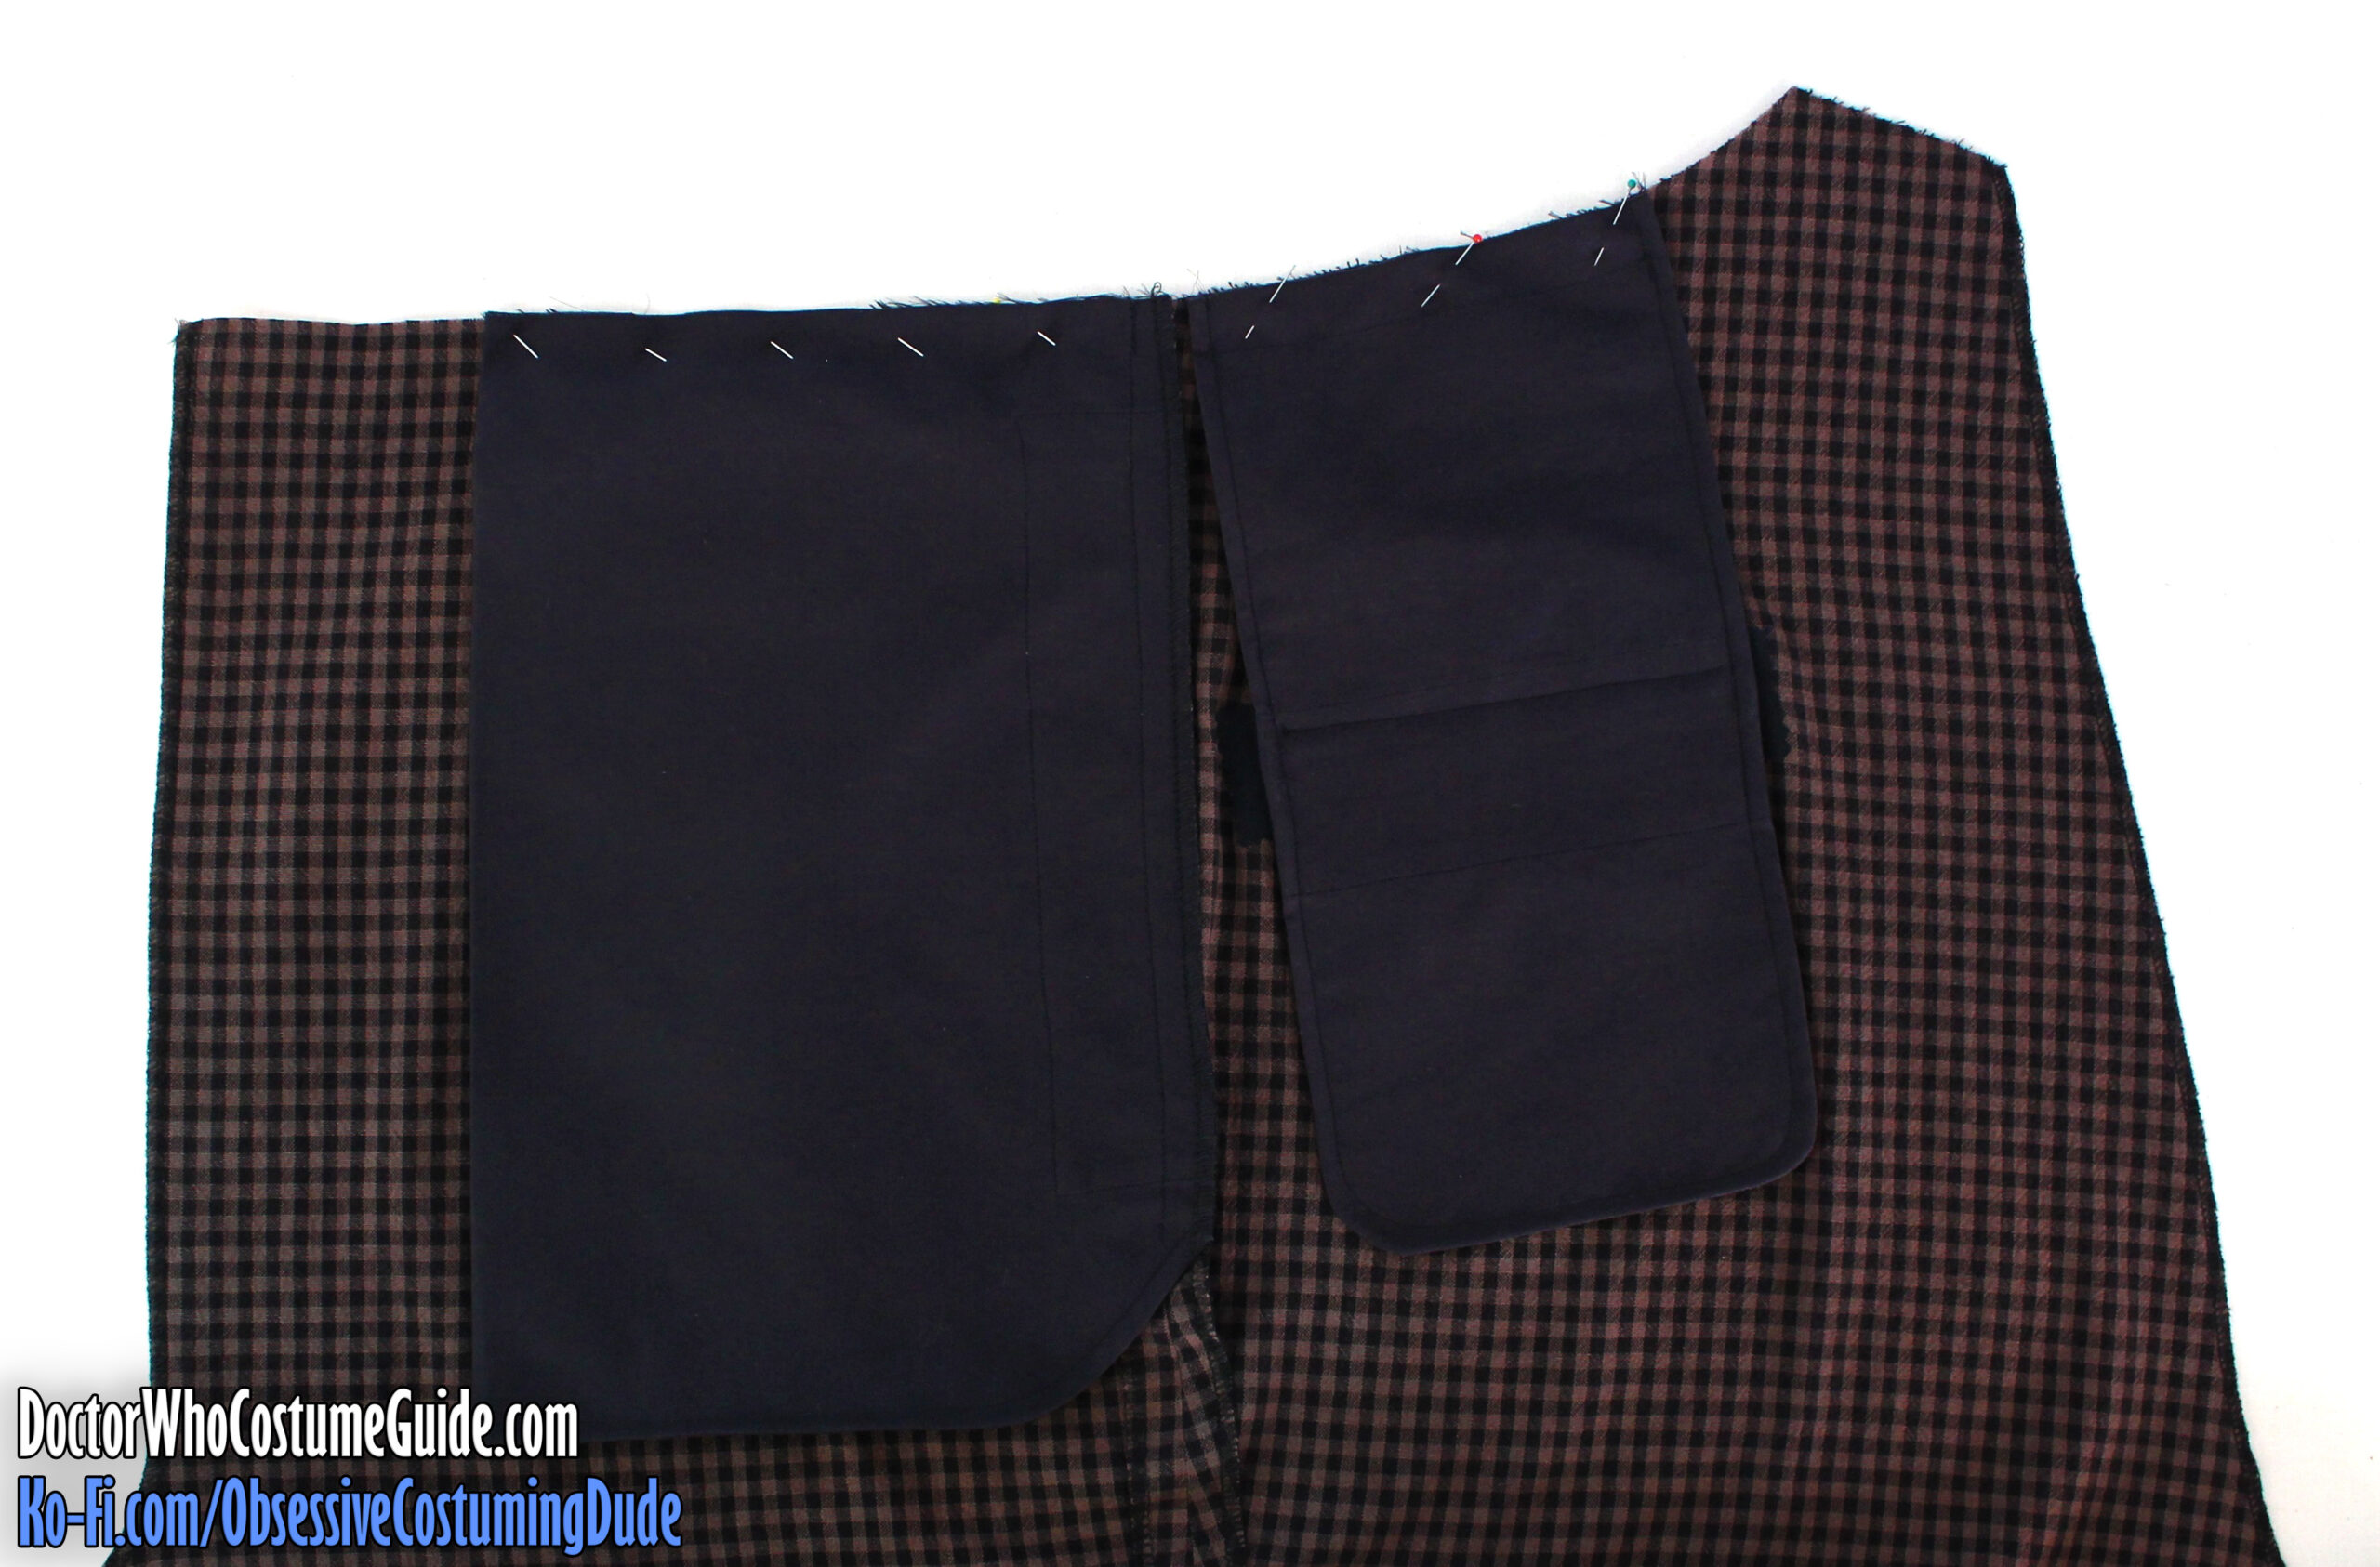
If necessary, trim the upper edges of the pocket bag so they’re flush with the upper edge of the trousers.
Pin the layers together along the upper and side edges.
I like to stabilize the area behind the pocket opening with a length of stay tape, just like with the front.
Should you wish to as well, topstitch the stay tape to the upper side area of the back pant leg inside the seam allowance.
(I suggest positioning the edge of the tape ¼” from the edge of the fabric and stitching ½” from the edge.)
The front and back pant legs are attached at the sides with two stitches: one brief stitch above the pocket opening, and one below the pocket opening down the remainder of the pant leg.
Pull the pocket layers out of the way, and sew the trousers front to the trousers back, shortening and reinforcing your stitches at the clipped corners.
Press the side seam allowances open above and below the pocket opening.
Pin the back edge of the pocket bag to the upper back pant leg so their edges are flush.
Sew the back of the pocket bag to the back pant leg along the seam line (⅝” from the edges). Above and beneath the pocket opening, taper your stitching to ½” so you’re only stitching through the back seam allowance.
Serge the back pant leg’s side allowance, including the back edge of the pocket bag.
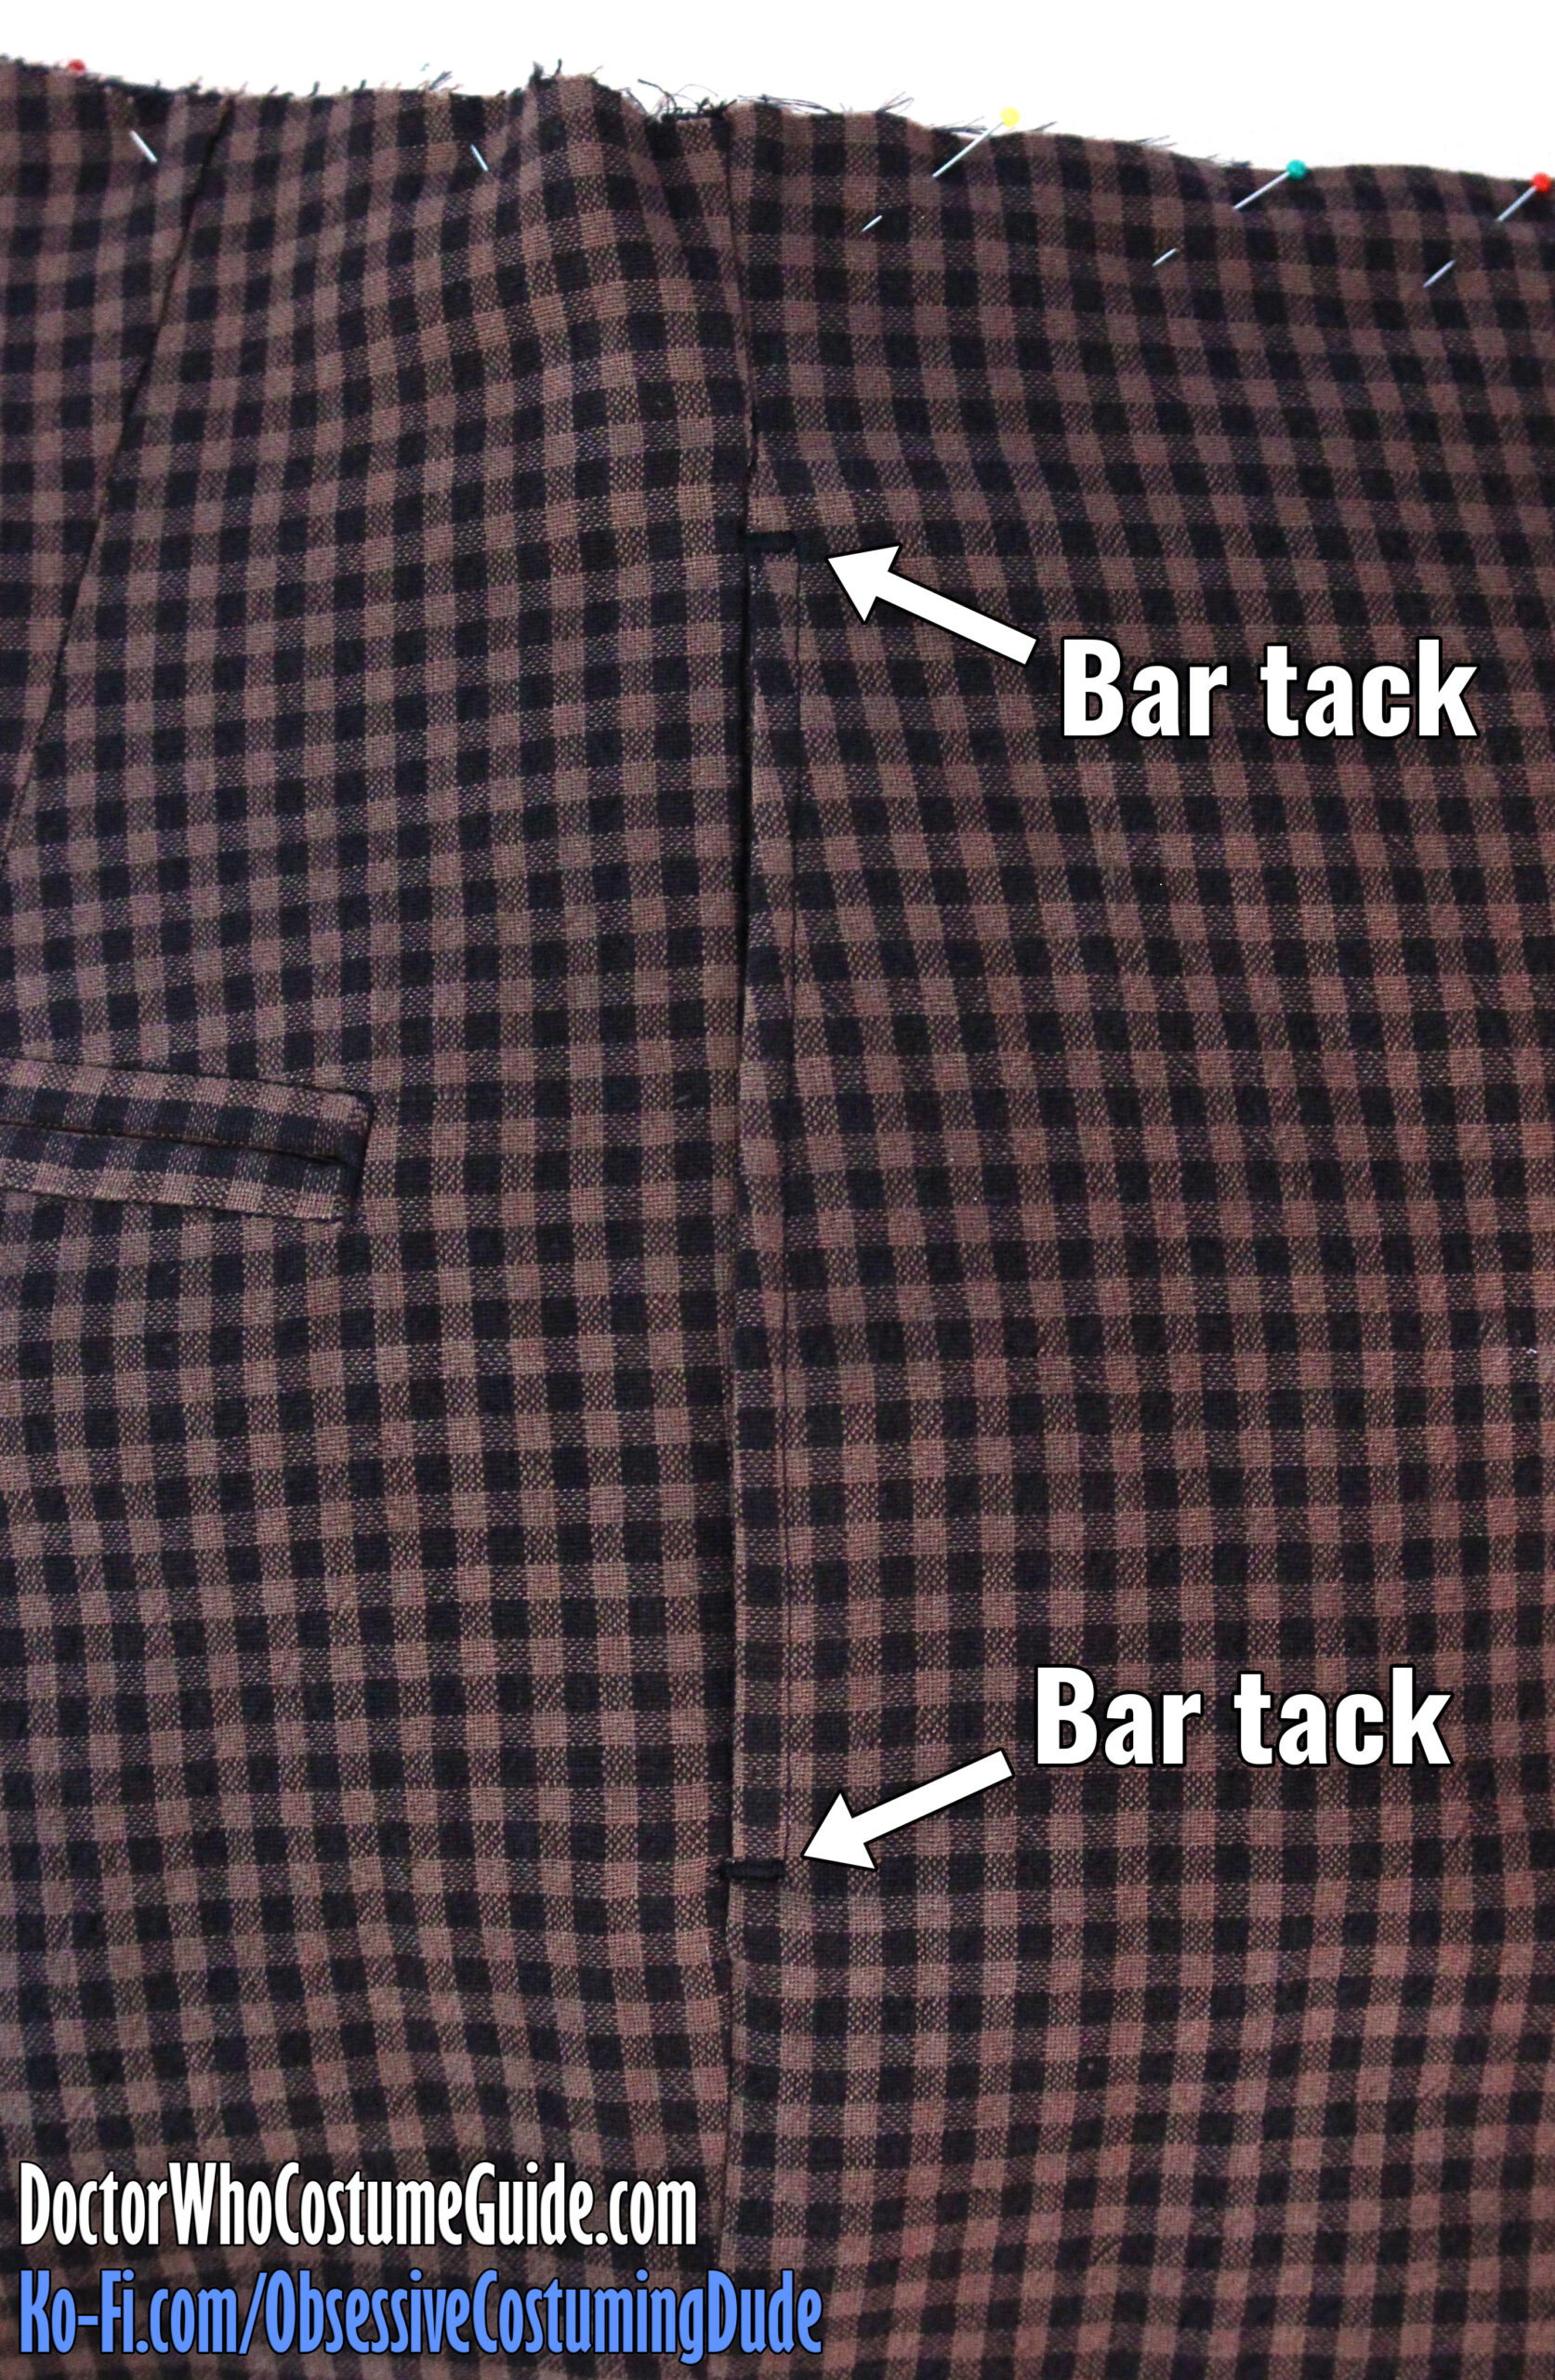
Securely anchor the pocket layers together by making two small bar tacks – one at the top of the pocket opening, and the other at the bottom.
Both bar tacks should extend to the ¼” topstitching.
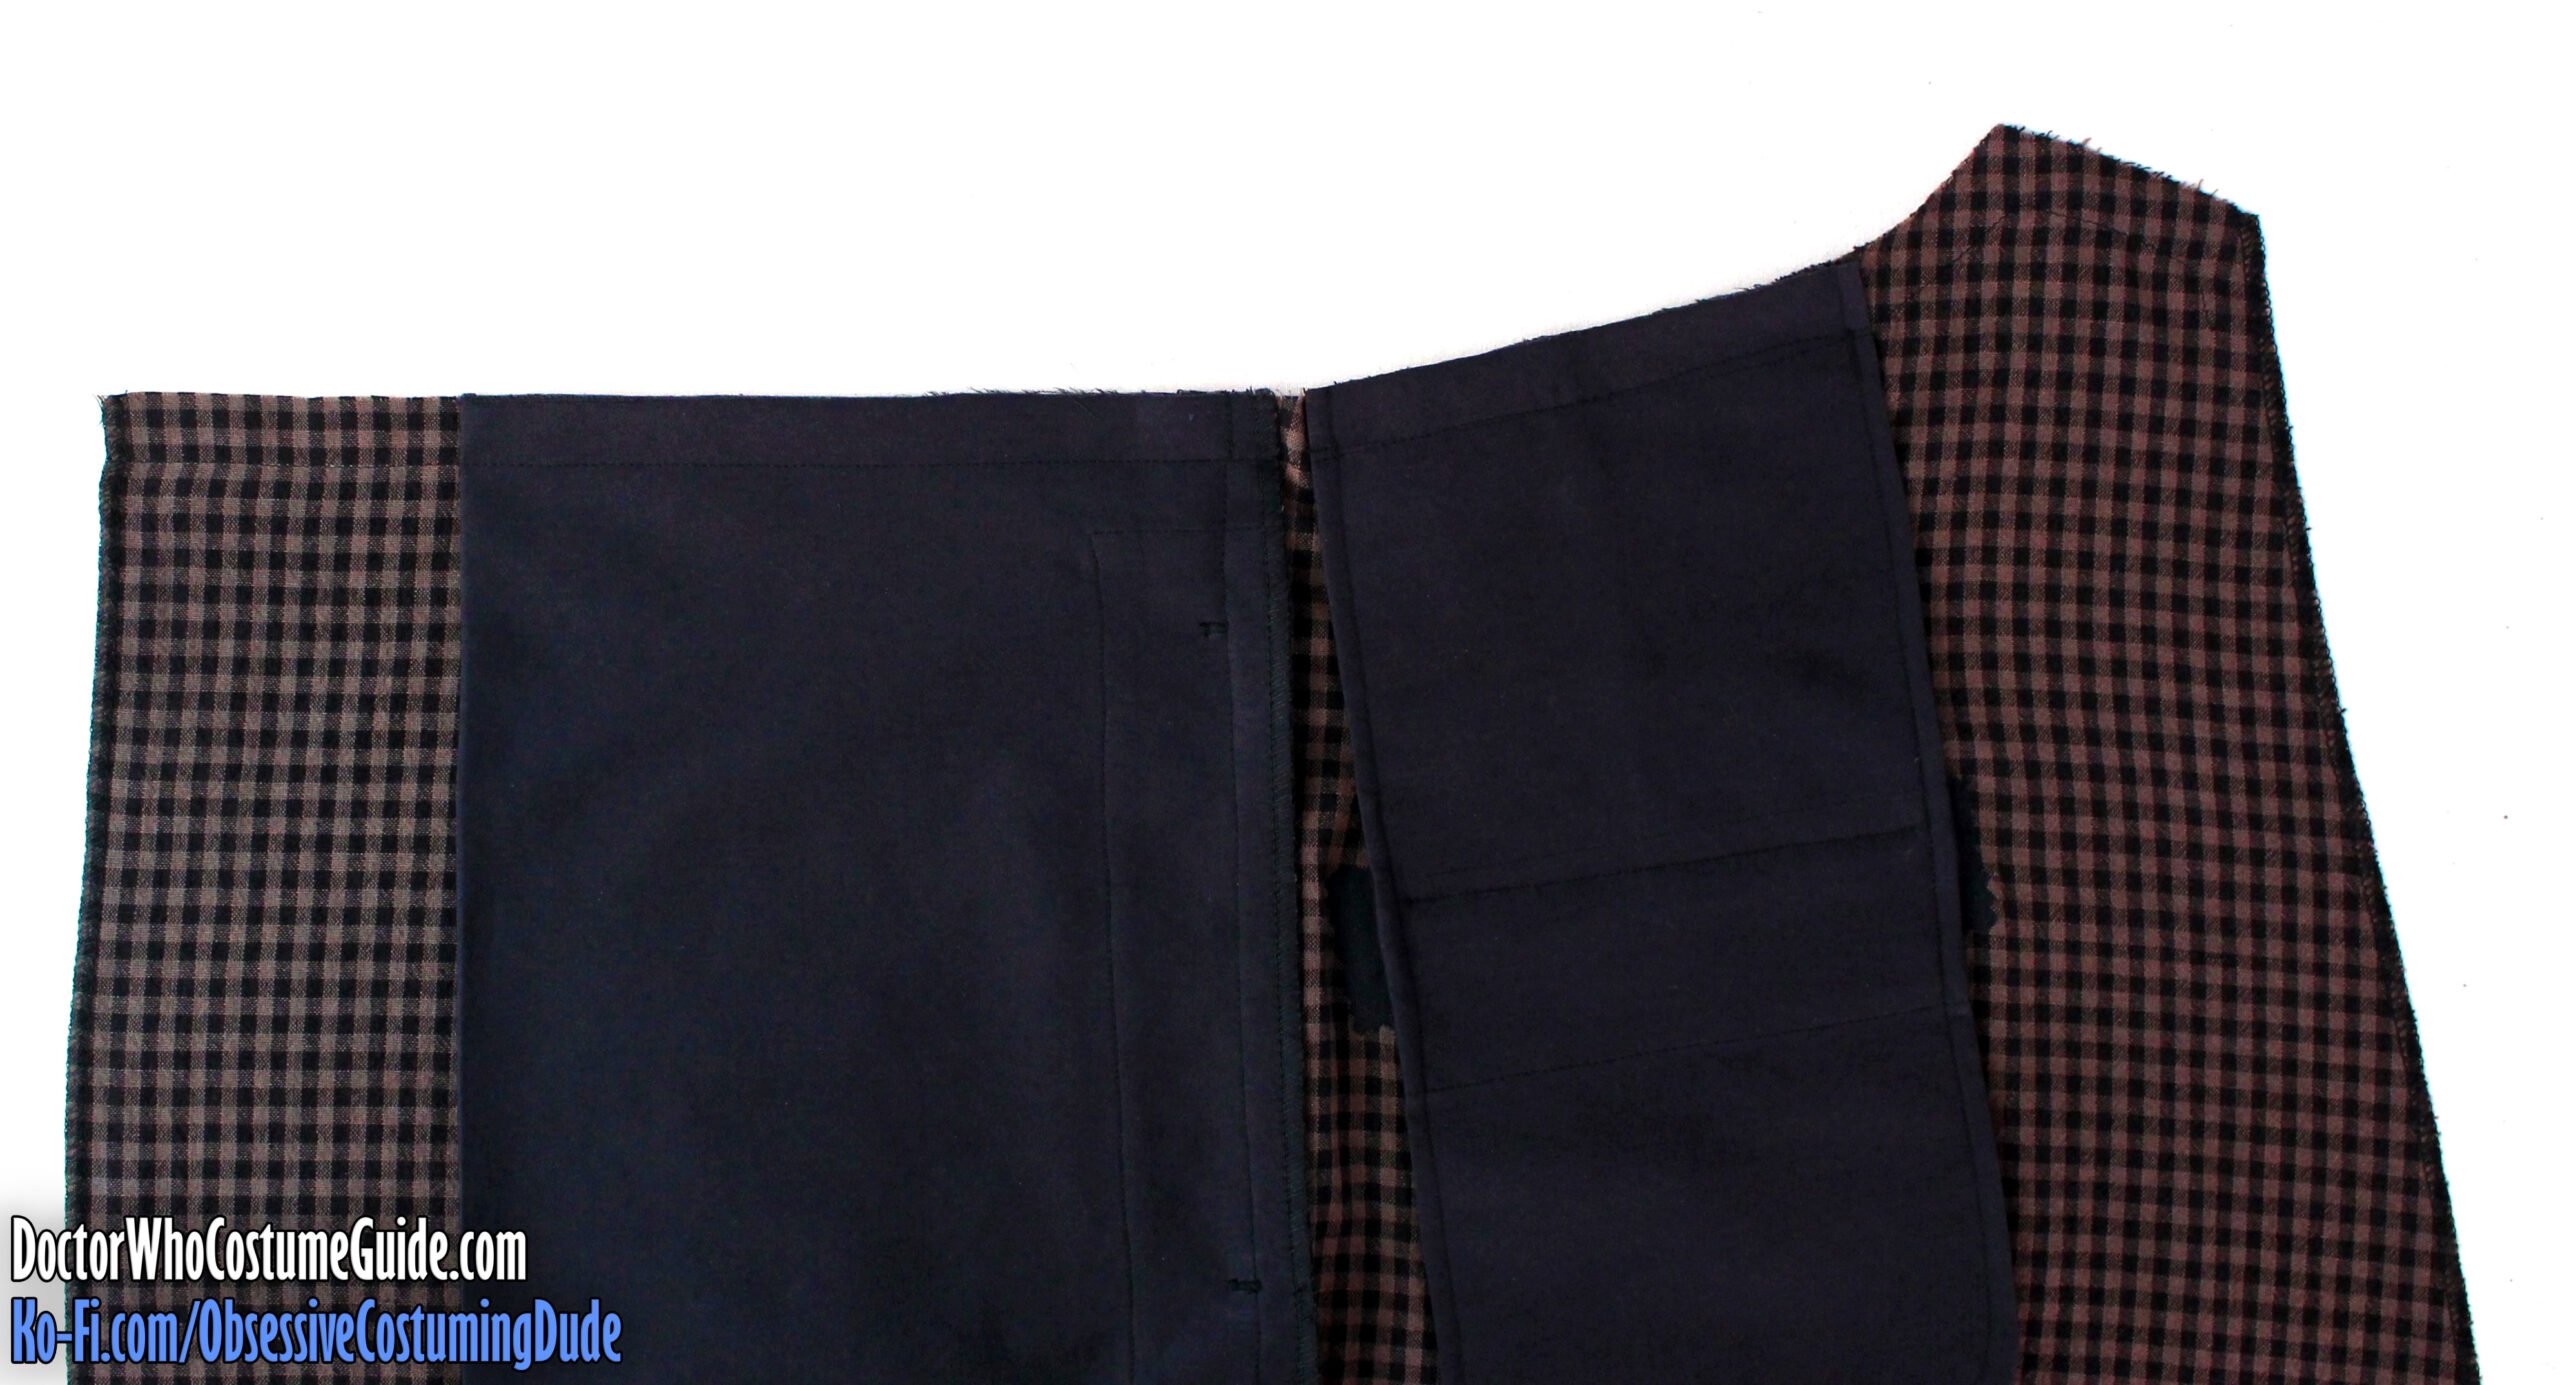
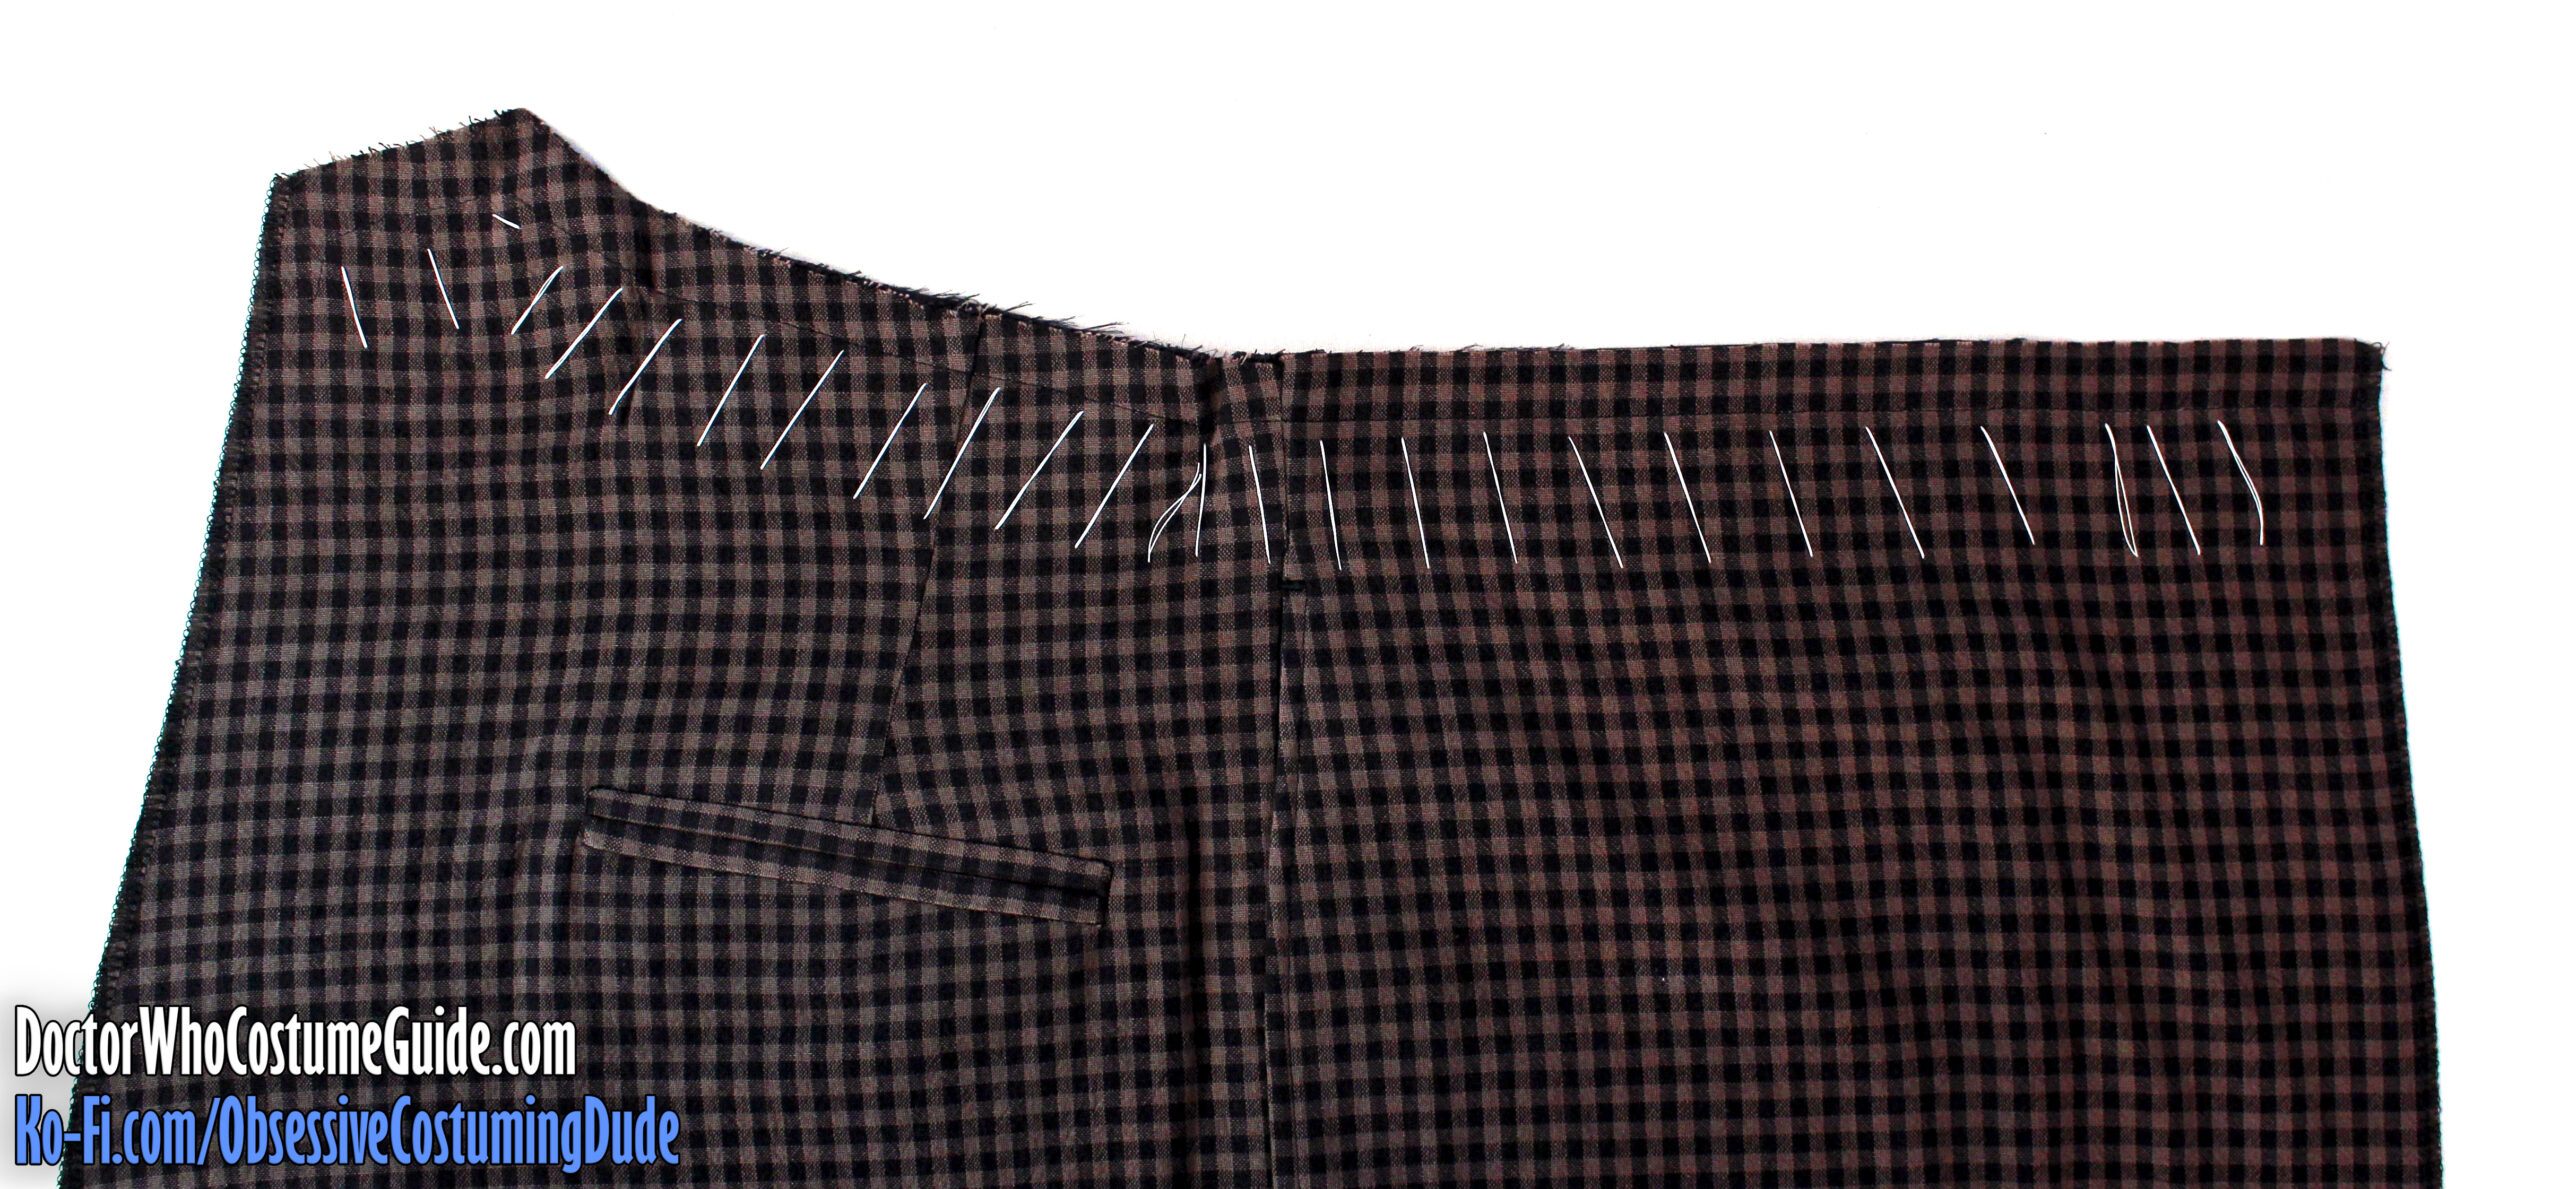
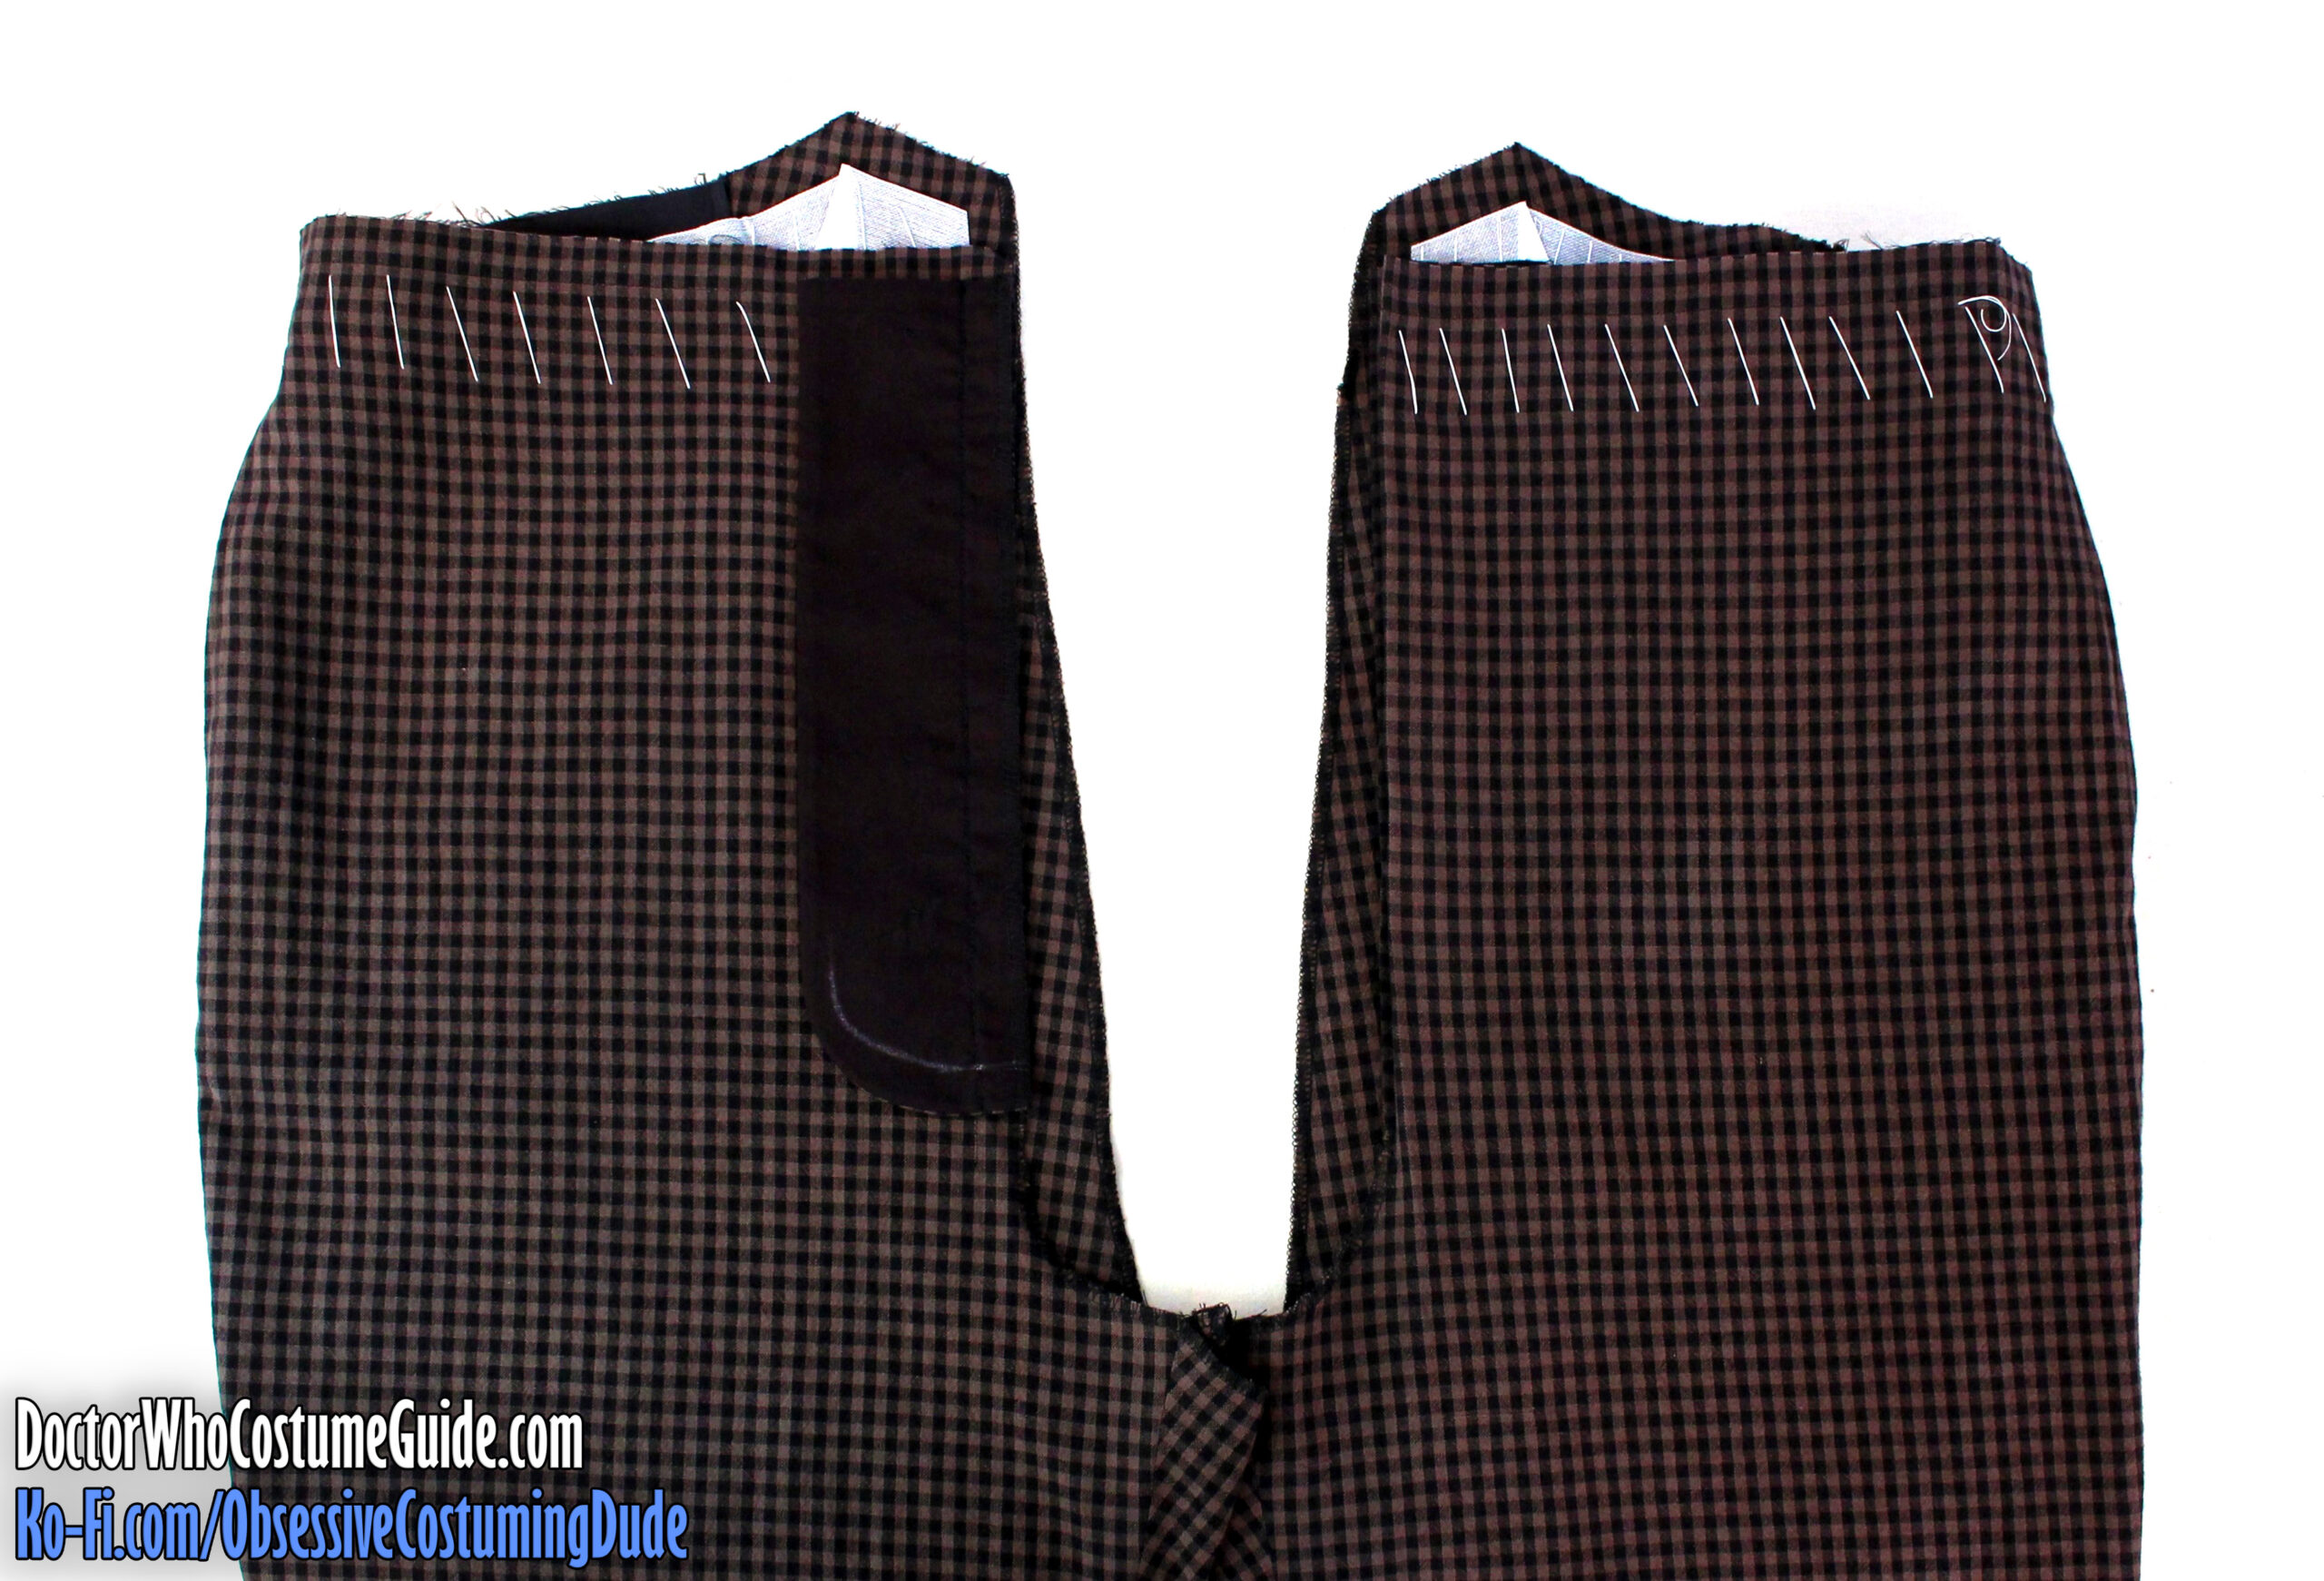
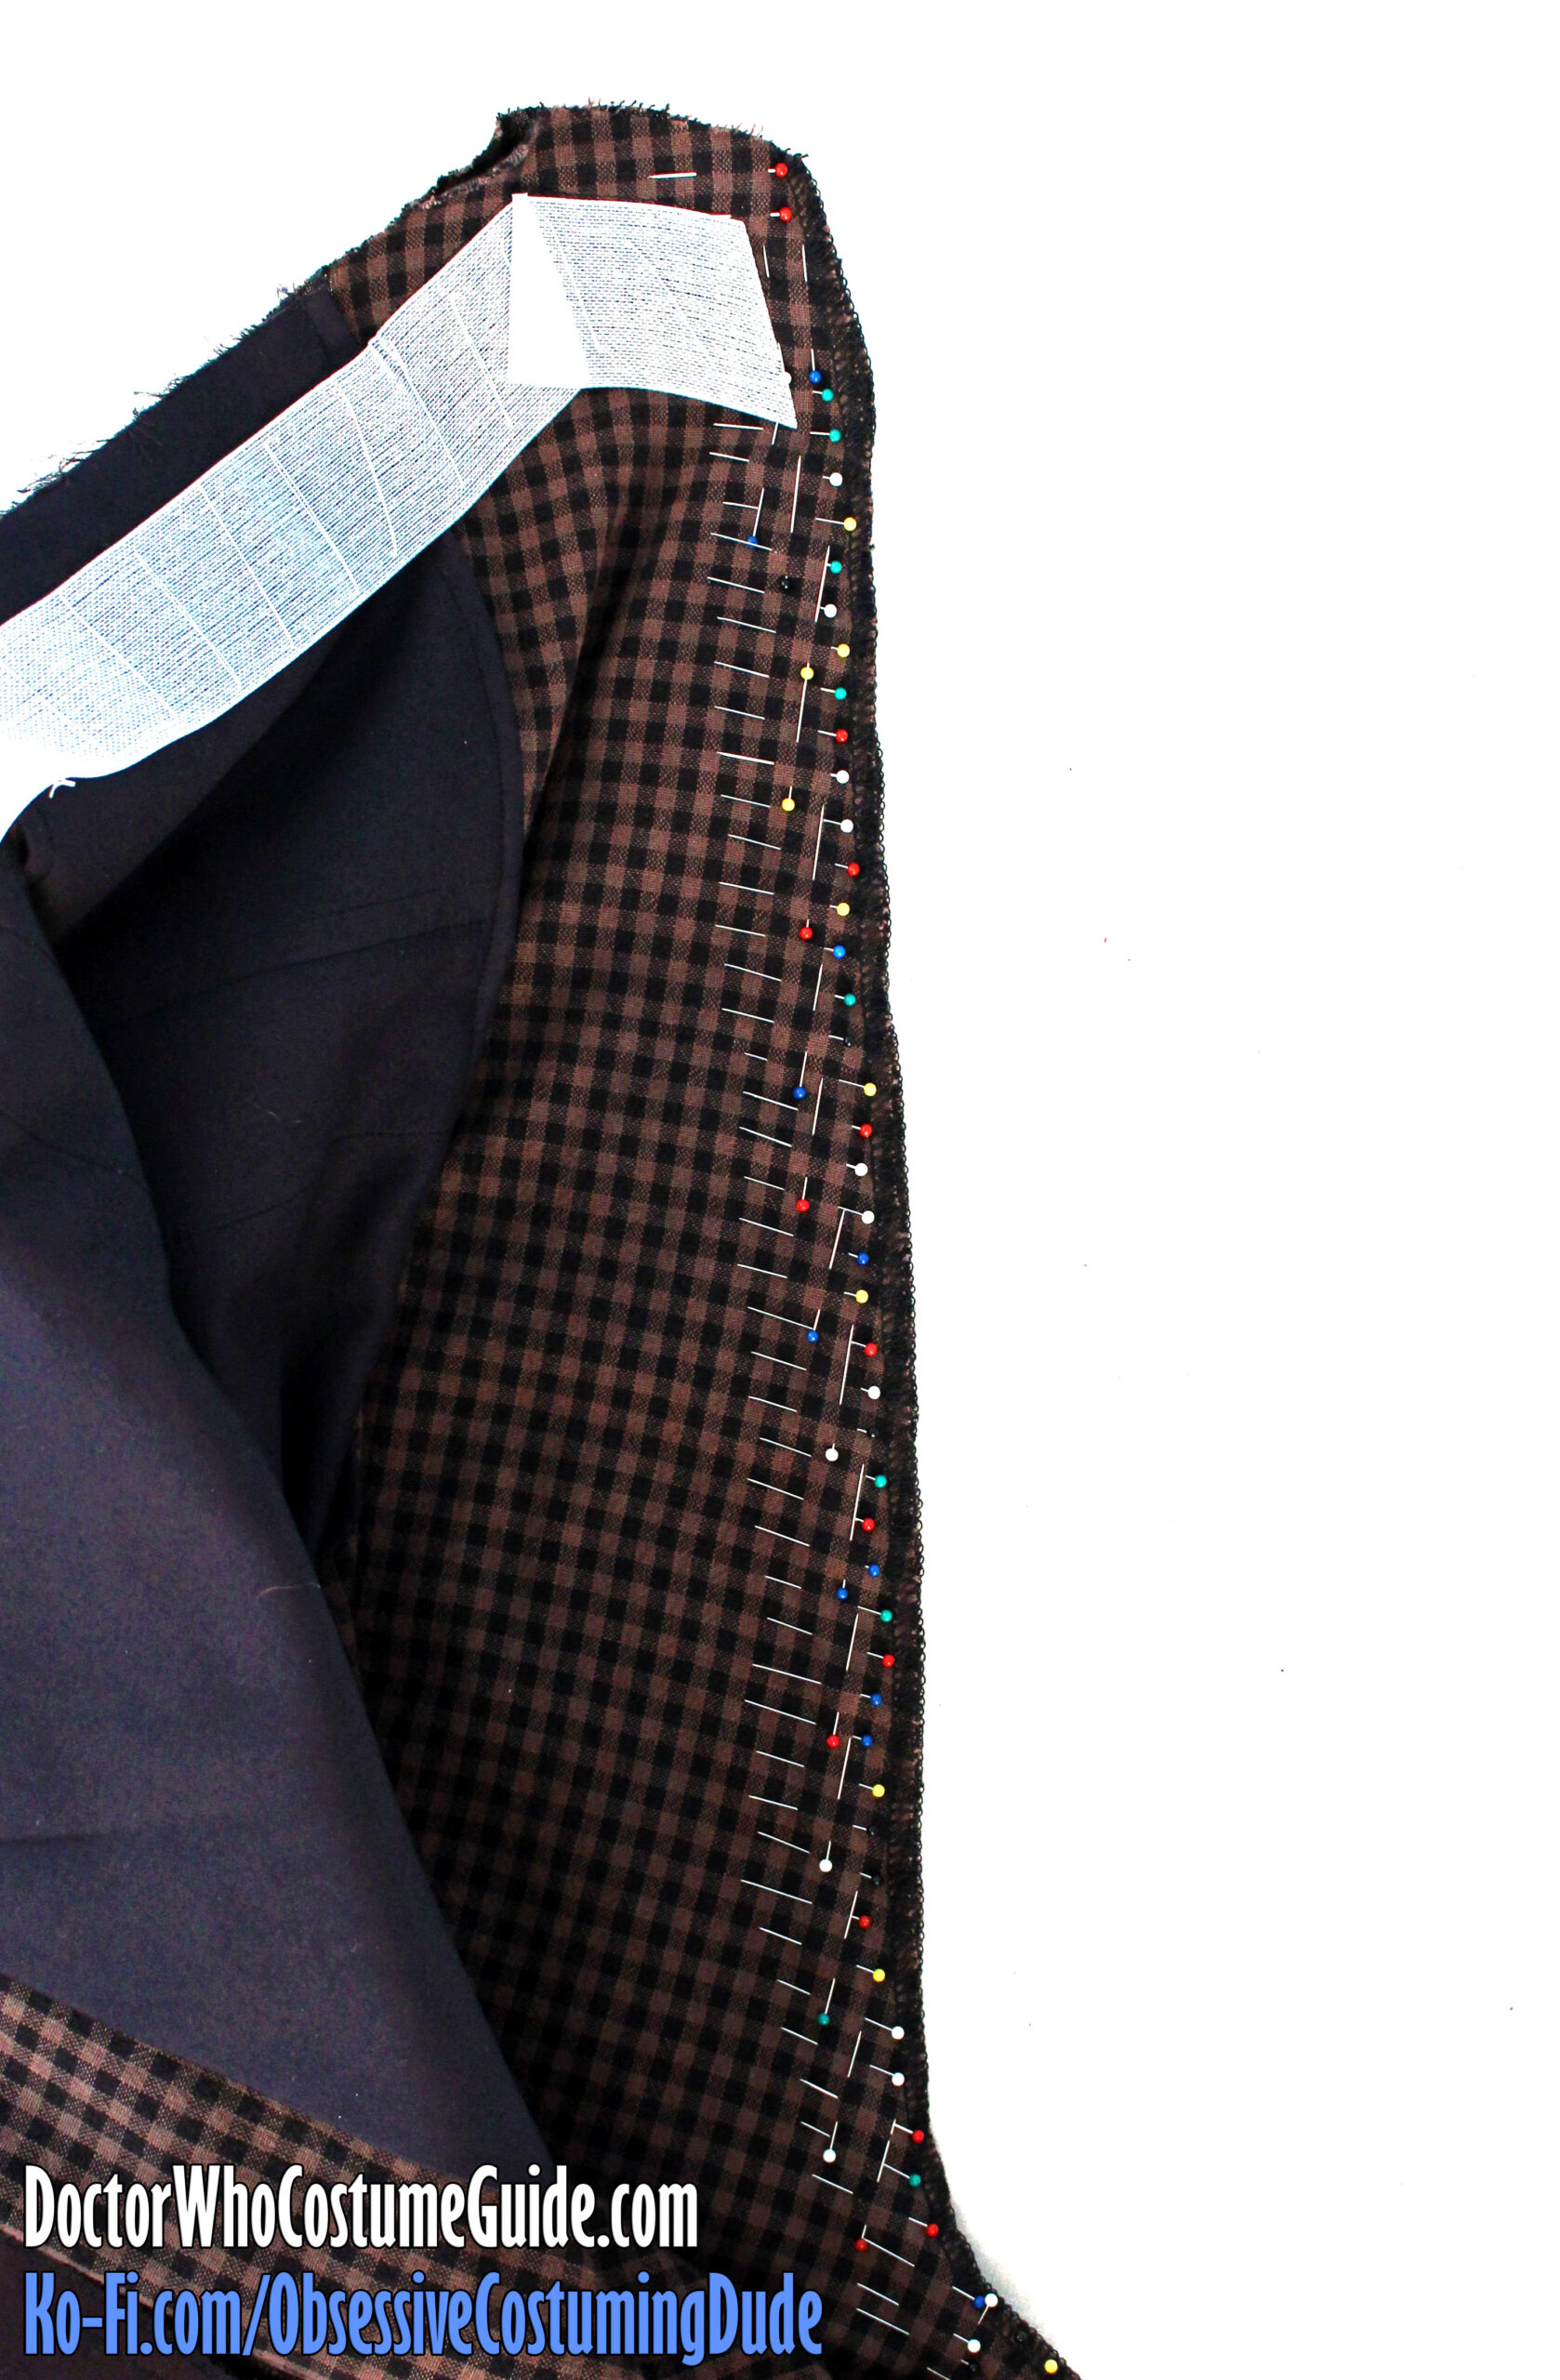
Stay-stitch along the trousers’ upper seam line (⅝” from the upper edges) through all layers.
Cut a length of Ban Roll of sufficient length to extend from the center front to center back seam lines. (I actually prefer to cut mine a bit longer, then trim it down to size afterward.)
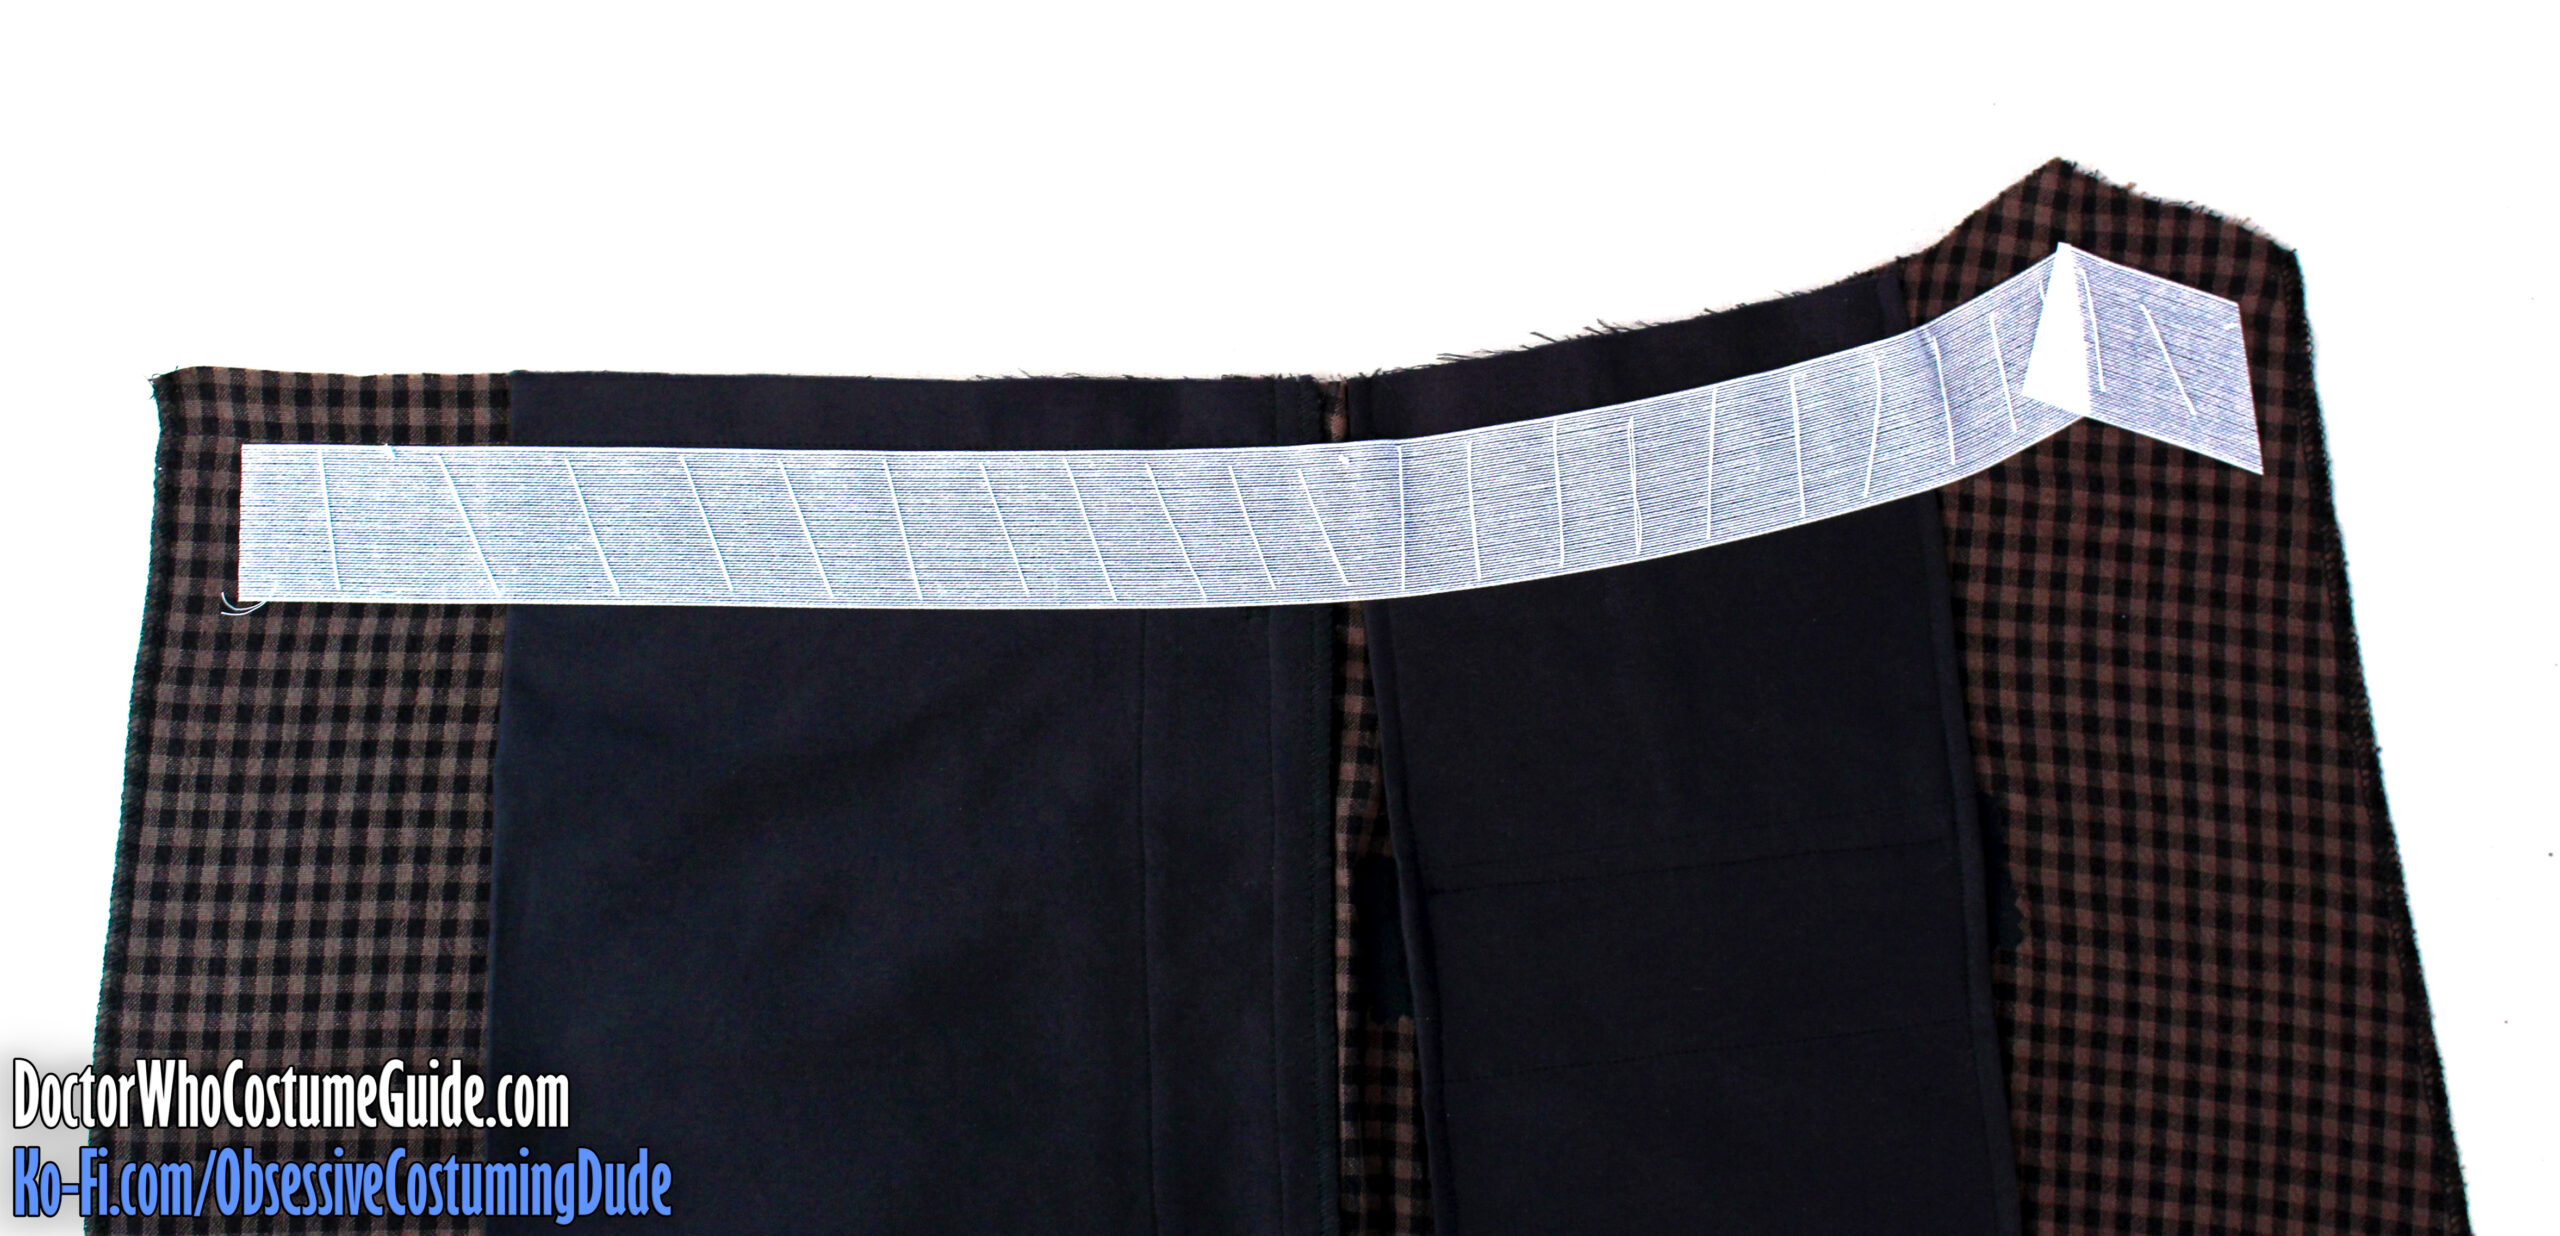
Position the Ban Roll on the underside of the trousers, with its upper edge flush with the upper seam line (along the stitching) and the front edge flush with the center front seam line.
Tailor-baste the Ban Roll to the trousers through all layers, turning the gentle back curve as best you can and pivoting at the upper back corner.
Trim the back edge of the Ban Roll so it’s flush with the center back seam line.
With the exception of the back right pocket, repeat for the left side of the trousers.
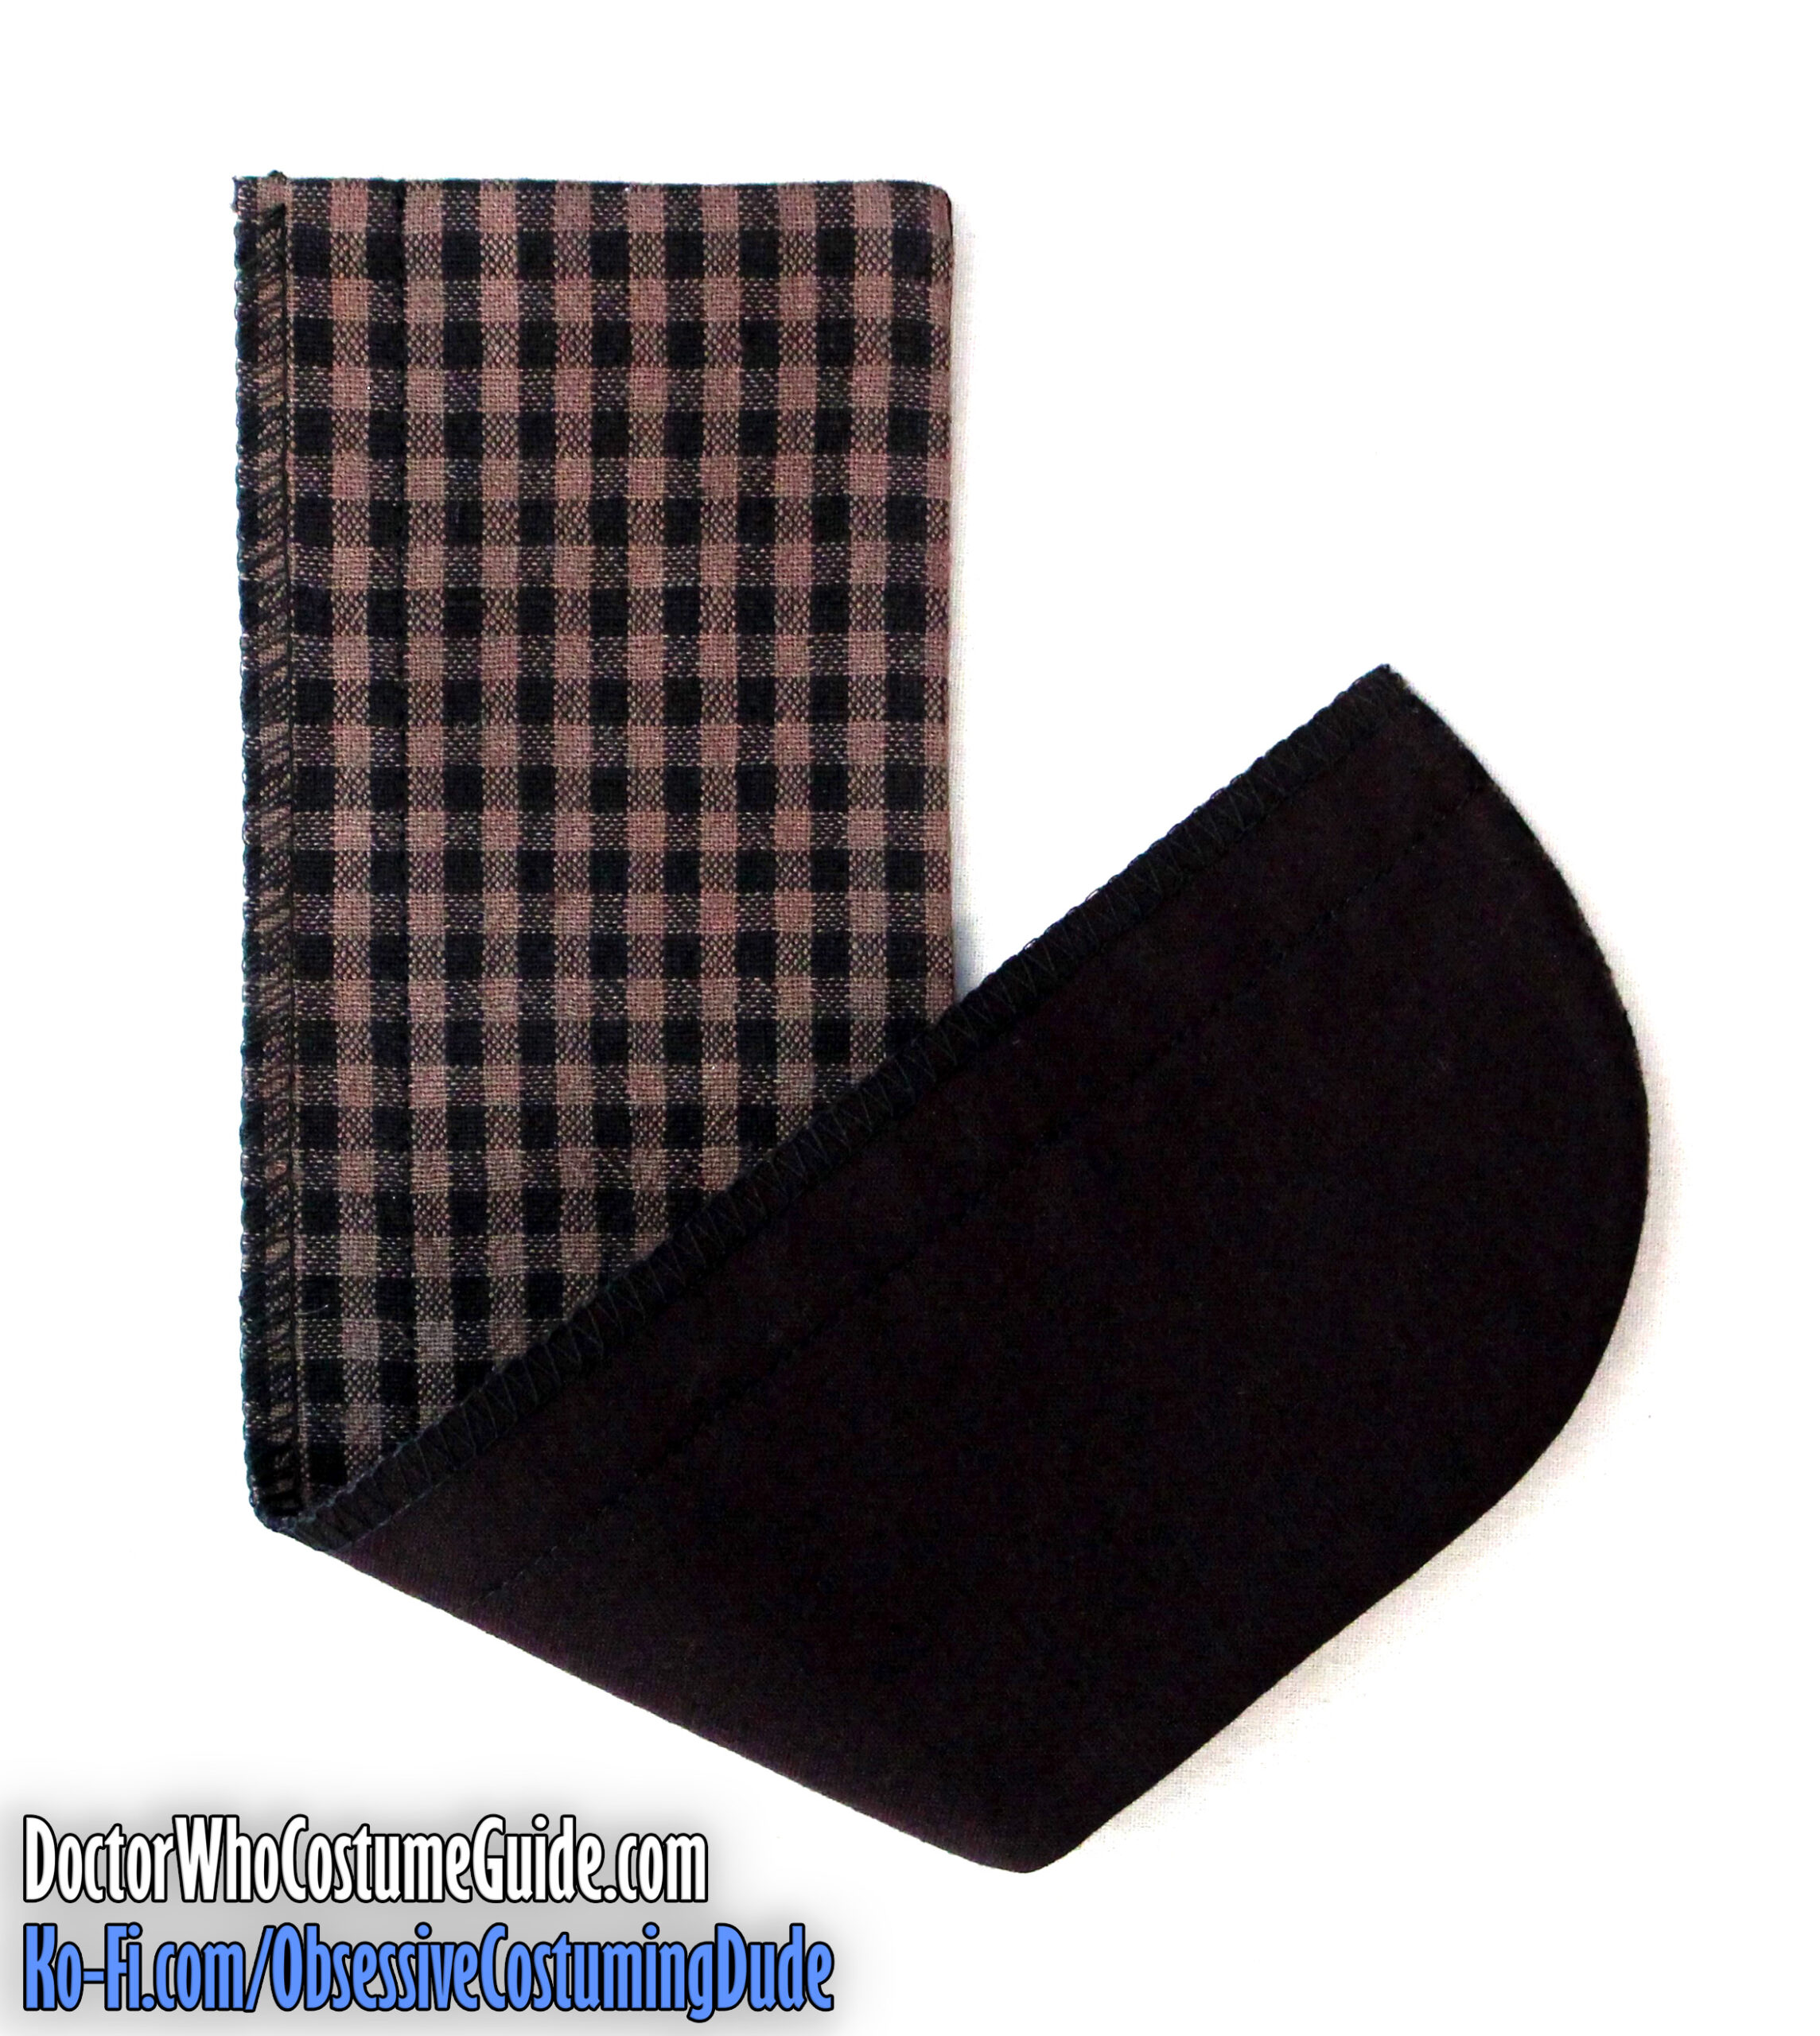
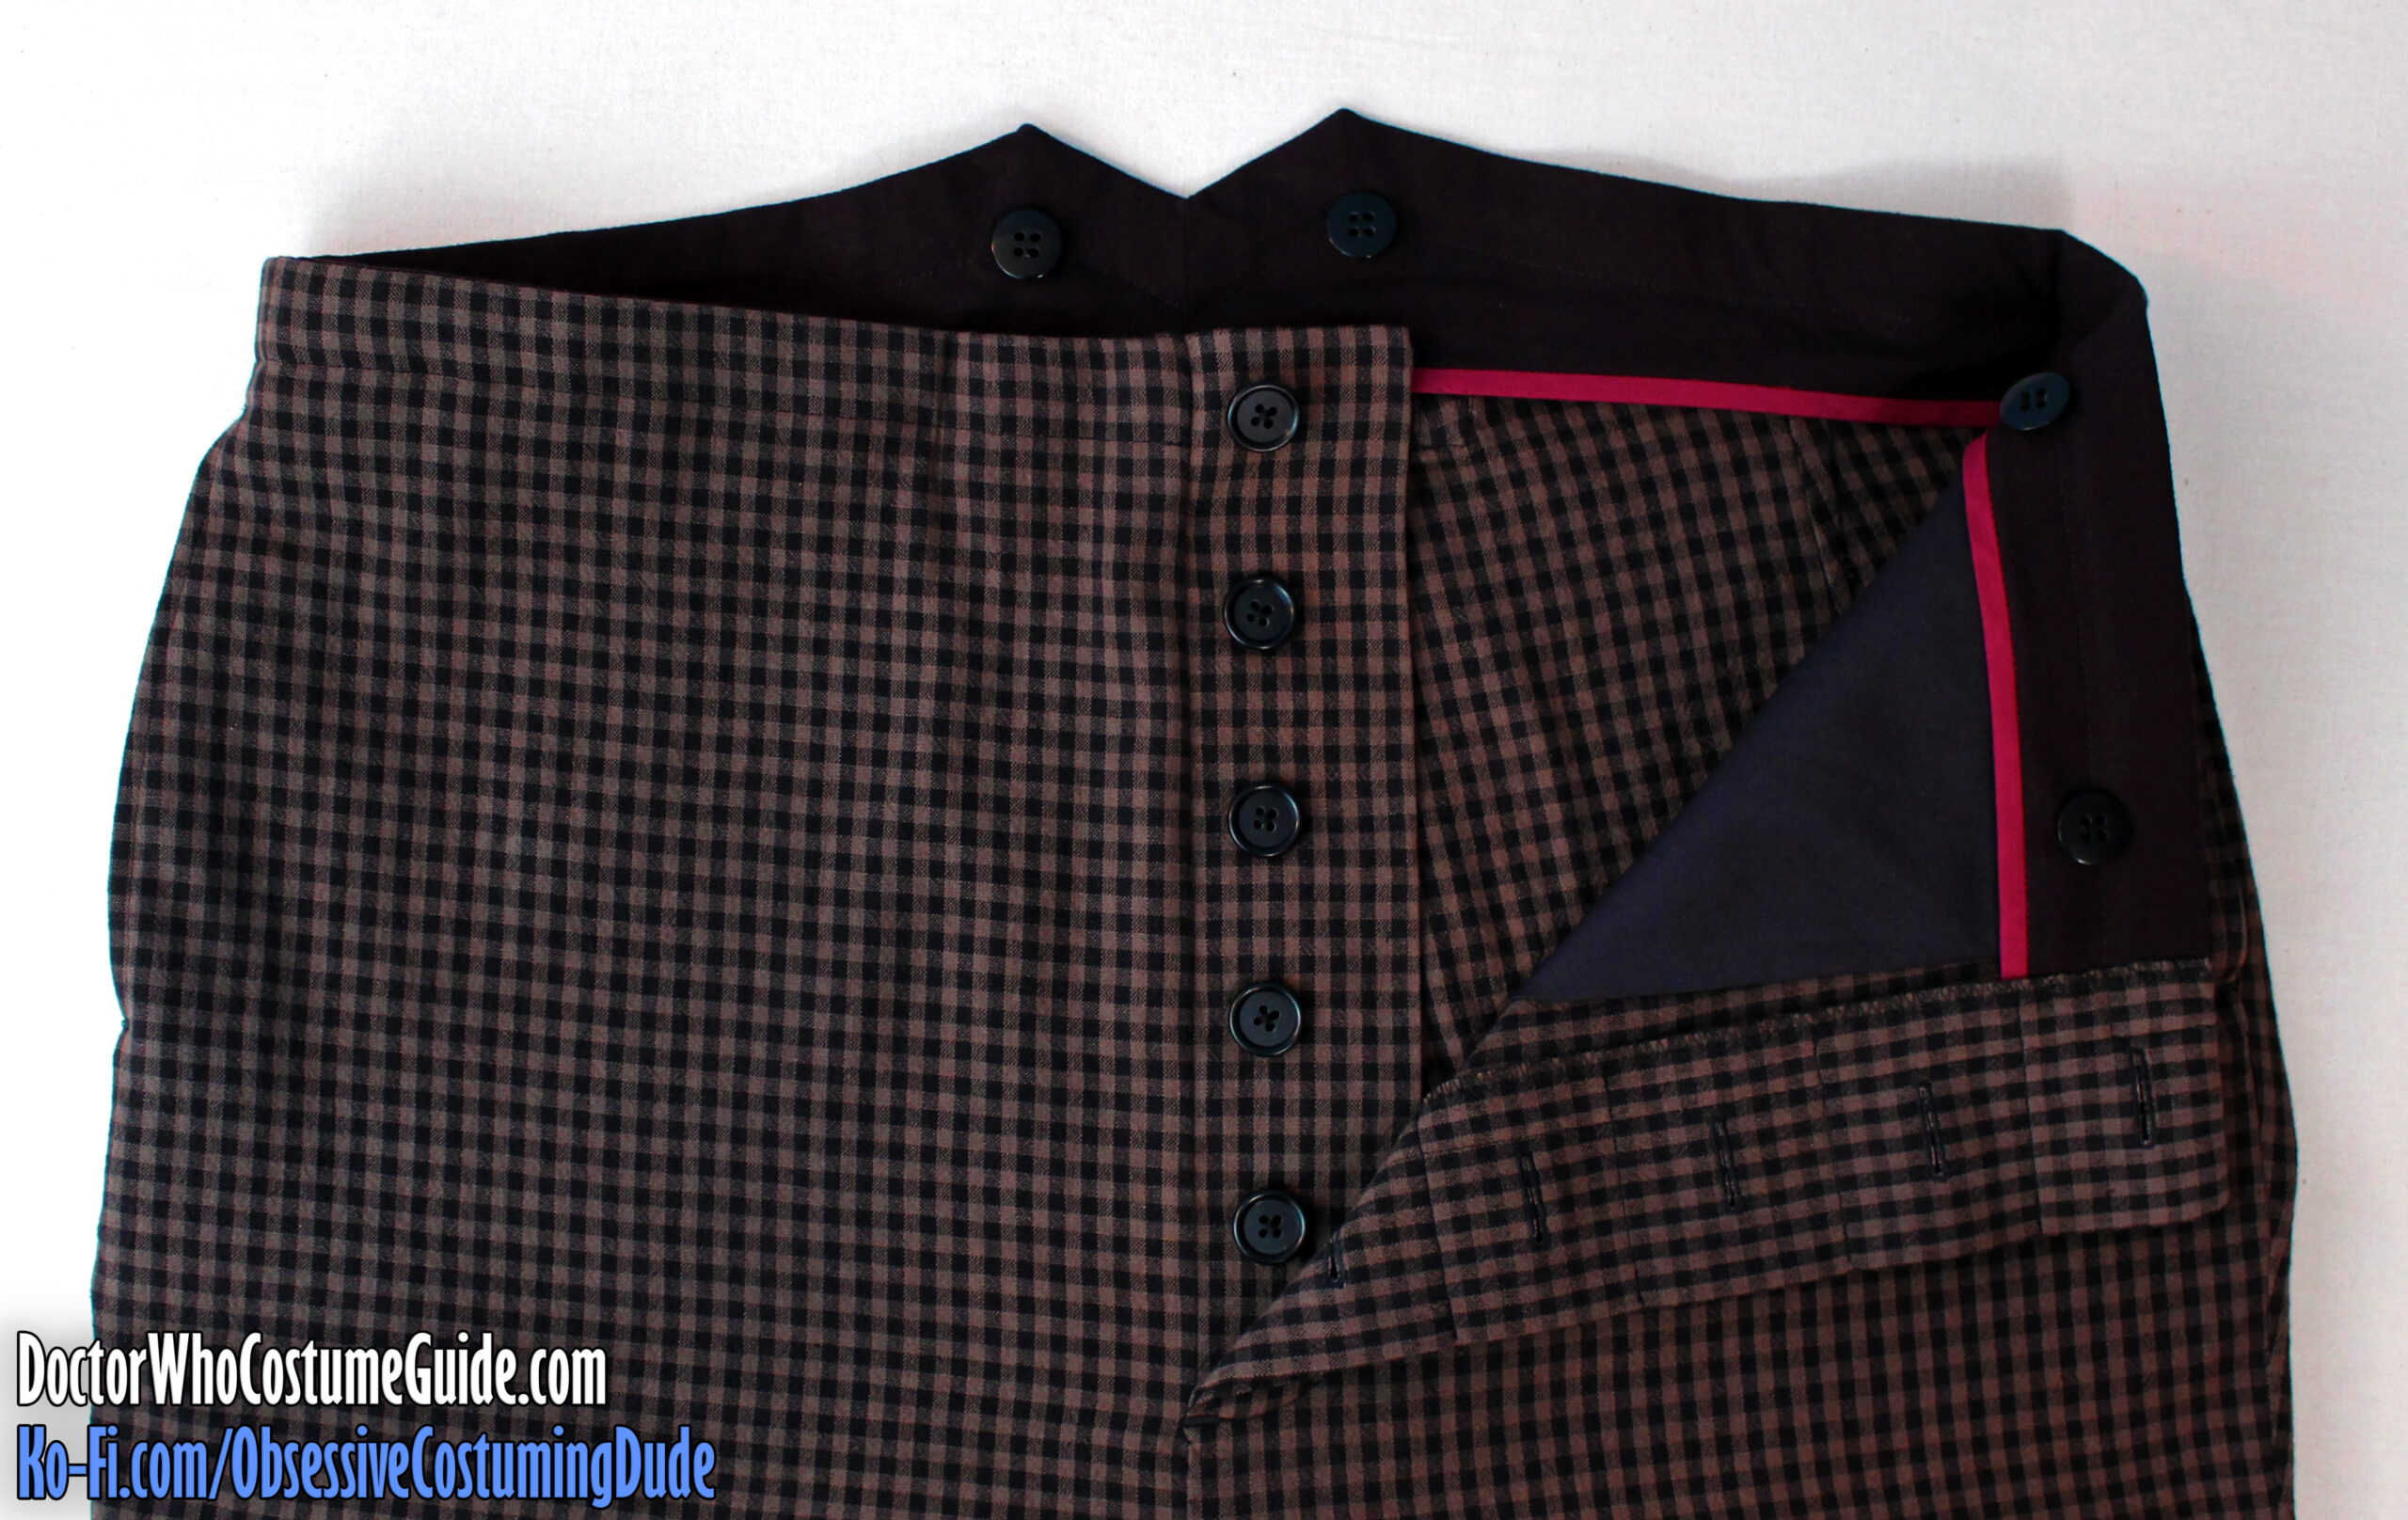
For the underside of the right fly (piece C), I chose to use a contrasting solid brown fabric.
Sew your two right fly pieces together along the upper and longer/outer edges, right sides together.
Trim the seam allowances down to about ⅛”.
Turn the right fly assembly right-sides-out and press.
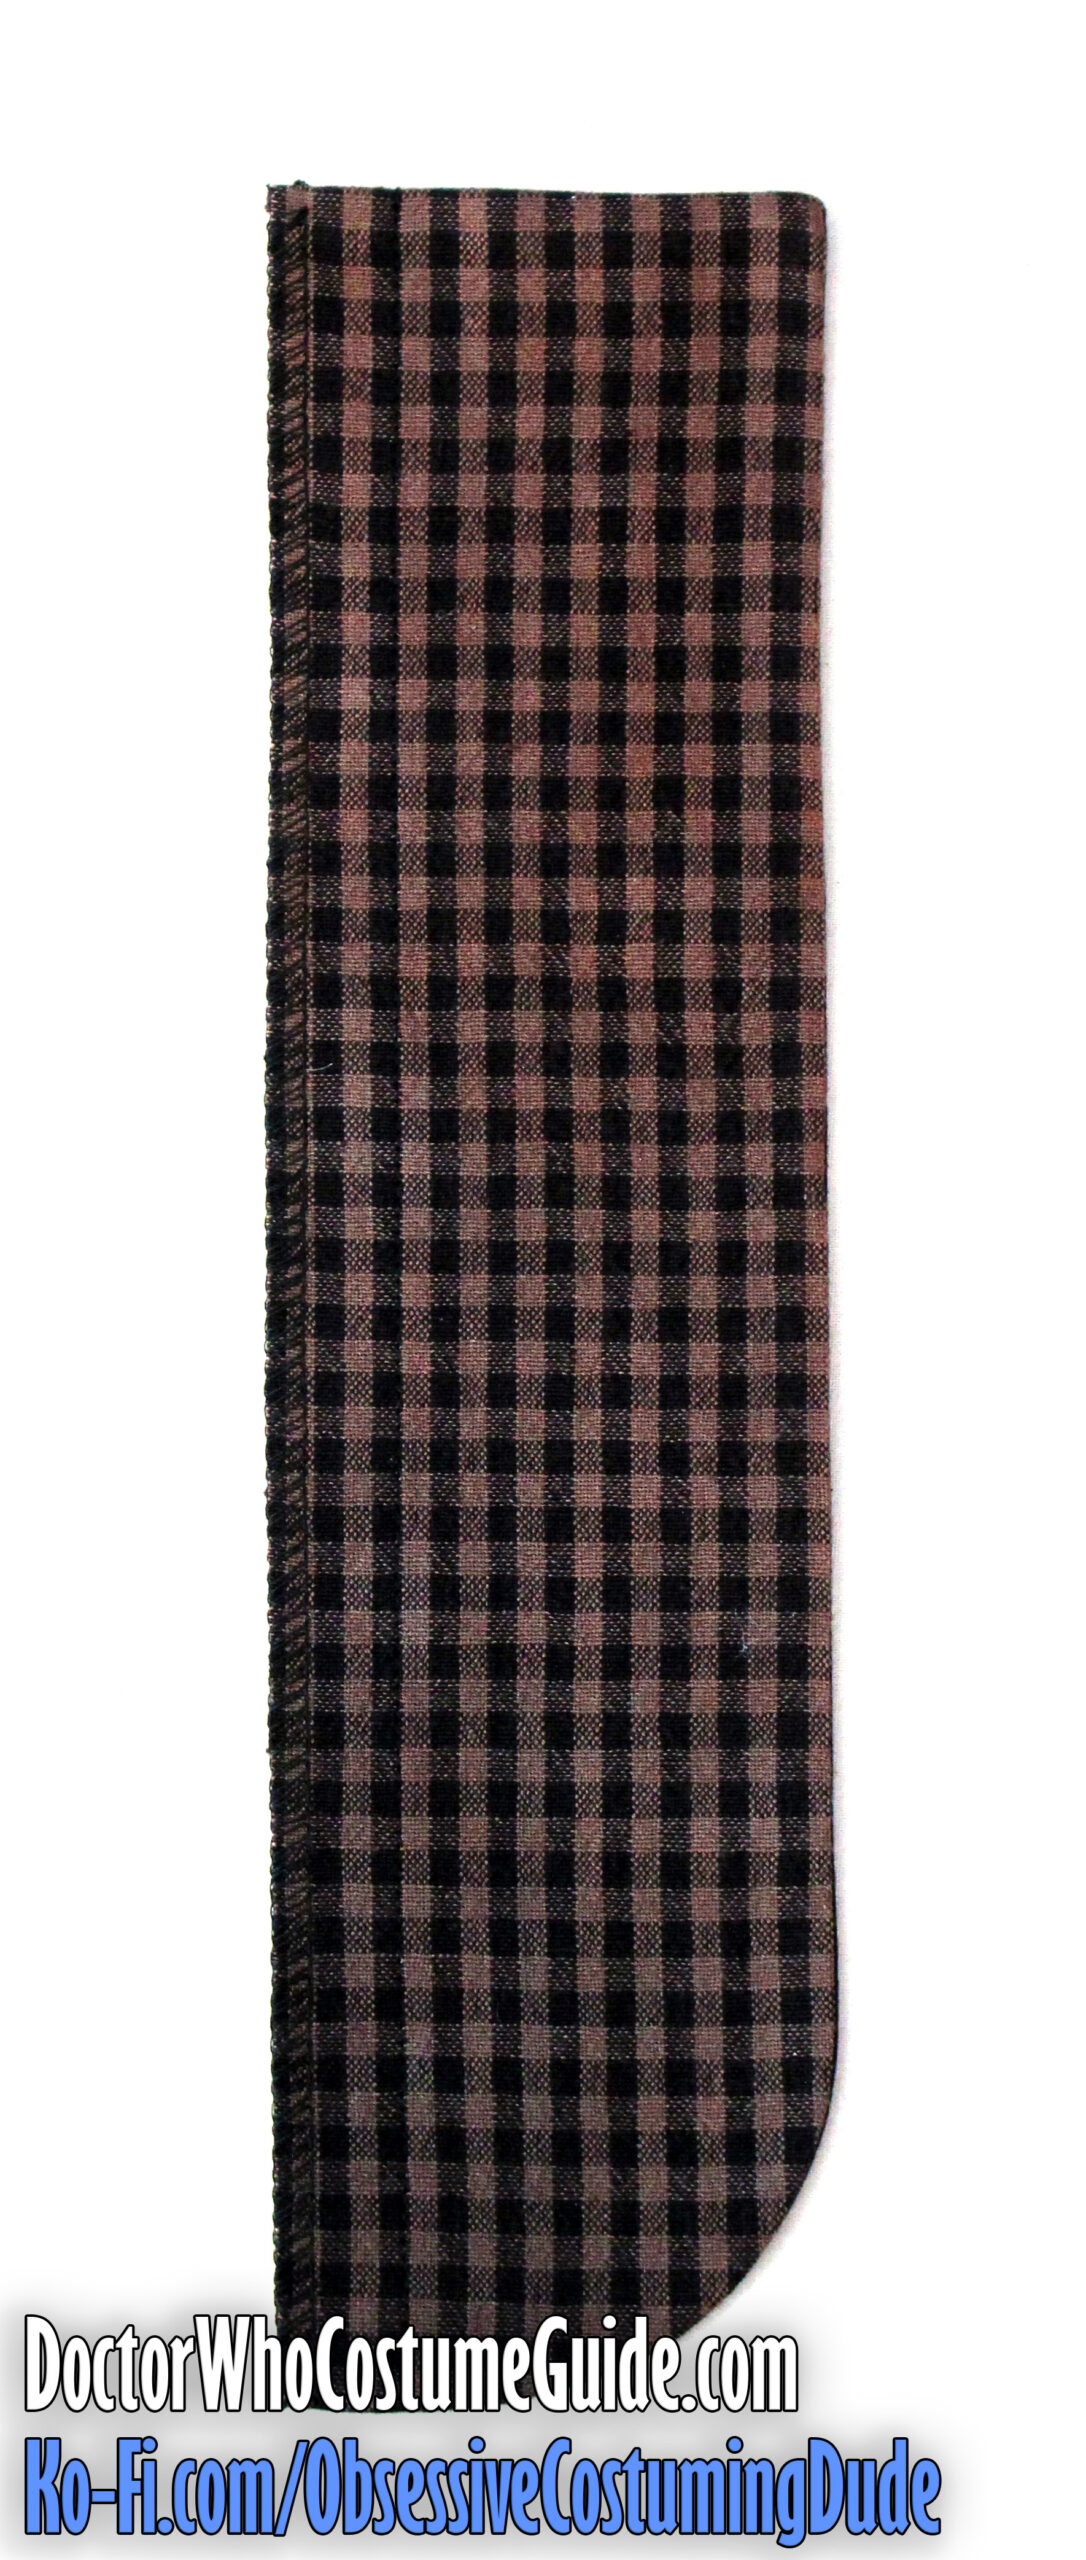
Serge the straight, open edge of the right fly assembly.
(I also like to go ahead and stitch along the center seam line, ⅝” from the straight/serged edge.)
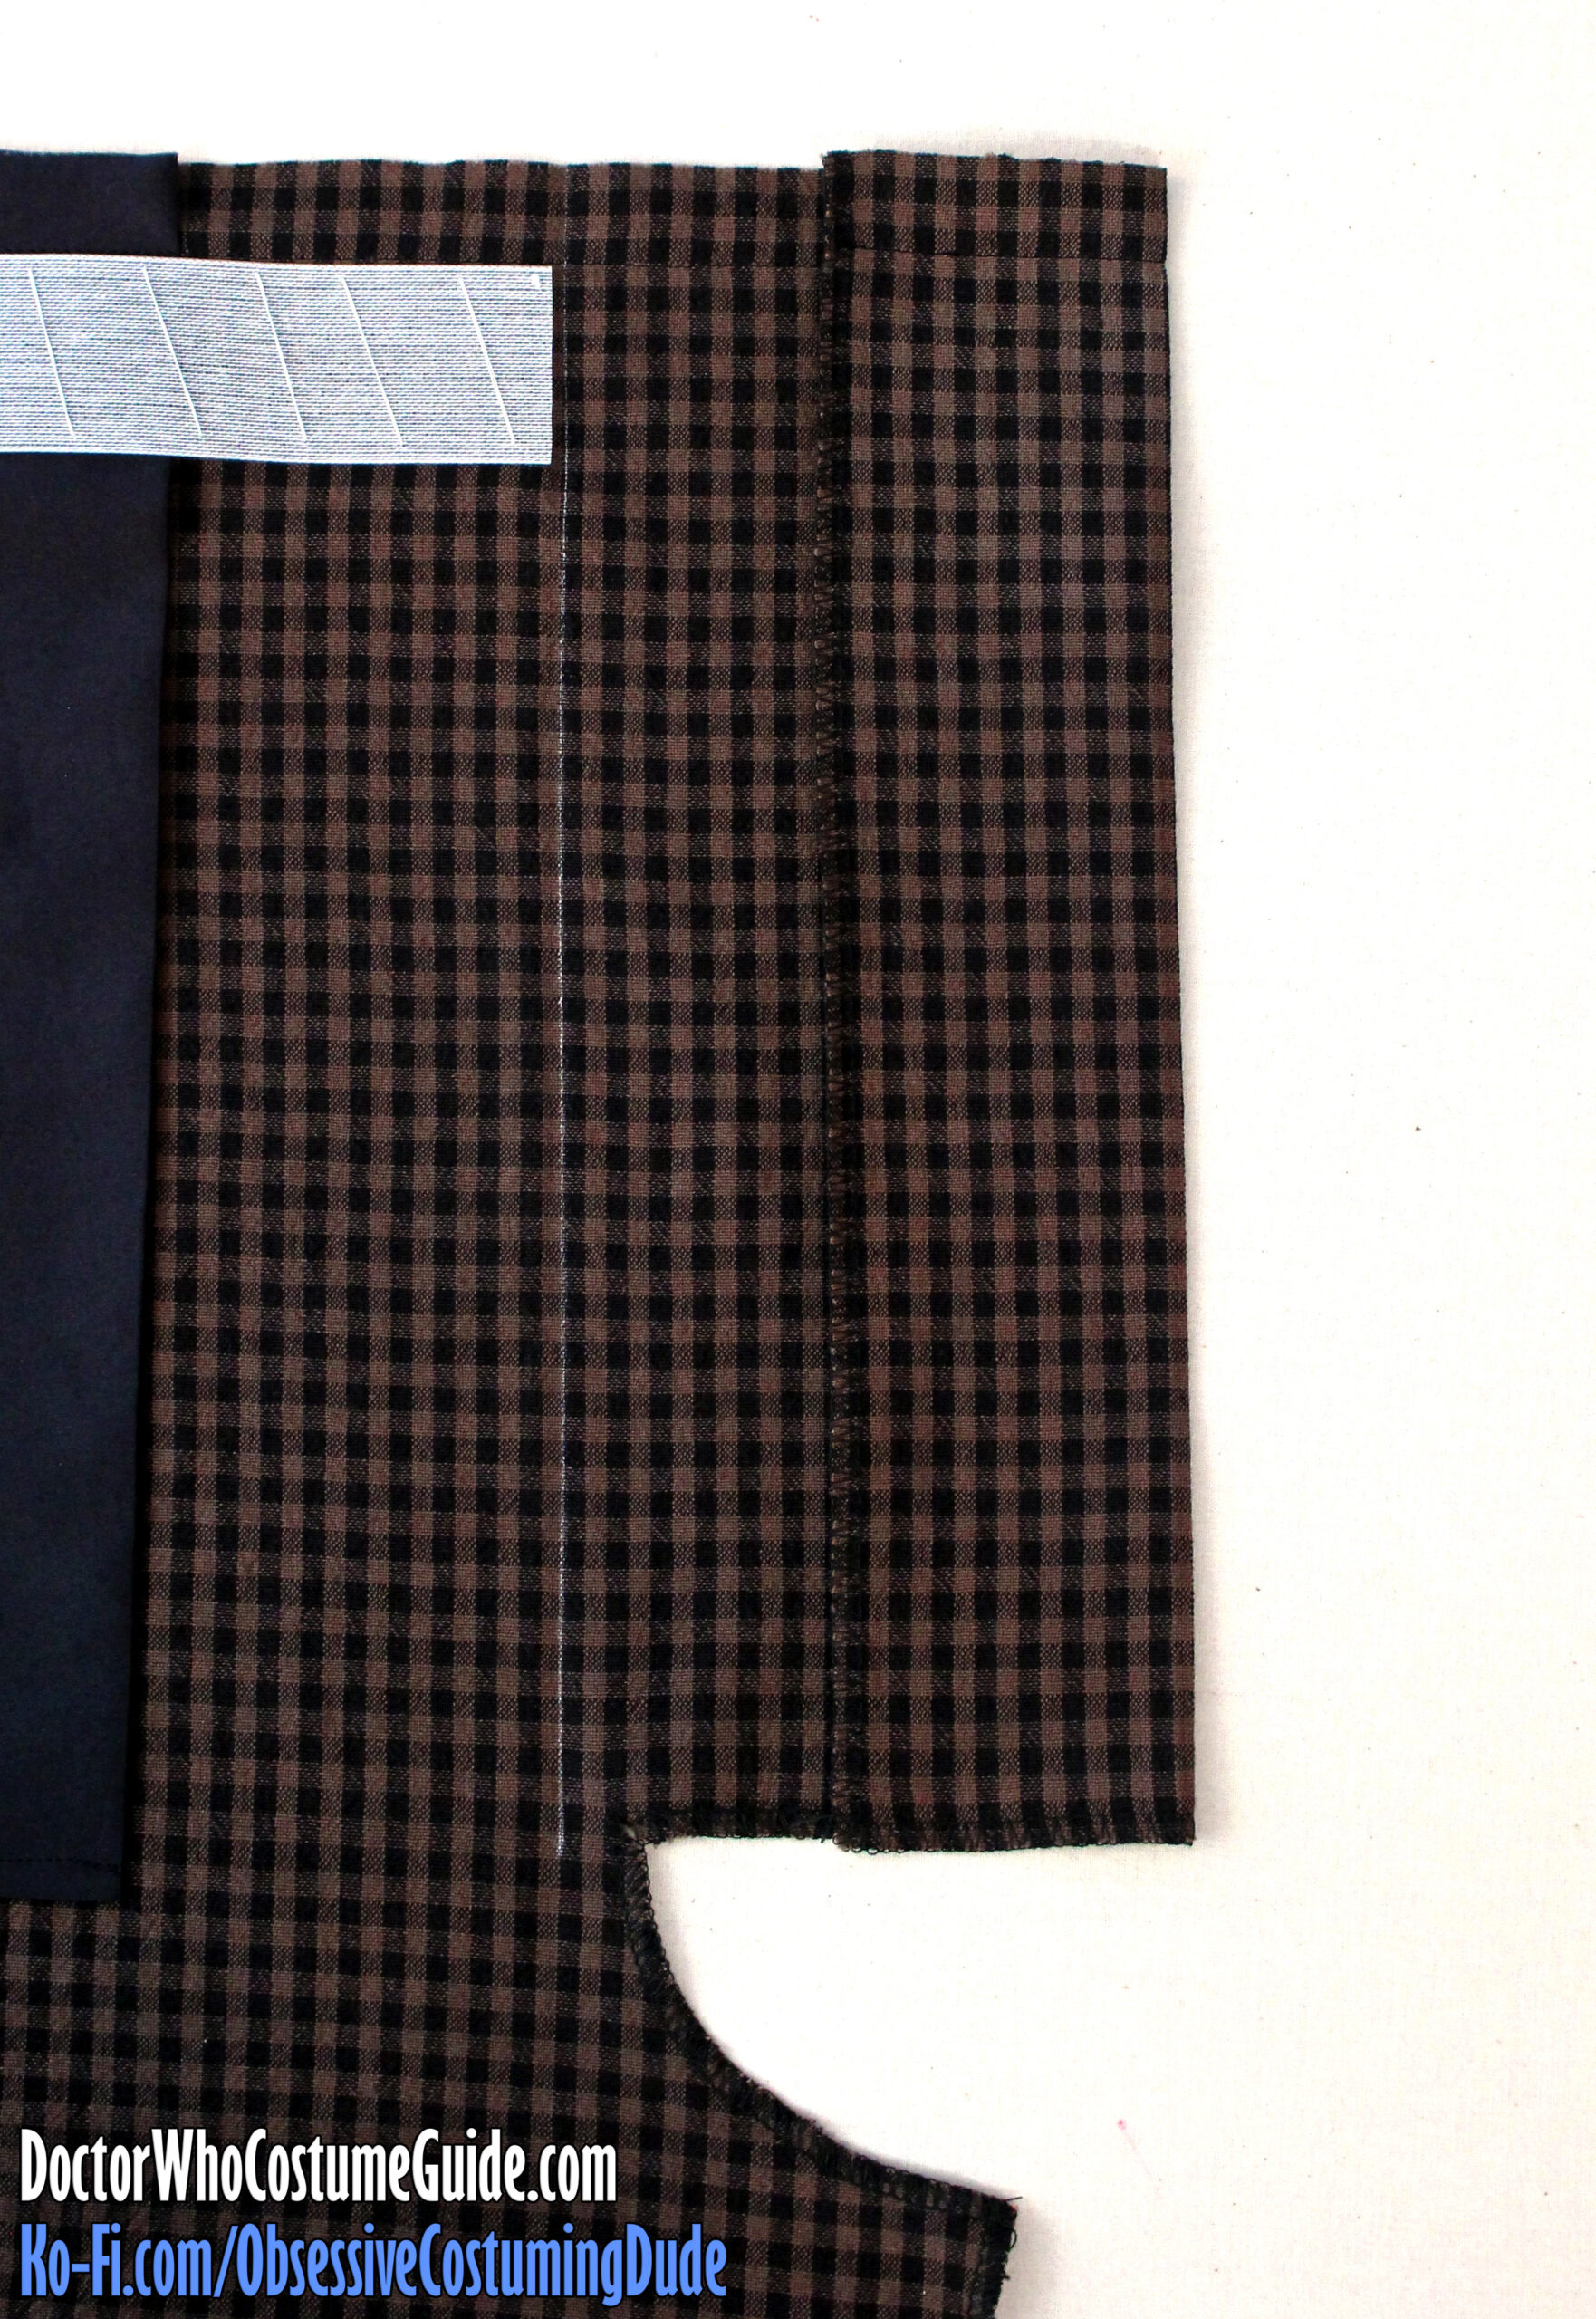
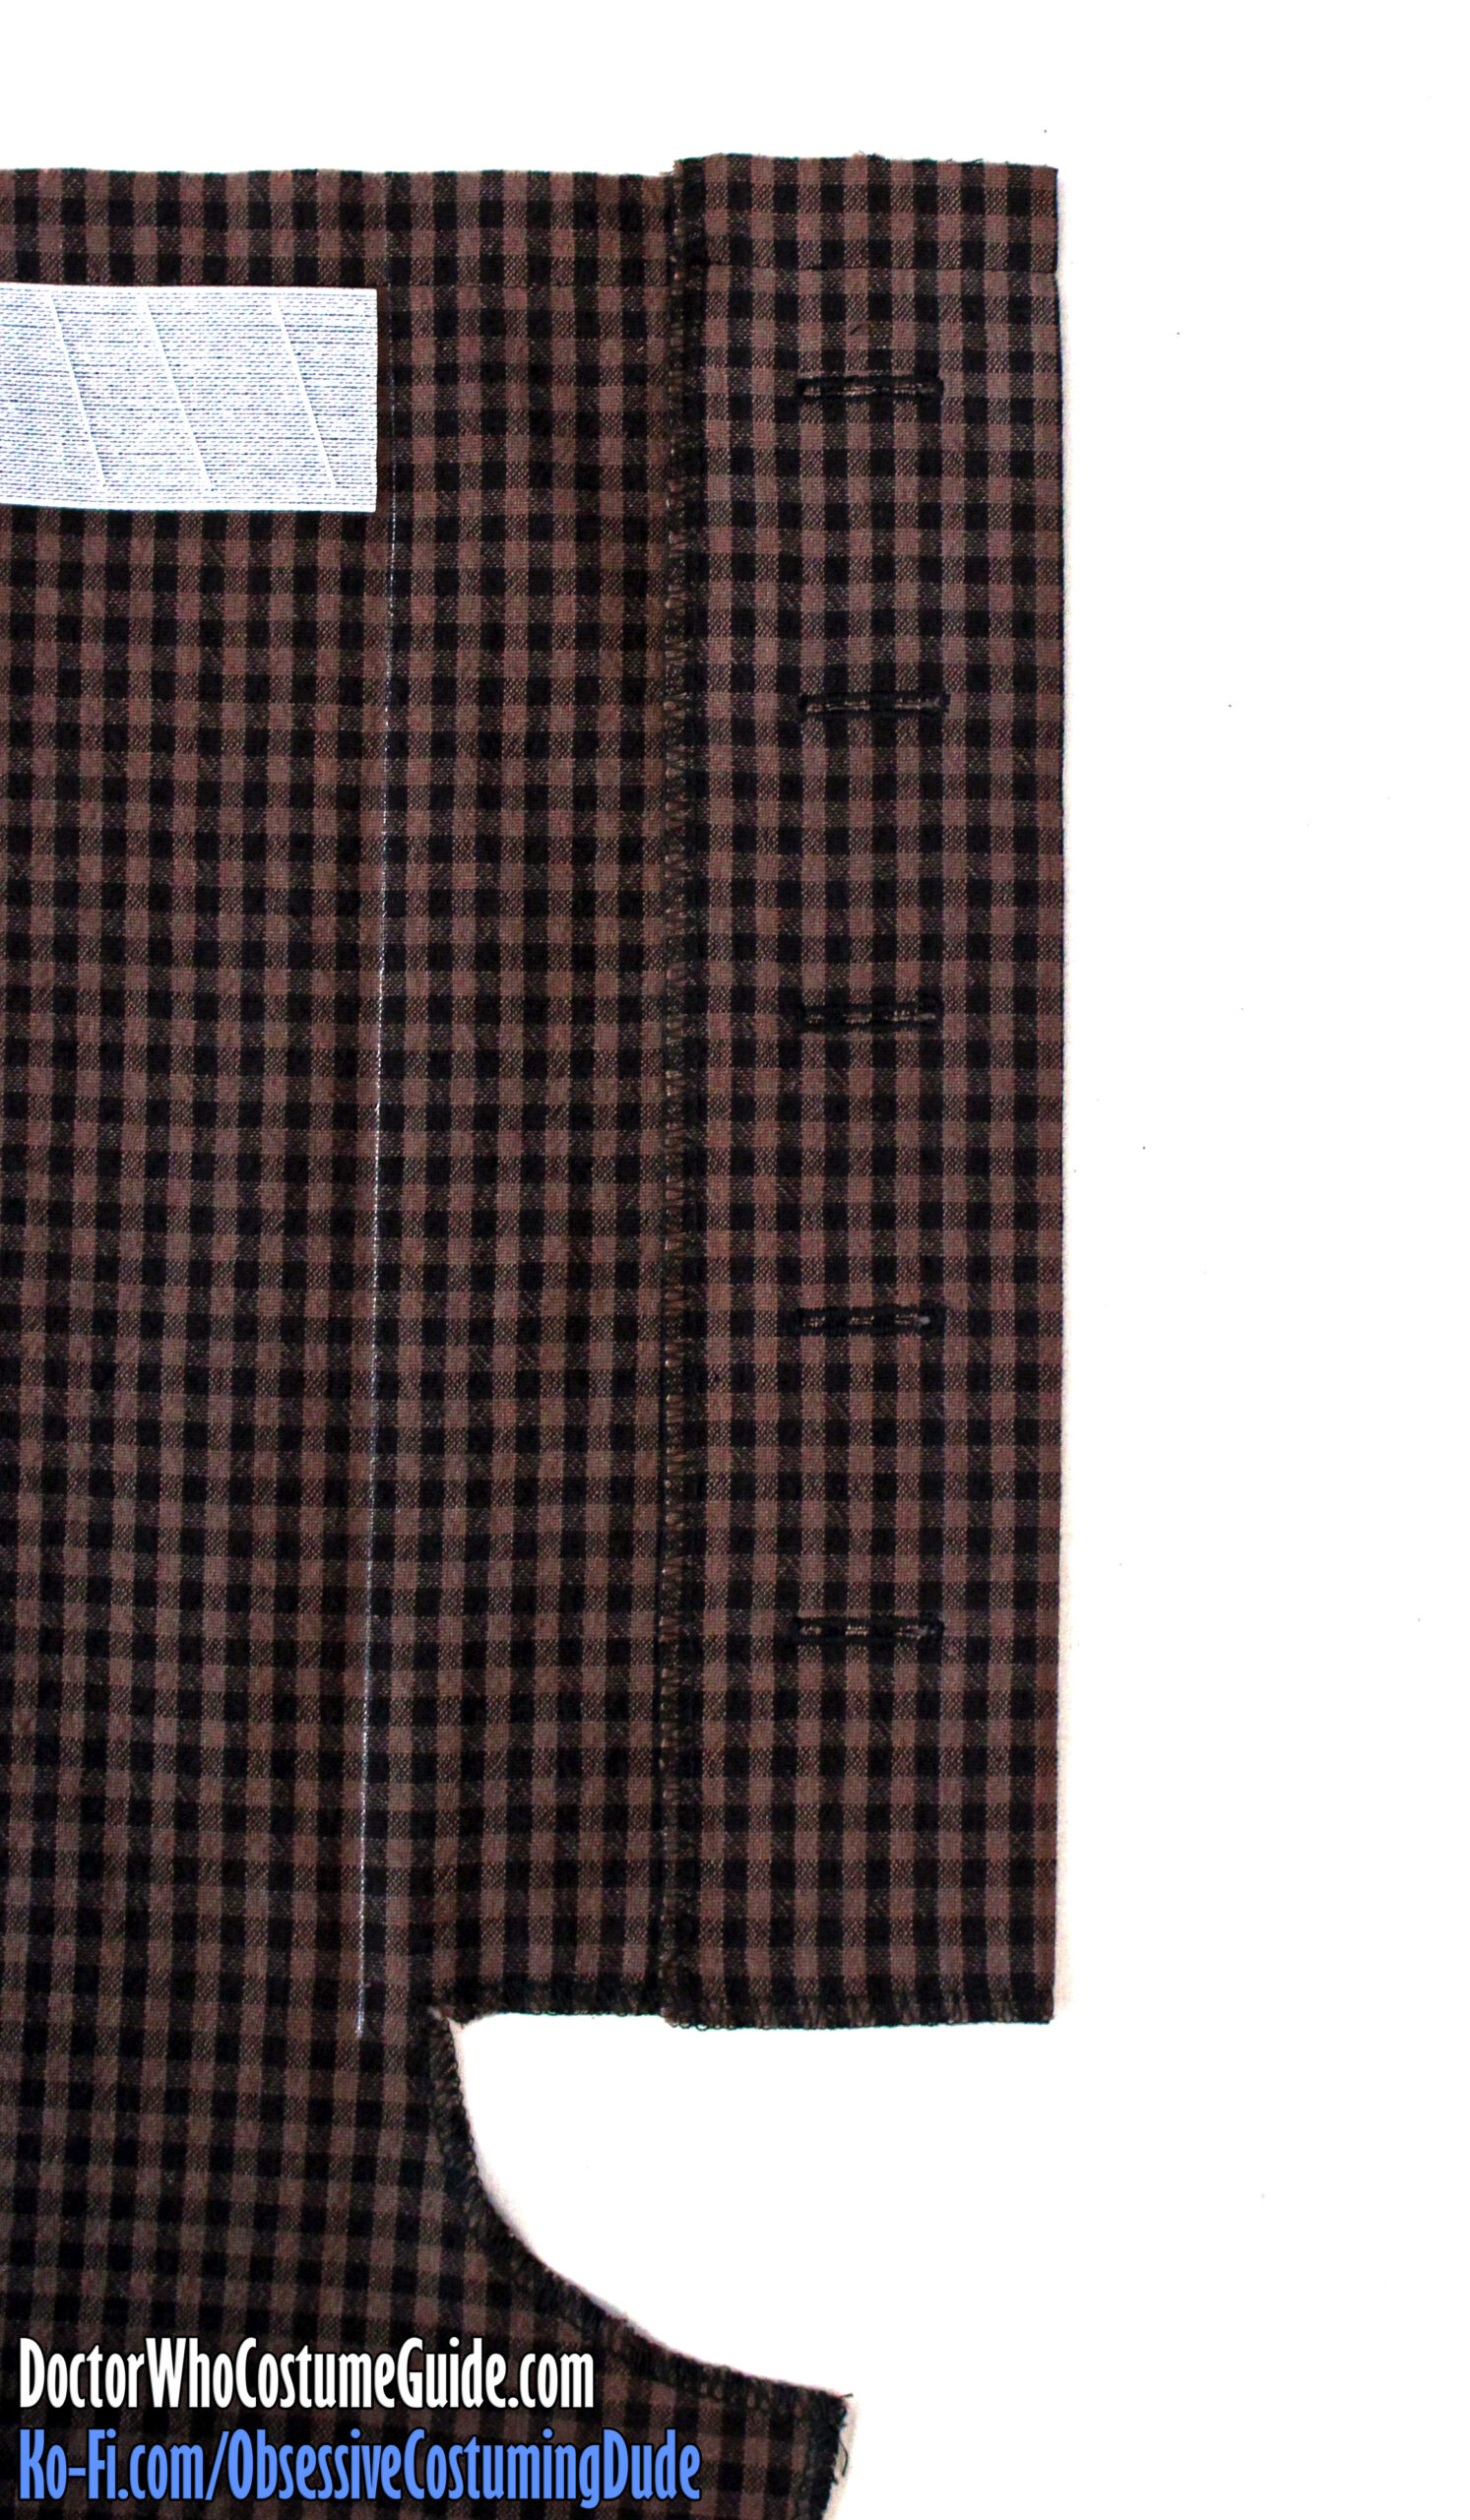
Space and attach the buttons to the right fly assembly.
(There are no guides for these on the printed pattern since their spacing will vary if the pattern is lengthened or shortened, but I suggest spacing them approximately 1 ½” to 2” apart. Note that in these photo references, I lengthened my trousers from the pattern since I am taller than average.)
Position the right fly assembly face-down onto the right side (outside) of the right front pant leg with center edges flush and its upper edge ⅝” beneath the upper edge of the trousers.
Sew the right fly to the to the right pant leg along the center front, right sides together, ending your stitch ⅝” from the lower edge of the fly. Reinforce your stitching at the ends.
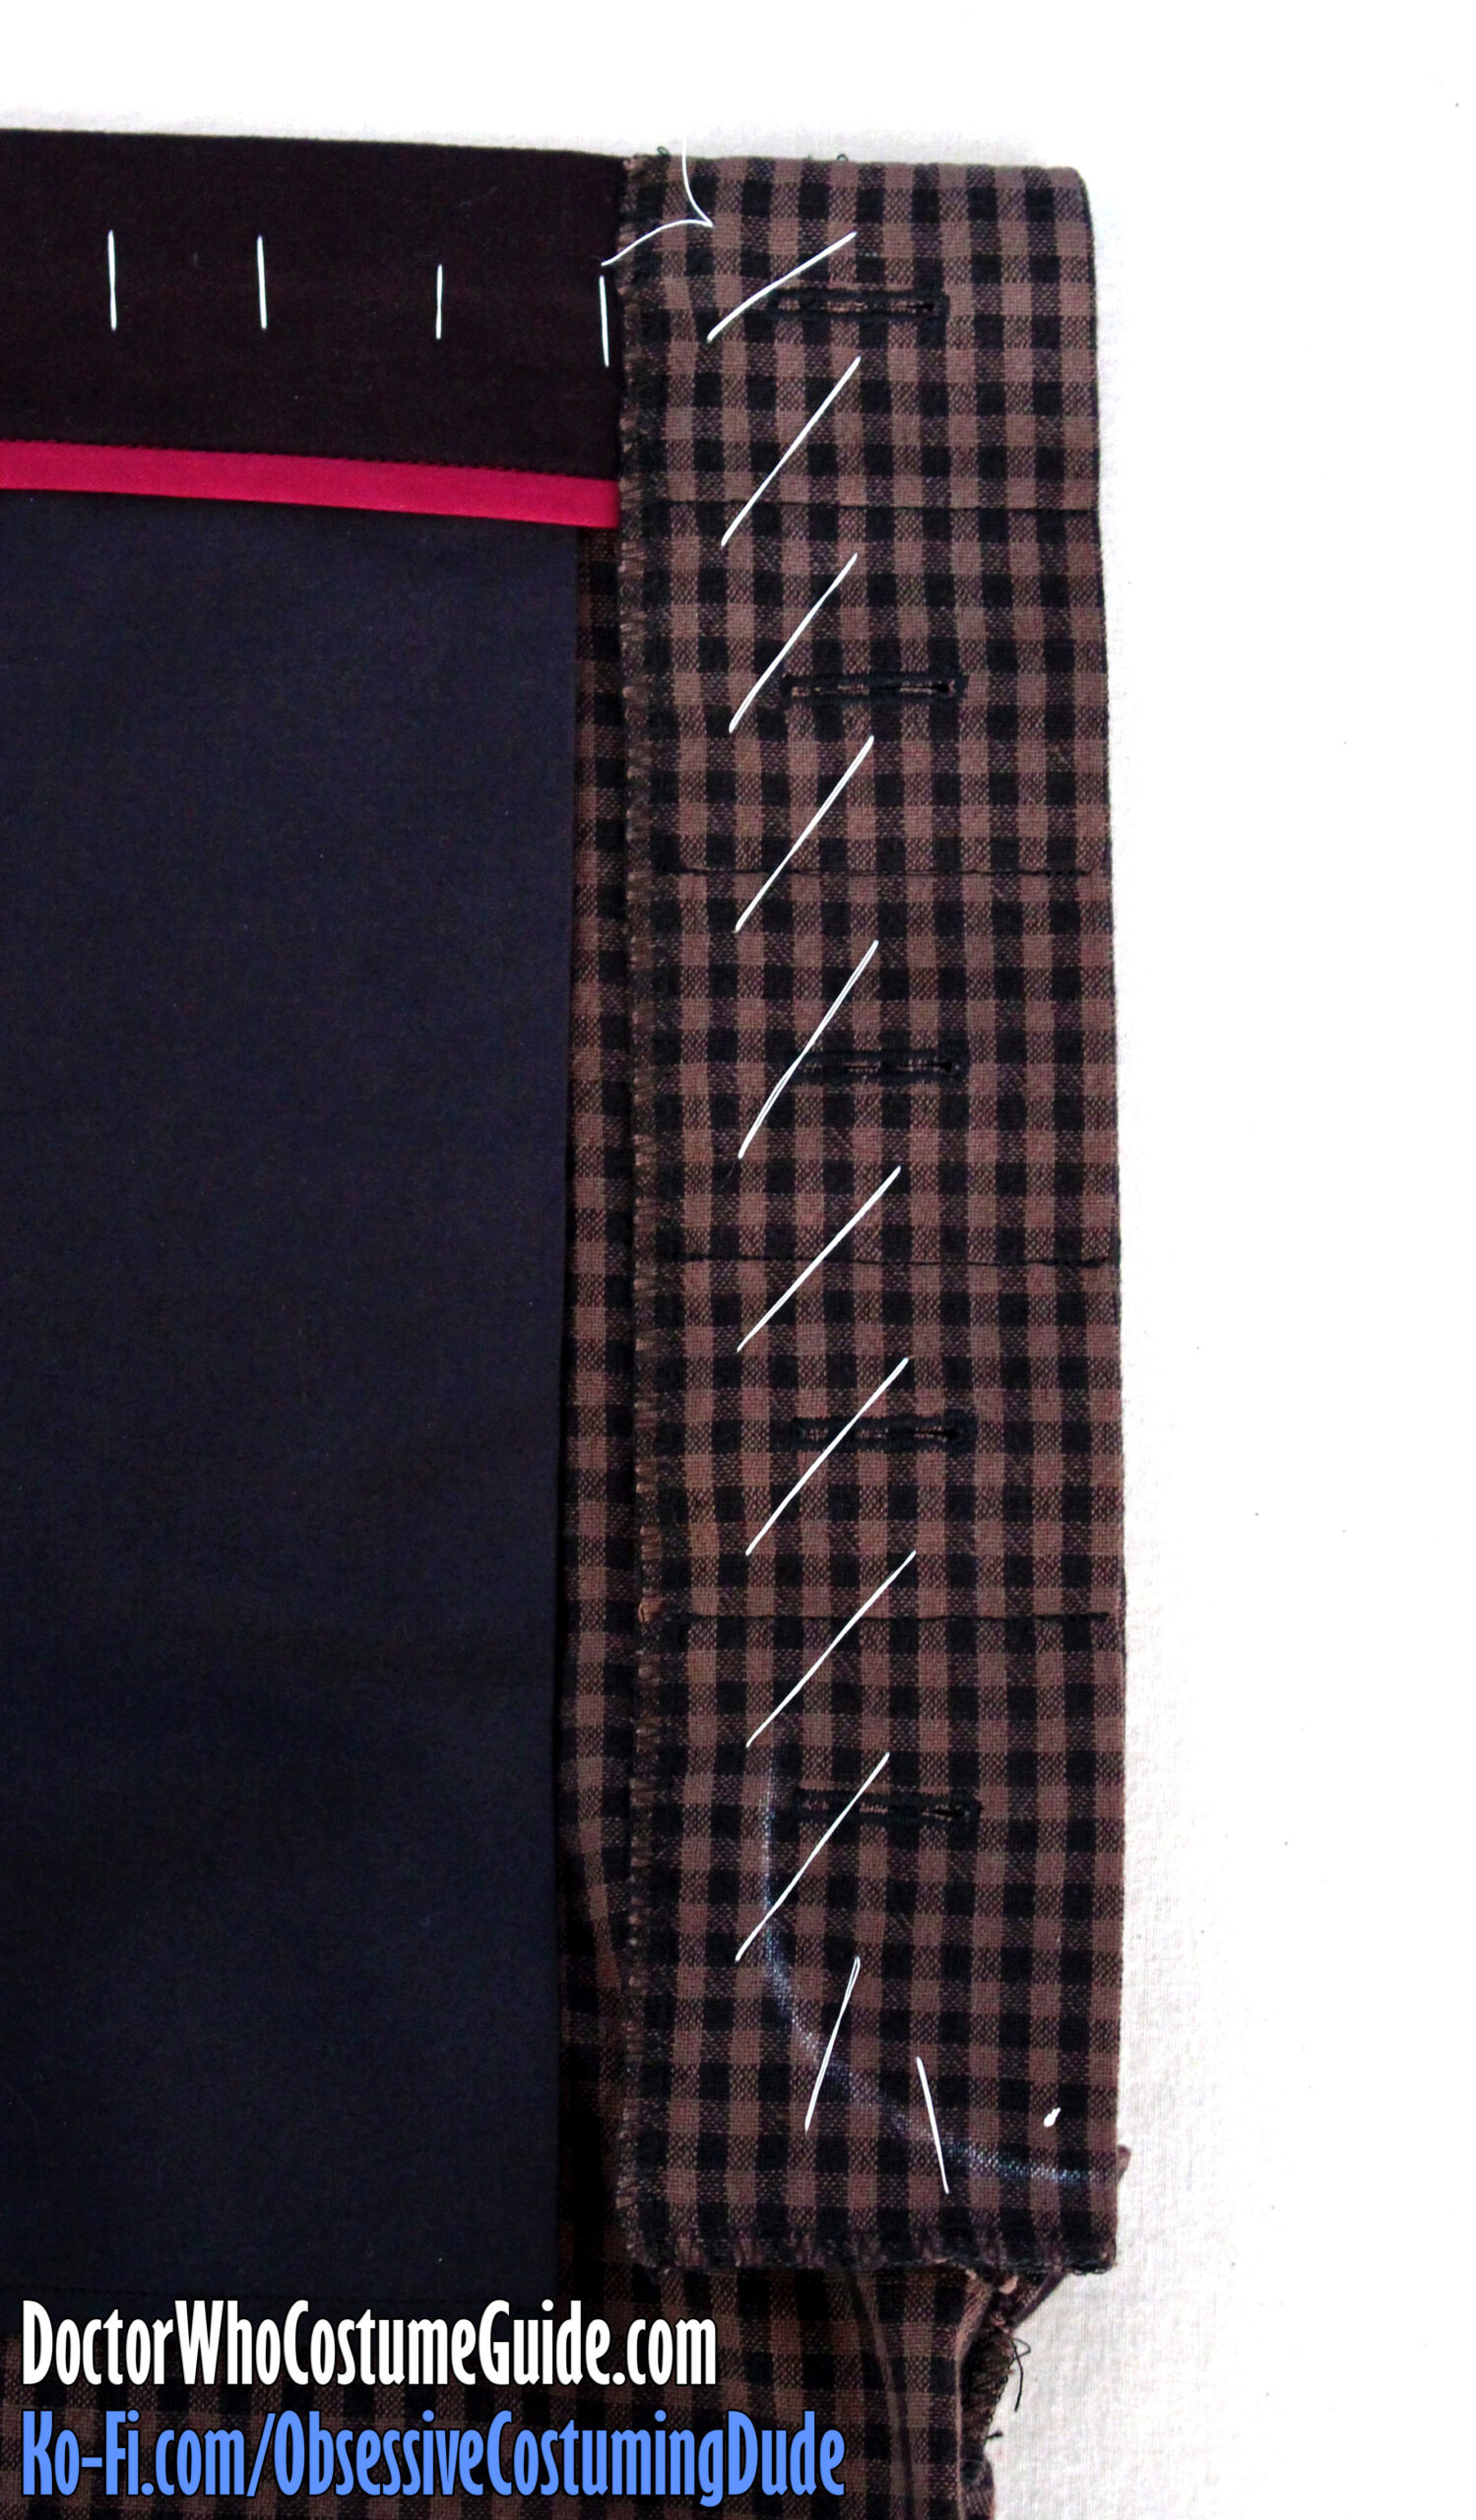
The left (button) fly is, as far as I’m aware, somewhat unusual in its construction; the left pant leg’s front extension is folded “accordion-style” and stitched to form the left fly.
First, fold the outermost 2 ⅝” of the left fly extension under and press.
(The chalk line is the center front.)
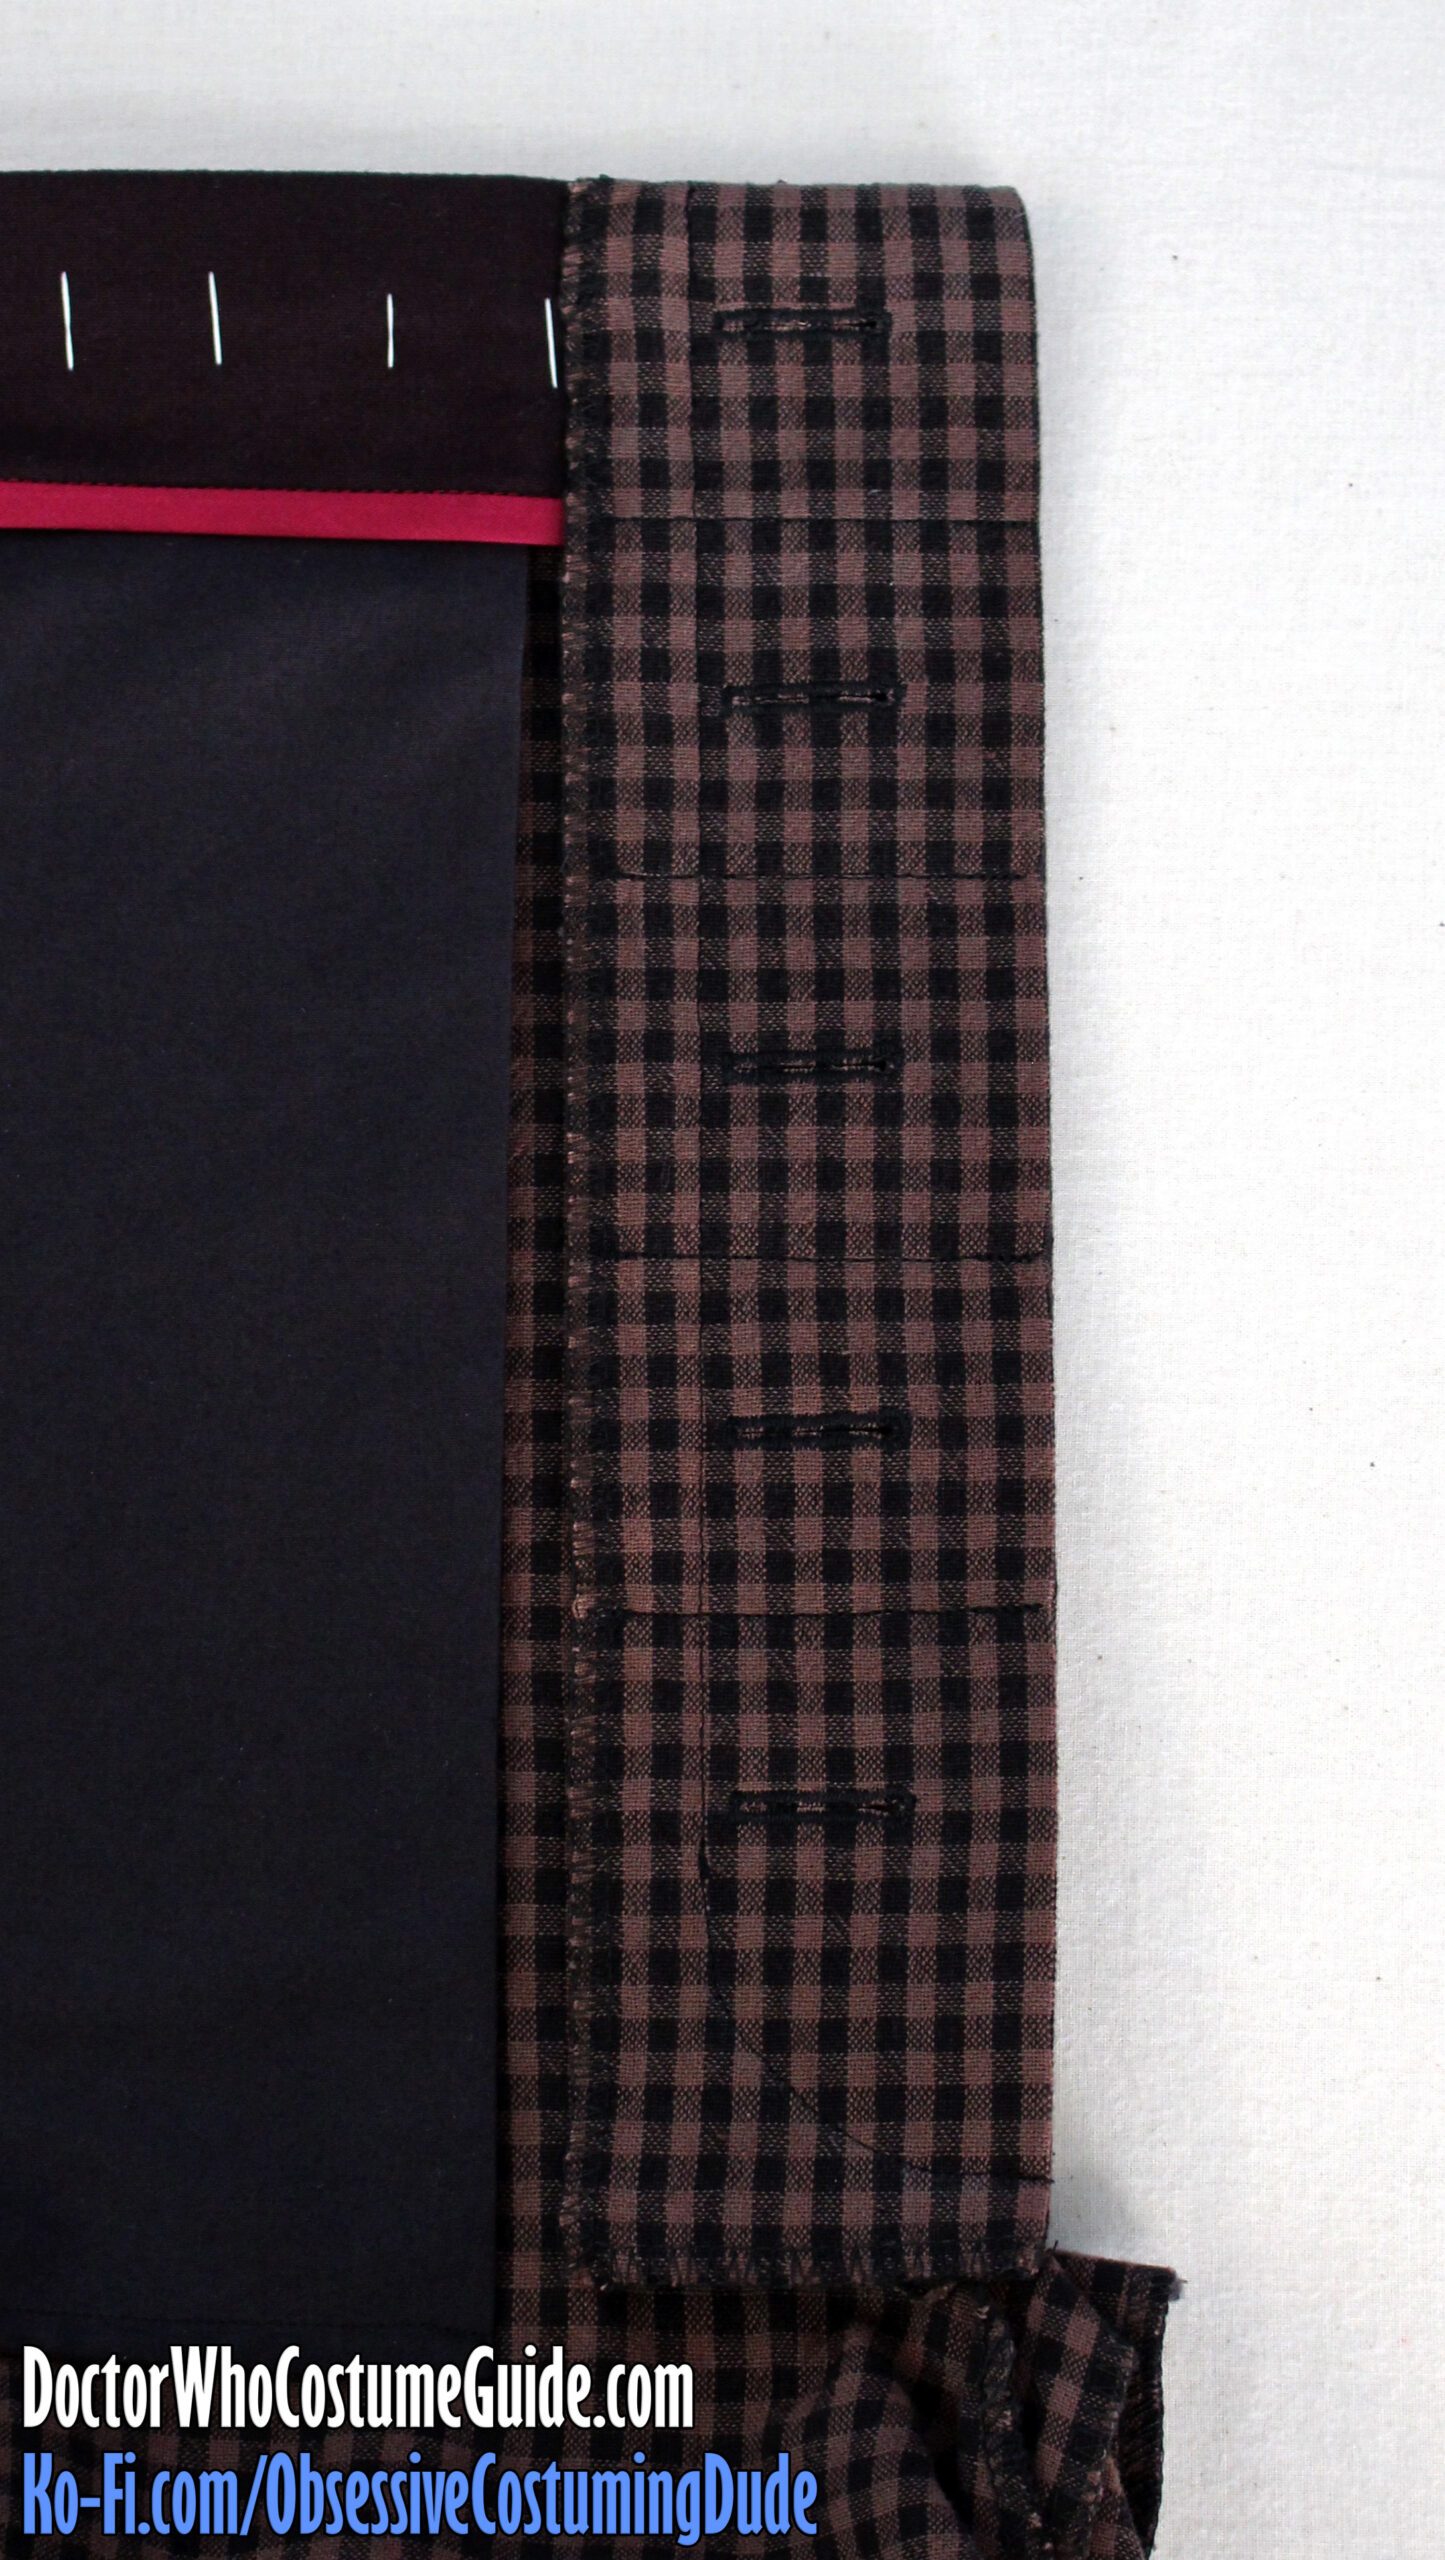
Make and slash the buttonholes on the two outermost layers of the left button fly.
The outer edges of the buttonholes should be about ¾” from the outer, serged edge of the fly.
I suggest applying some liquid fray preventer to the buttonholes.
Fold the two “buttonhole” layers of the left fly over to the right side (outside) so the folded edge is flush with the center front of the pant leg.
Topstitch horizontally through all layers halfway between each pair of buttonholes, using a short stitch length and reinforcing at the ends.
I also suggest chalk-marking a gentle curve toward the bottom of the fly to serve as a guide for the left fly topstitching.
Turn the left fly assembly under along the center front and press.
Sew both pant leg inseams closed.
Press the seam allowances open.
Turn one pant leg inside-out and insert it into the other.
Fold the lower edges of the fly assemblies upward so they’re out of the way.
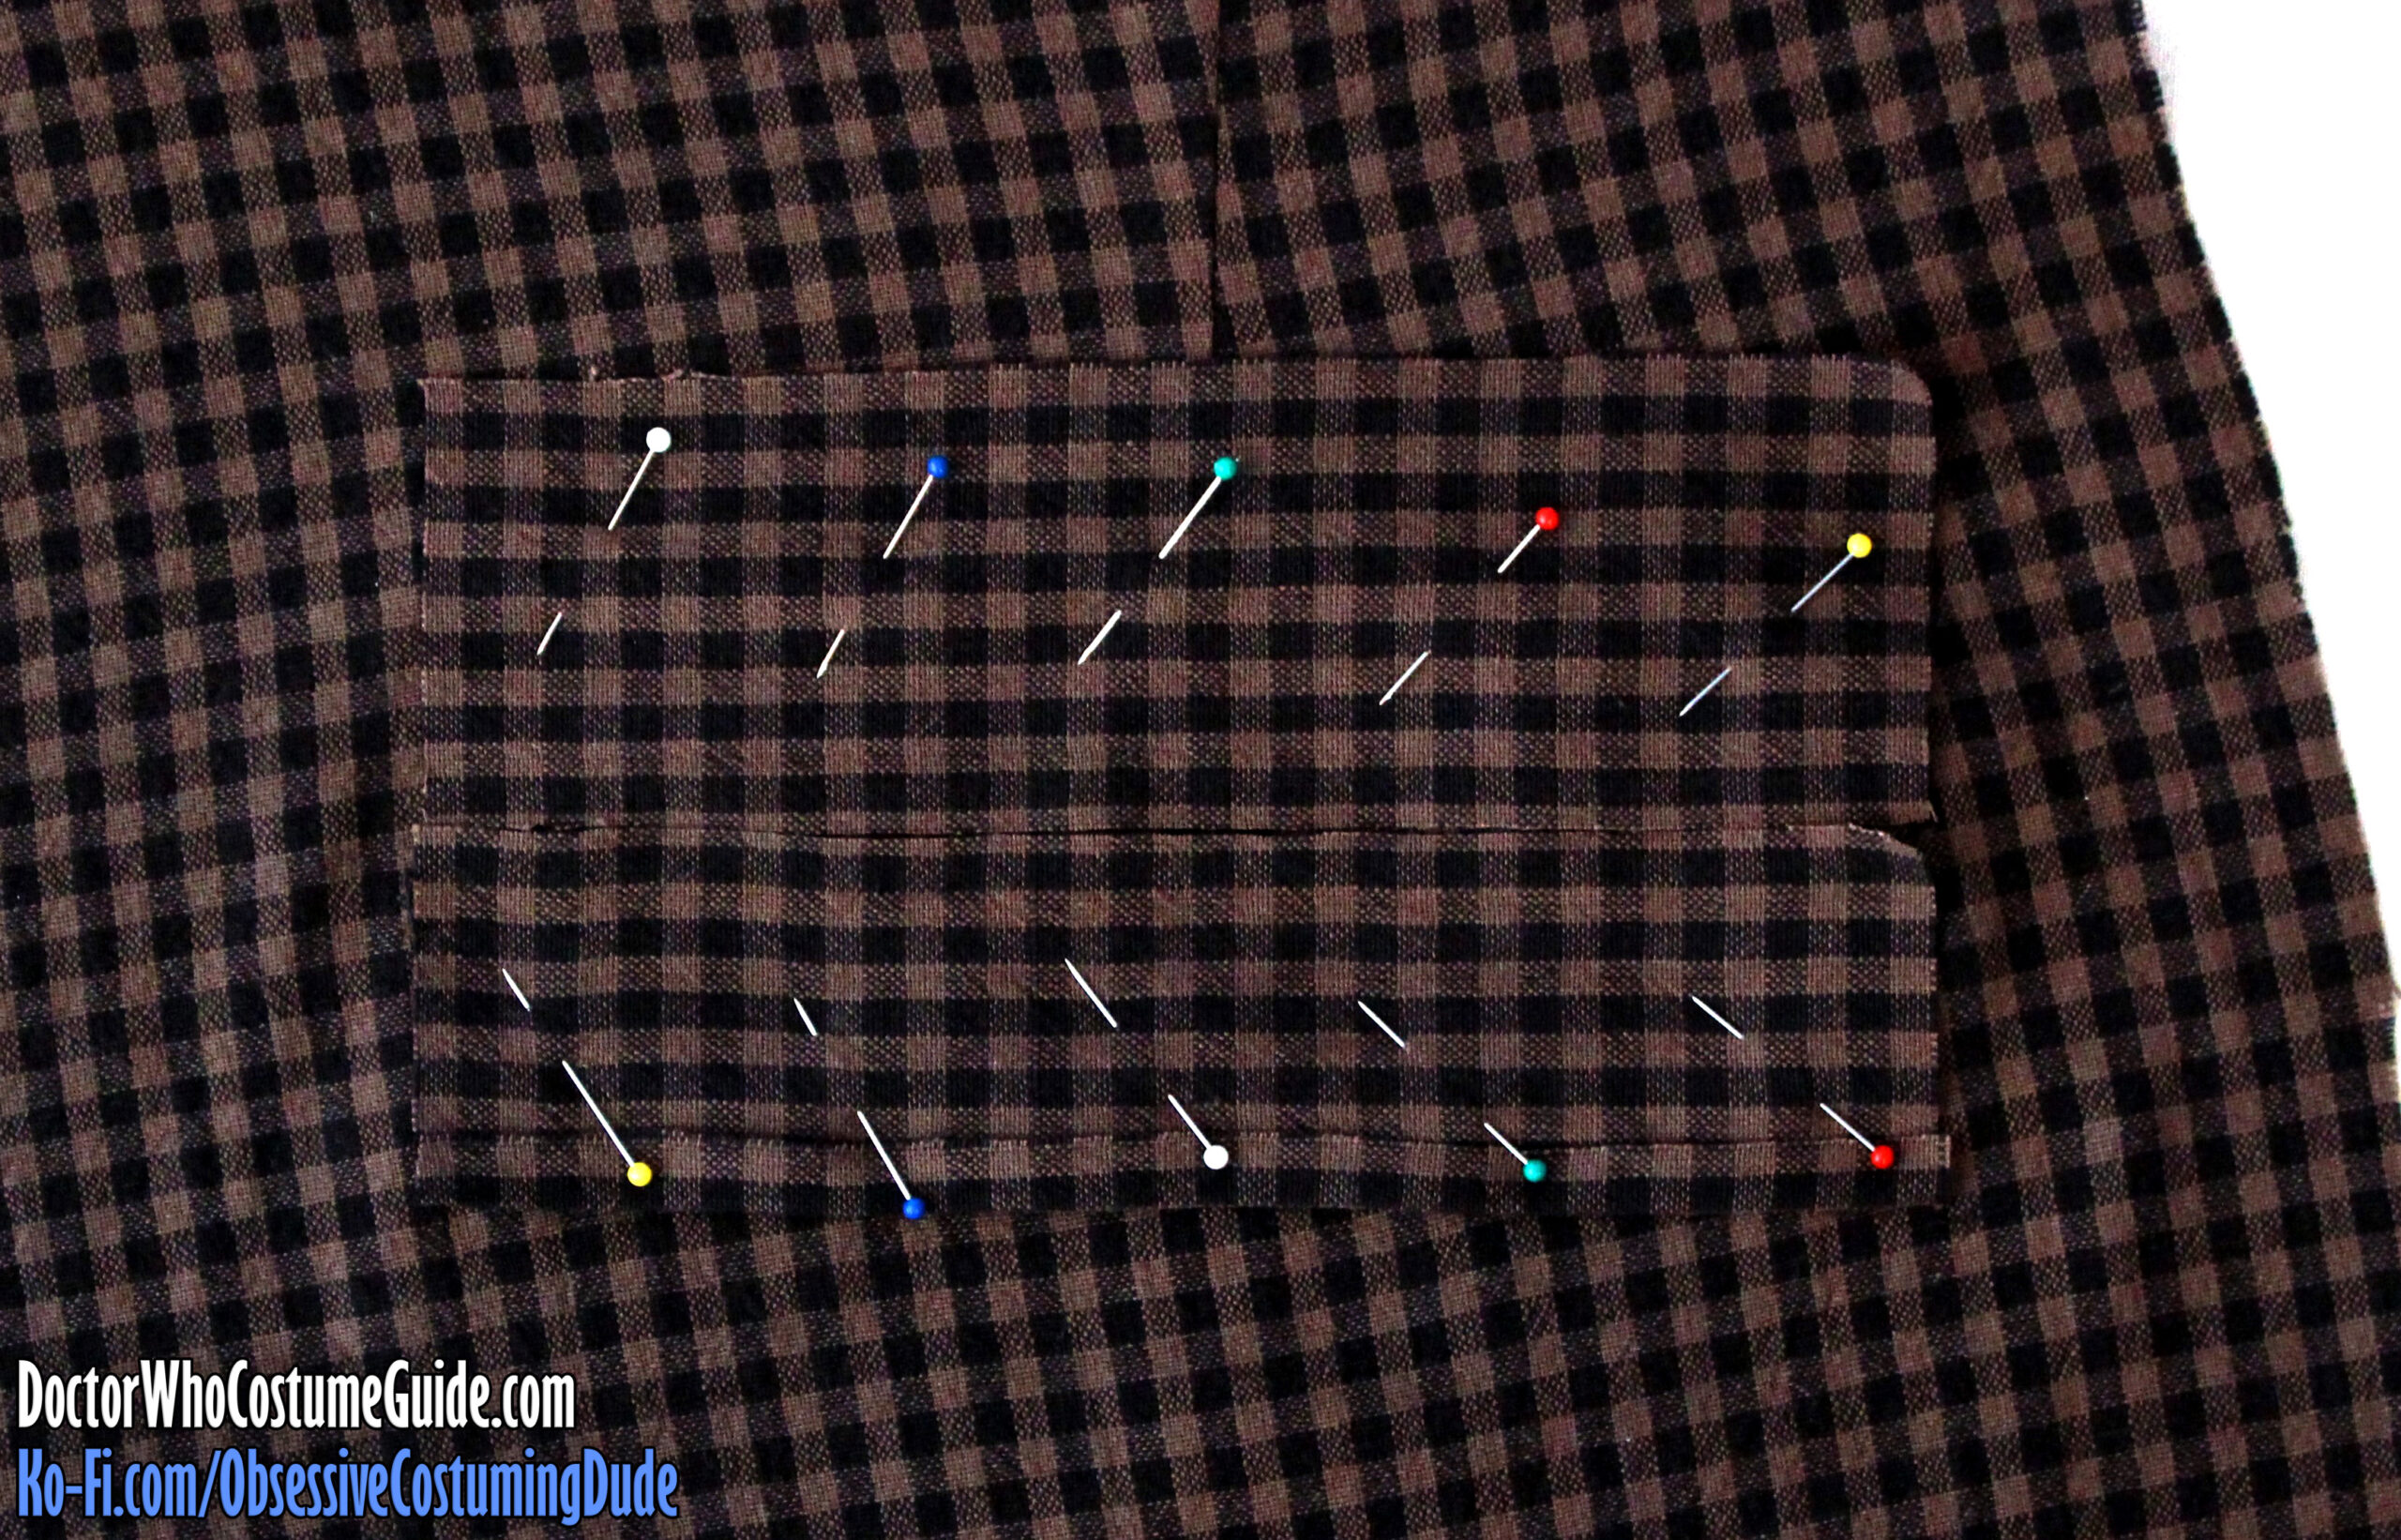
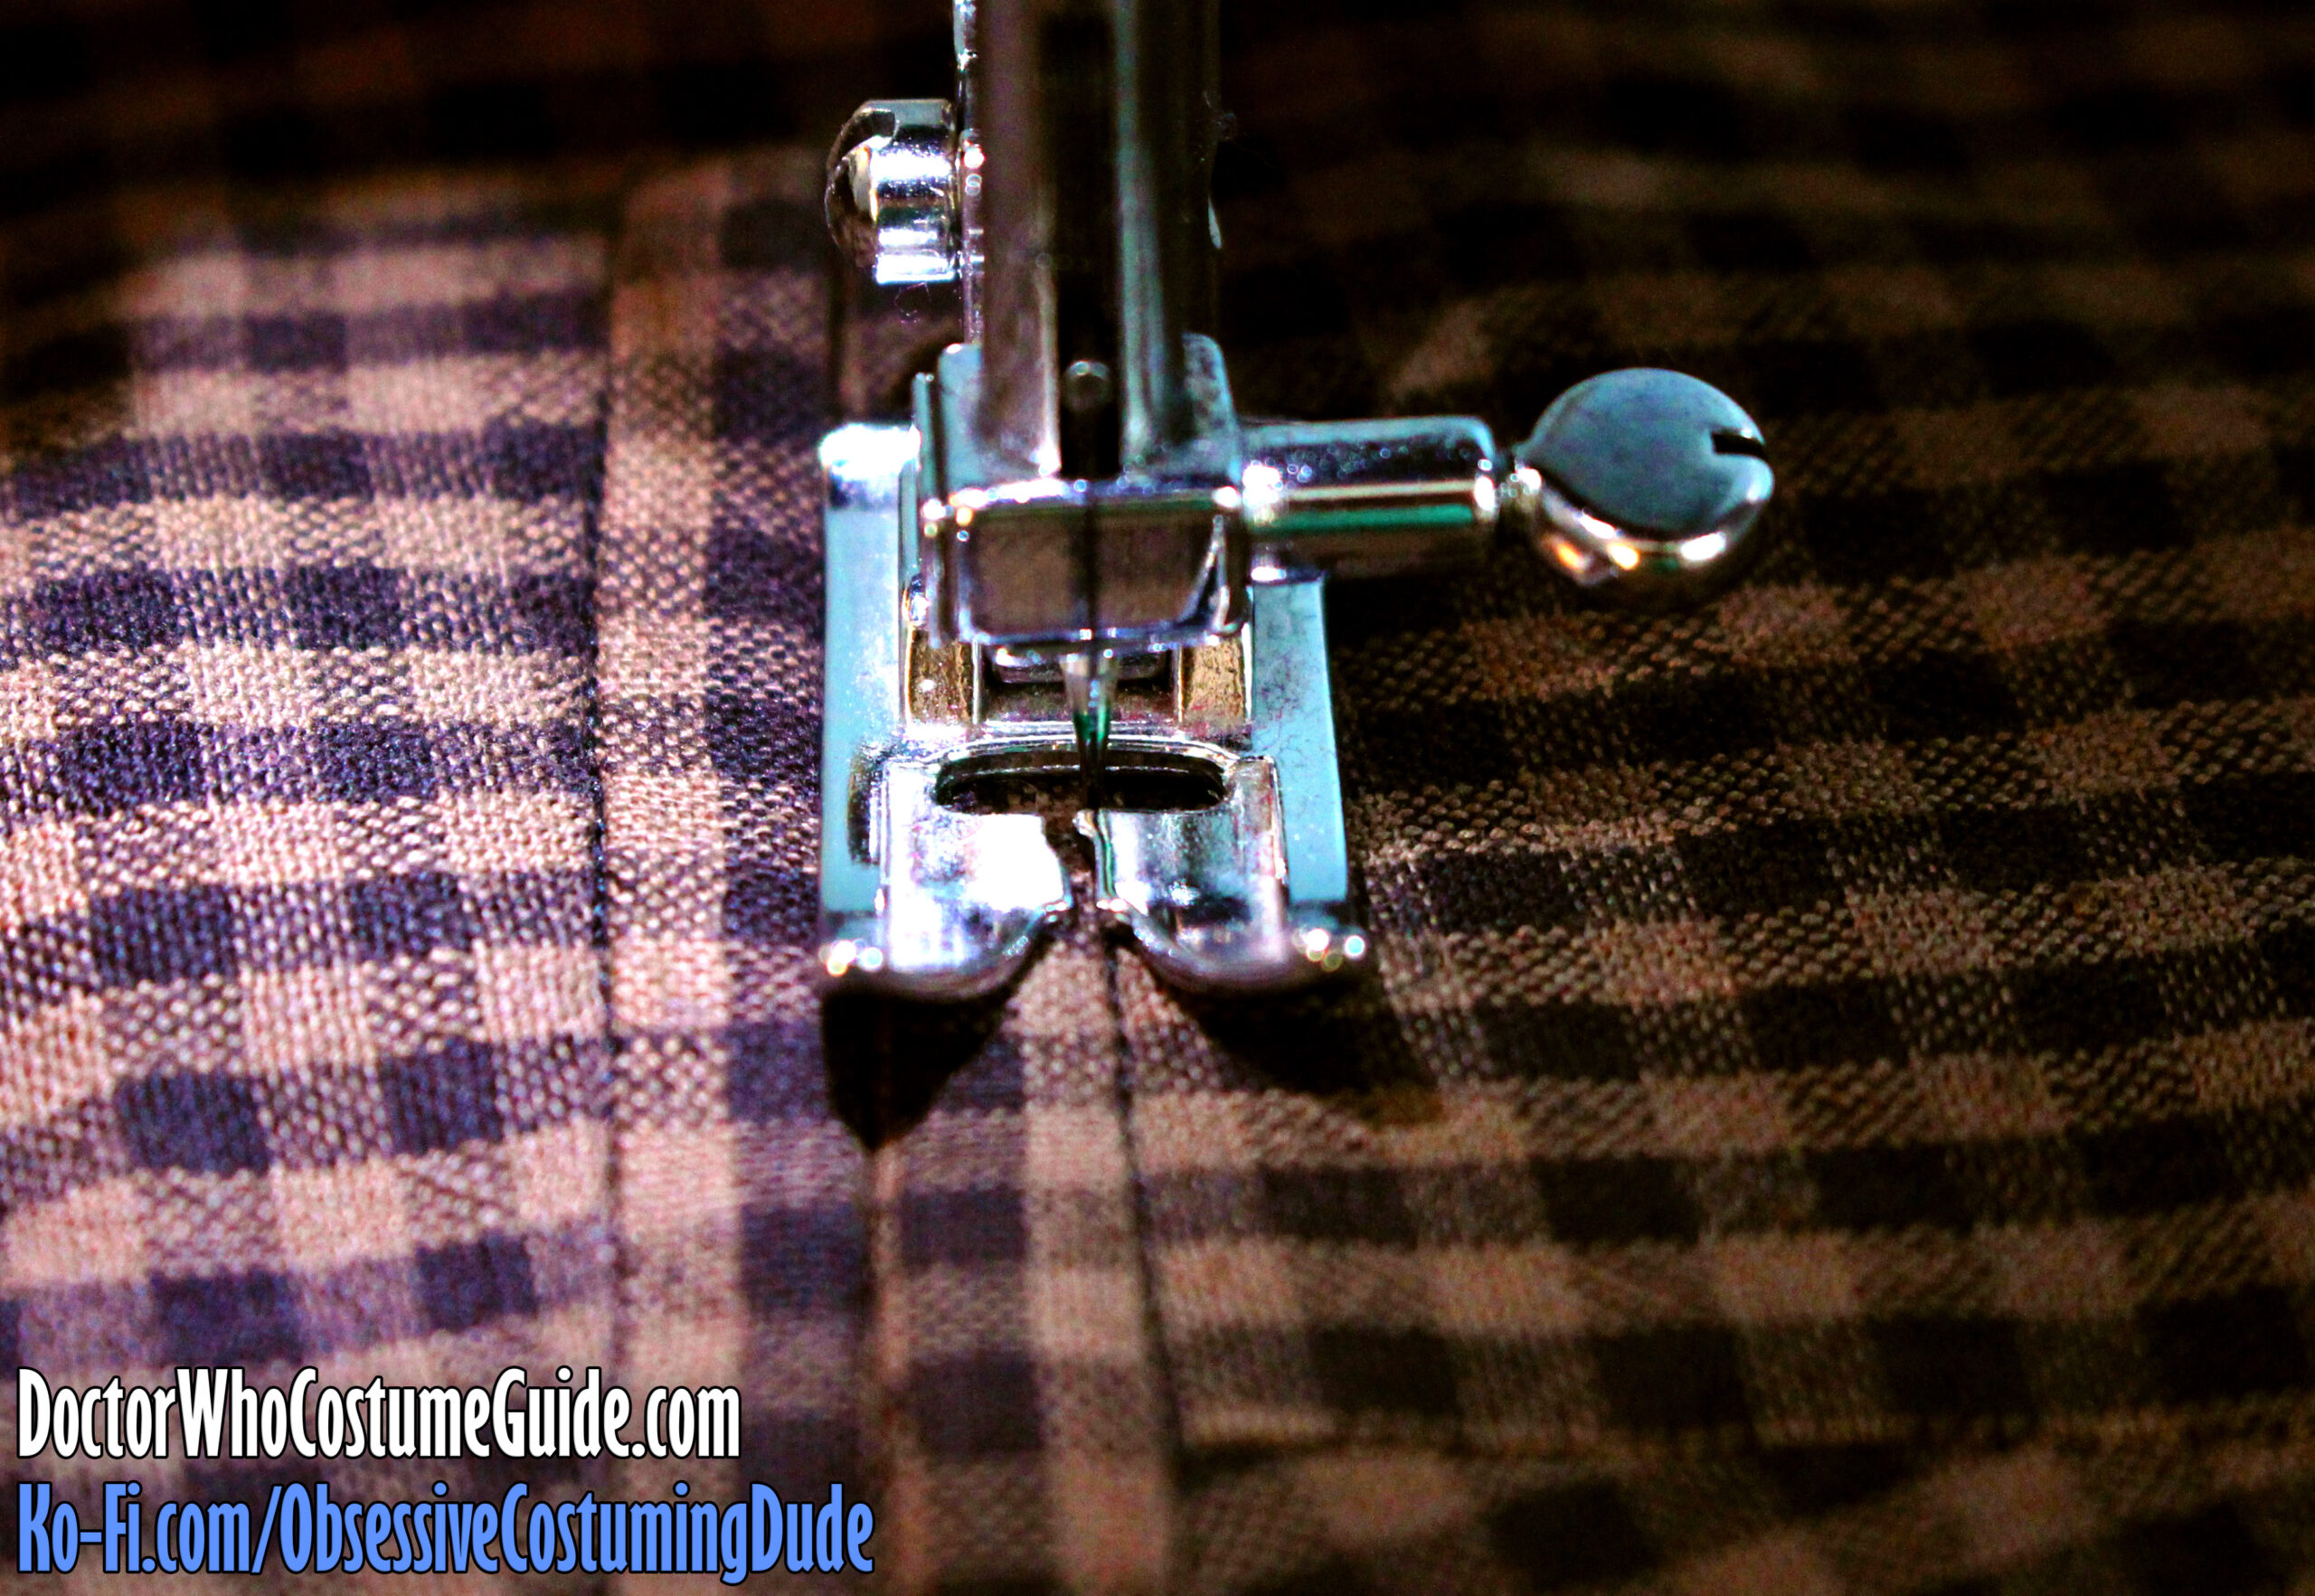
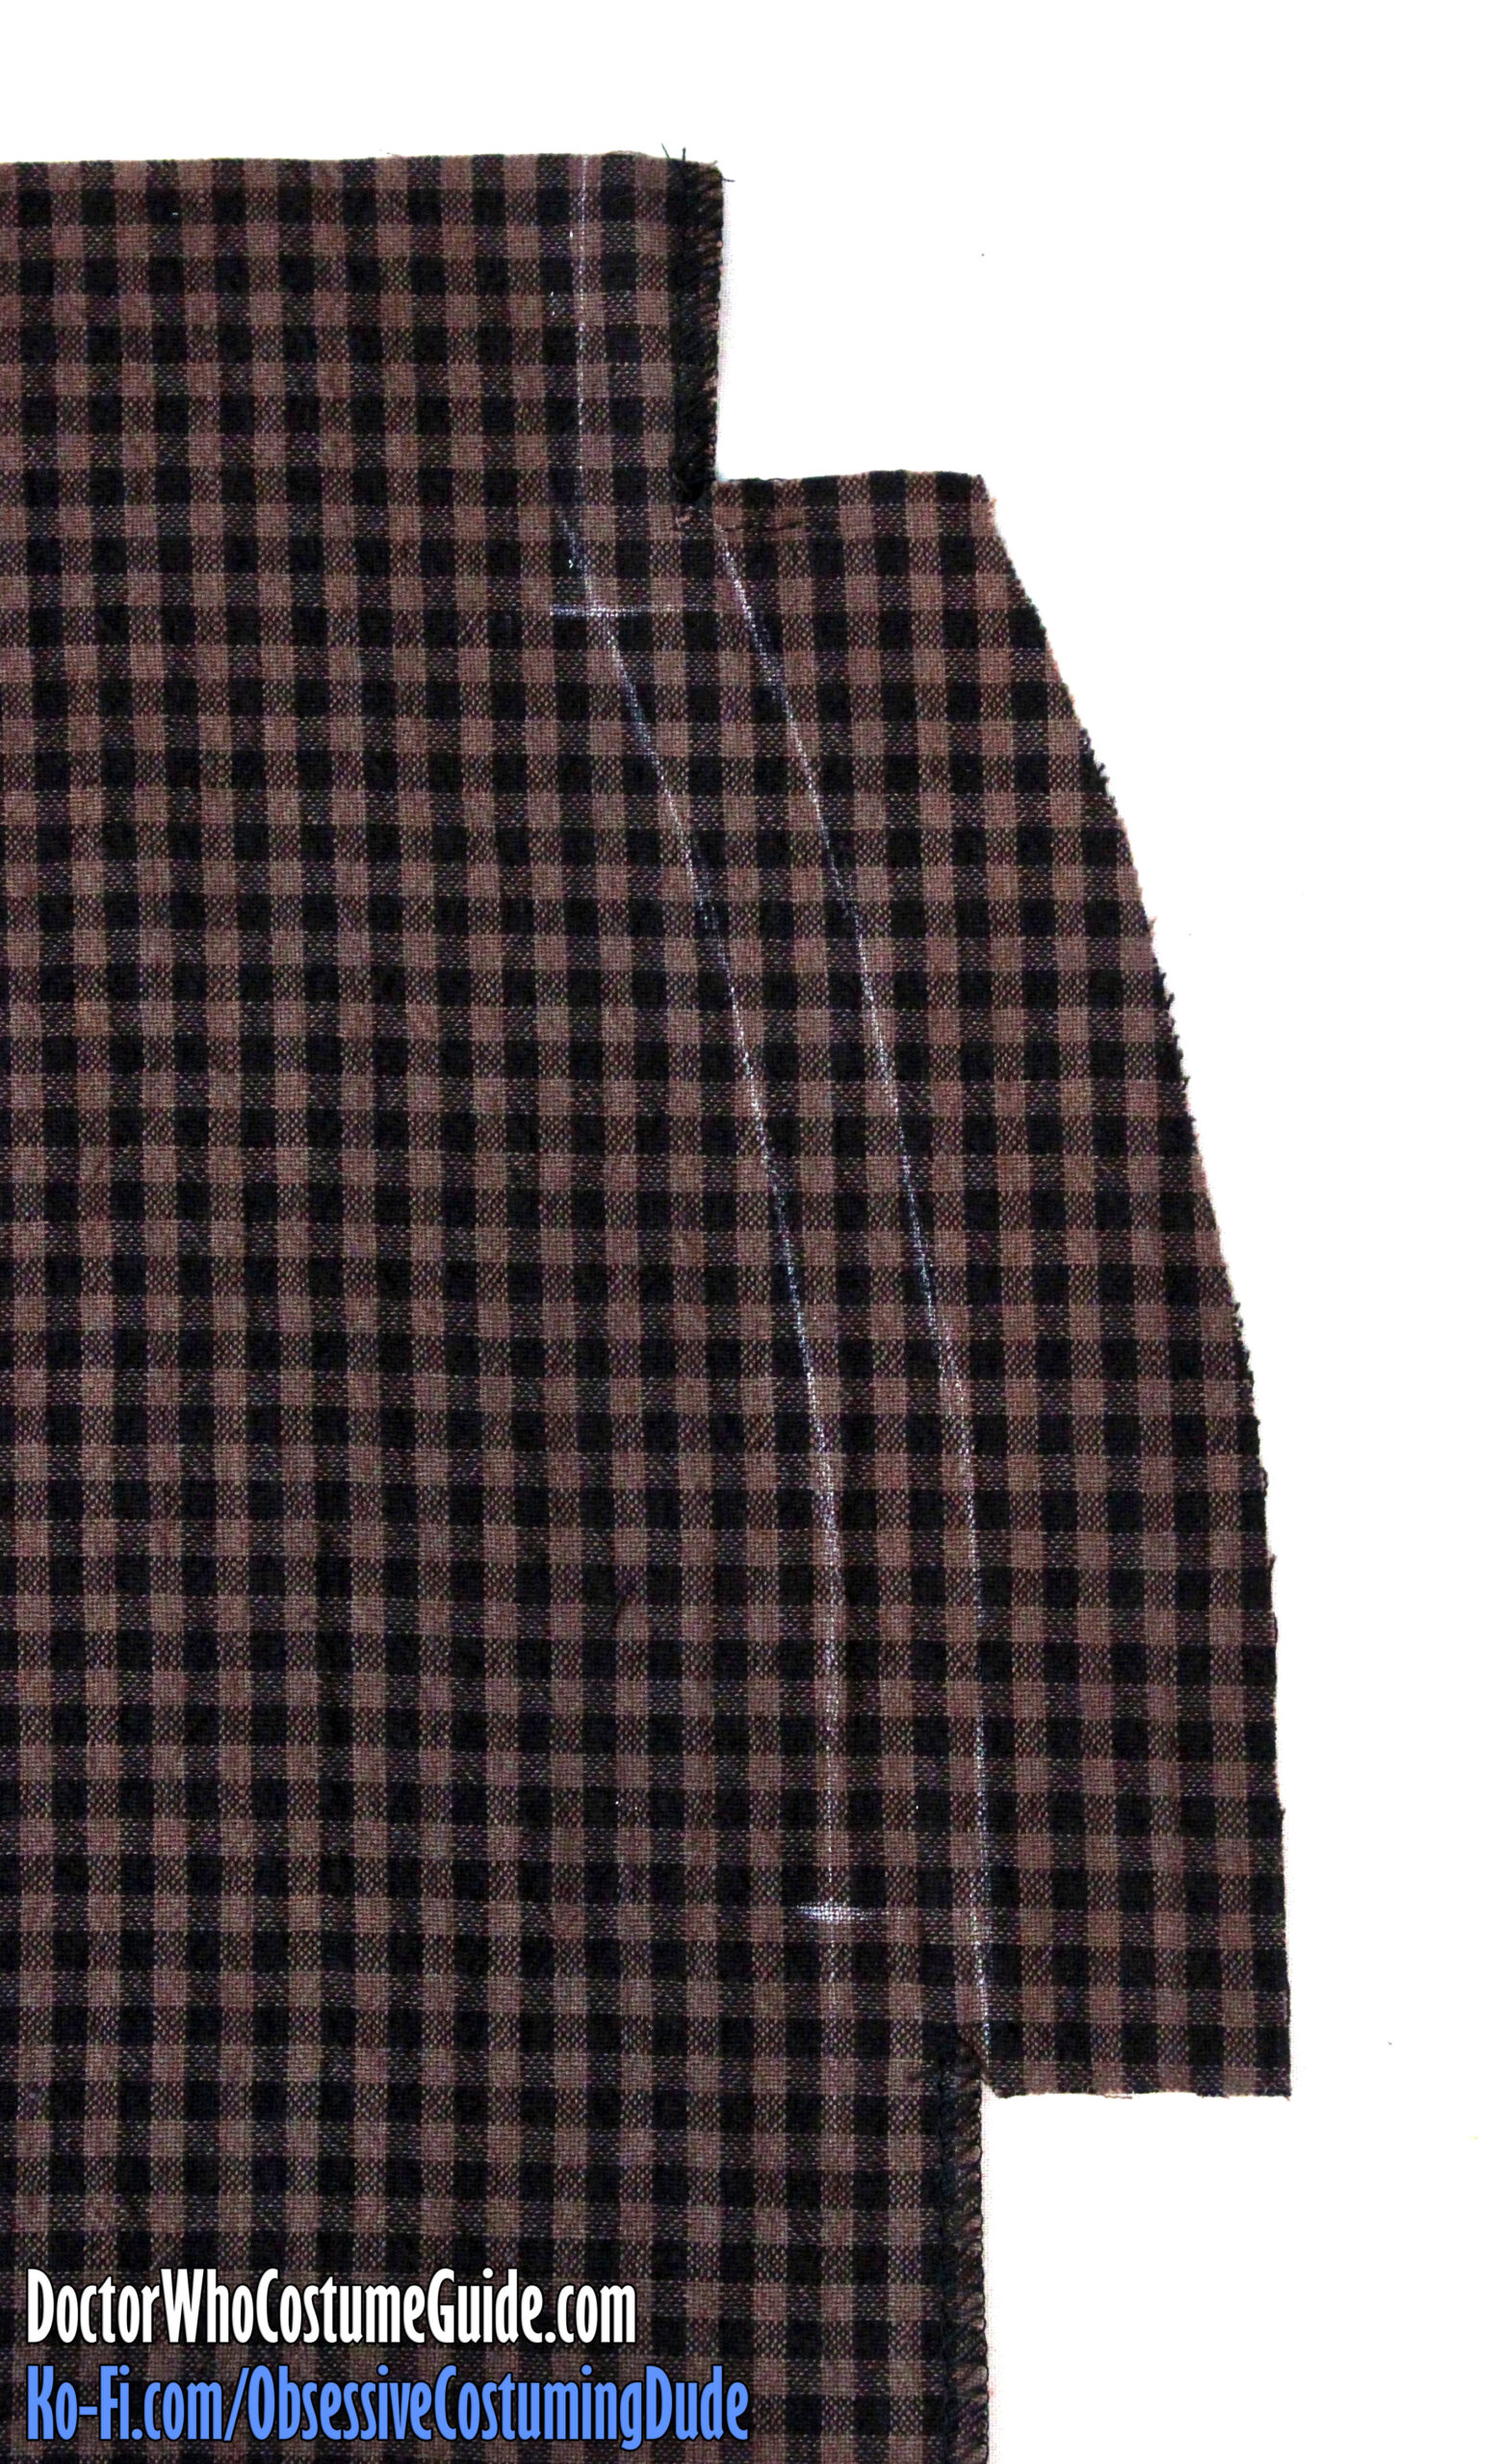
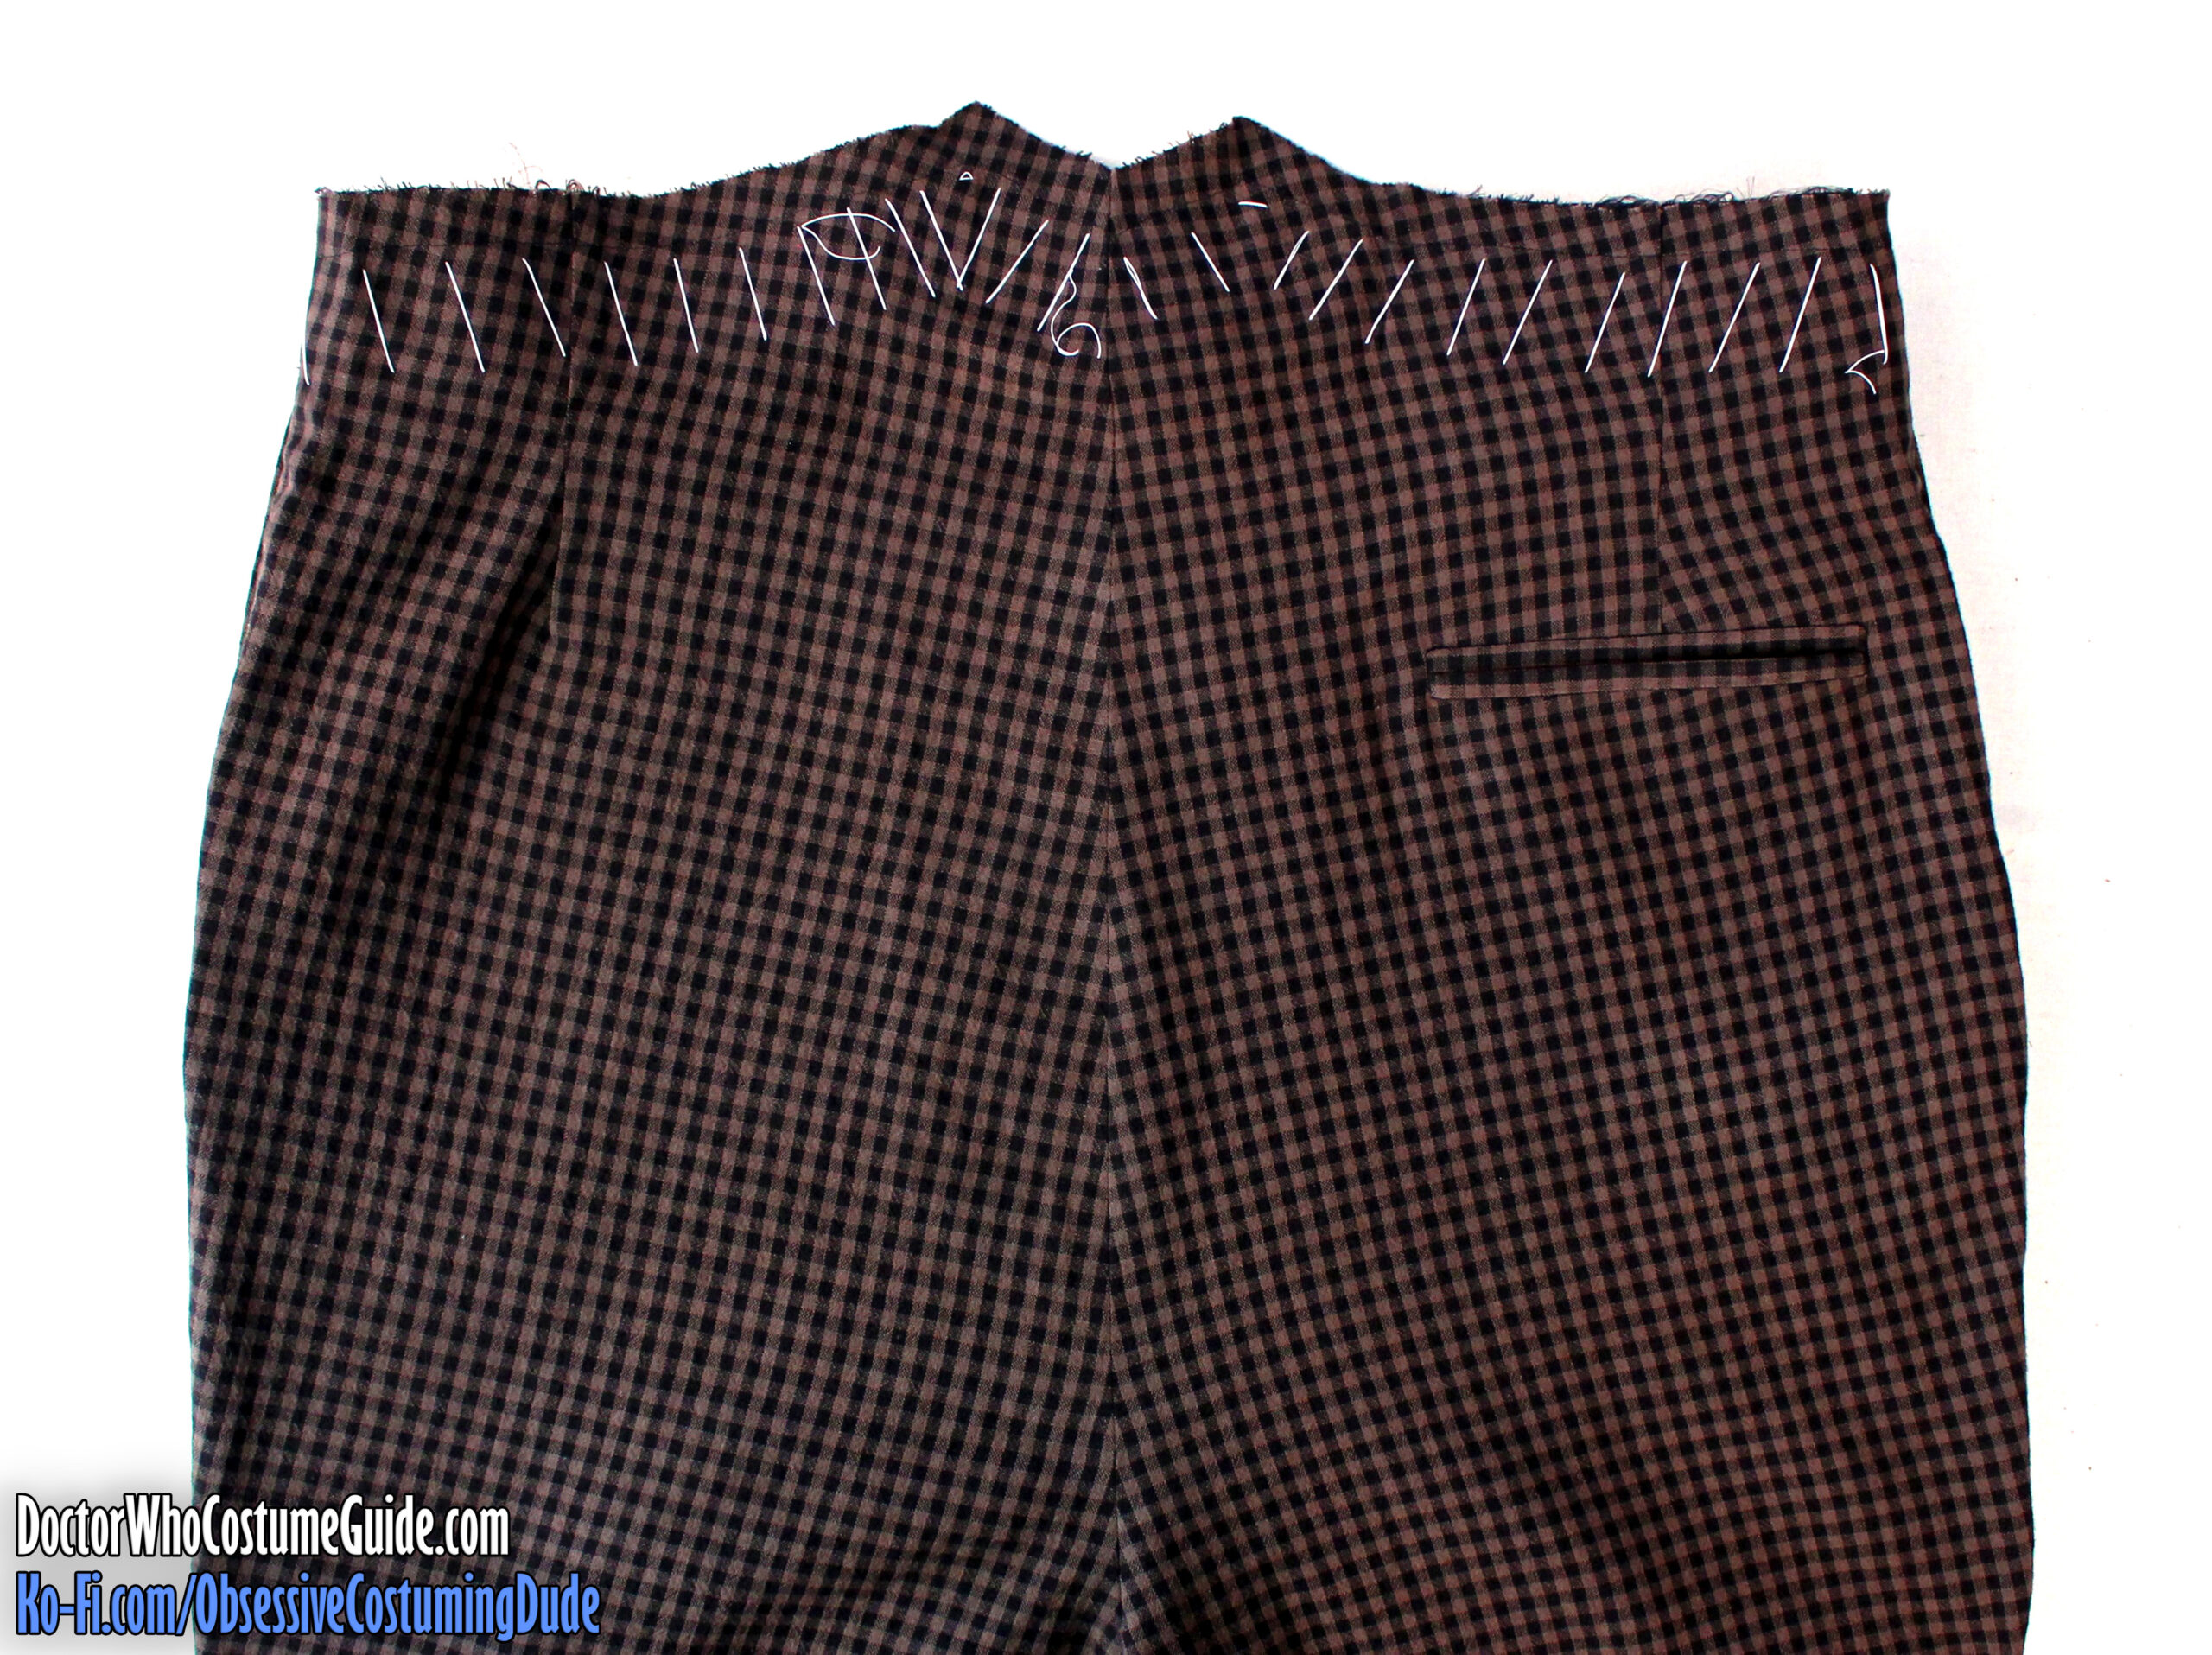
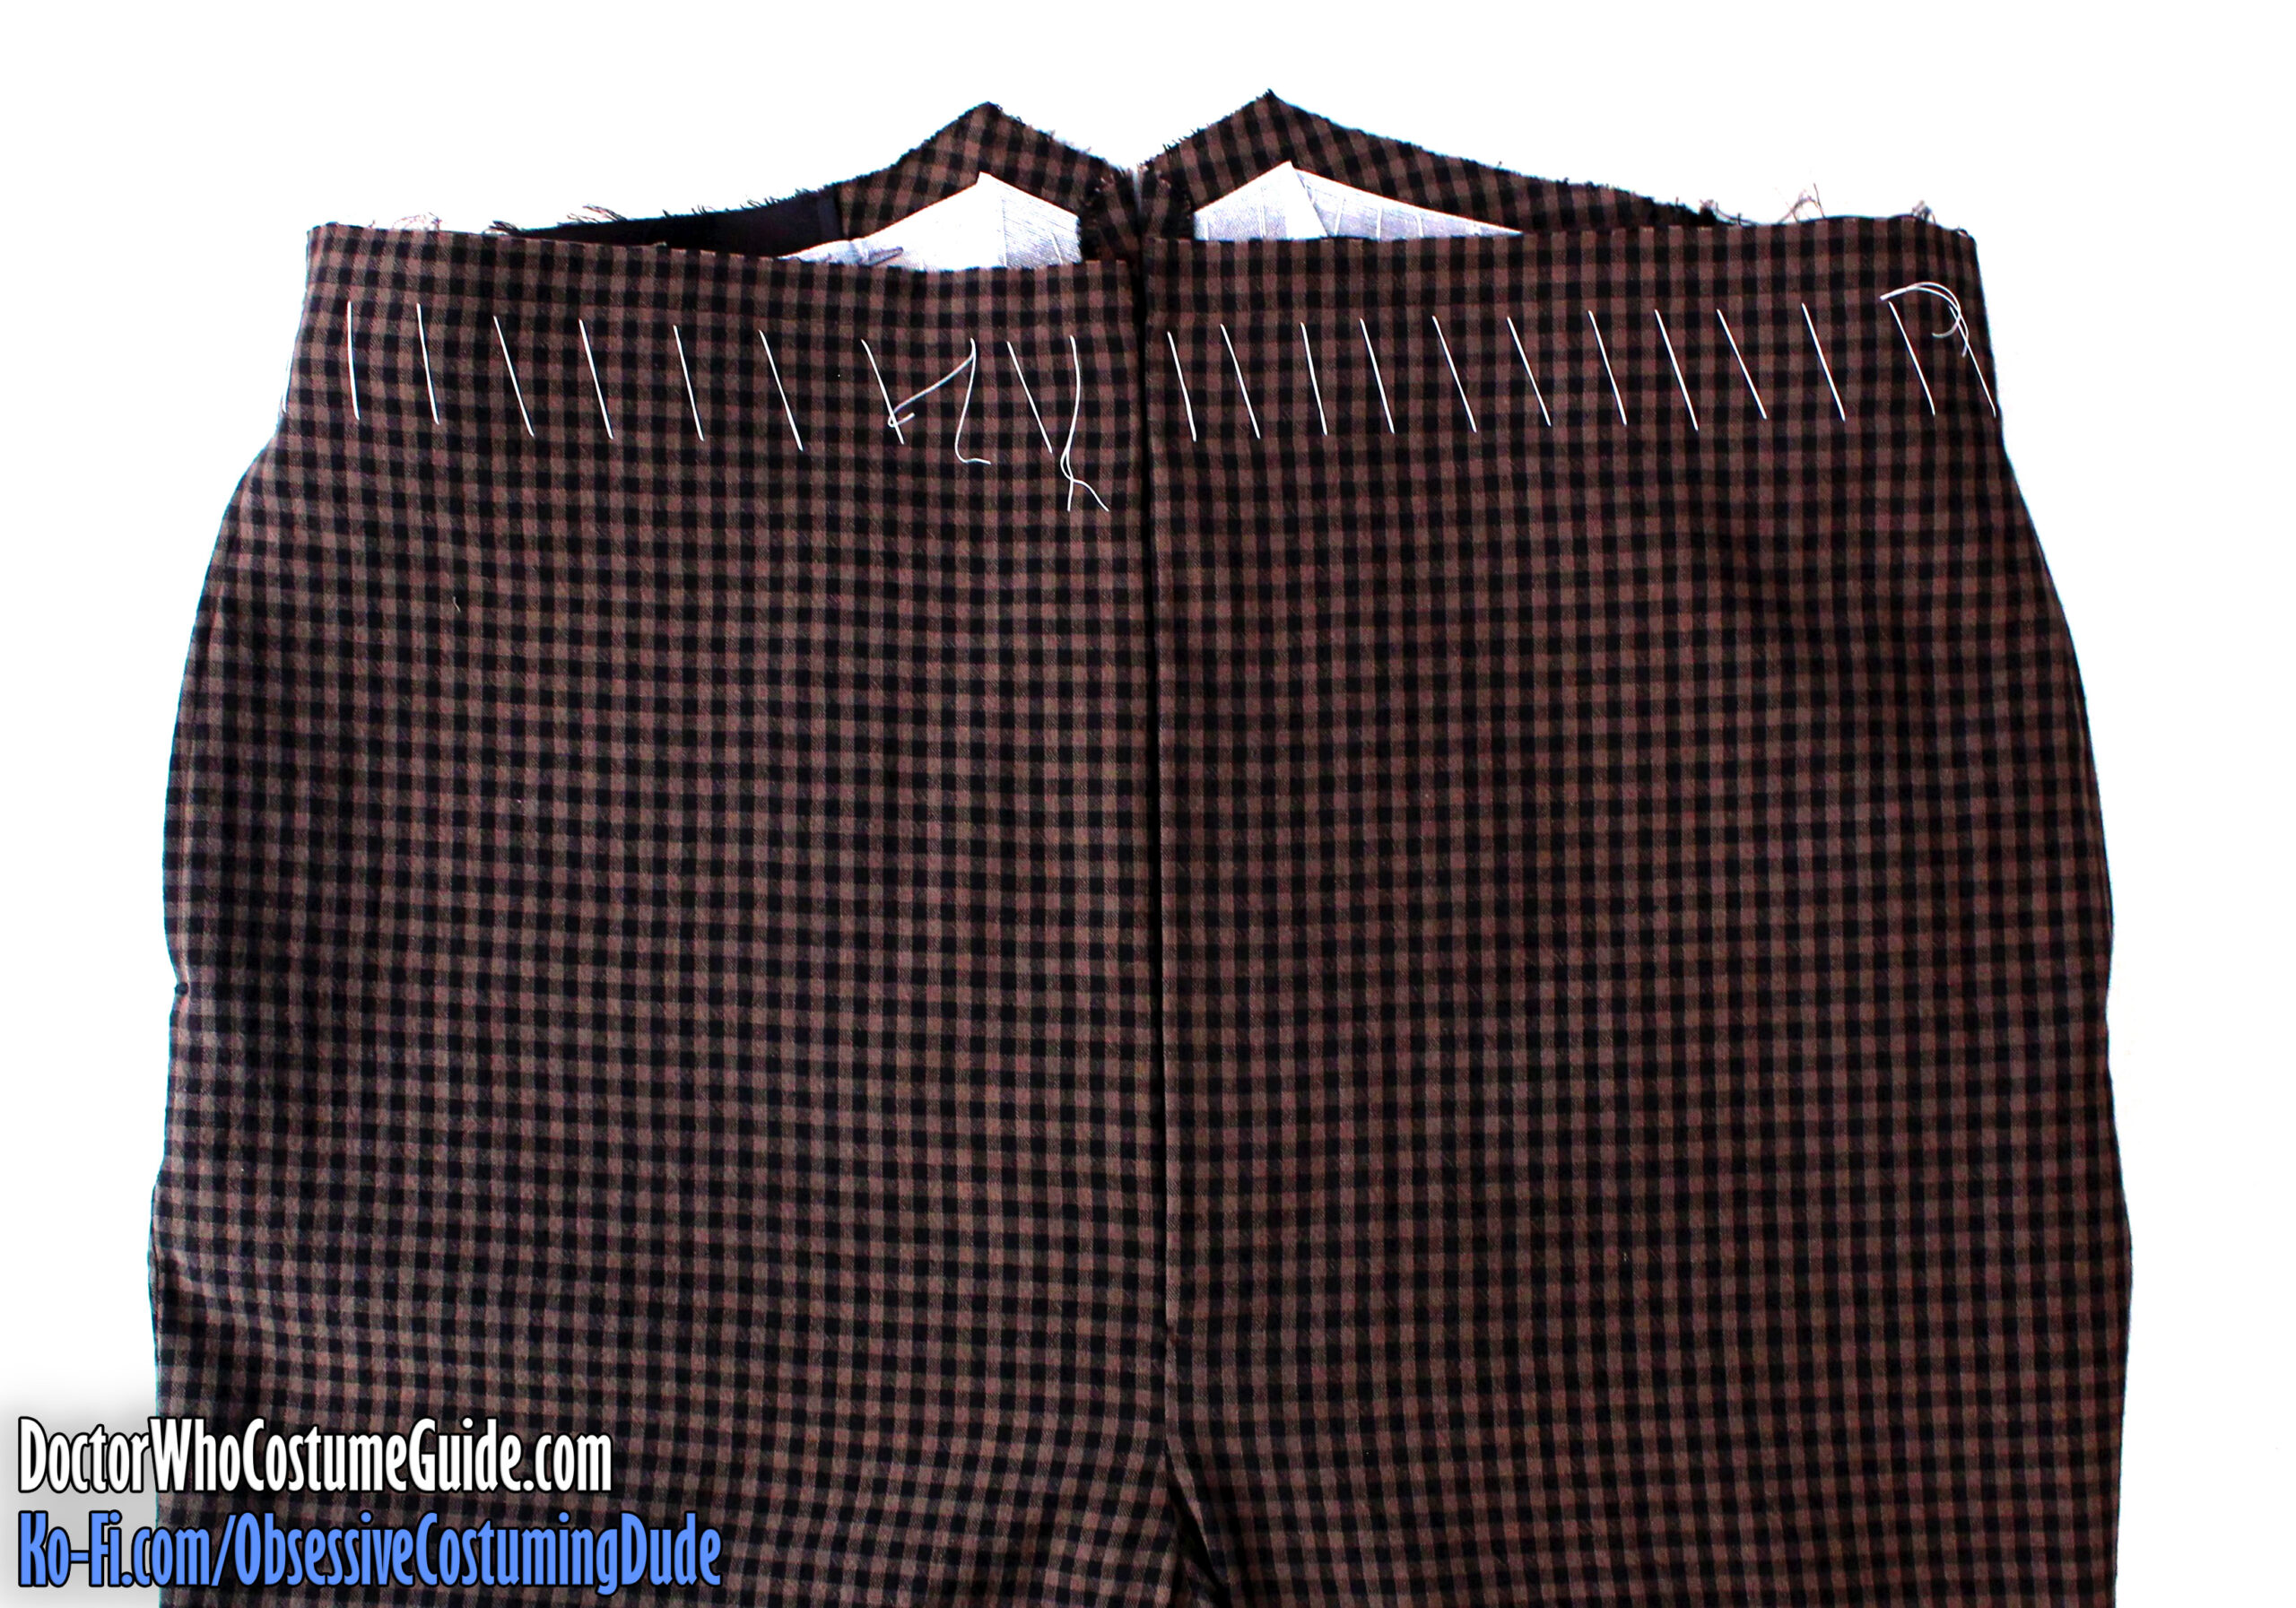
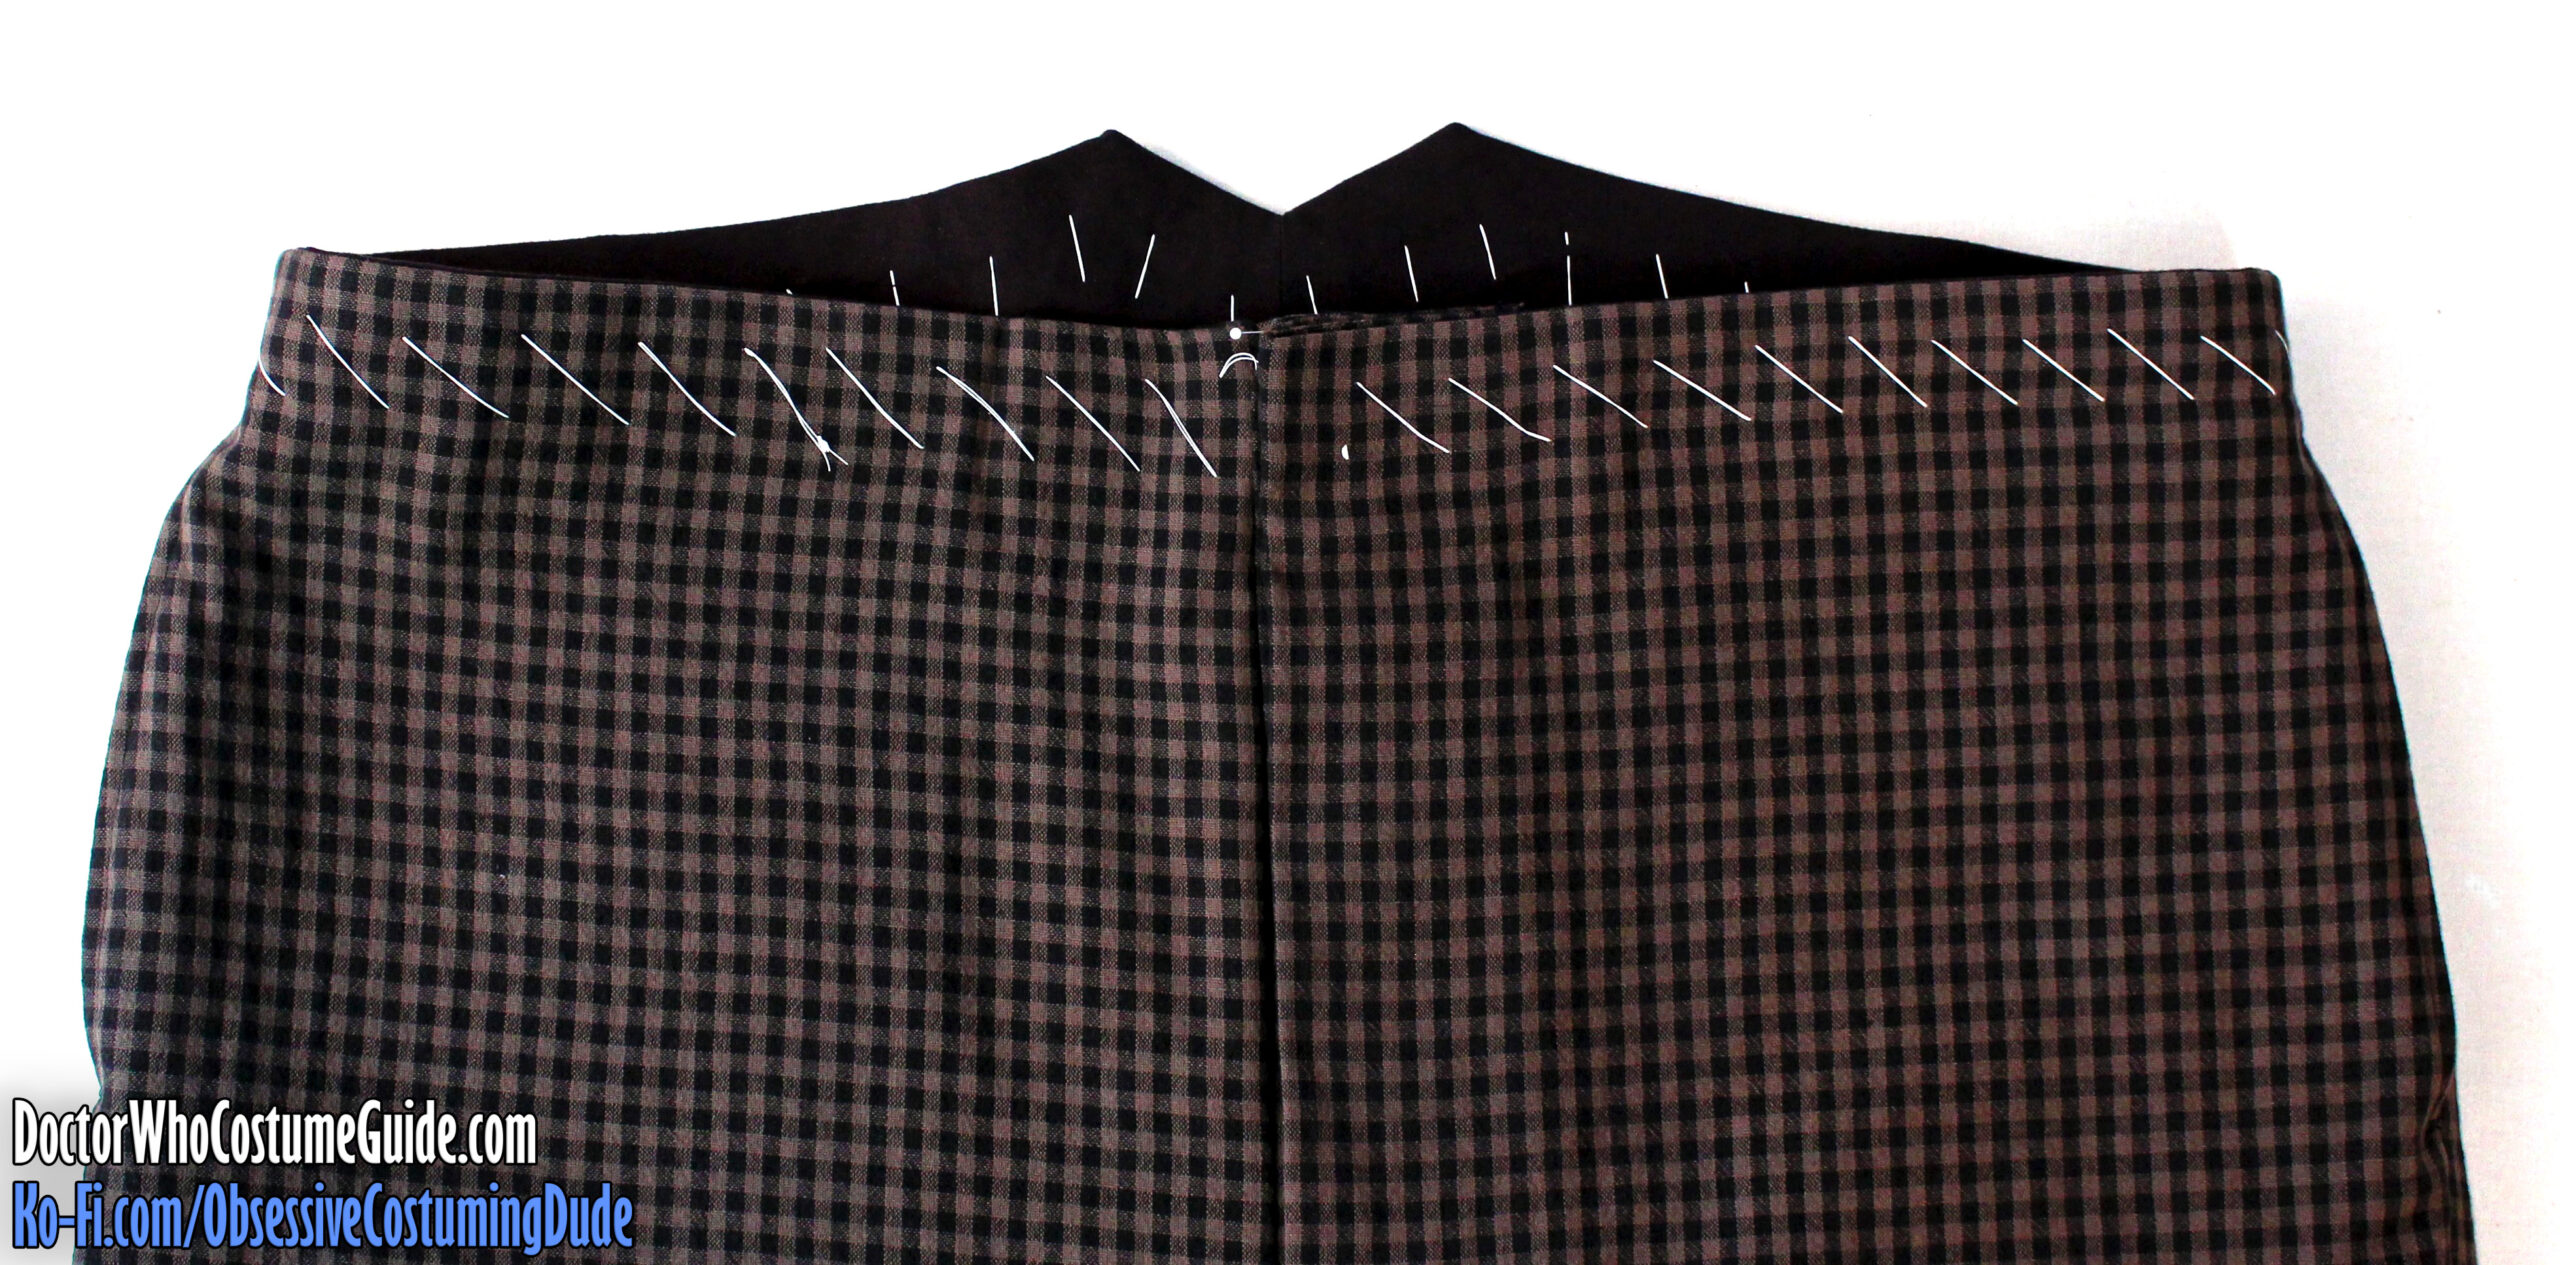
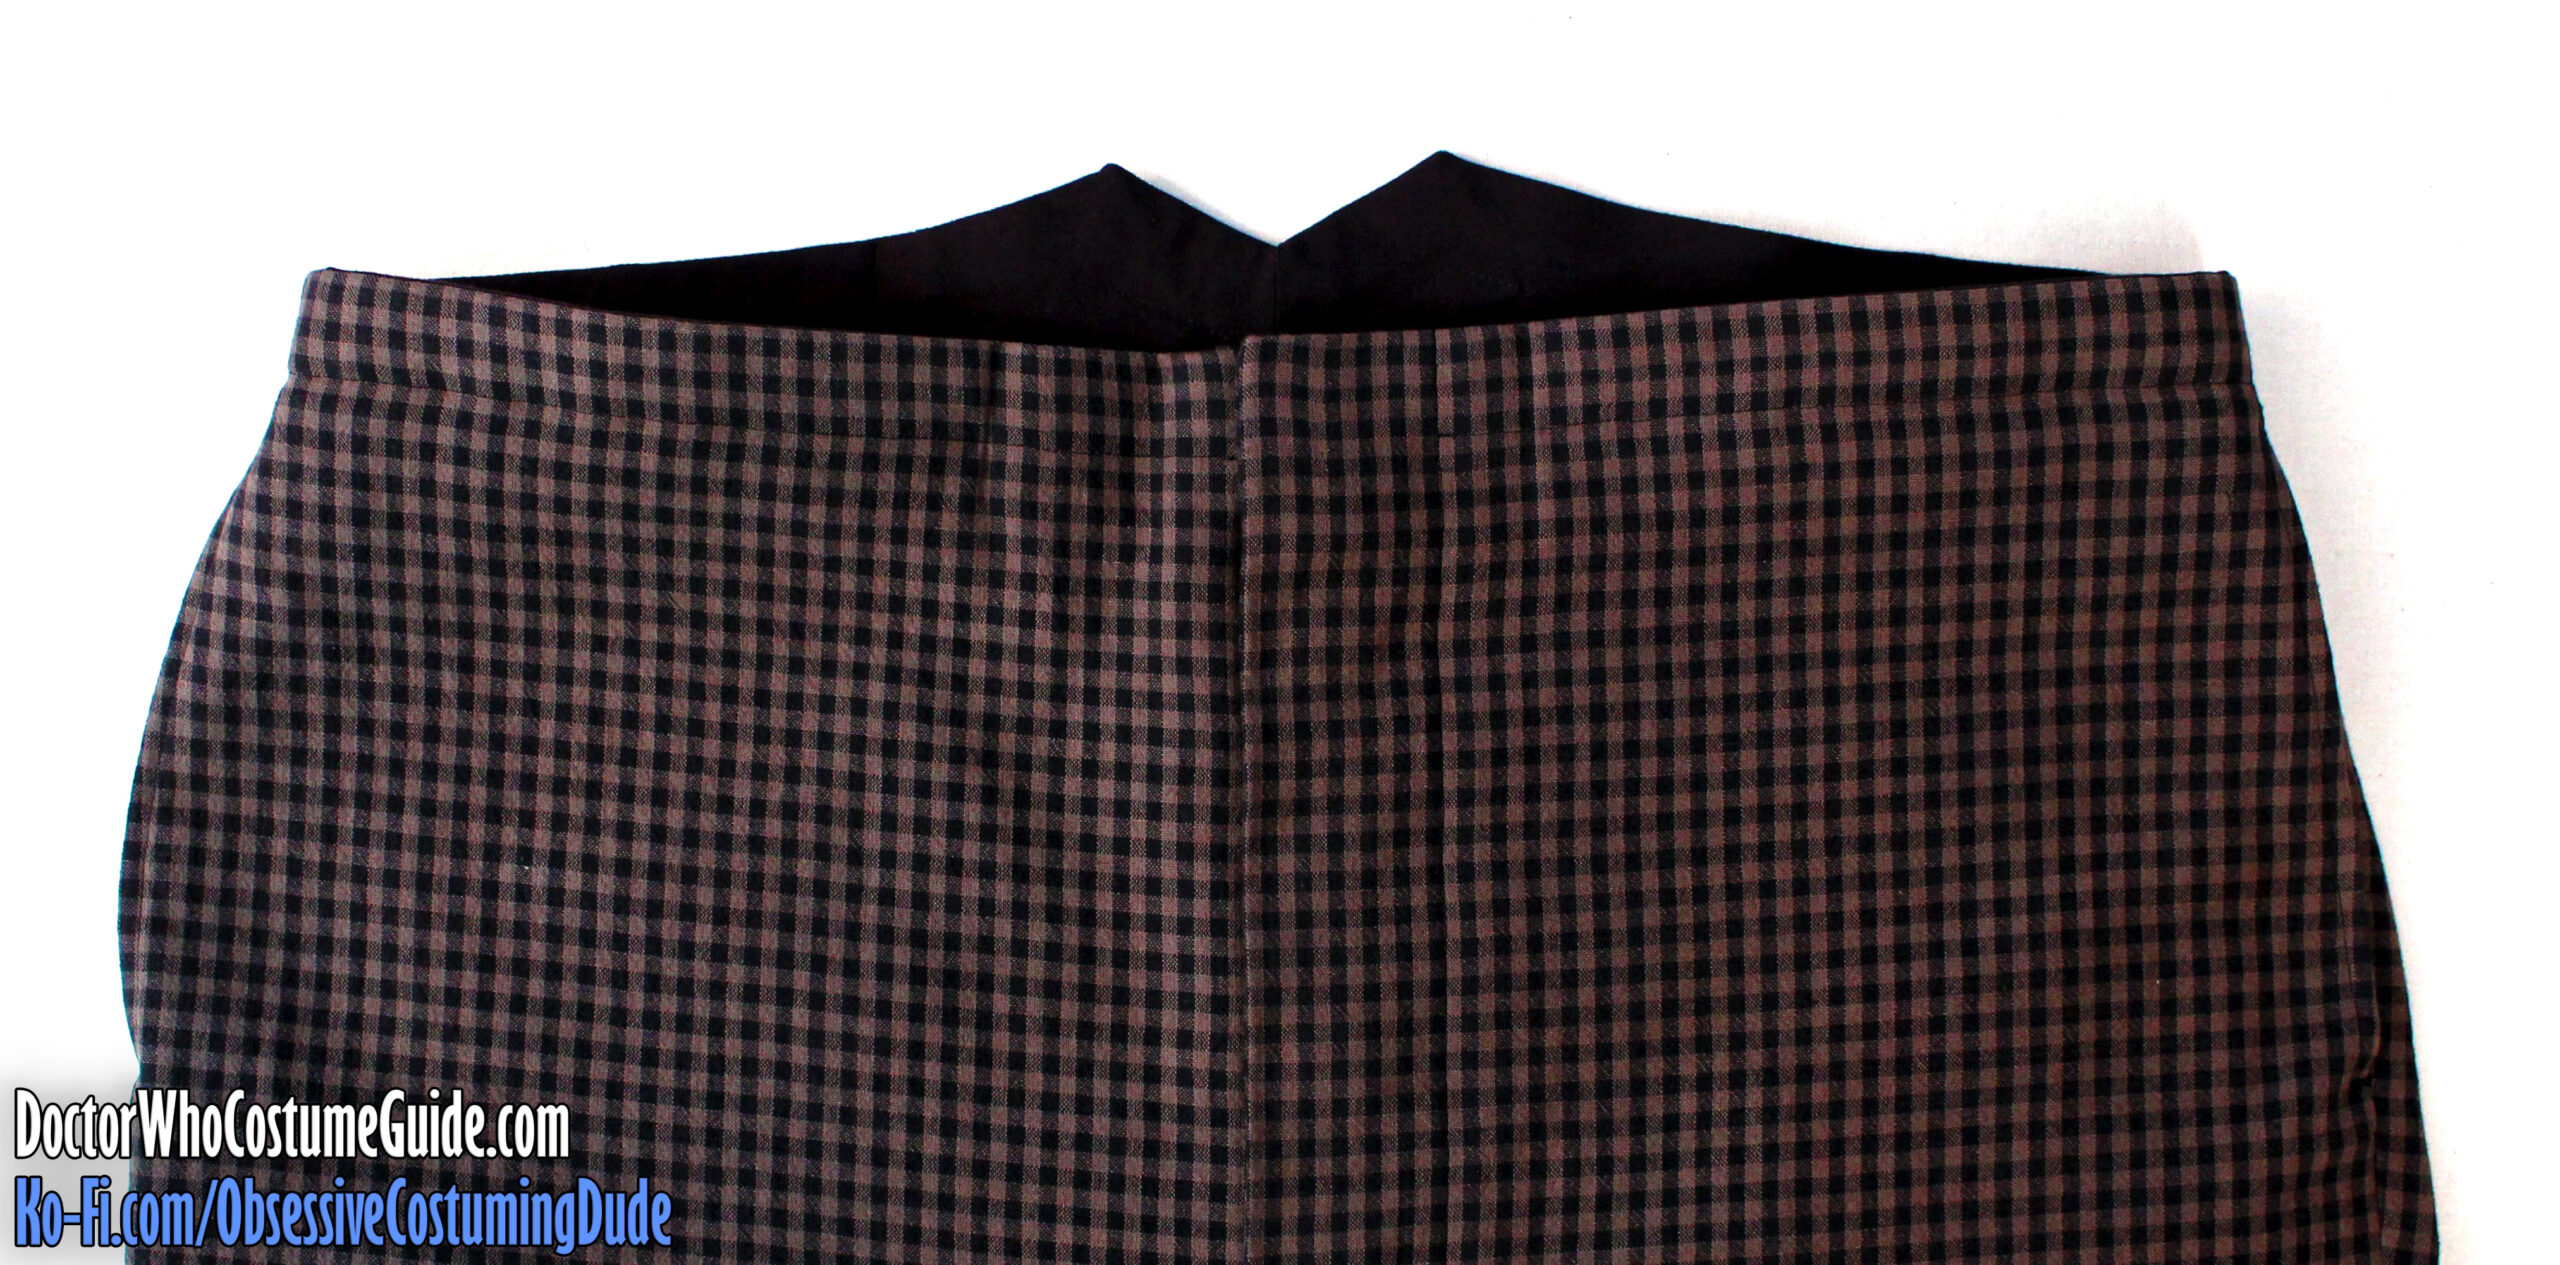
To match the check patterns symmetrically across the center back and crotch areas, I suggest pinning extensively, both horizontally and vertically.
Sew the two pant legs together from ⅝” beneath the upper edges of the center back to the bottom of the fly assemblies (where your previous stitching ended), right sides together and matching inseams. Reinforce your stitching on each end.
Press the seam allowances open, and press the right fly outward (away from center).
Observe how with careful cutting and sewing, the check patterns will match across the back/crotch seams.
It’s a subtle detail, but the check pattern should flow continuously across the center front as well.
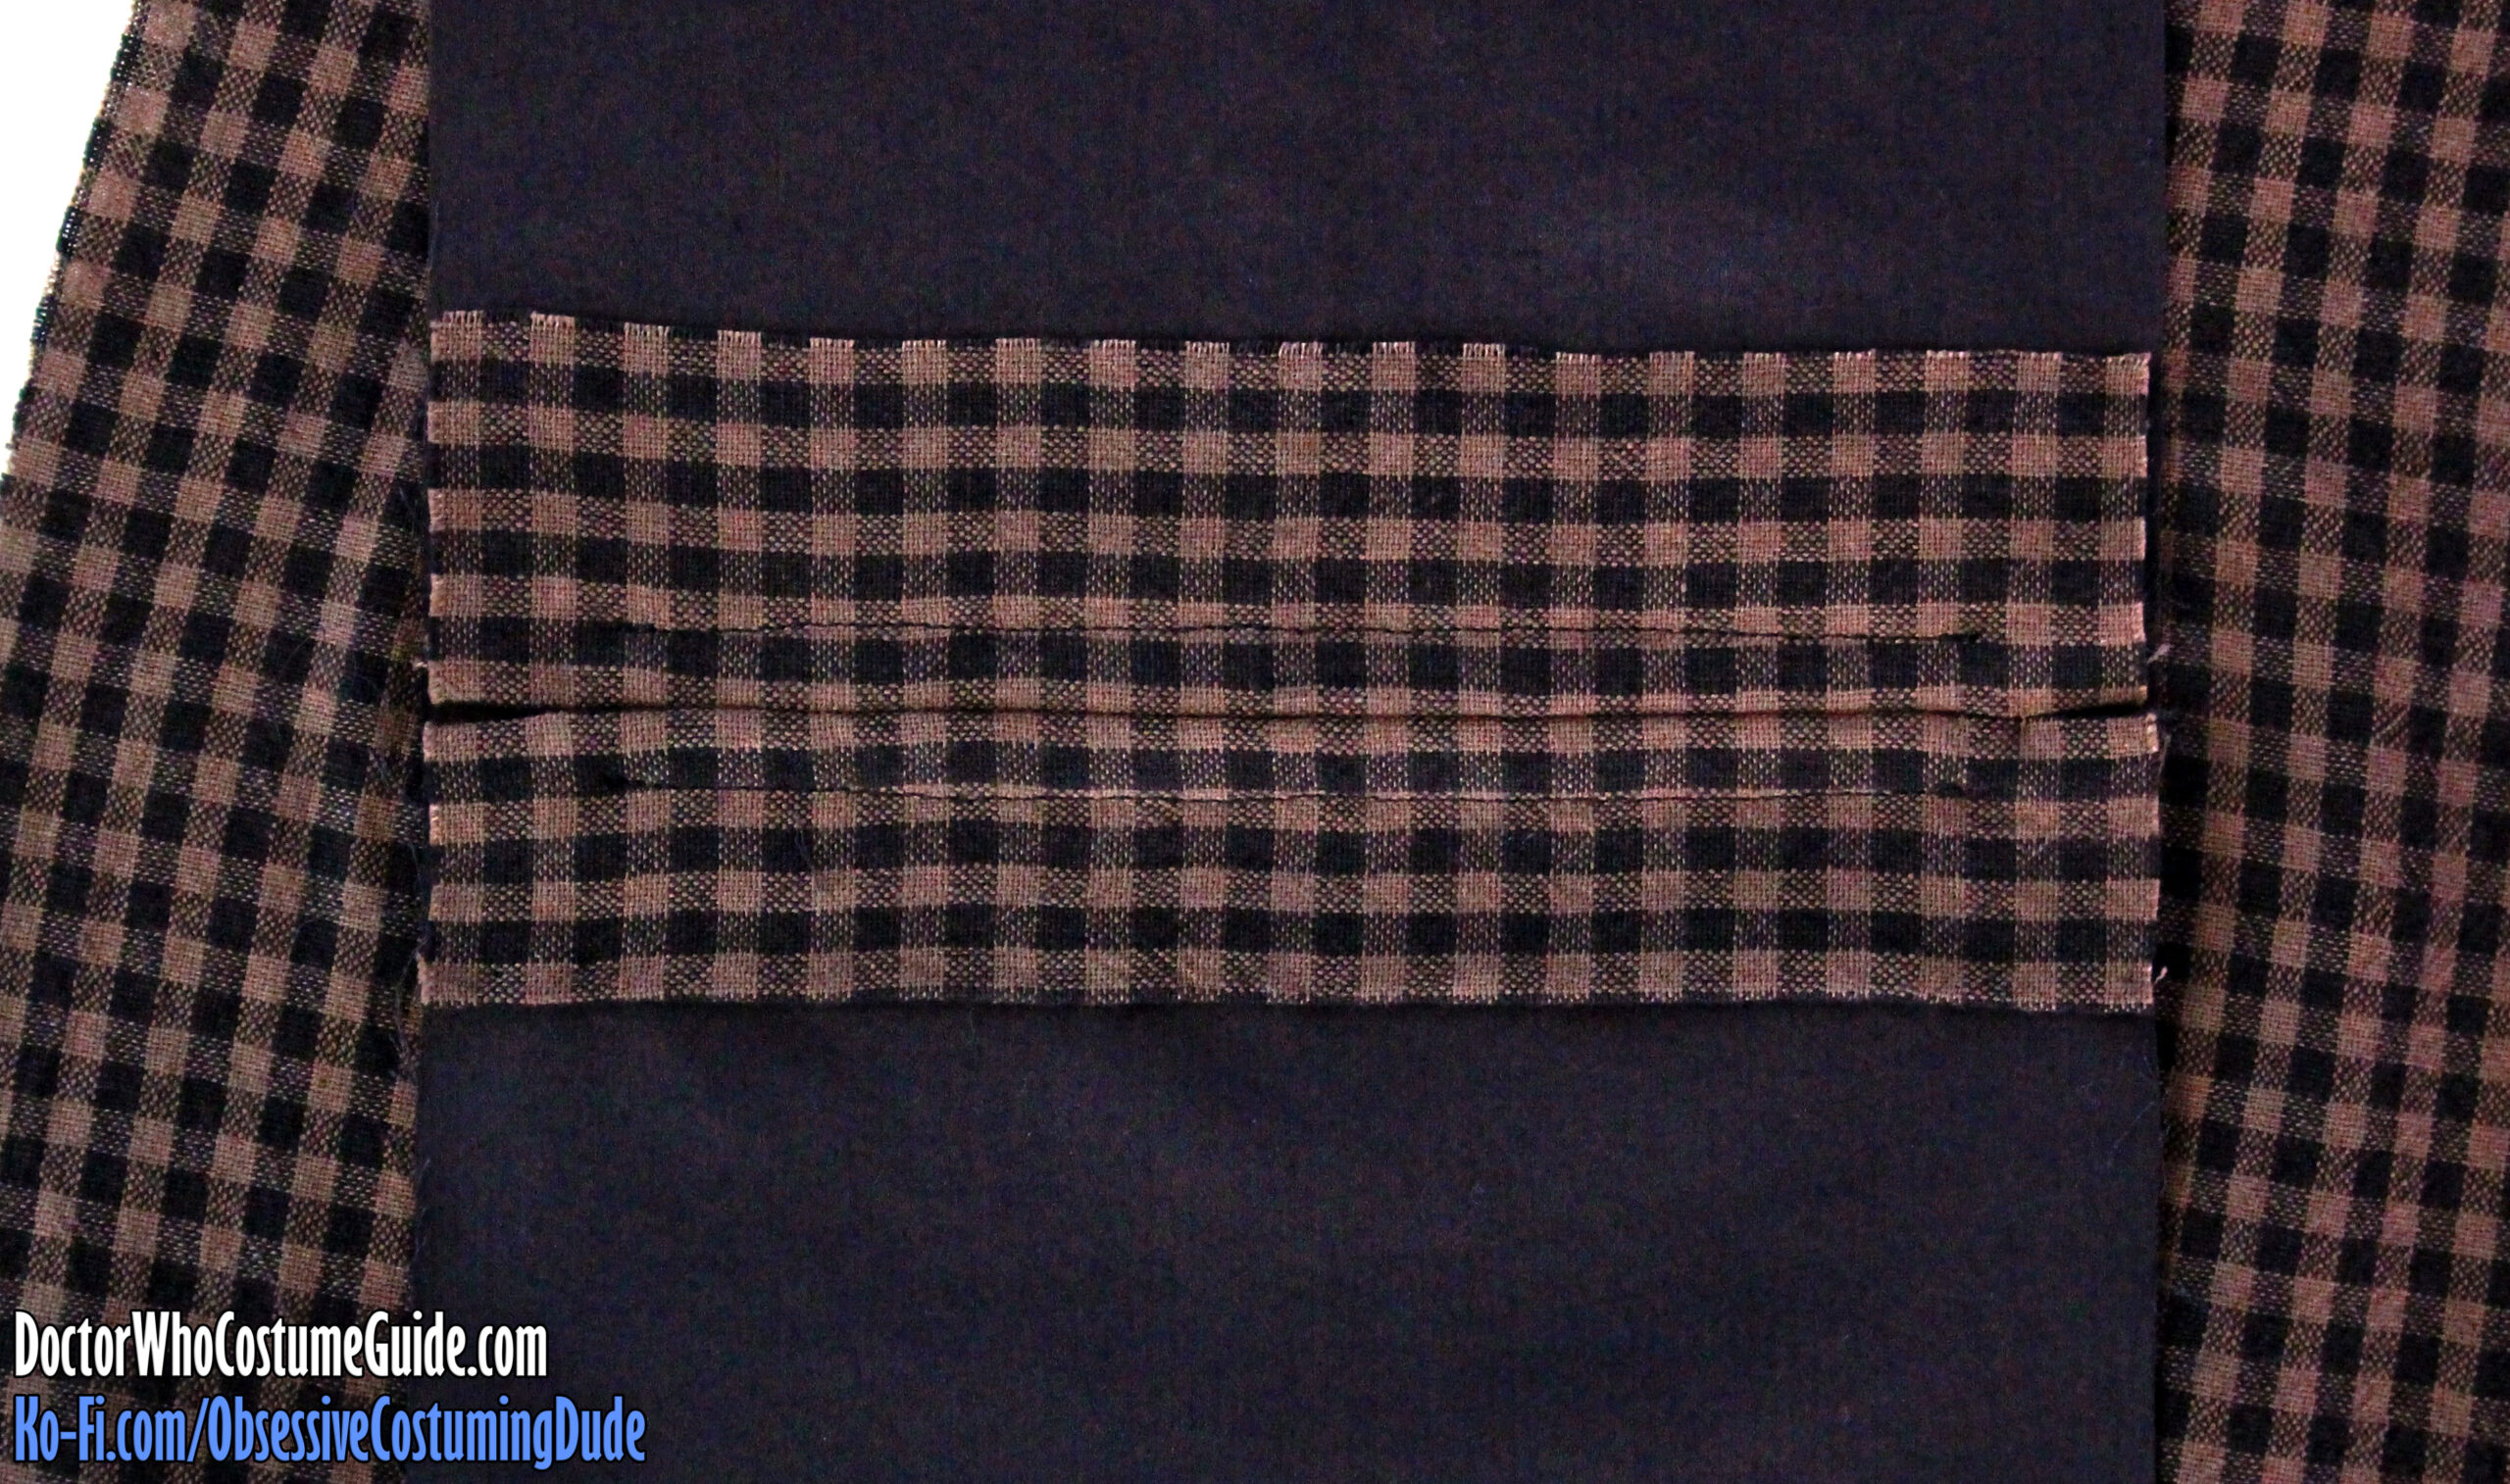
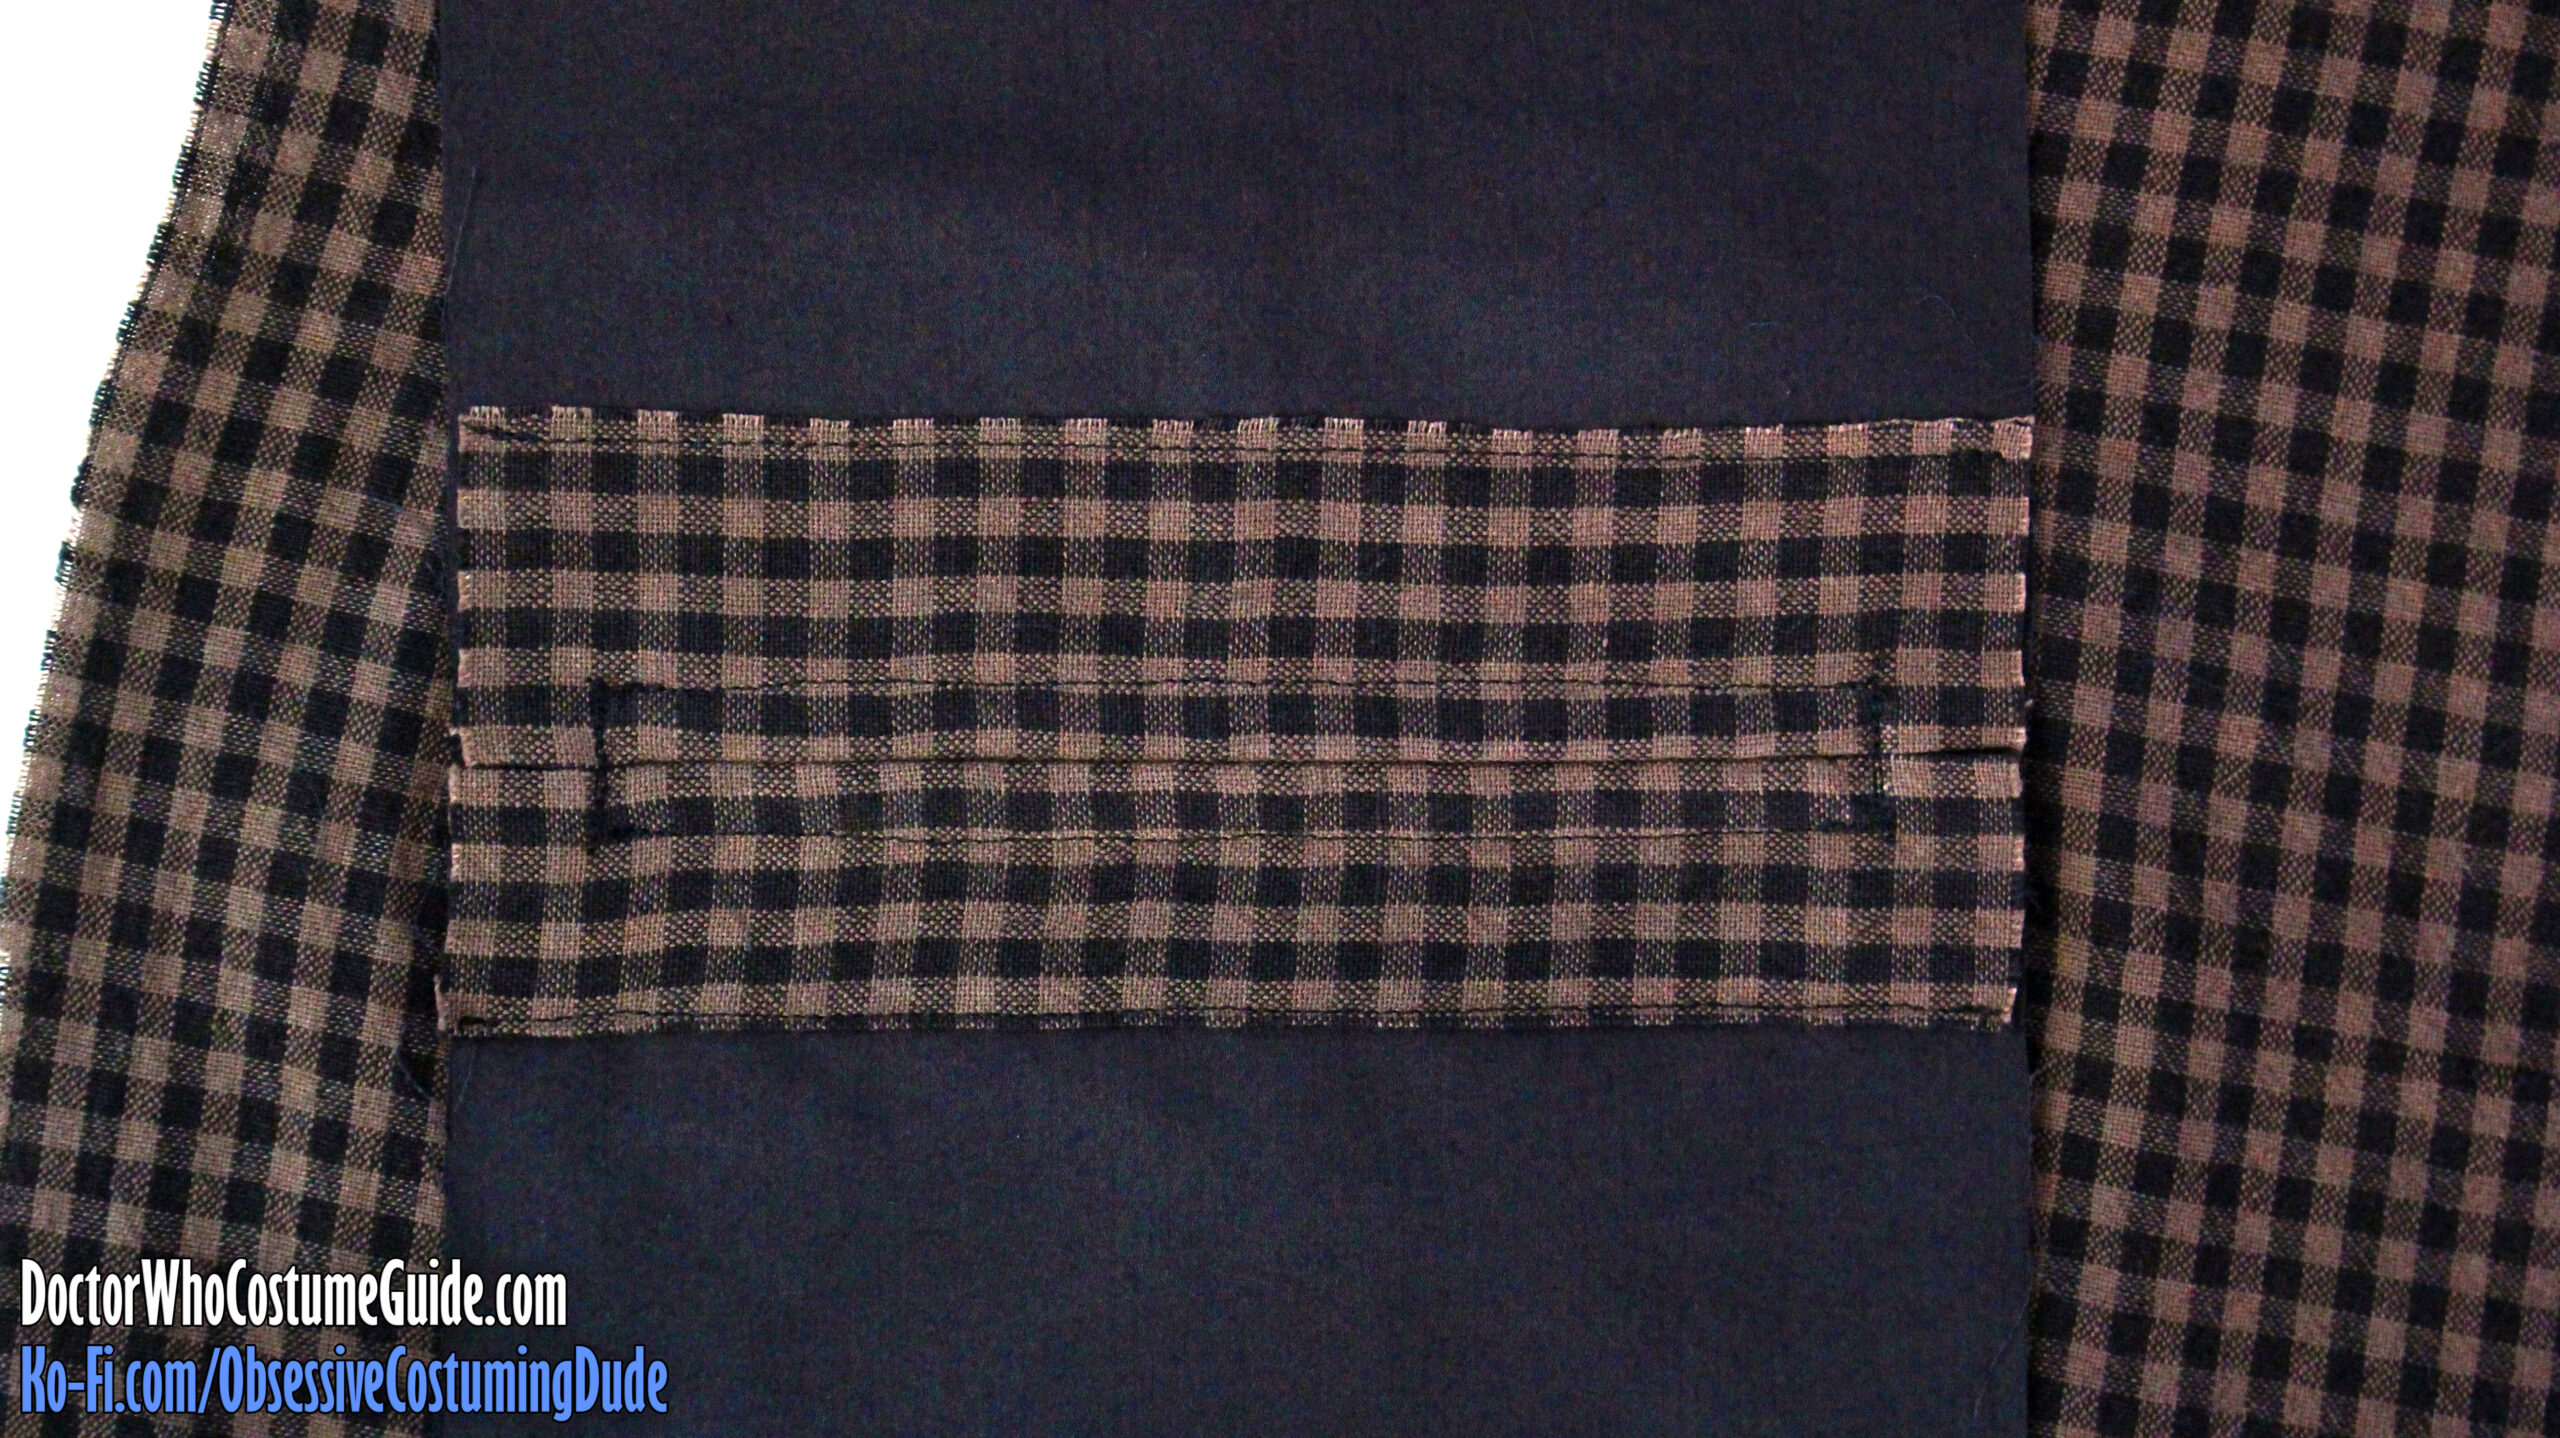
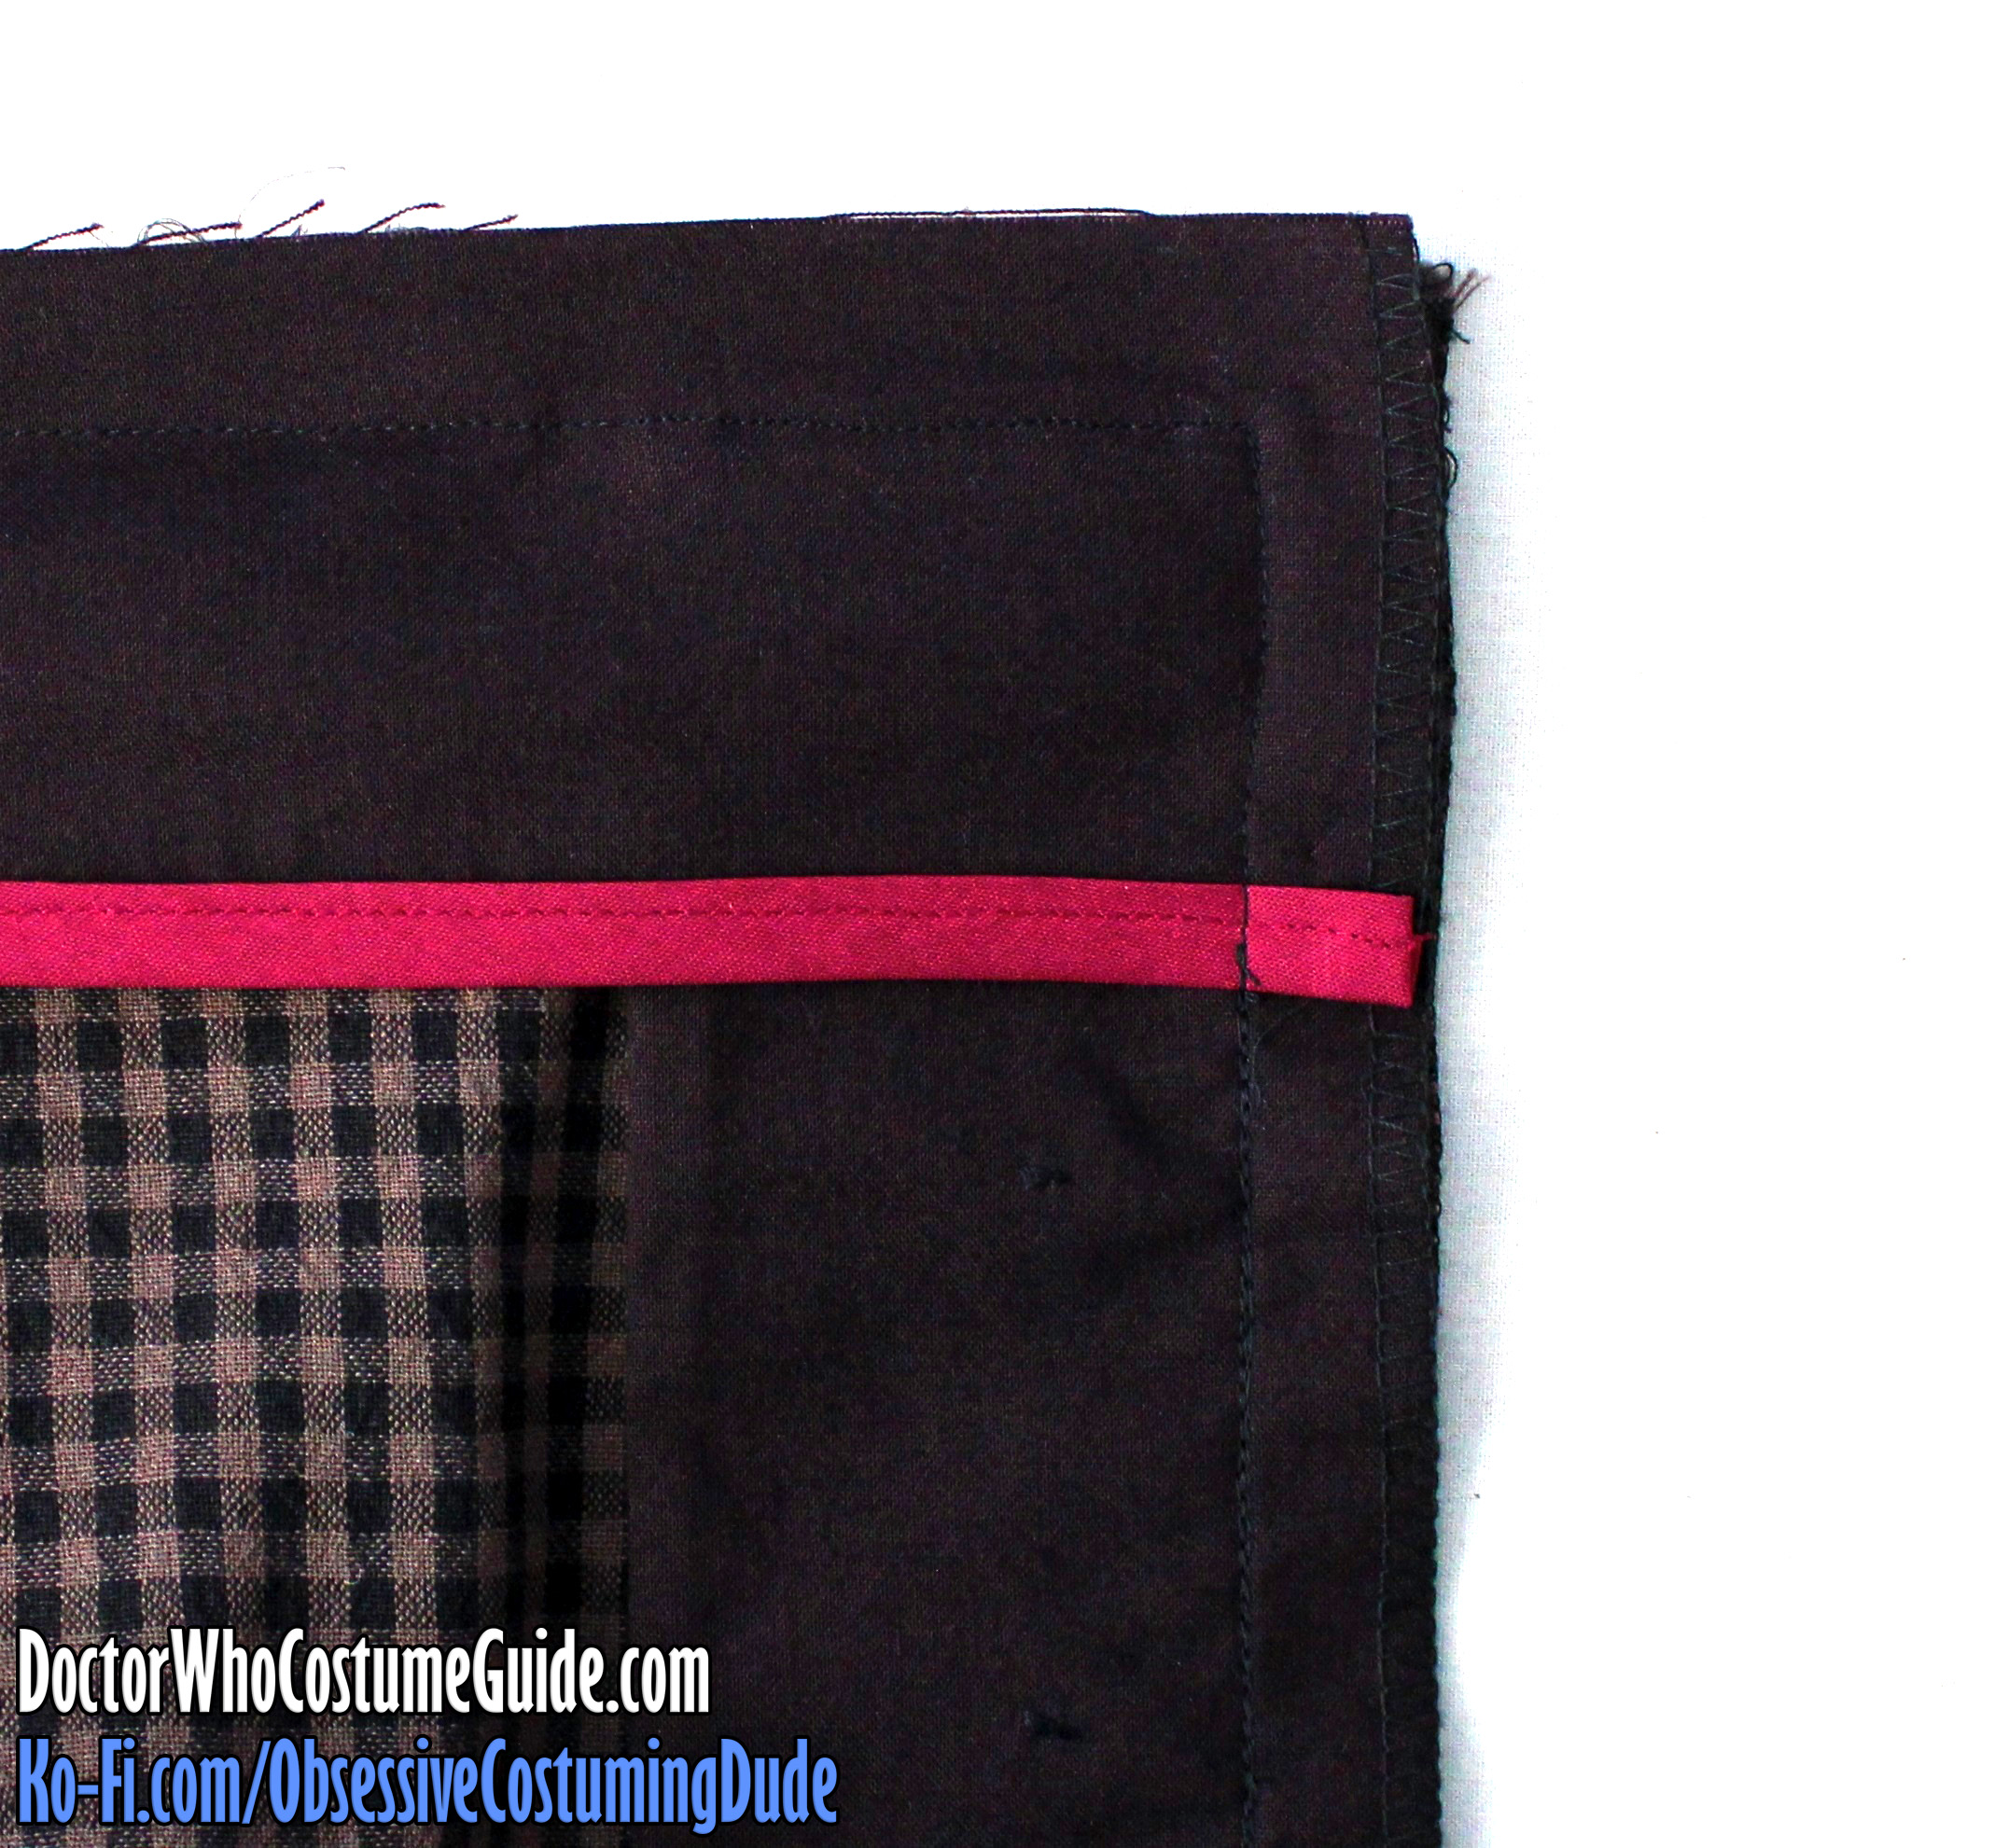
Serge the front and side edges of the front waistband facing (piece D).
Serge the side and back edges of the back waistband facing (piece E).
Sew the front and back waistband facings together at the sides.
Press the seam allowances open.
Repeat for the other waistband facing assembly.
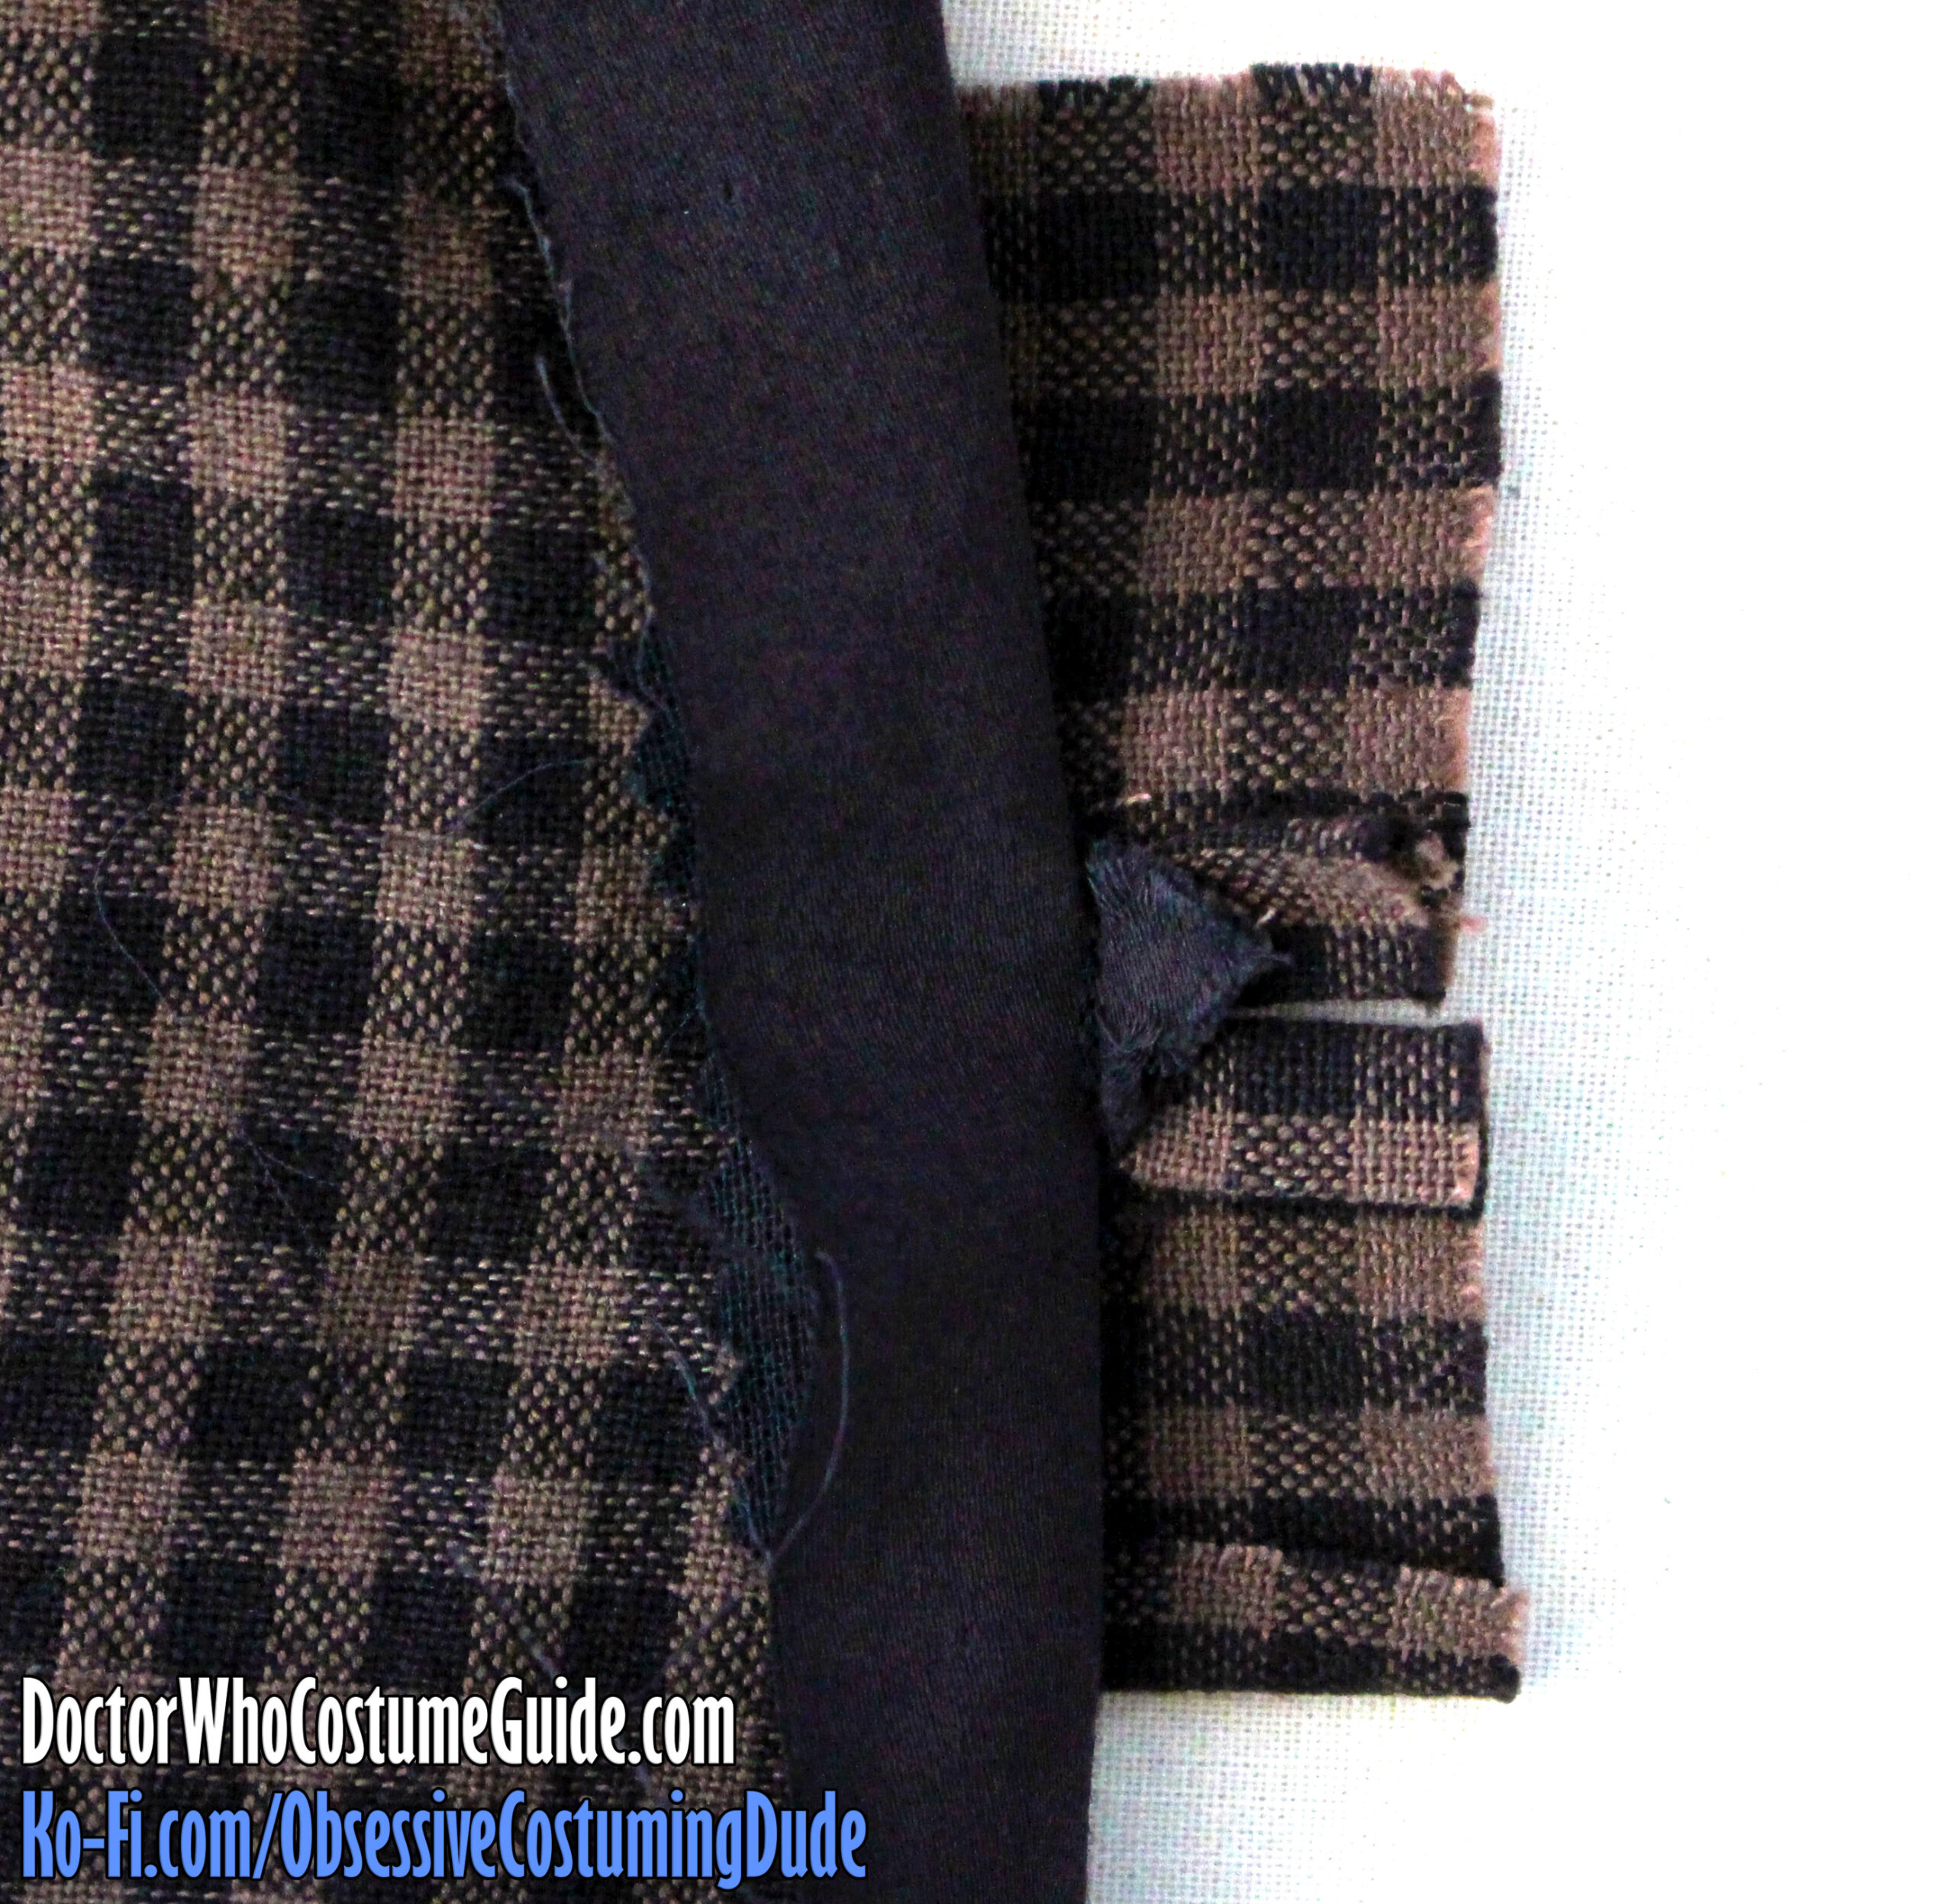
Sew the two waistband facing assemblies together at the center back, beginning or ending your stitching ⅝” from the top and reinforcing several times.
Press the seam allowances open.
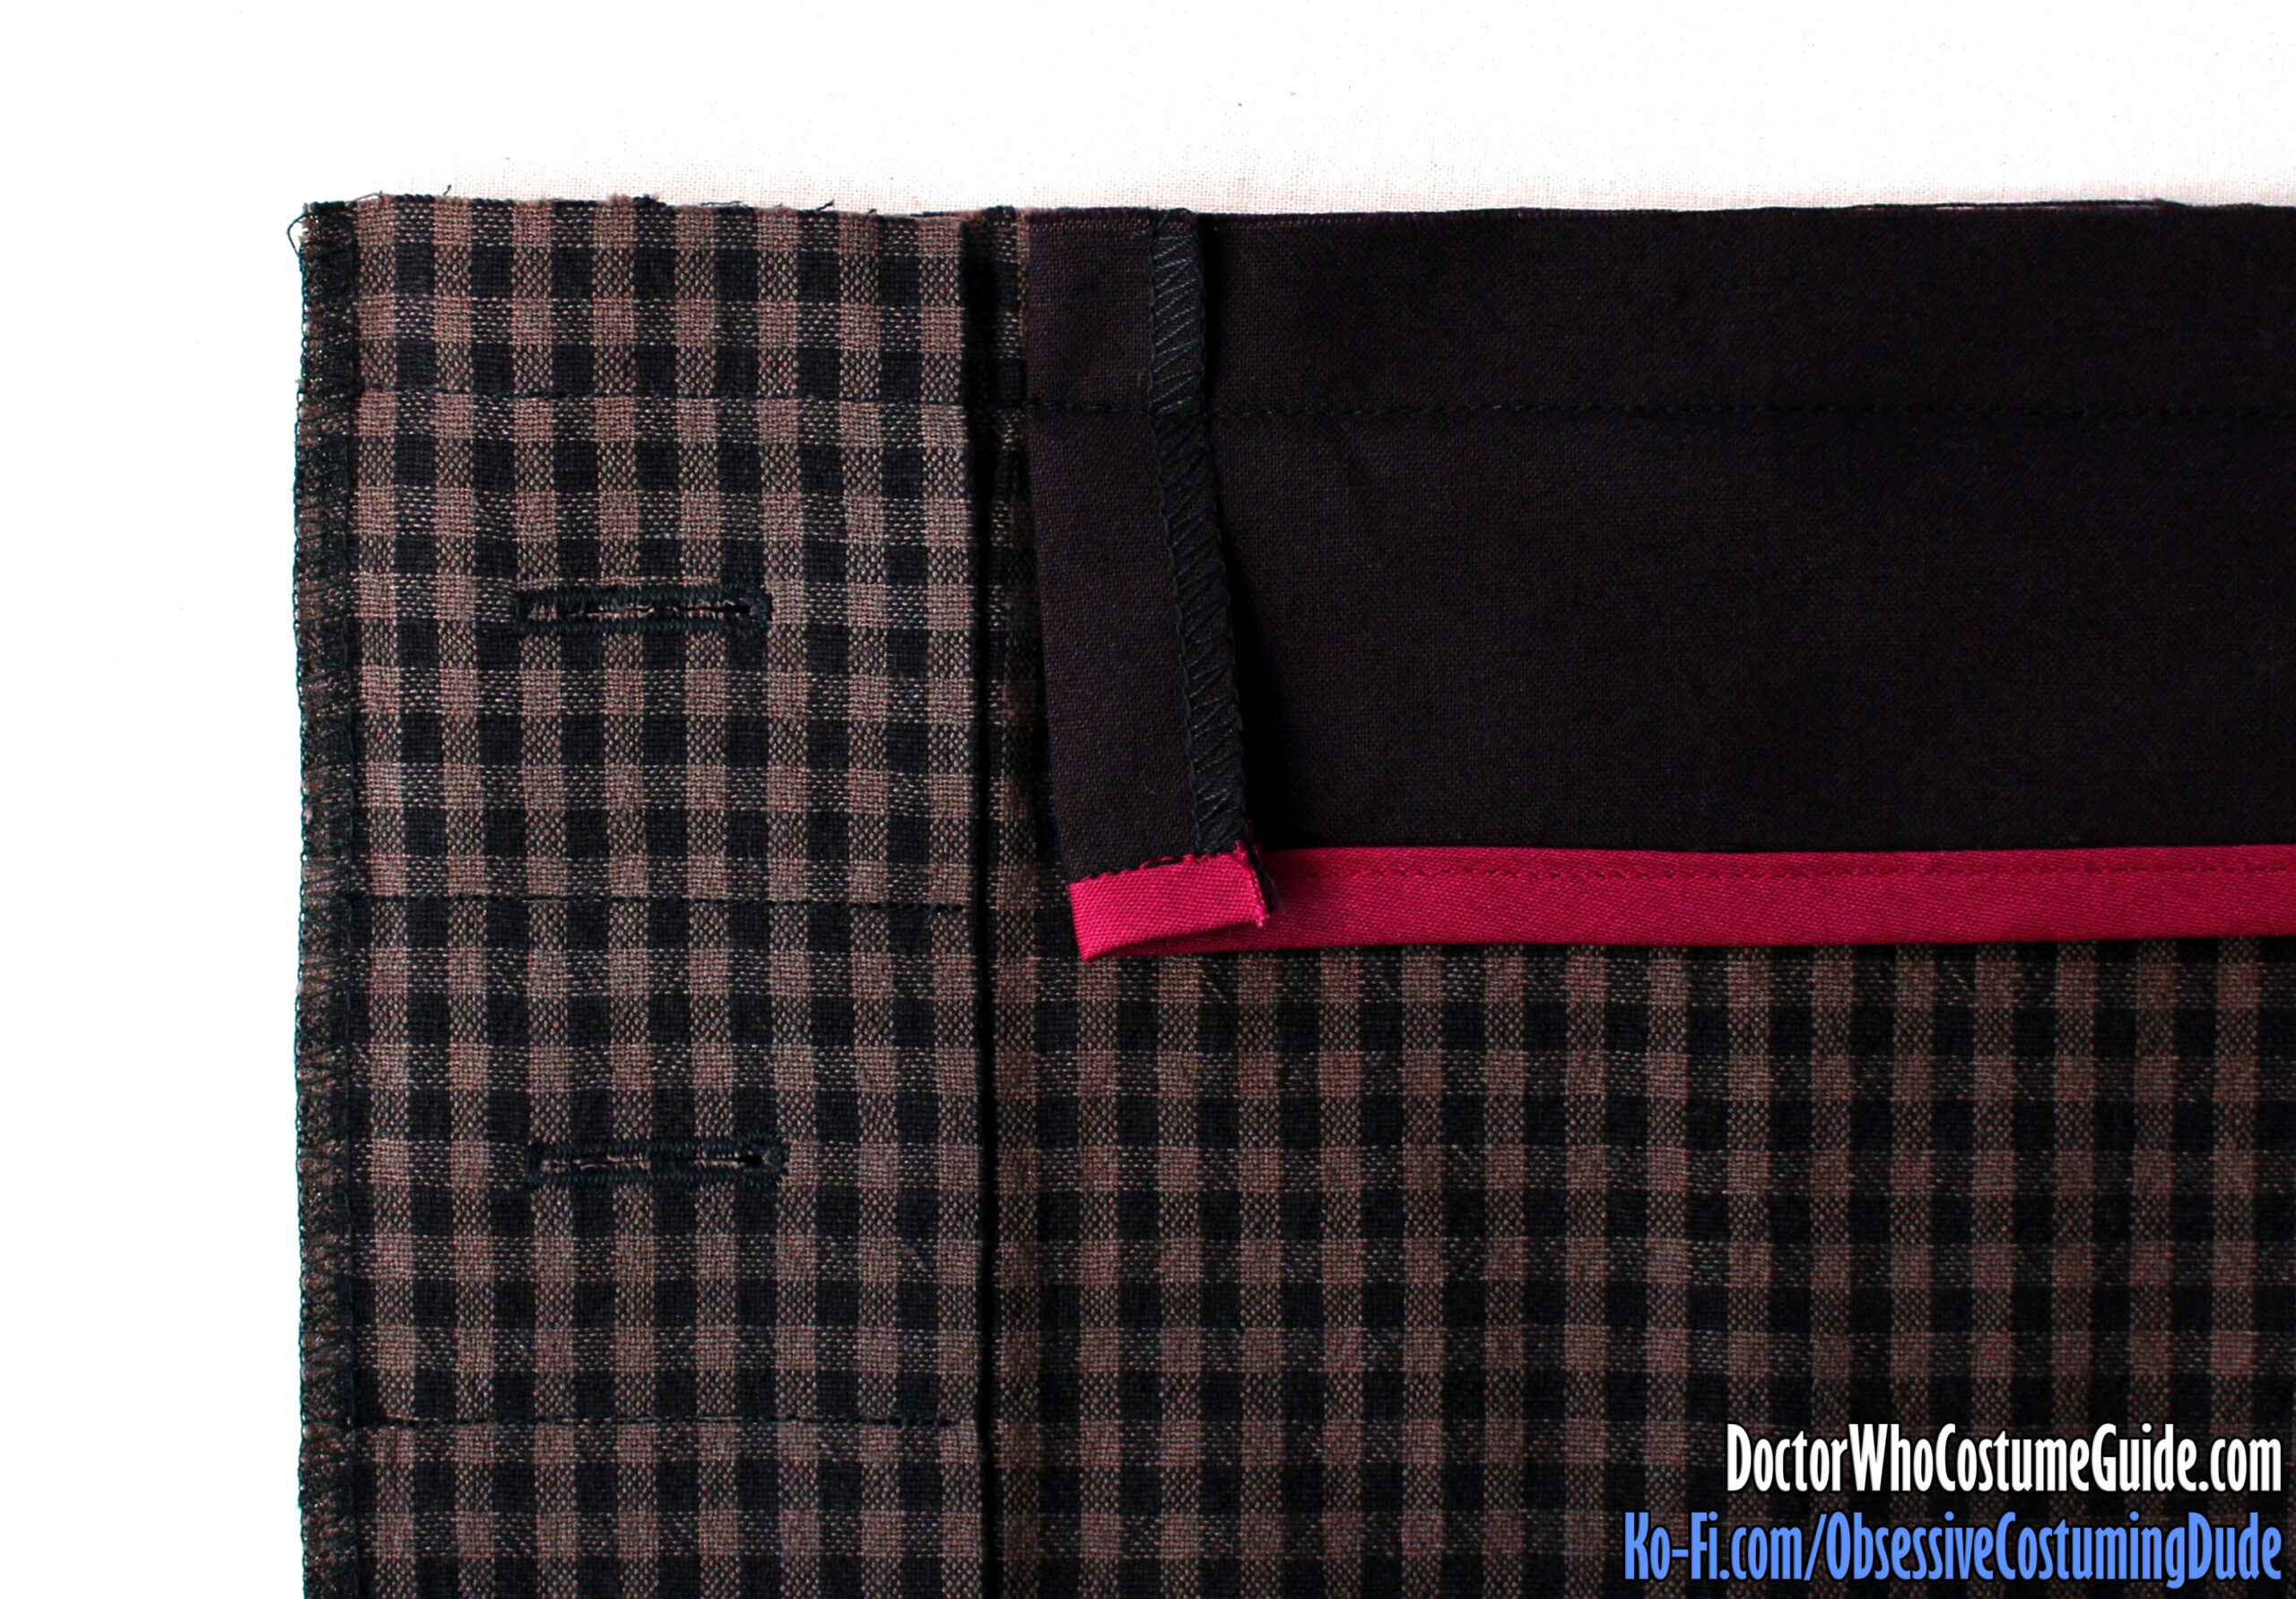
You can simply serge the lower edge of your waistband facings if you’d like, but I chose to bind mine with a contrasting ¼” double-fold bias tape. (See below.)
Turn the right fly assembly back to the outside of the trousers, and unfold the left fly assembly away from center.
Press the frontmost ⅝” of the left waistband facing assembly under.
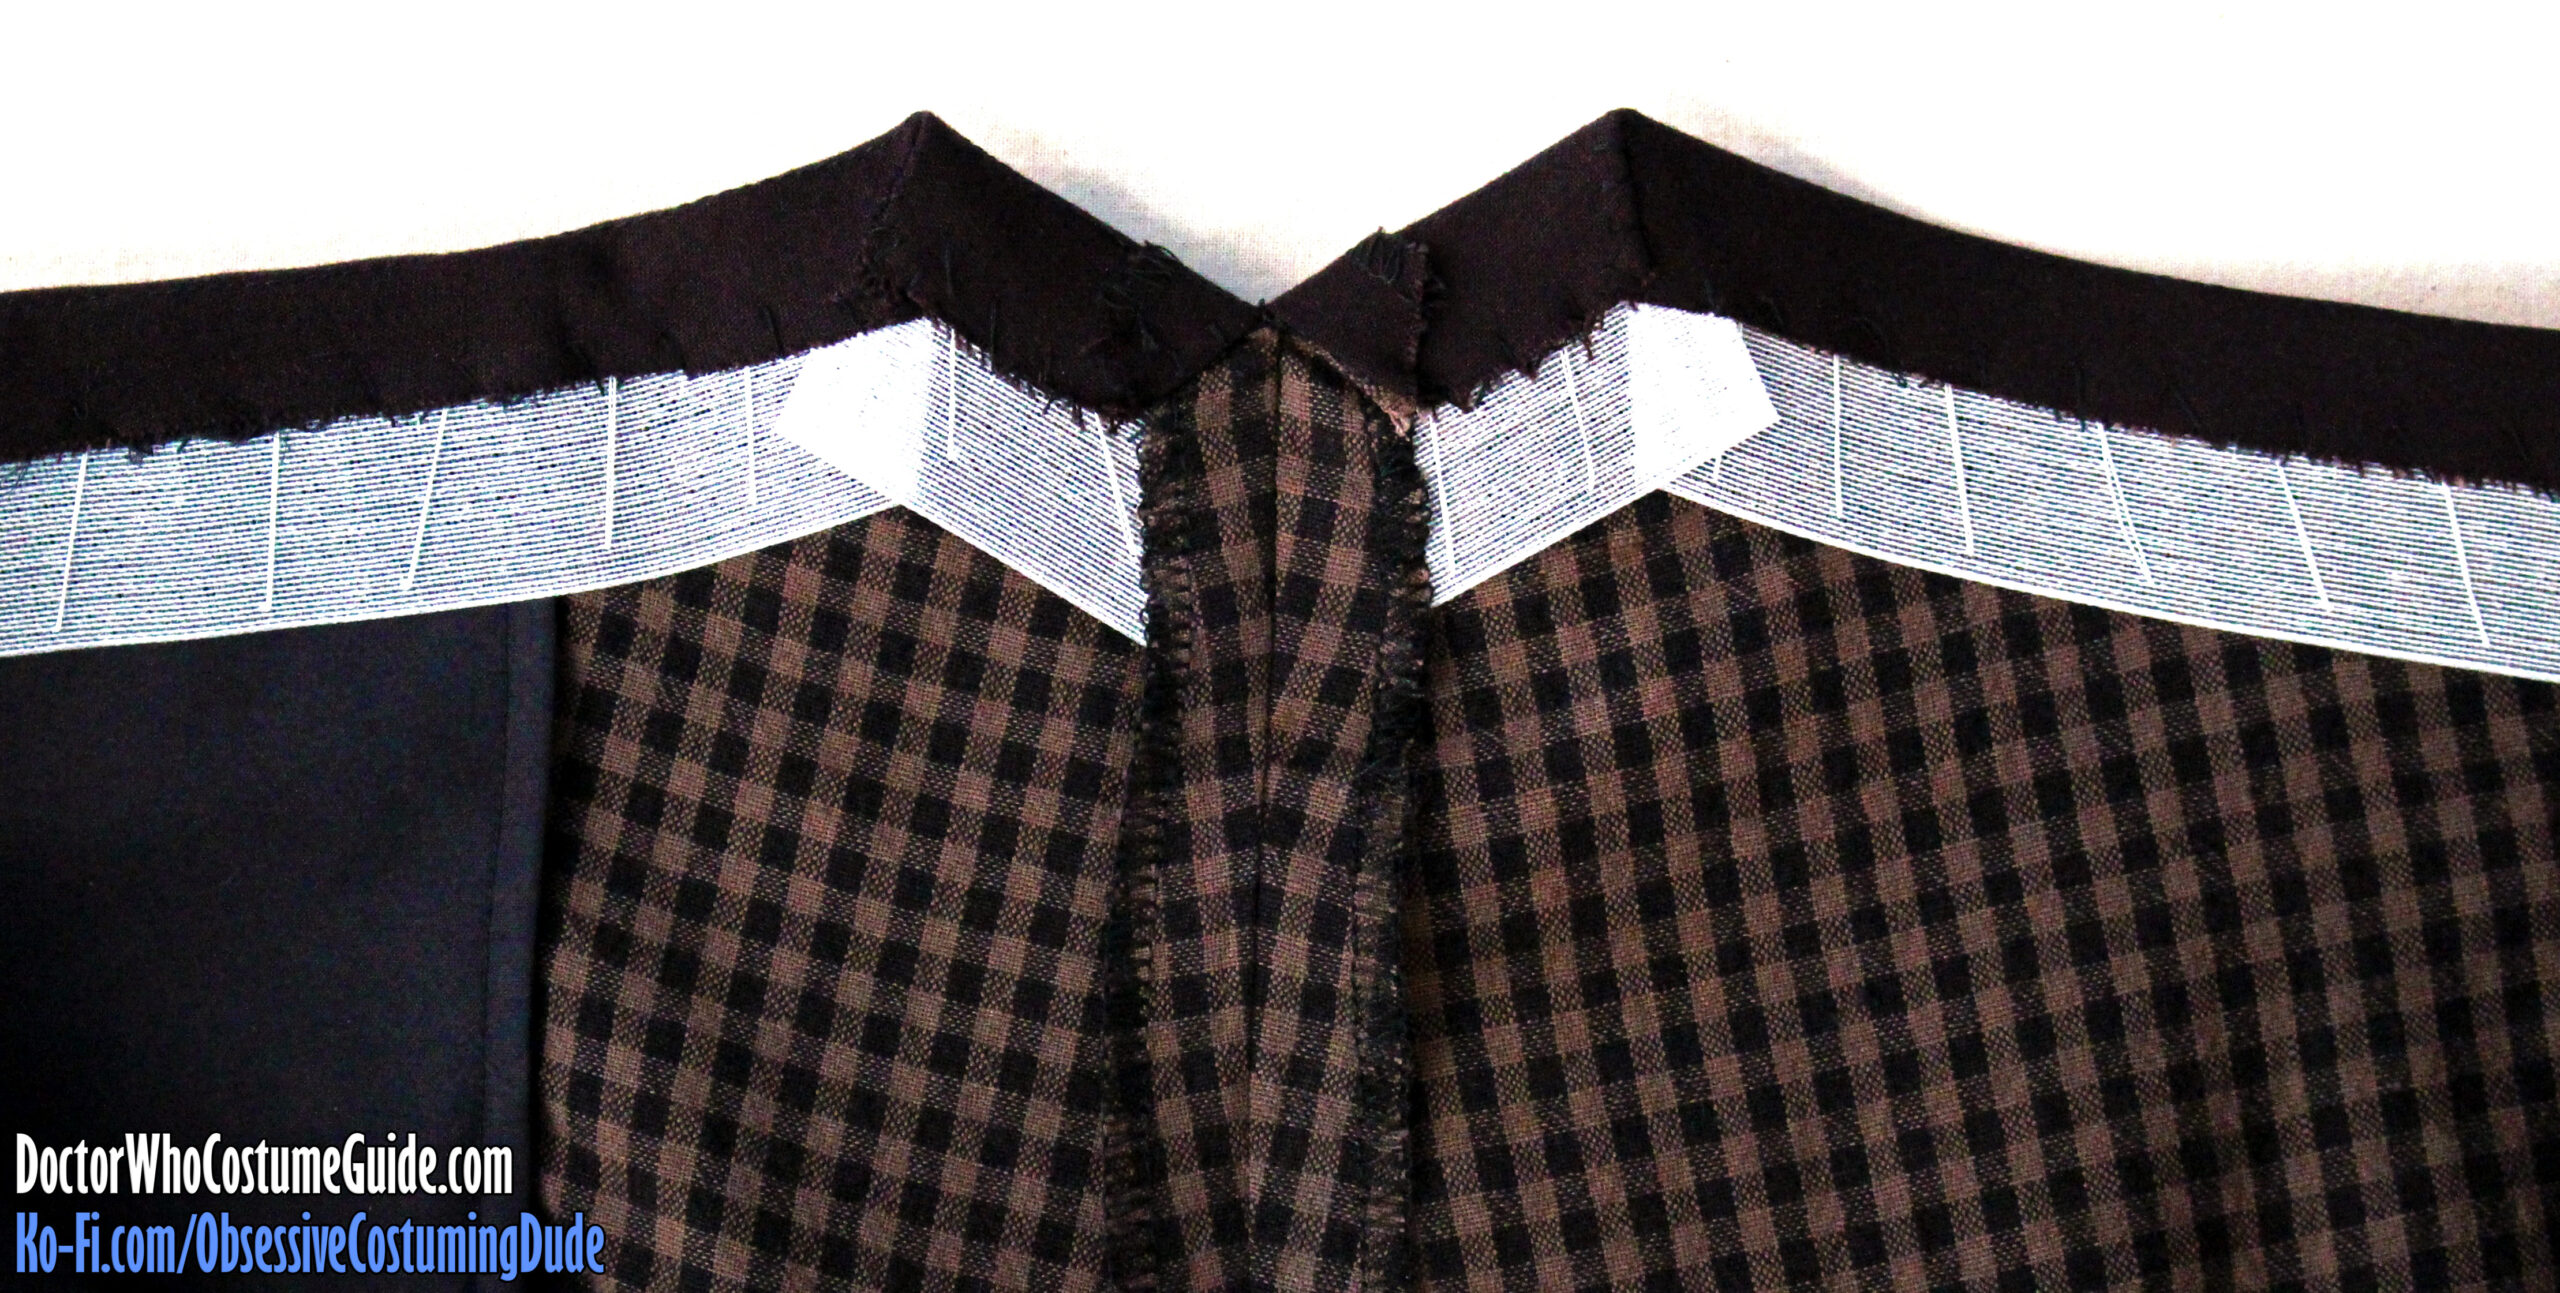
Pin the waistband facing assembly to the trousers, right sides together and upper edges flush. (The right front edge of the waistband facing should be flush with the right edge of the right fly, and the folded left front edge of the waistband facing should be flush with the folded edge of the left fly.)
The waistband facing assembly is sewn to the upper edge of the trousers with two stitches: one for each side (right and left), from the center back to the front.
Unfold the center back allowances on the opposite side to begin or end your stitching, and reinforce several times at the front and back. (I prefer to stitch from the underside of the trousers, exactly over the previous stitch line.)
At the right front, pivot at the corner and stitch down to the right fly.
At the left front, the folded left front edge of the waistband facing should be flush with the folded edge of the fly.
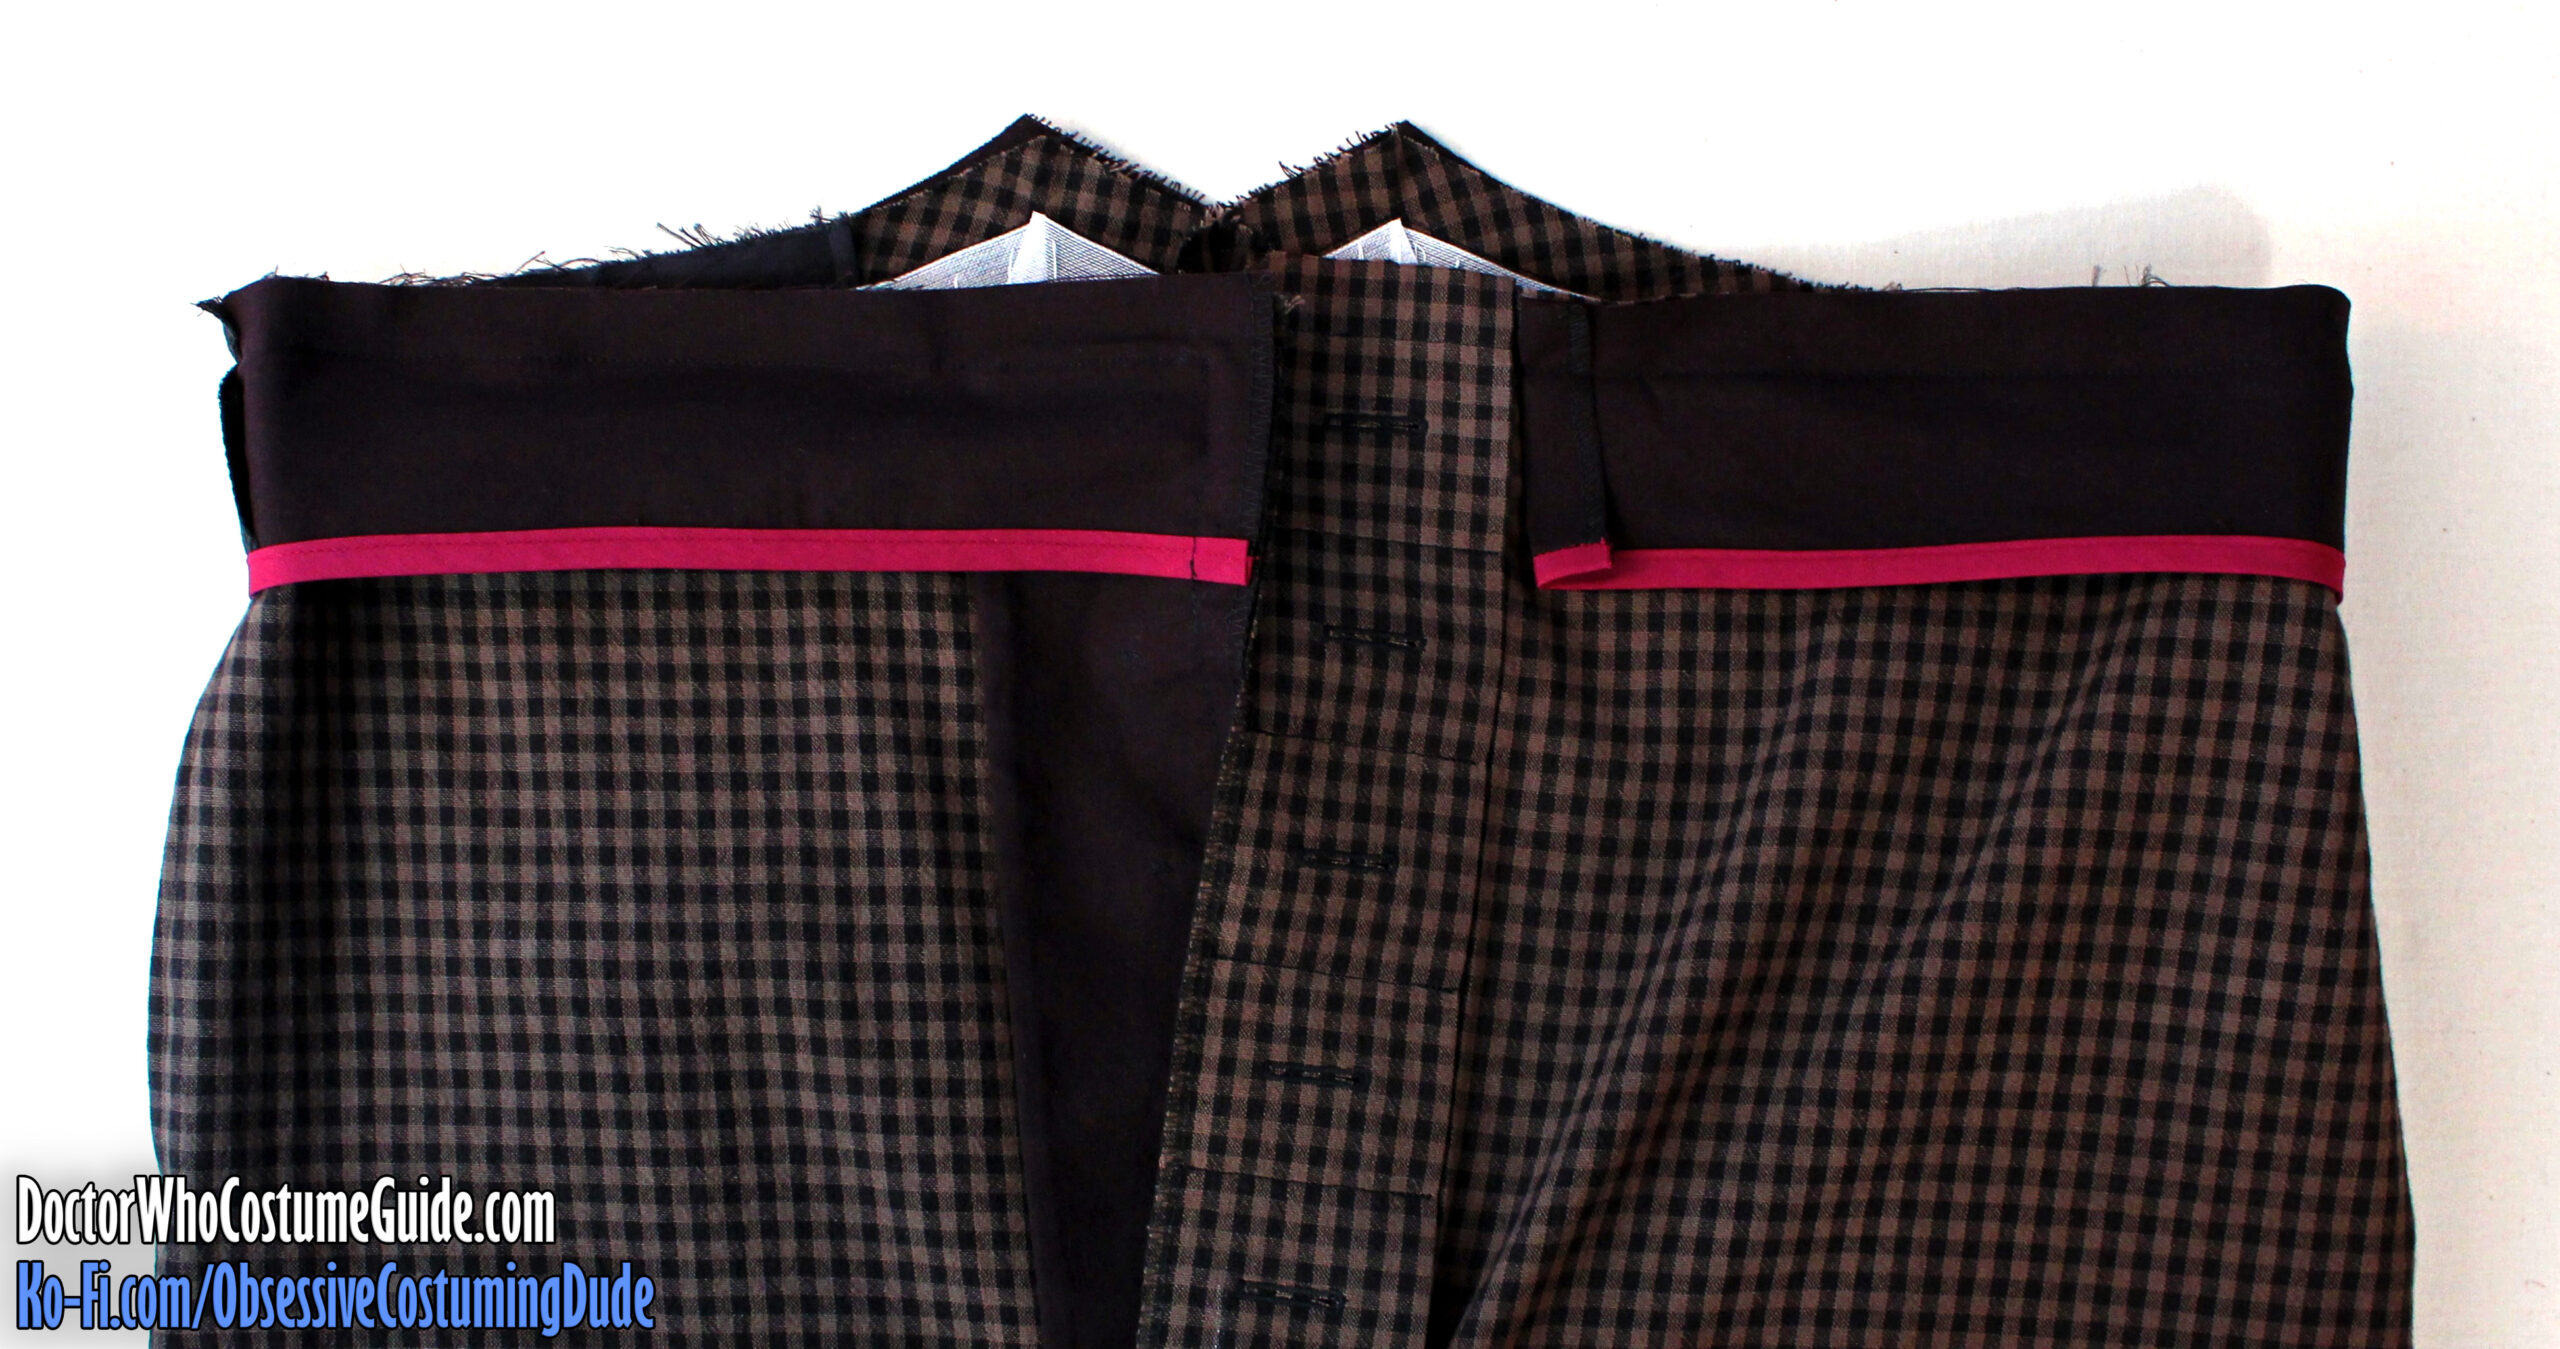
Press the waistband/facing seam allowances downward along the seam line.
Instead of trimming the allowances close to the two upper corners at the center back, press one allowance over the other. This will both produce sharper corners and allow the trousers to be more easily altered later if necessary.
Hand-sew the allowances to the Ban Roll.
Turn the waistband facing under, turn the fly assemblies back under, and press.
Remove the previous tailor-basting, then tailor-baste the waistband facings into place again through all layers.
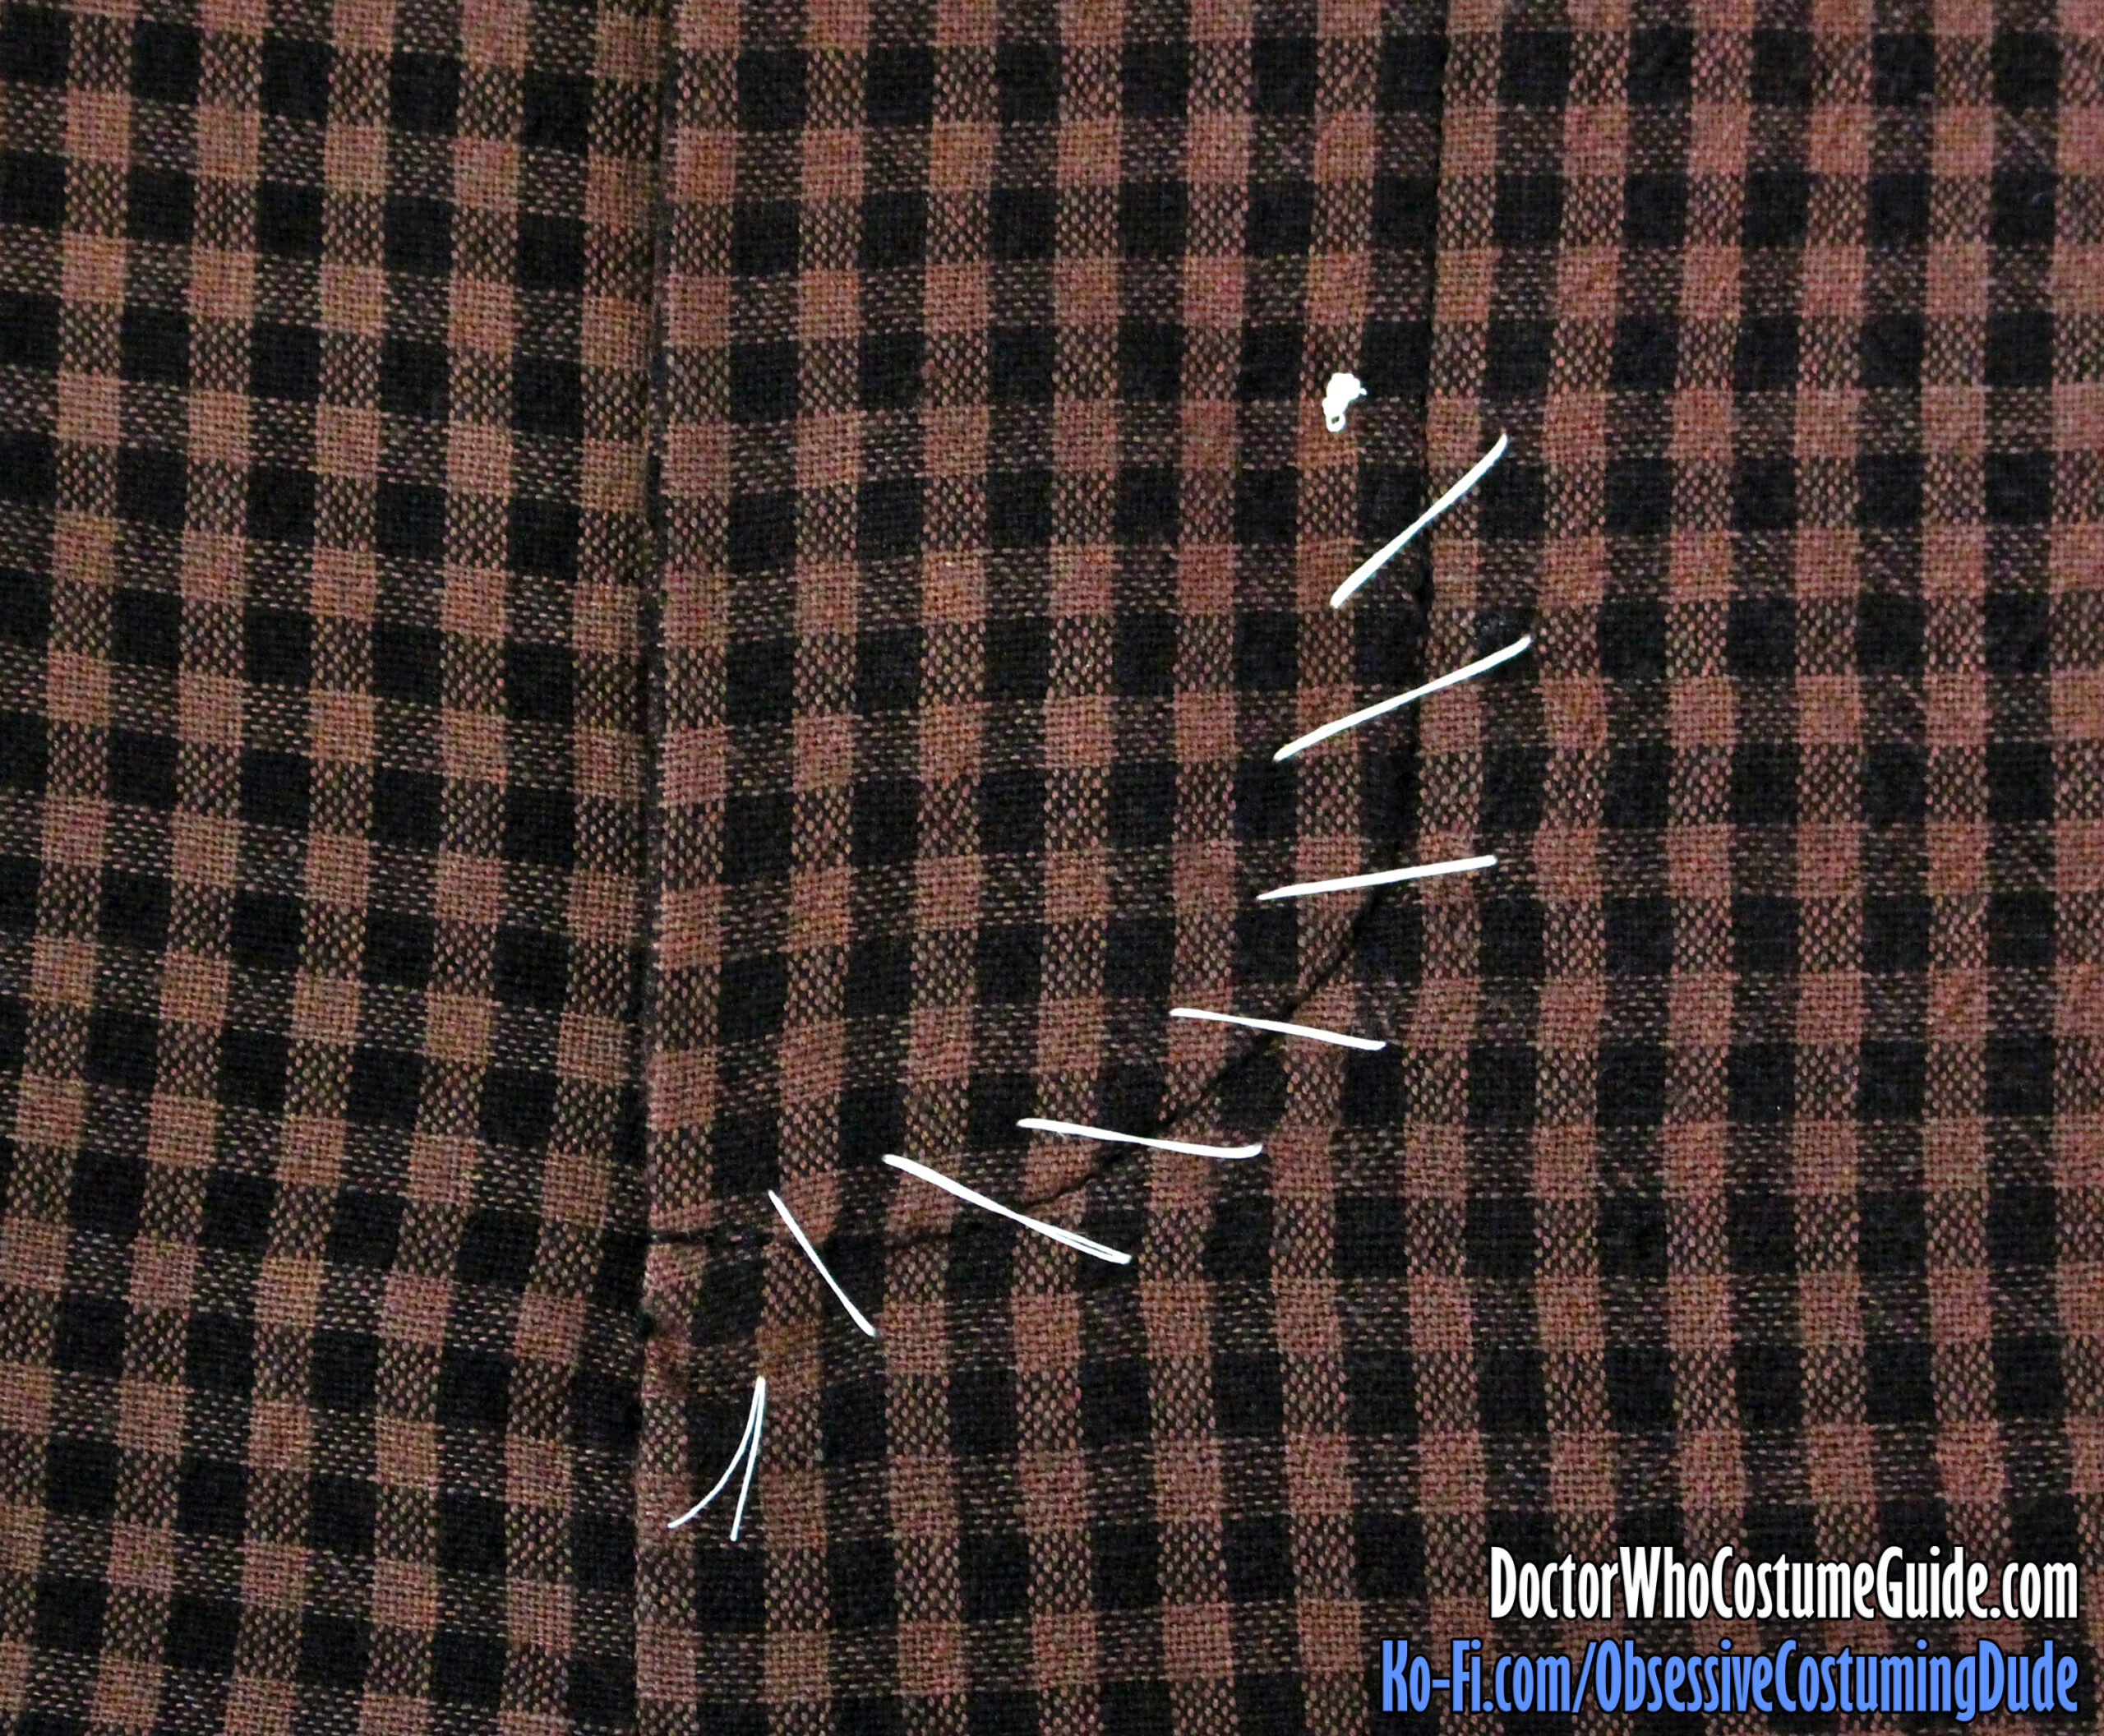
Slip-stitch the upper edge of the left fly to the trousers front.
Tailor-baste the left fly assembly into place through all layers.
Topstitch the left fly assembly into place through all layers.
Ordinarily I like to do this from the underside, using a quilting/walking foot and stitching ⅝” from the outer (serged) edge of the fly assembly.
However, since this fabric has an obvious check pattern, any deviation in the stitching would be somewhat noticeable and unsightly.
Therefore, I suggest instead stitching from the right side using the check pattern as your guide. (As long as you’re stitching through all layers and give the buttonholes a reasonable berth, it doesn’t really matter exactly where – and better for any minor deviations to be on the interior!)
Anchor all the layers together by hand along the lower curve.
Topstitch again along the lower curve, exactly over your previous stitching, beginning and ending with small bar tacks.
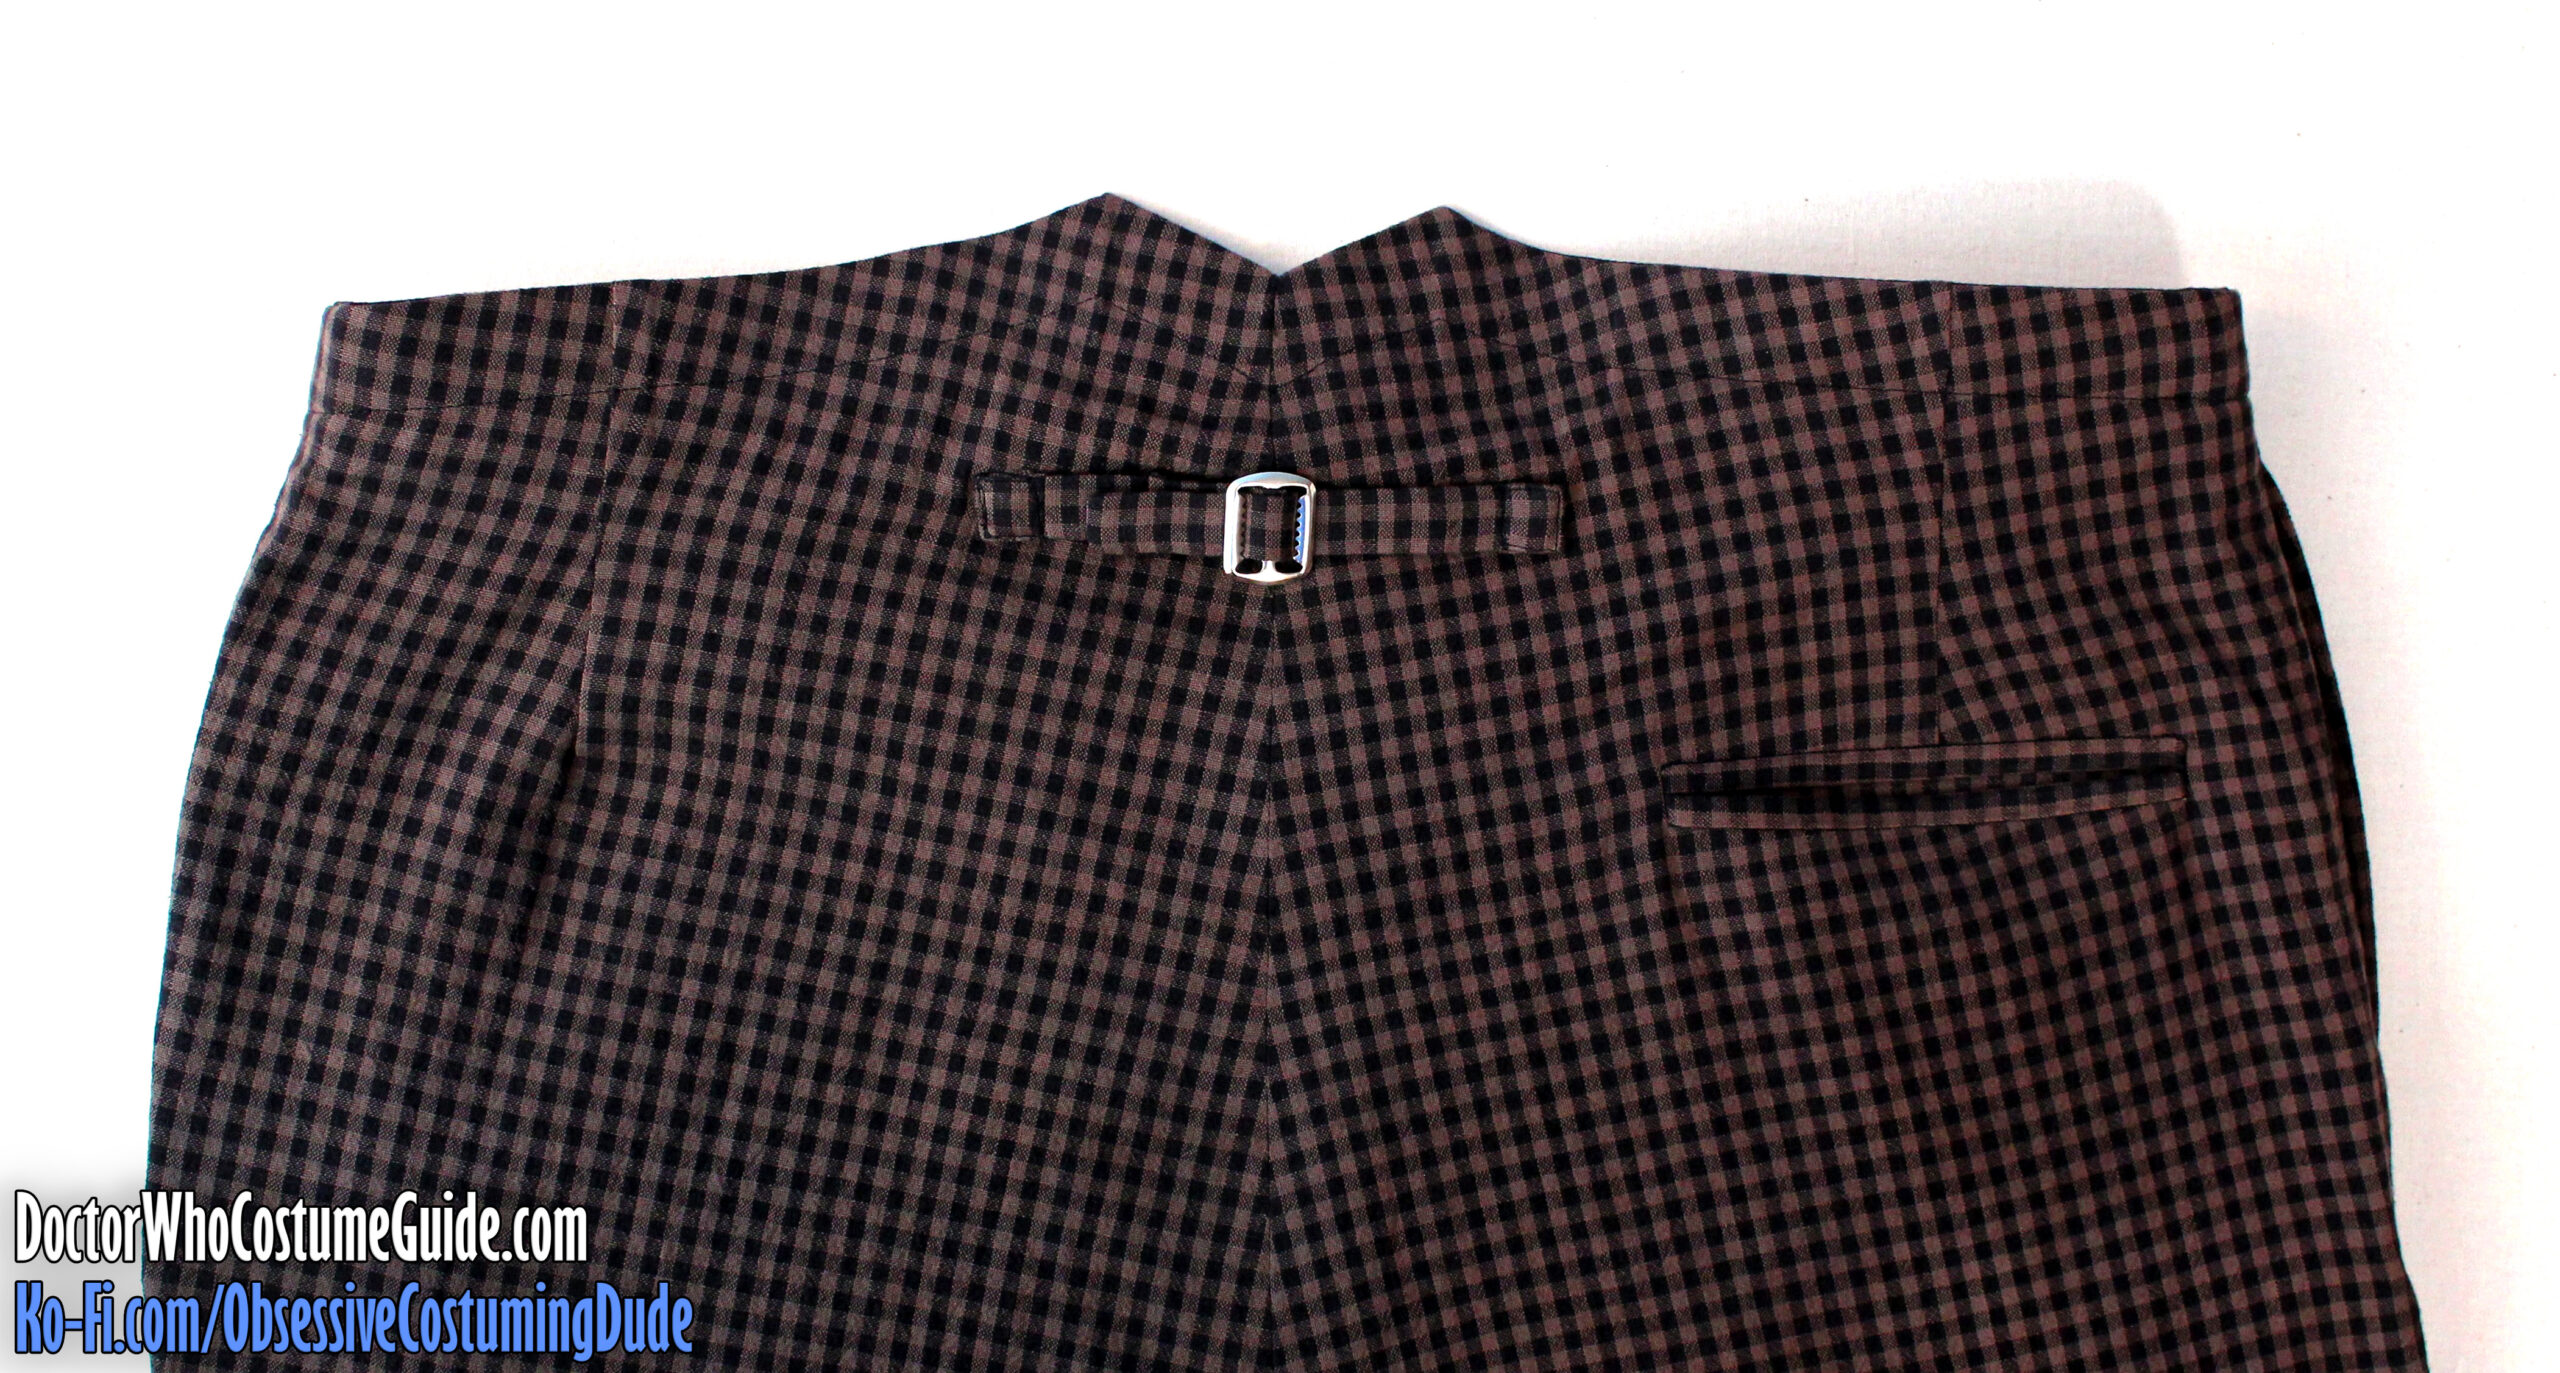
To secure all the layers into place, topstitch along the top of the trousers 1” from the upper edge, beginning your stitch at the left fly topstitching, pivoting at the back corners, and ending at the front right edge.
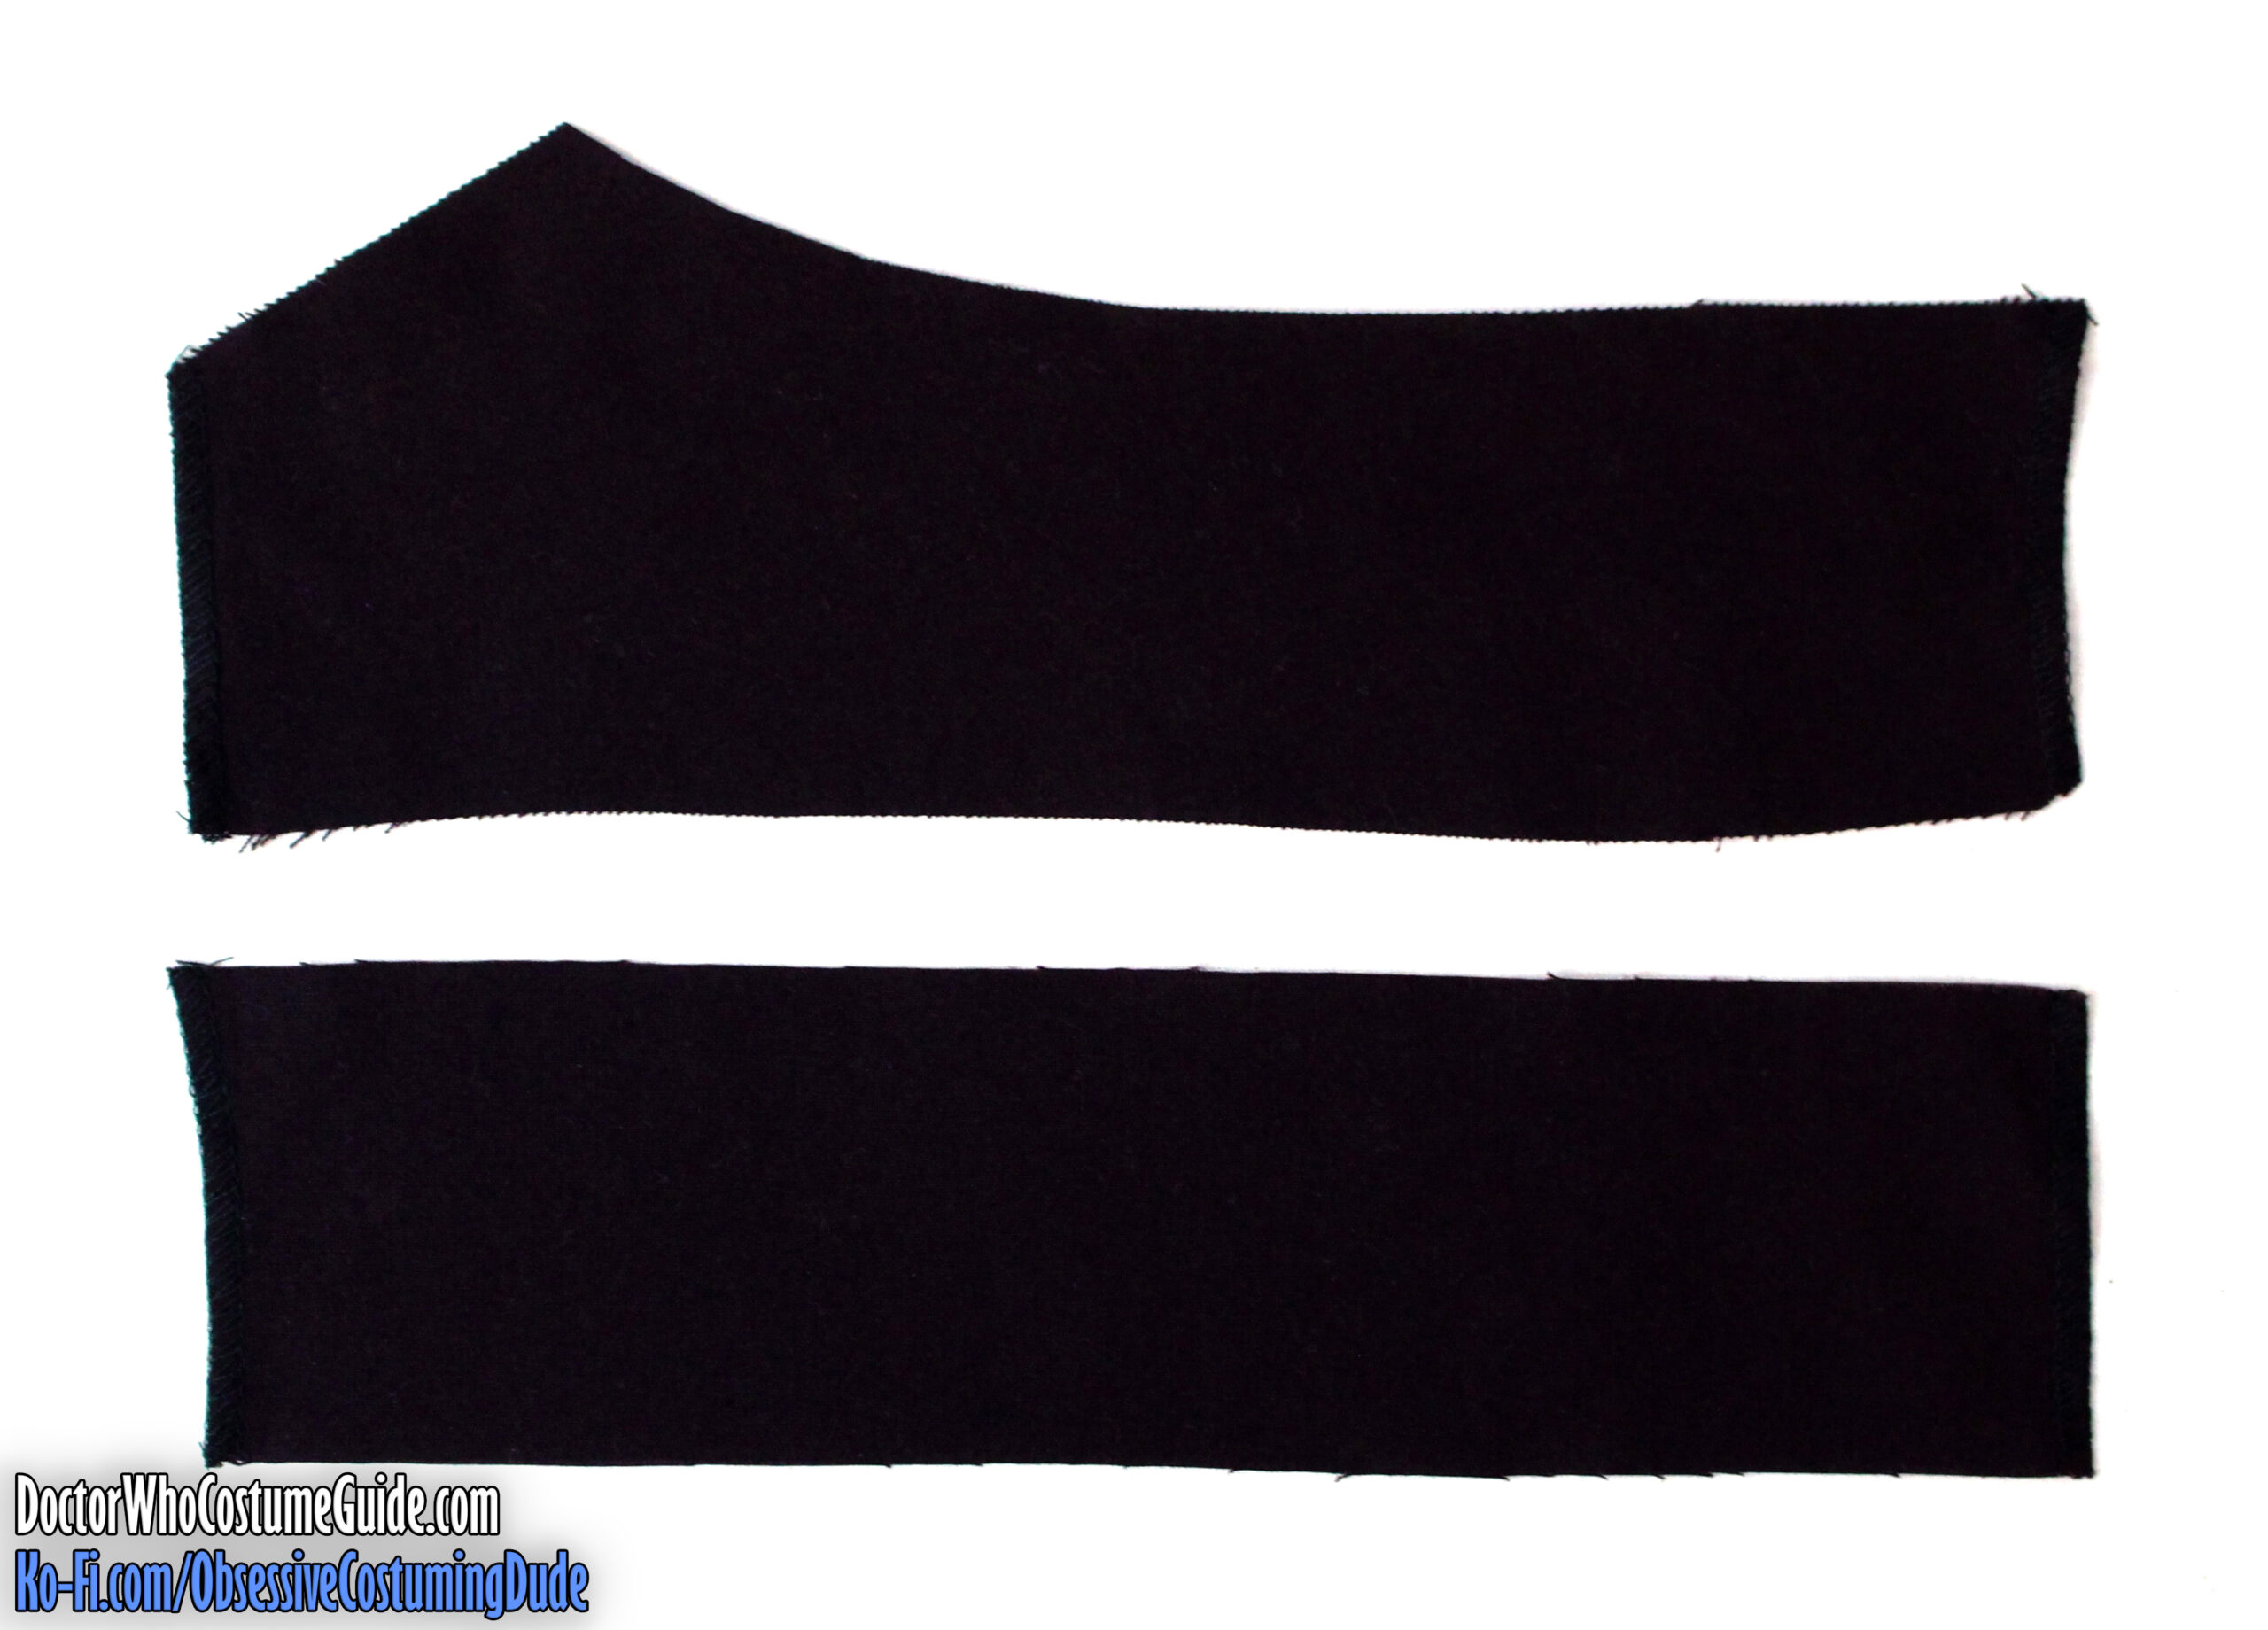
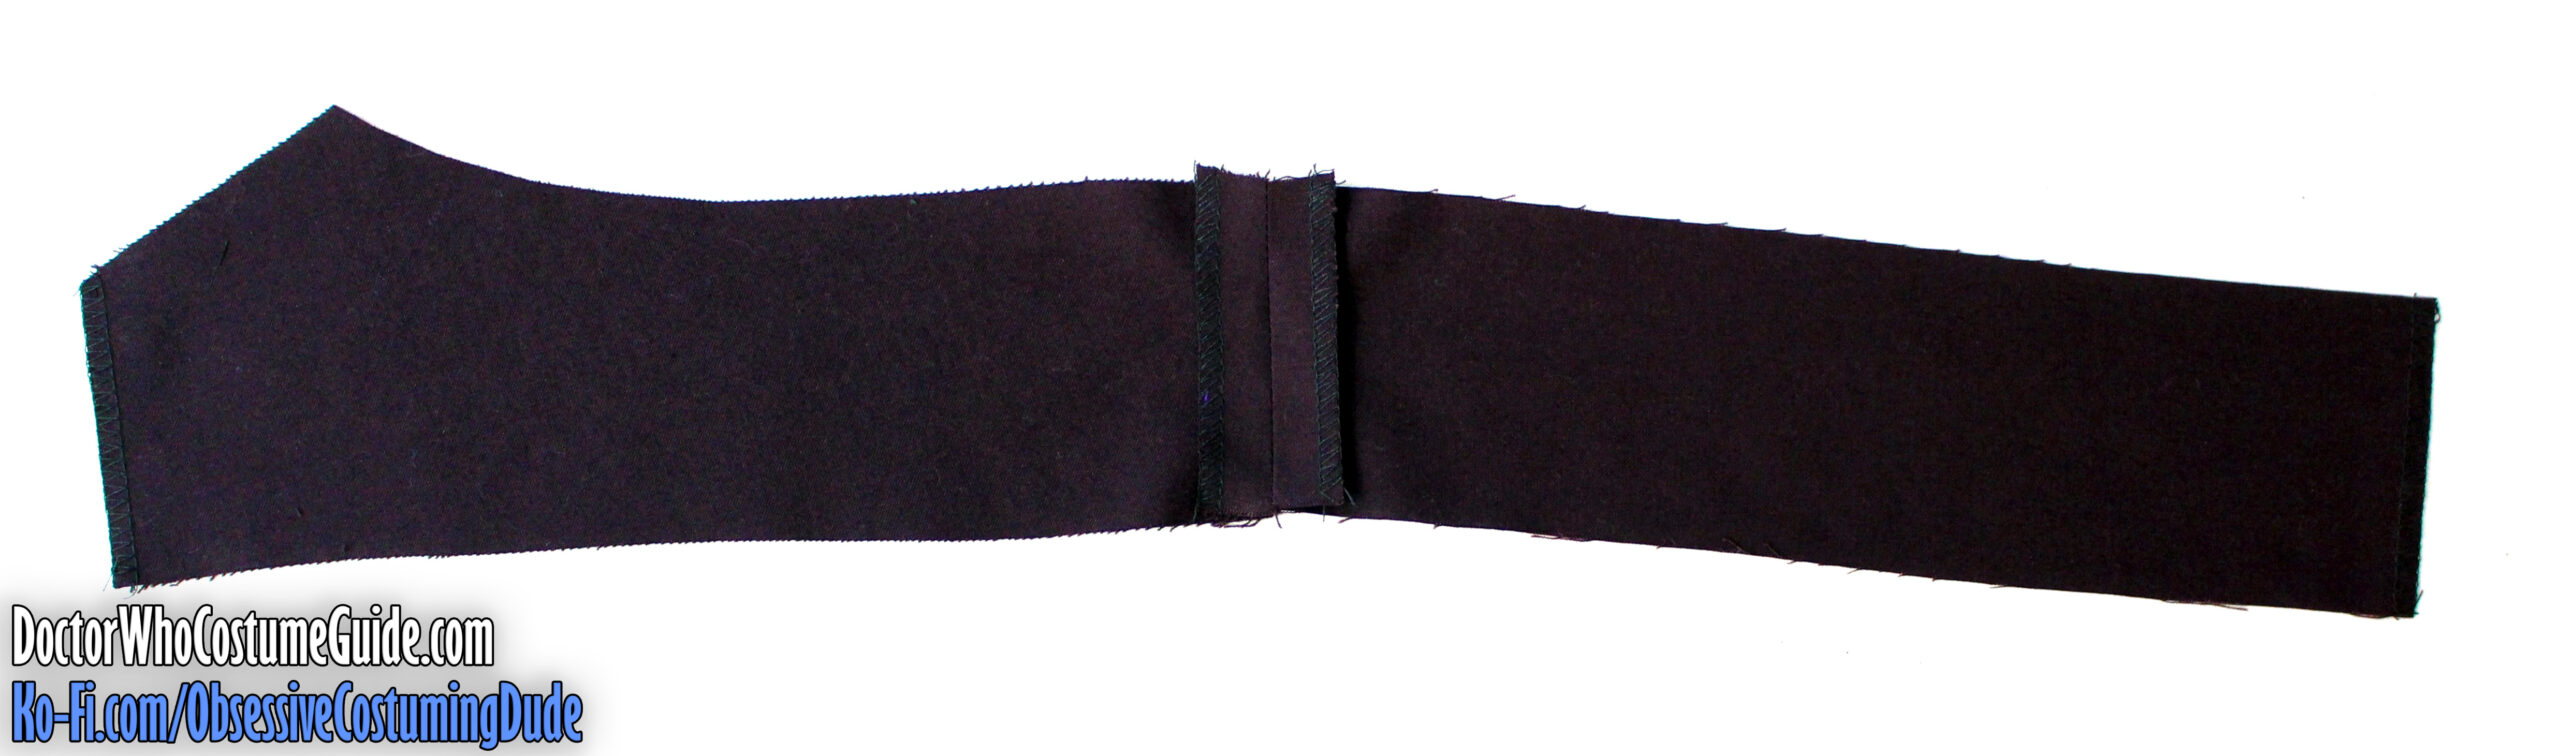
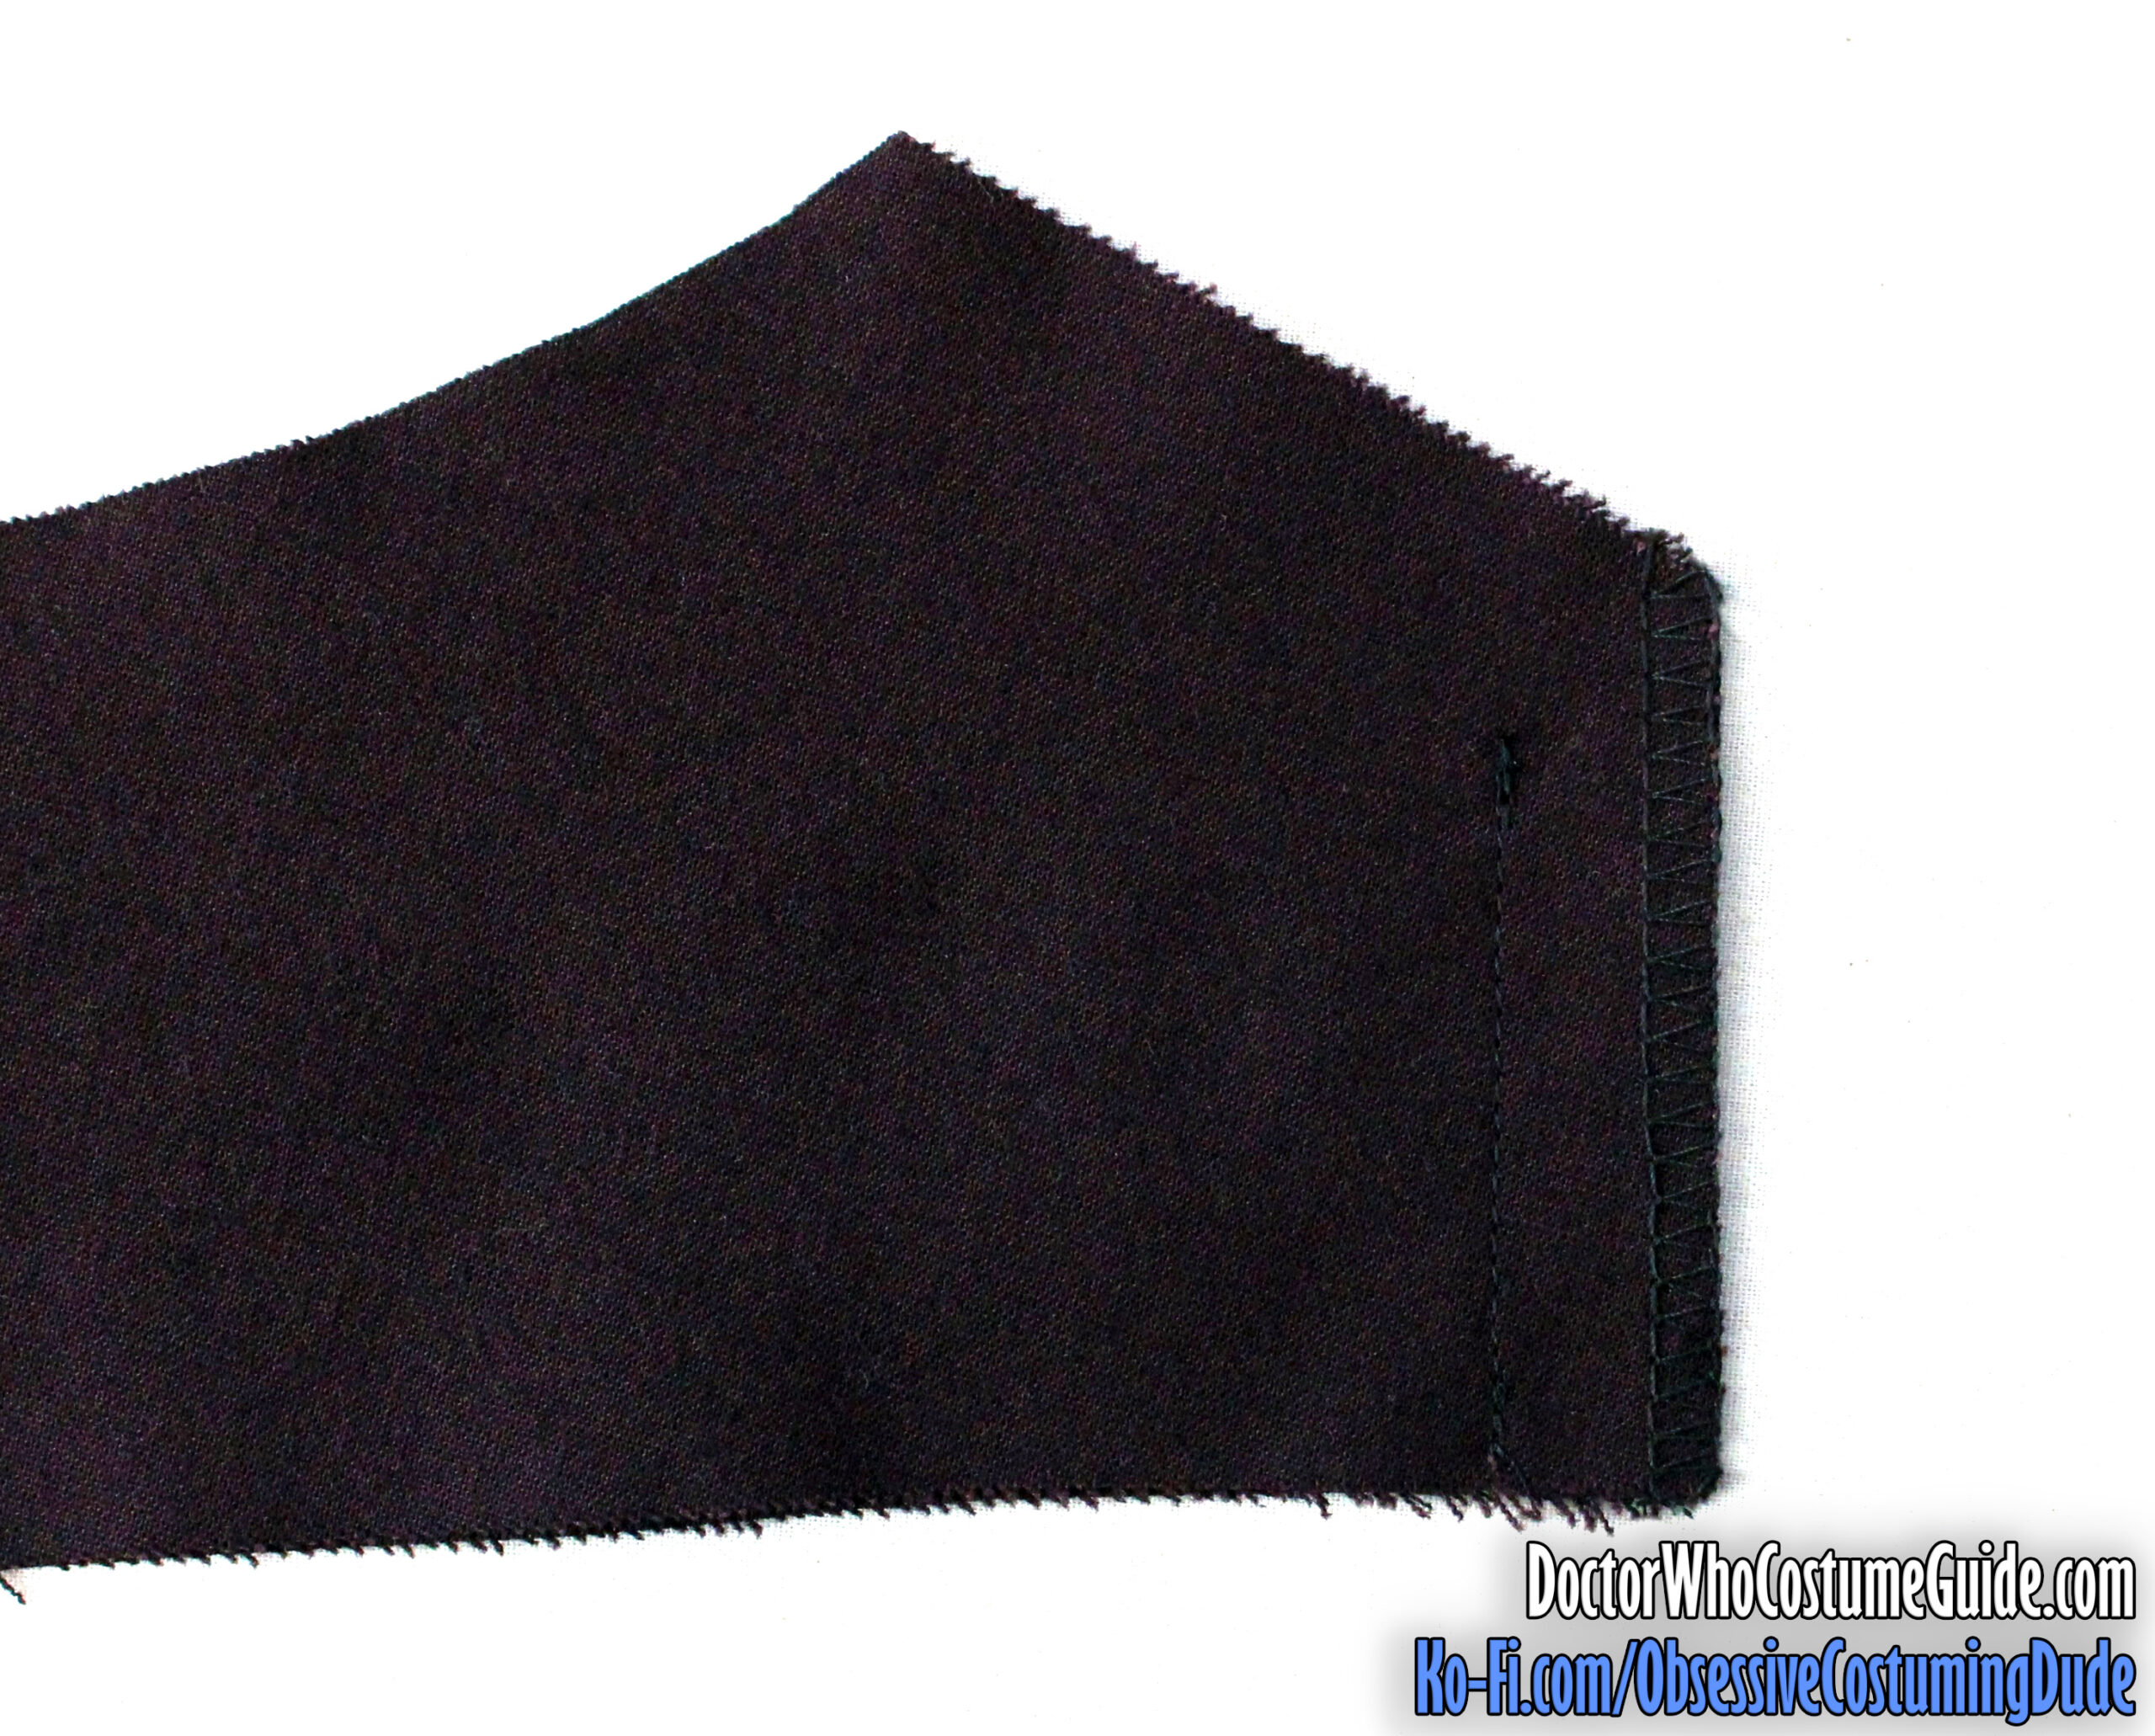
Sew two back straps (piece K) together along the two longer edges and one short edge with a short stitch length.
Trim the allowances down to about ⅛”, turn the strap right-sides-out, and press it flat.
Turn the open end under ⅝”, then turn it under ⅝” again and press.
Hand-sew the “hemmed” end into place along the folded edges.
Repeat for the other back strap.
Position the two back straps symmetrically across the center back approximately 1” beneath the topstitching, with the “hemmed” ends away from center.
Topstitch the back straps into place with a square of topstitching at the outer ends.
Loop the straps through the buckle.
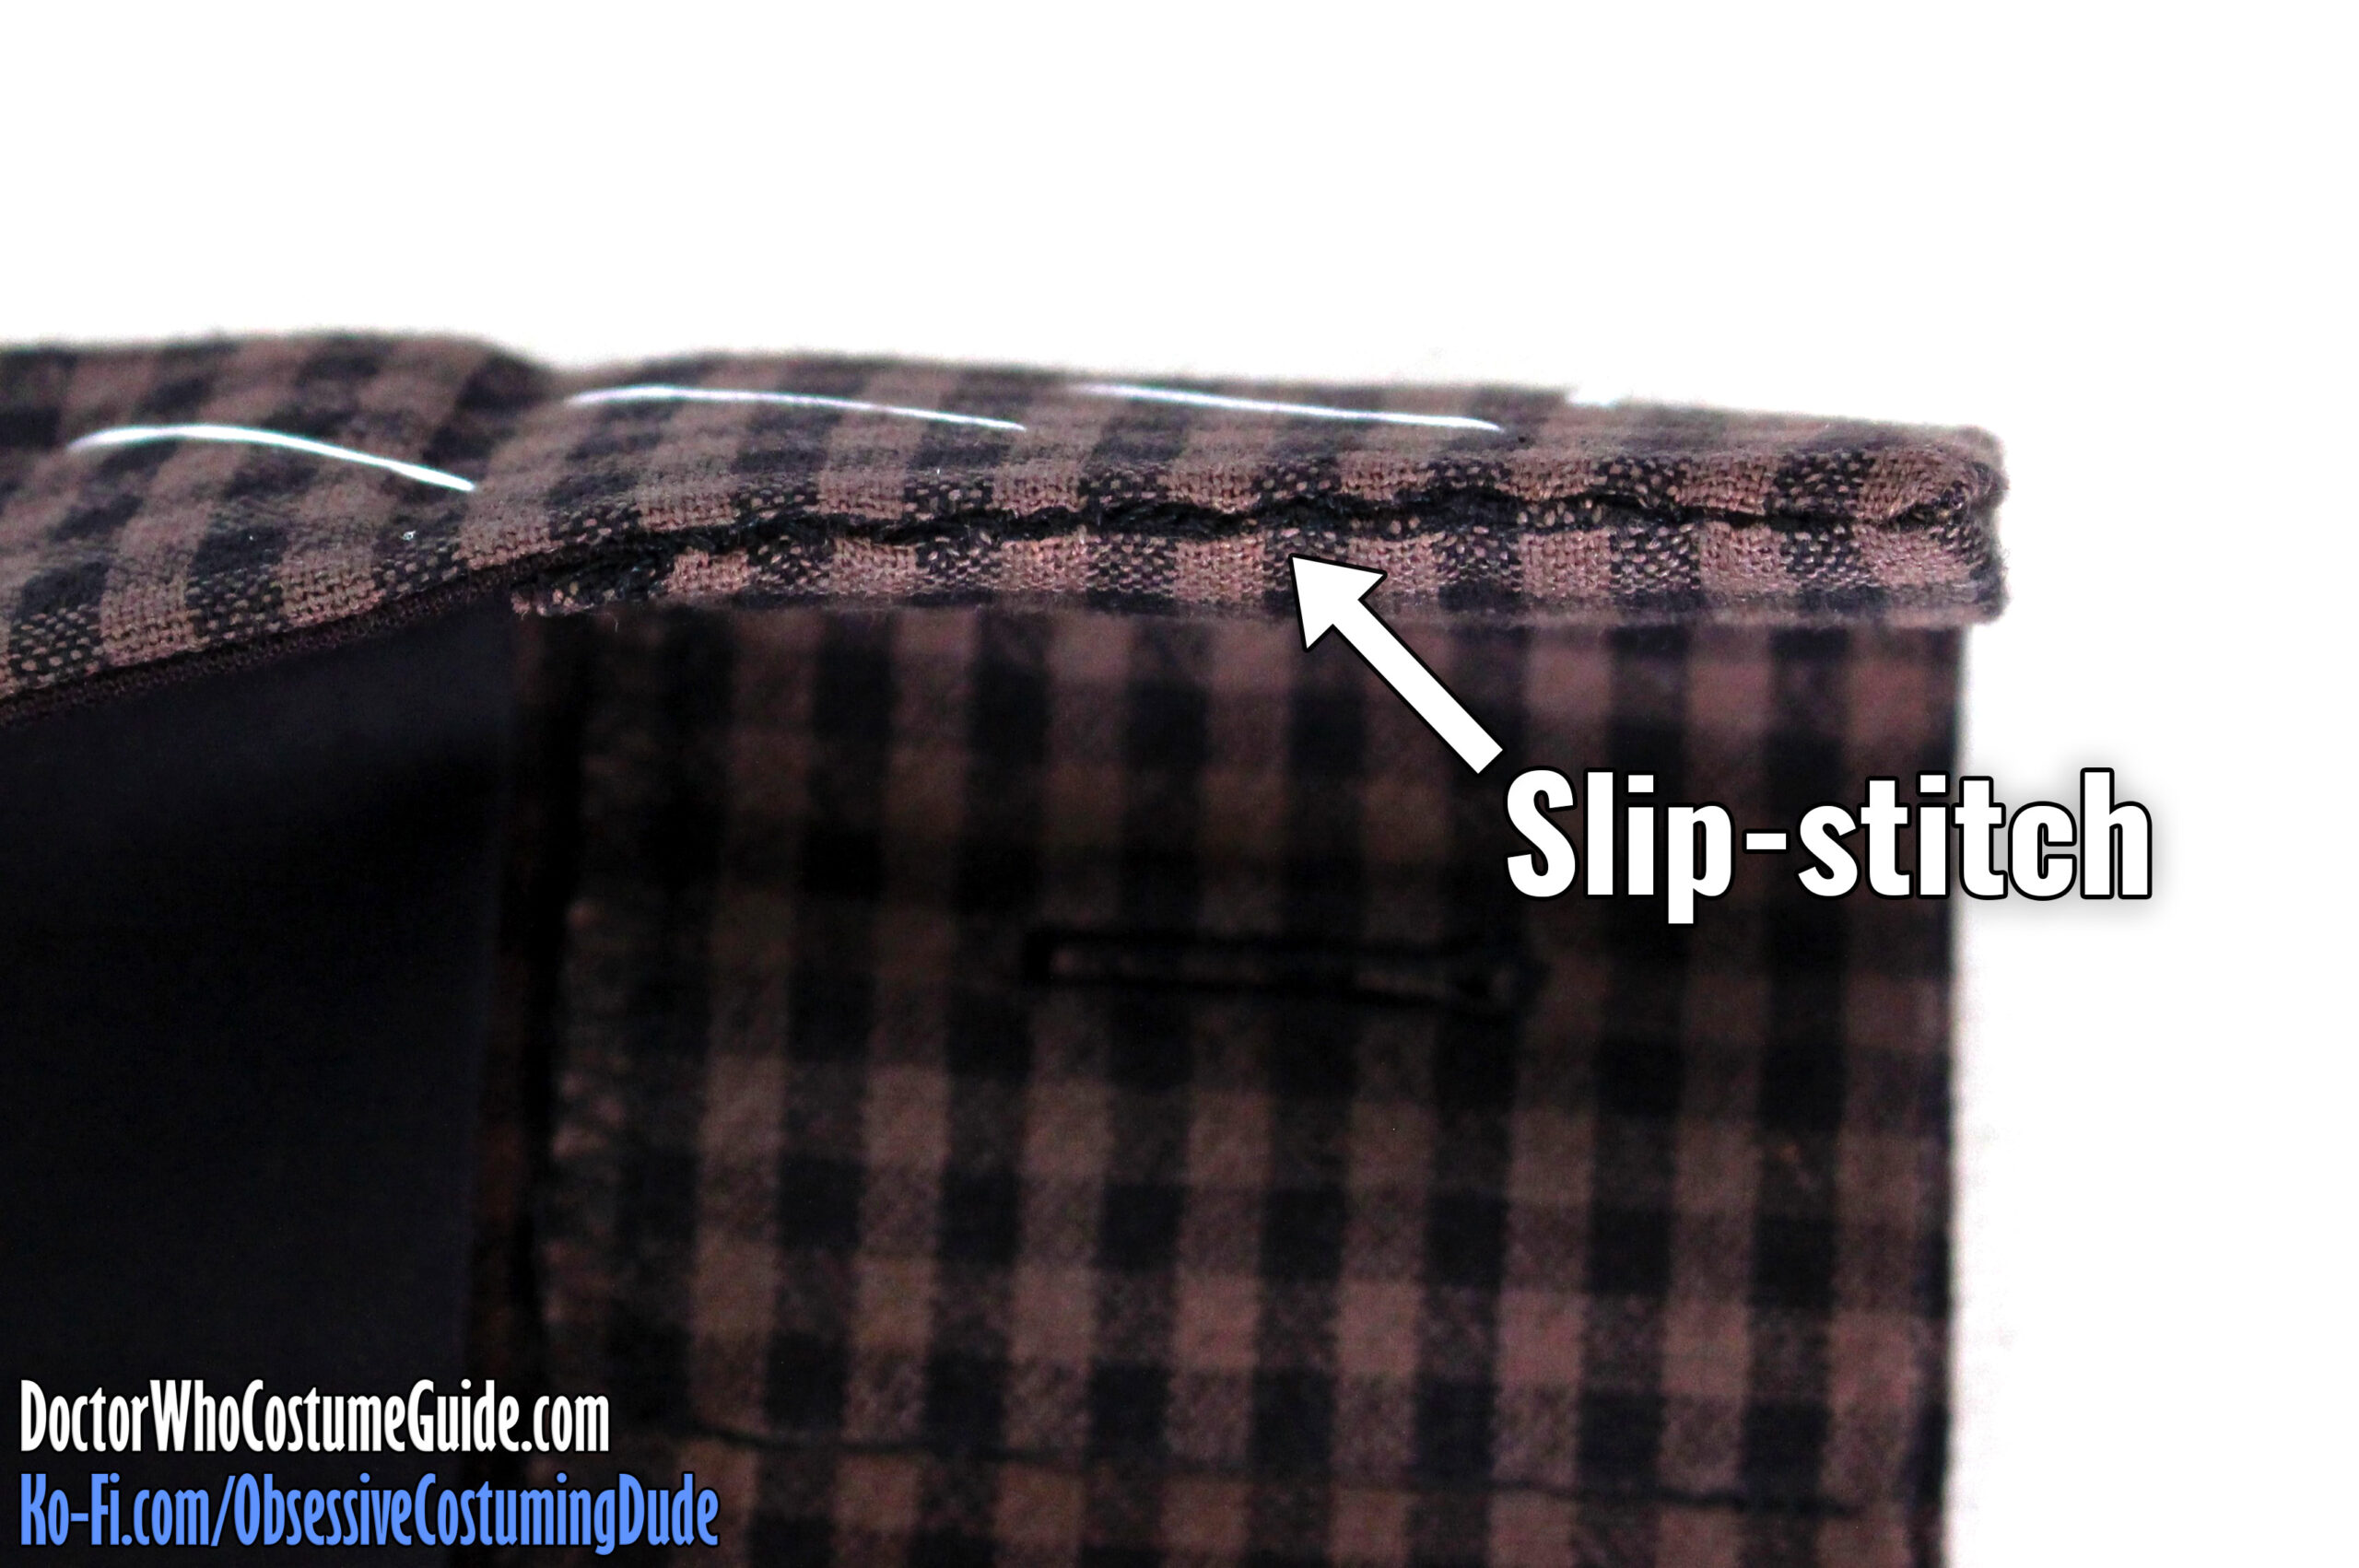
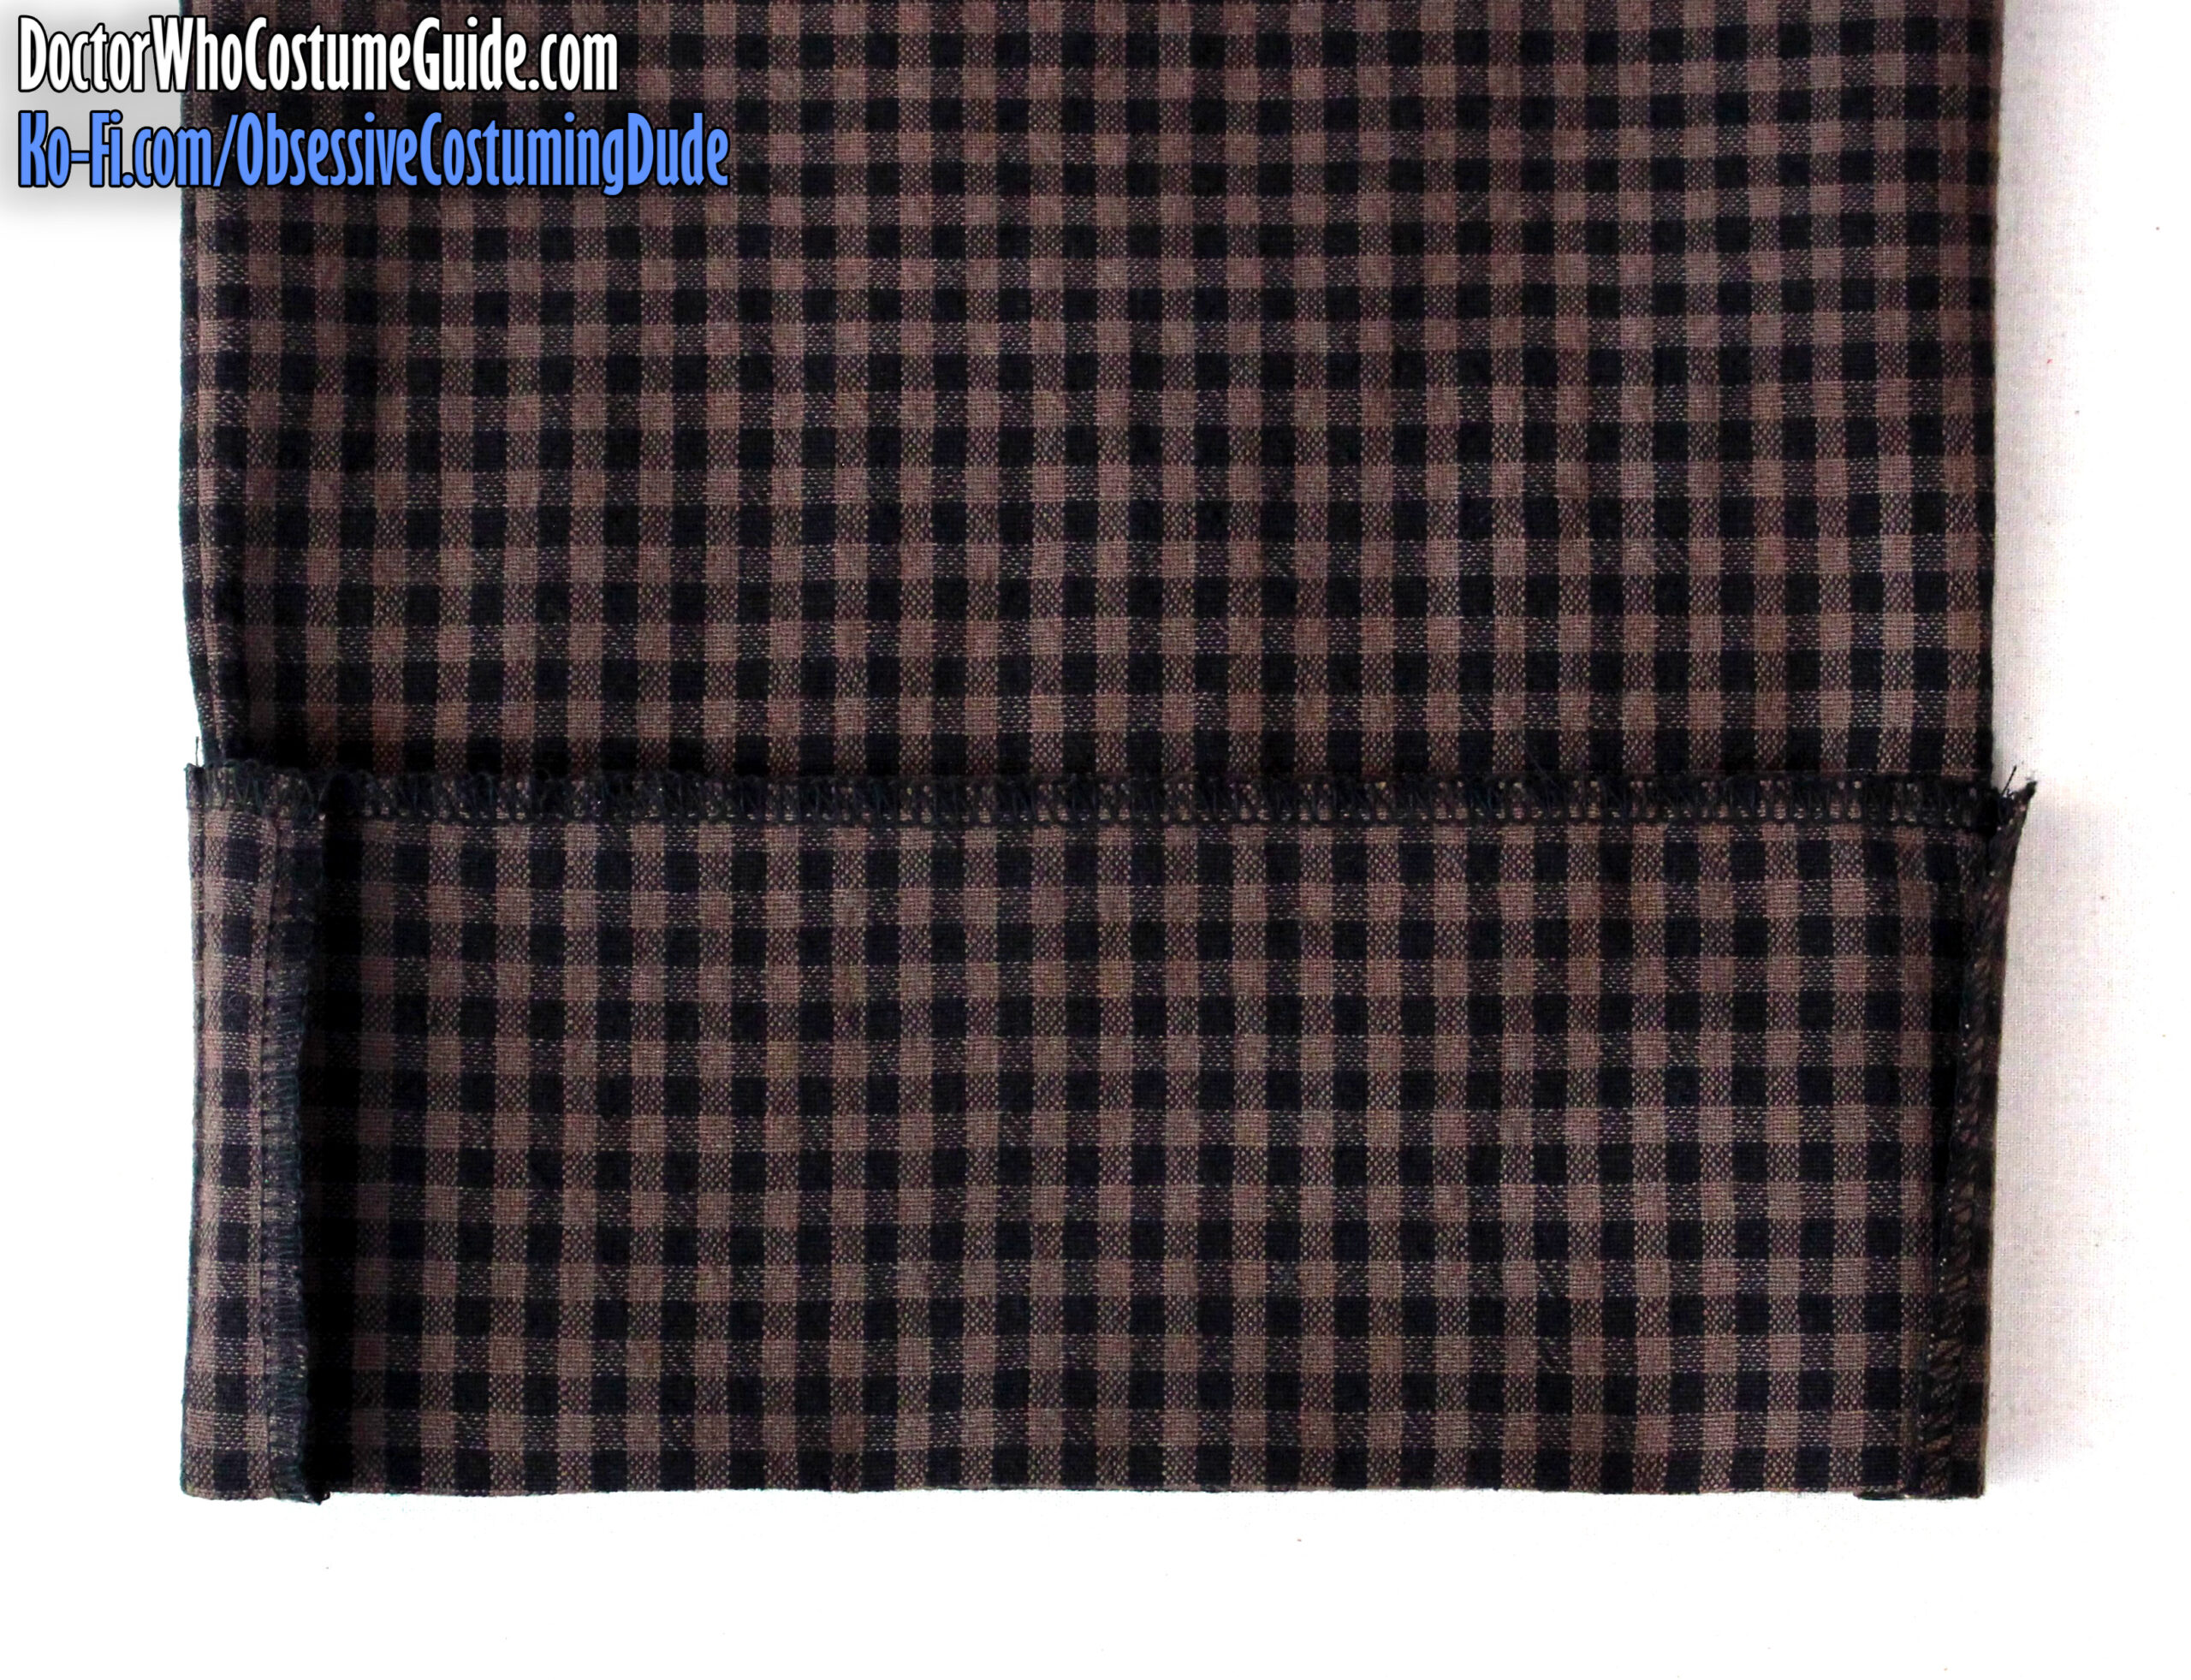
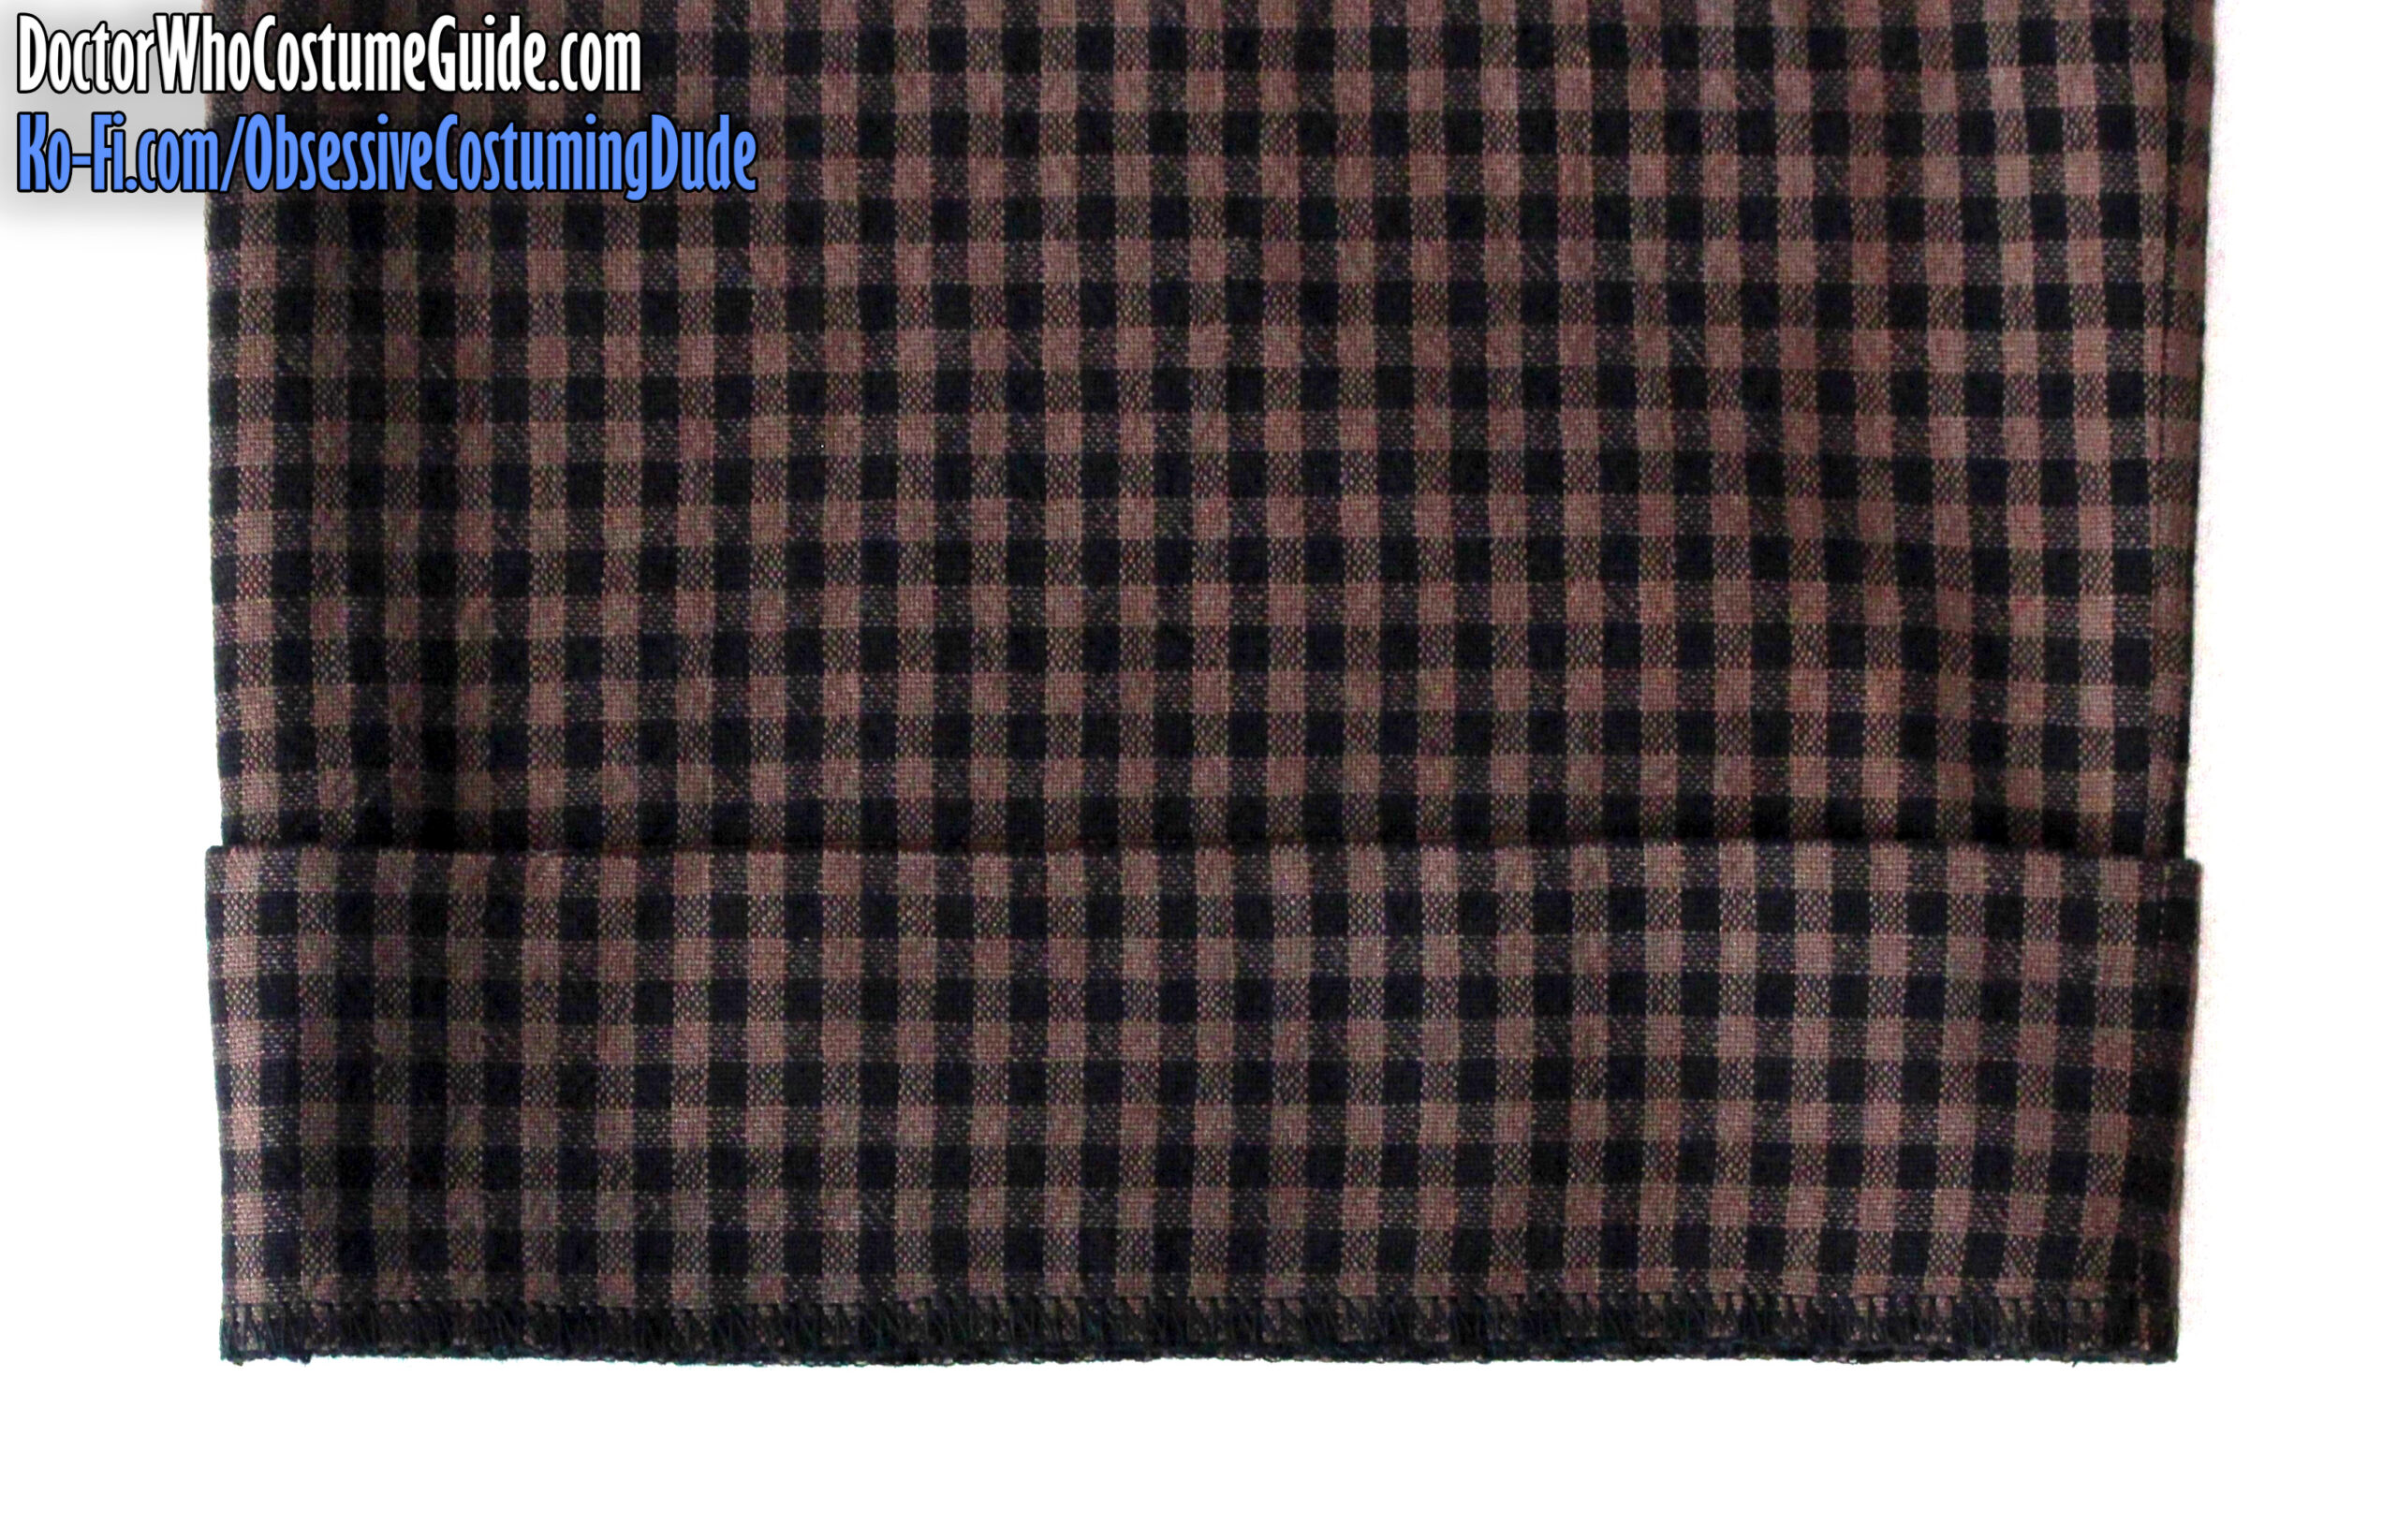
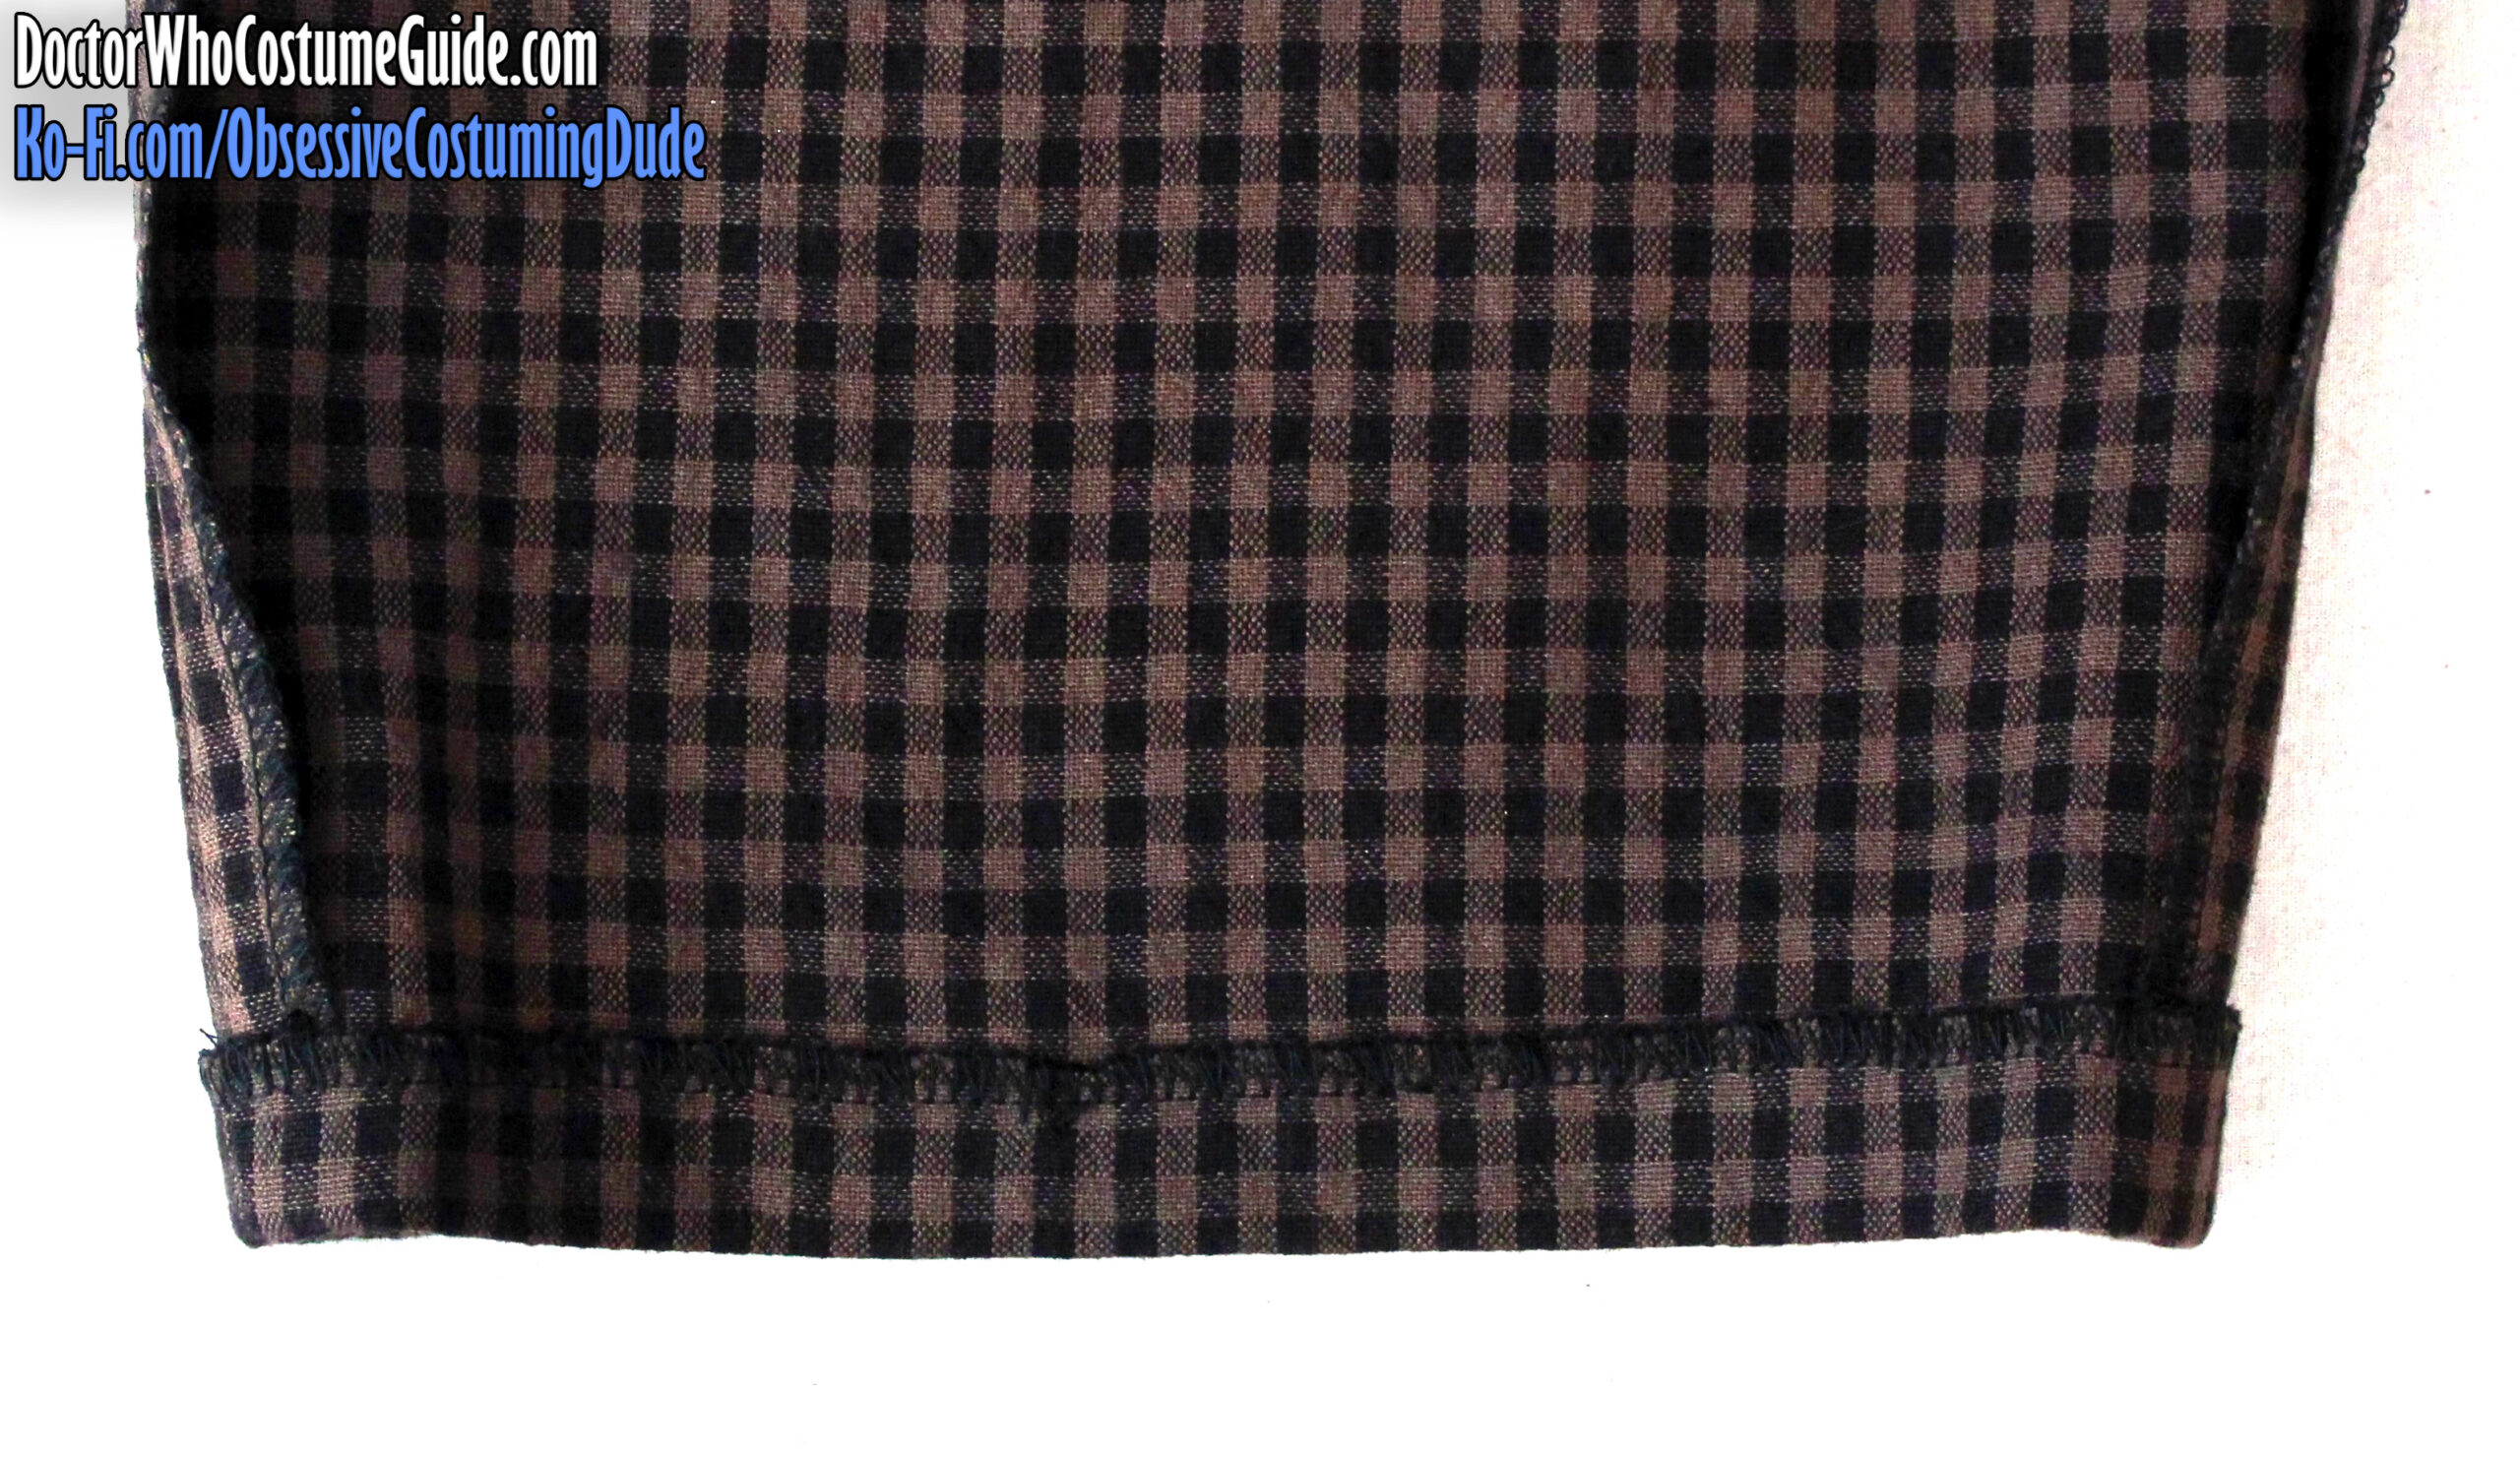
To form the lower cuffs, with the pant leg right-side-out, first press the lower pant leg upward along the uppermost guide on the printed pattern (3 ¼” from the raw edge).
Fold the cuff downward along the second-highest pattern guide (1 ¼” from the lower folded edge, or 2” beneath the serged edge).
Turn the bottom ¾” to the underside of the pant leg and press.
Hand-sew the ¾” cuff allowance to the underside of the pant leg. You can also catch the underside of the cuff with your stitching, but take care not to stitch through all layers to the outside of the cuff.
And finally, hand-sew six buttons to the waistband facings for the suspenders/braces.