Tenth Doctor Brown Suit Tutorial – Trousers Back Assemblies
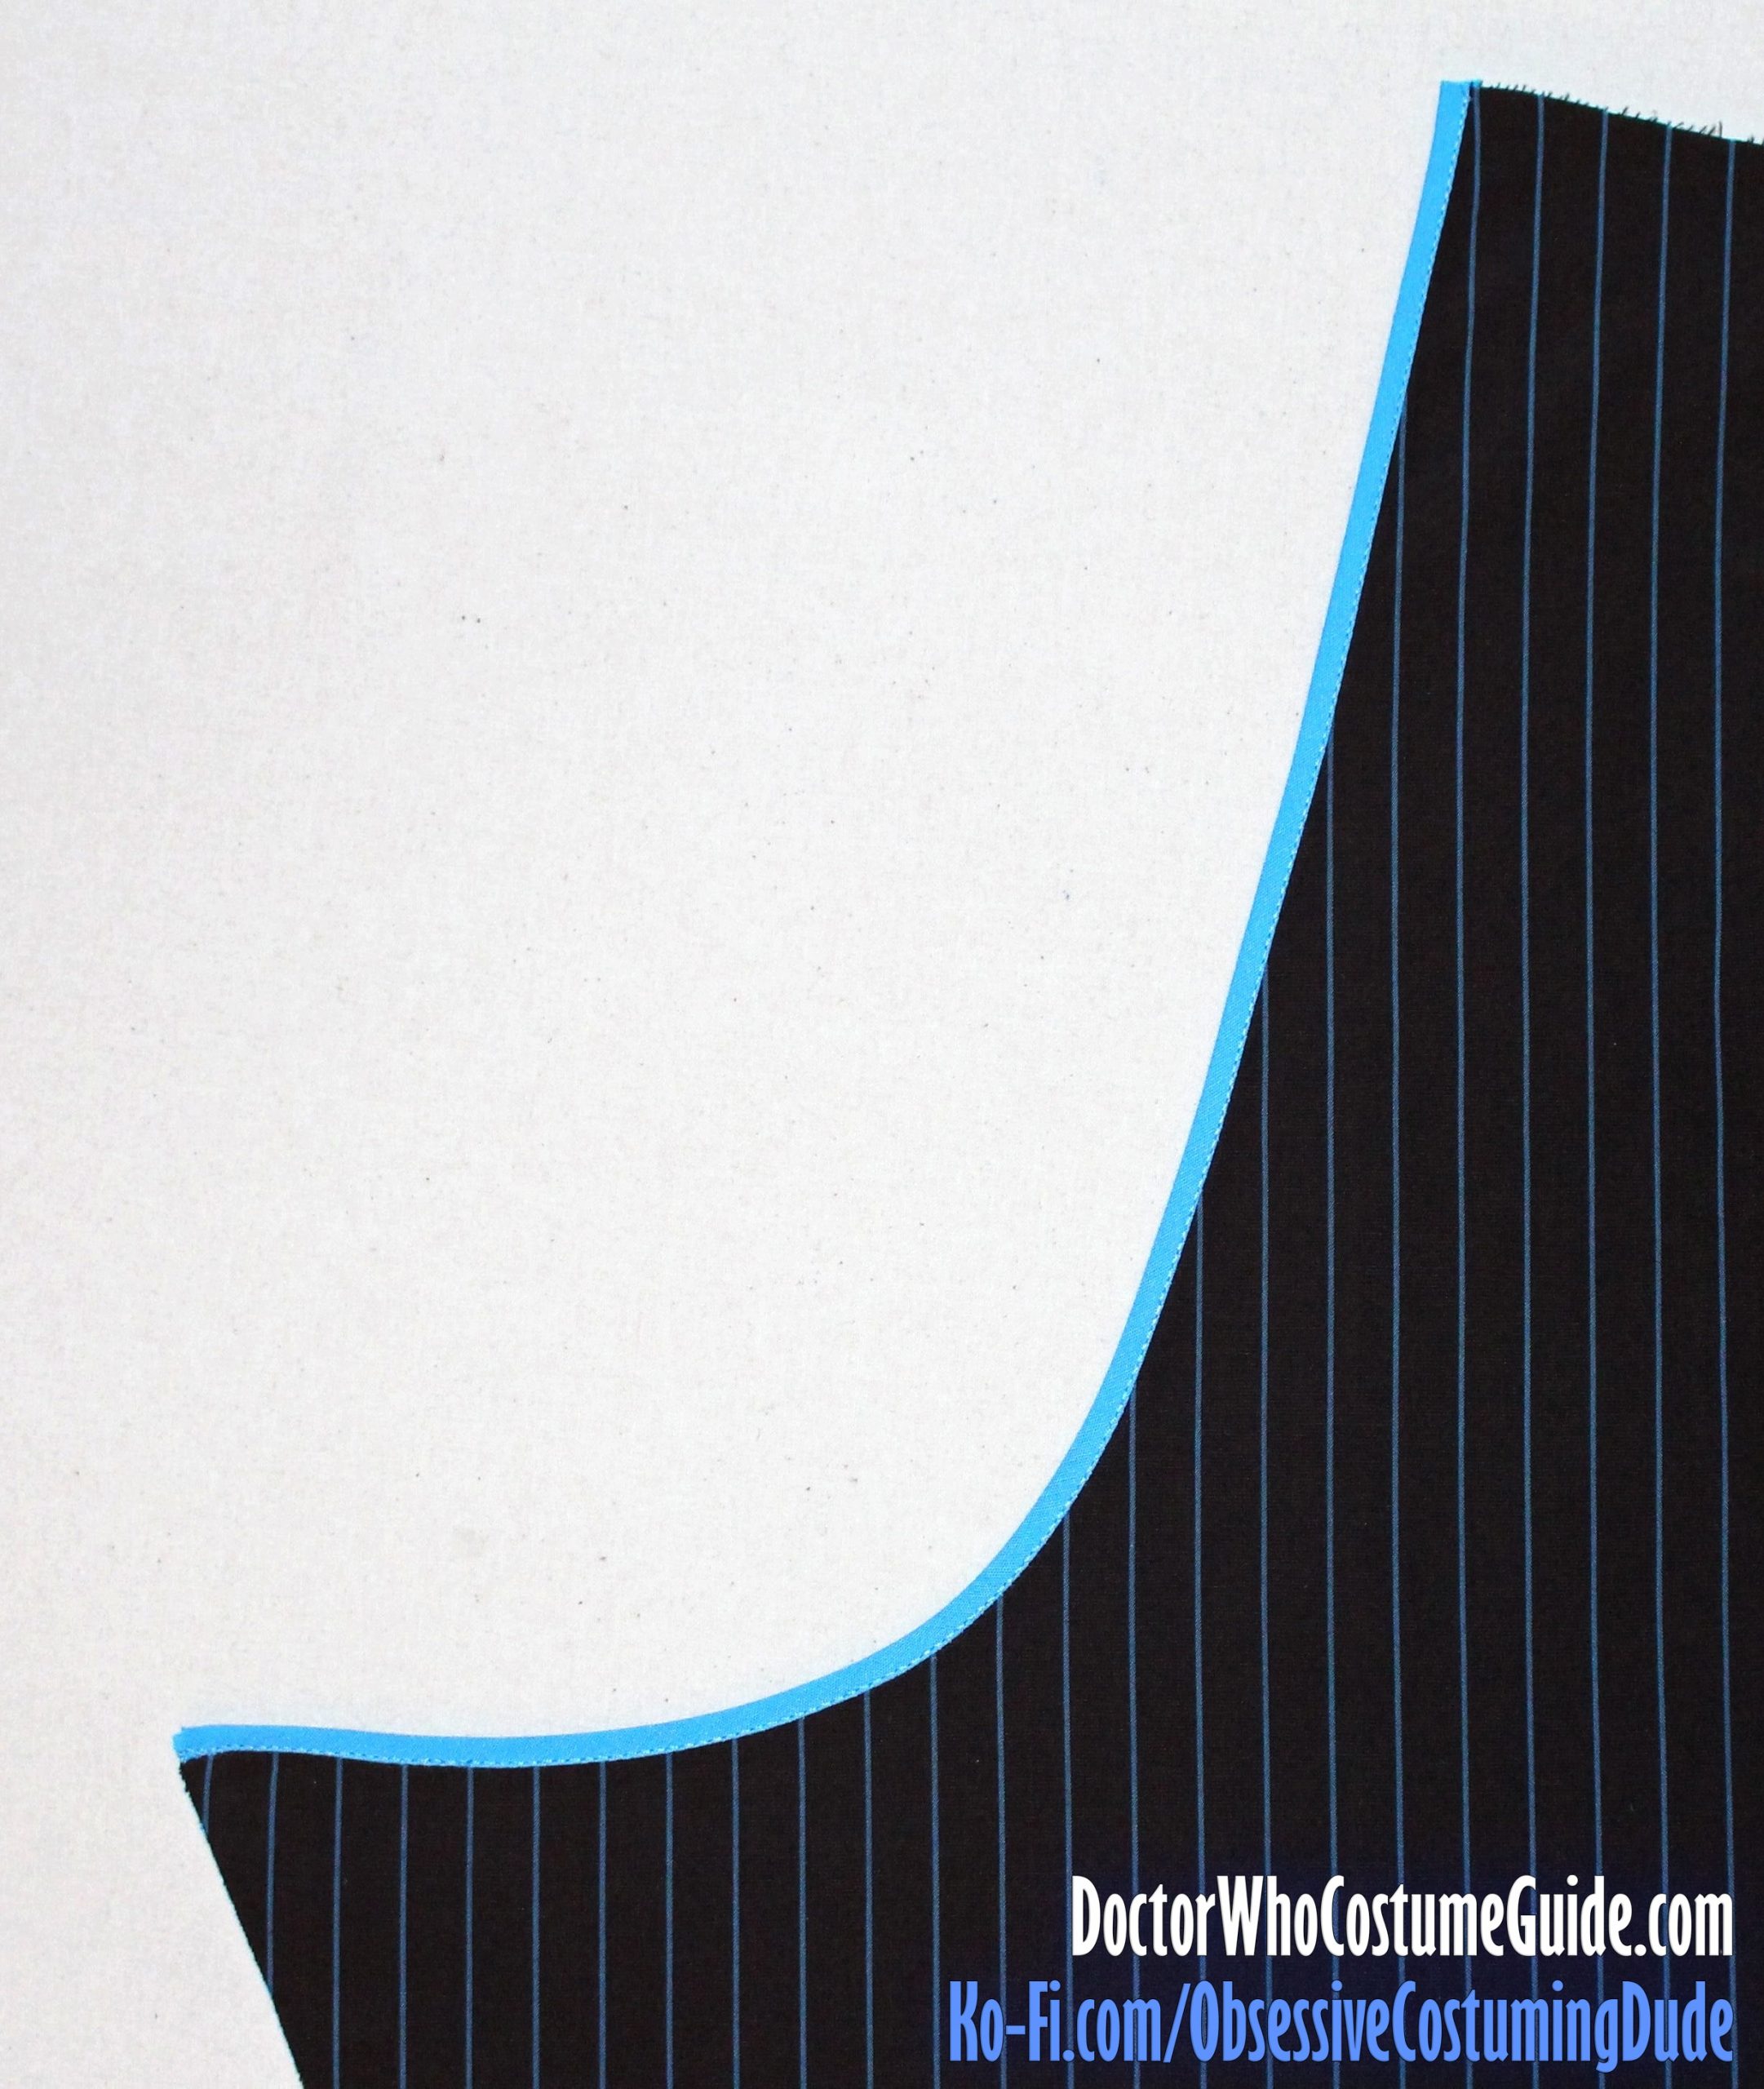
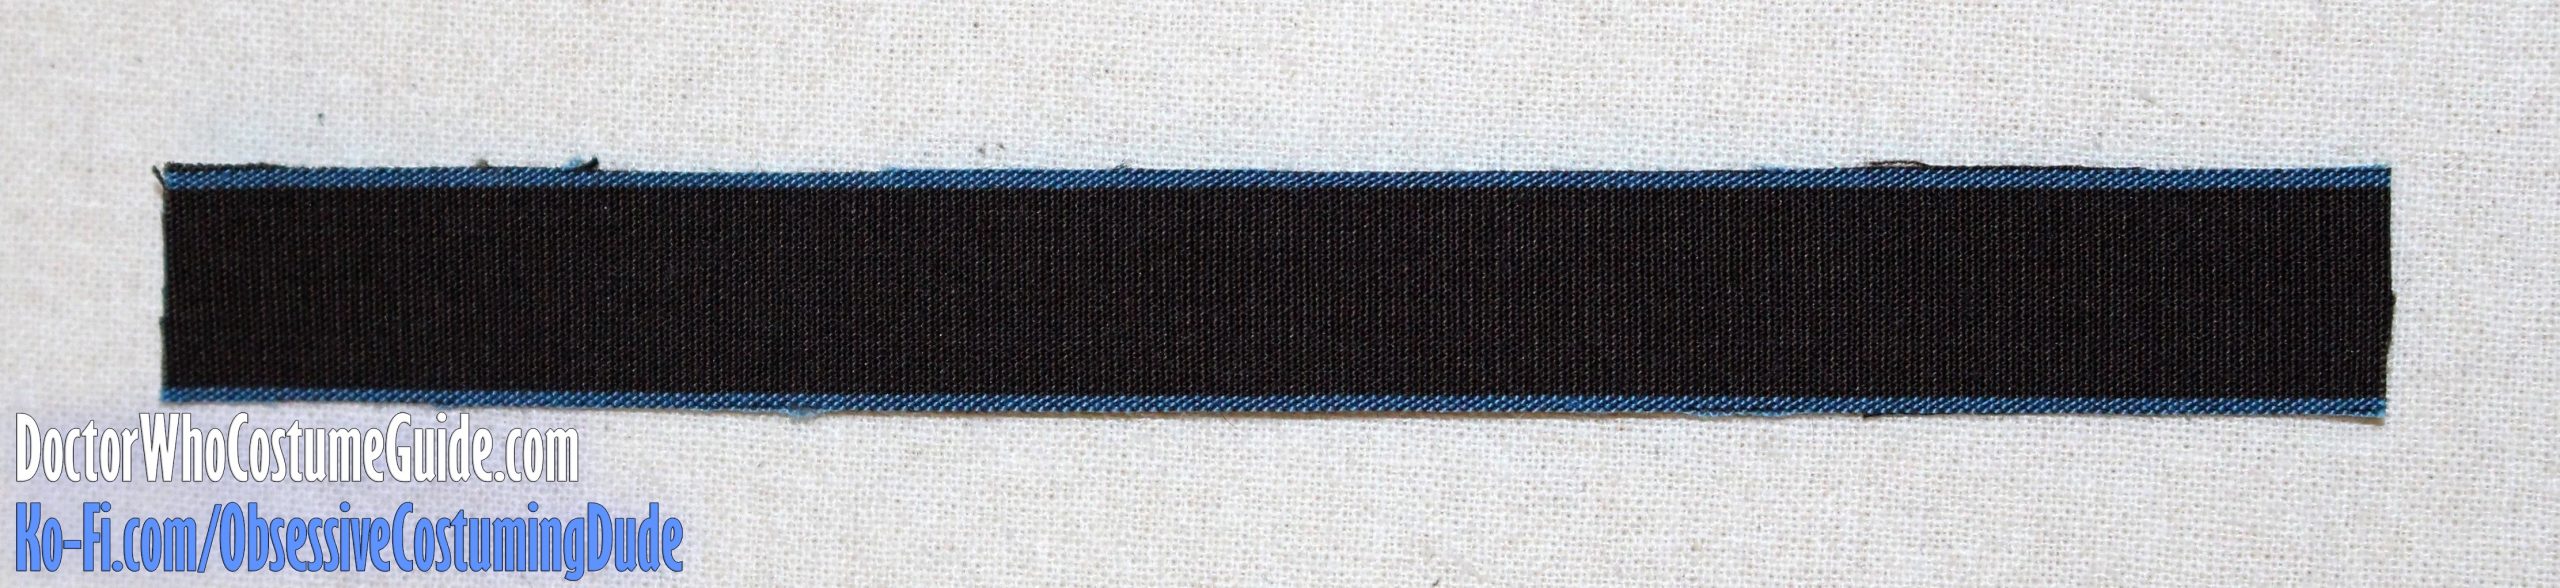
For the back of the trousers, the first thing you’ll want to do is enclose the center back edges with ¼” bias tape.
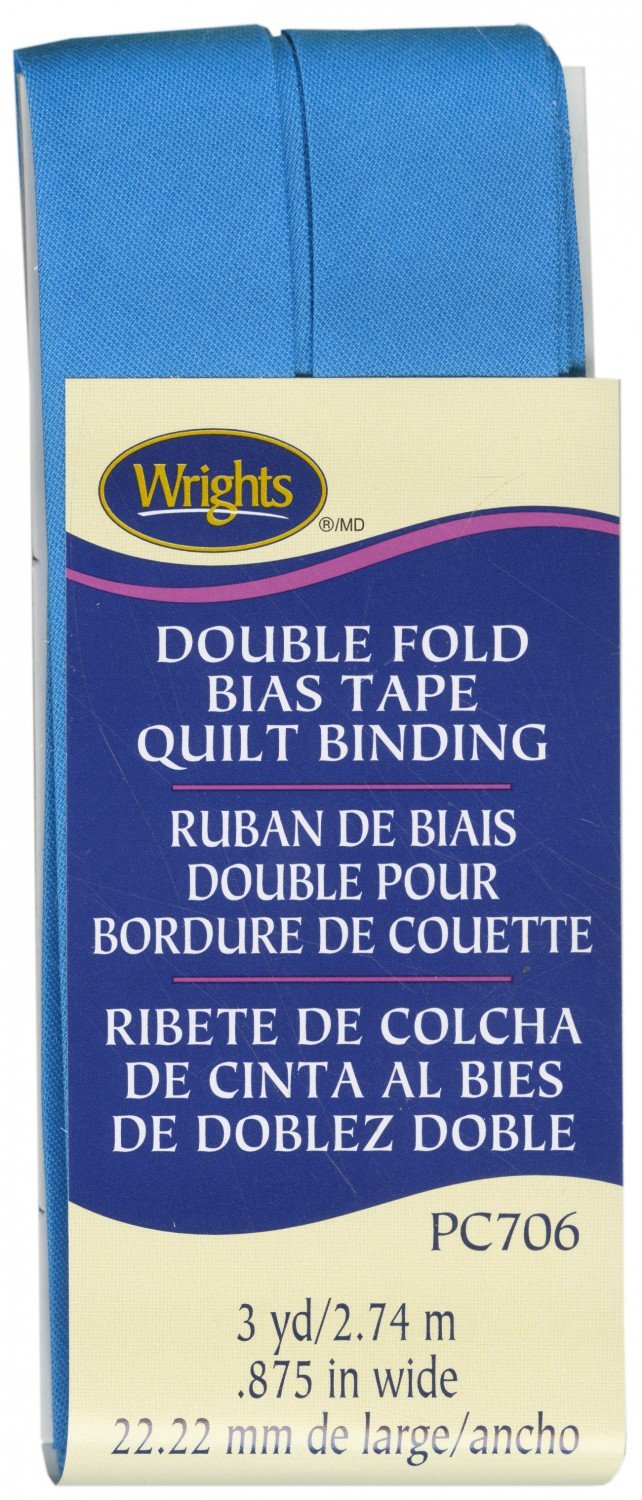
As mentioned in the “Required materials,” the closest color match I found to the original GAP bias tape wasn’t available as ¼” bias tape; it was only available in extra wide quilt binding, so that’s what I used.
Obviously, using it in its original, full width would be absurd!
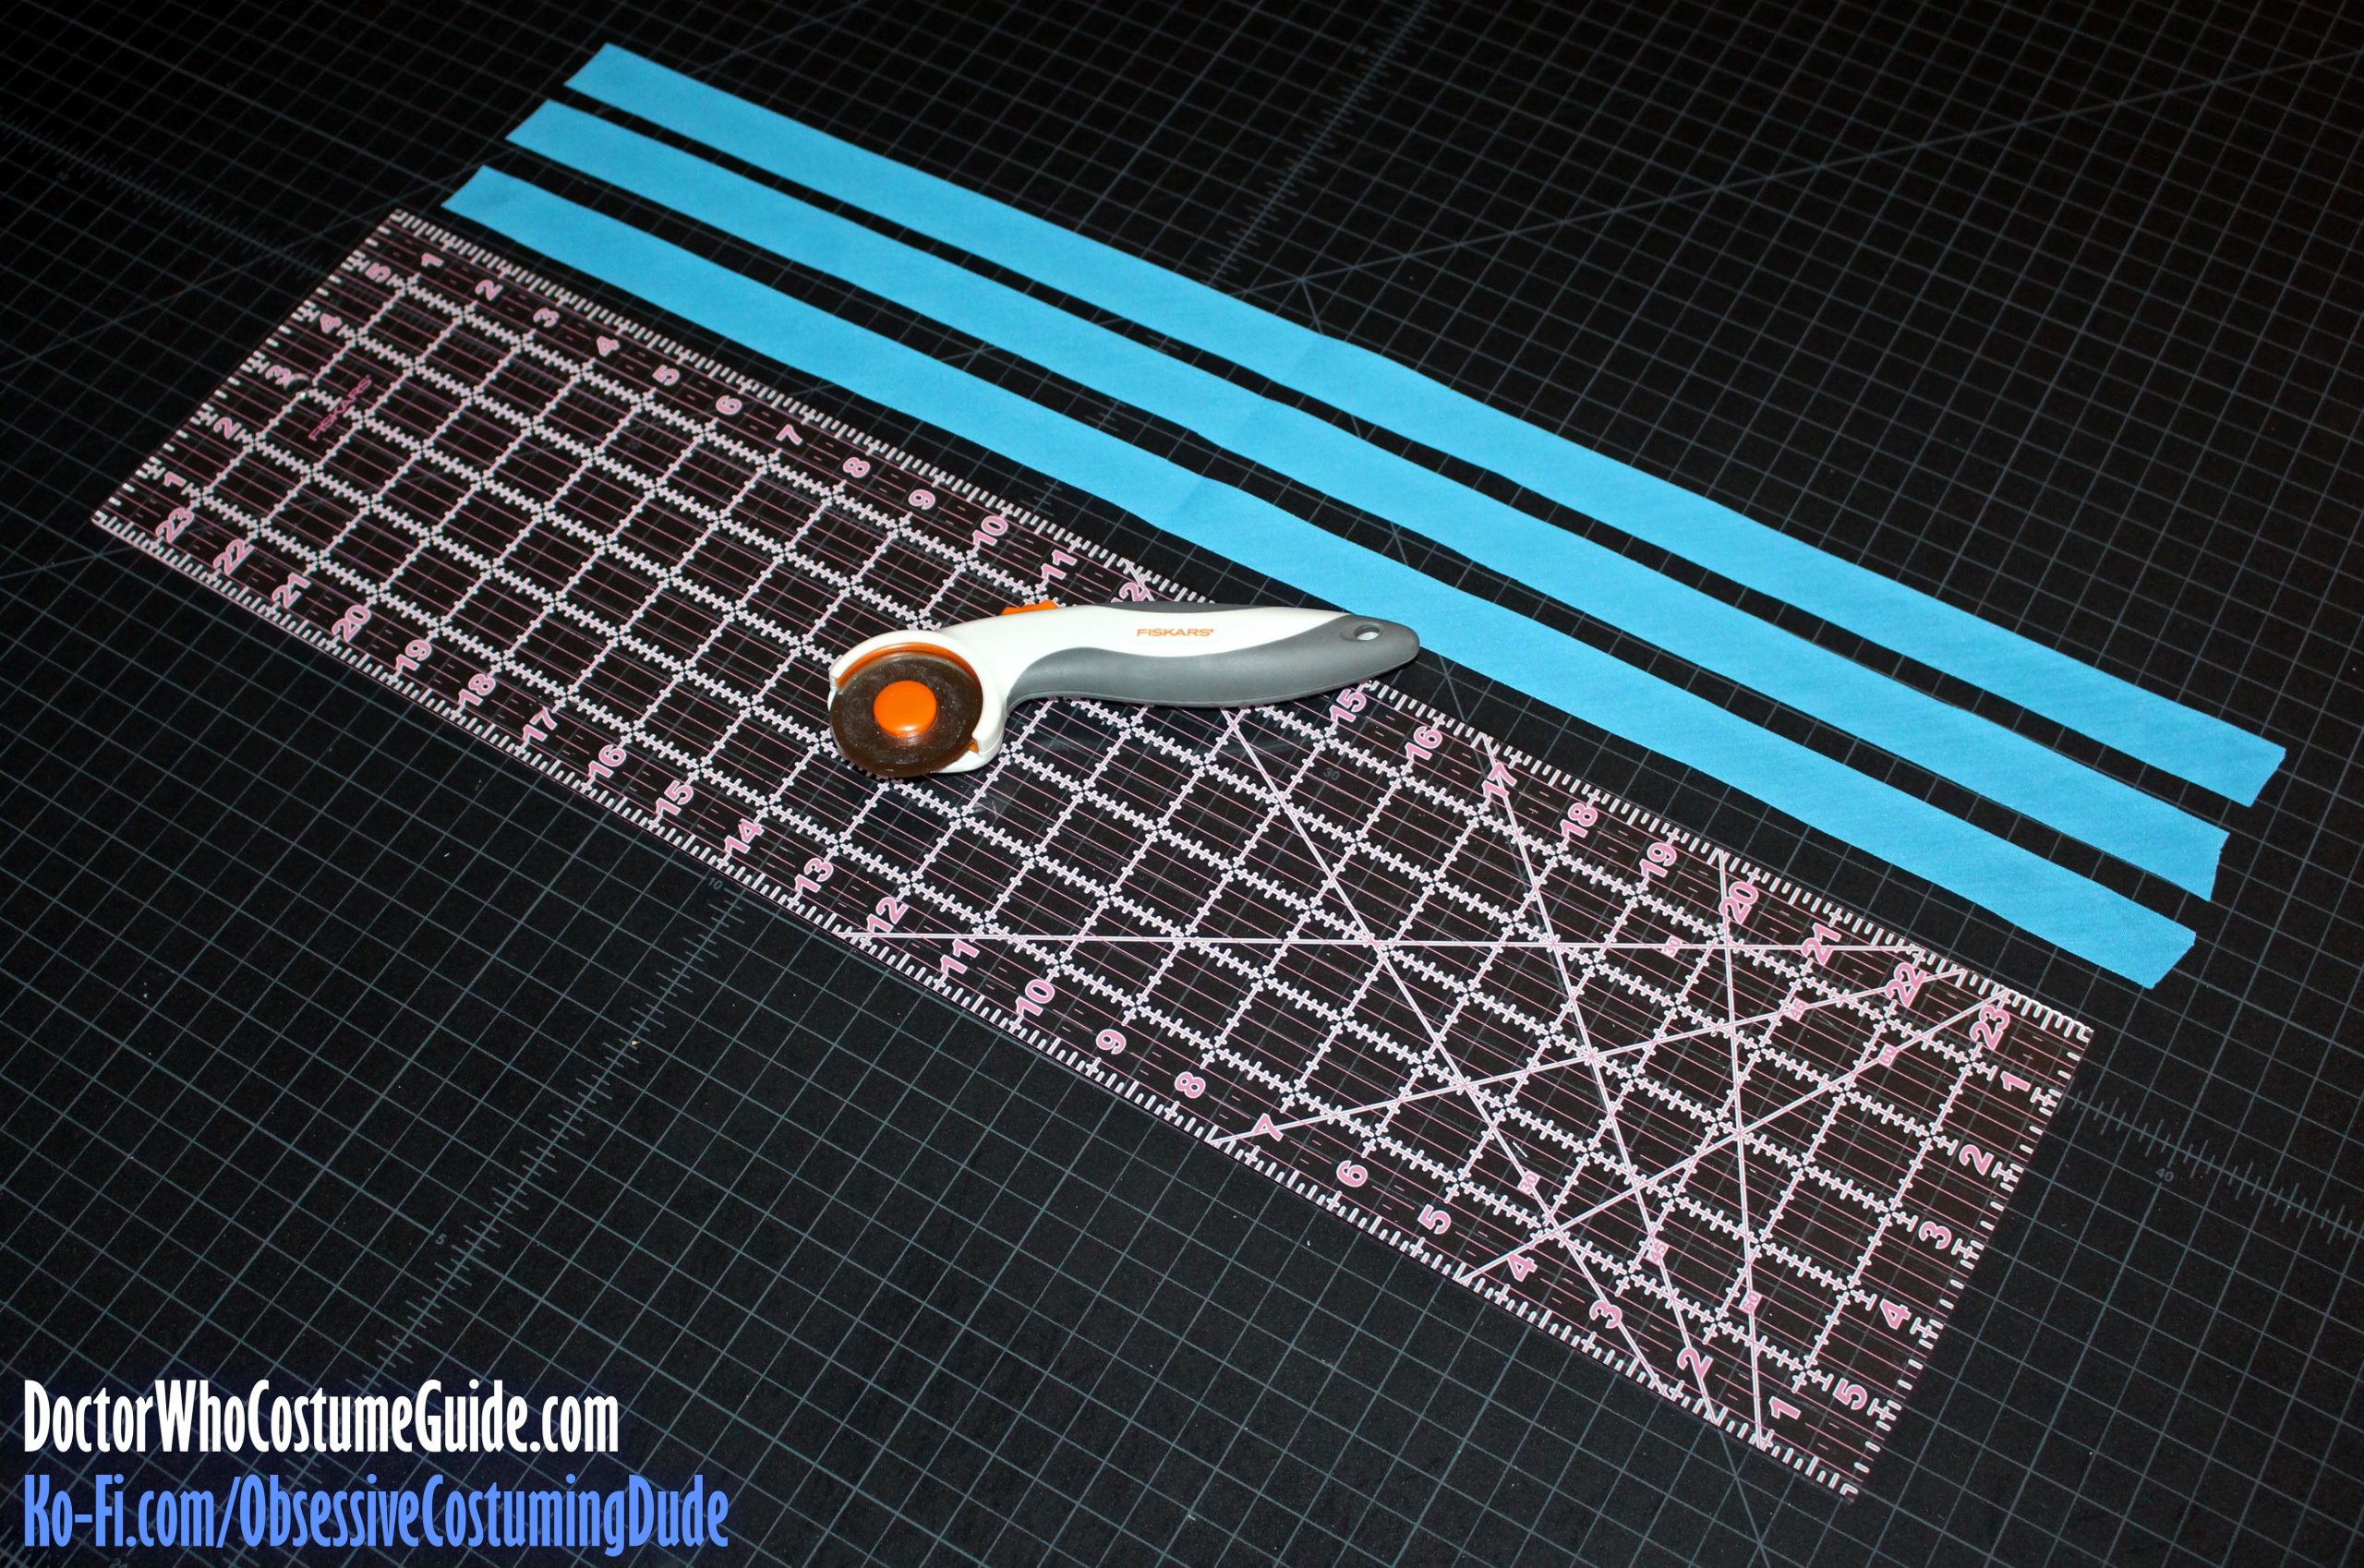
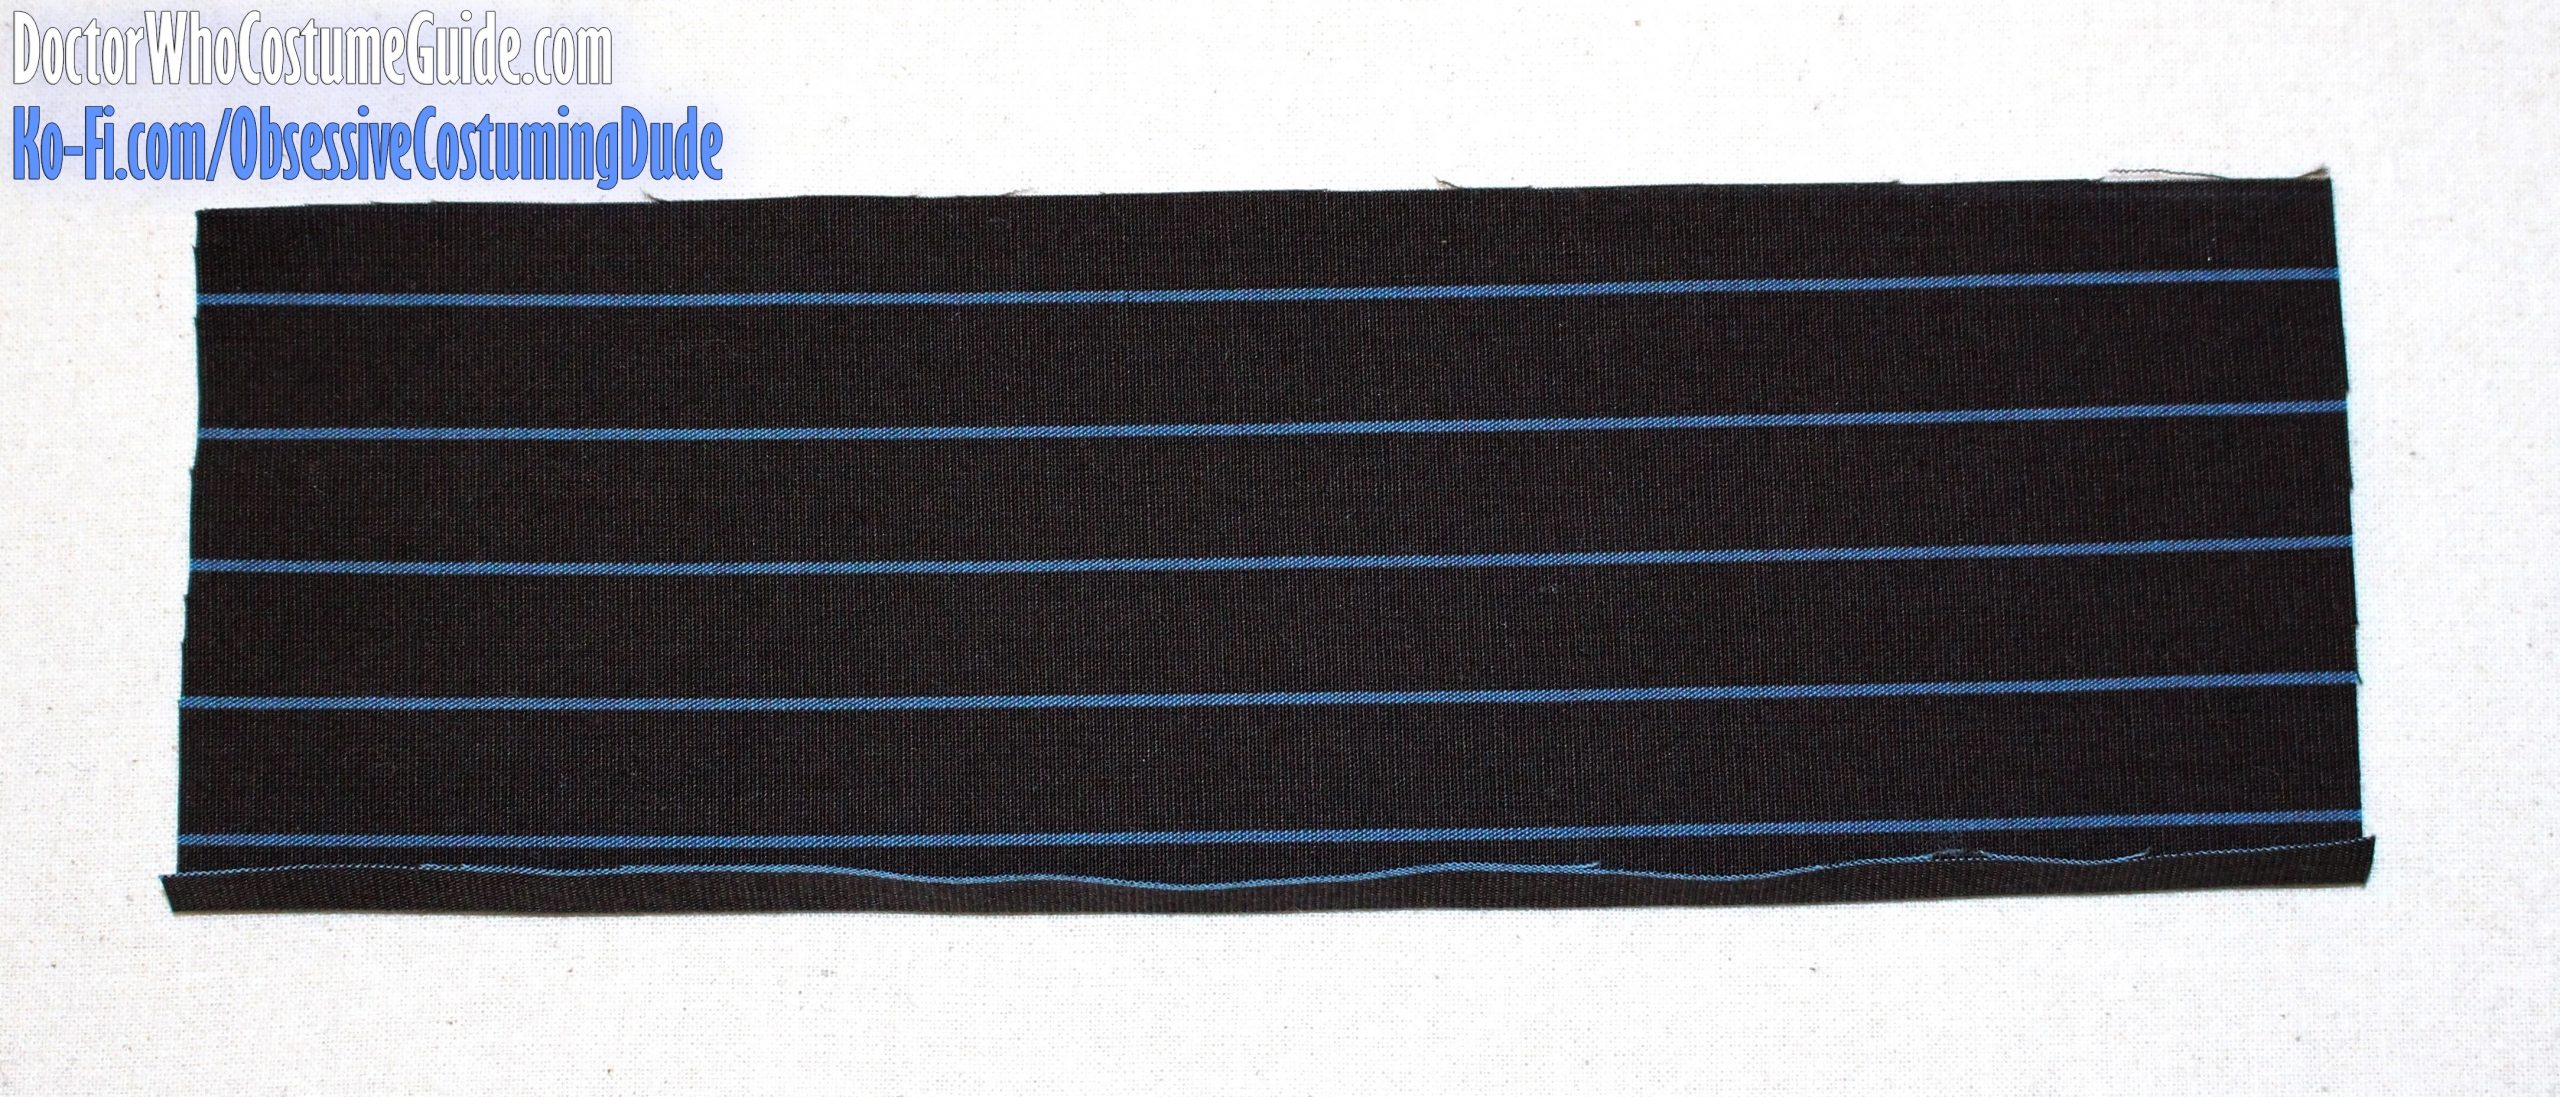
So, I pressed the quilt binding open (and flat), then cut it into strips 15/16” wide using my see-through ruler, rotary cutter, and cutting mat (see below).
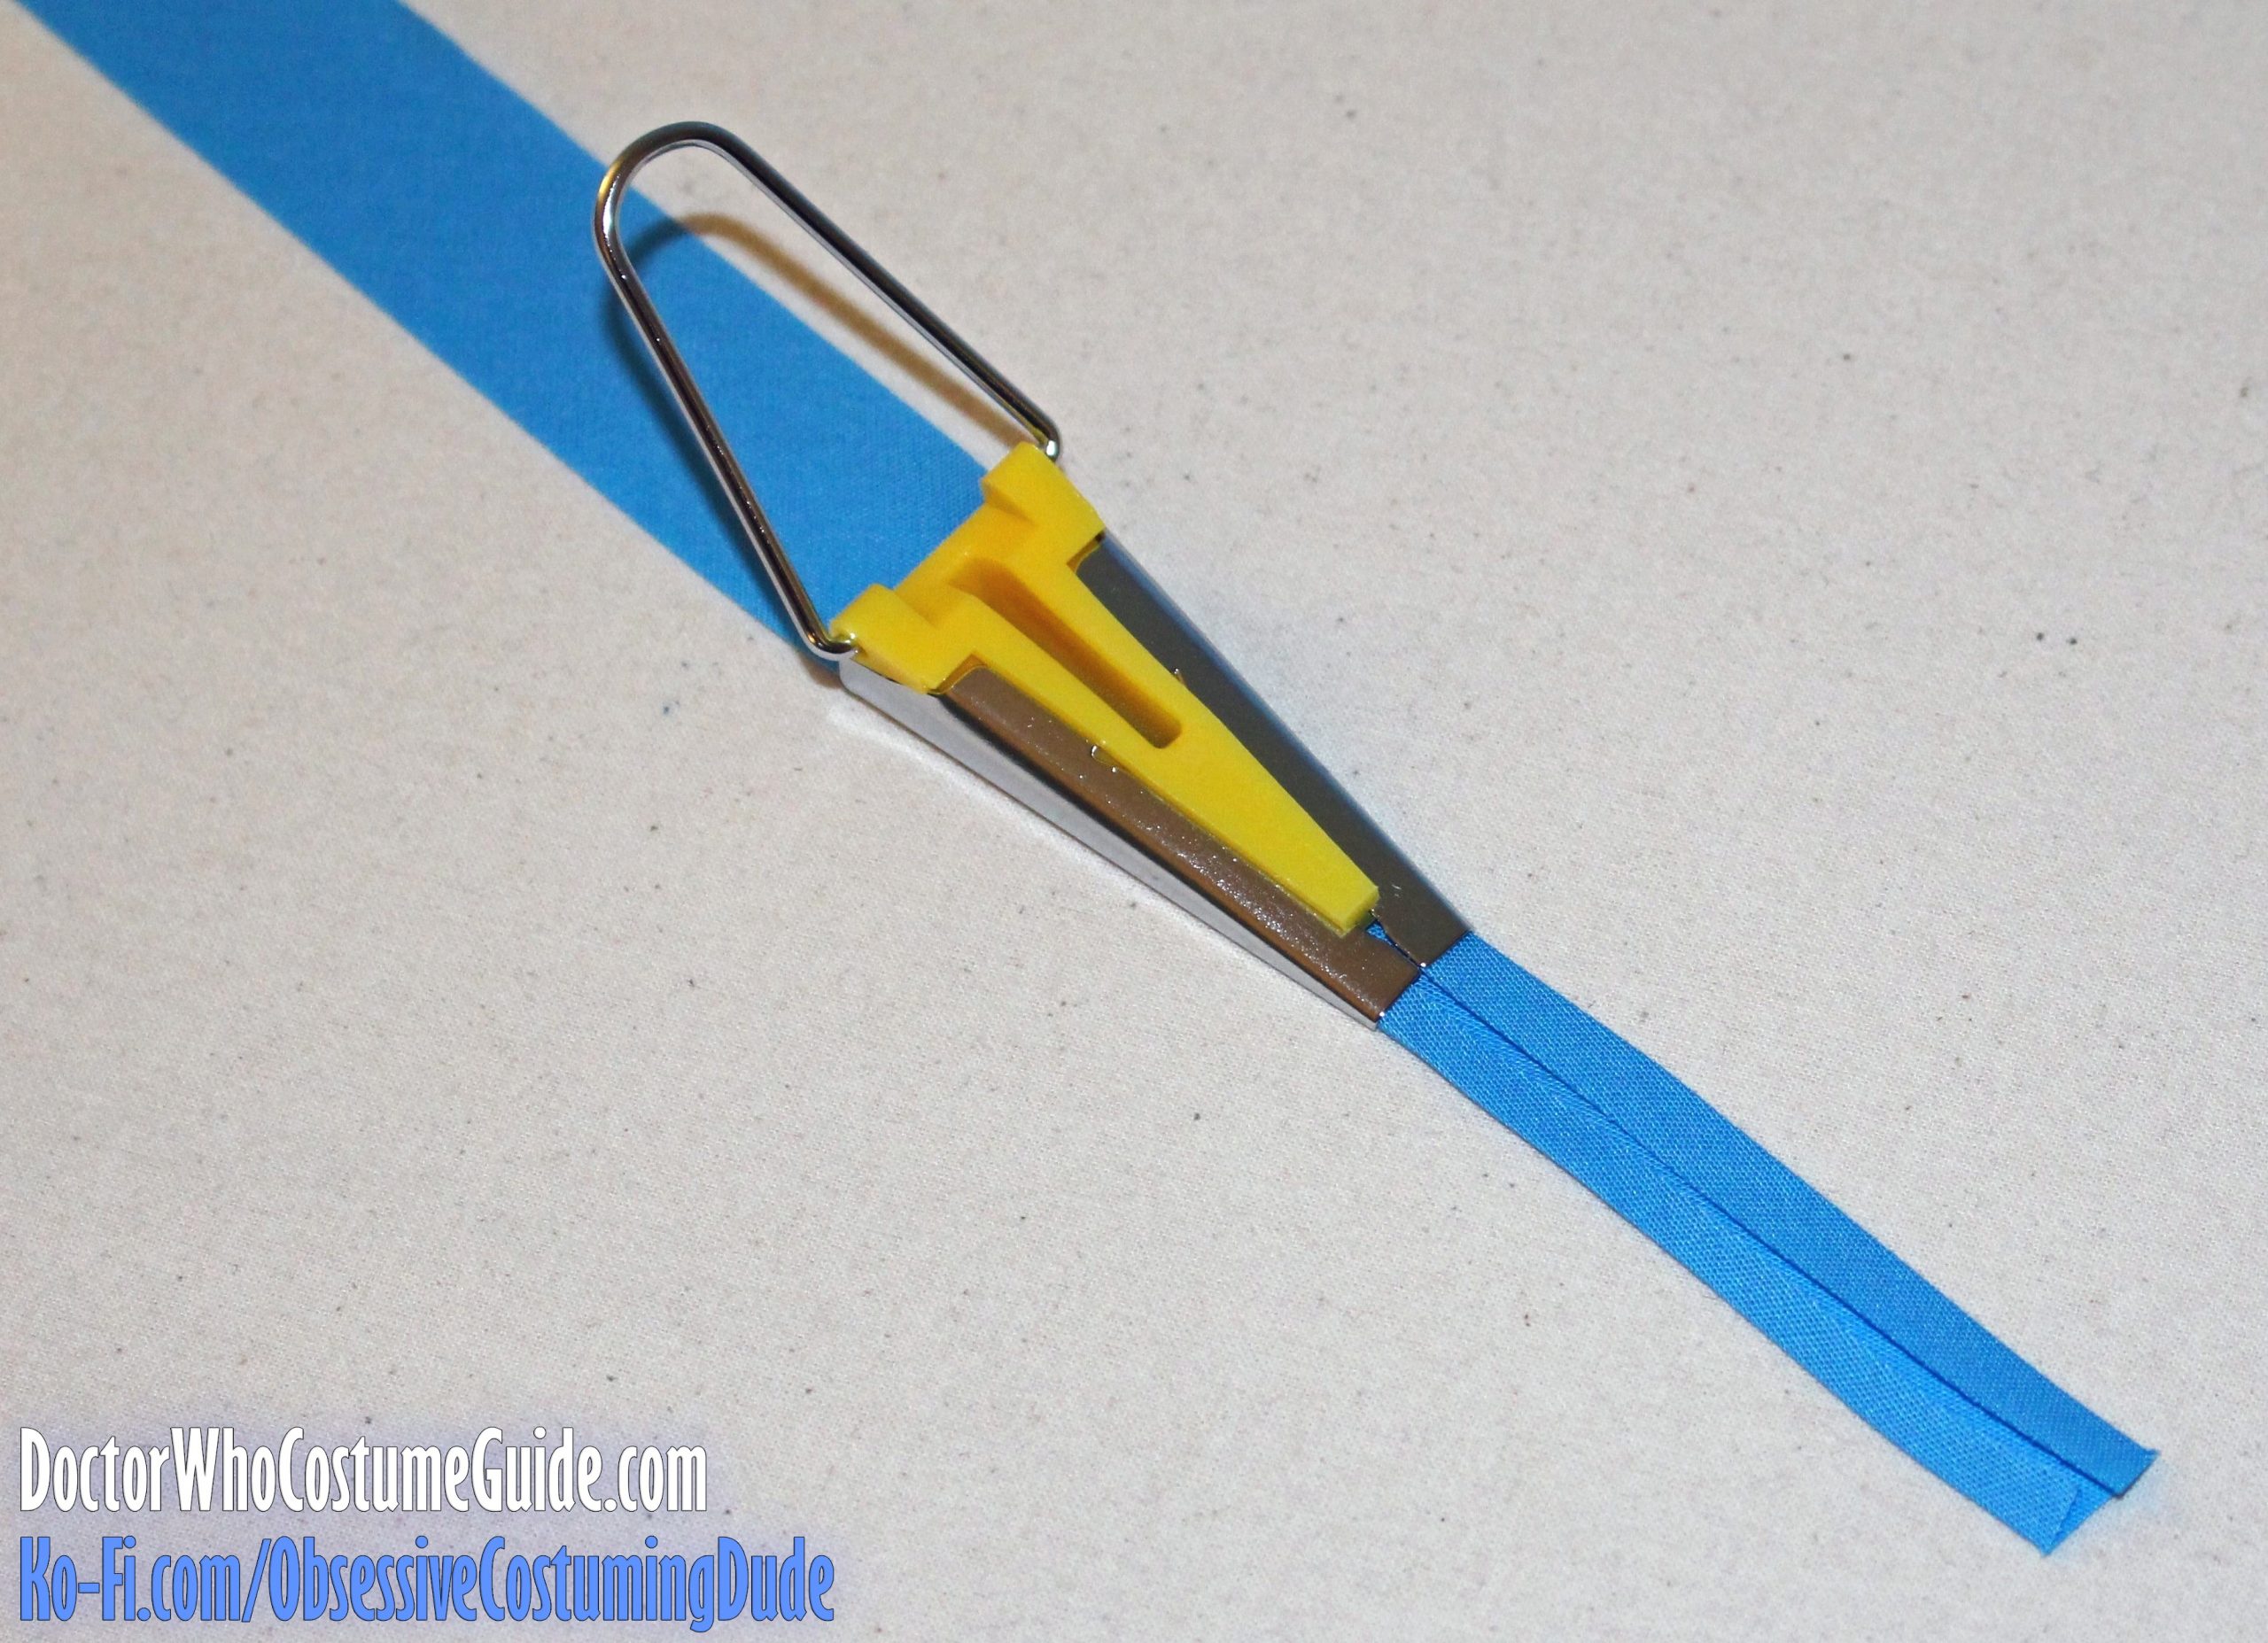
Then, I used a bias tape maker to press the edges of the strips under and pressed the strips in half, with one folded edge slightly wider than the other.
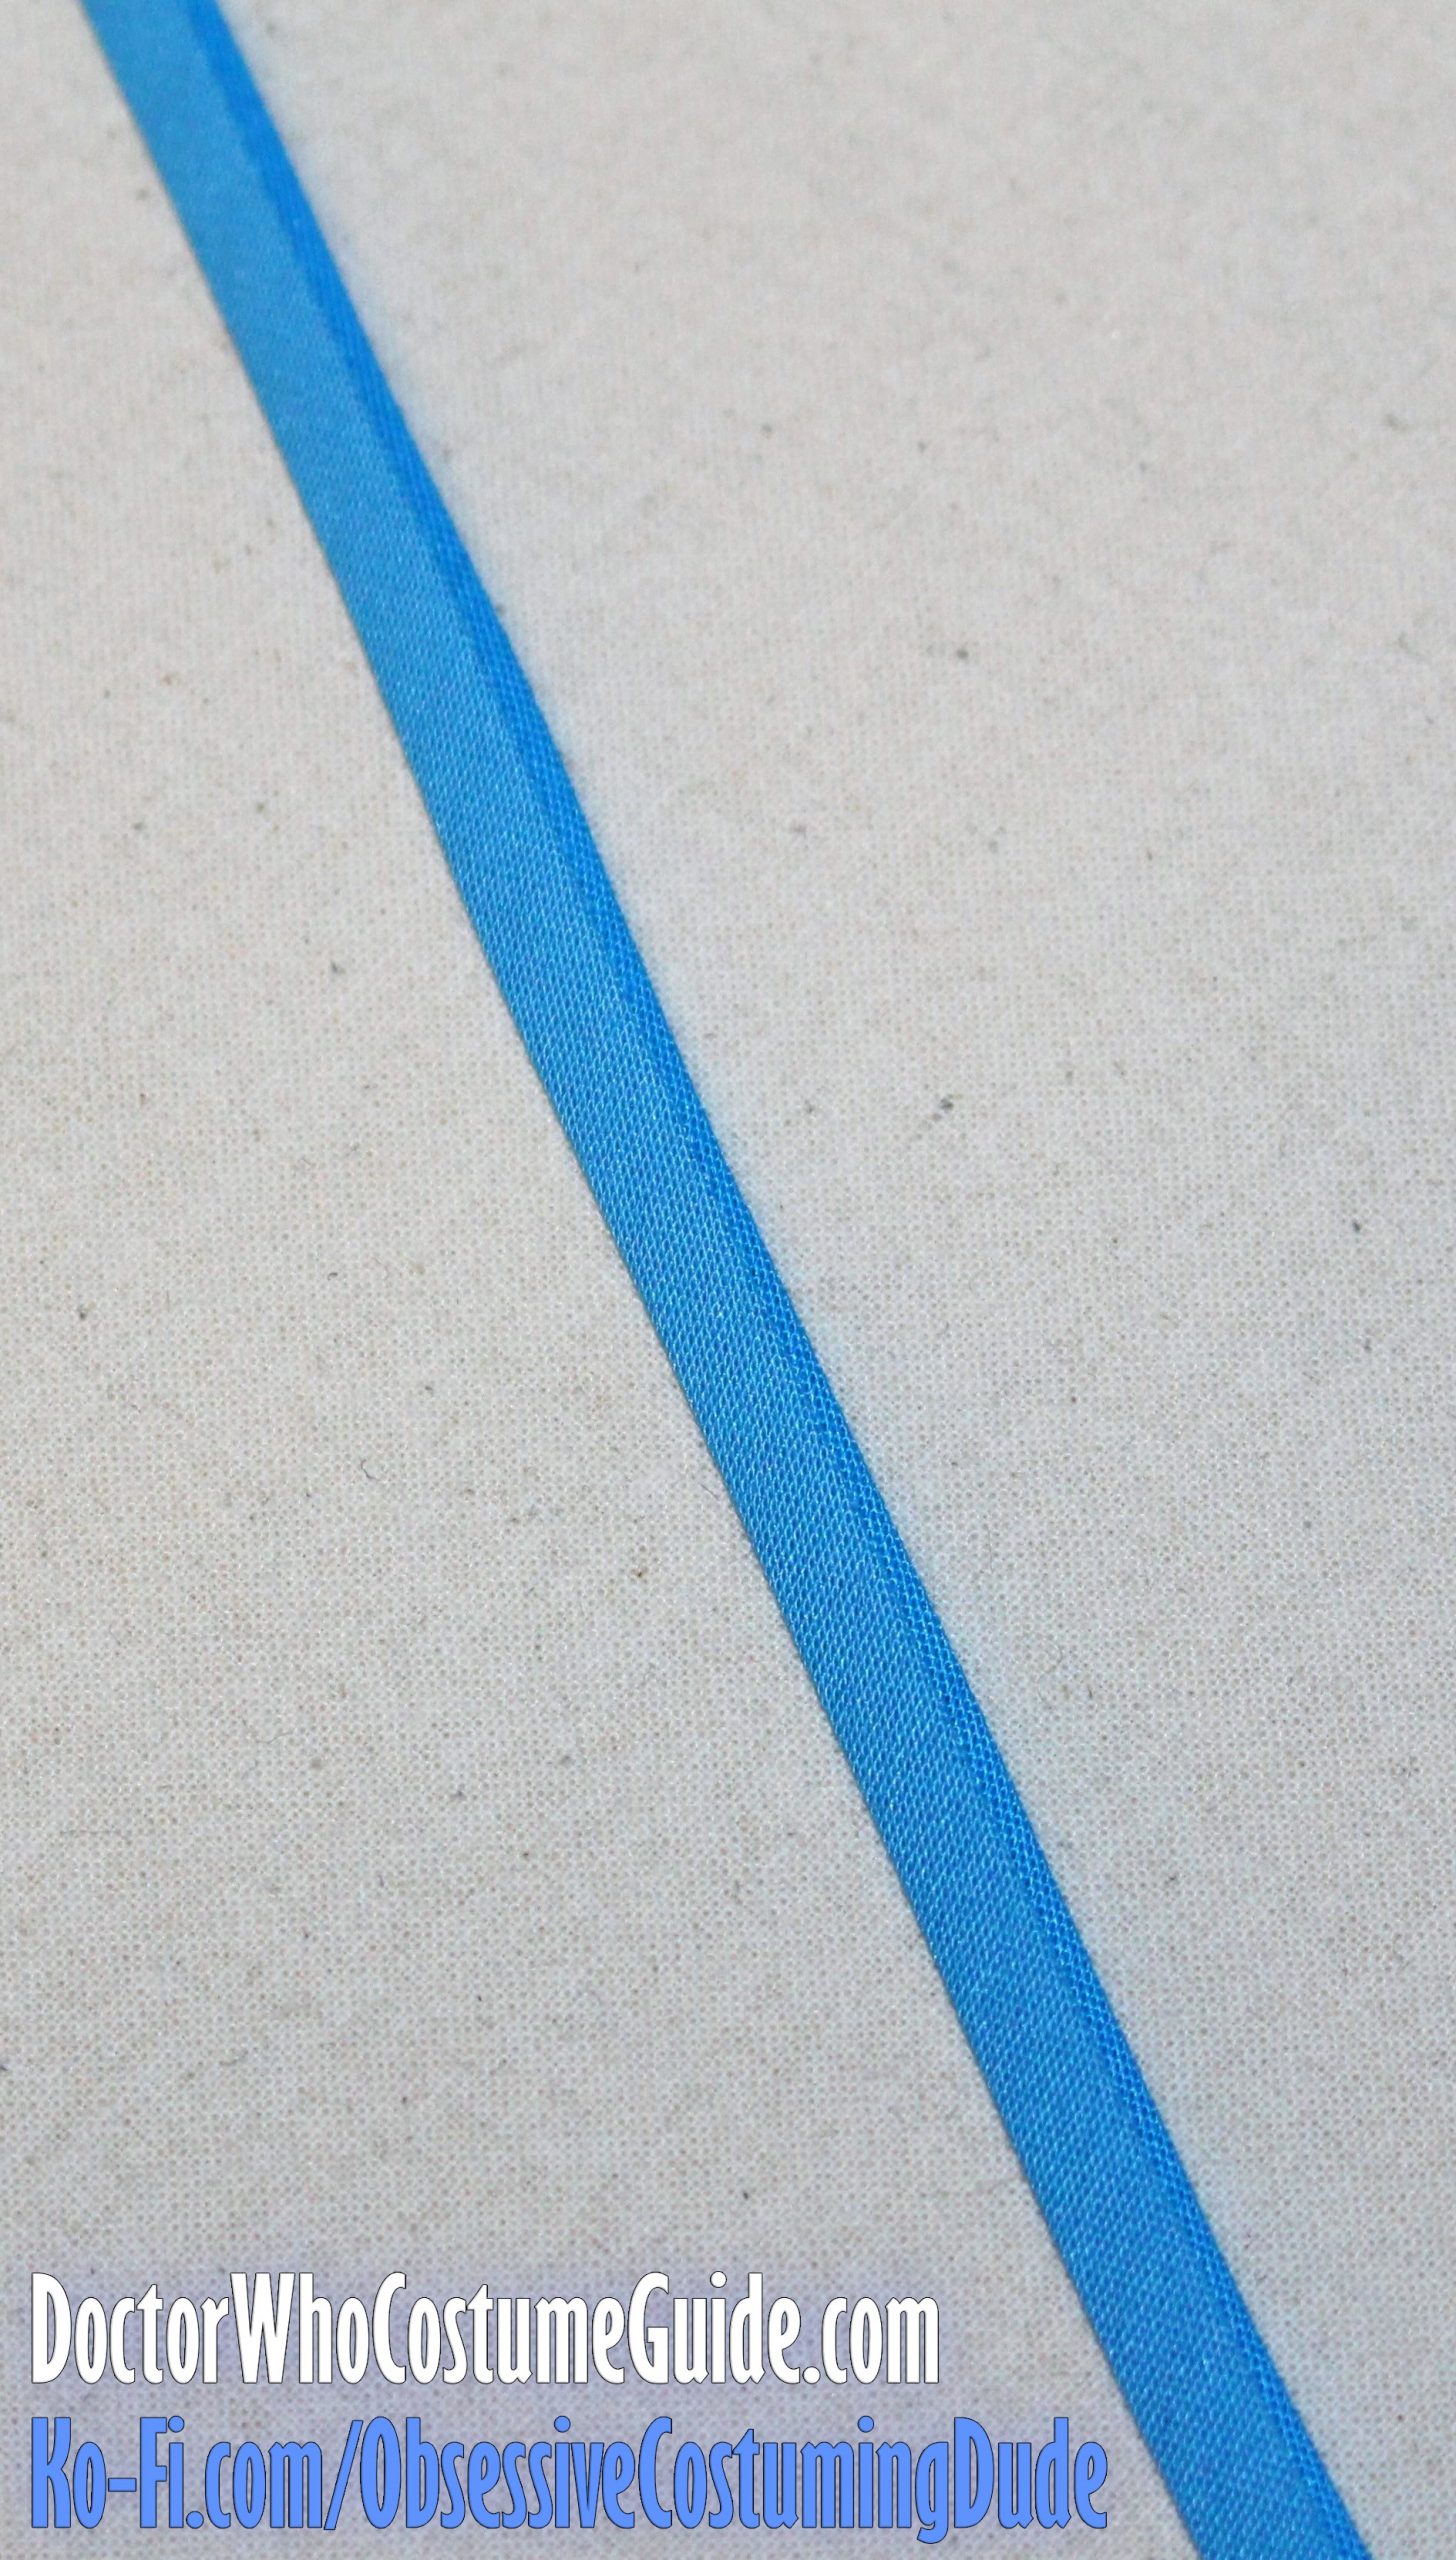
And, voila! Custom-made bias tape.
Using “sky blue” thread, sew the bias tape to the center back edge of the trousers backs (piece BB).
On the original GAP trousers, the bias tape was simply edge-stitched into place.
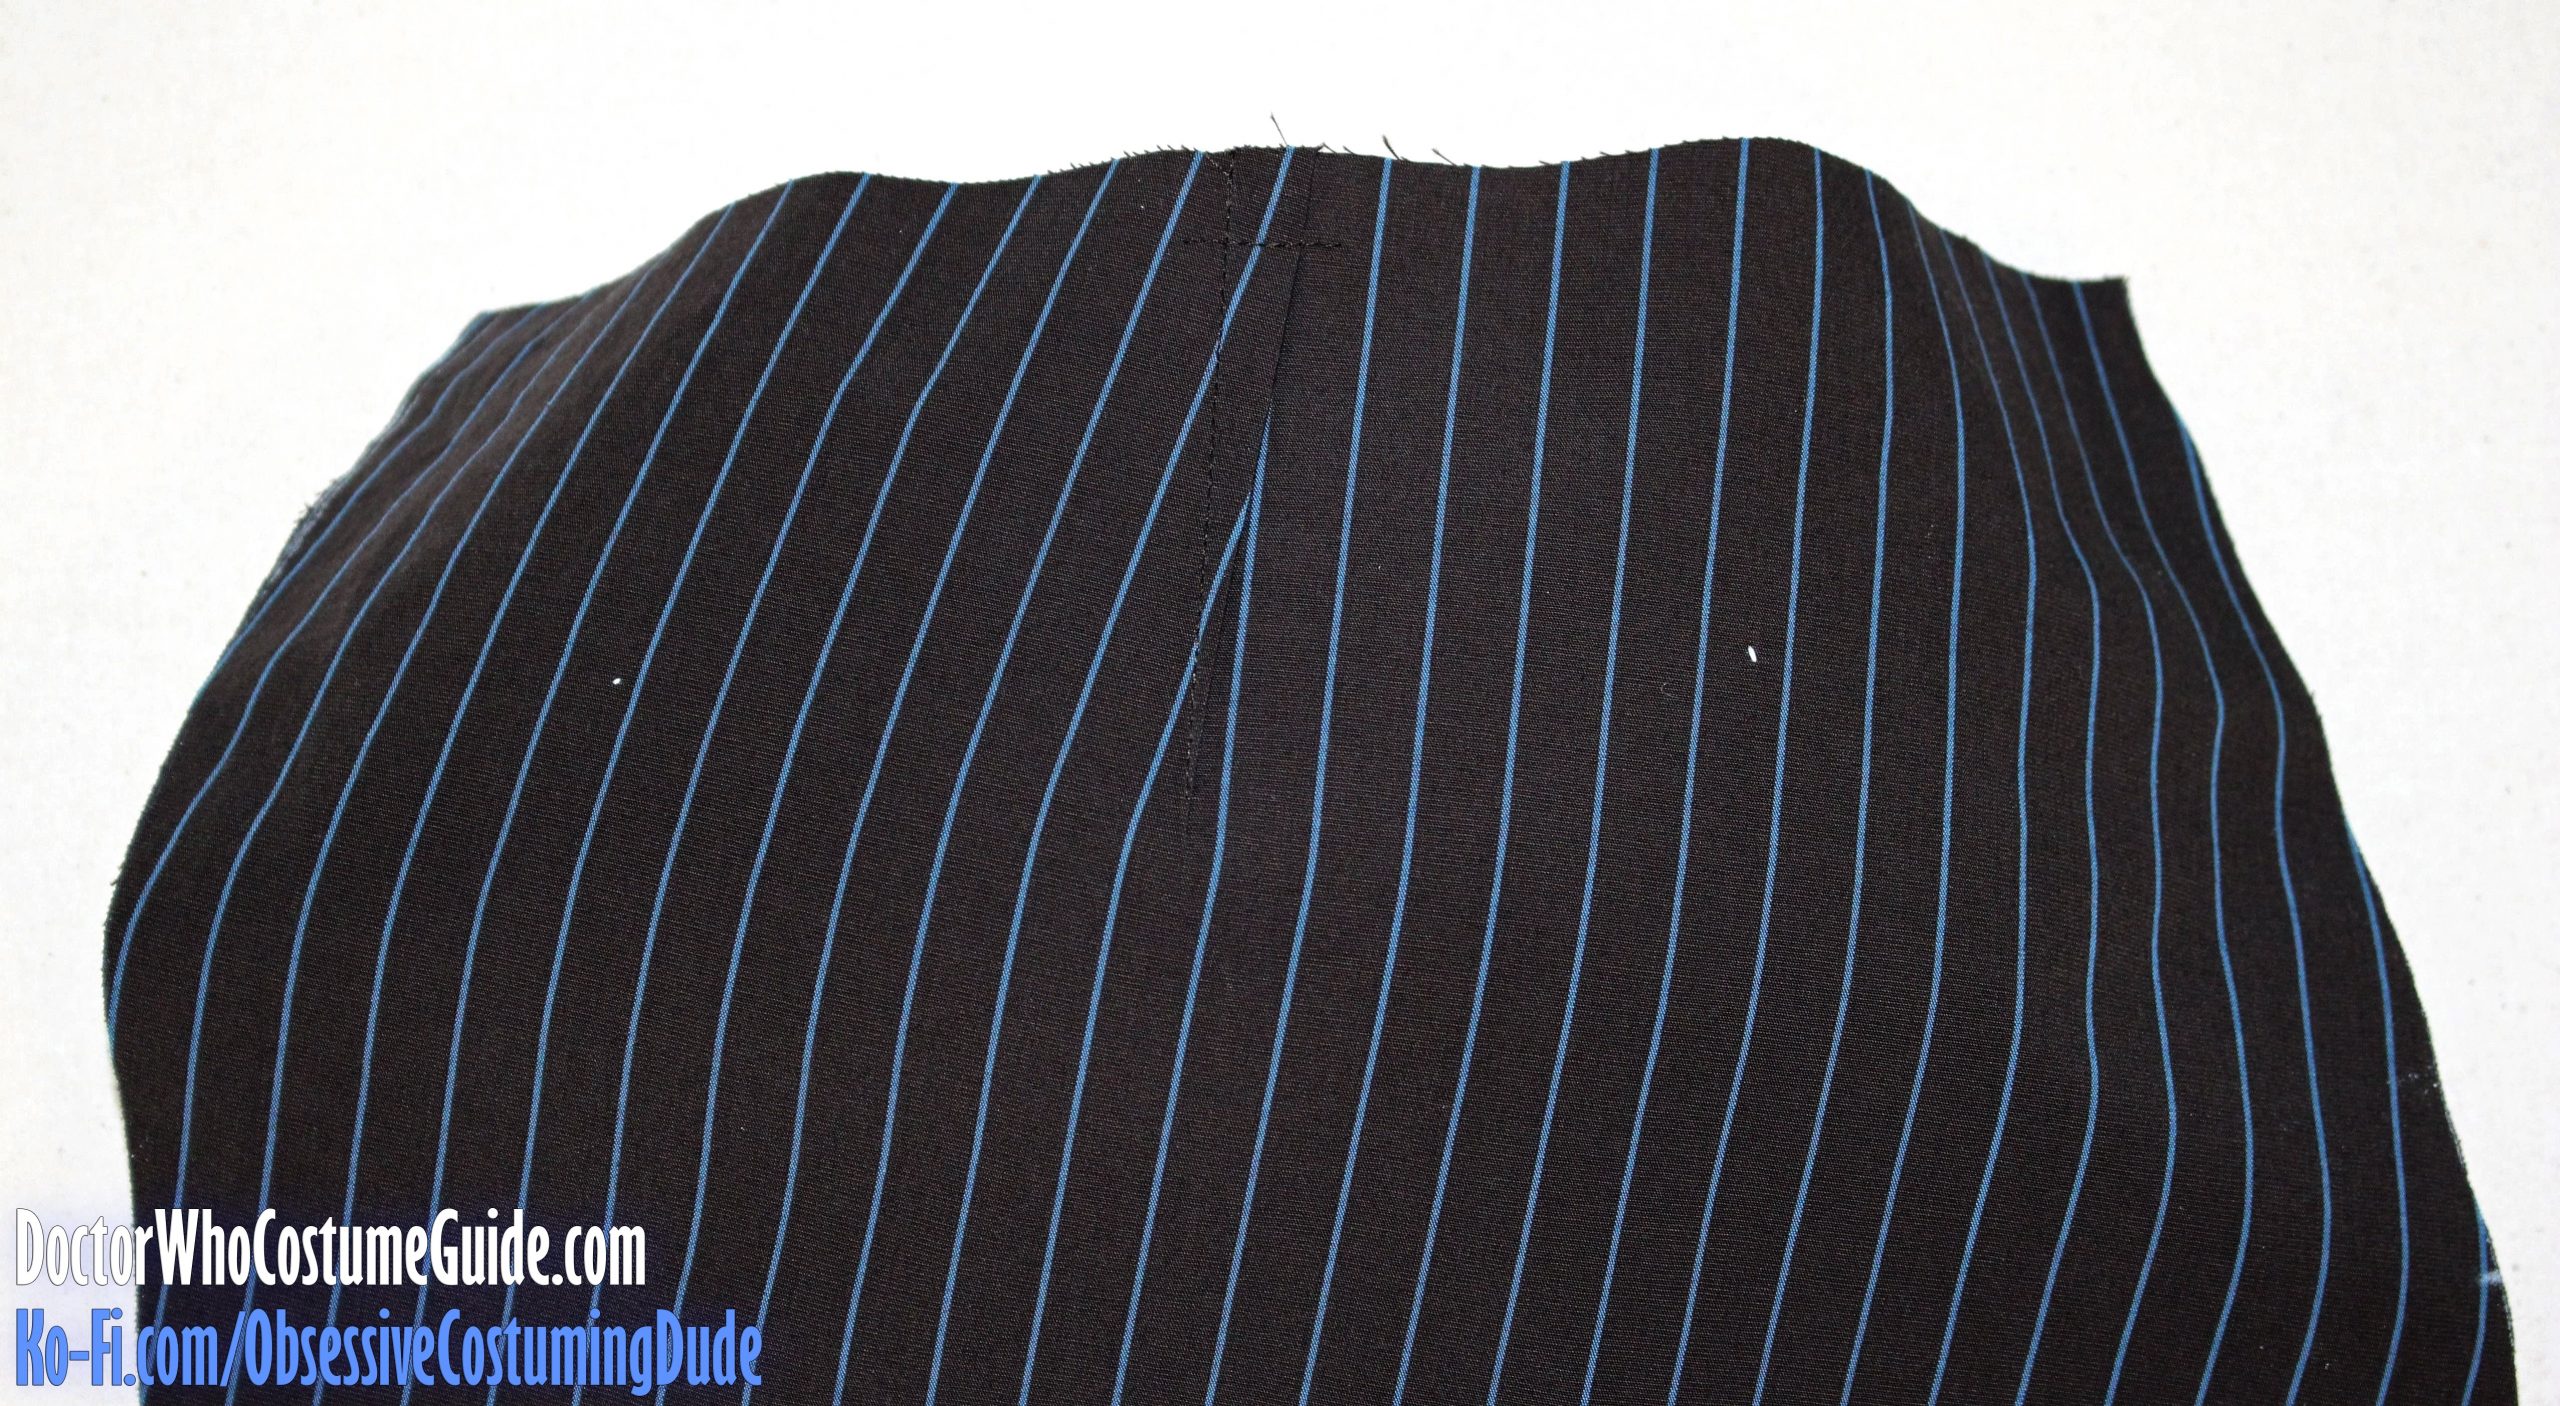
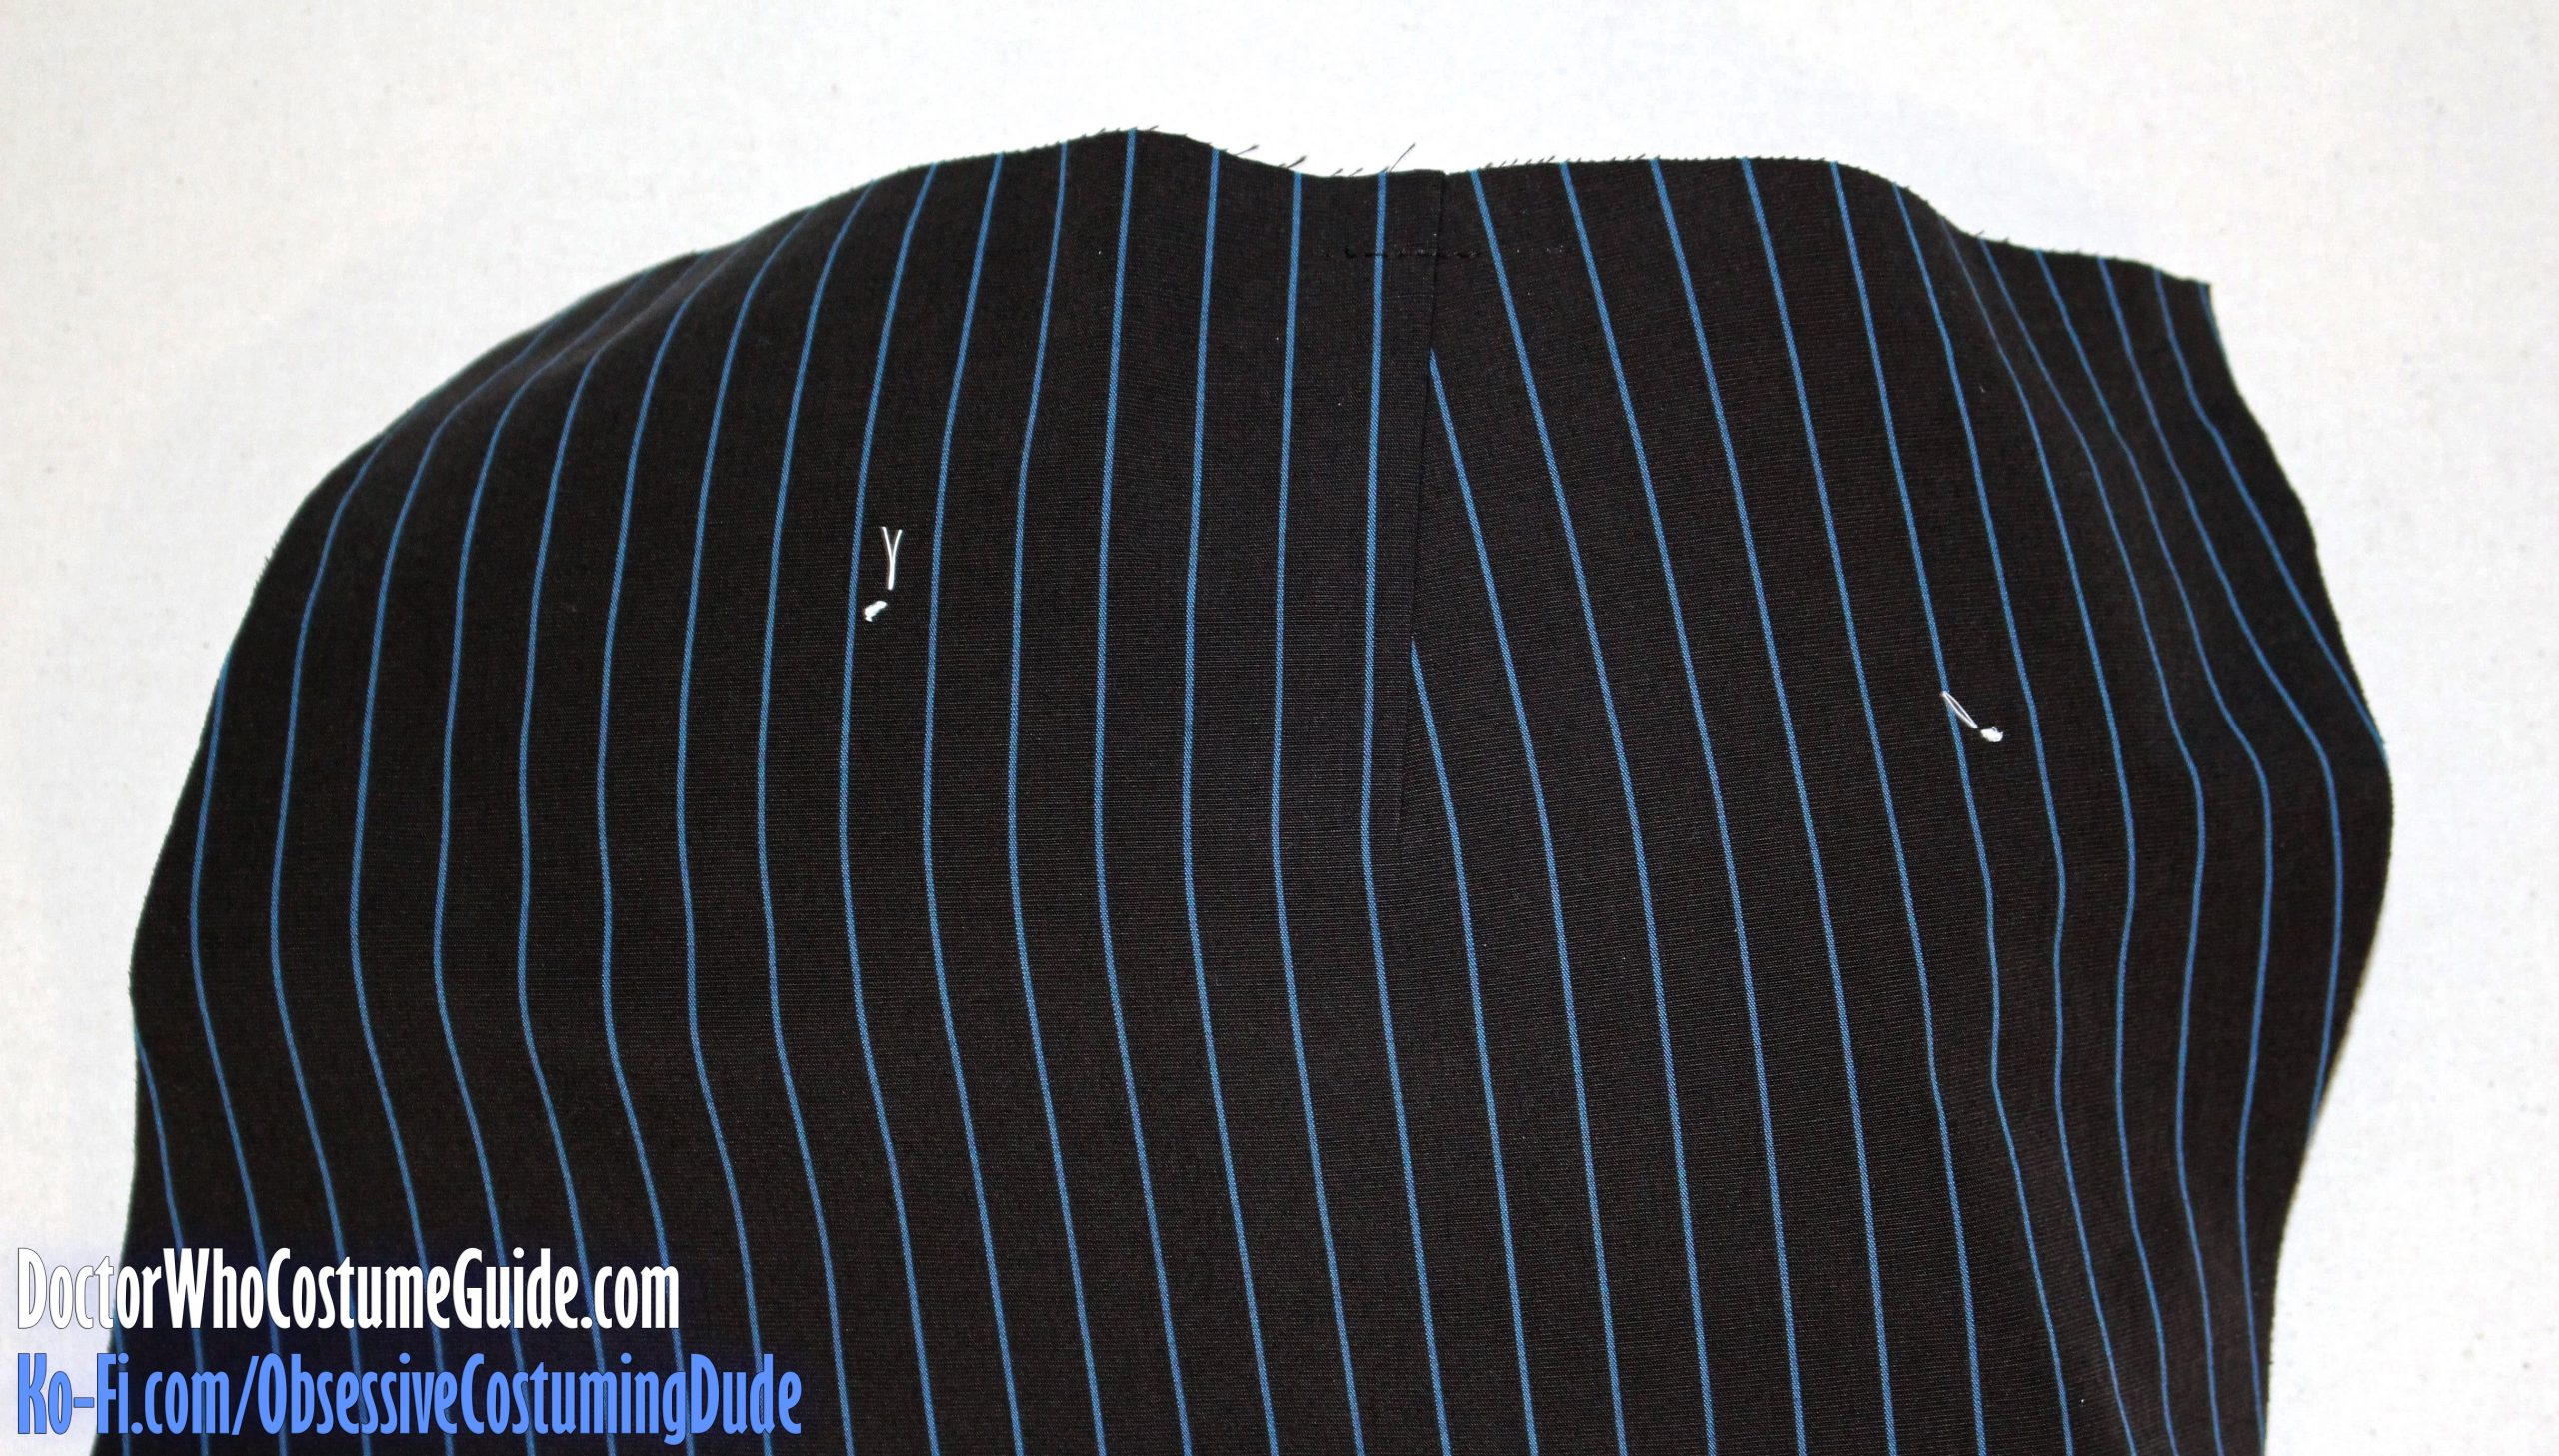
Switch back to brown thread and sew the back dart closed.
Press the dart toward center over a tailor’s ham.
Sew or baste the dart into place ½” from the top of the trousers.
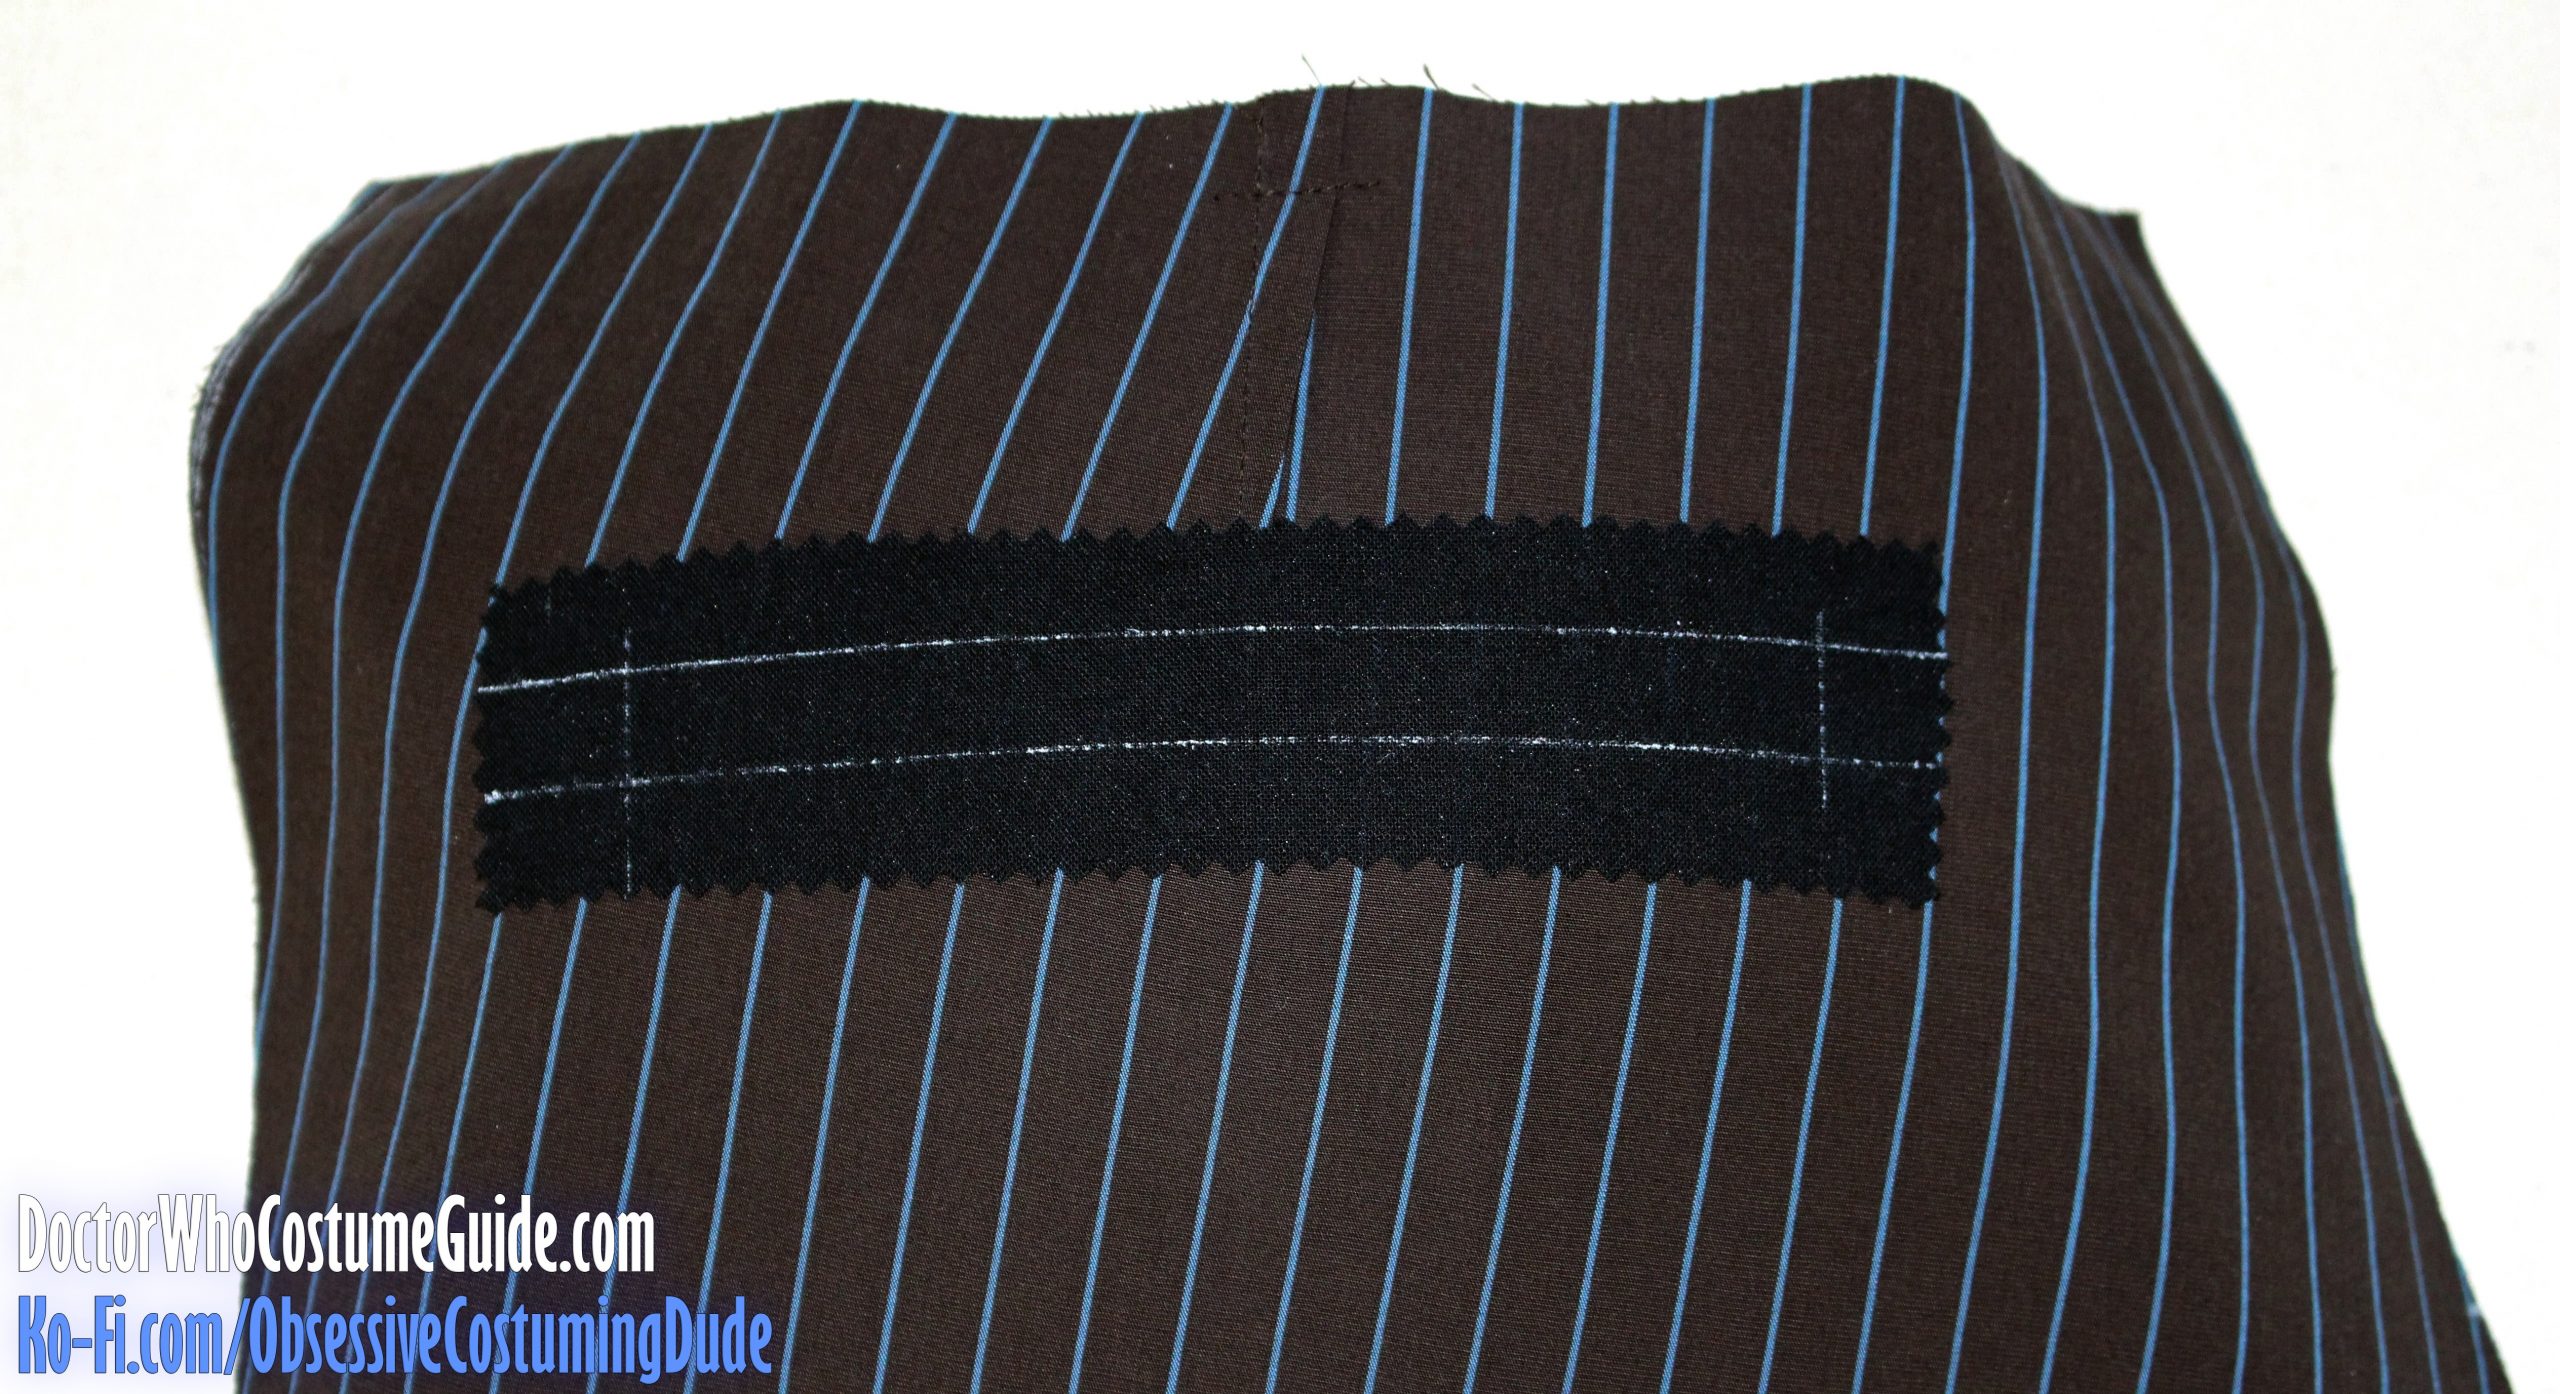
NOTE: It’s since come to my attention that the following technique for making double-welt pockets isn’t quite the same as was used on the original GAP trousers, but the differences are ultimately minor.
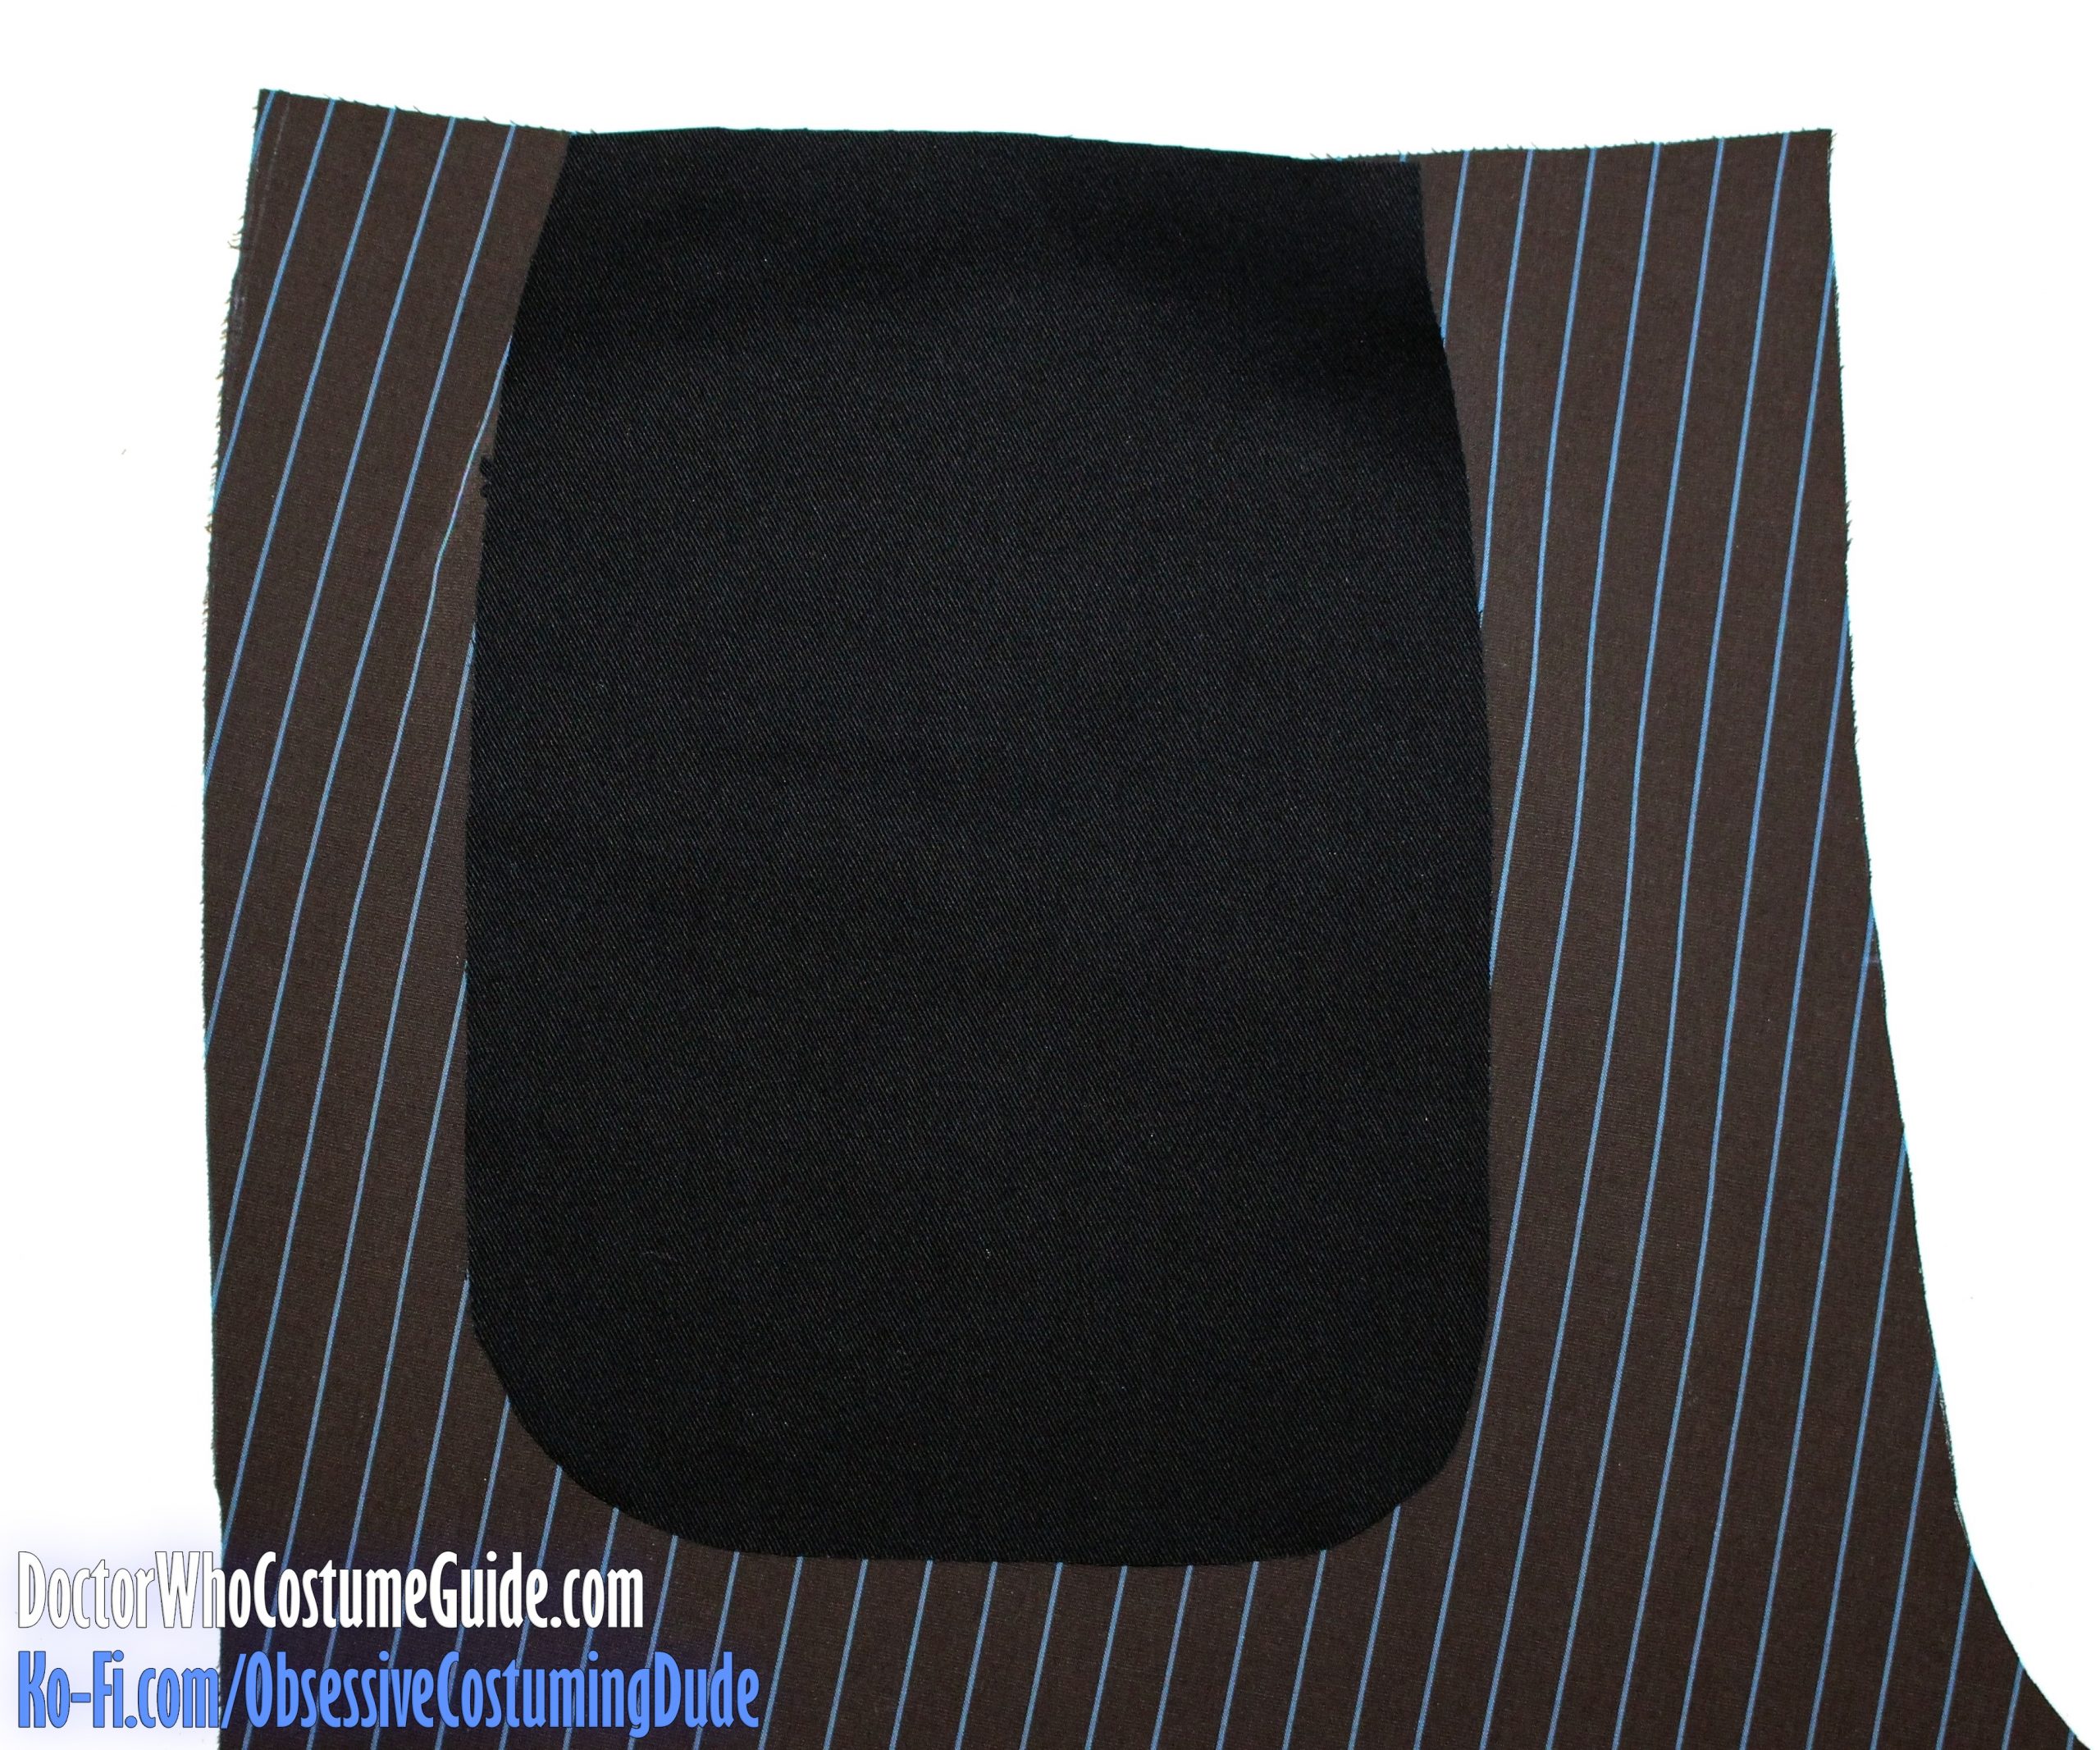
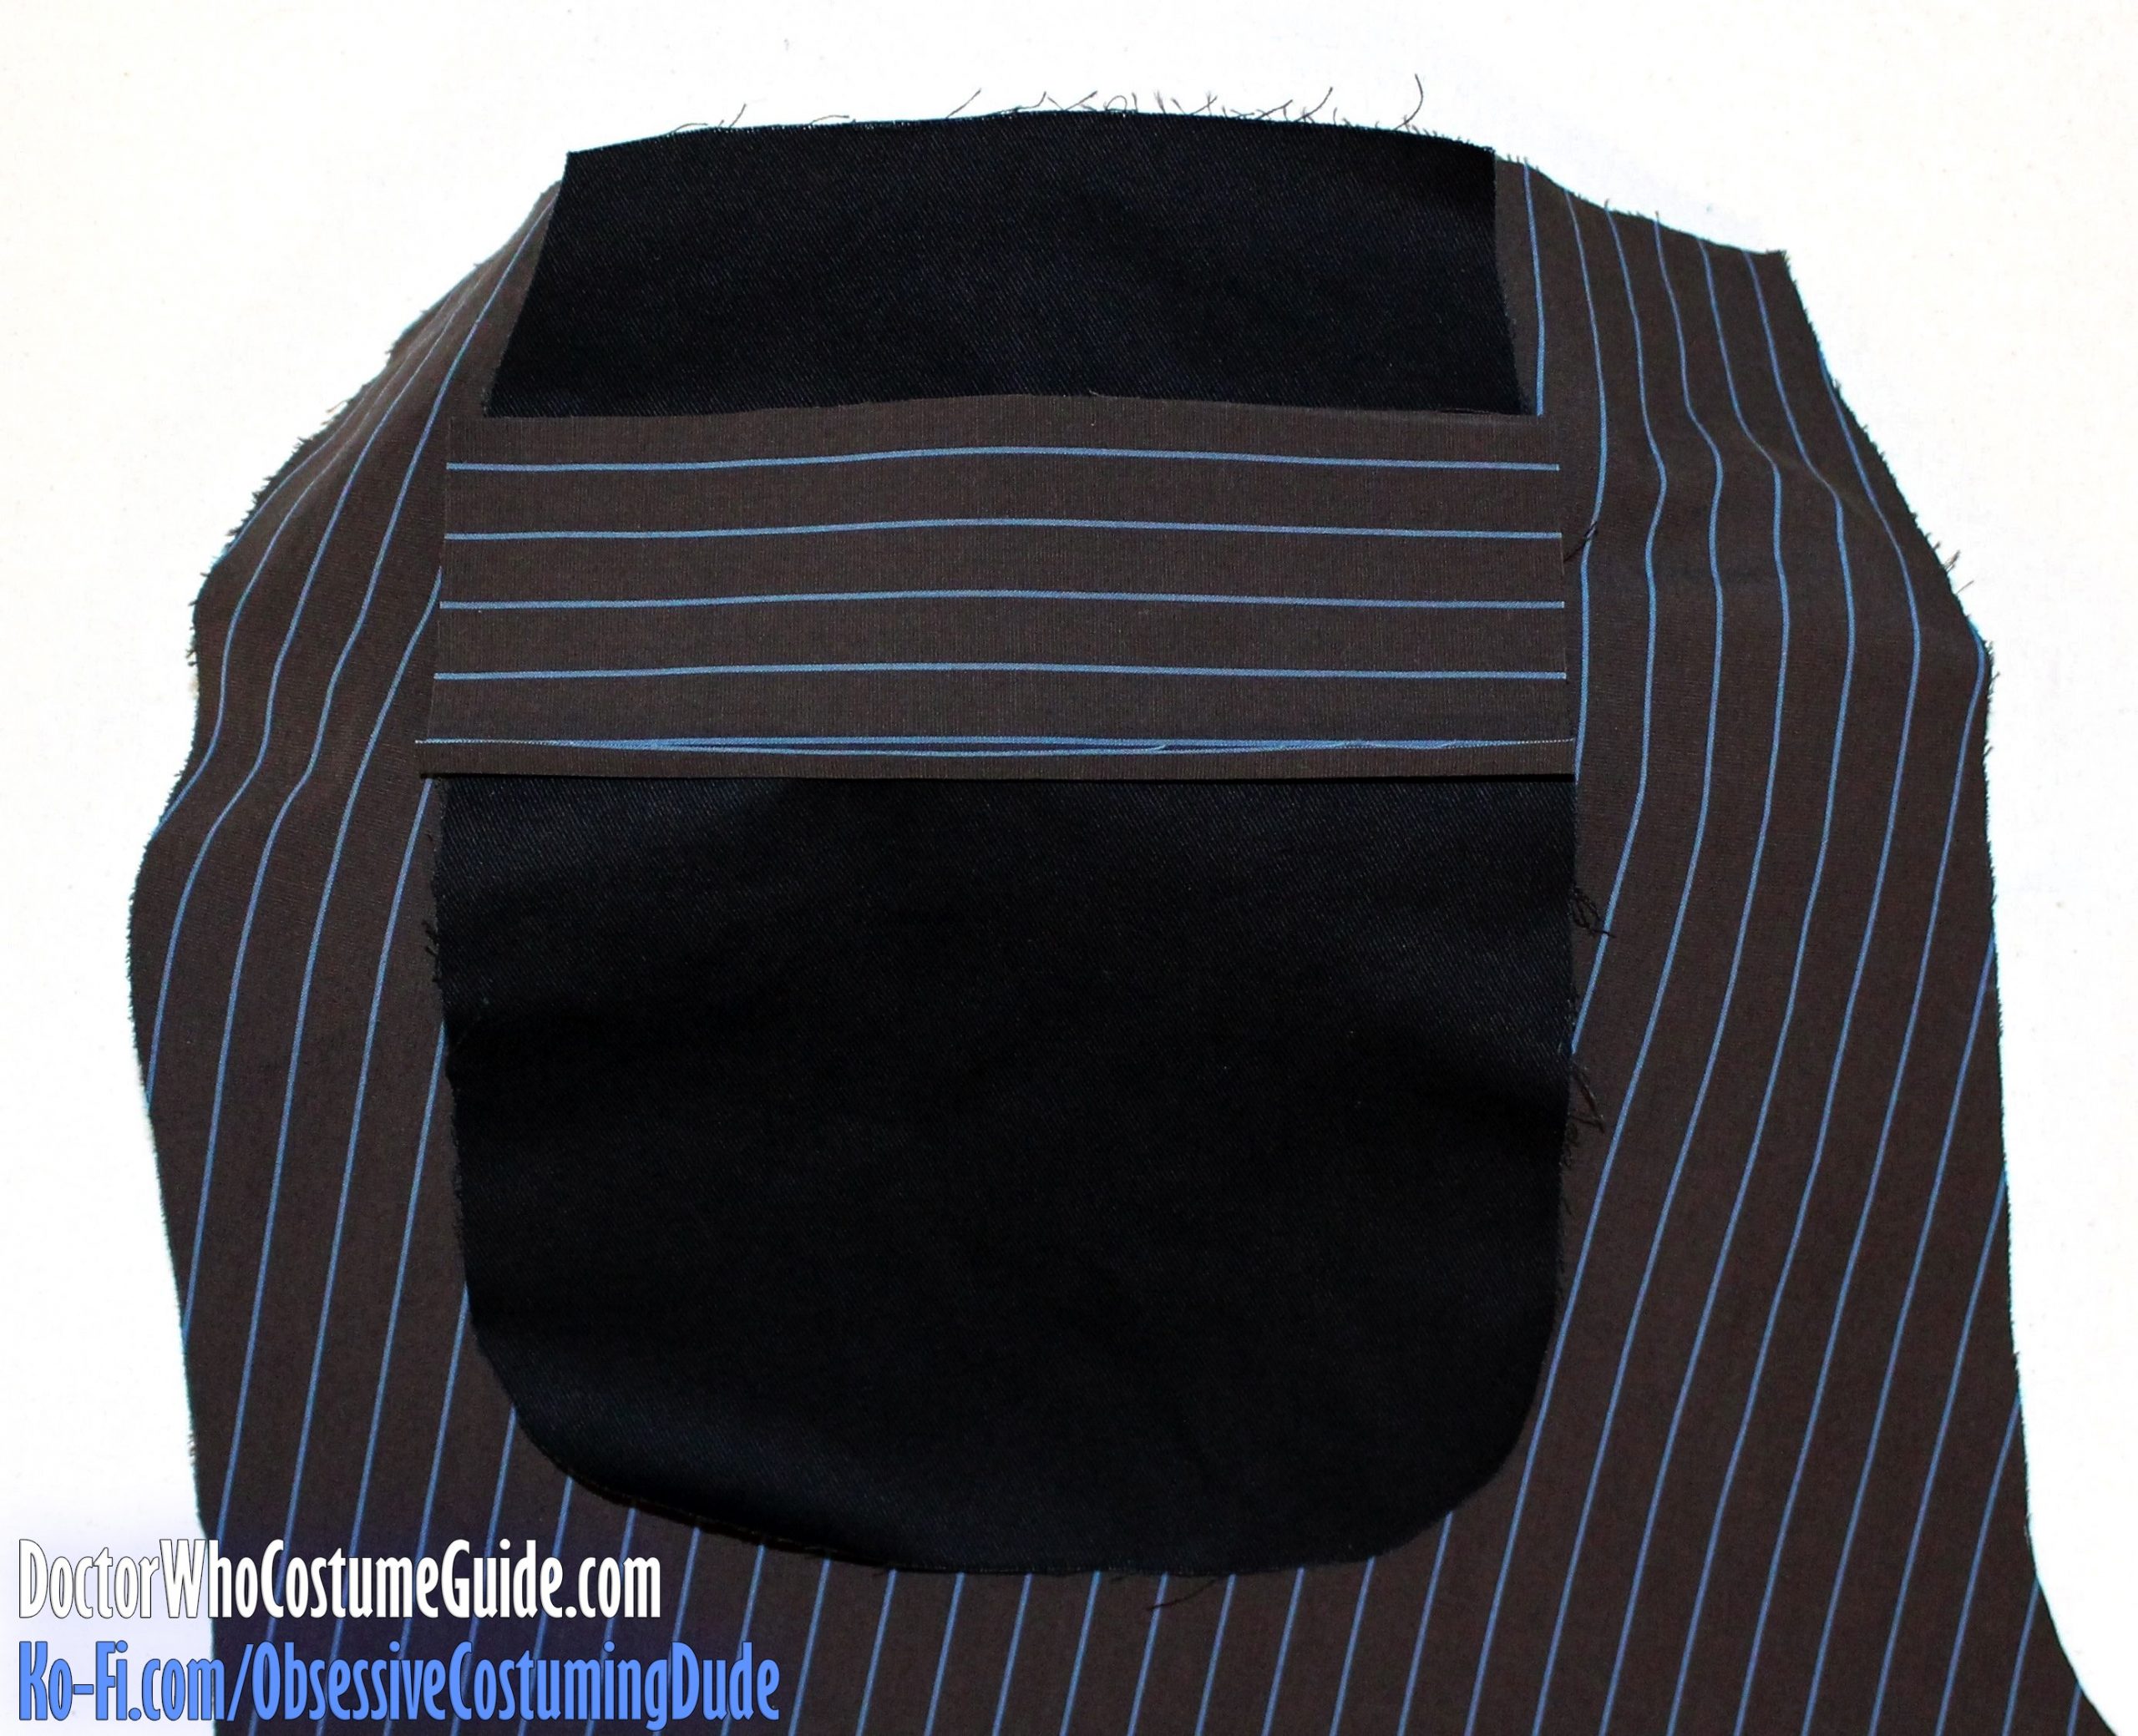
Stabilize the underside of the pocket area with a lightweight fusible interfacing, if desired.
I suggest cutting small rectangle about 6 ½” x 1”, ideally with pinking shears.
Draw a 5 ½” x ½” rectangular box on the interfacing. (This will be the pocket opening.)
Topstitch around the perimeter of the pocket opening, shortening your stitch length around the corners.
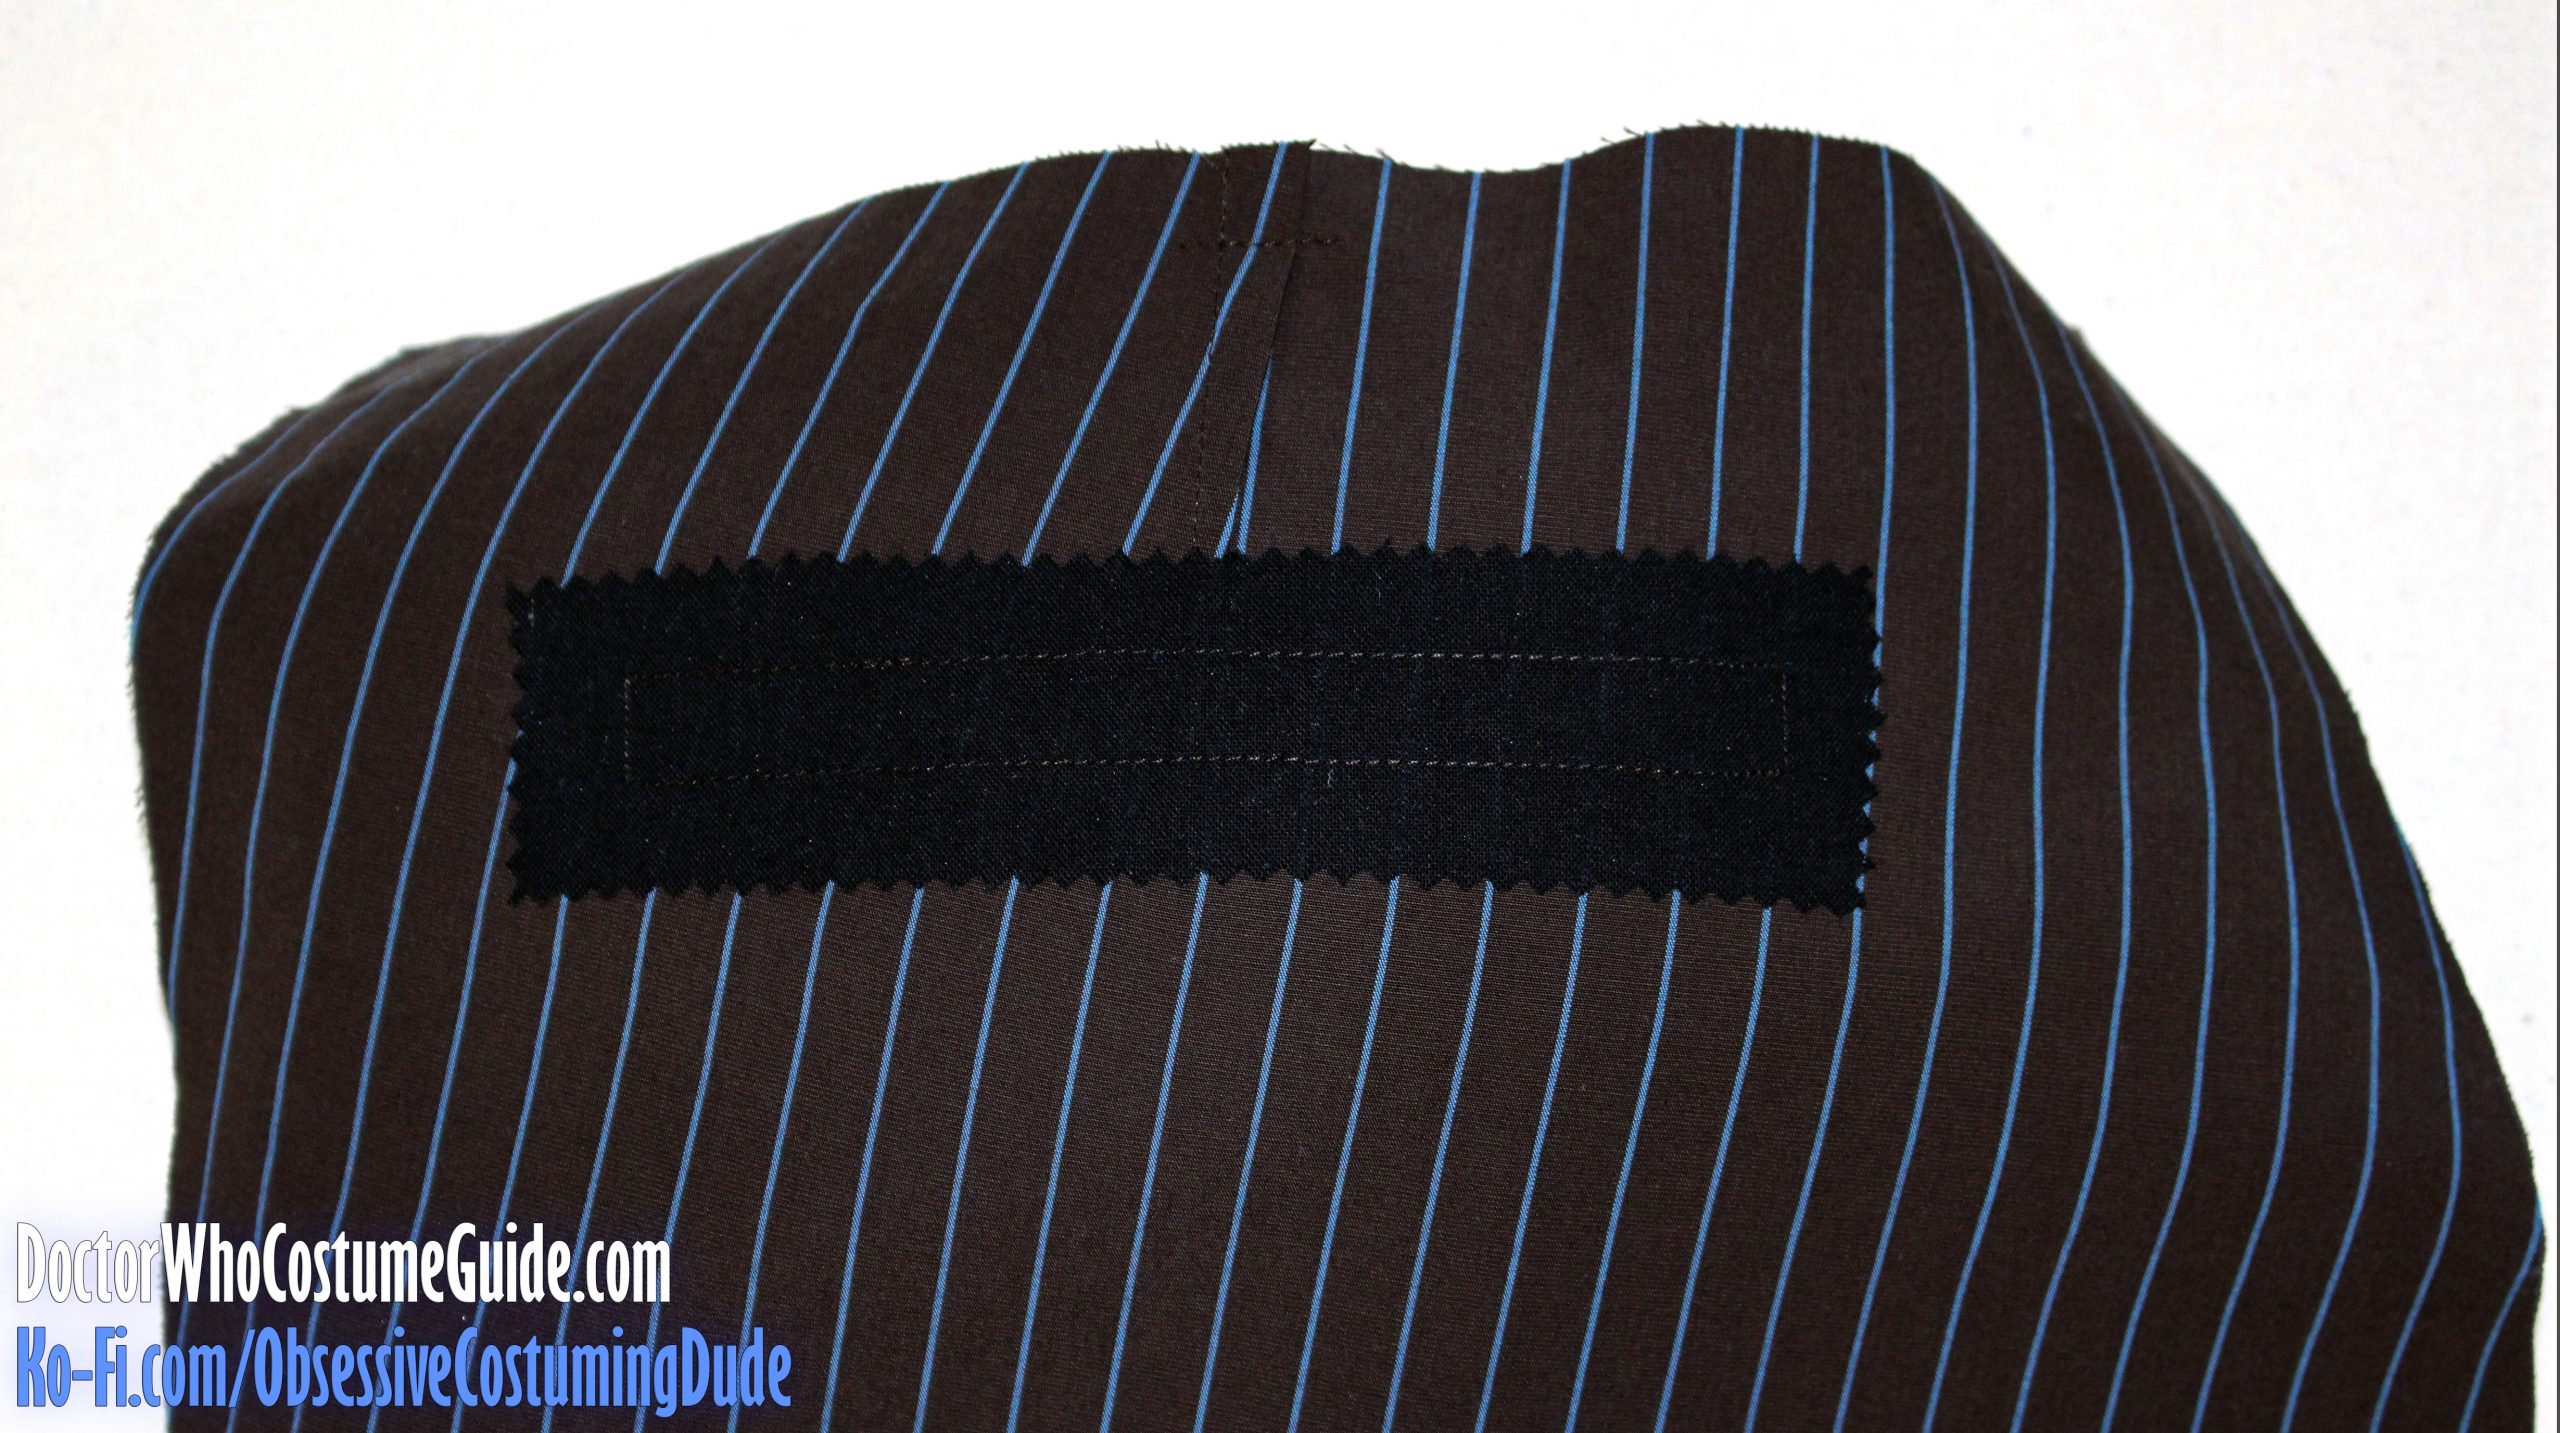
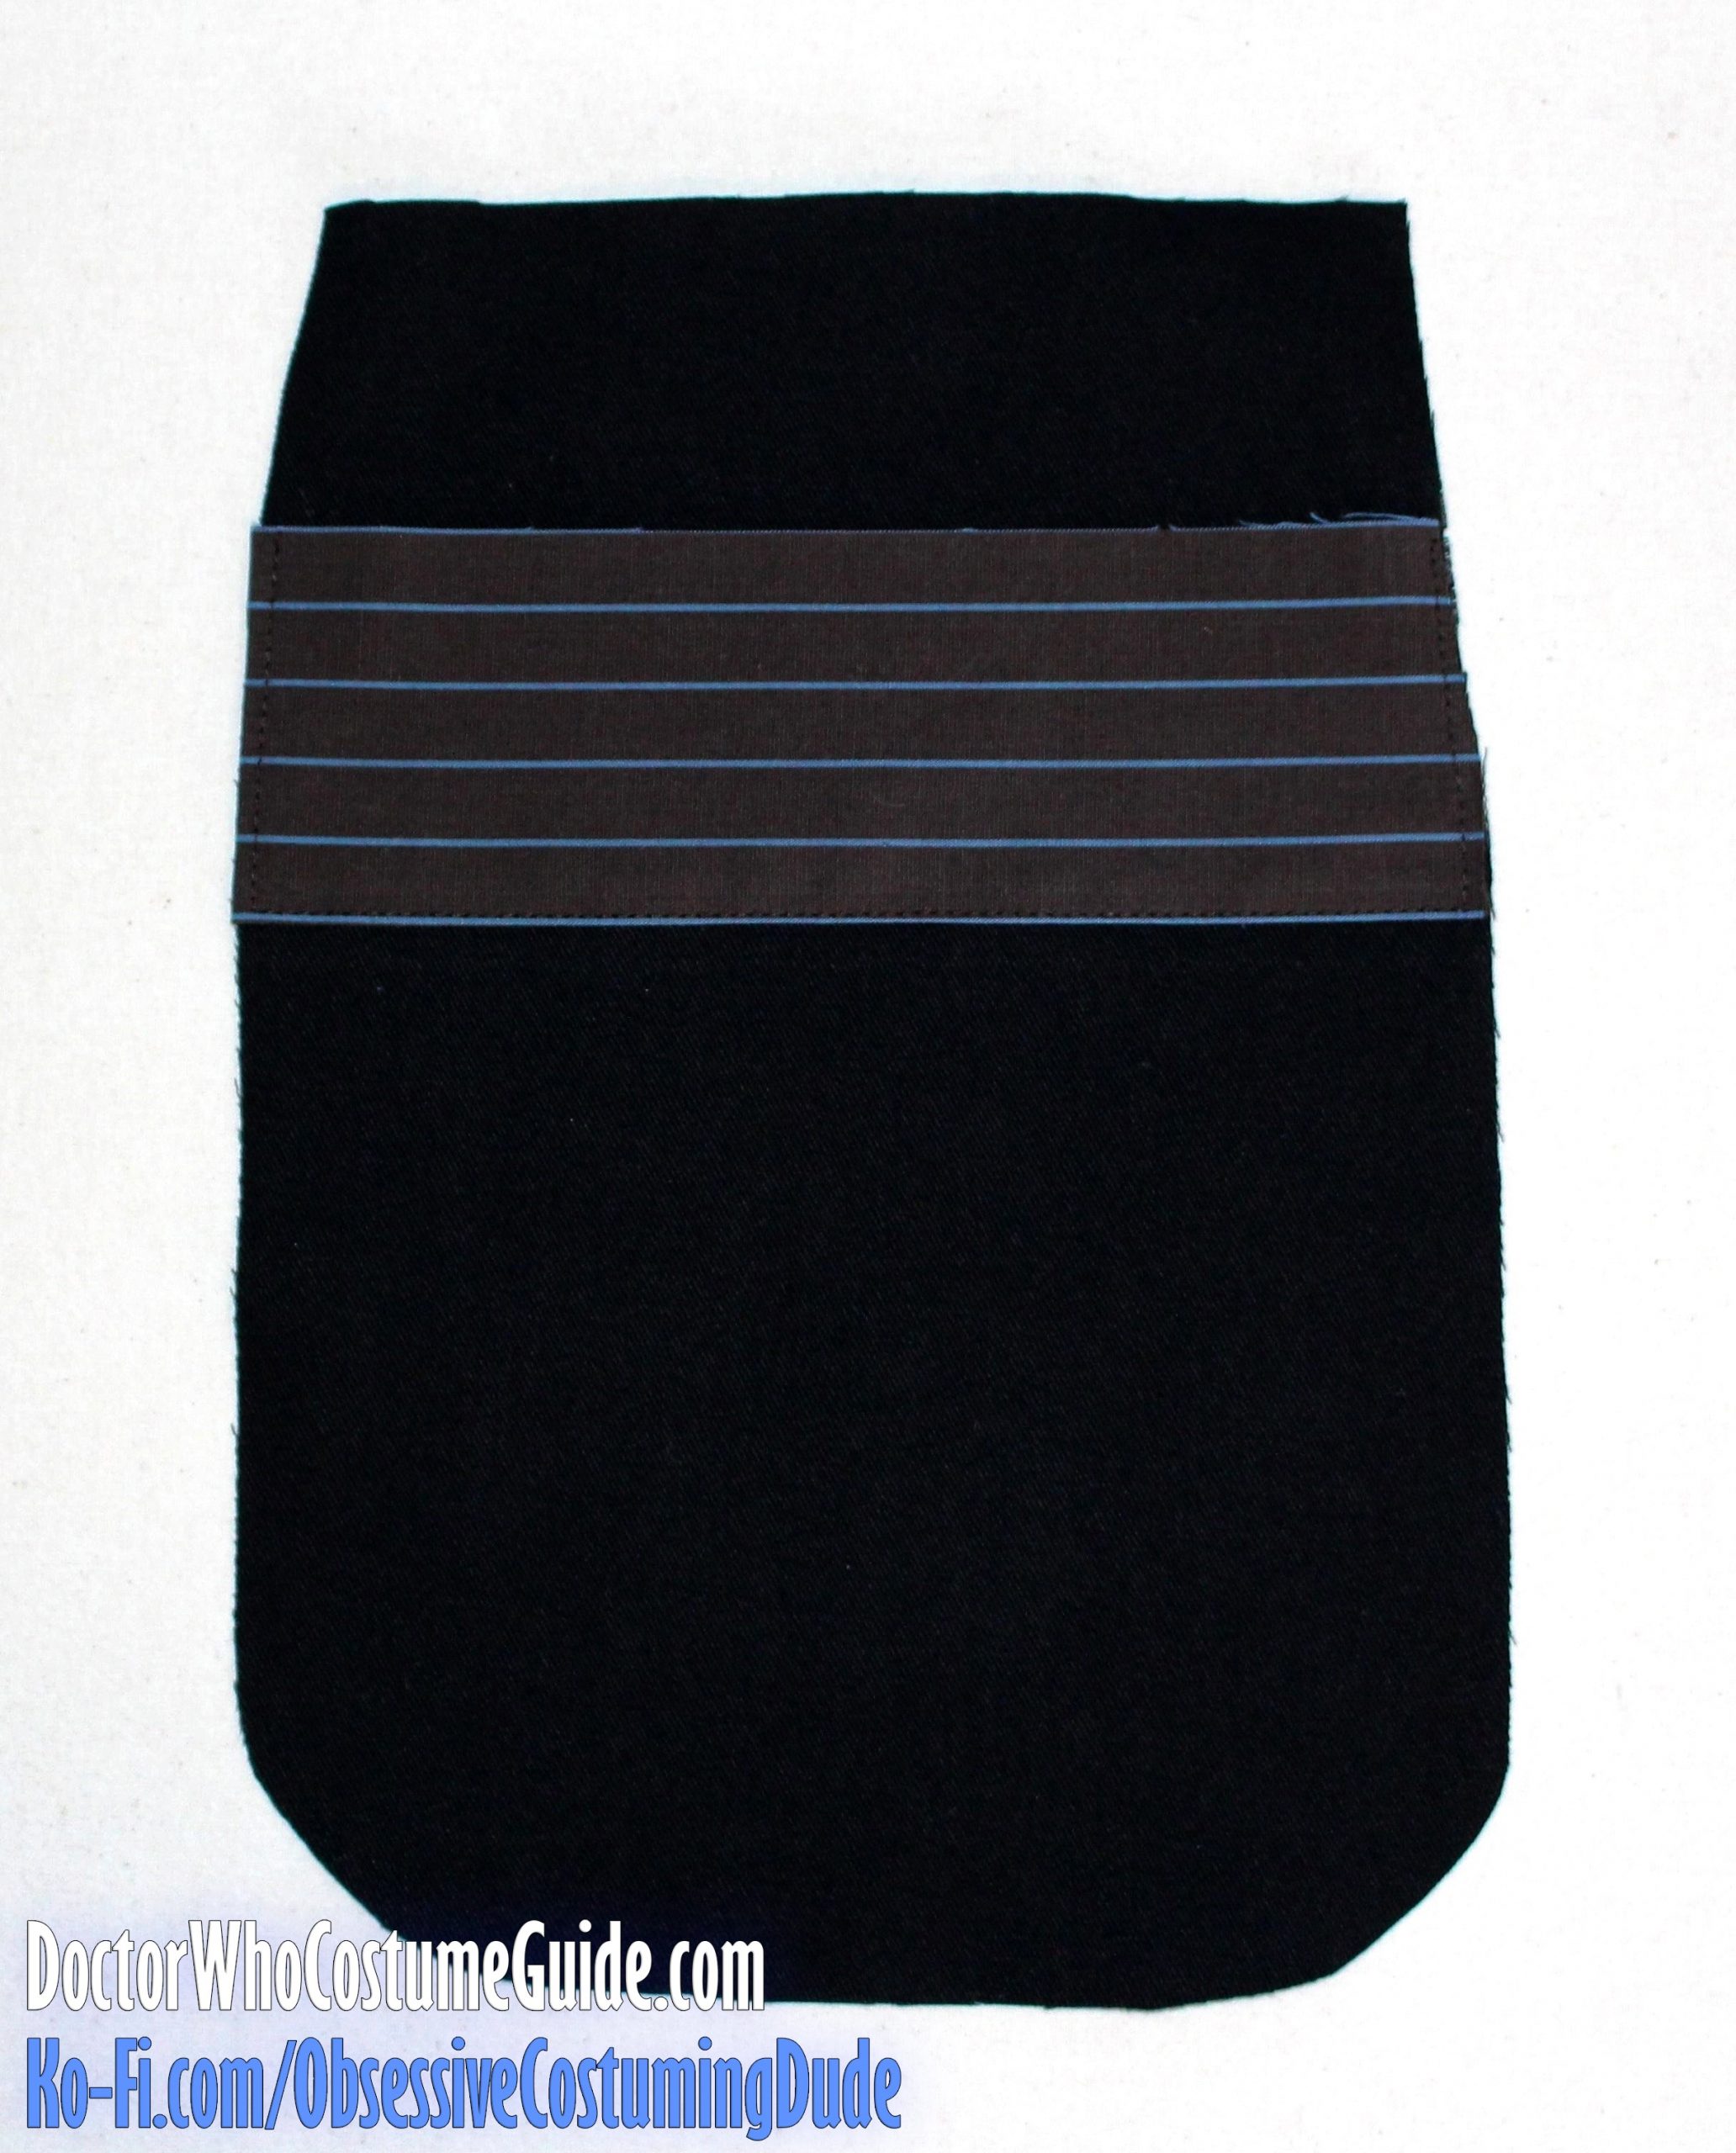
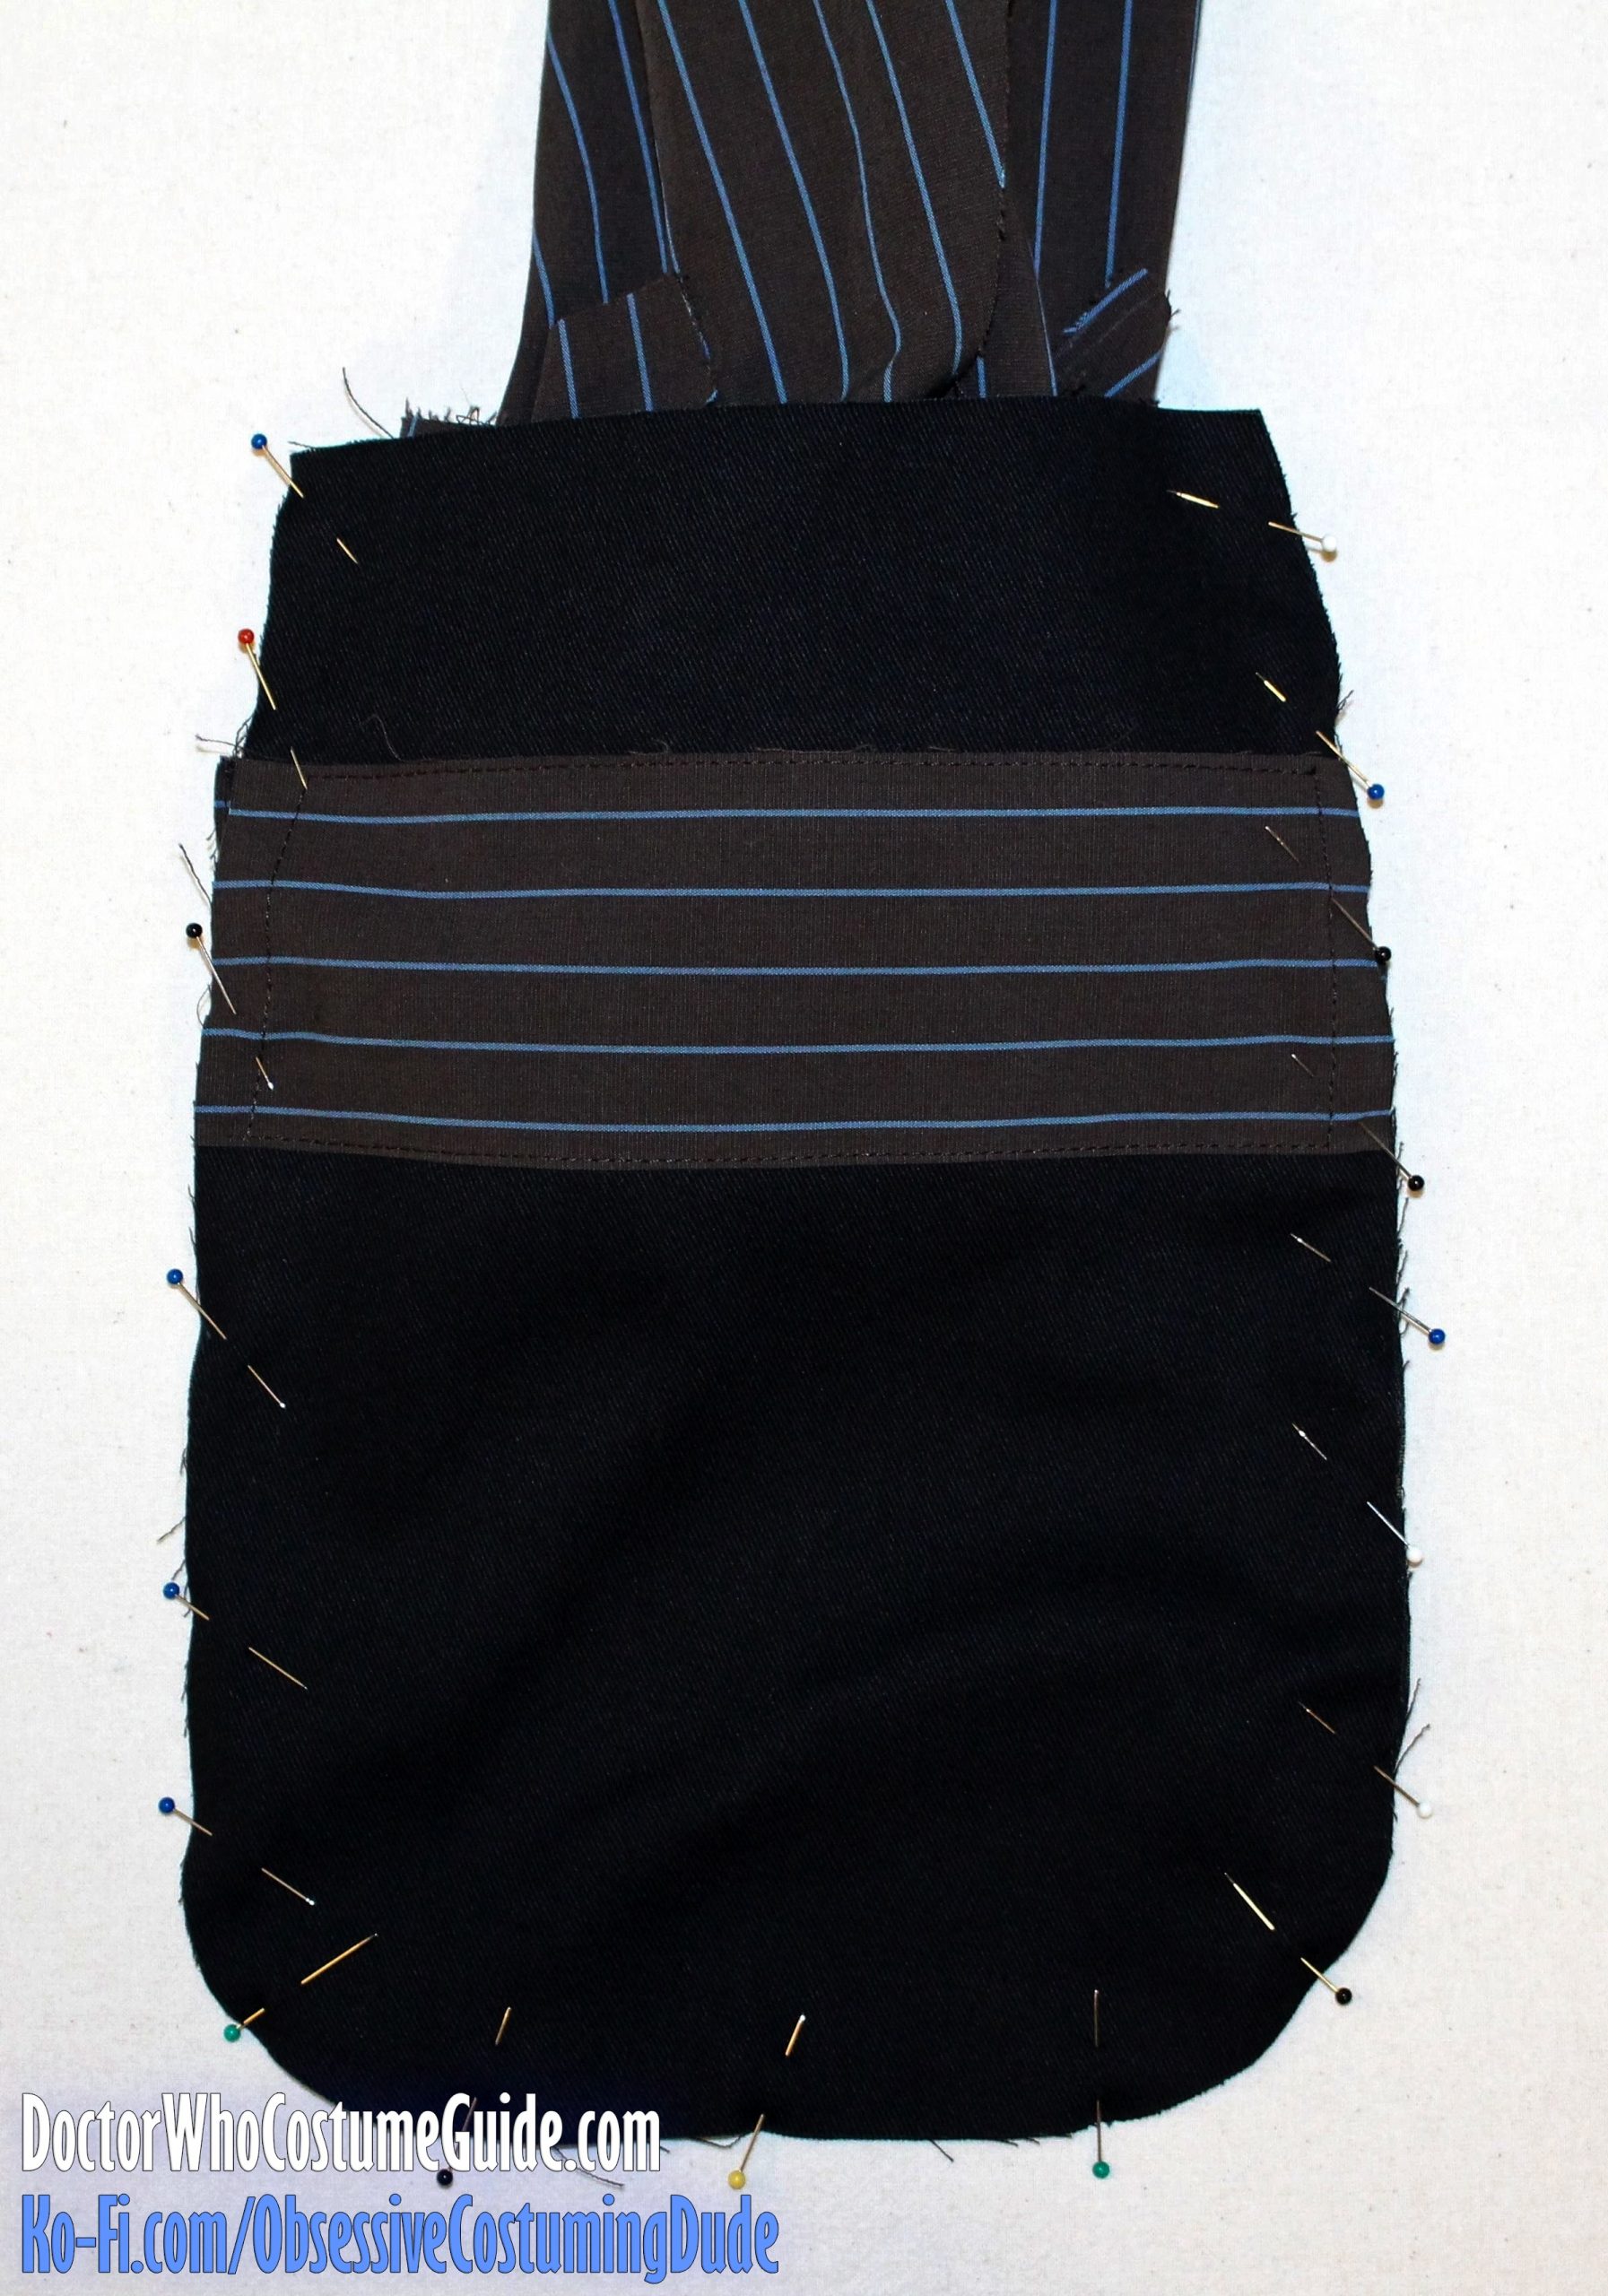
On the wrong side, horizontally center the back pocket bag (piece KK) over the pocket opening, with the top edge flush with the upper edge of the trousers.
(Also, remember that the original GAP trousers had lightweight cotton twill pocket bags instead of pocketing!)
From the right side, topstitch the perimeter of the pocket opening again through all layers, stitching exactly over the previous stitch line.
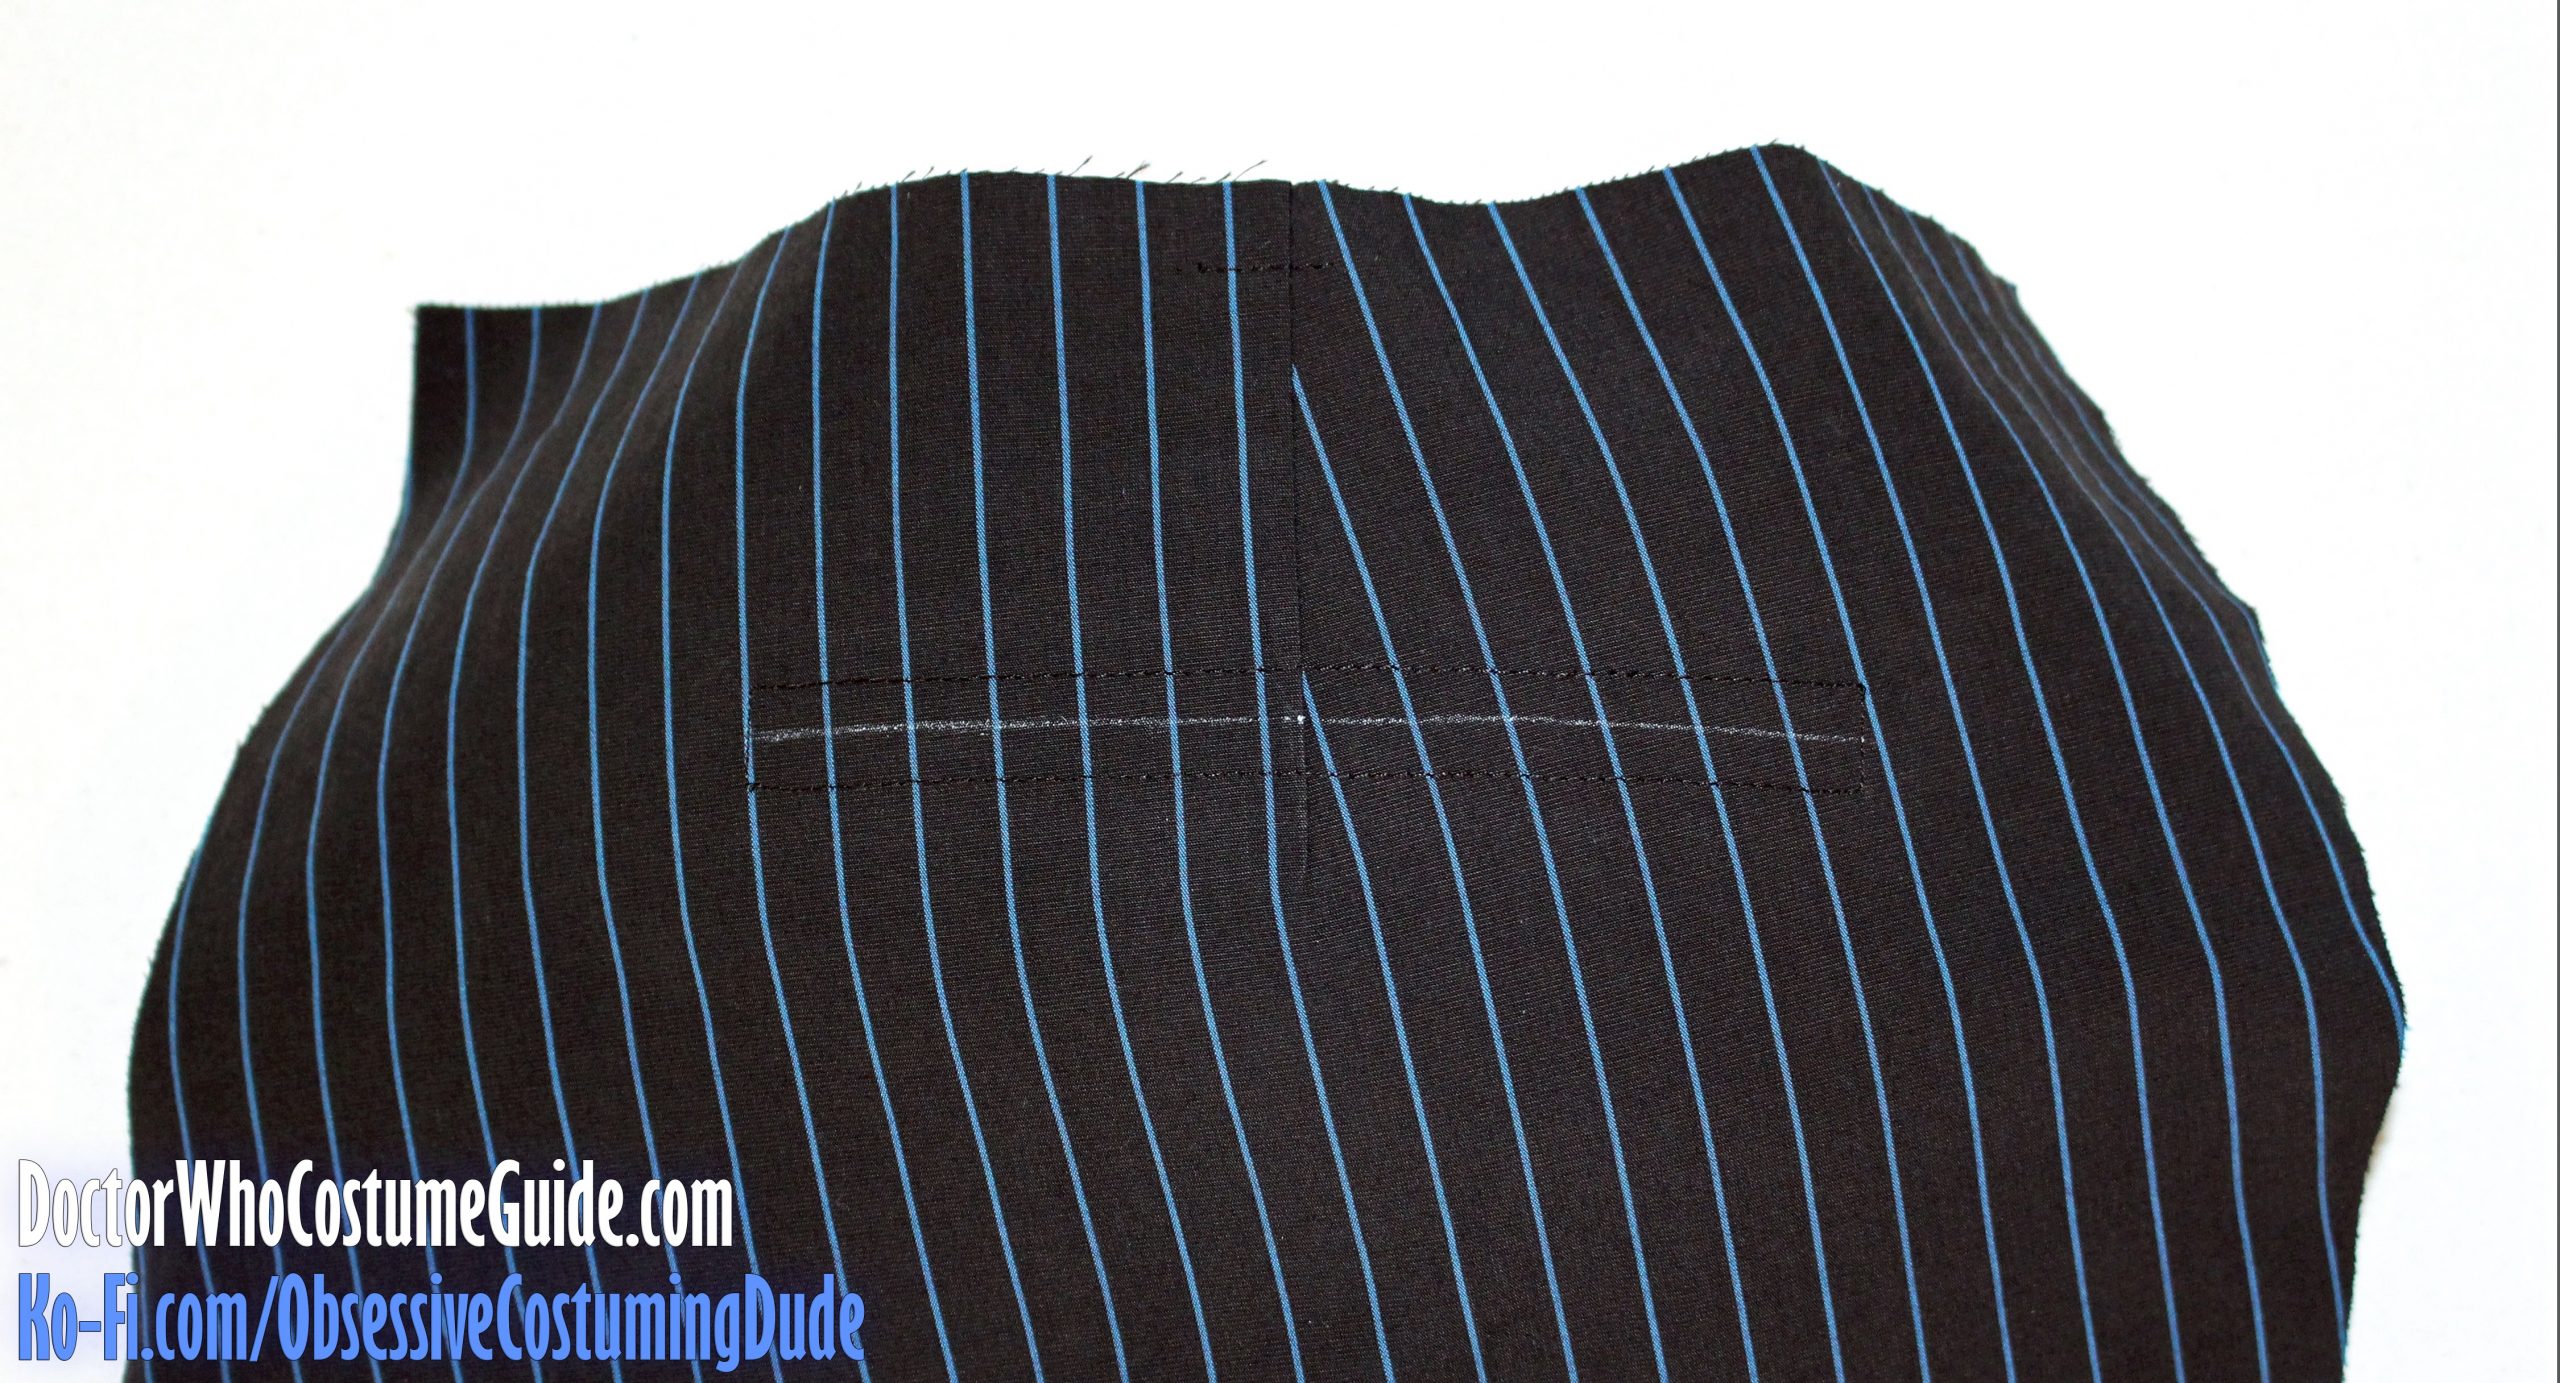
Using your tailor’s chalk, draw a horizontal line across the center of the pocket opening.
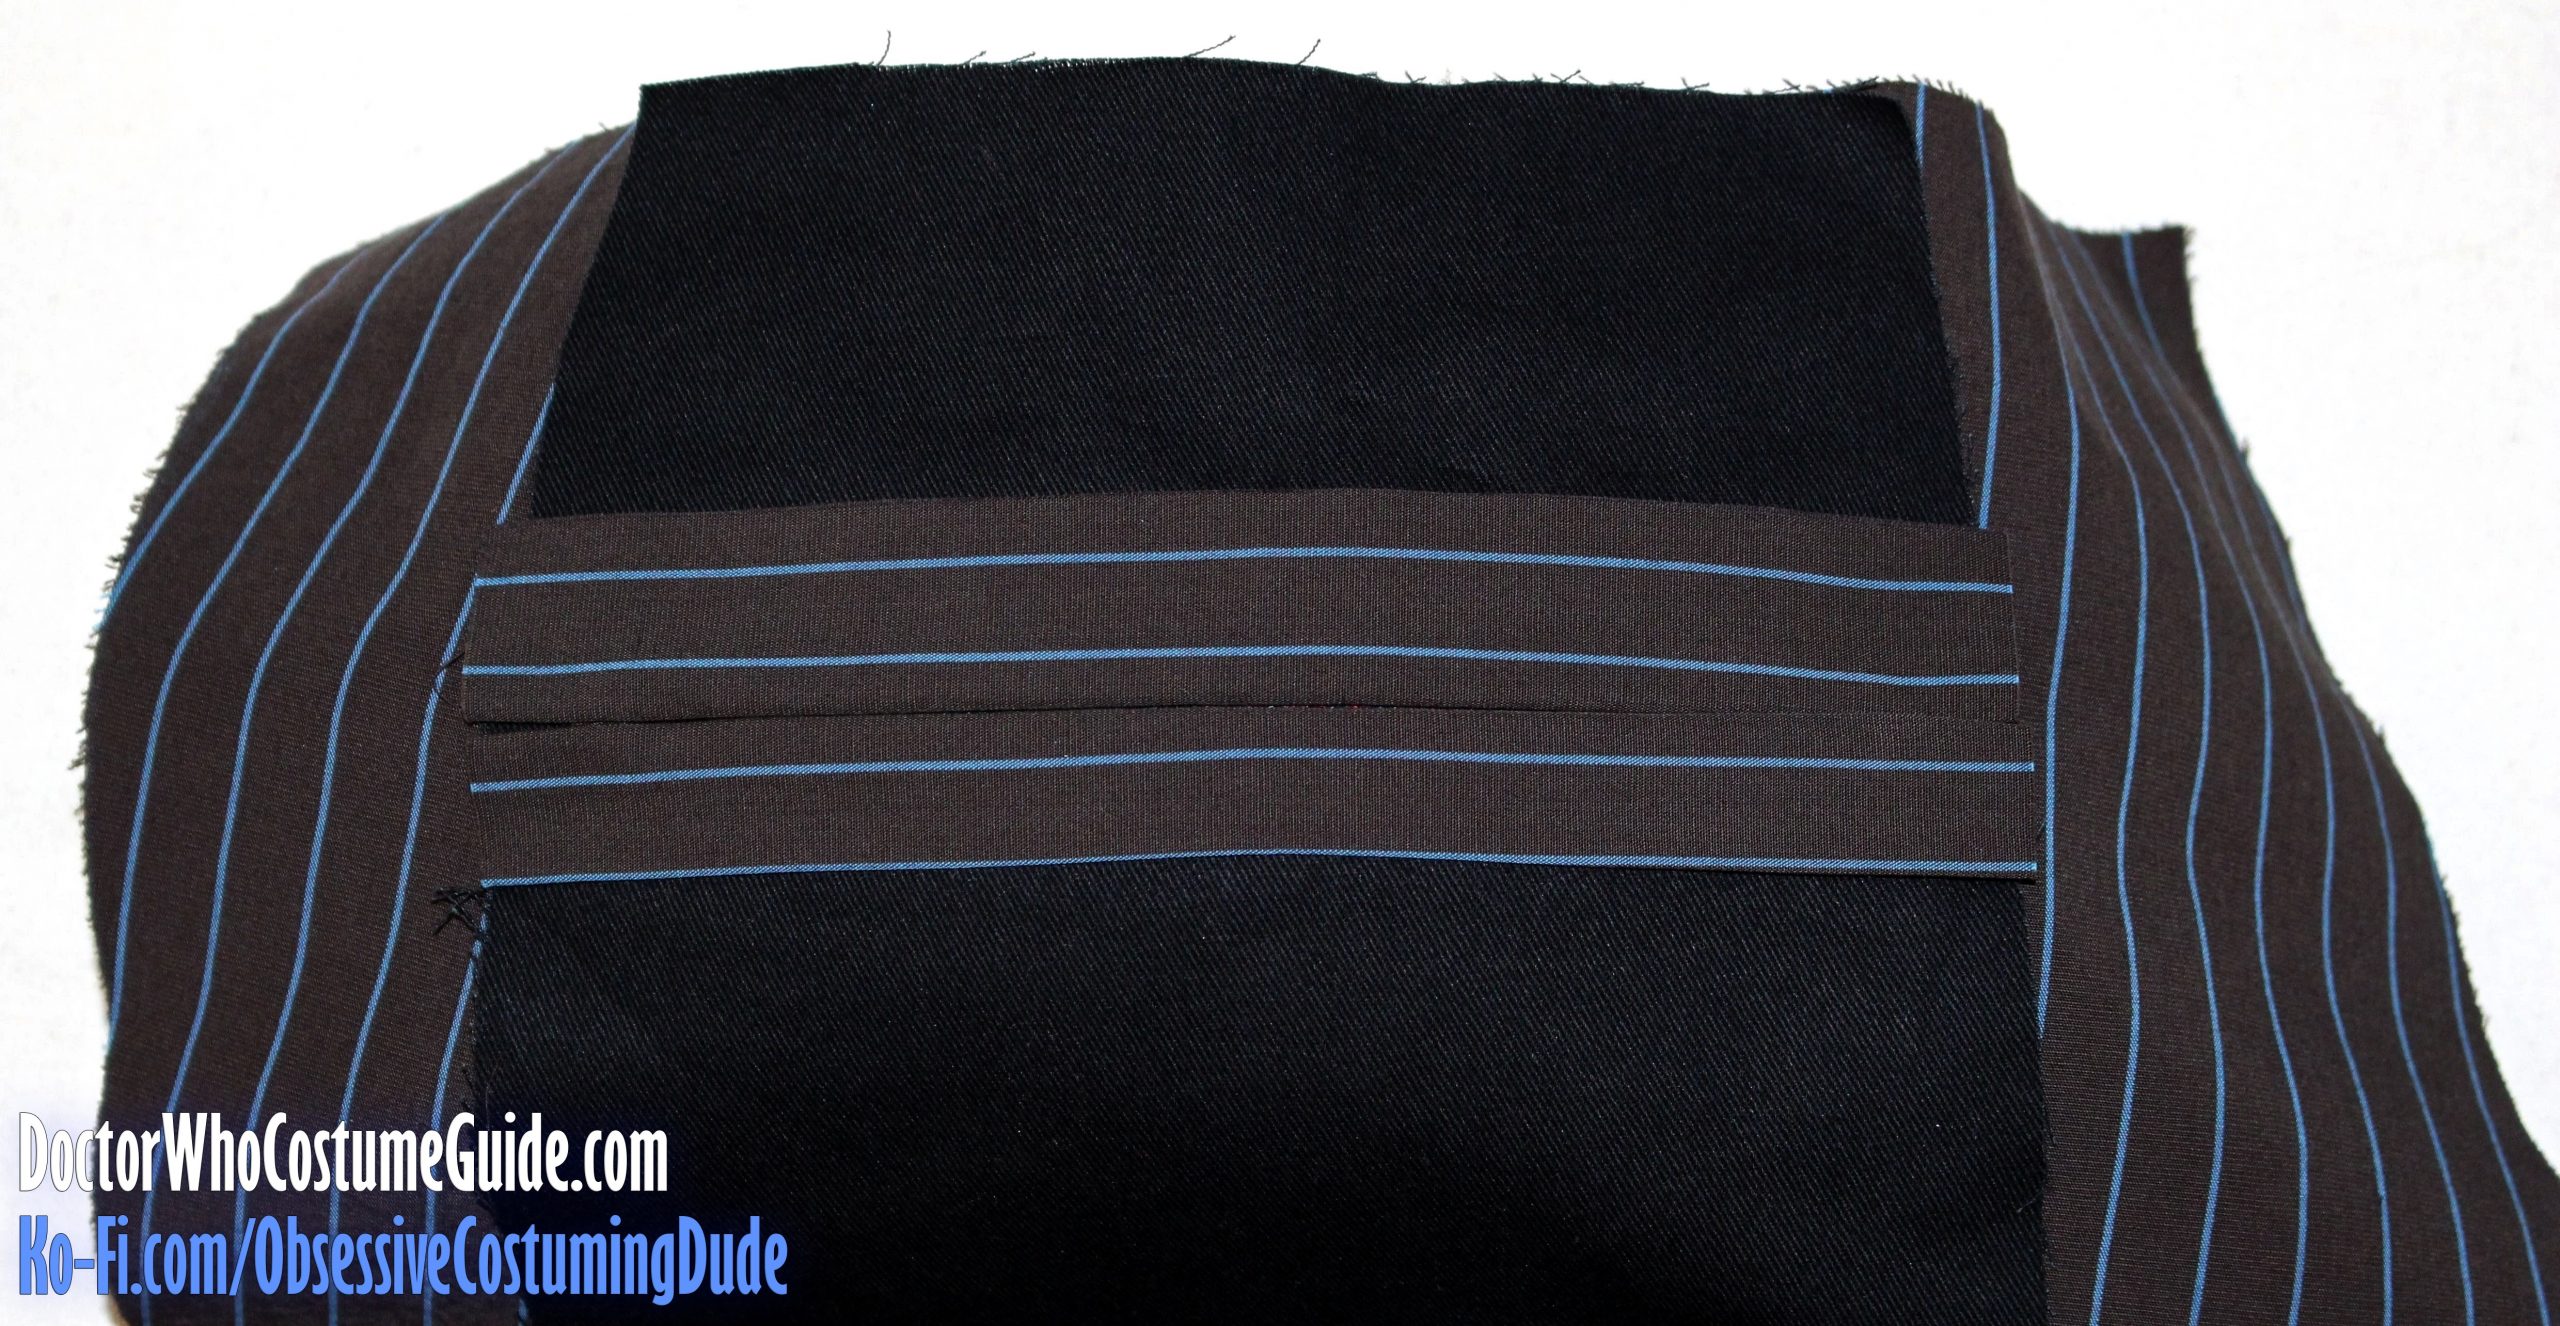
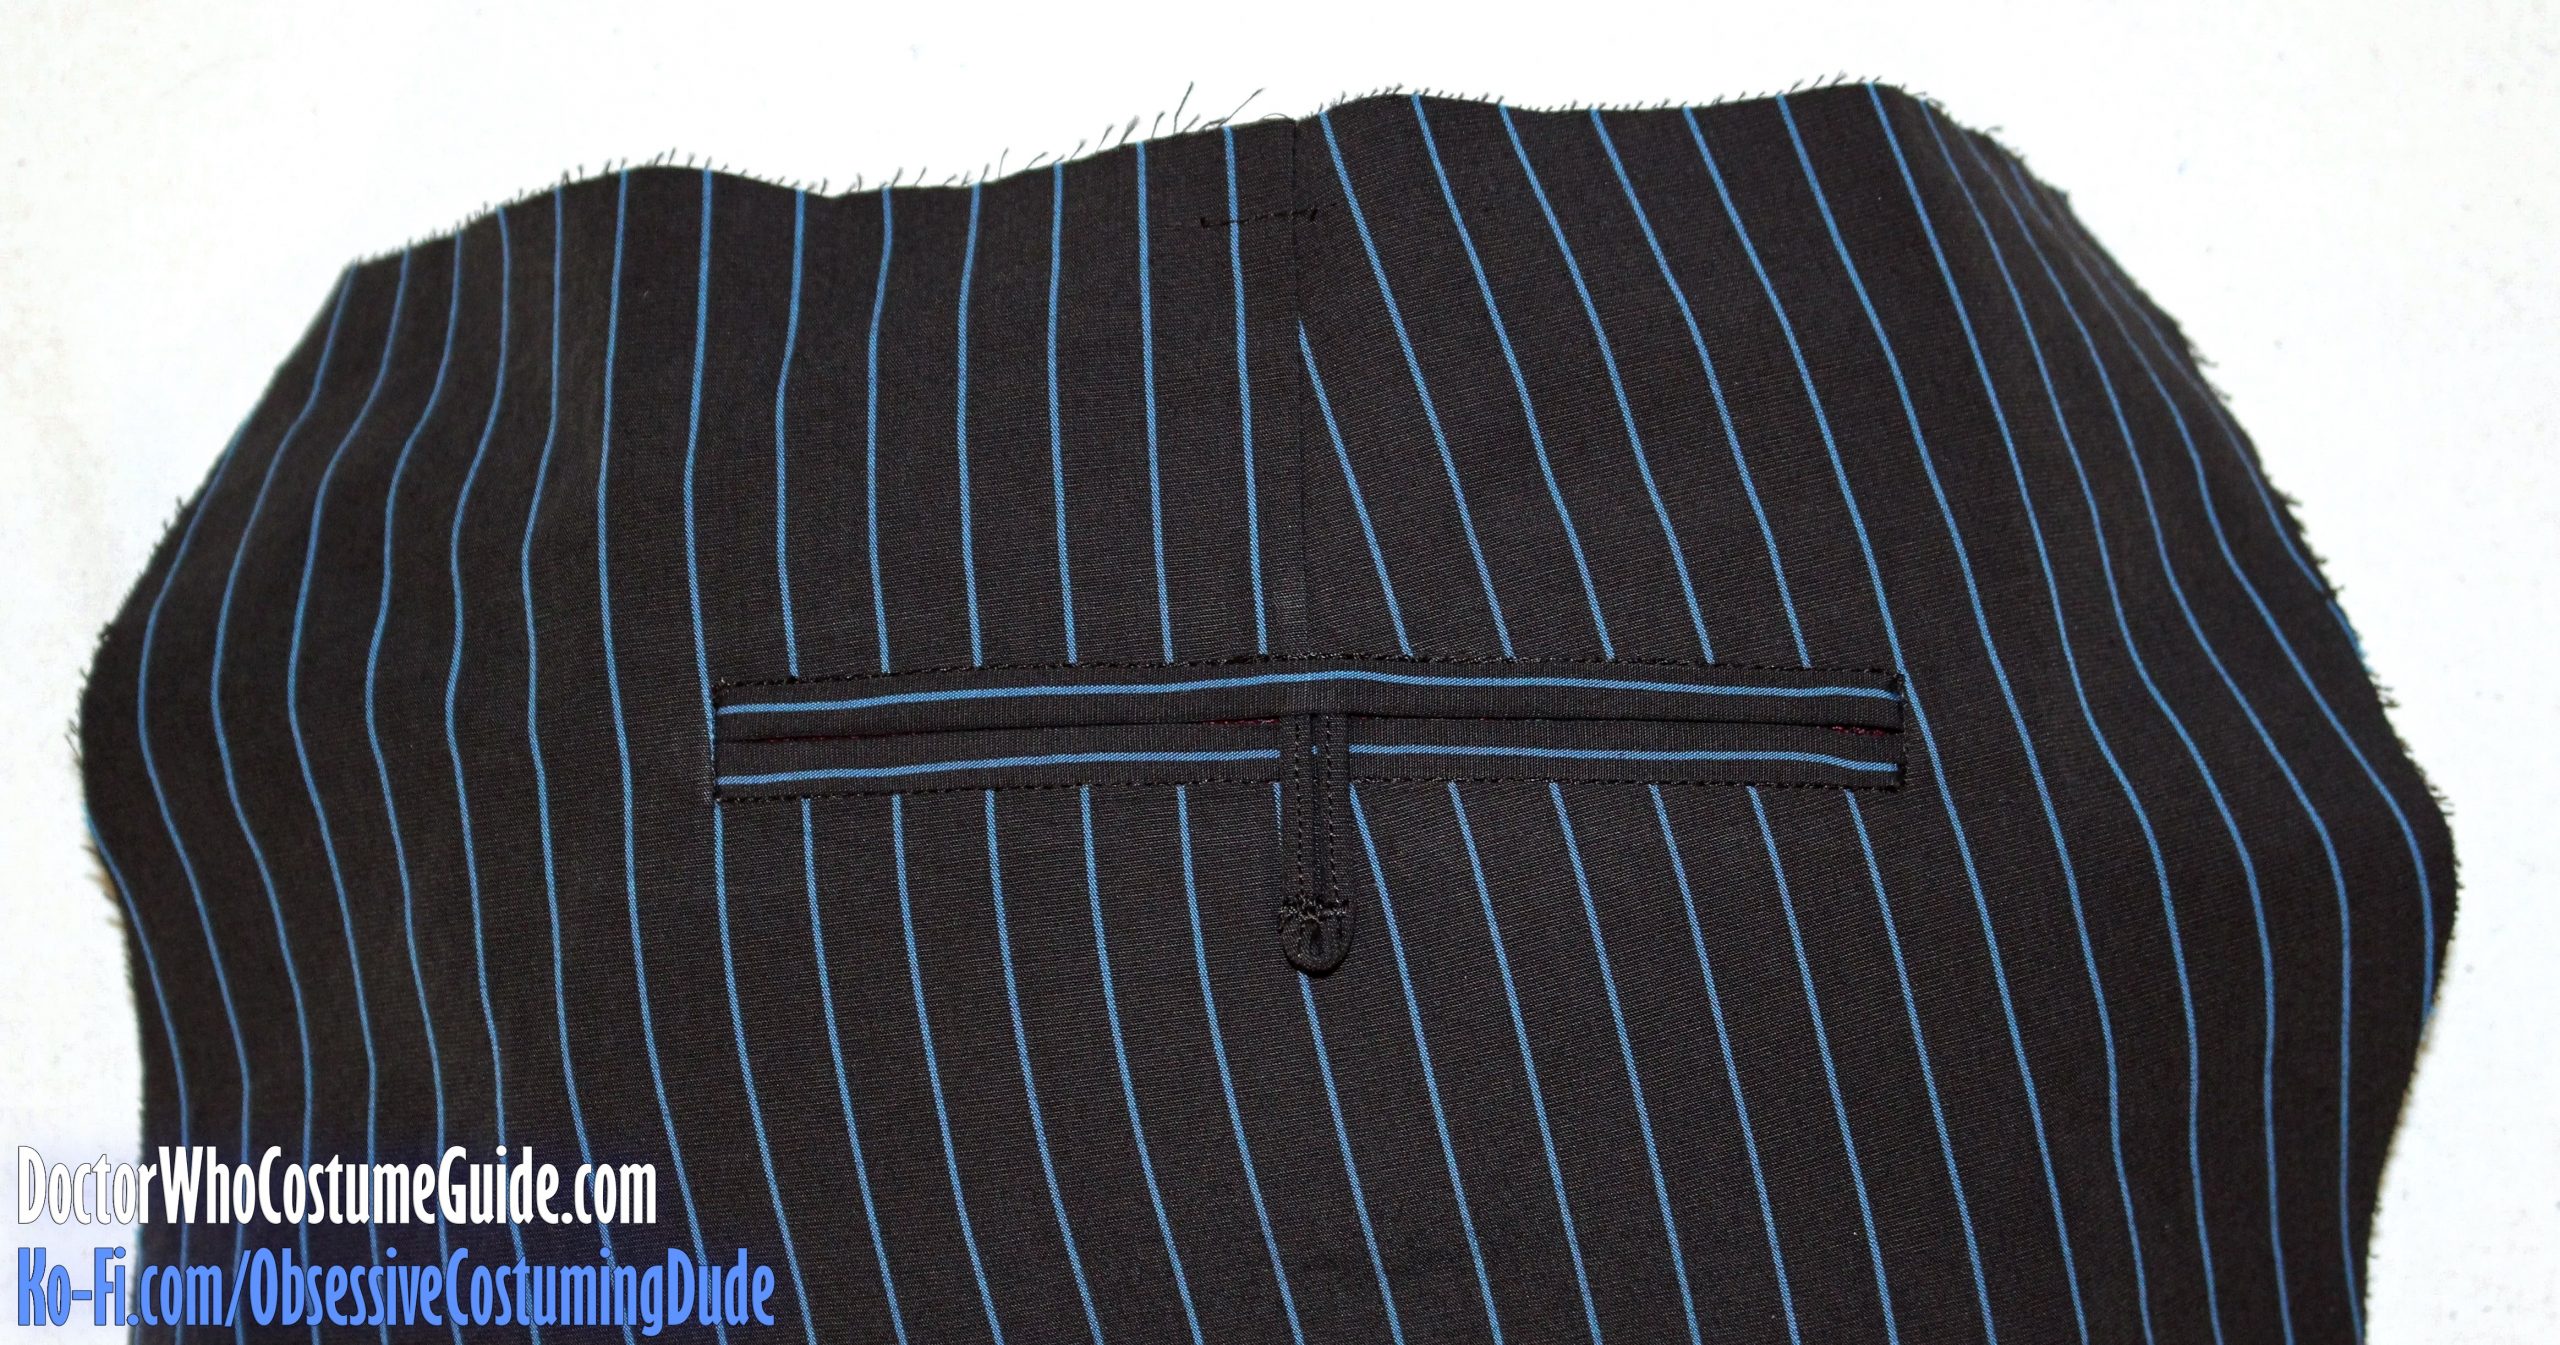
Press the lower edge of one back pocket welt (piece JJ) under ¼”.
Place your back pocket welts face down on the right side of the trousers so the edges meet at the center line you just drew, then pin them into place.
On the wrong side of the trousers, using your quilting/walking foot, stitch over the upper and lower (long) edges of the pocket opening again, beginning and ending exactly at the corners of the pocket opening.
Press the lower welt upward.
Unfold the lower welt and press the upper welt downward.
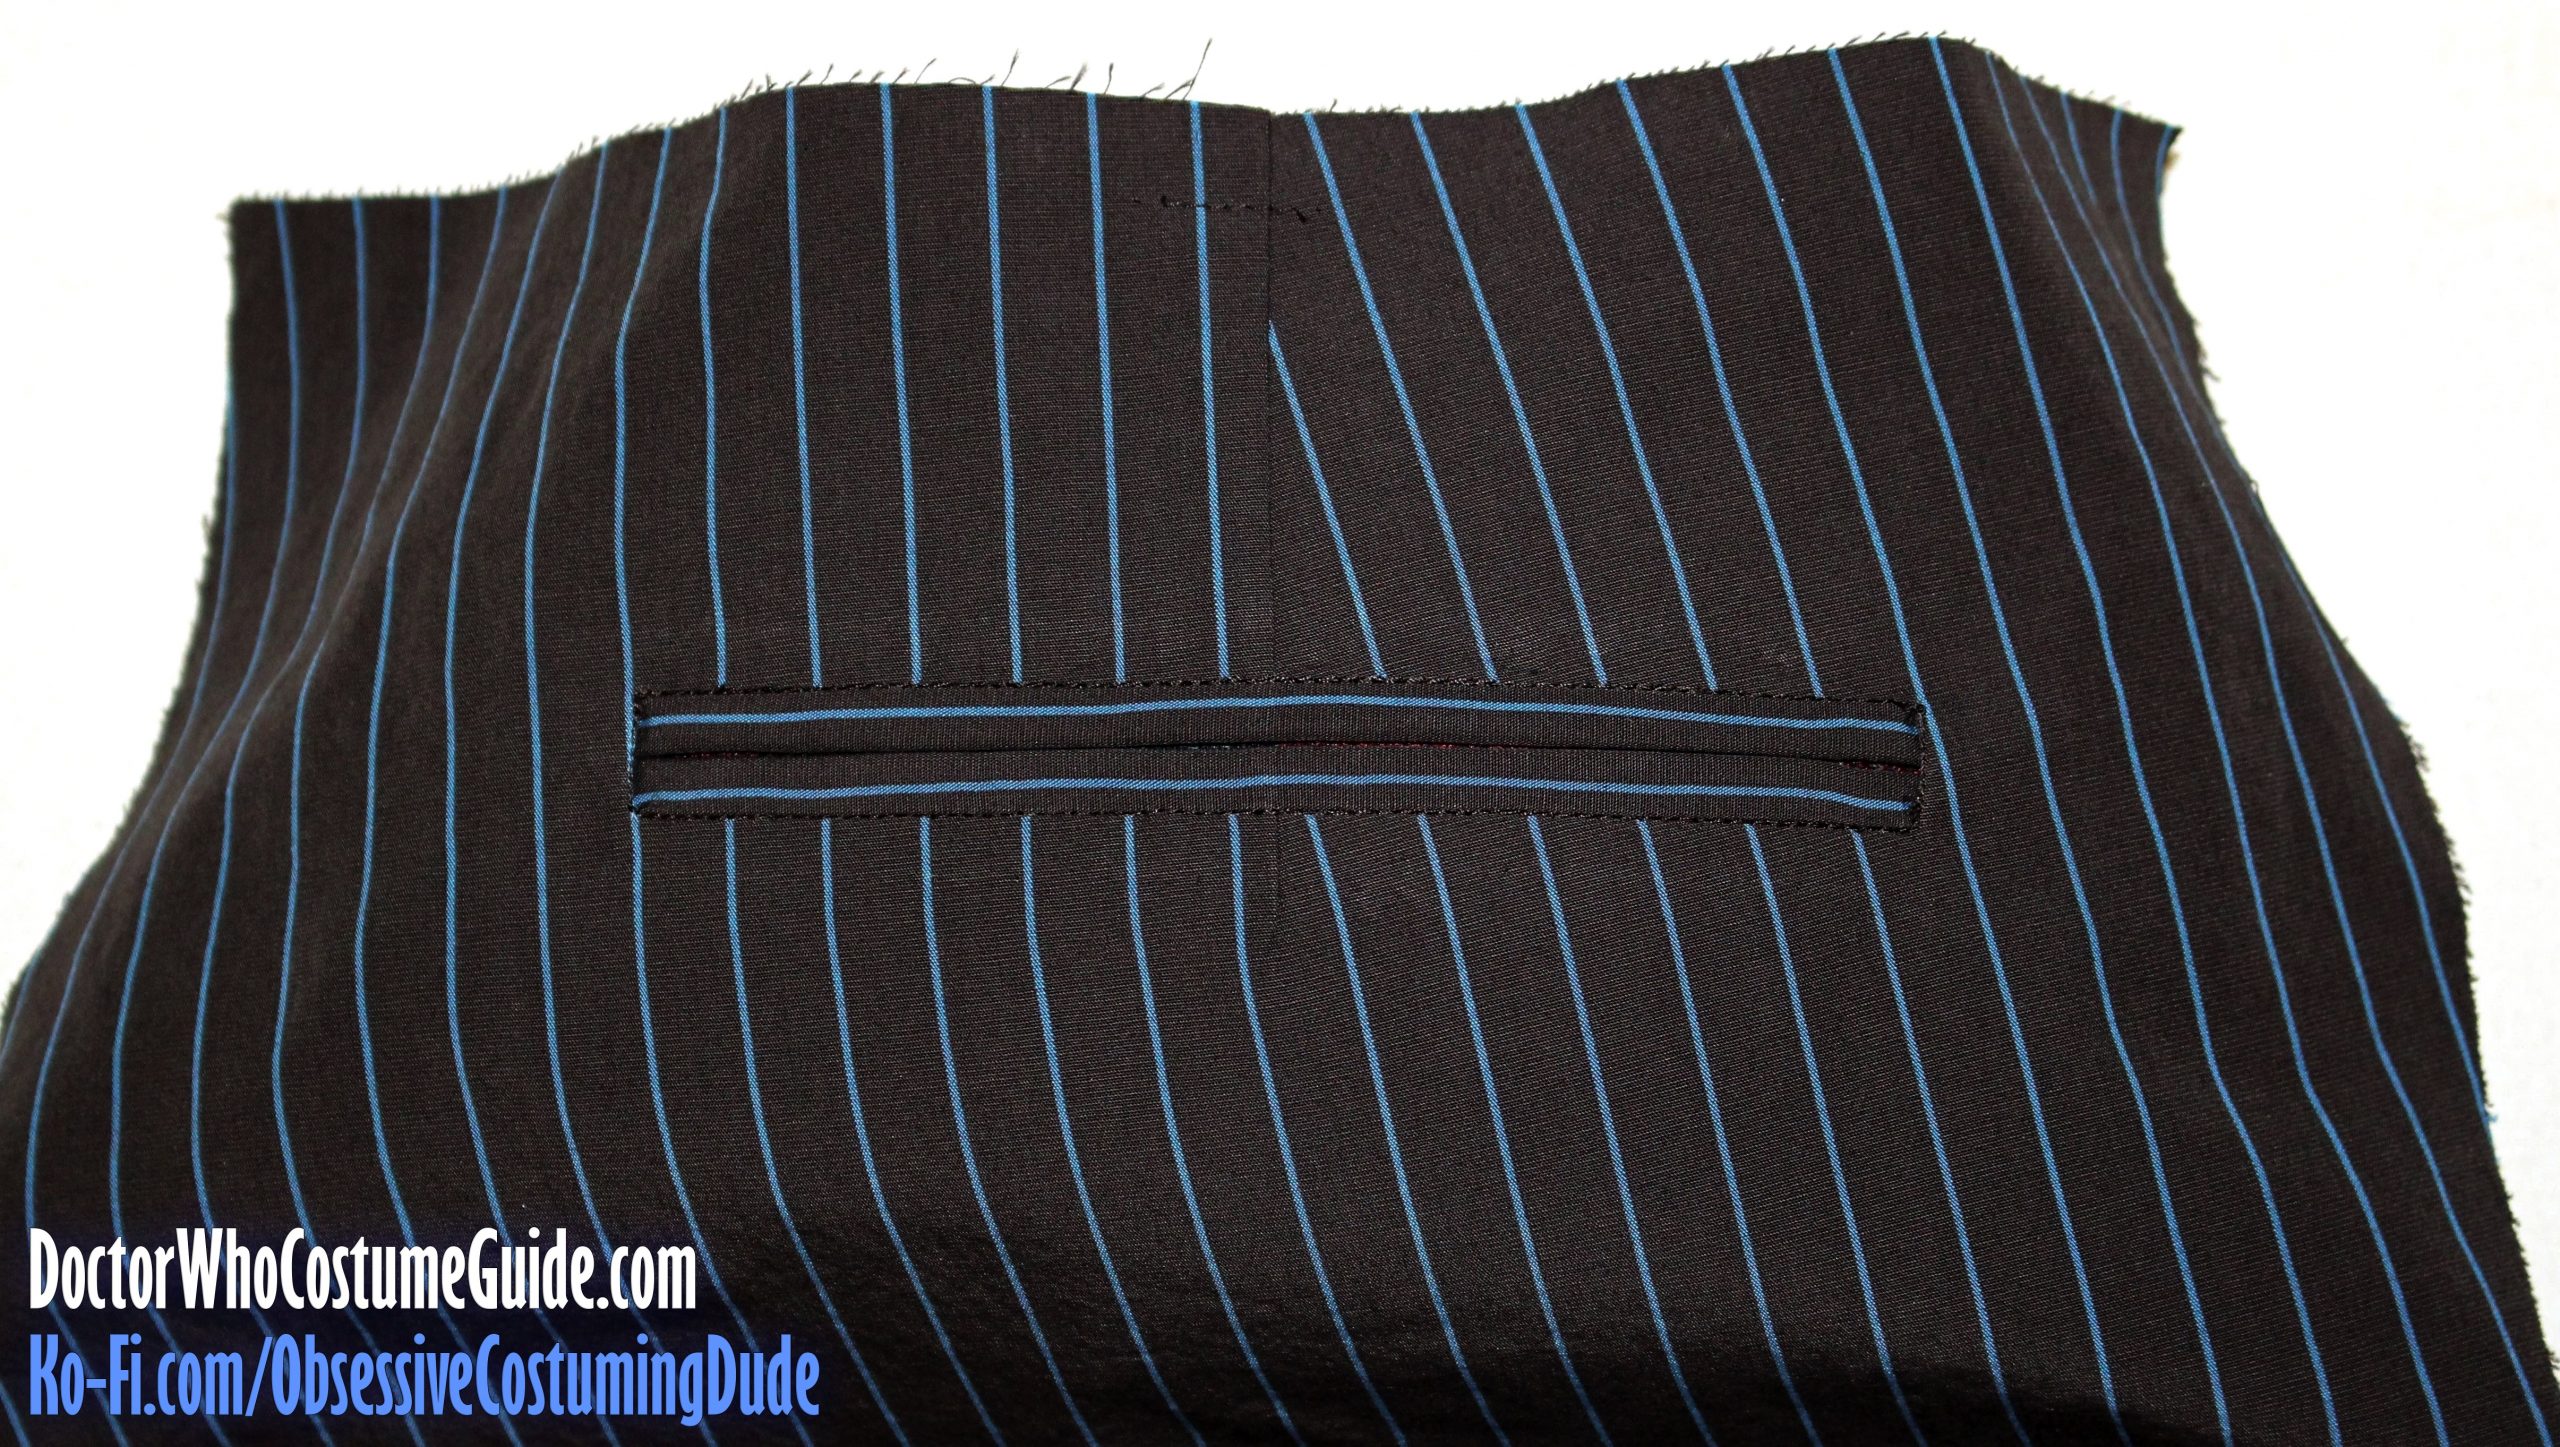
Slash the pocket opening across the center, stopping about ⅜” from the ends and snipping a “Y” shape to the corners on each side, catching only the pocketing and garment fabric (not the welts).
TIP: Be sure to clip all the way to the corners, but not past them! Sharp scissors are essential for this!
Turn the pocket welts under and press.
Turn the triangular “prongs” under and press.
From the right side, using your quilting/walking foot, “stitch-in-the-ditch” through all layers along the upper and lower (longer) edges of the pocket opening.
Using your zipper/piping foot, sew the triangular “prongs” to the edges of the pocket welts.
Edge-stitch the lower (folded) edge of the lower welt to the pocketing, leaving the outermost ⅝” free.
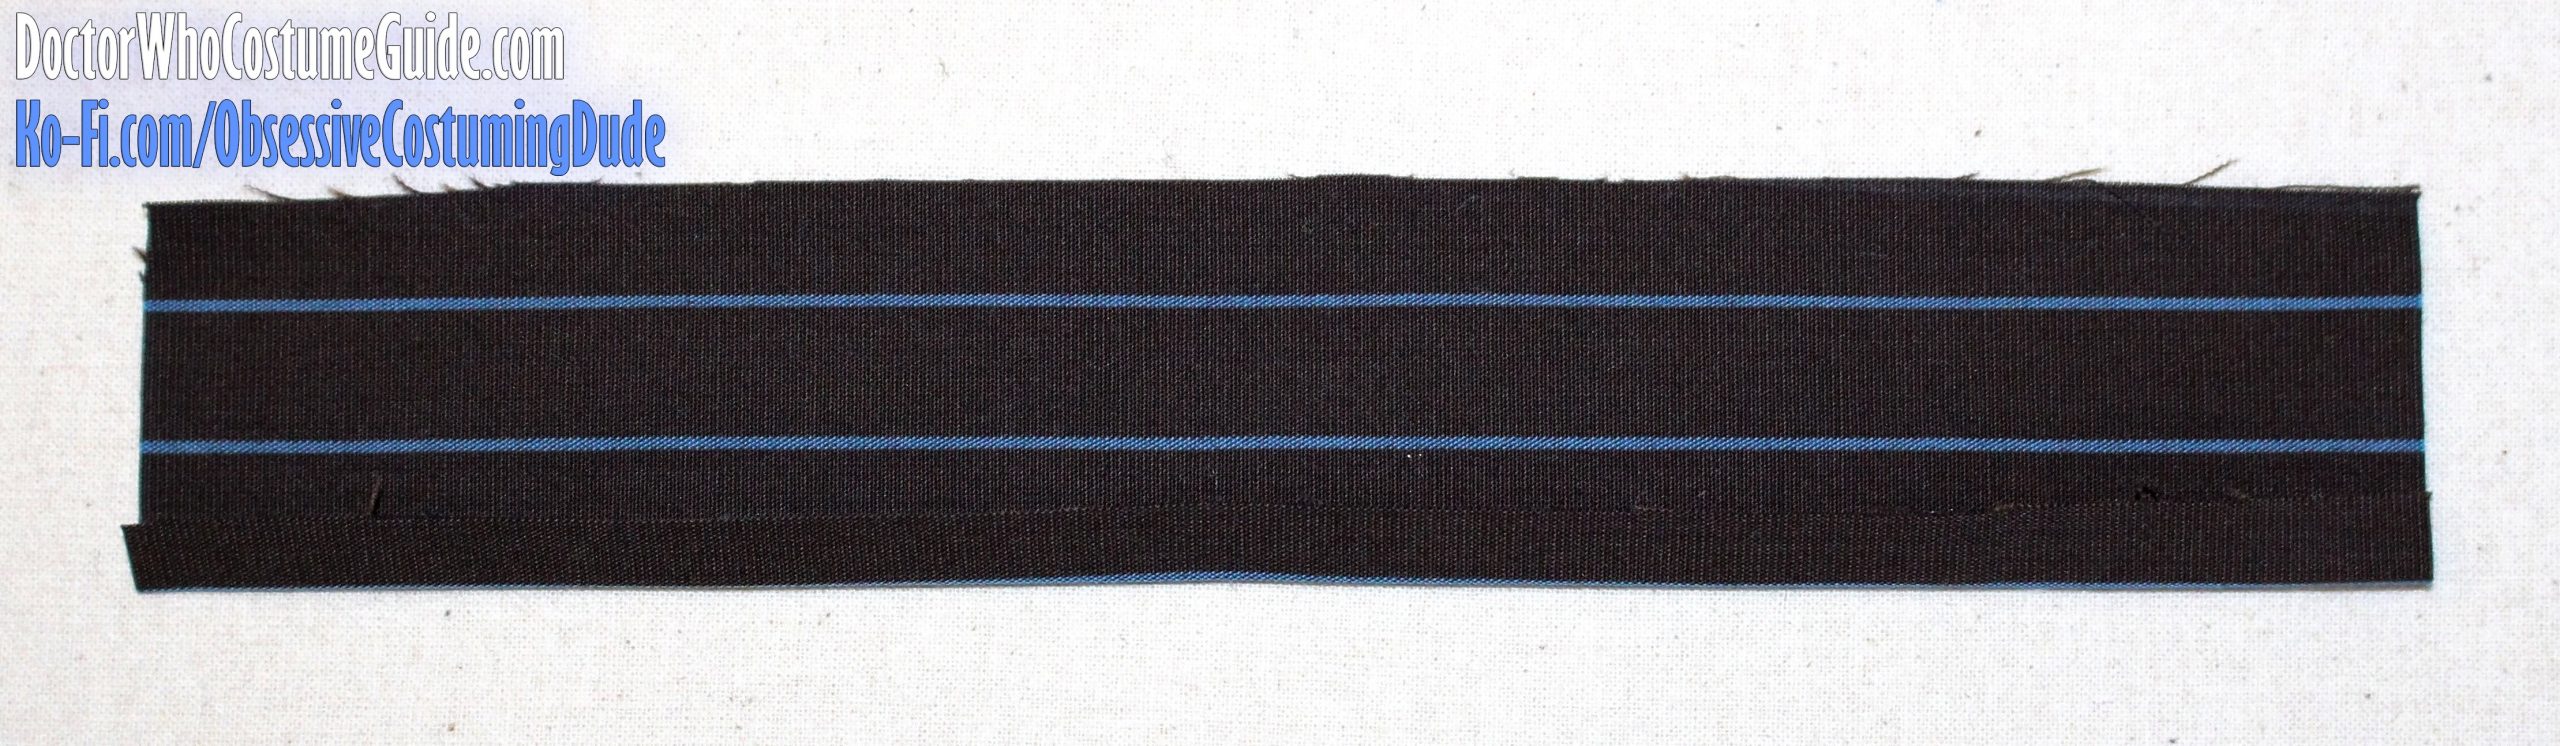
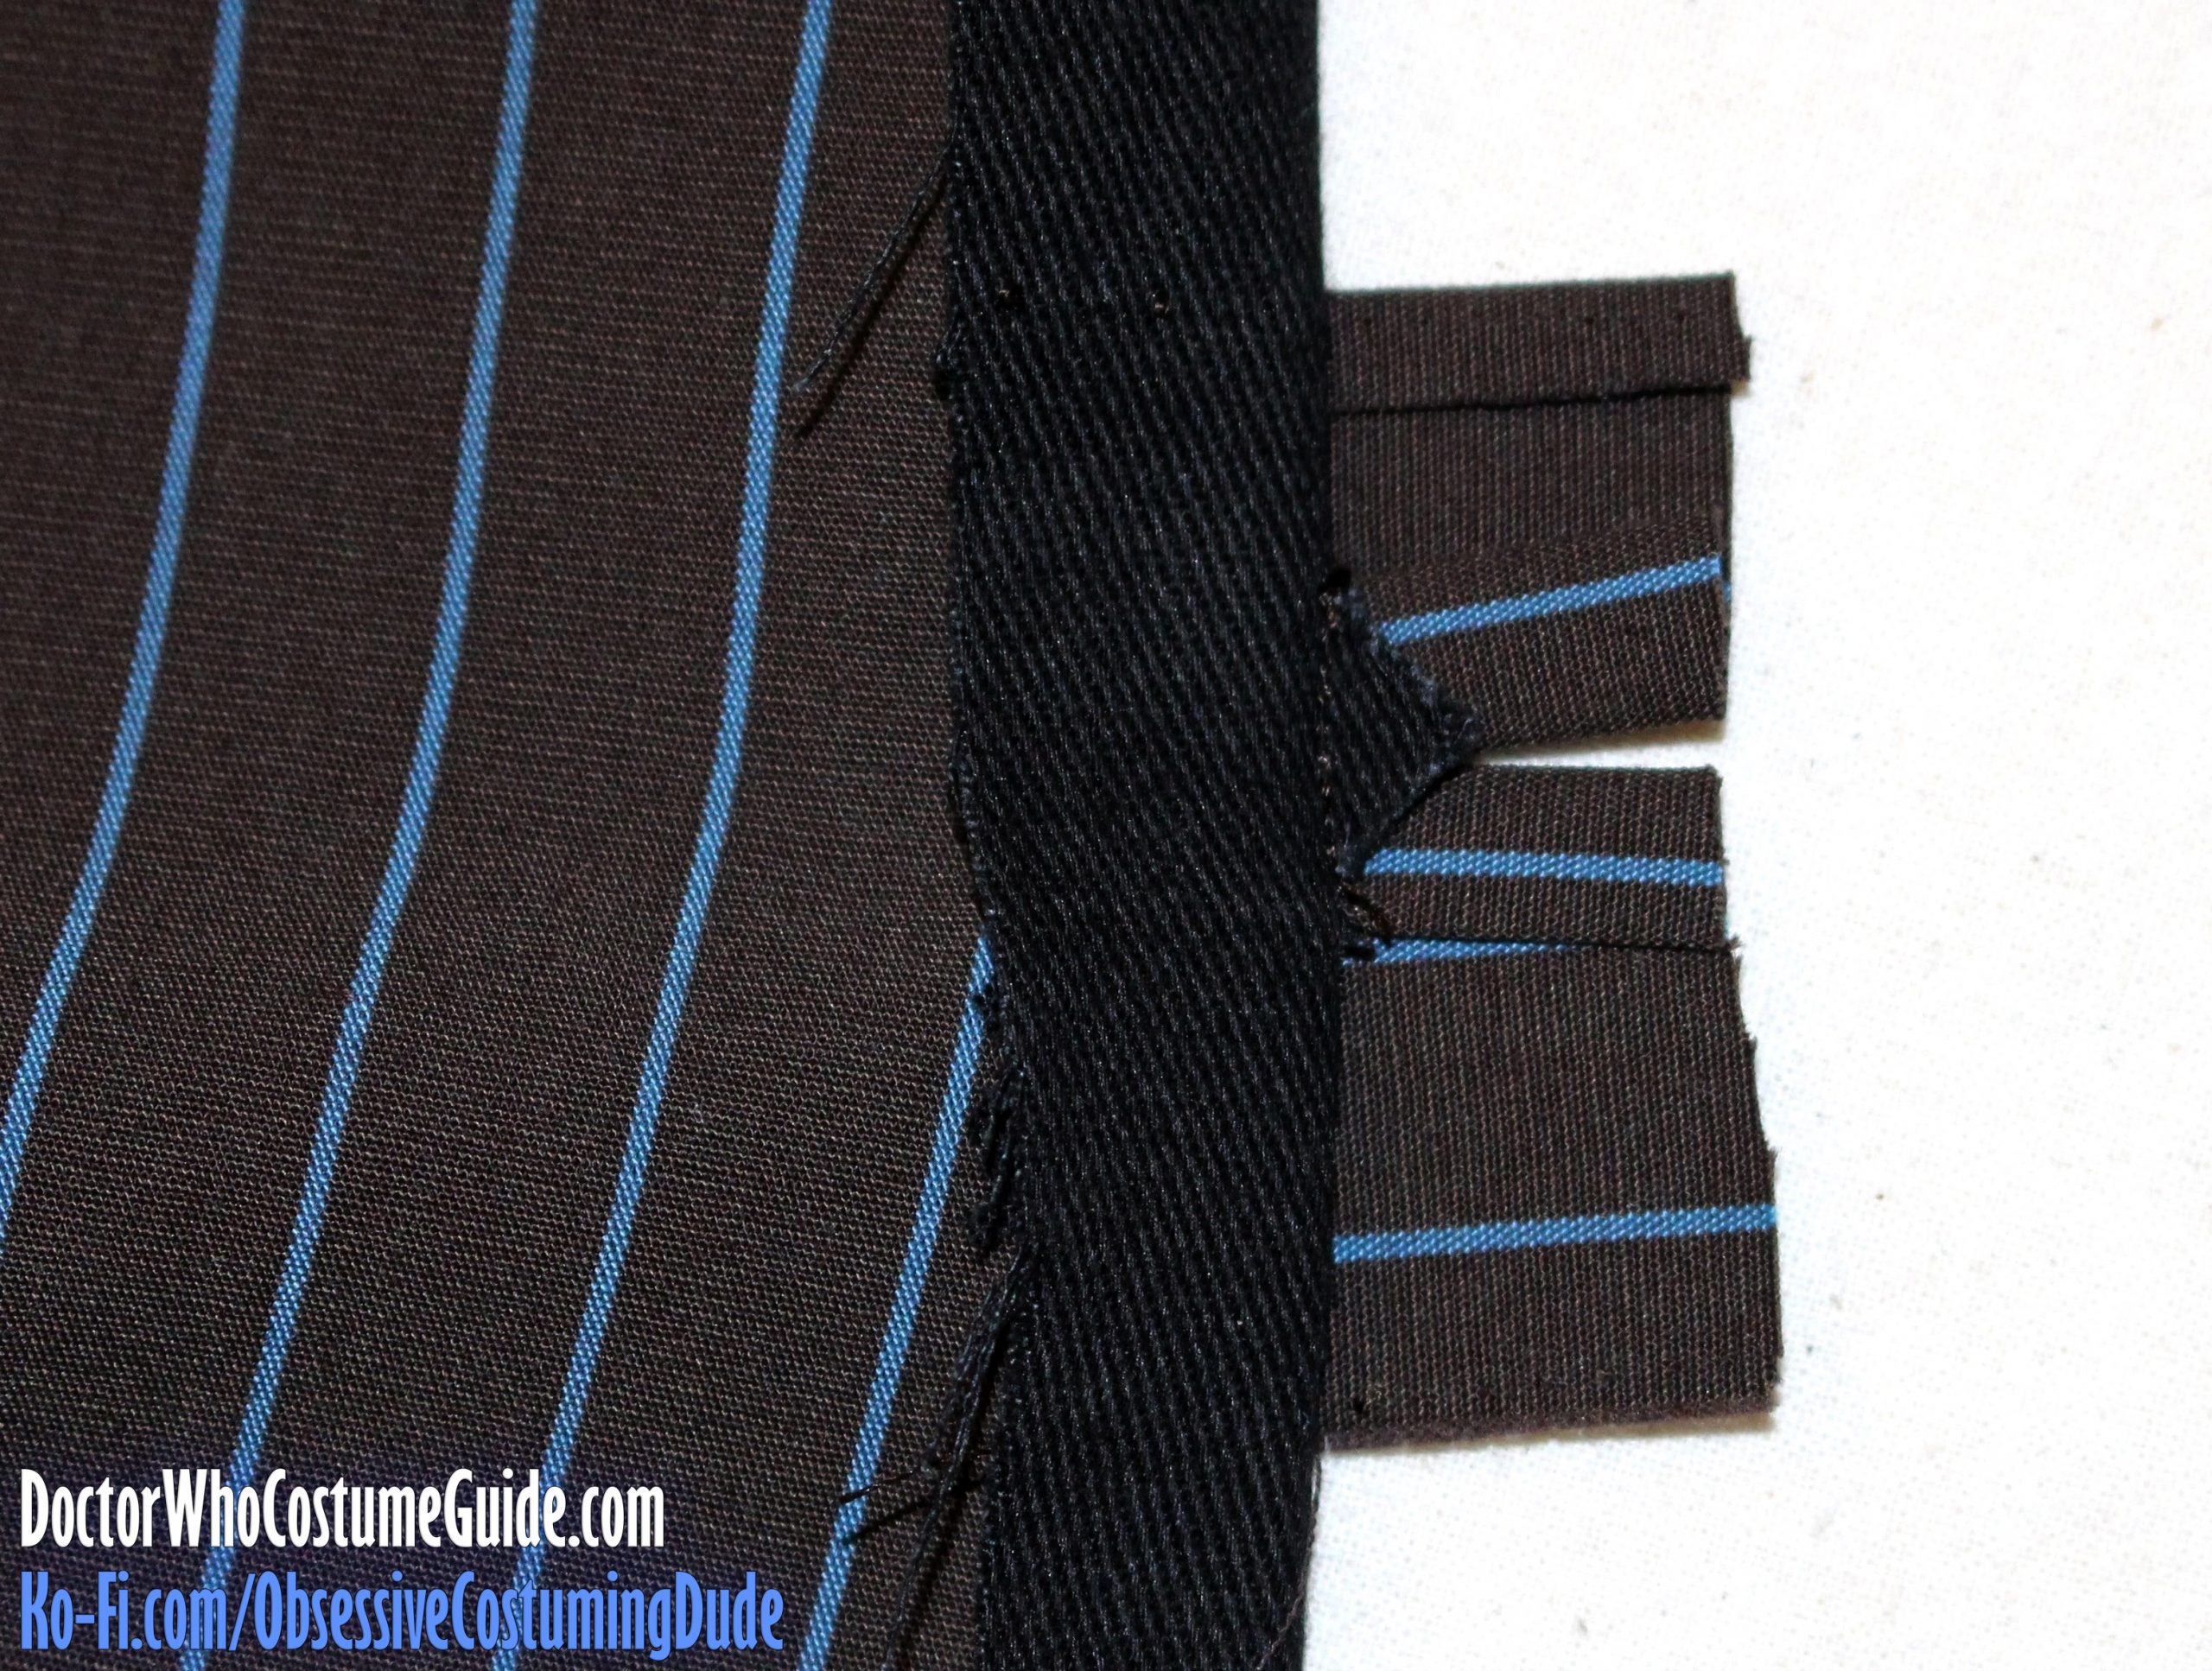
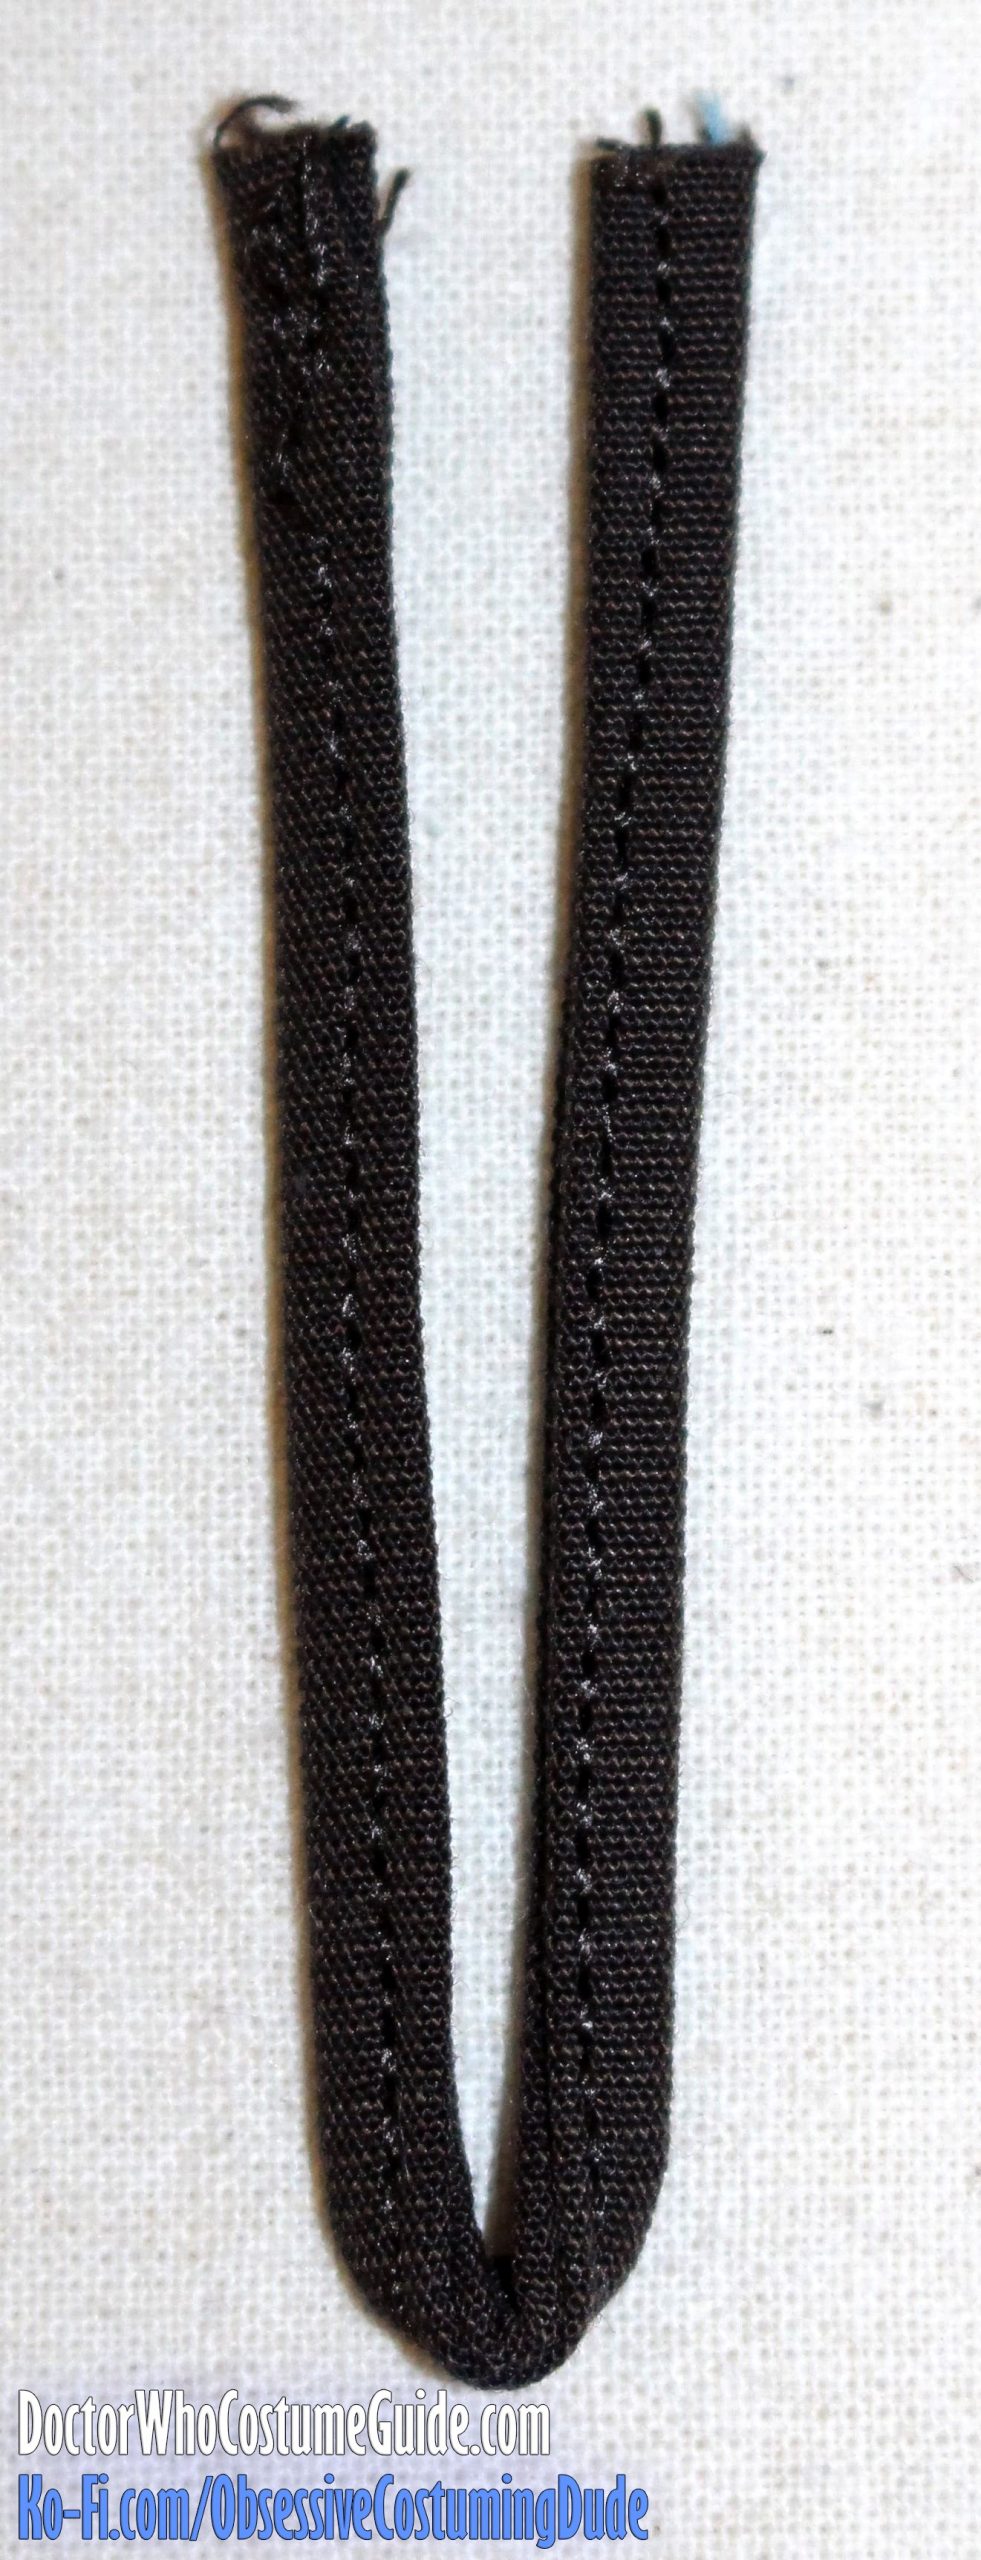
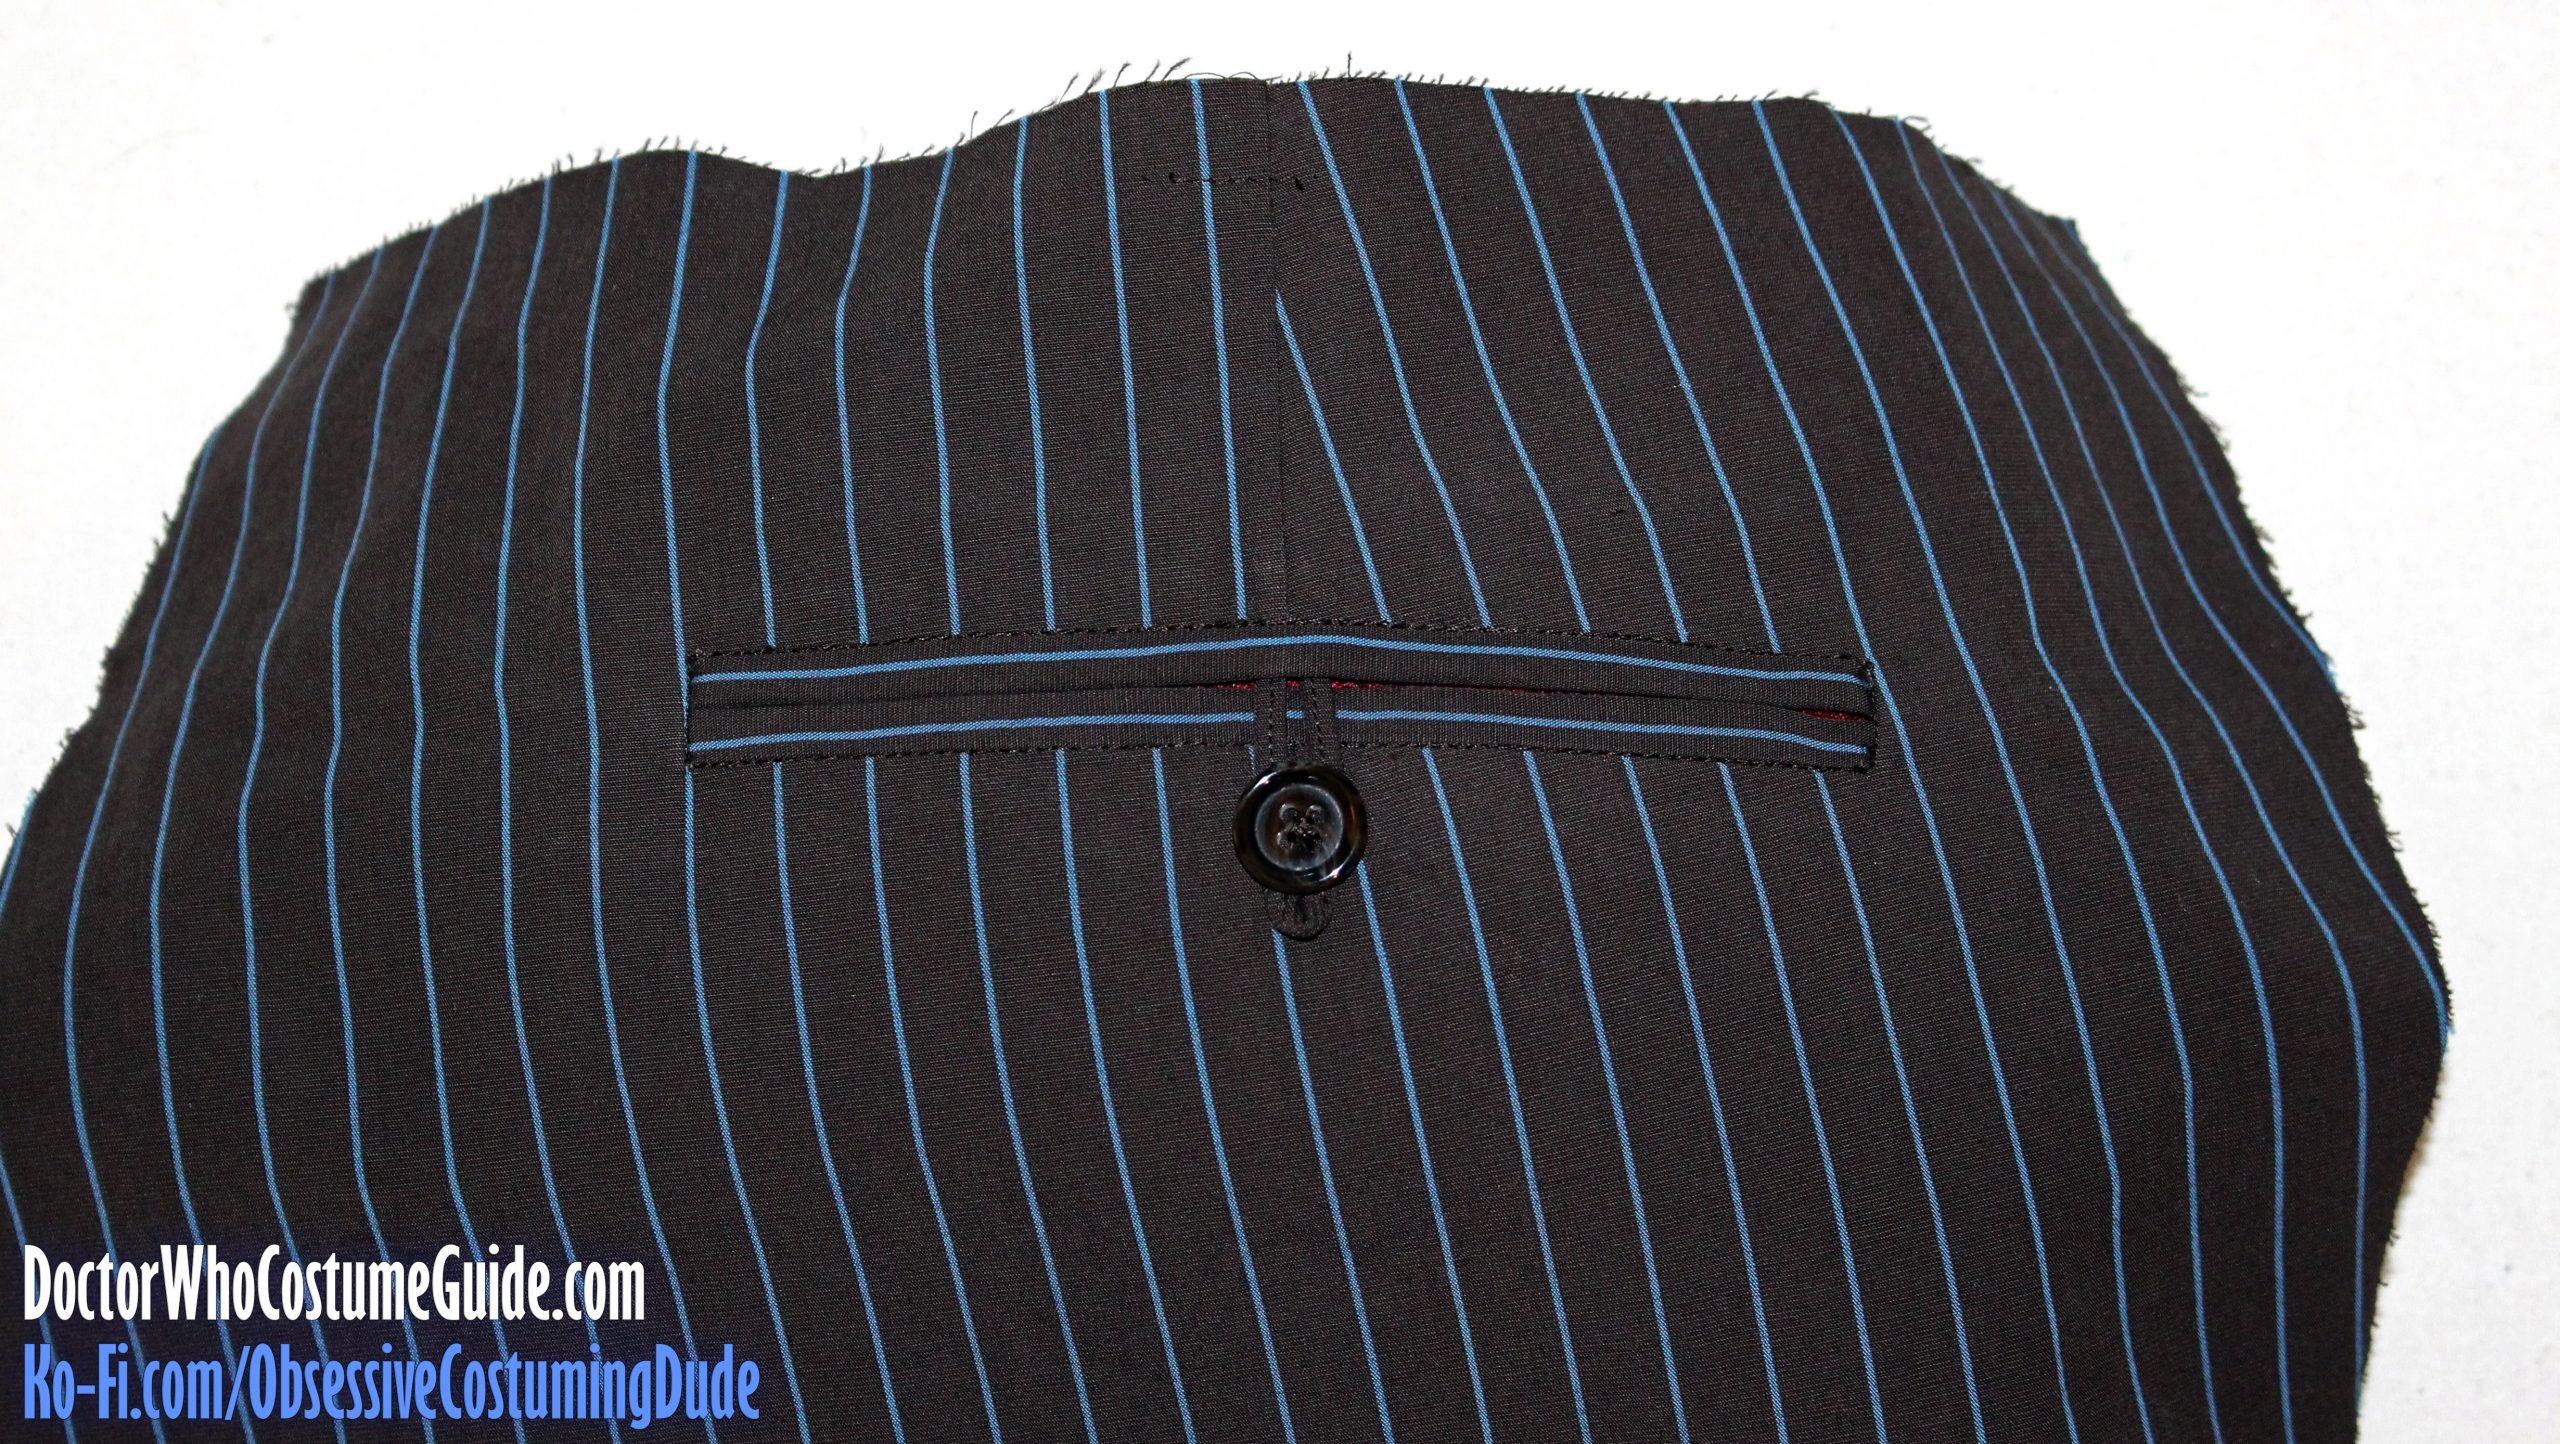
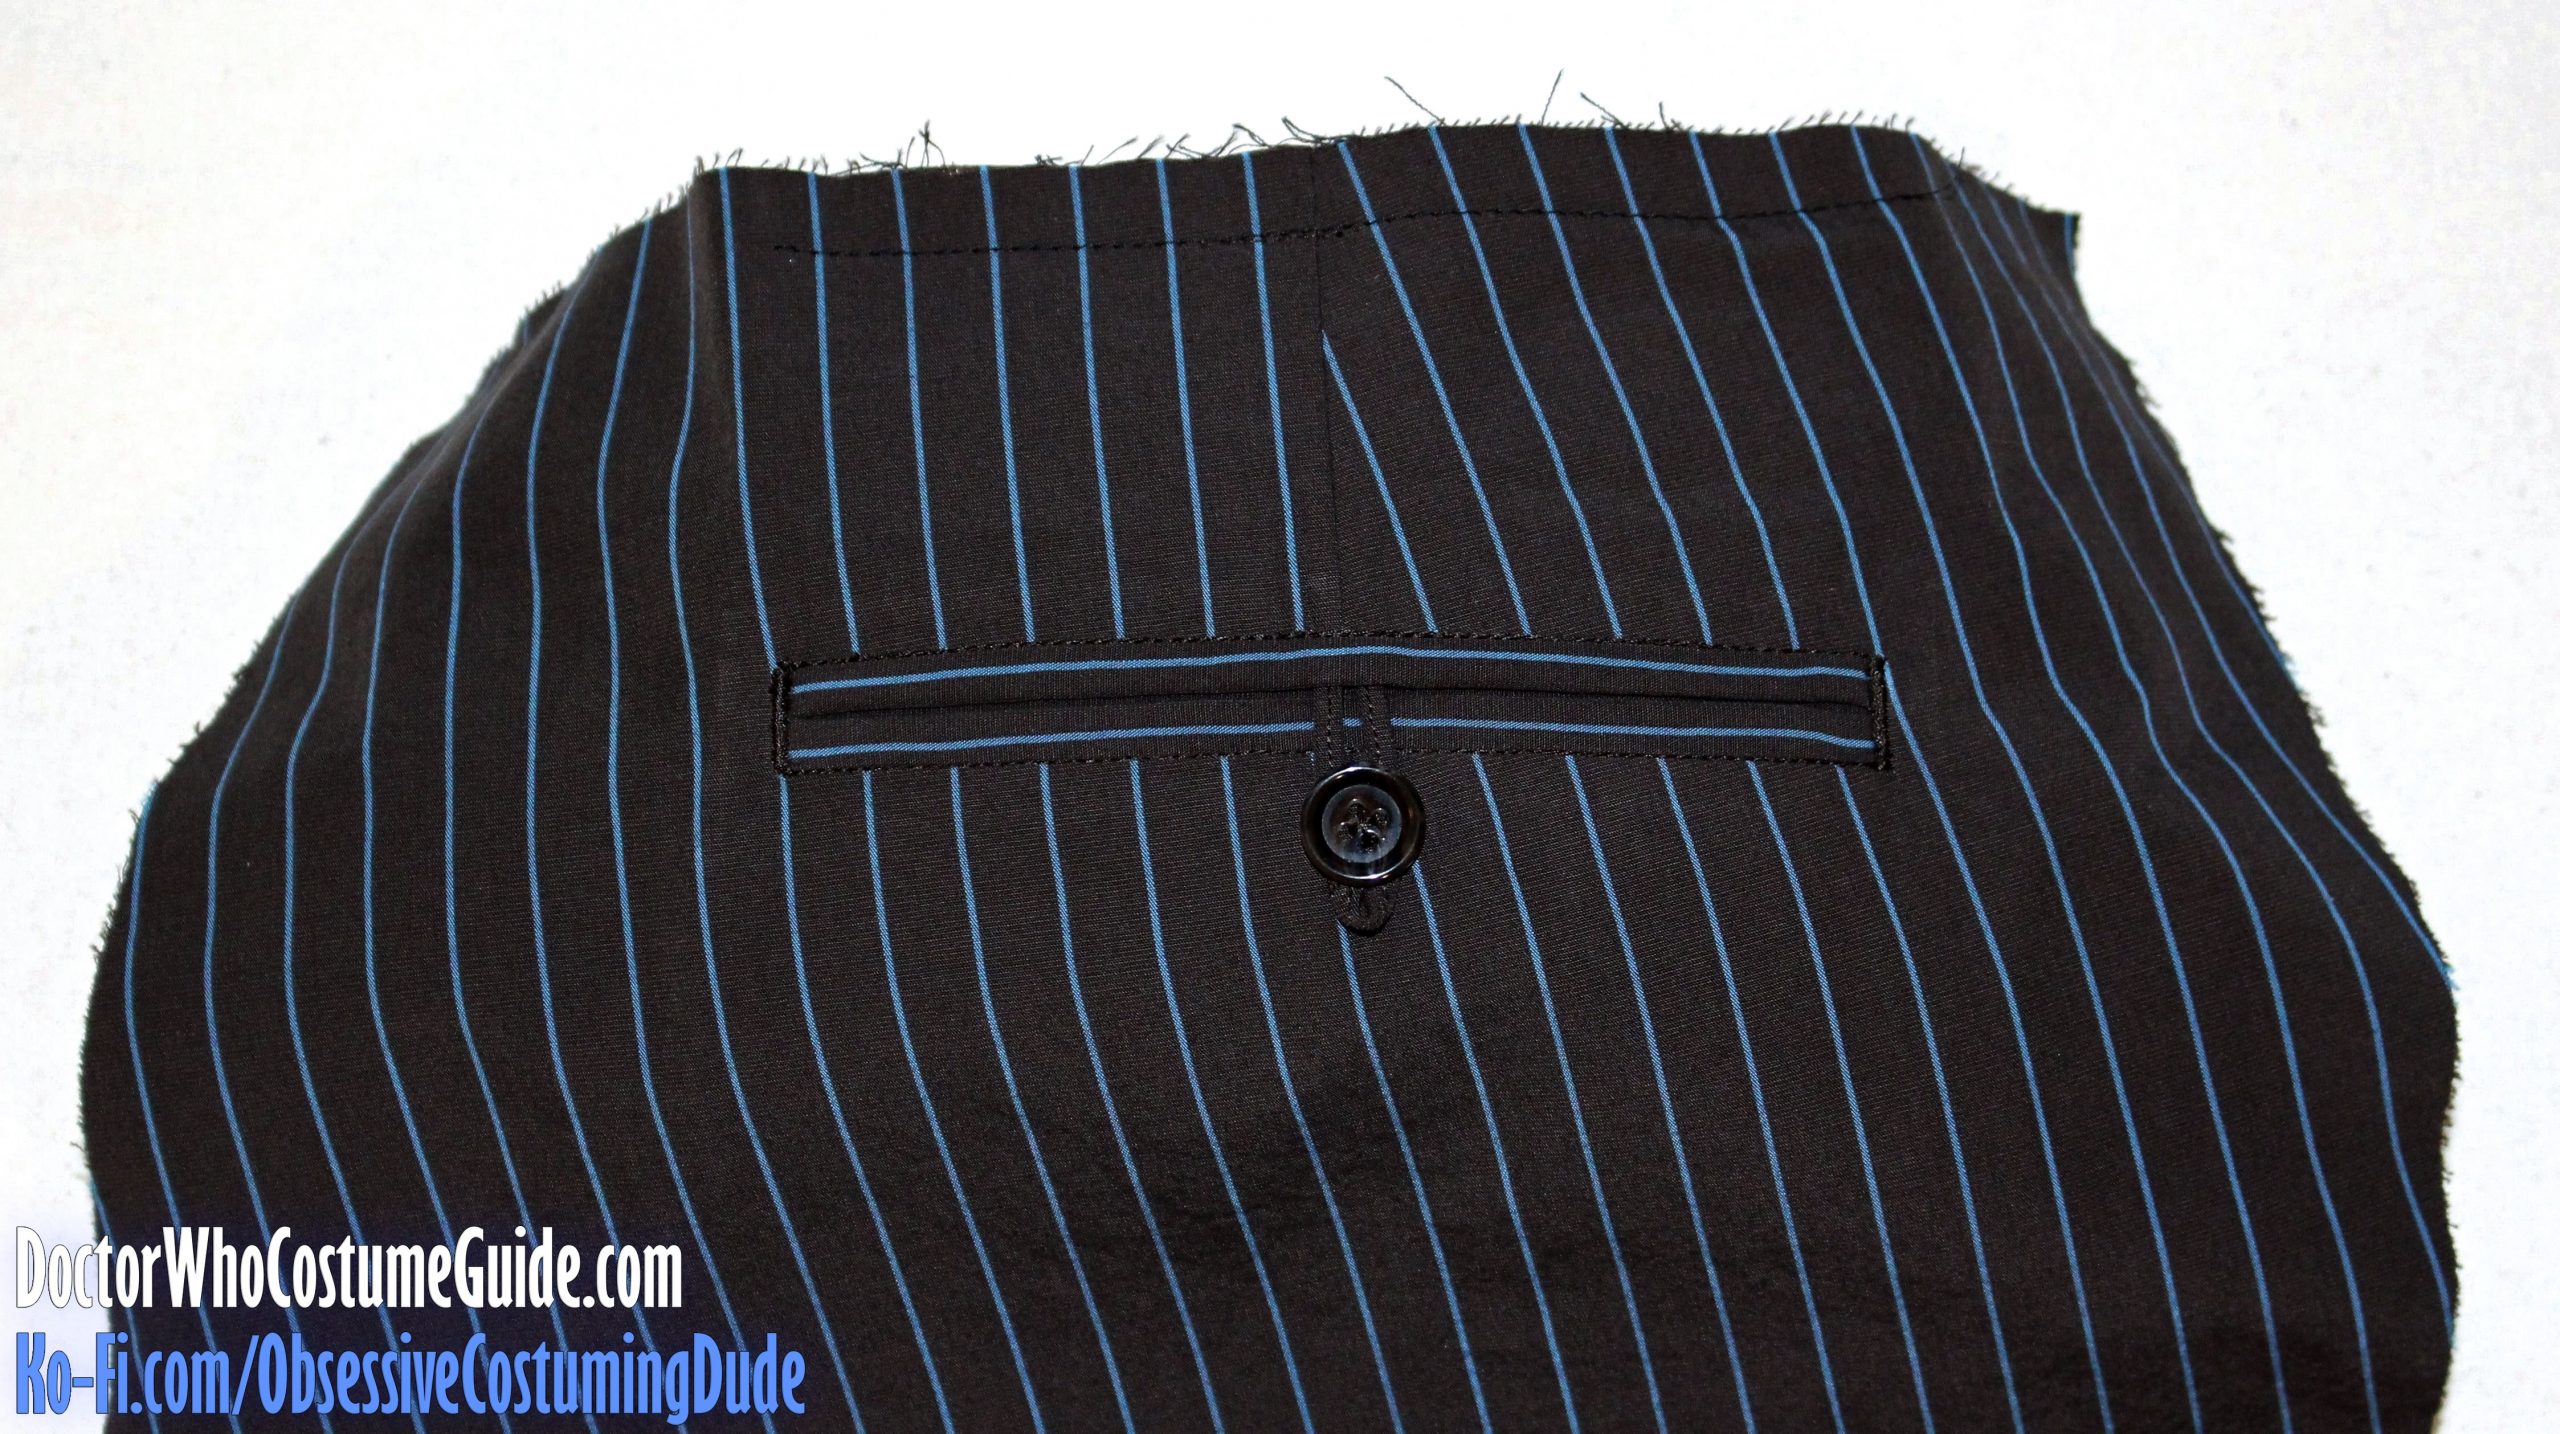
There is a pattern for the back button tab (piece NN), but you don’t actually need to use it.
Instead, I prefer to simply interface a piece of scrap fabric with a lightweight fusible interfacing, and cut strip of fabric the exact width of a pinstripe and about 4 ½” long.
Press the longer raw edges of the button tab under, toward center.
Then, fold the button tab in half the long way and press.
Edge-stitch the button tab closed through all layers.
TIP: Because the strip is now too narrow for the feed dogs on most sewing machines to “grab” it, this can be a bit tricky. I’ve found it helpful to leave long thread tells at the beginning of the stitch, then pull the button tab along with those tails while stitching. In other words, go slowly and pull it through yourself, rather than relying on the machine to do it for you.
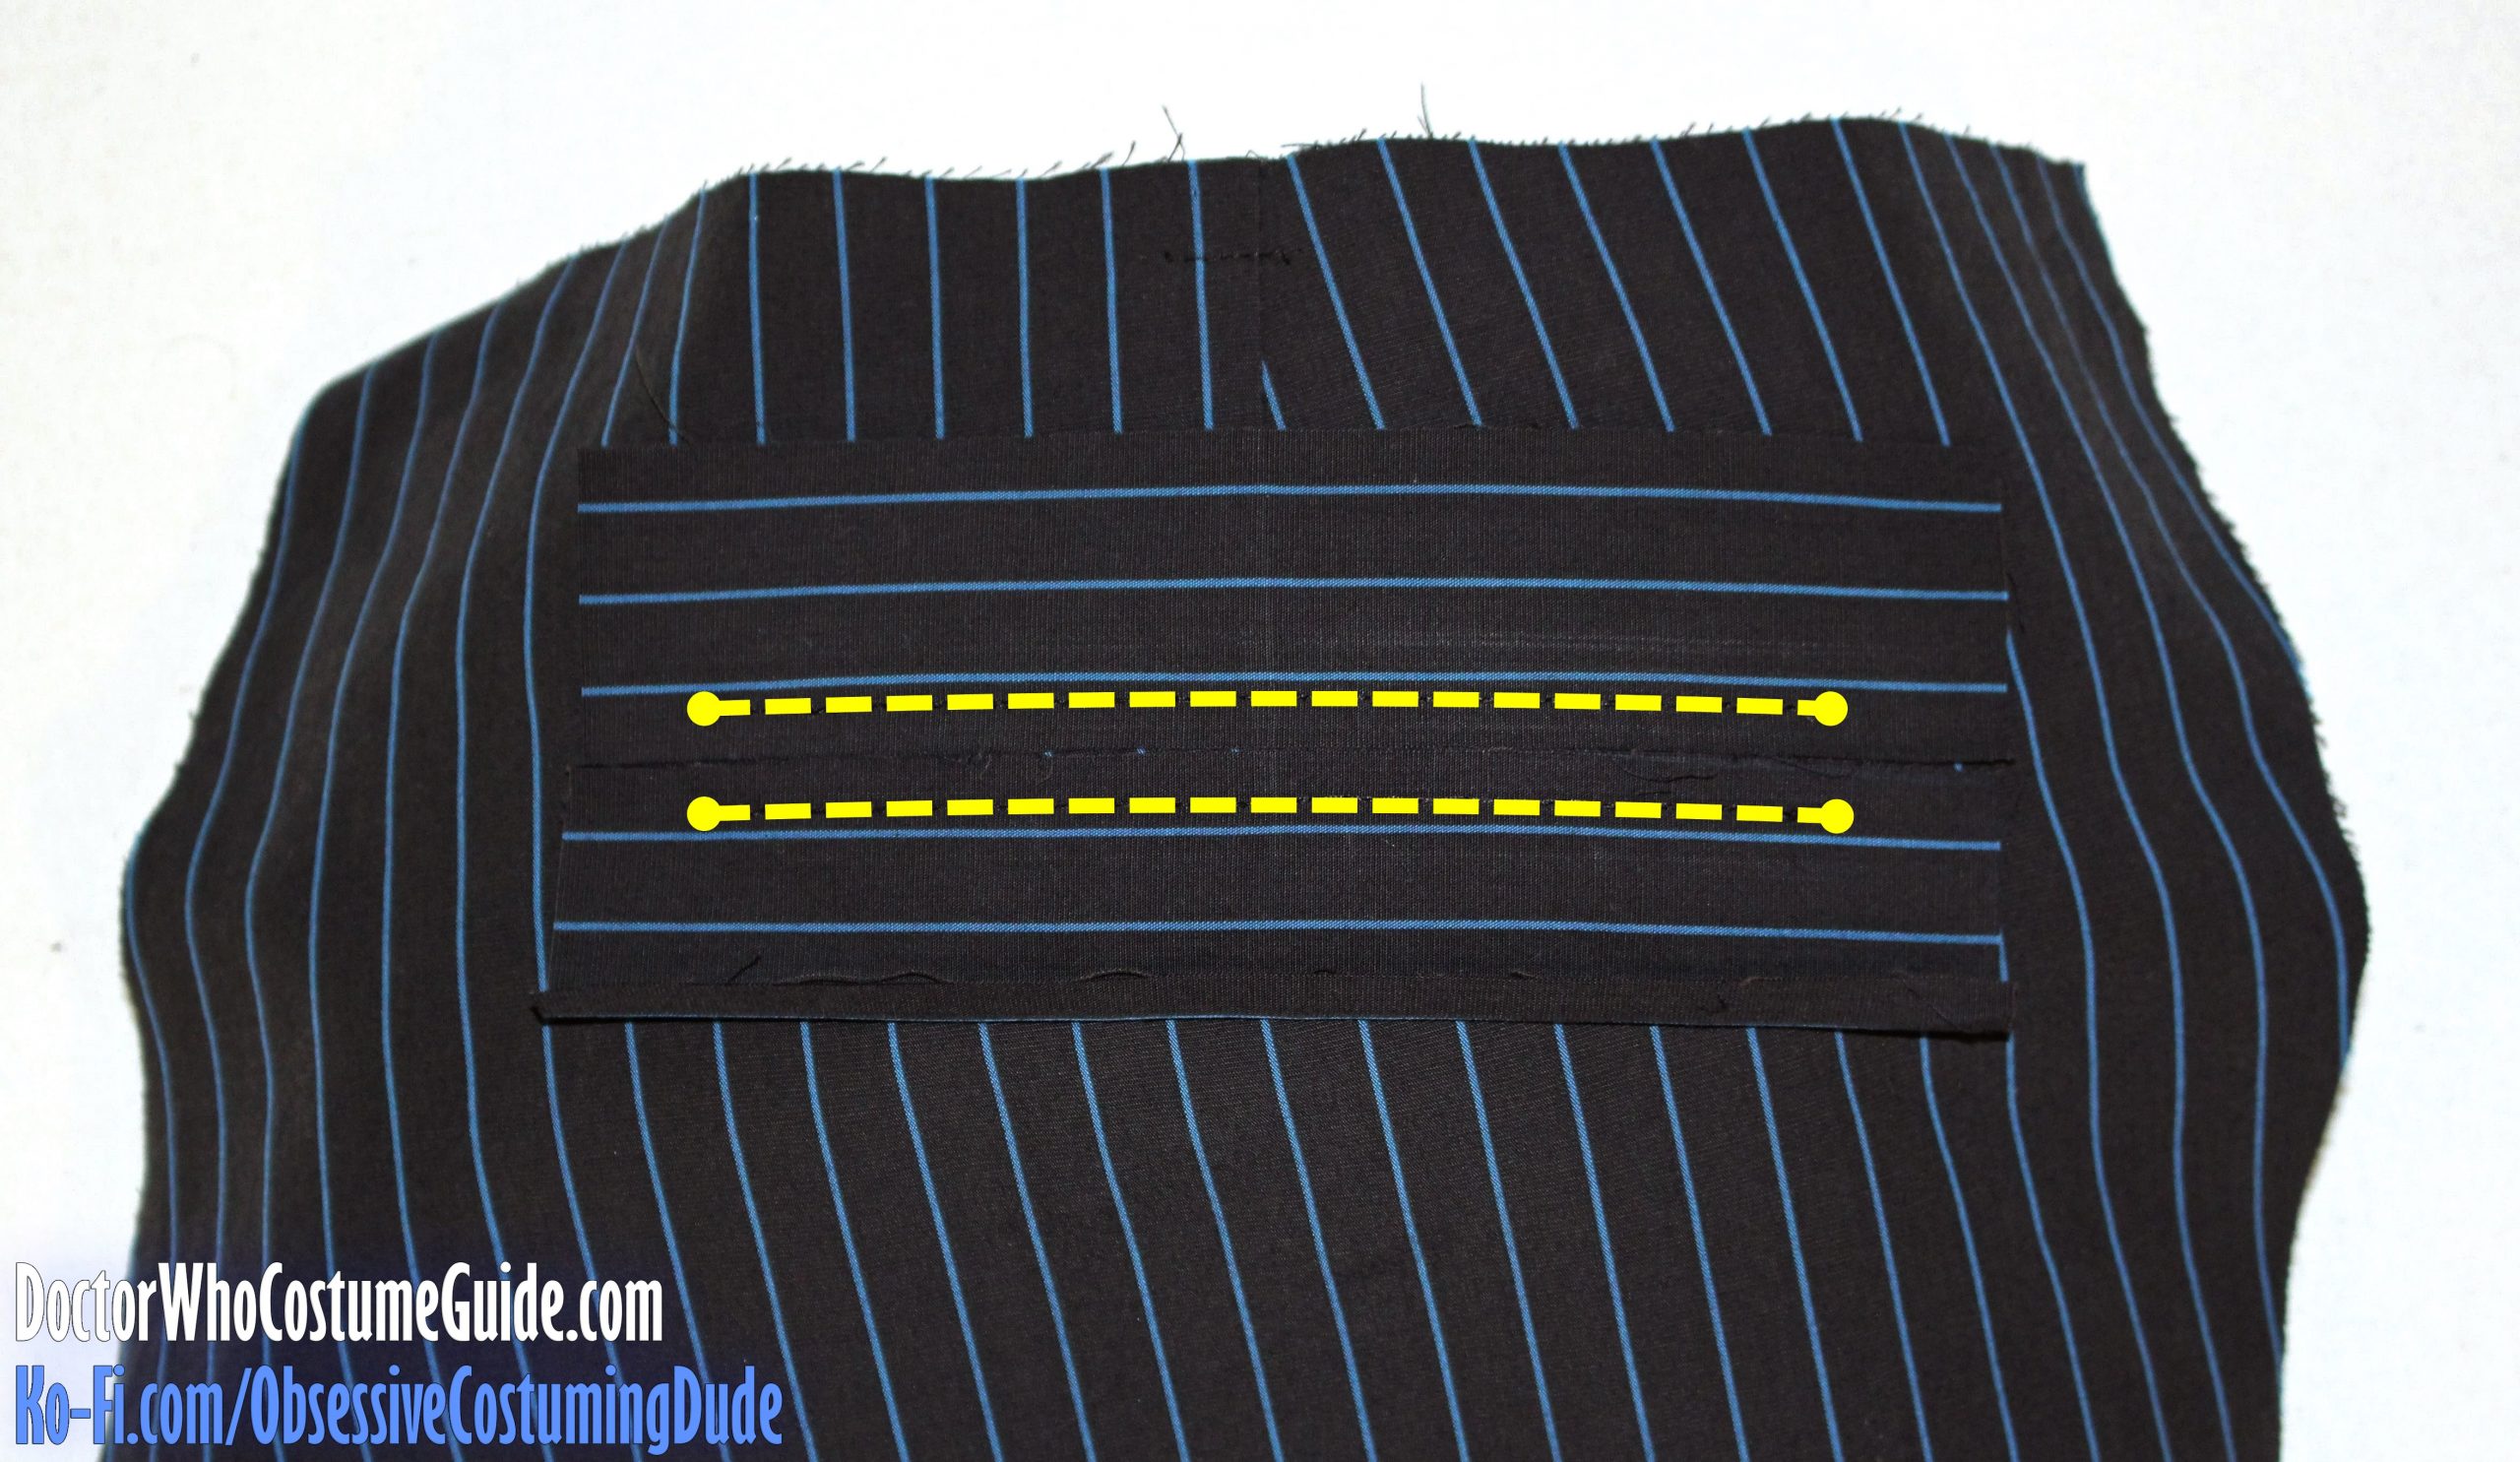
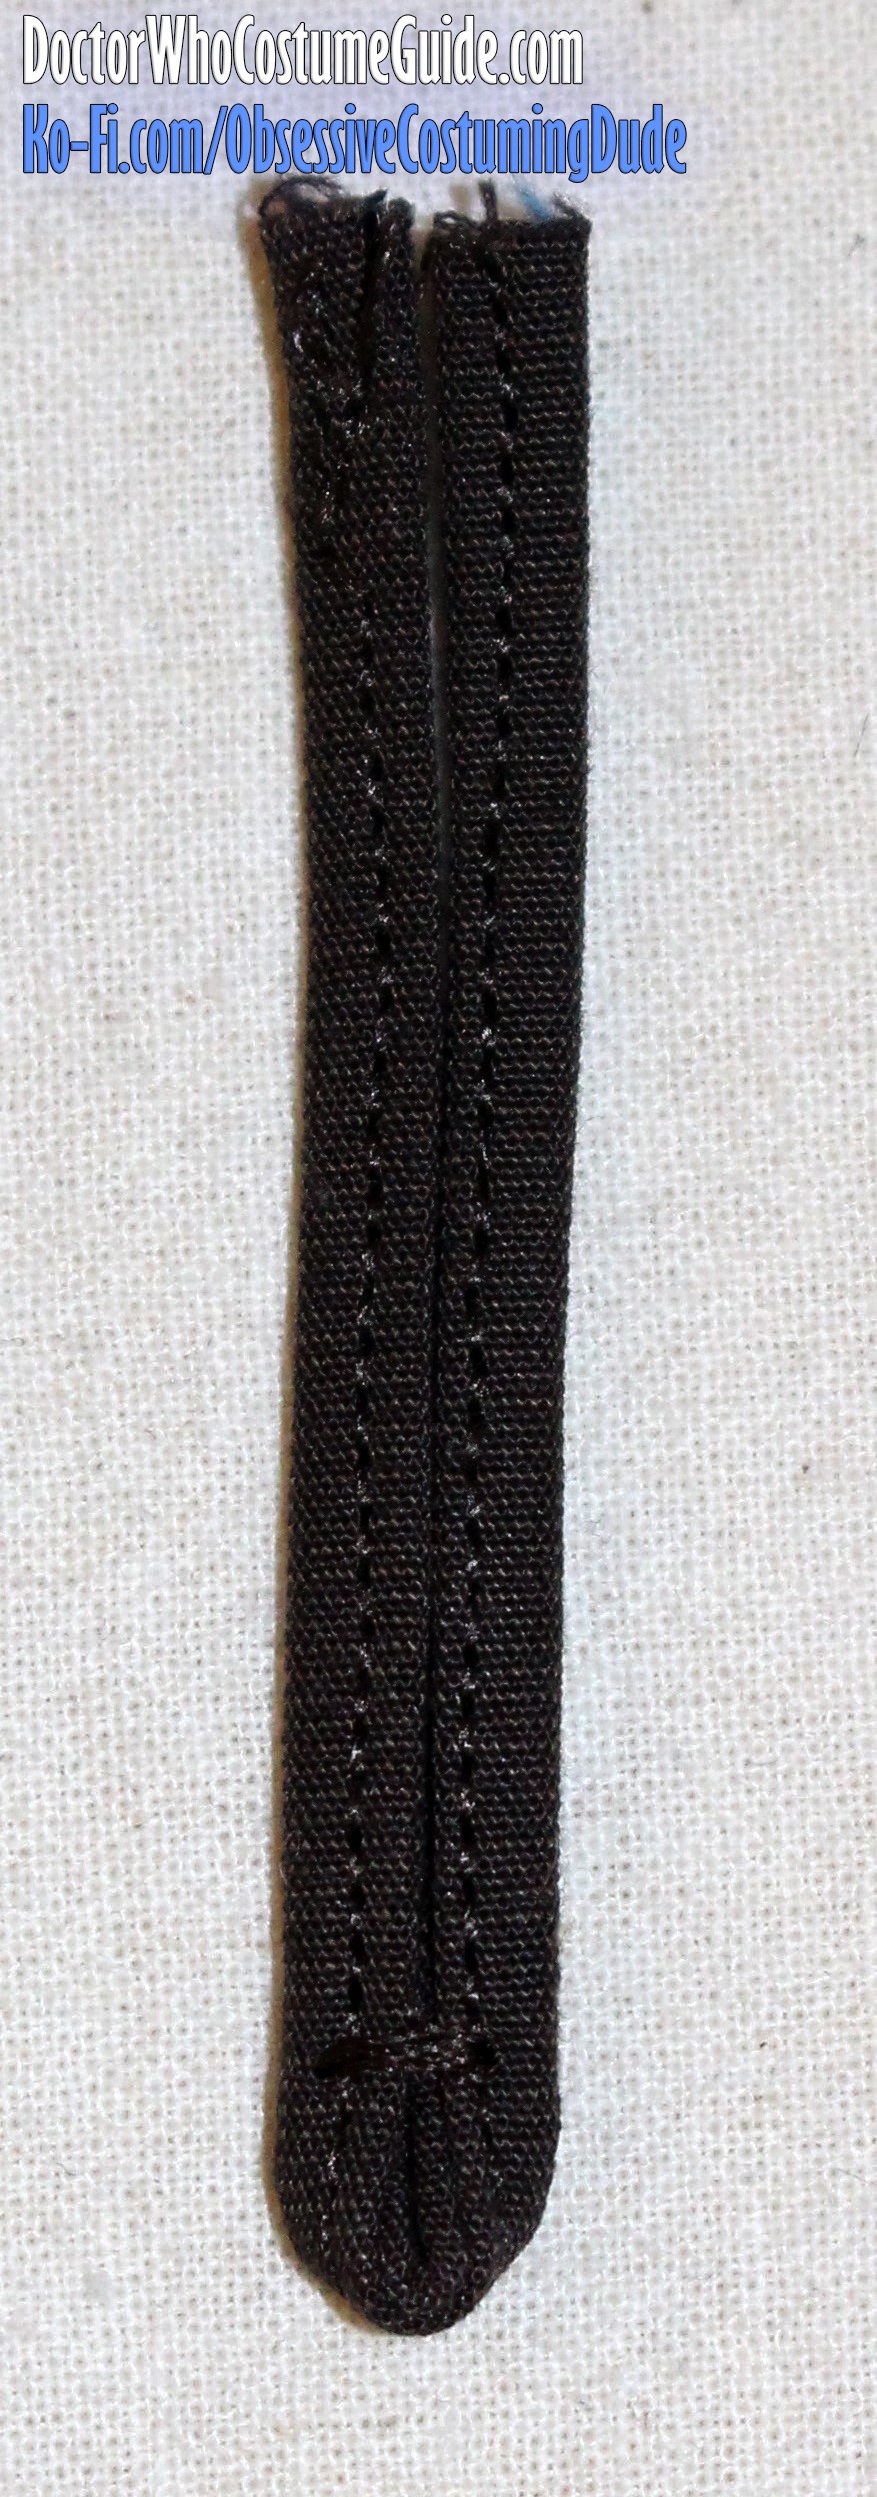
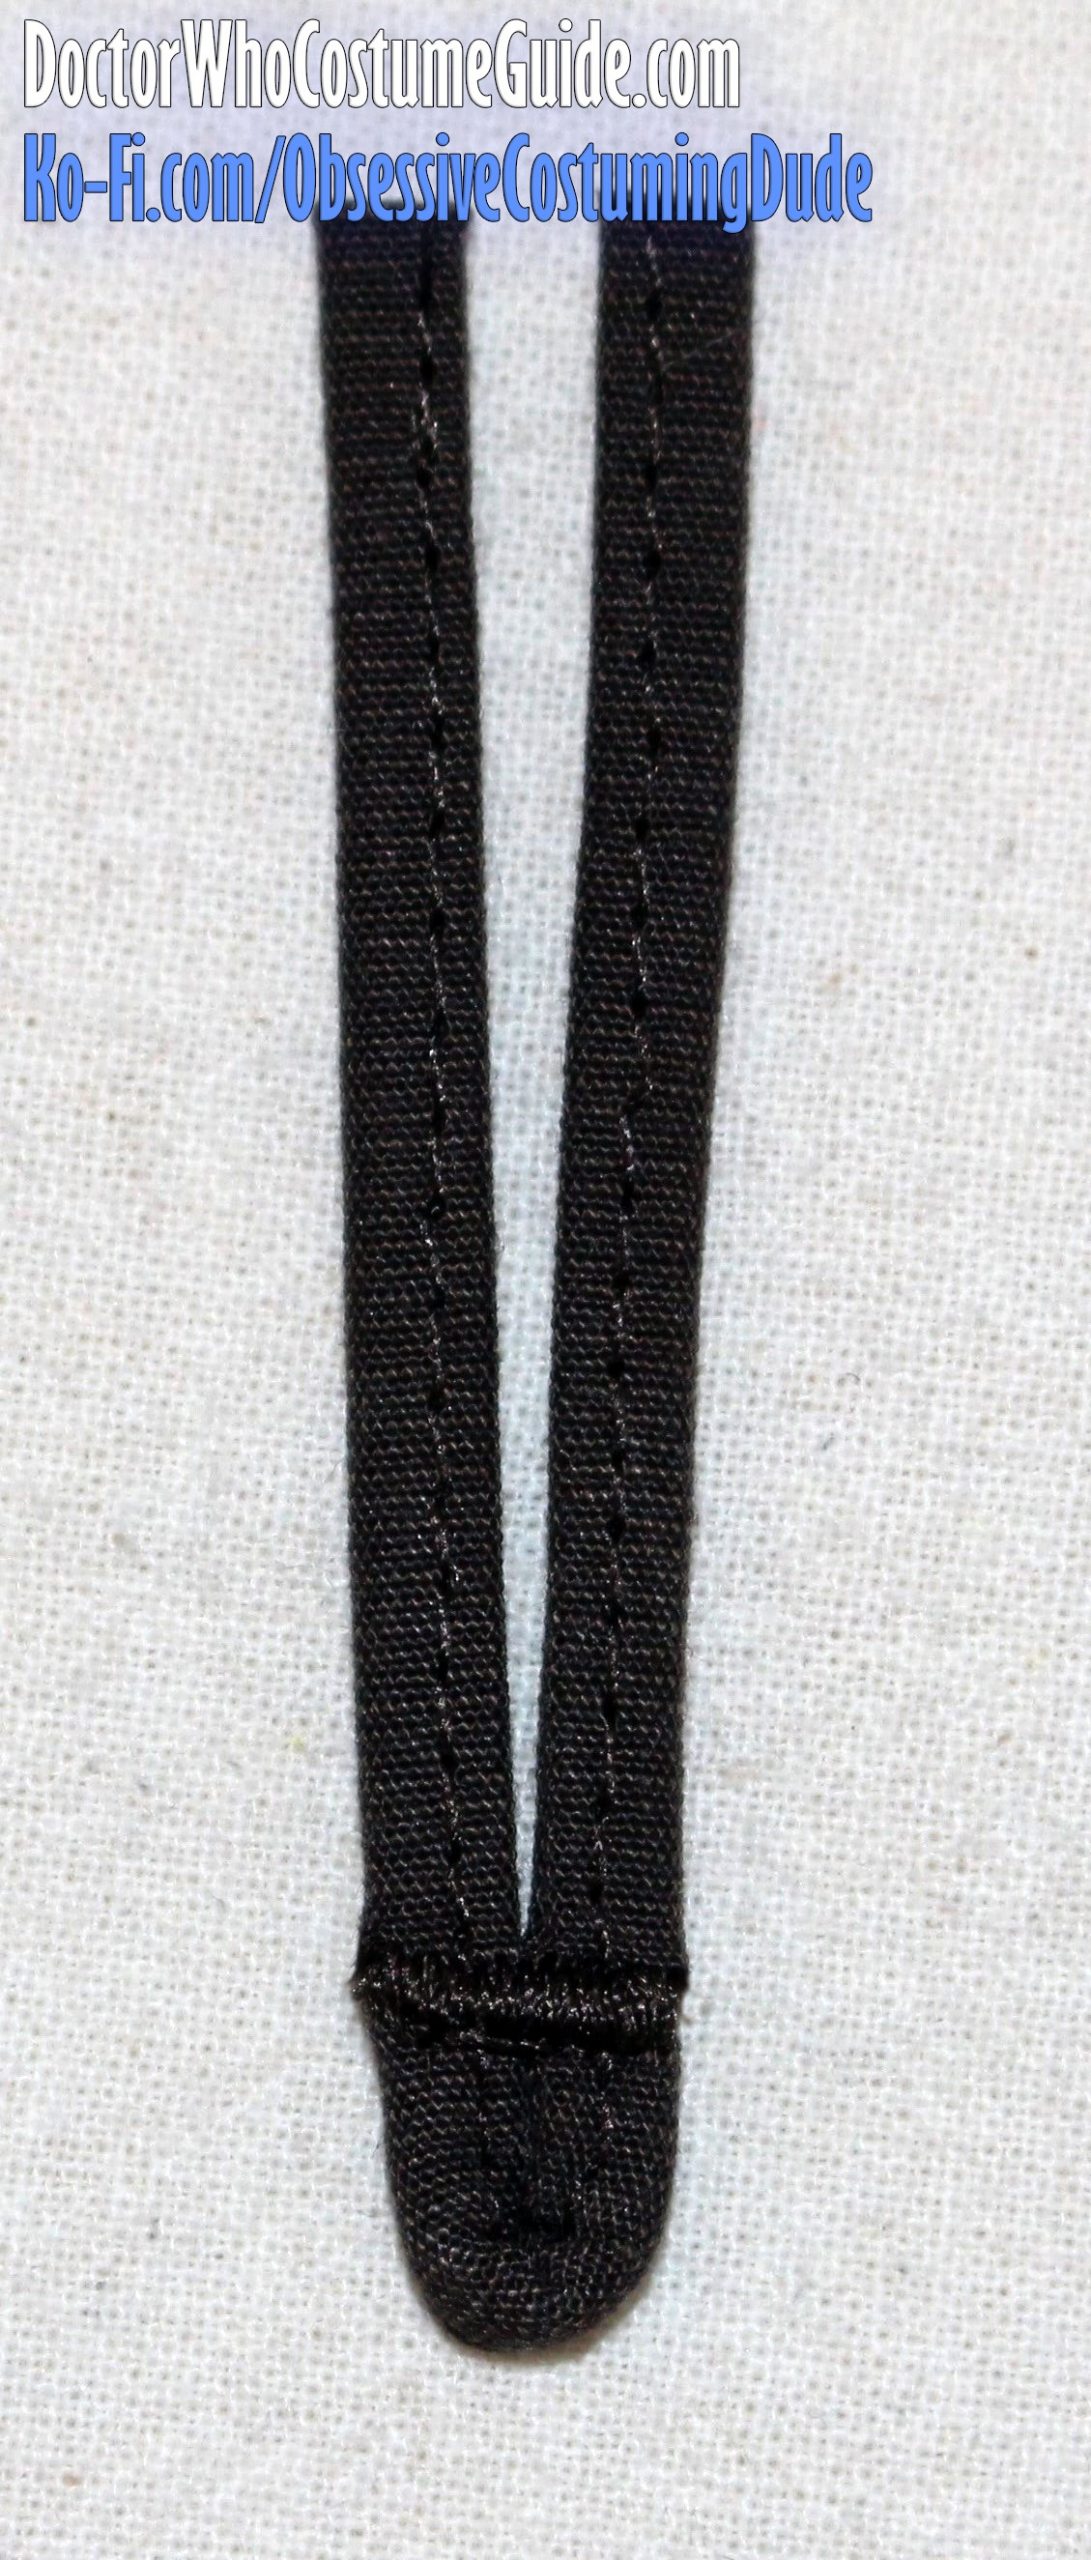
Fold the button tab into an arrow shape and press.
Keeping the inner edges flush, either topstitch or make a small bar tack near the bottom of the button tab.
(This anchors the two sides together and provides a “bridge” across which to sew the actual bar tack, in the next step.)
Rotate the button tab sideways, and make a bar tack over the previous topstitch/bar tack.
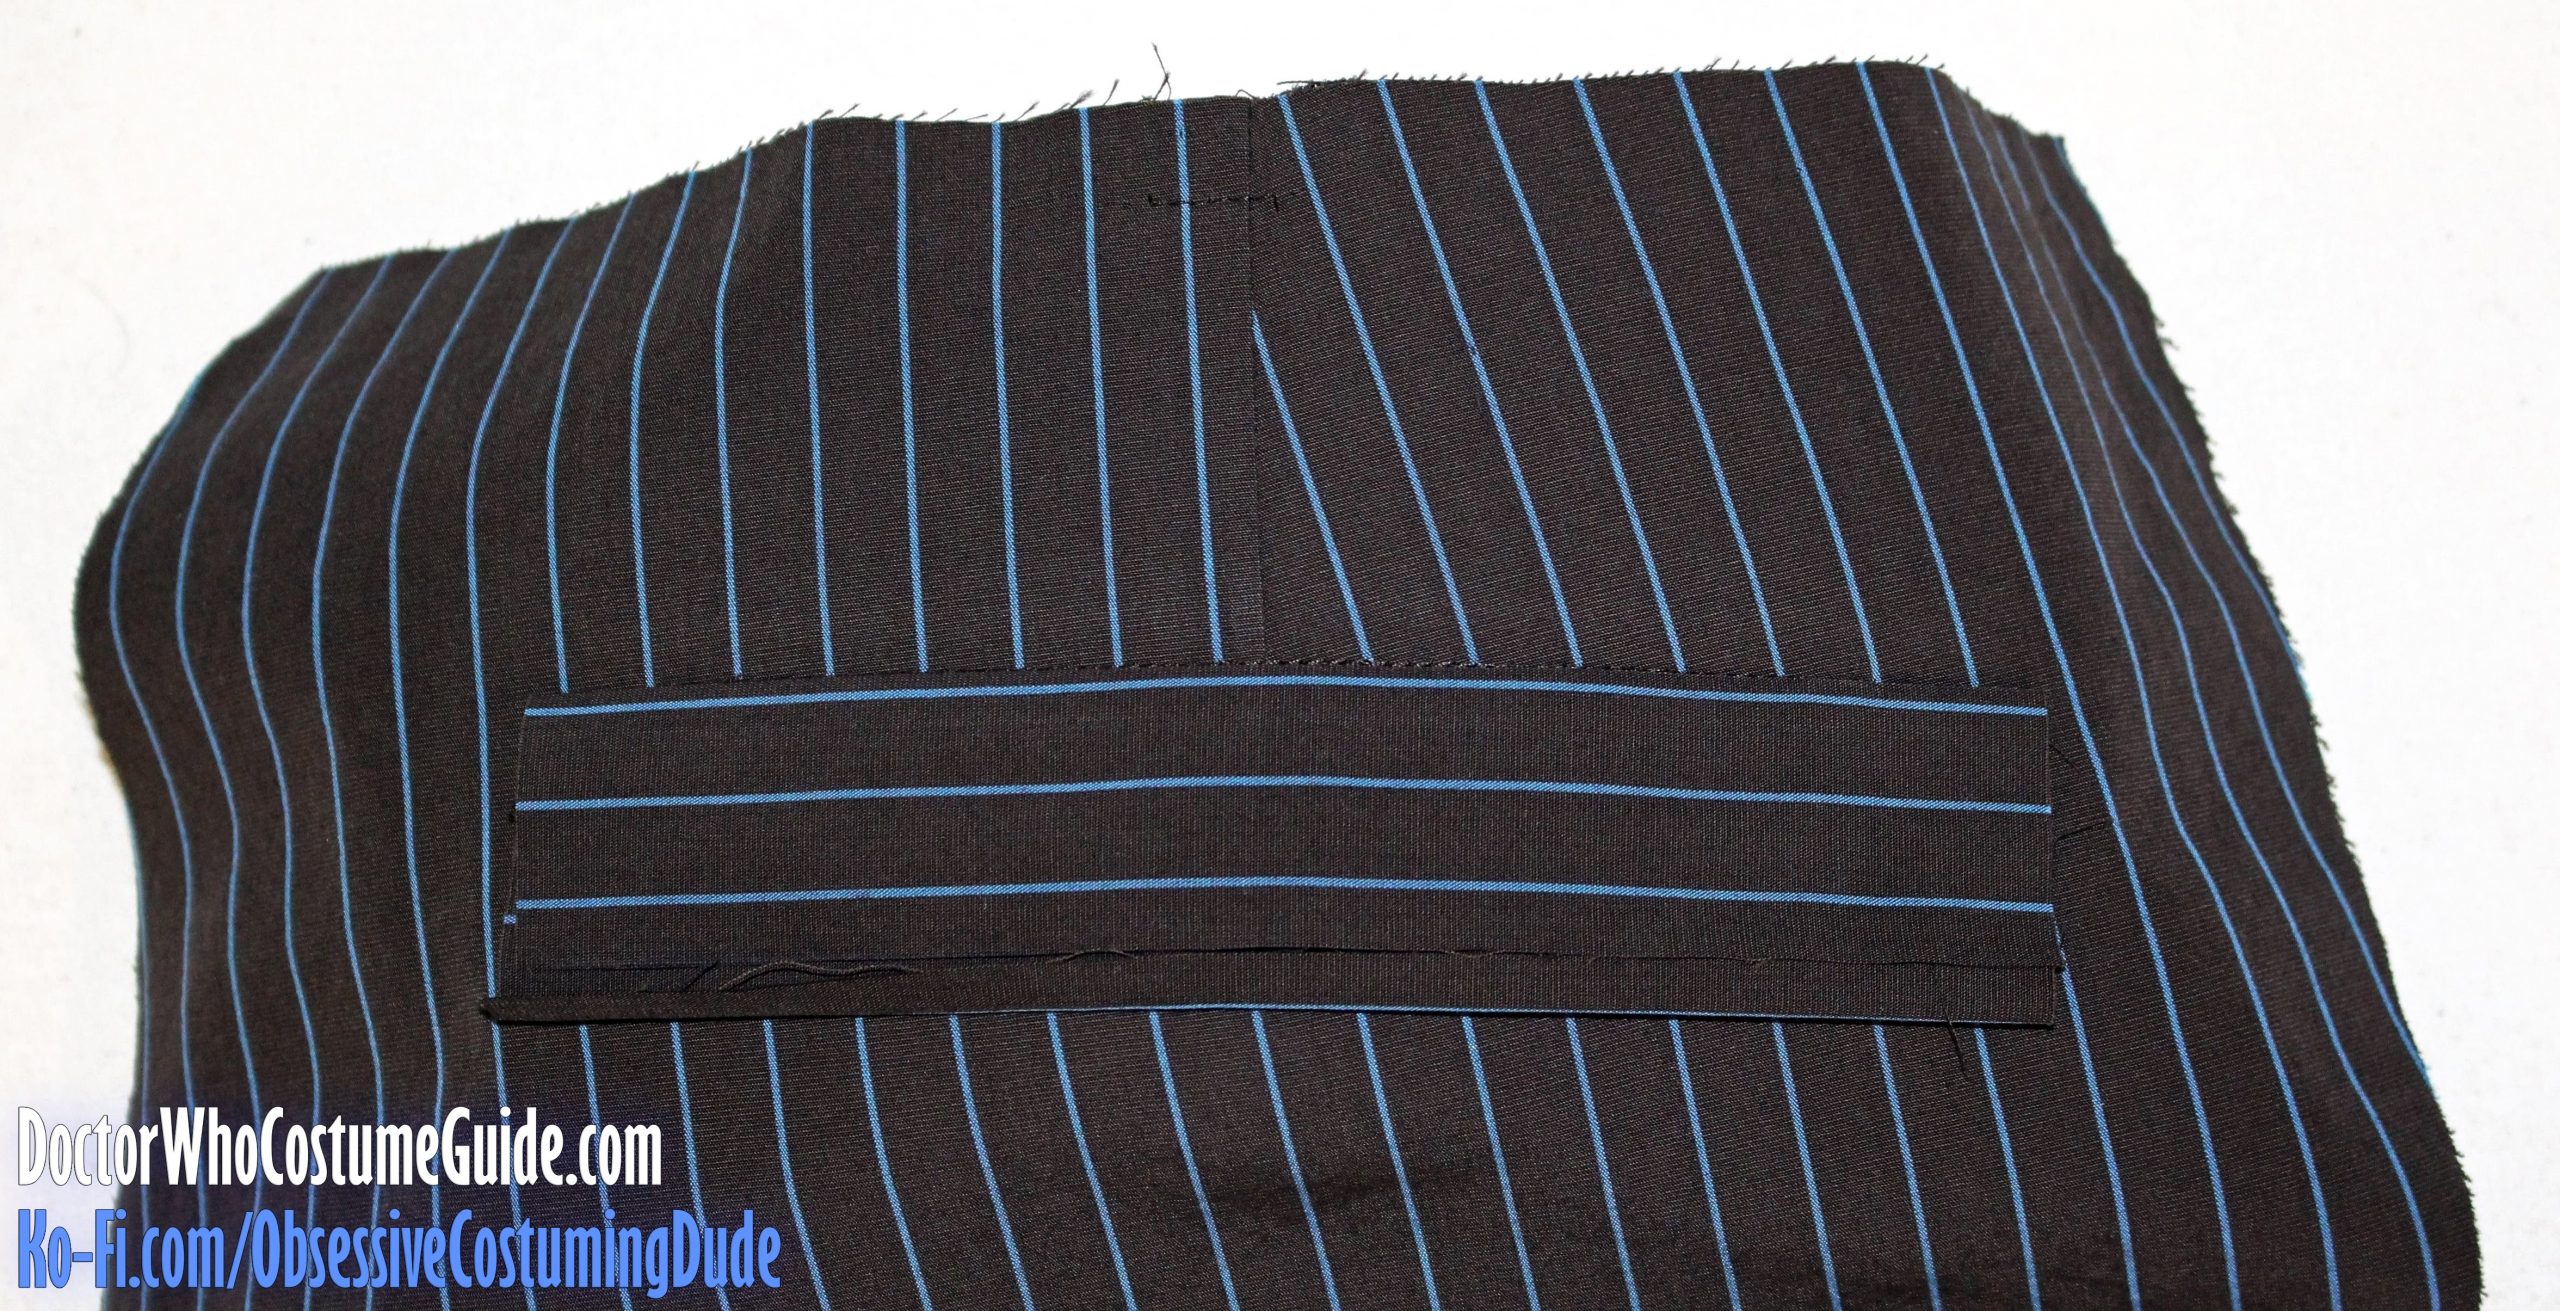
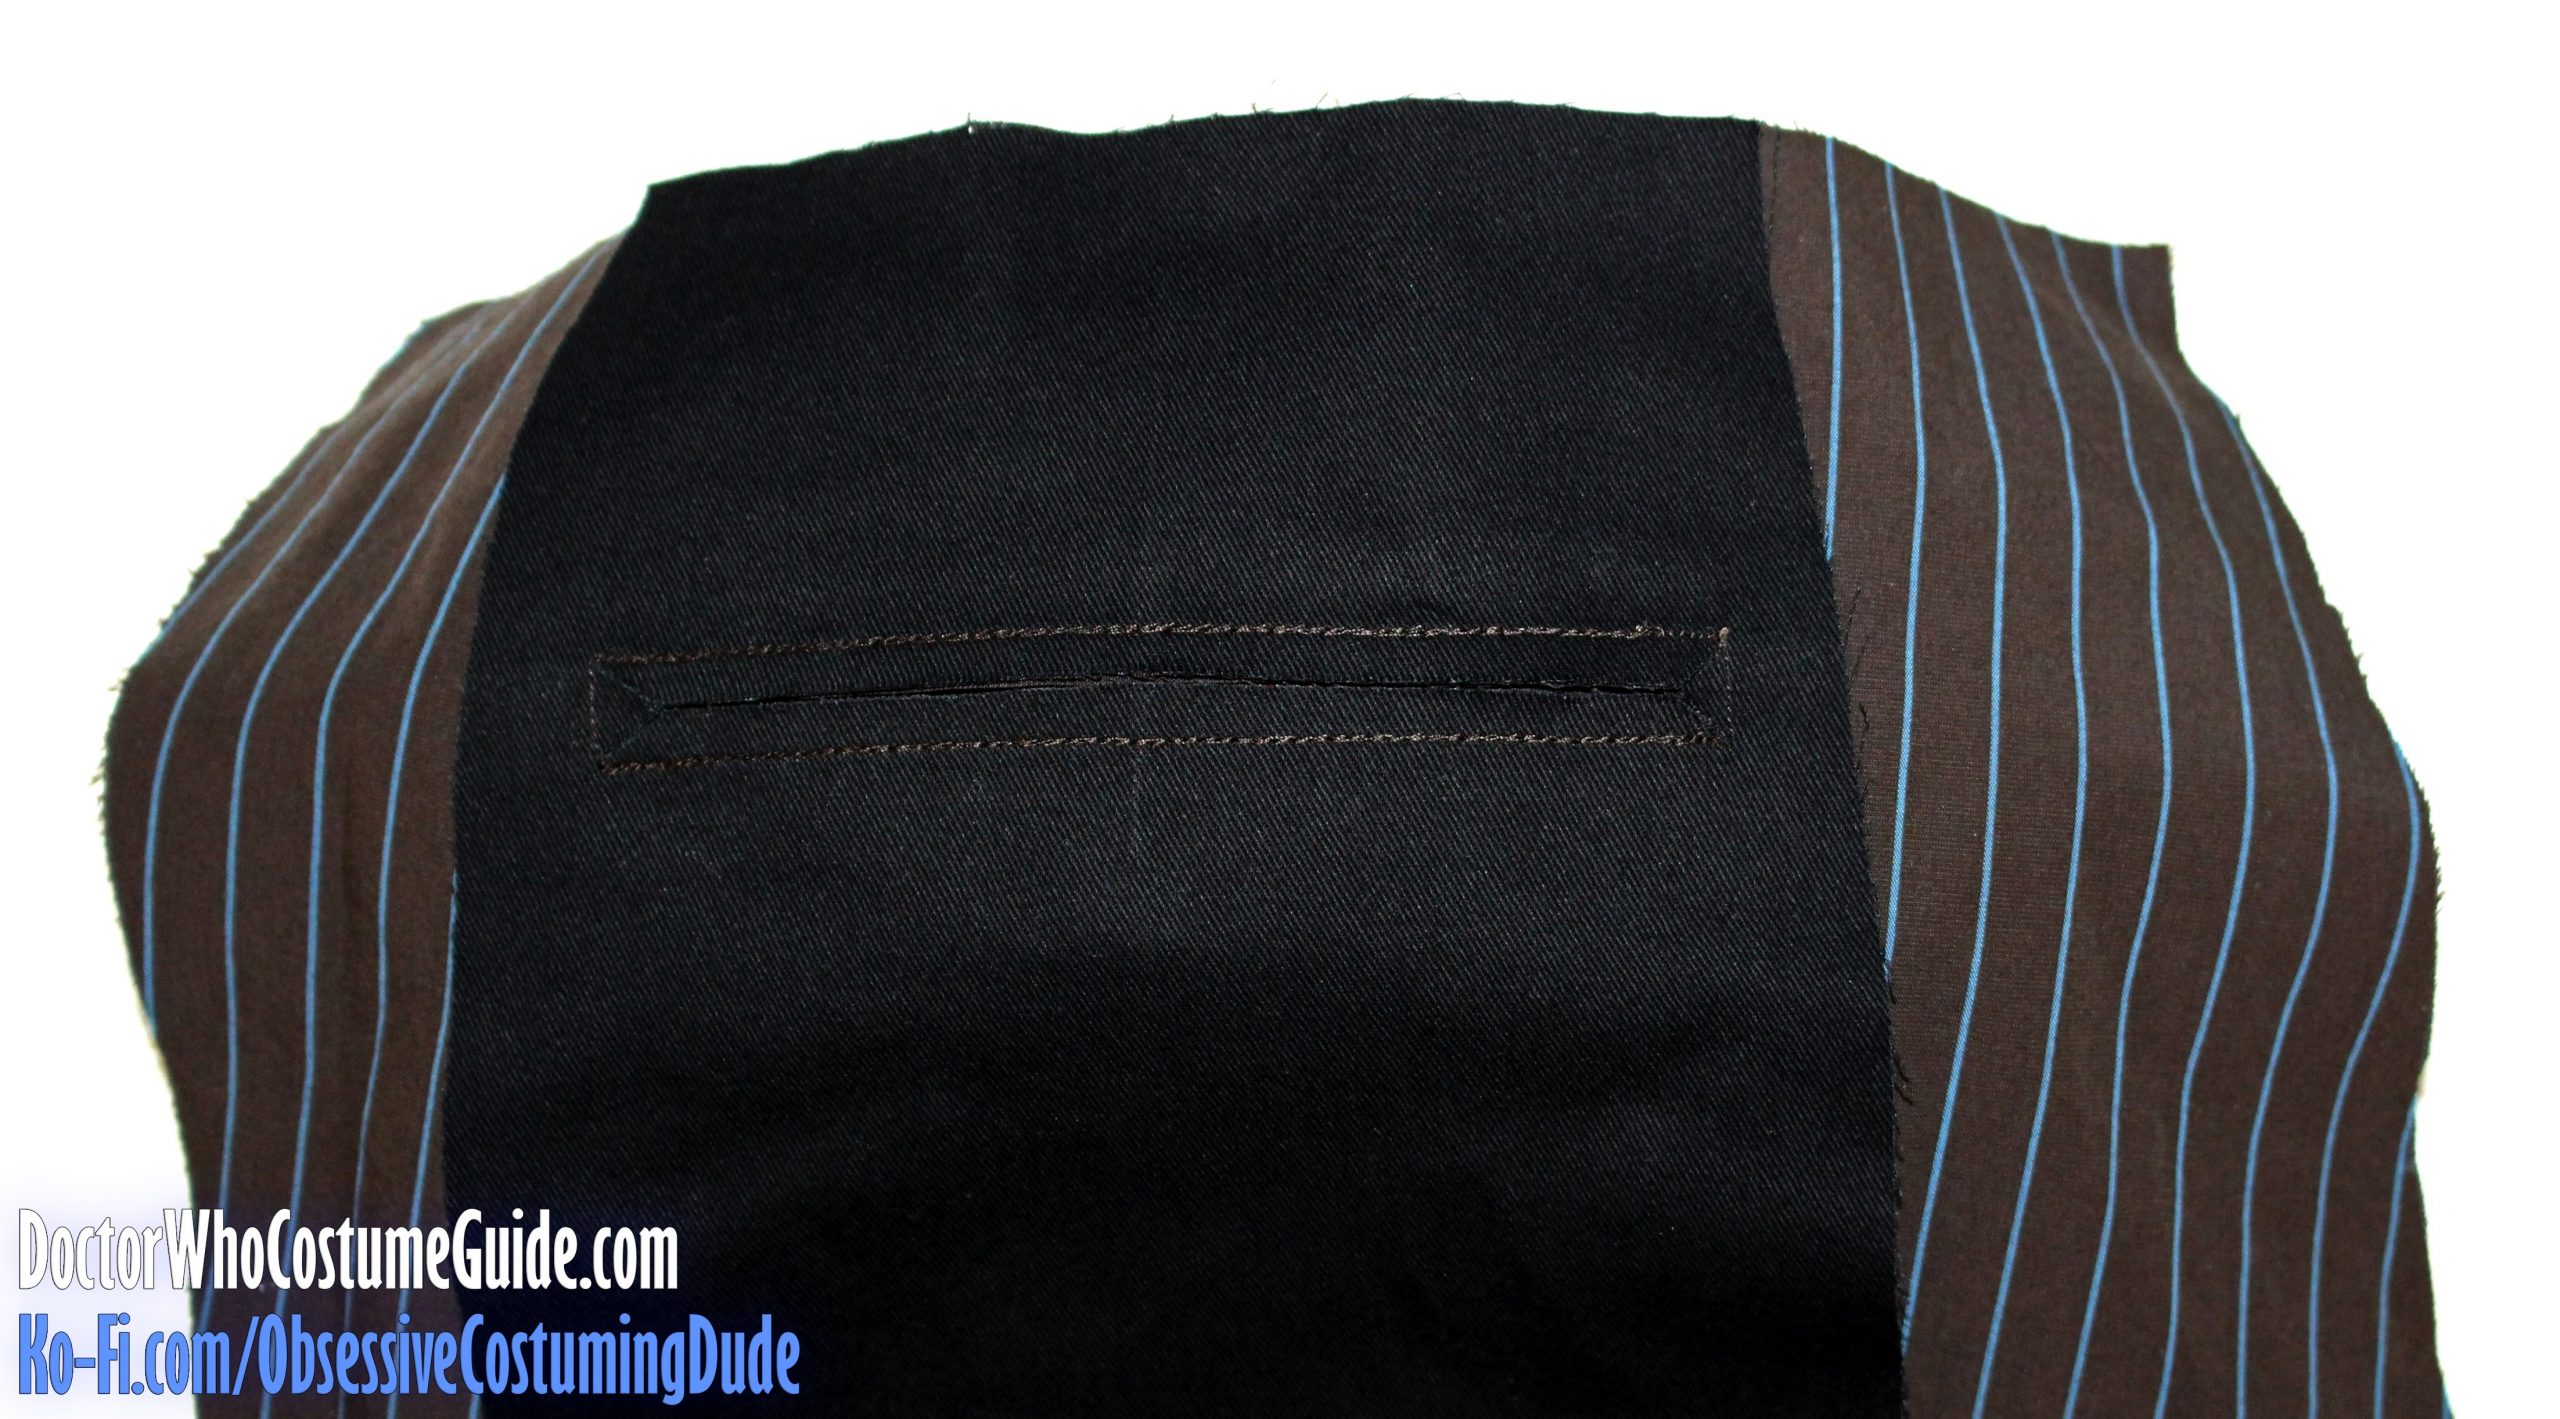
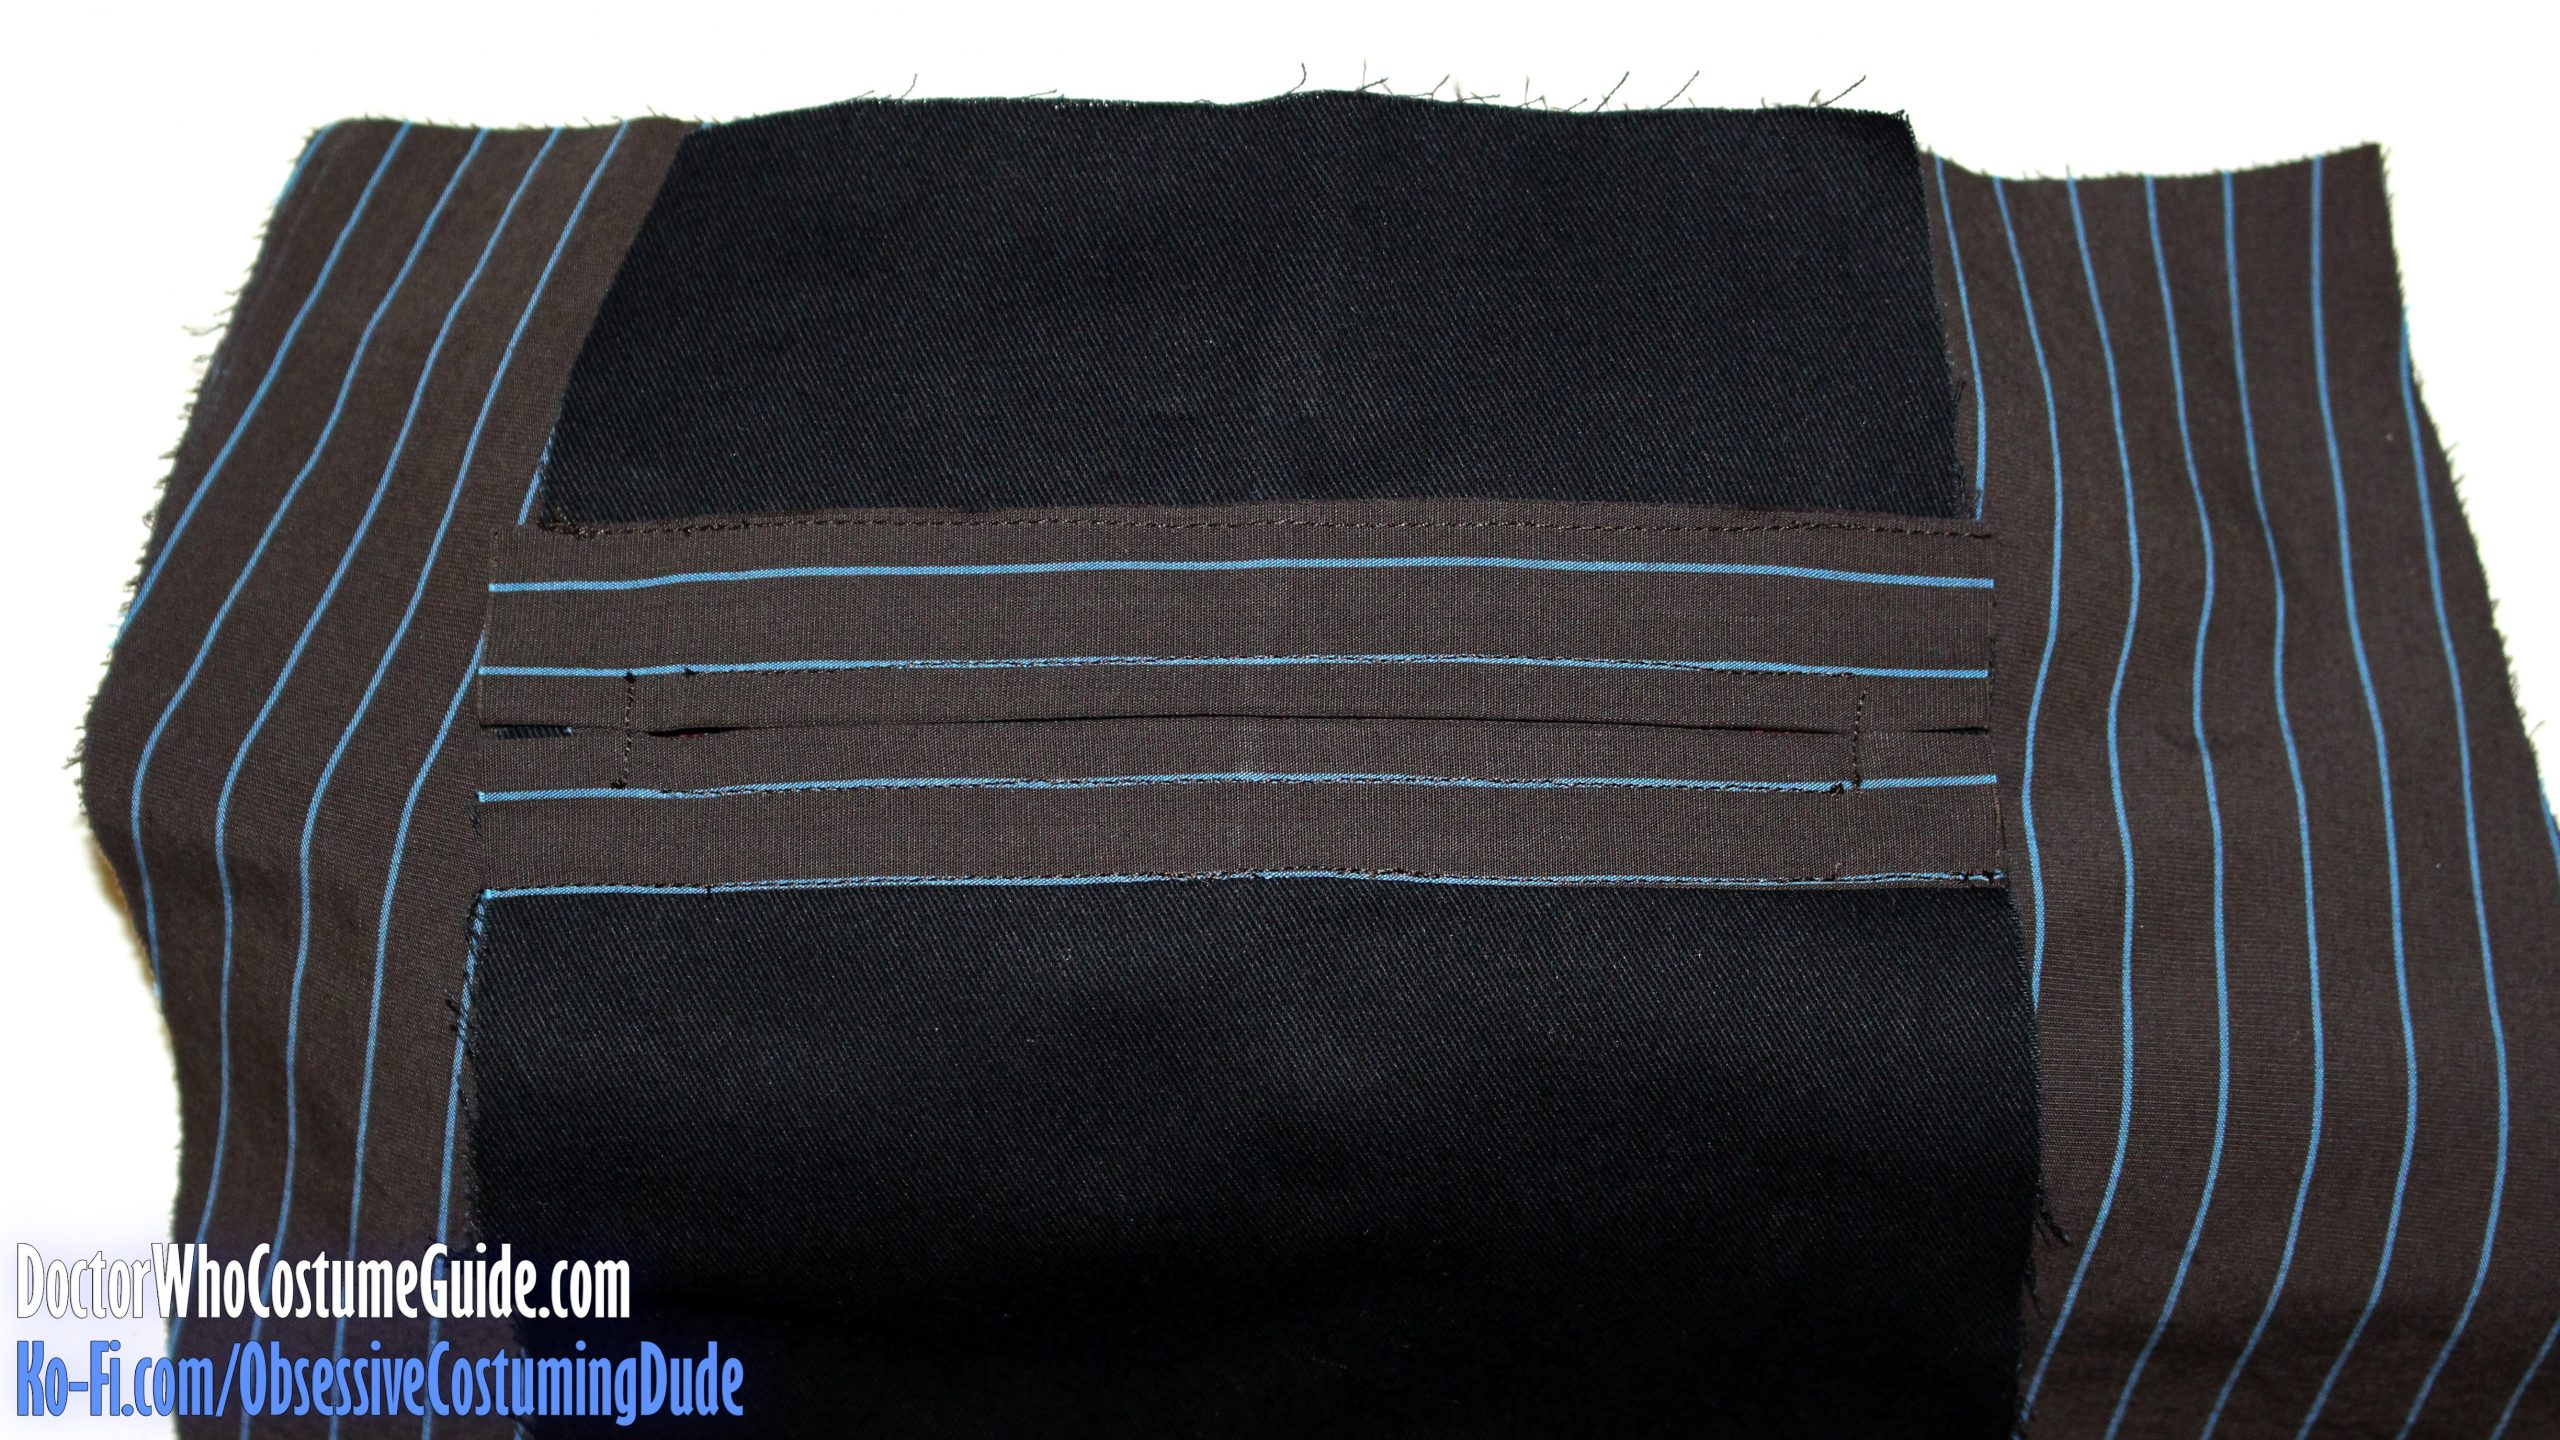
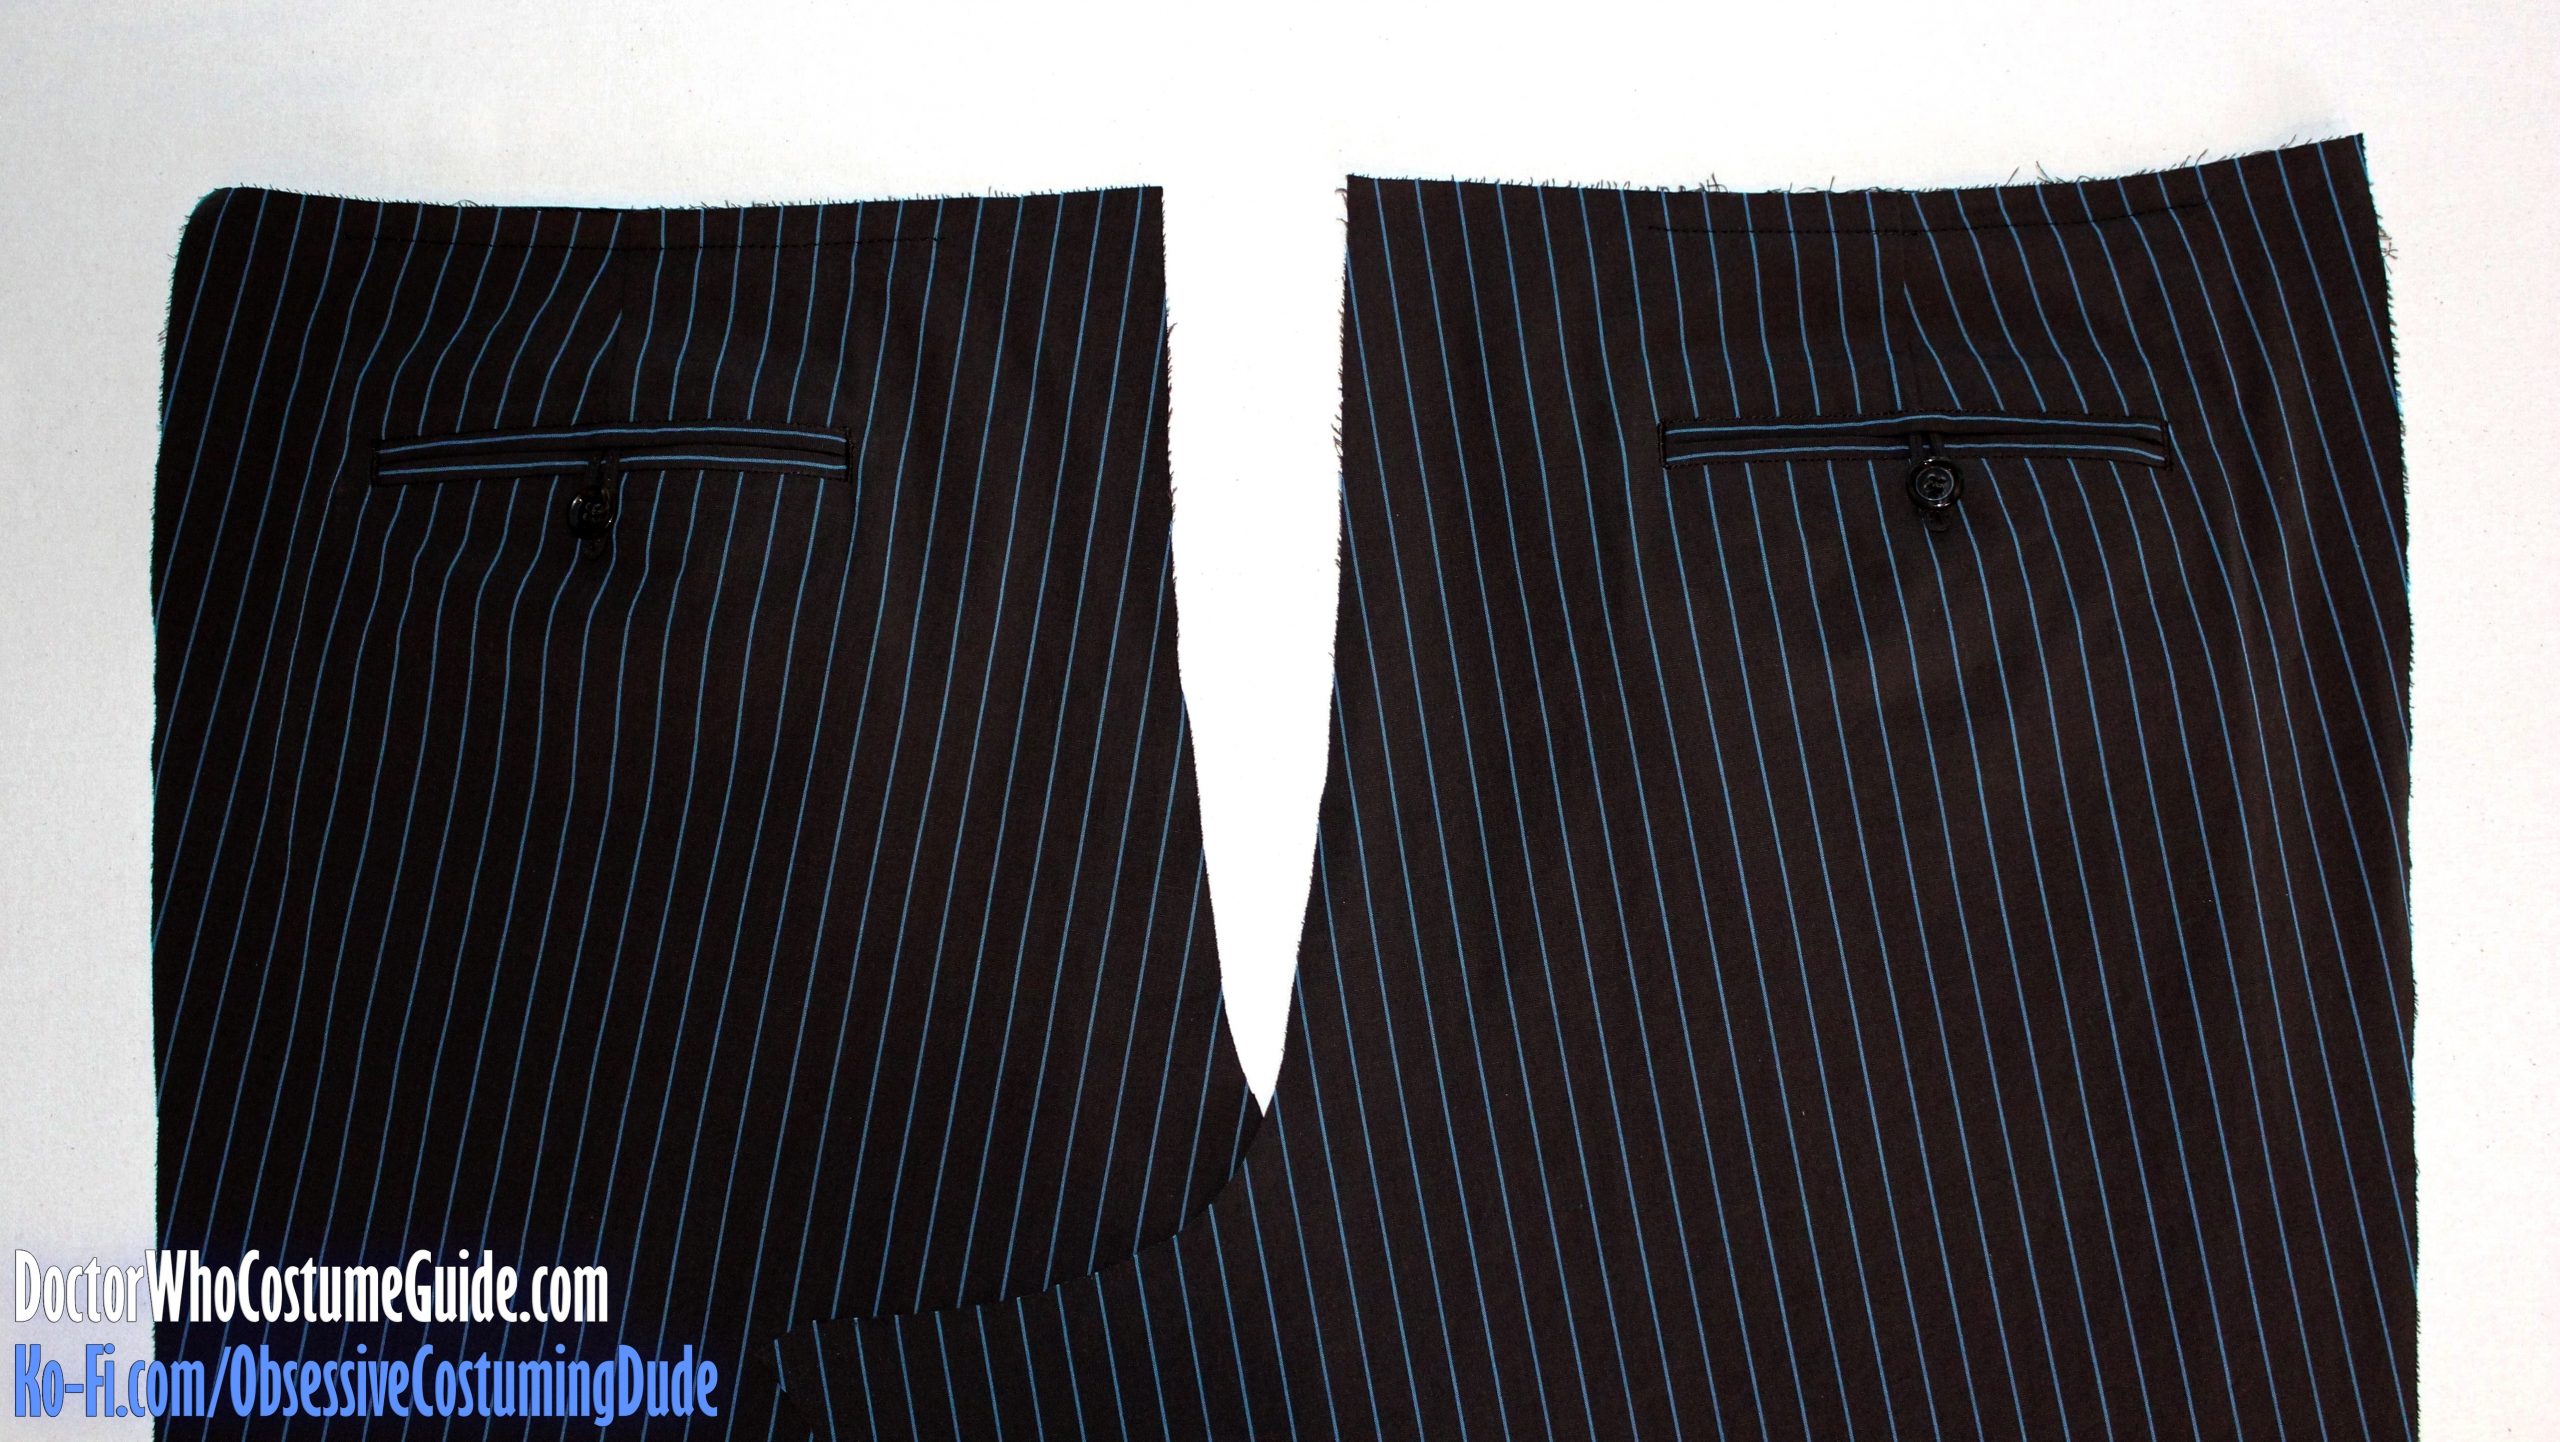
Insert the button tab into the pocket opening directly beneath the back dart so it extends about 1 ⅜” beneath the upper stitch line, or 1 ⅛” beneath the lower edge of the upper welt.
Sew or baste it into place across the upper edge of the upper pocket welt.
Attach a button at the beneath the lower welt, and directly beneath the dart/button tab.
(Special thanks to Alex Murphy, aka “The Ginger Doctor,” who owns a pair of original GAP trousers, for his input on how the original button tabs were constructed!)
Fold one long edge of the back pocket facing (piece LL) upward ¼” and press.
On the wrong side, position the back facing directly over the pocket opening.
Carefully position the second back pocket bag over the first so all edges are flush.
Pin the facing into place on the second pocket bag.
Using brown thread and a black bobbin, edge-stitch the pocket facing to the second pocket bag along the side and lower edges.
(You can stitch across the upper edge of the pocket facing too if you’d like, but the upper edge remained unsewn on the original GAP trousers.)
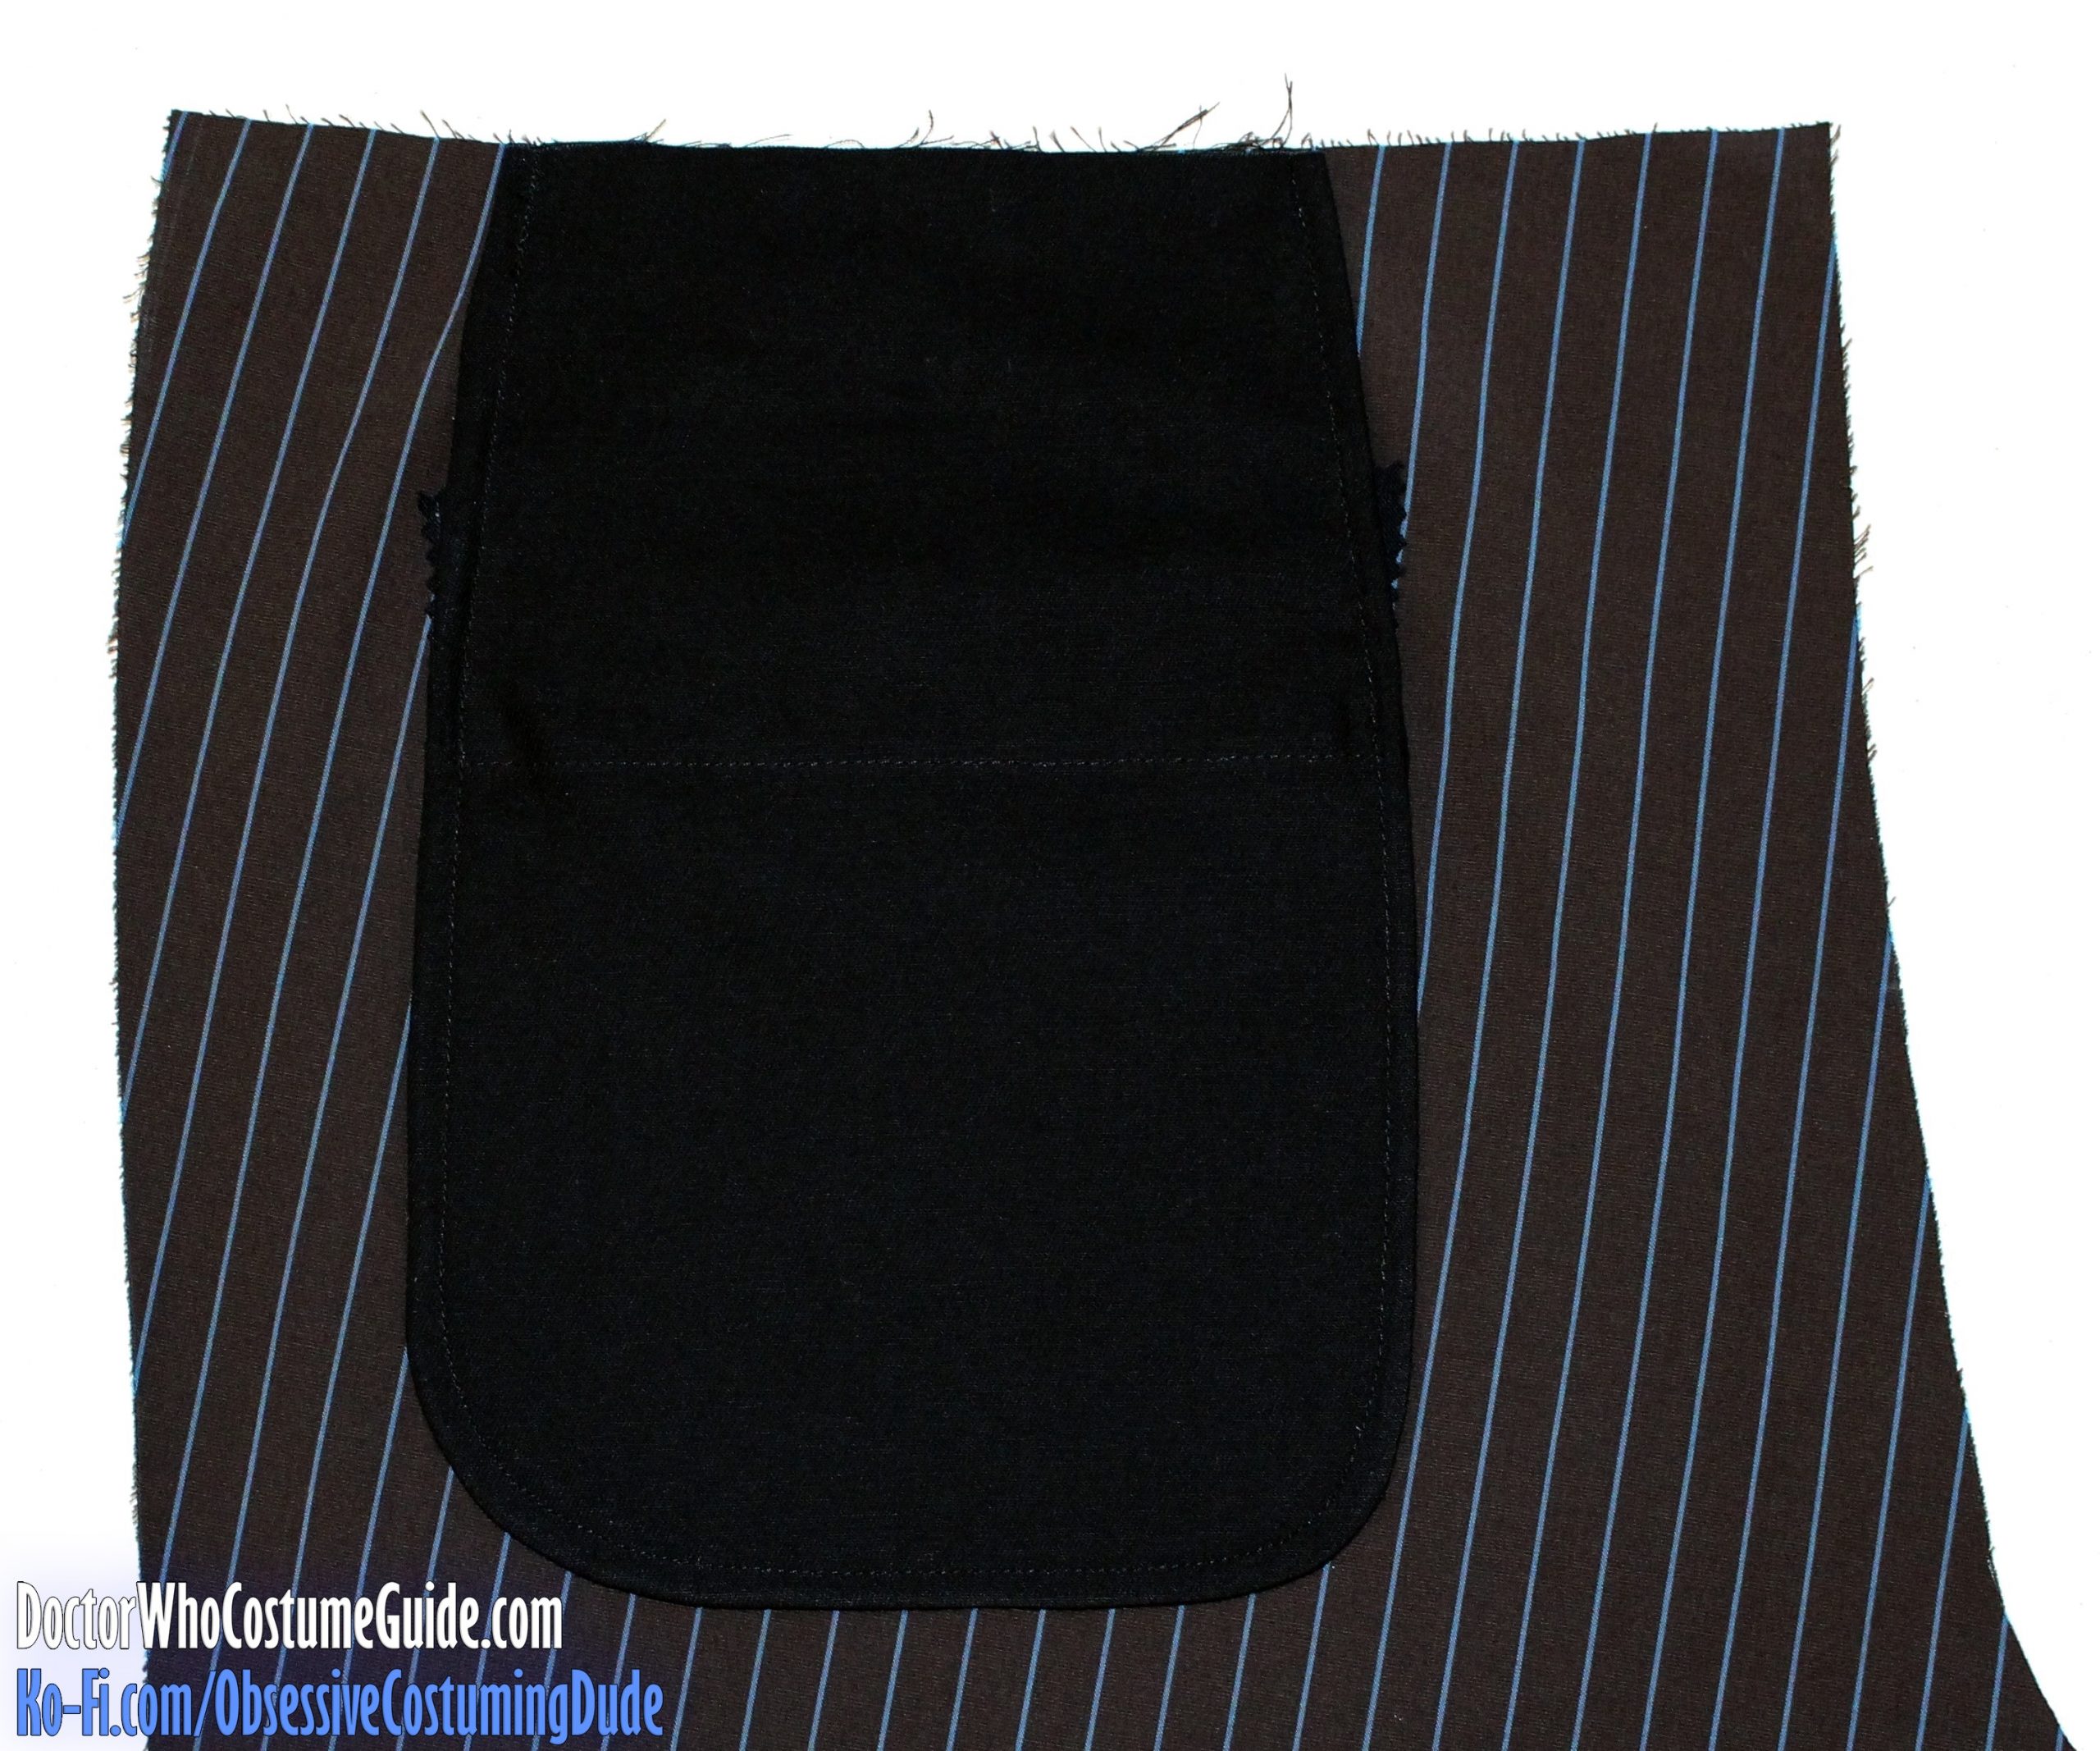
To enclose the edges of the pocket pouch in a French seam, first place the trousers right side upward (with the pocket bag on the underside), then pull the trousers up and out of the way so the bottom and sides of the pocket bag are visible.
Place the second pocket bag (with the facing attached) on top of the first, wrong sides together.
Pin the two pocket bags together along the side and lower edges.
Using black thread, sew the two pocket pouches together along the side and lower edges with ¼” seam allowance.
Trim the seam allowances down to ⅛”.
Turn the pocket “right-sides-out” and press.
Using black thread, topstitch around the side and bottom of the pocket bag ¼” from the edge, completing the French seam.
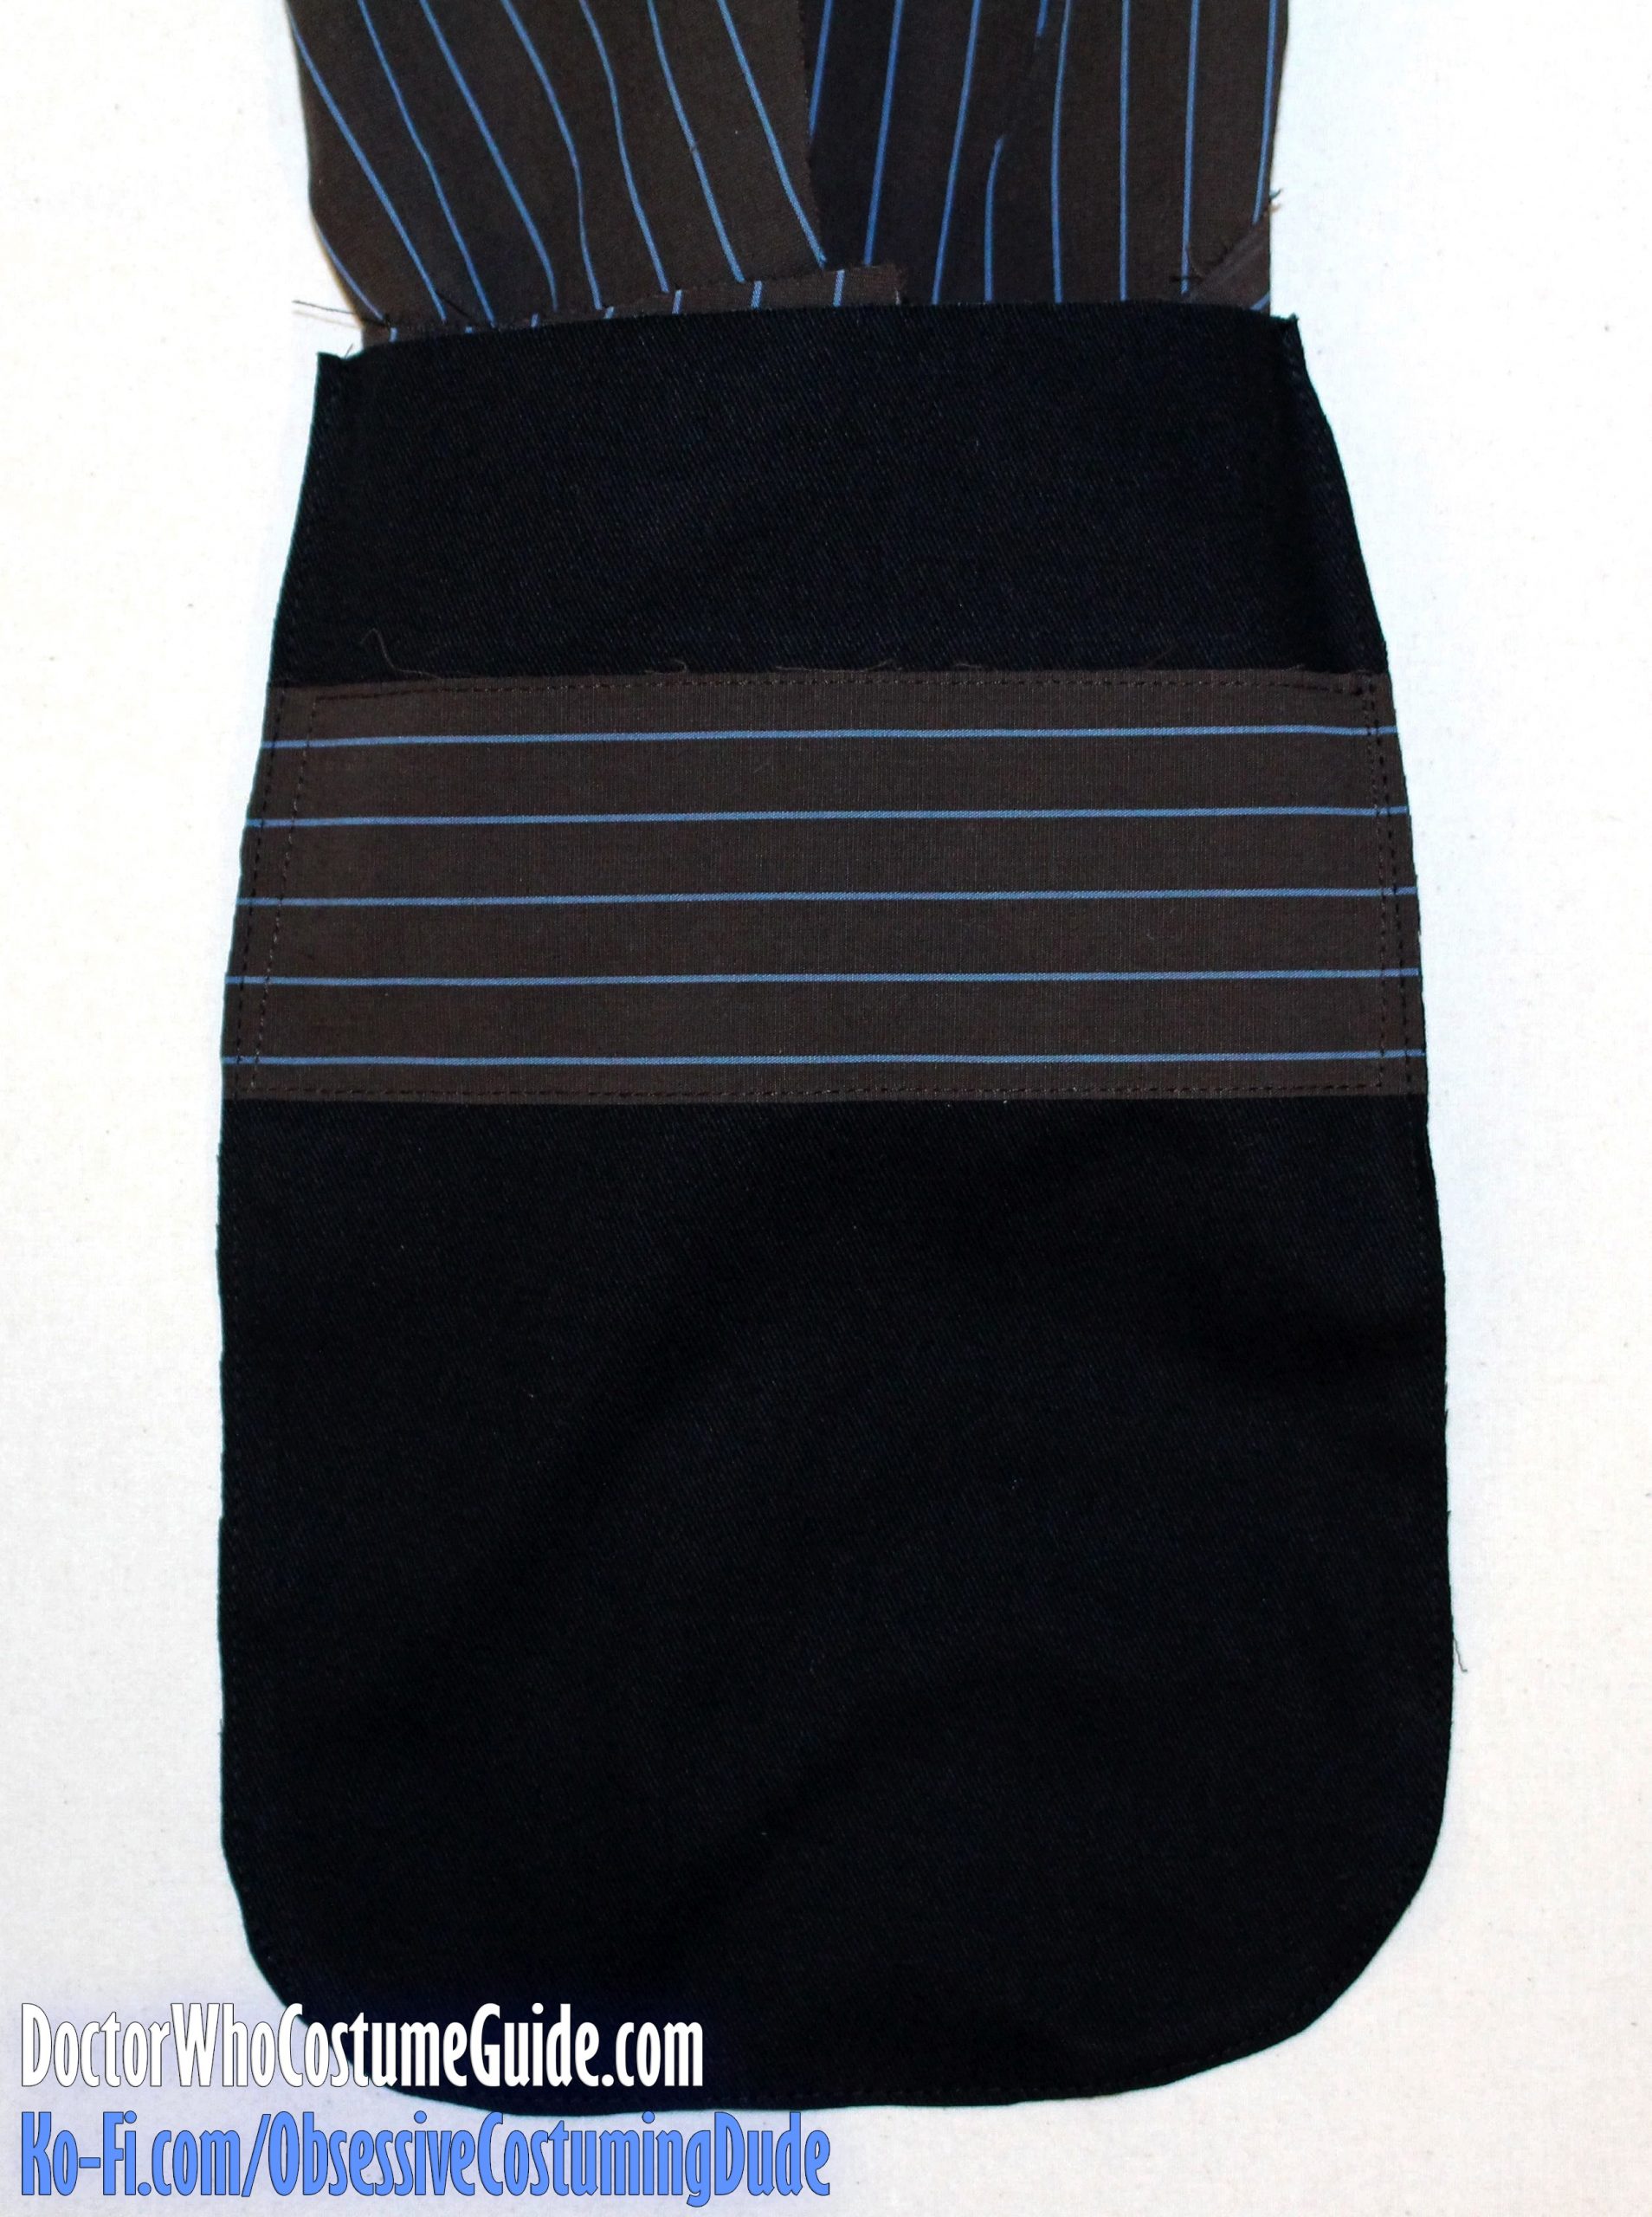
Sew or baste the pocket bag to the trousers ½” from the upper edge.
Using your quilting/walking foot, brown thread, and a black bobbin, make a small bar tack on each side of the pocket opening and “stitch-in-the-ditch” across the upper edge one final time to secure the pocket bag.