Tenth Doctor Brown Suit Tutorial – Jacket Front Assemblies
DARTS
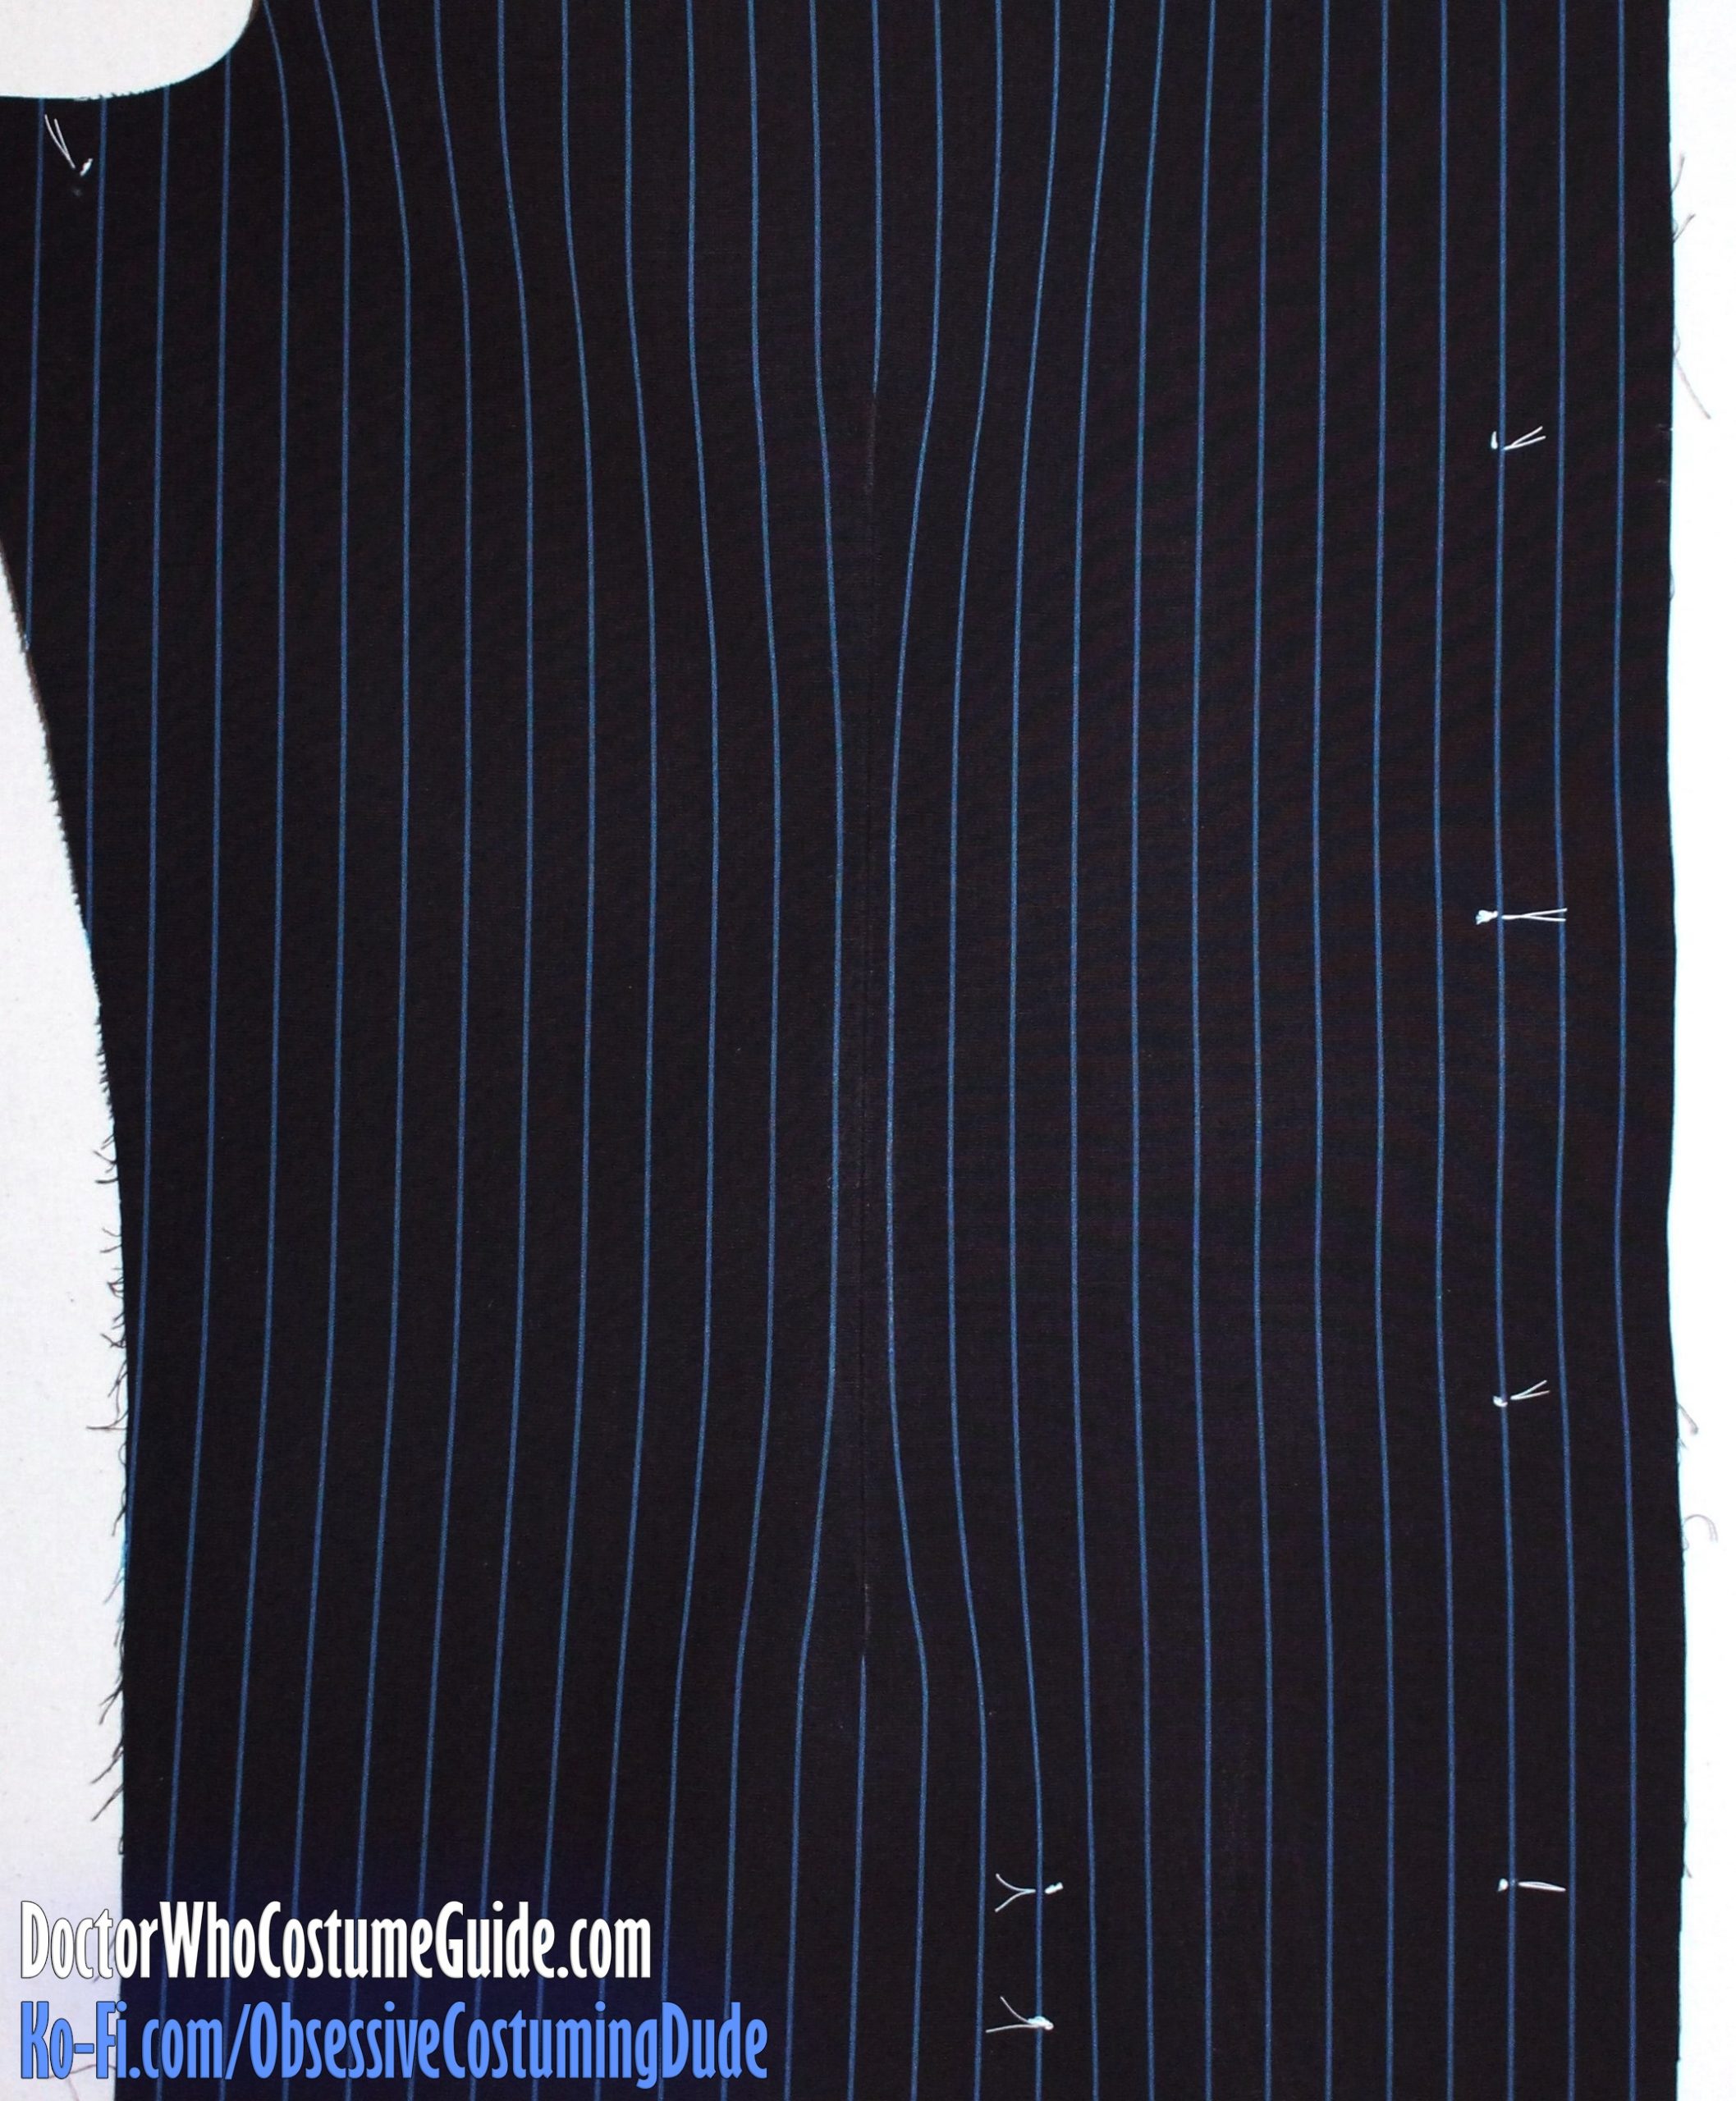
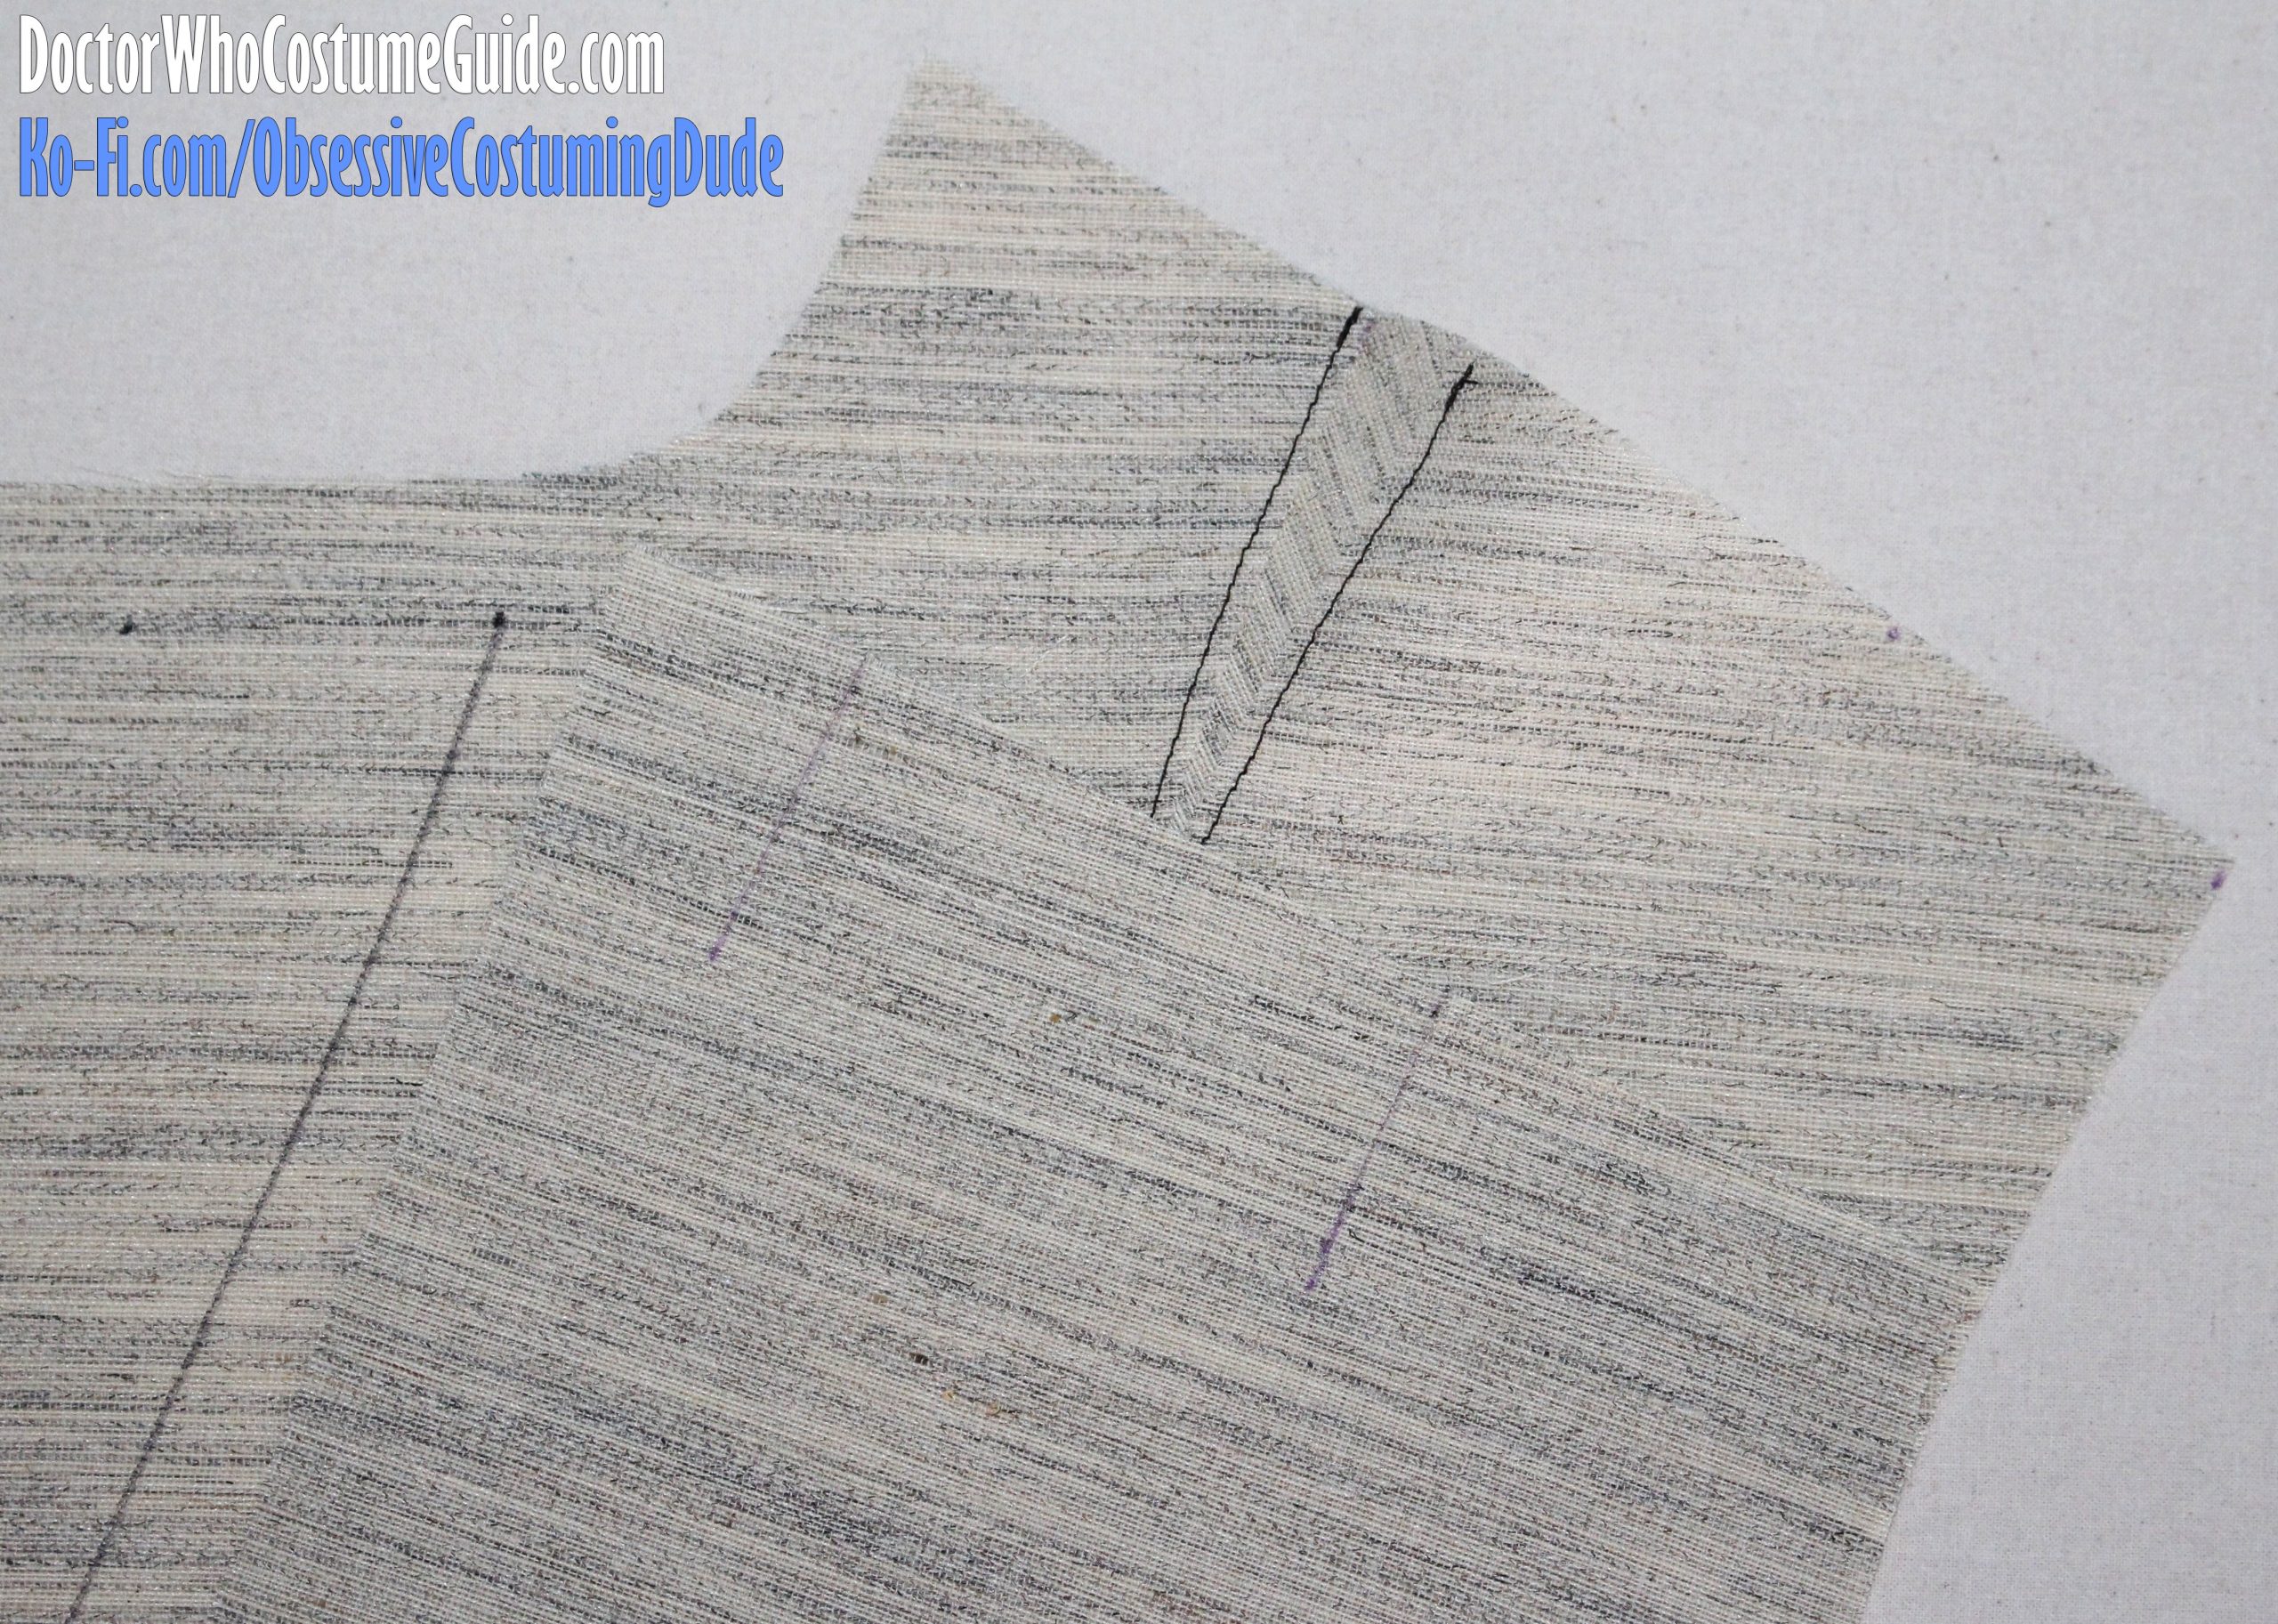
We’ll start by sewing the fitting darts on the jacket fronts.
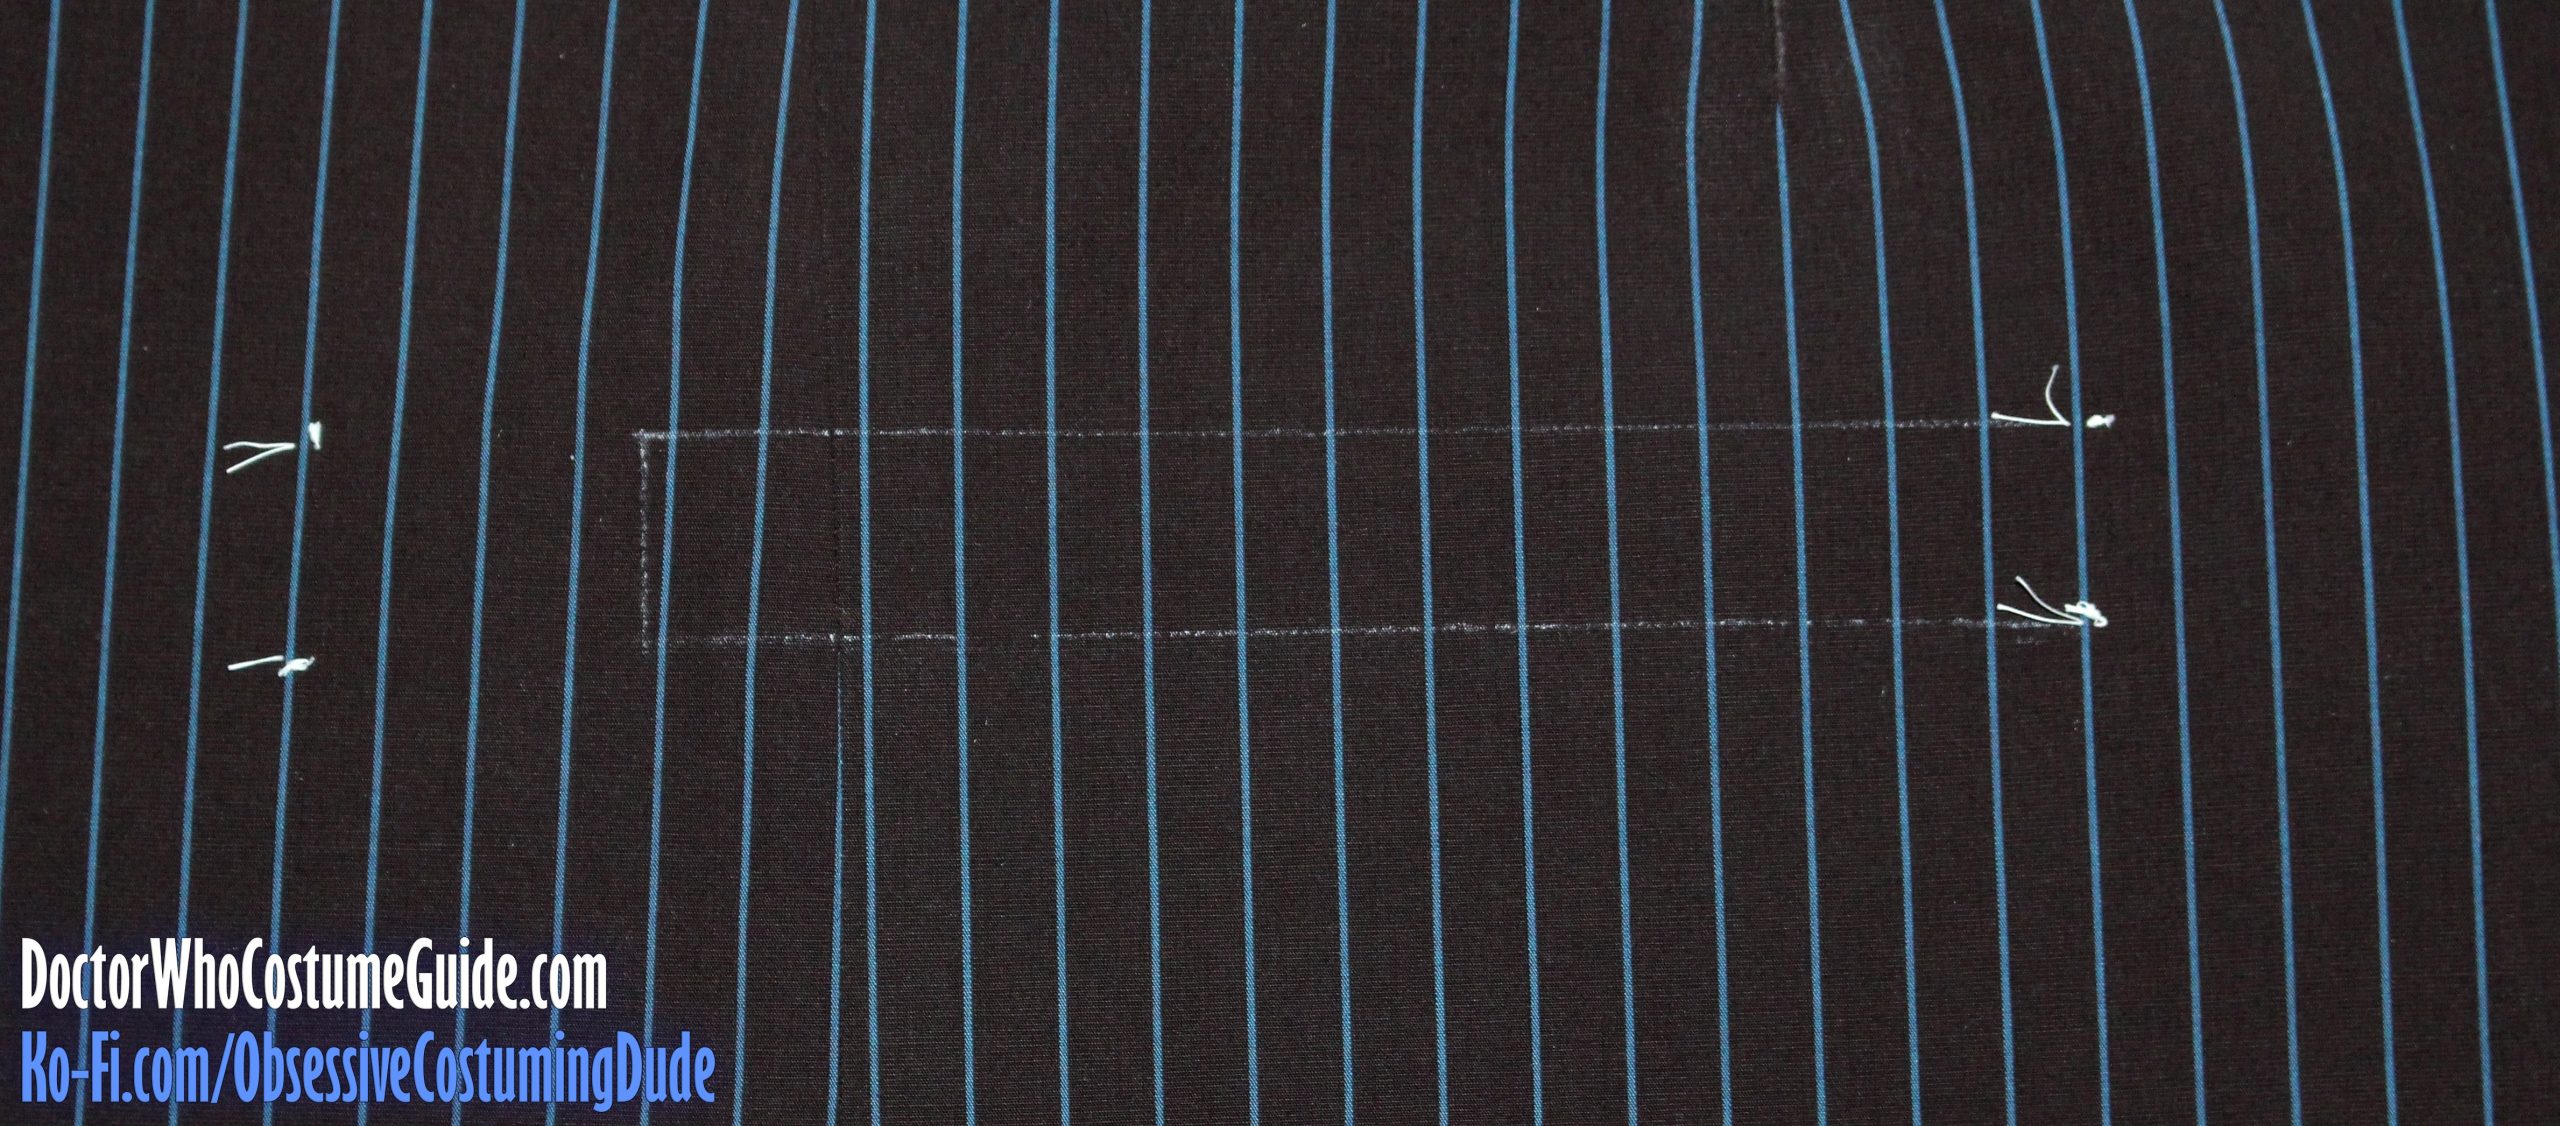
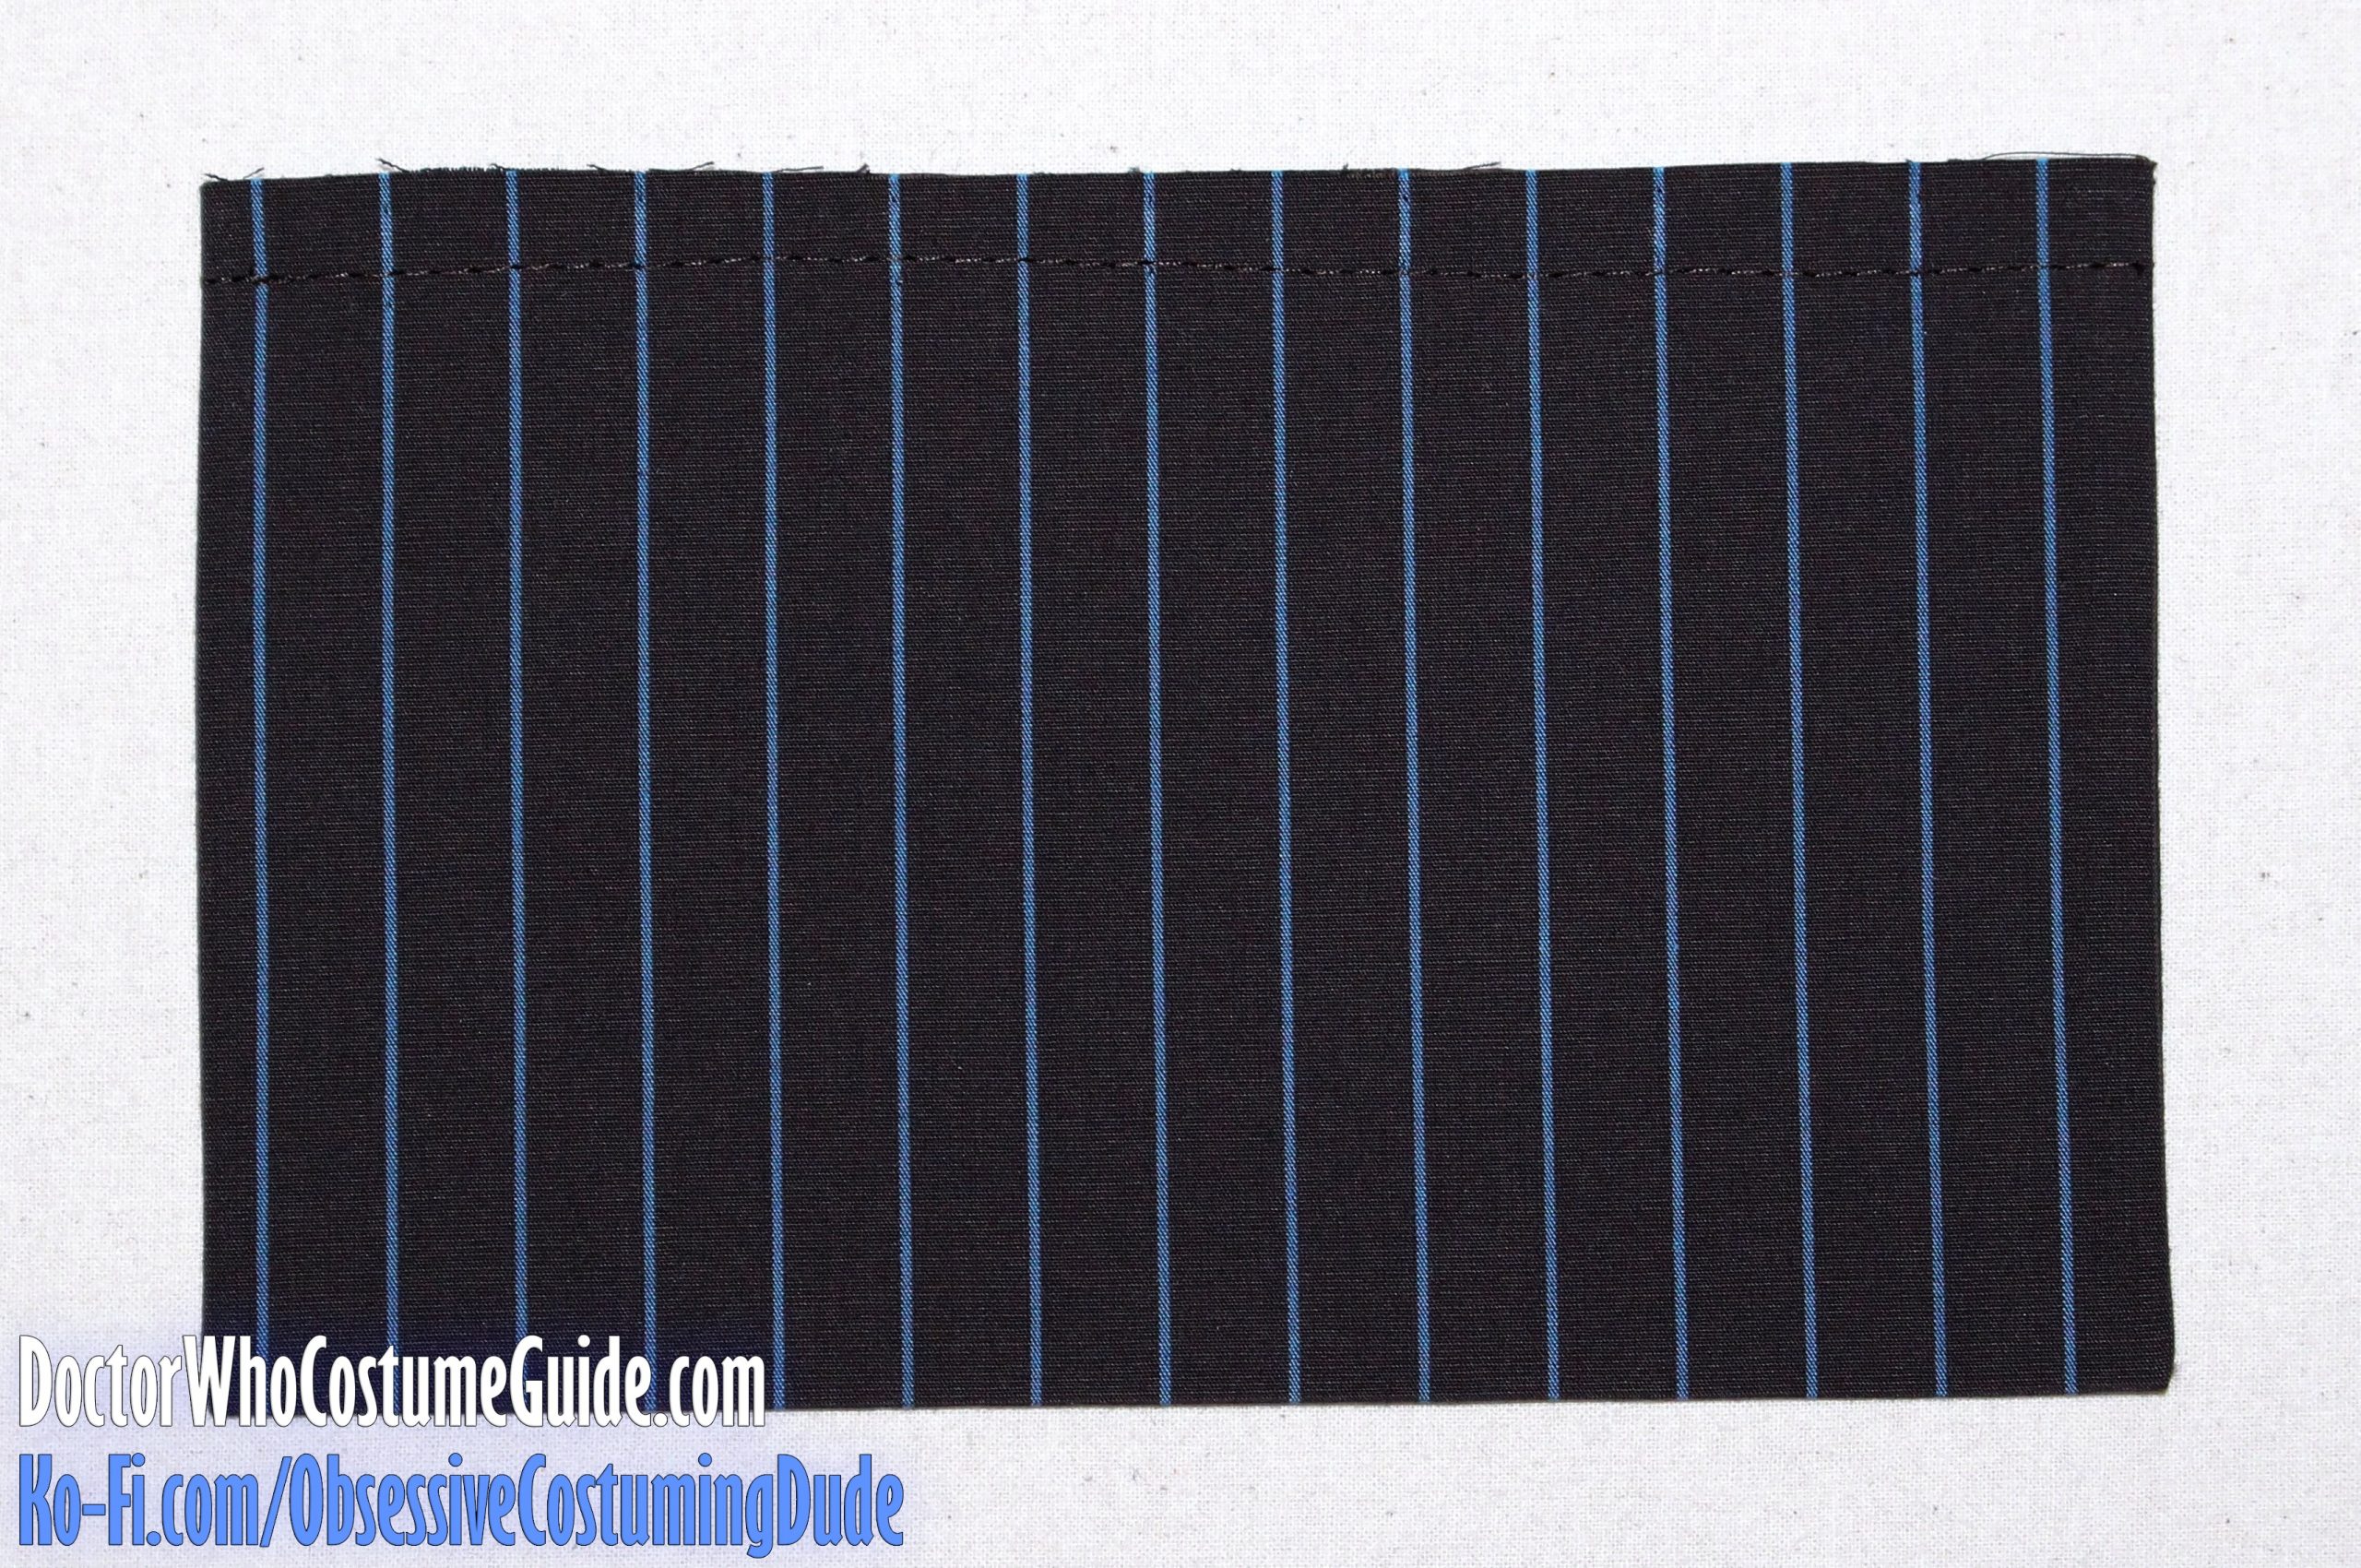
The dart should ideally be centered over a pinstripe. (Feel free to shift the dart a little in either direction if needed to achieve this.)
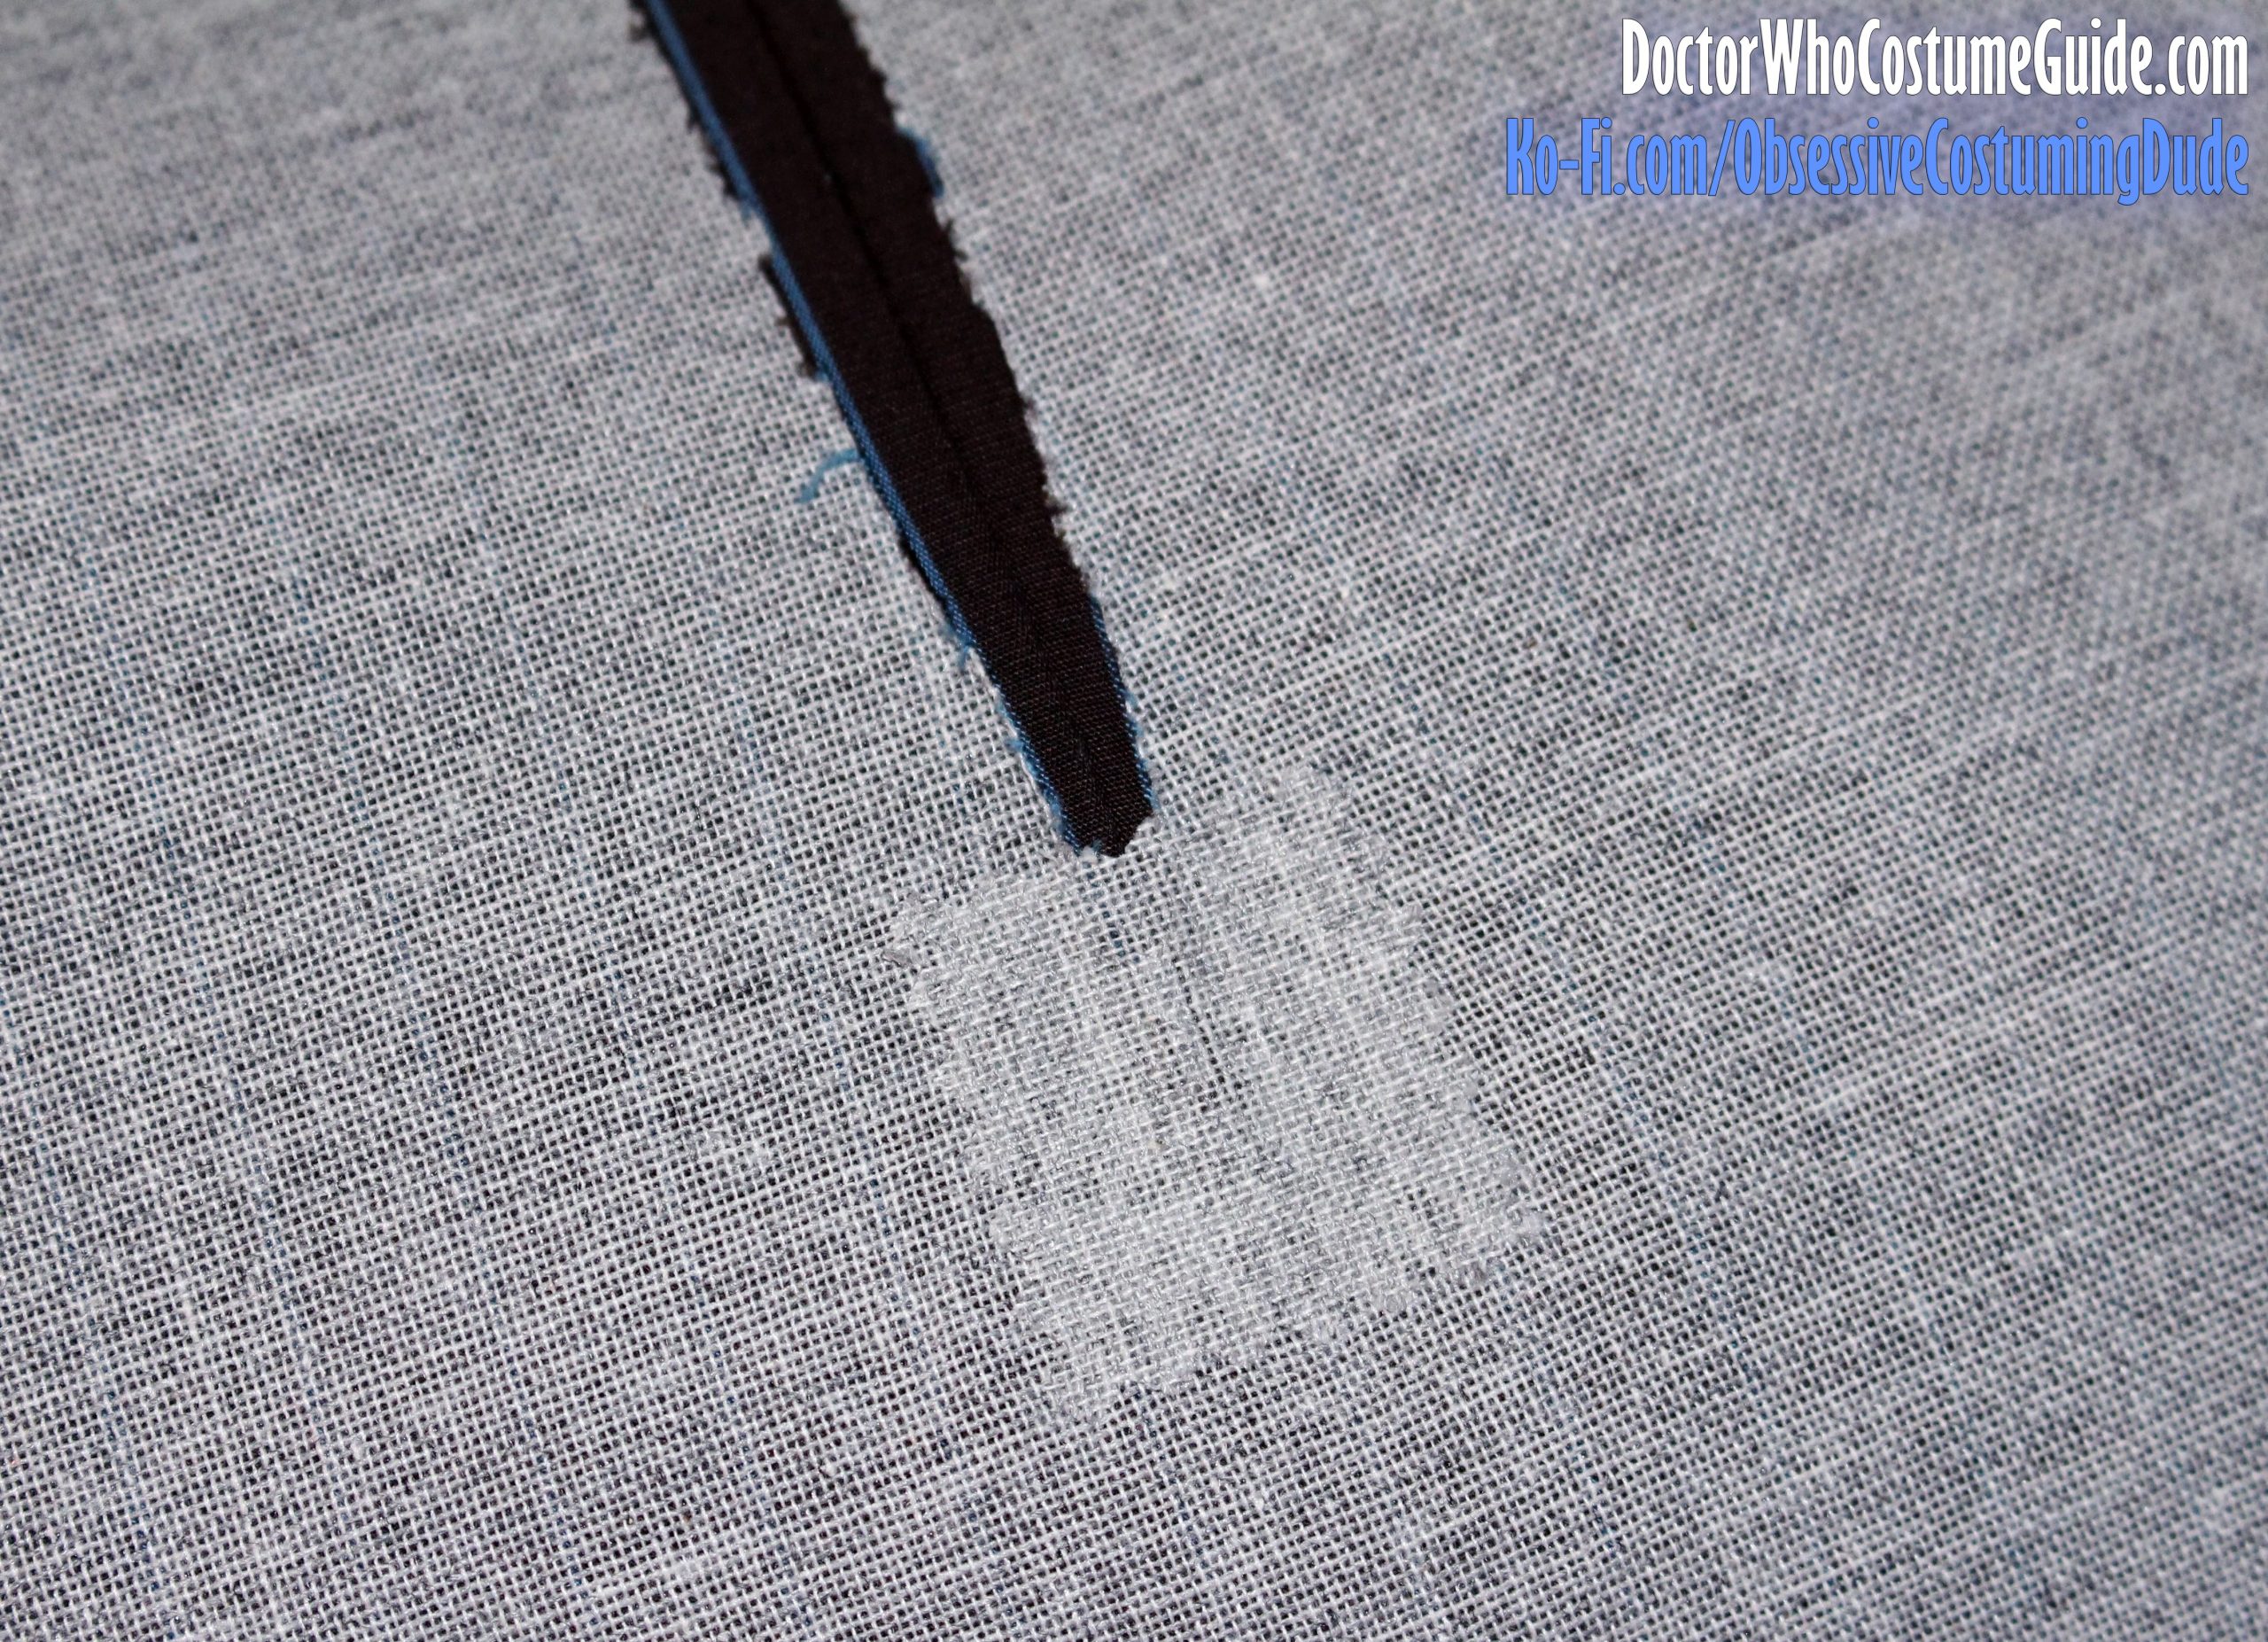
TIP: If you interfaced your jacket front with a fusible, the pinstripes will probably not be visible on the underside. To aid you in sewing a perfectly aligned dart, sew or baste through the relevant pinstripes in an easily-distinguishable thread color.
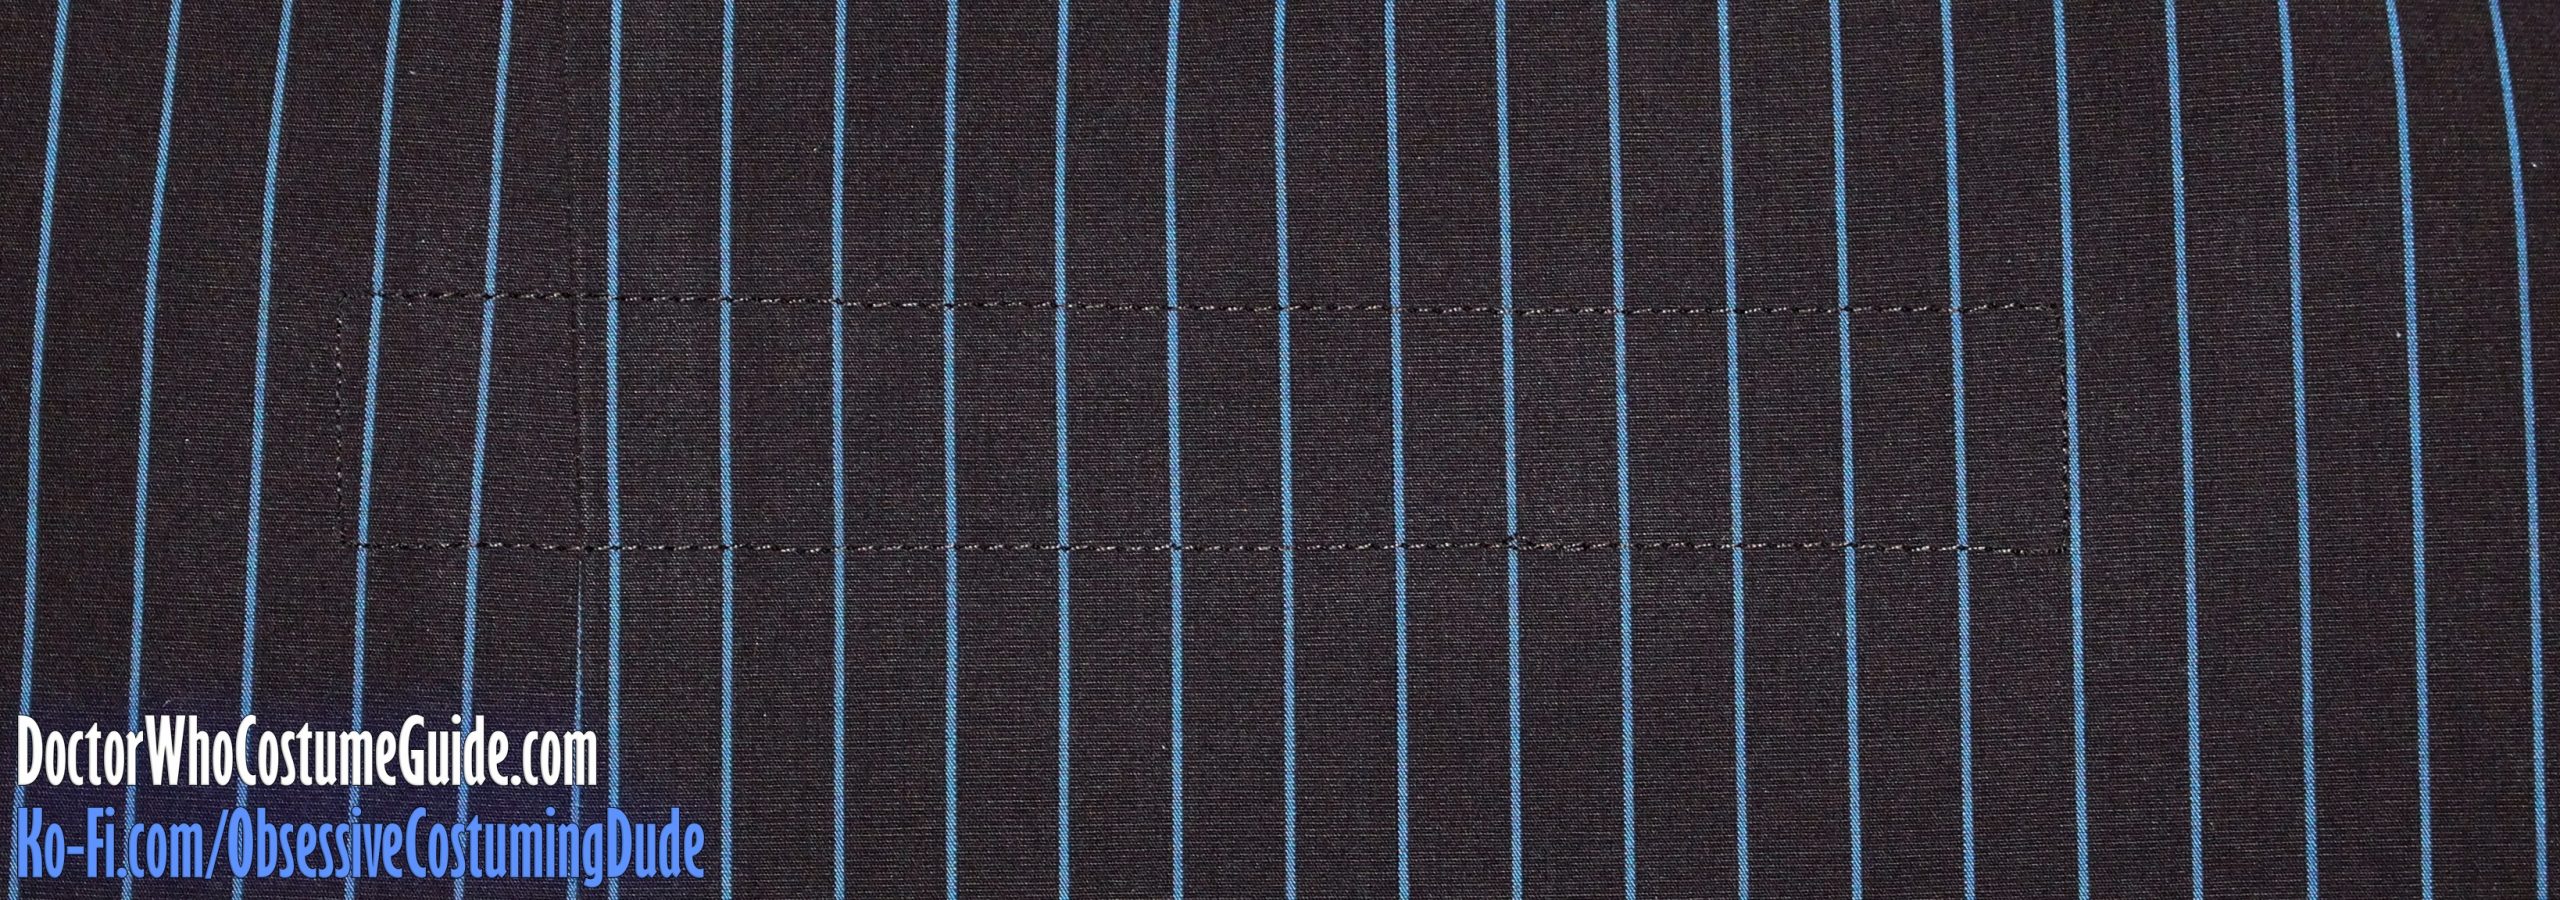
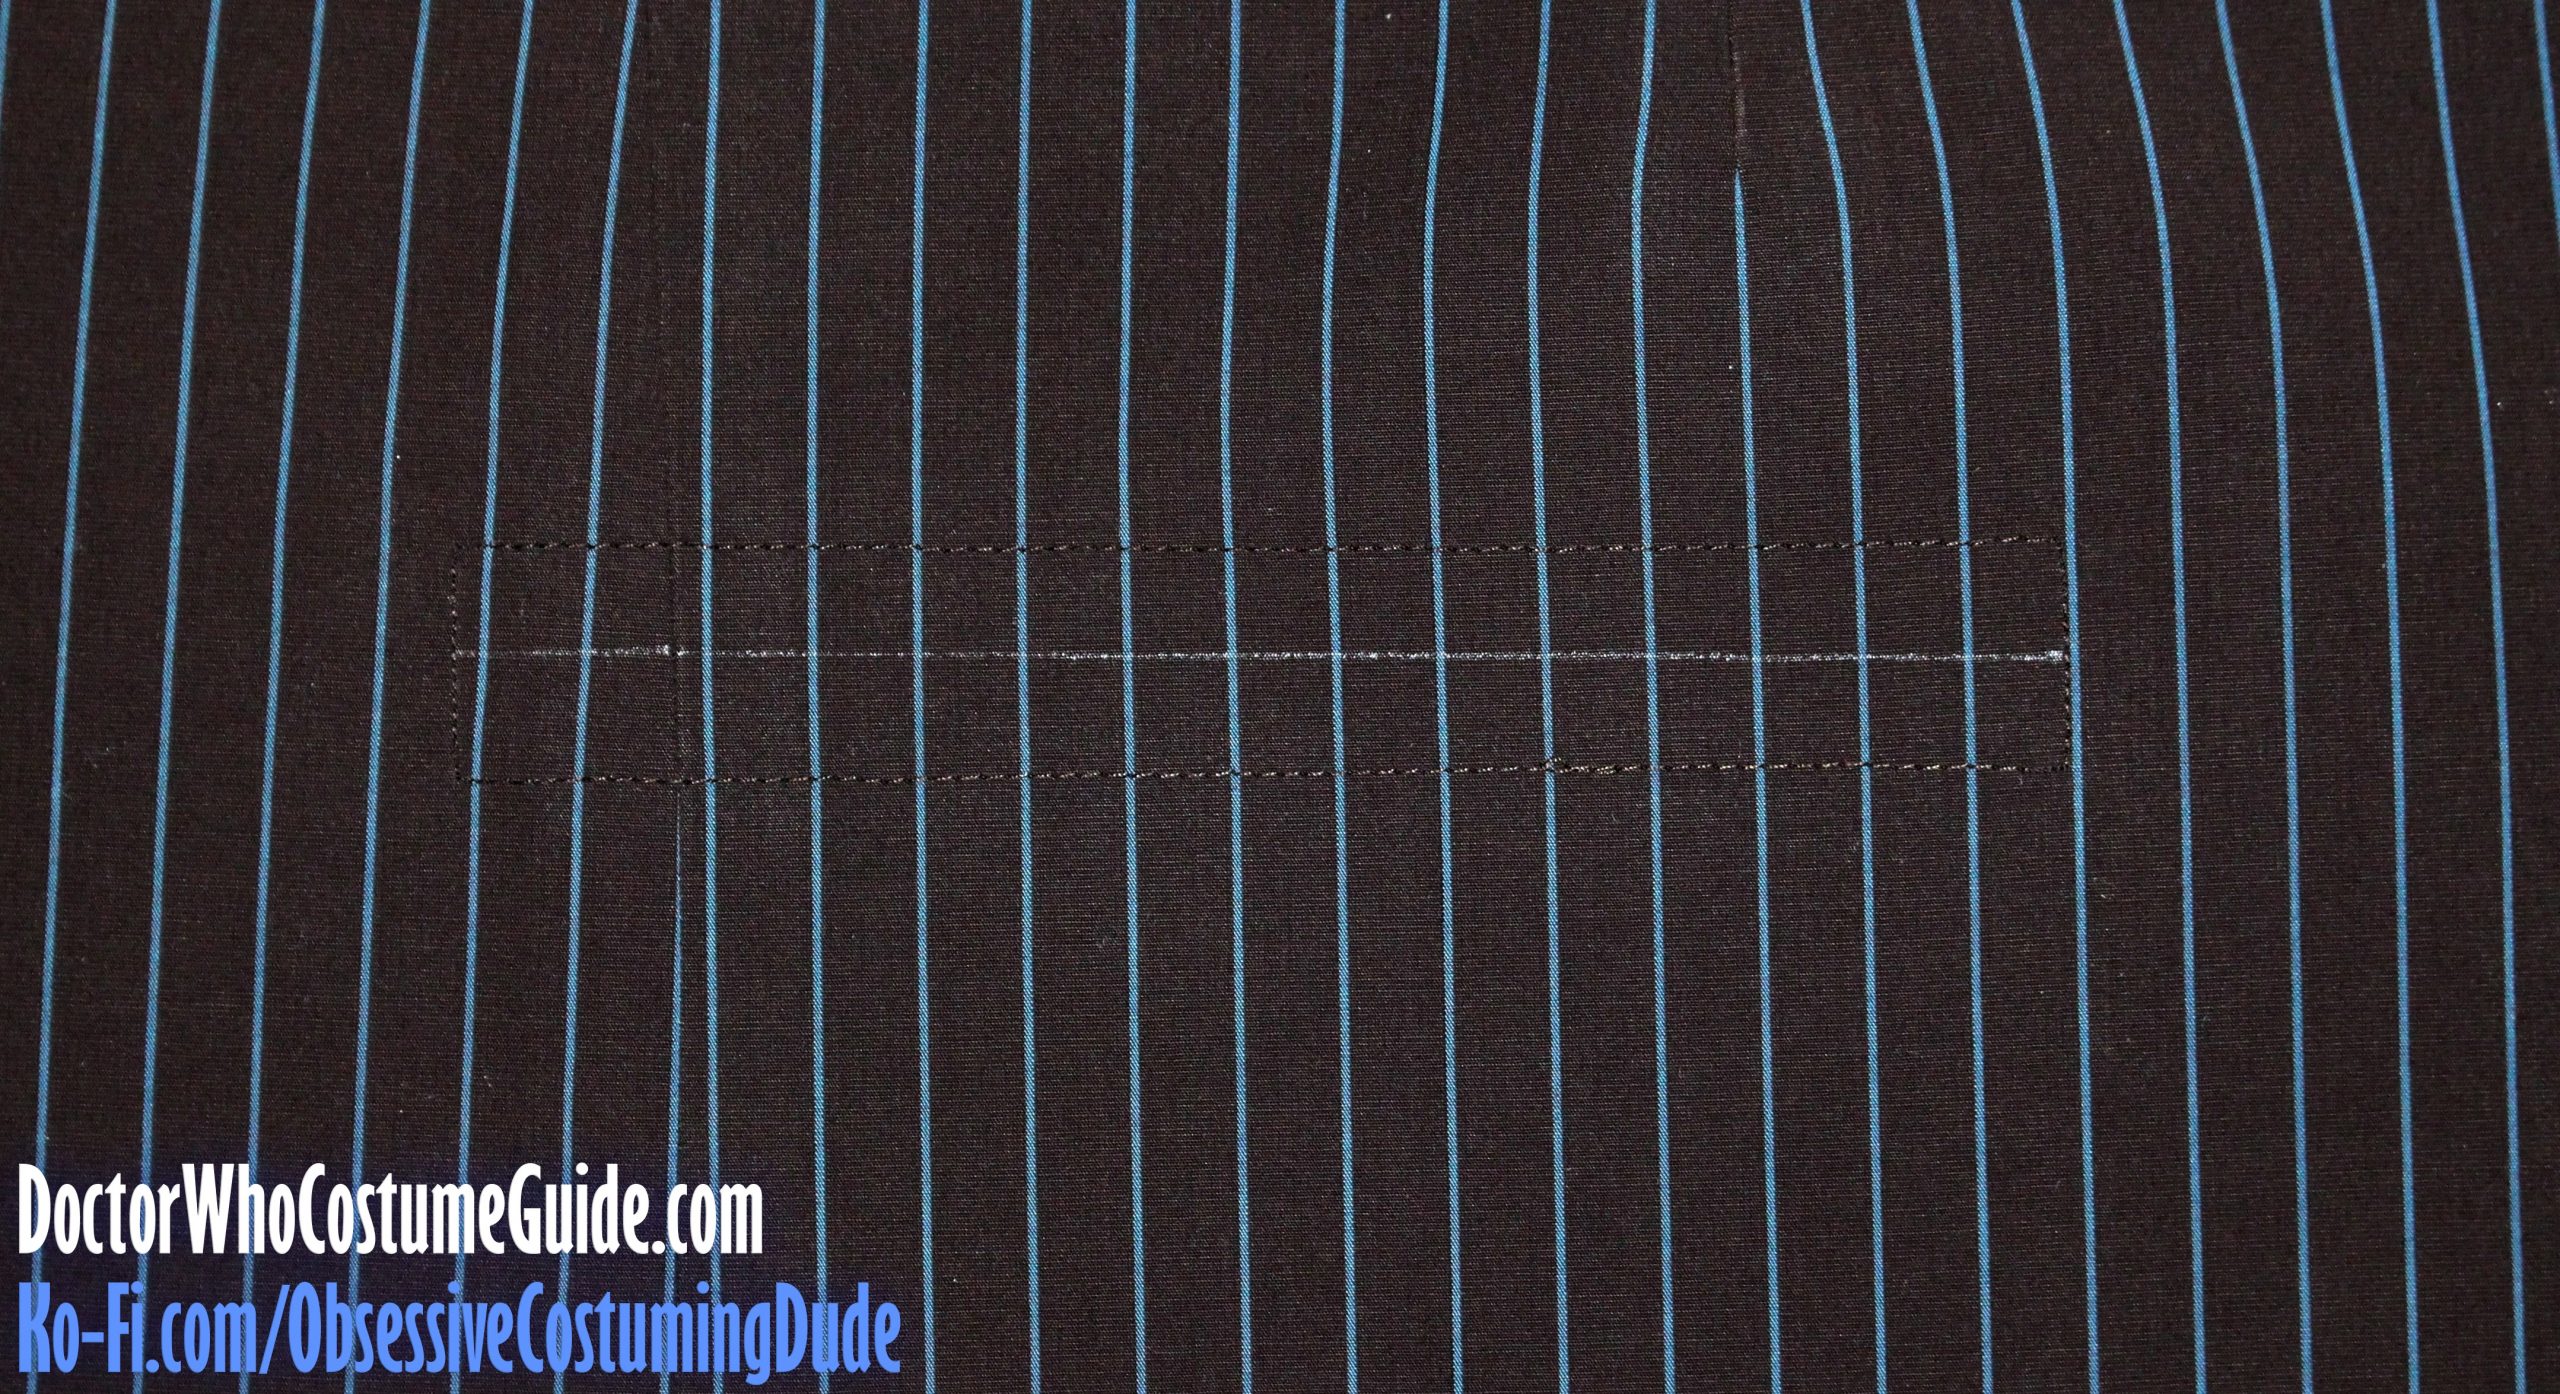
Sew the dart closed along the dots indicated on the printed pattern. (At its widest point, between the middle four dots, the stitch line should be exactly halfway between the adjacent two pinstripes.)
Slit the dart open down the center, beginning and ending the slit about ½” from the top and bottom of the dart.
Press this portion of the dart open over a tailor’s ham.
To control the fabric at the tips of the darts, thread a hand-sewing needle and insert the eye end of the threaded needle into the dart tip.
Press the dart tip so the fabric is flat at the center (rather than getting mashed down to one side or the other).
Then pull the needle out by the thread, since the needle itself will be hot, and press the dart tip again.
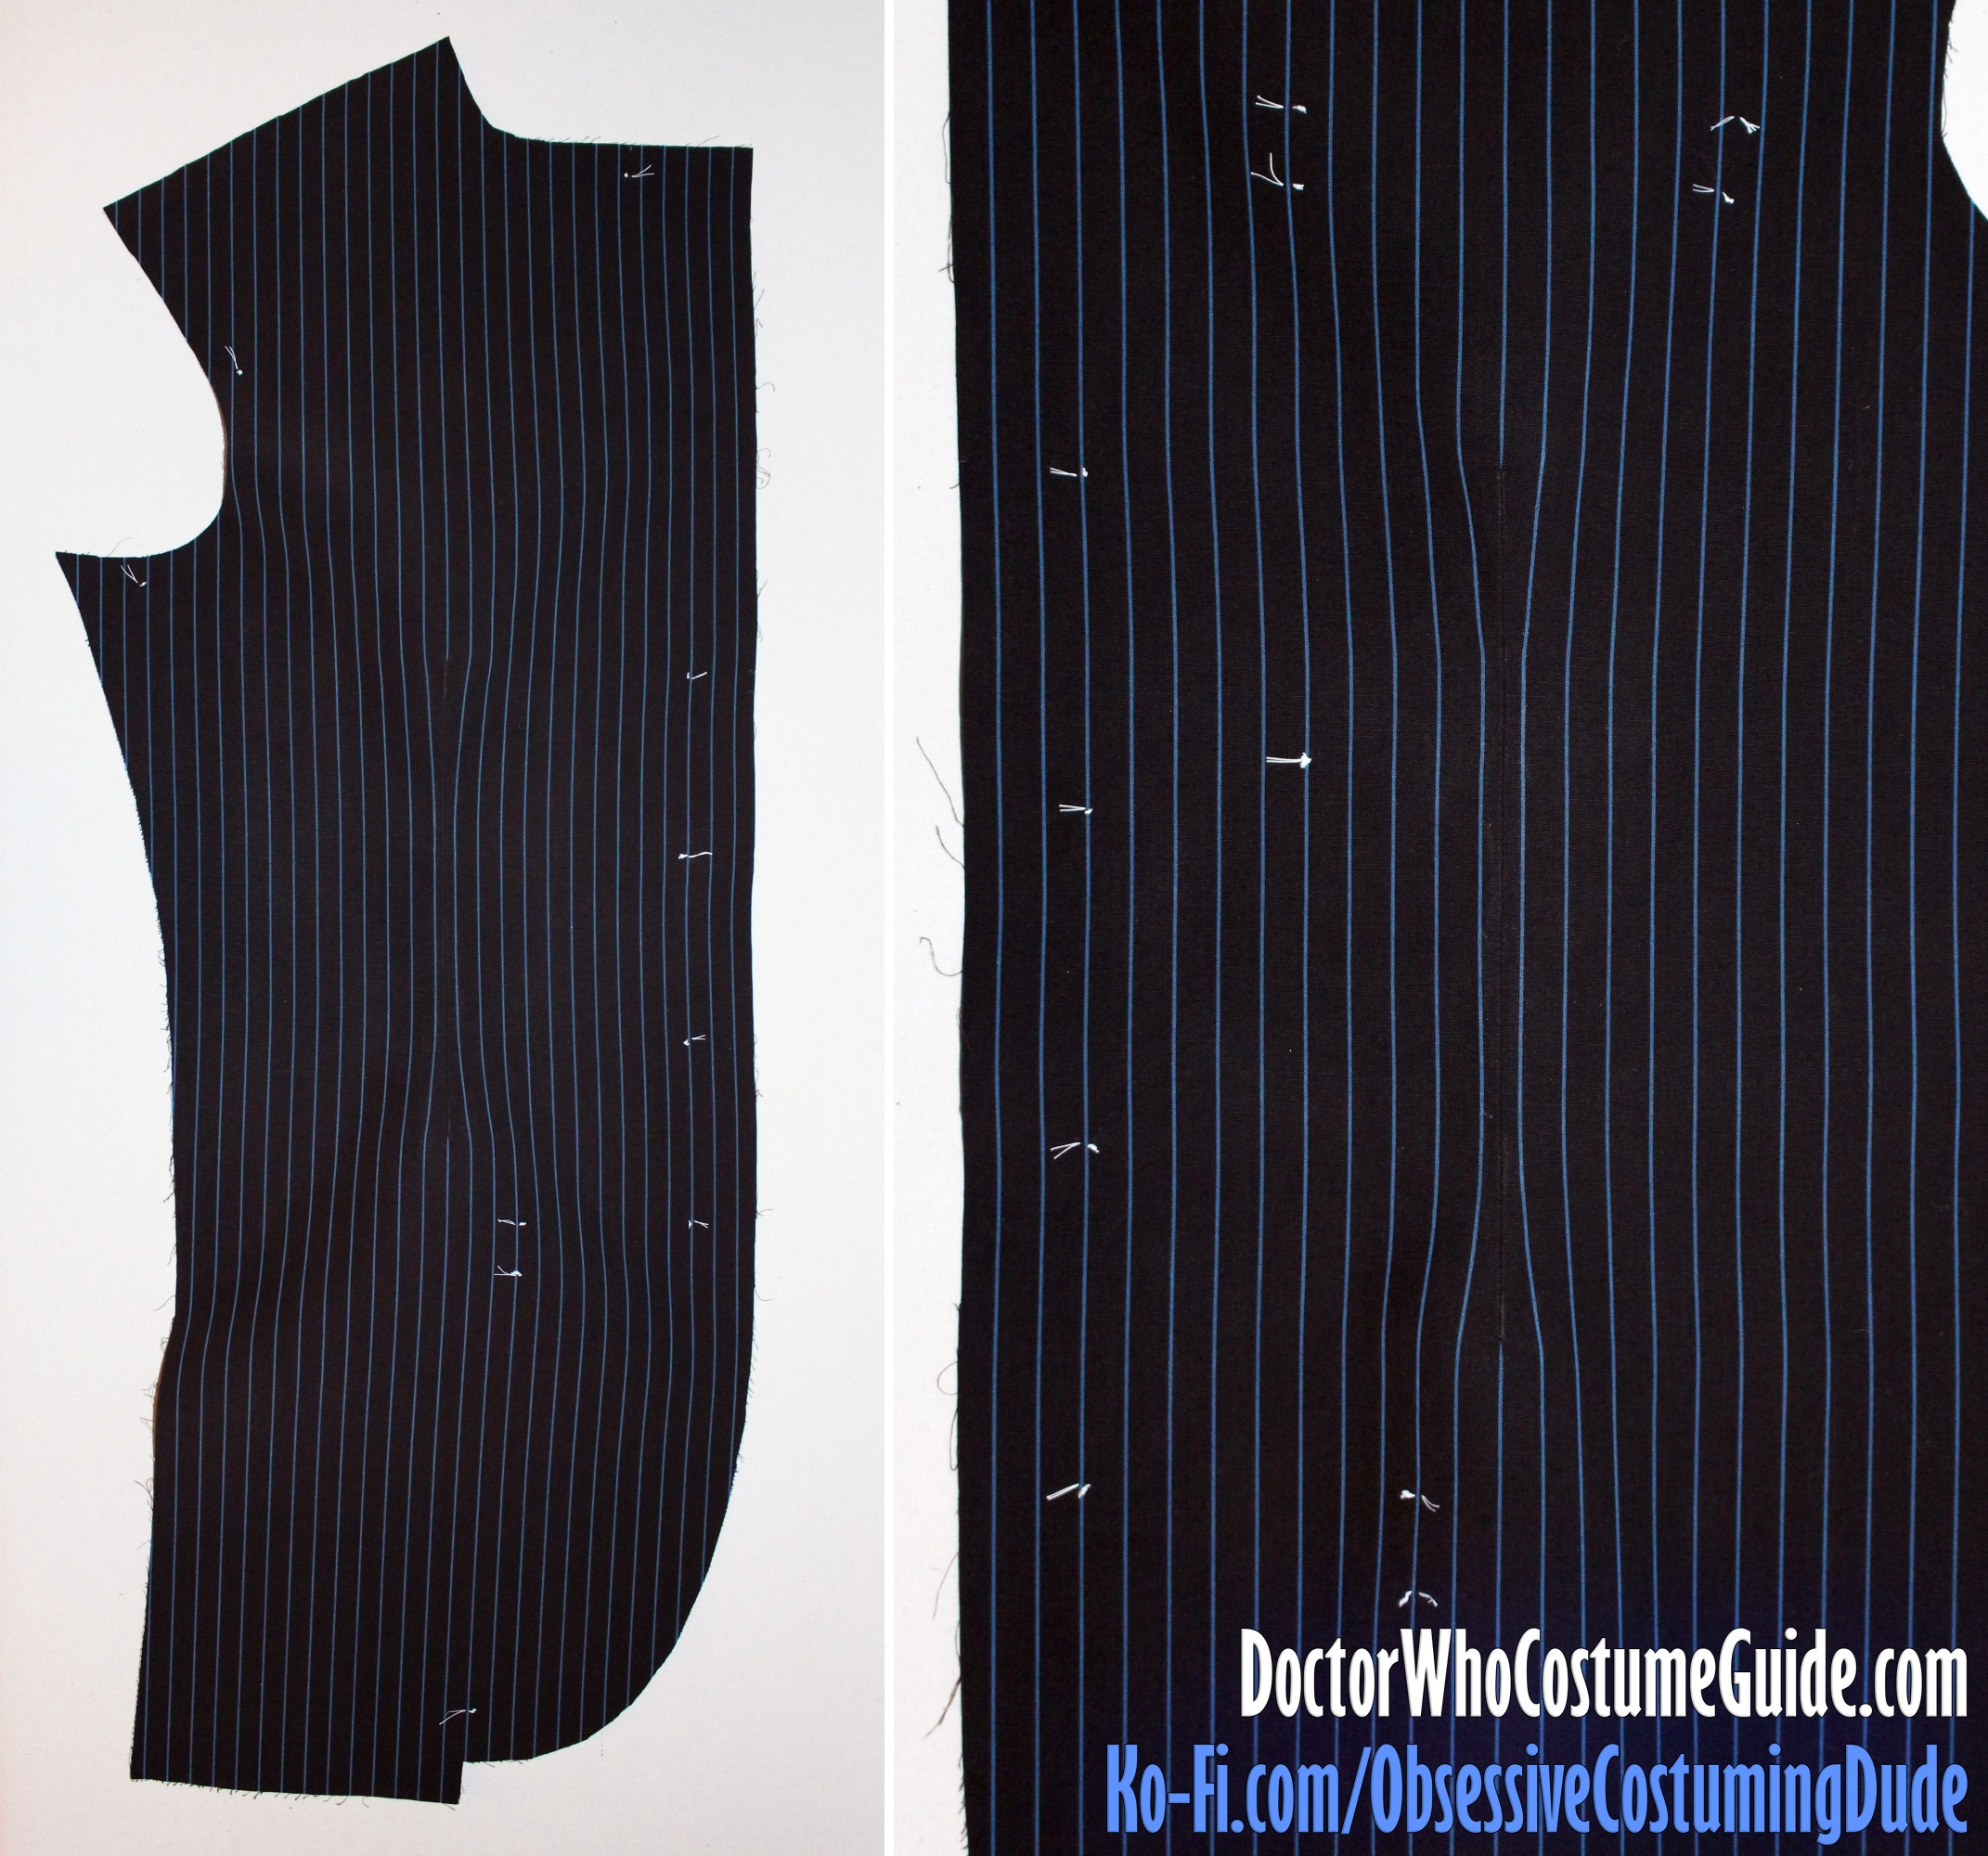
At this point, the dart should already look pretty darn good:
Observe how, with the dart centered over a pinstripe, the center stripe appears to simply be “swallowed” into the dart, and the two adjacent stripes taper to form an uninterrupted stripe pattern.
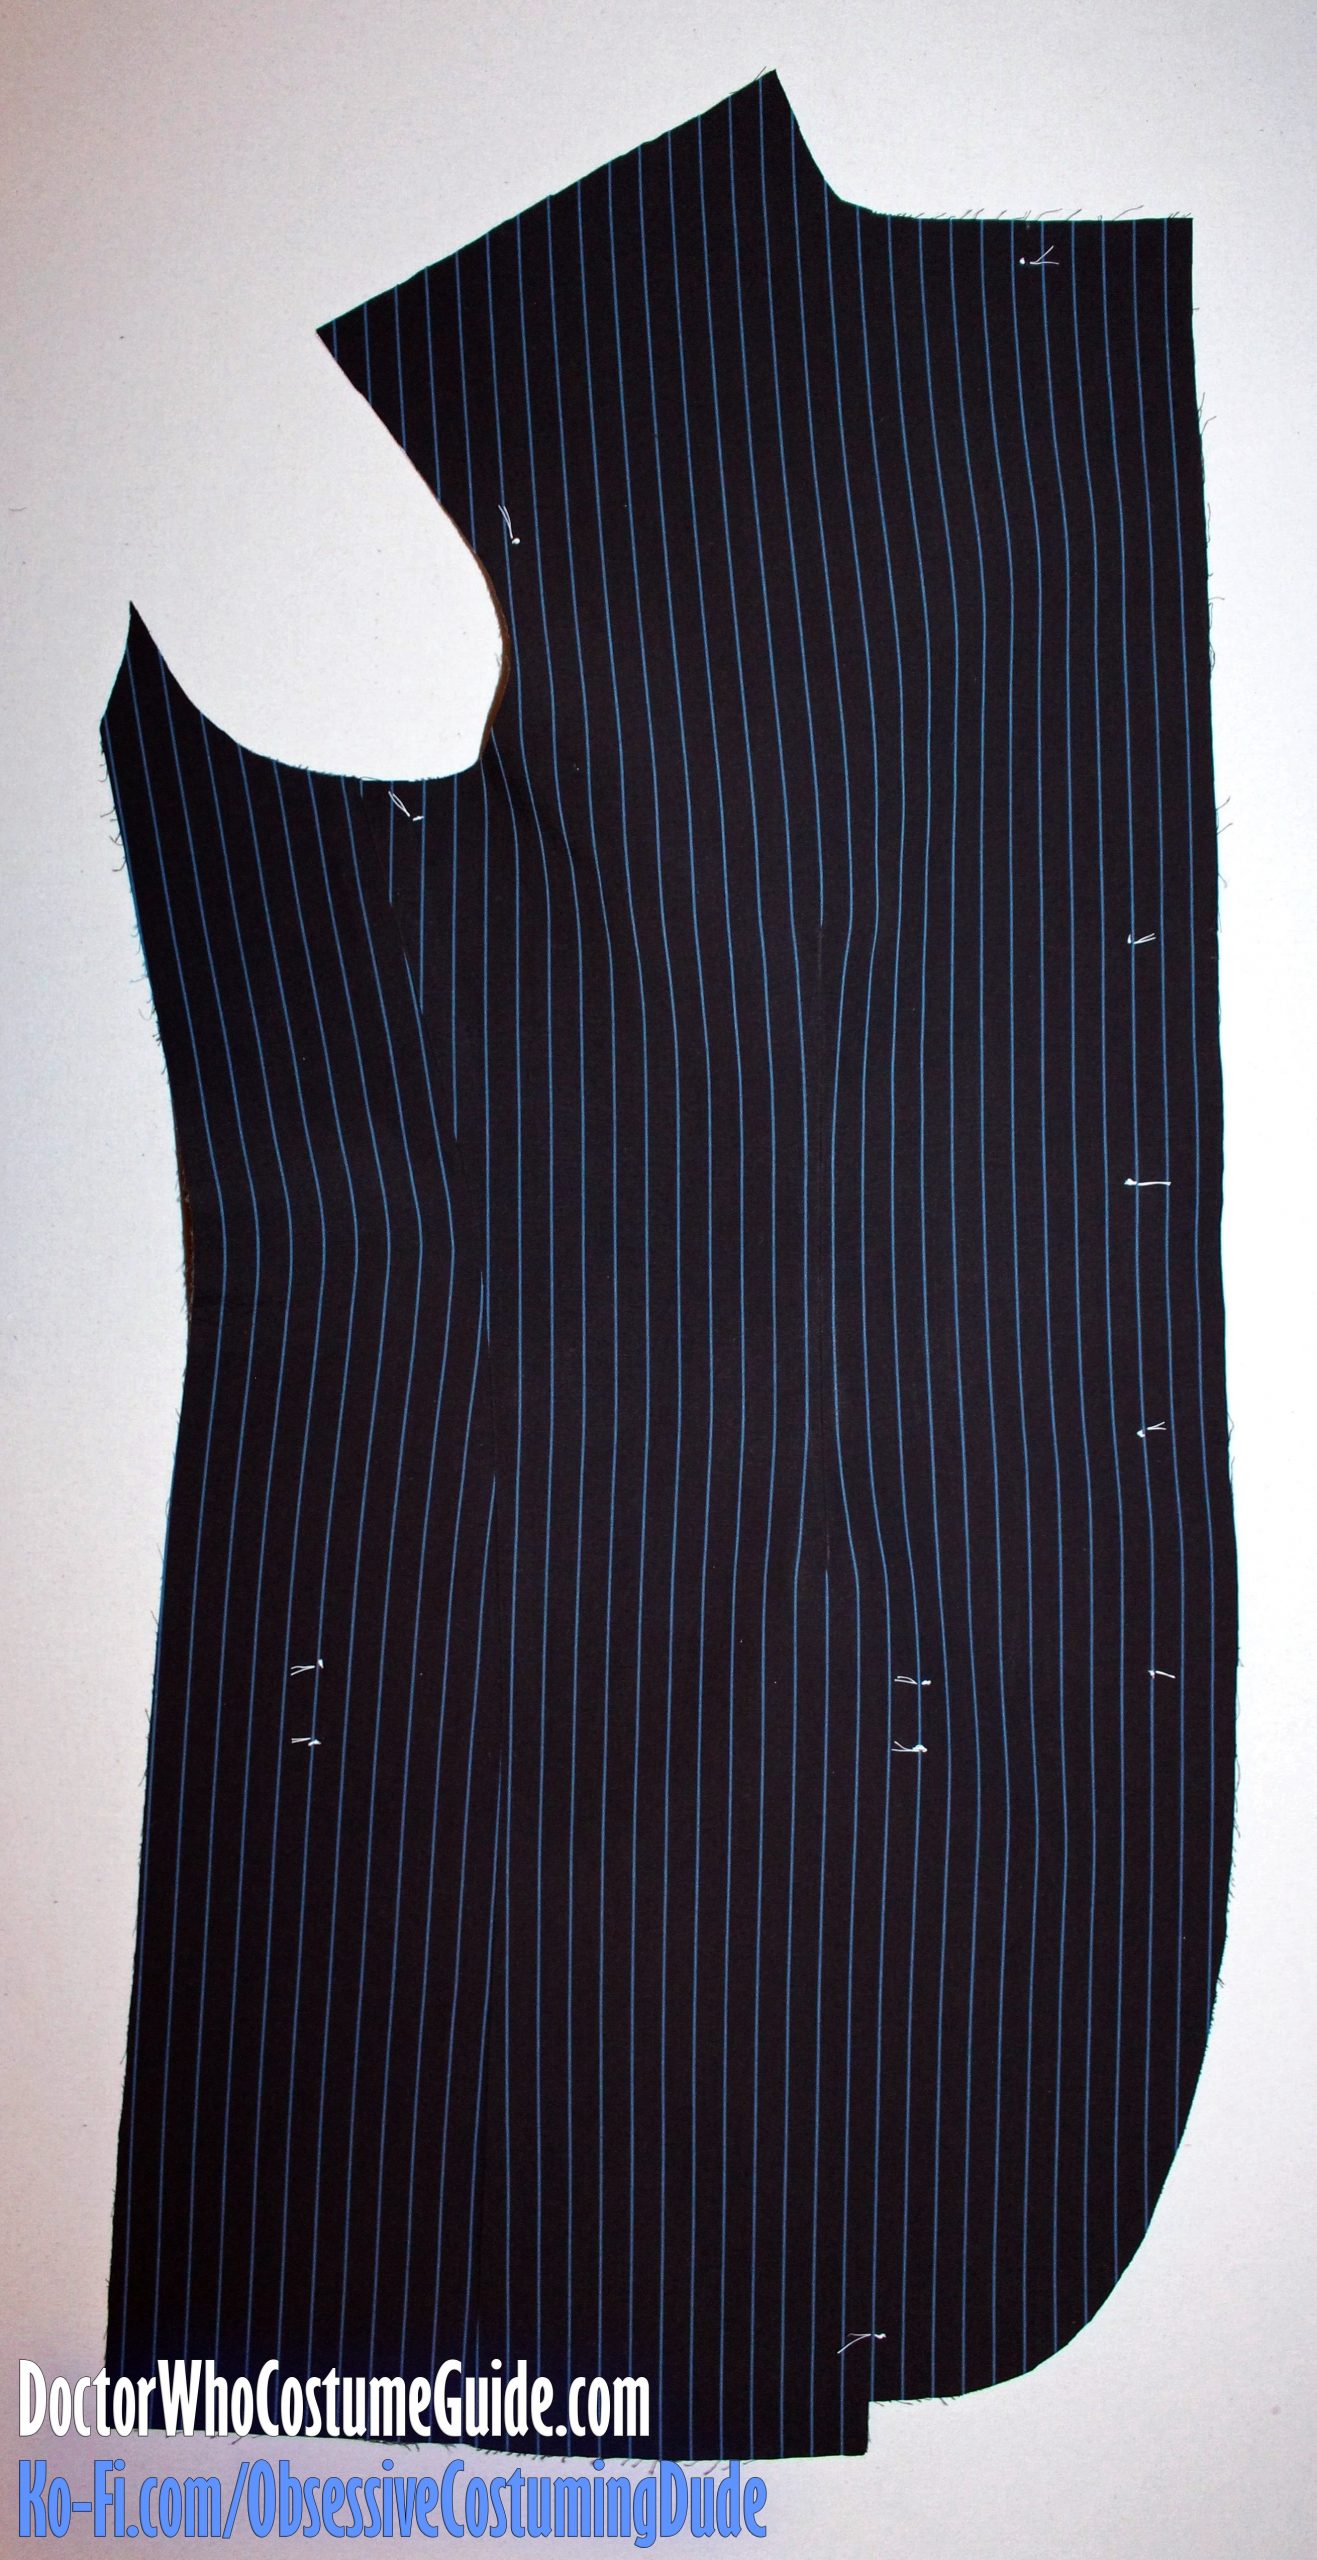
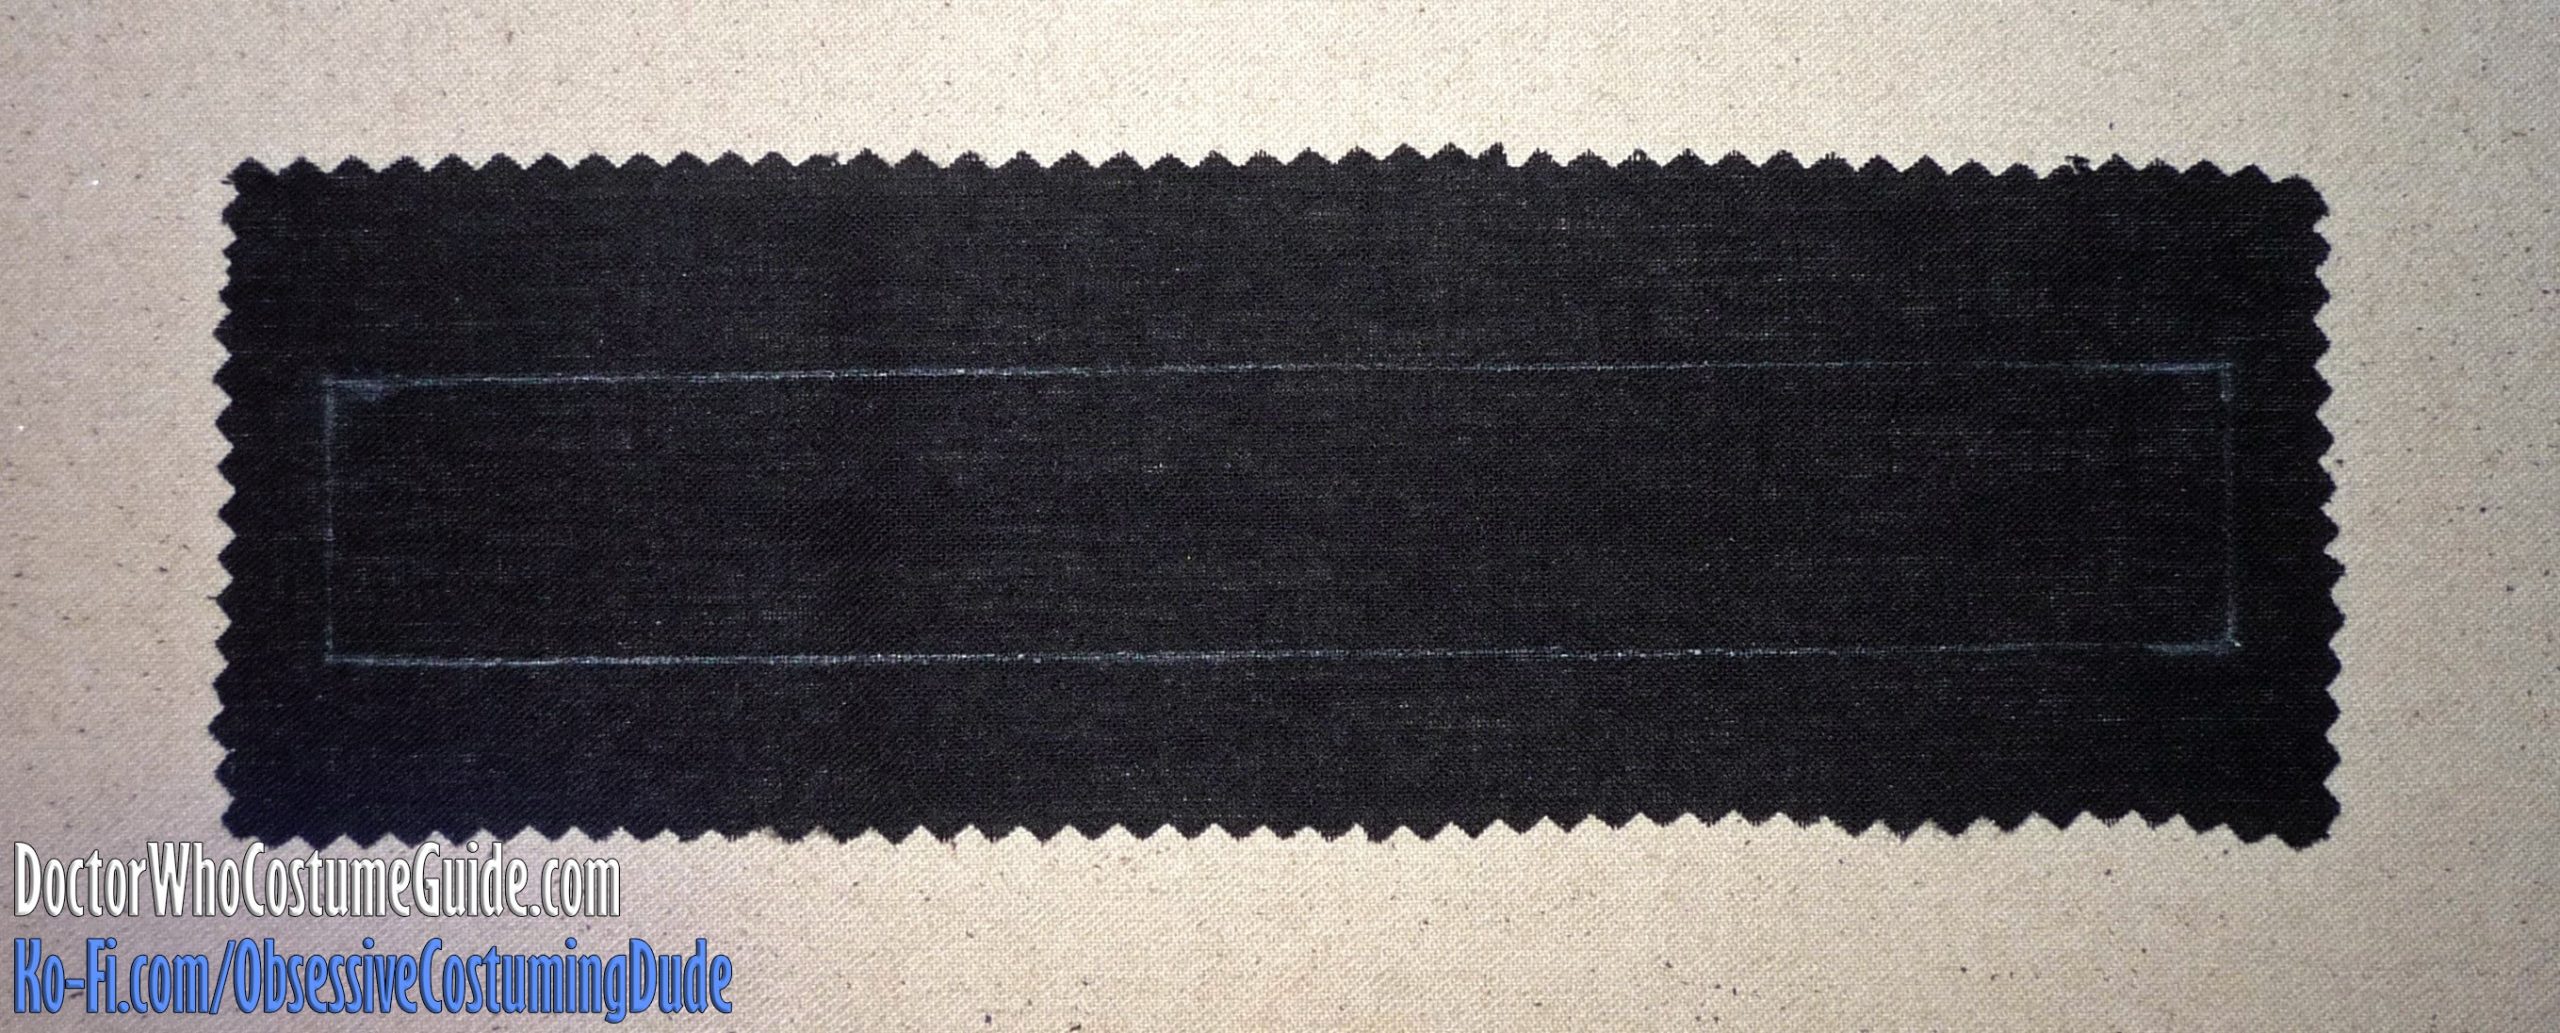
Although at this point you could call it a day with the darts and move on, I suggest going the extra mile and securing each dart tip with a small piece of fusible interfacing. This will help the dart hold its lovely shape at the tips.
A small square is all you need – approximately 1″ x 1″, and ideally cut with pinking shears. The “pinked” edges will help prevent unsightly solid lines along the interfacing edges on the right side of the garment.
If anything, at this point the finished dart should look even better!
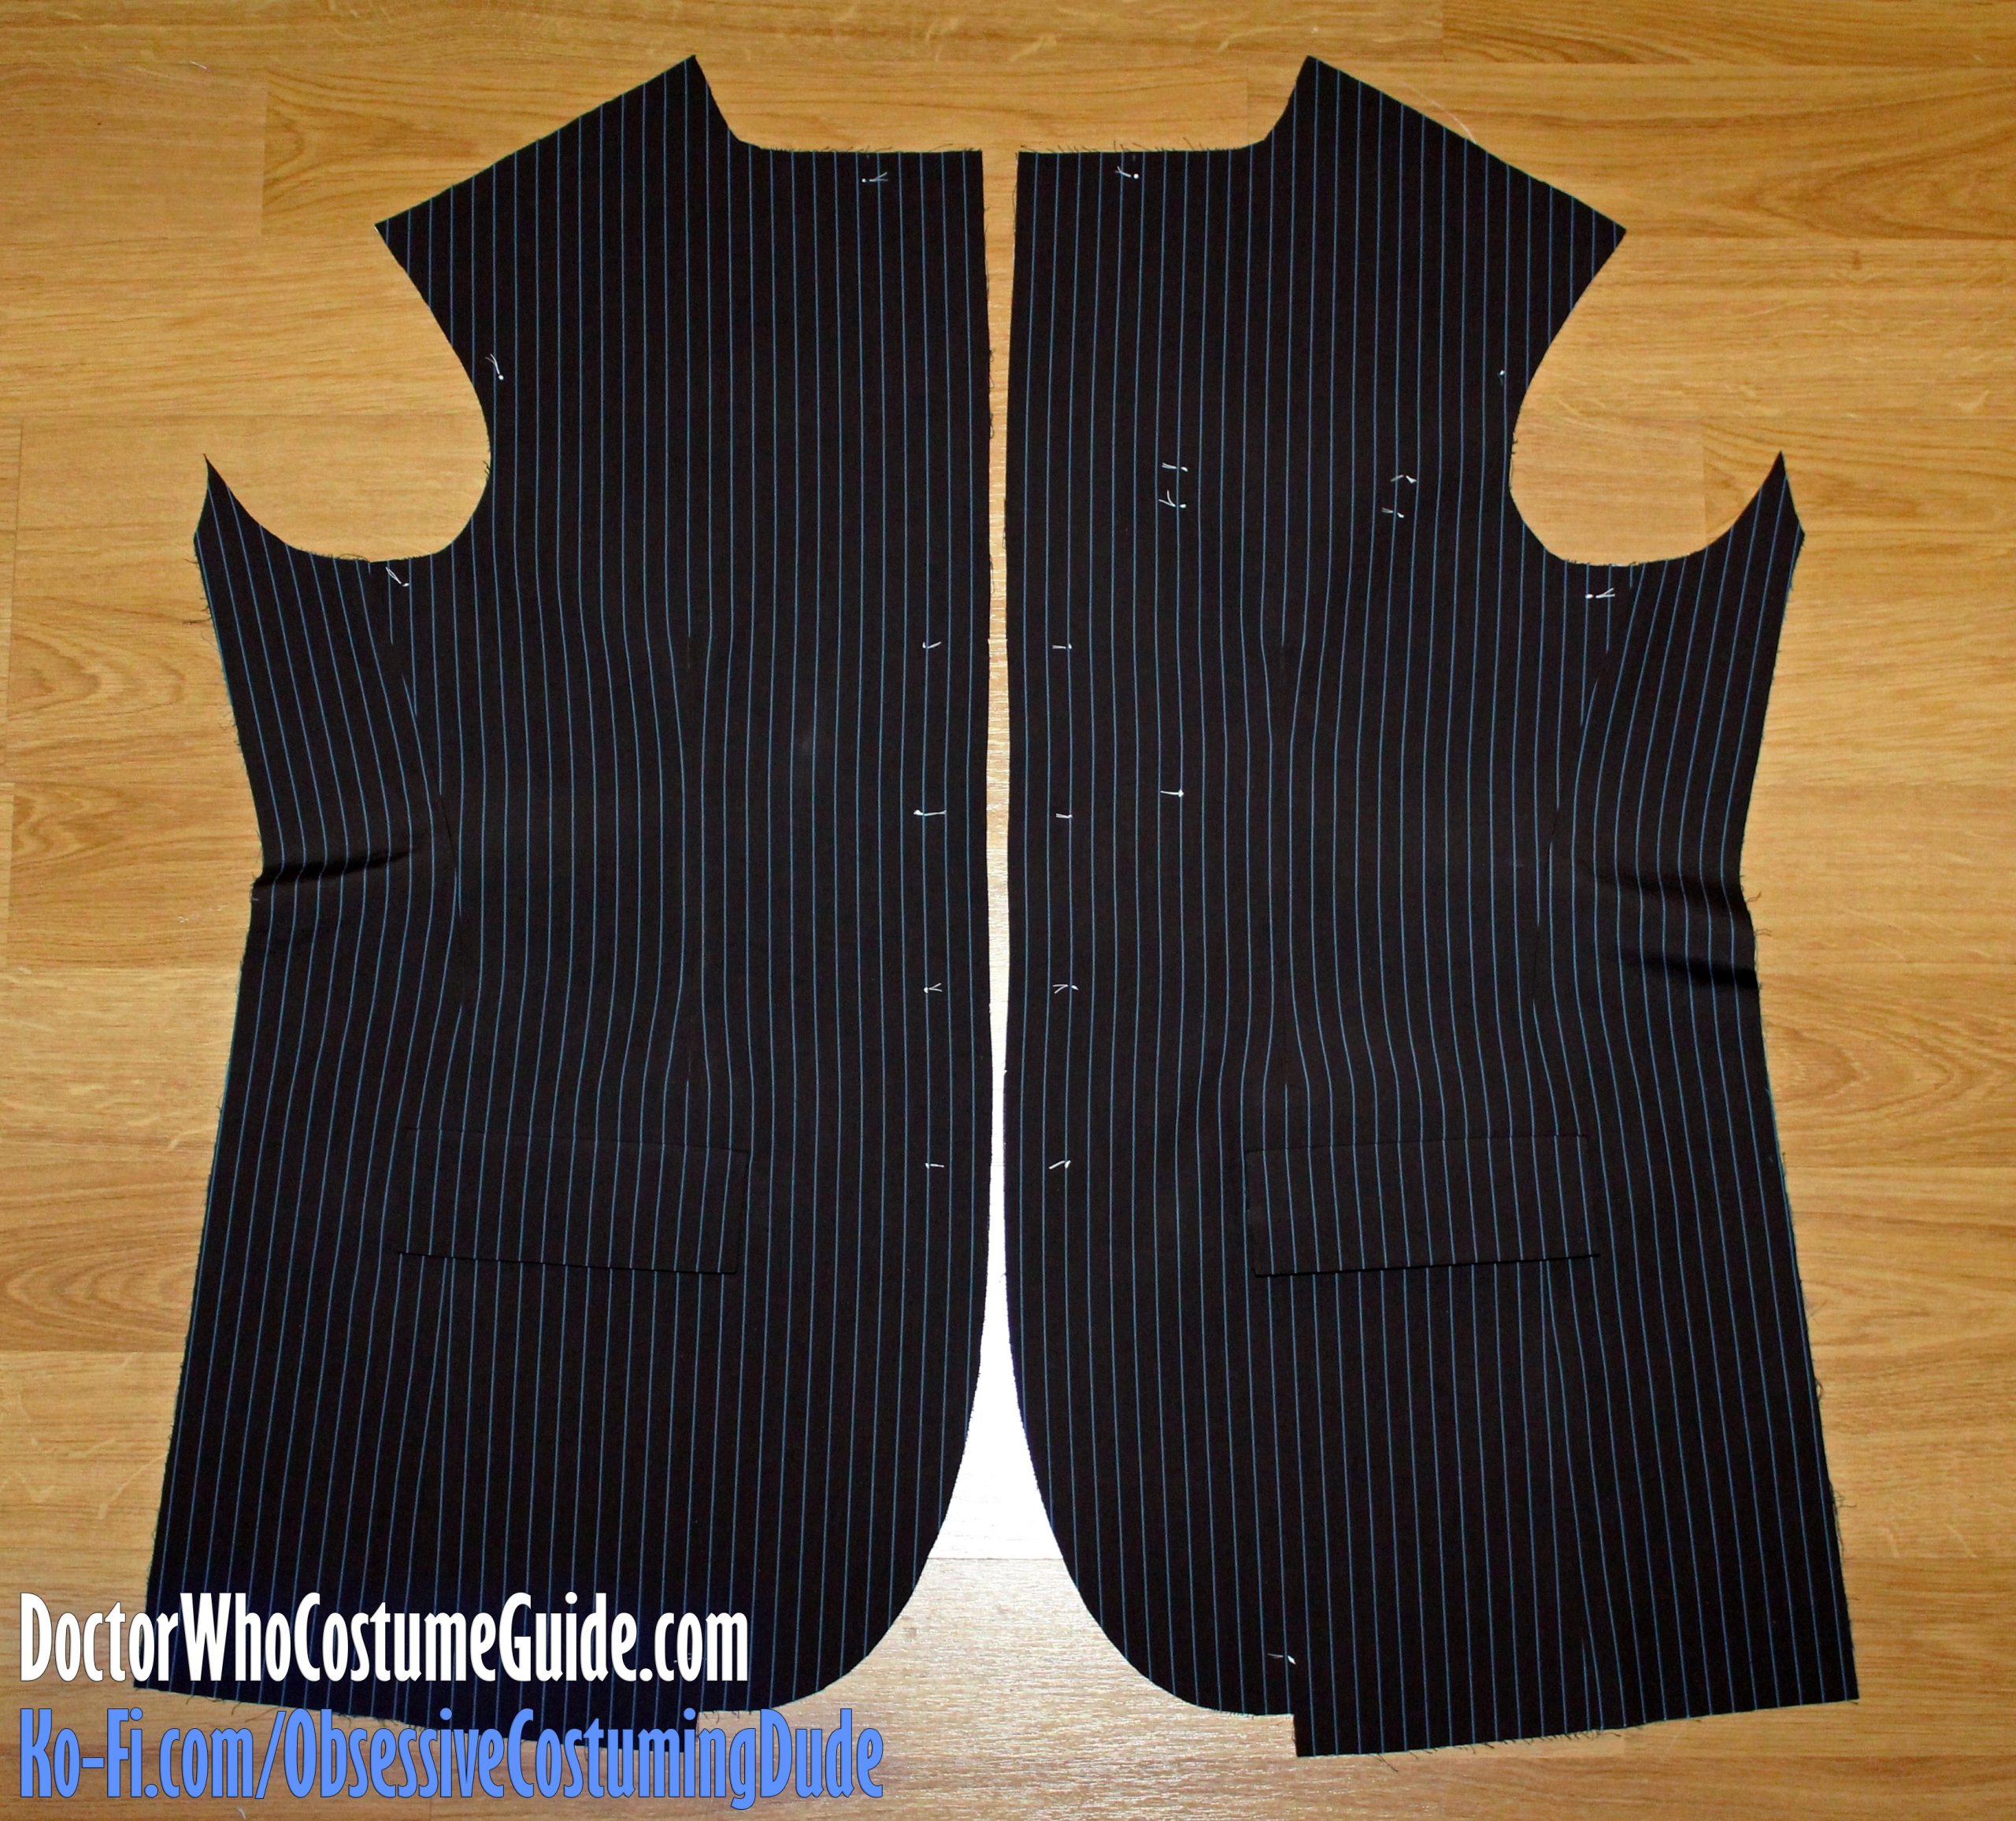
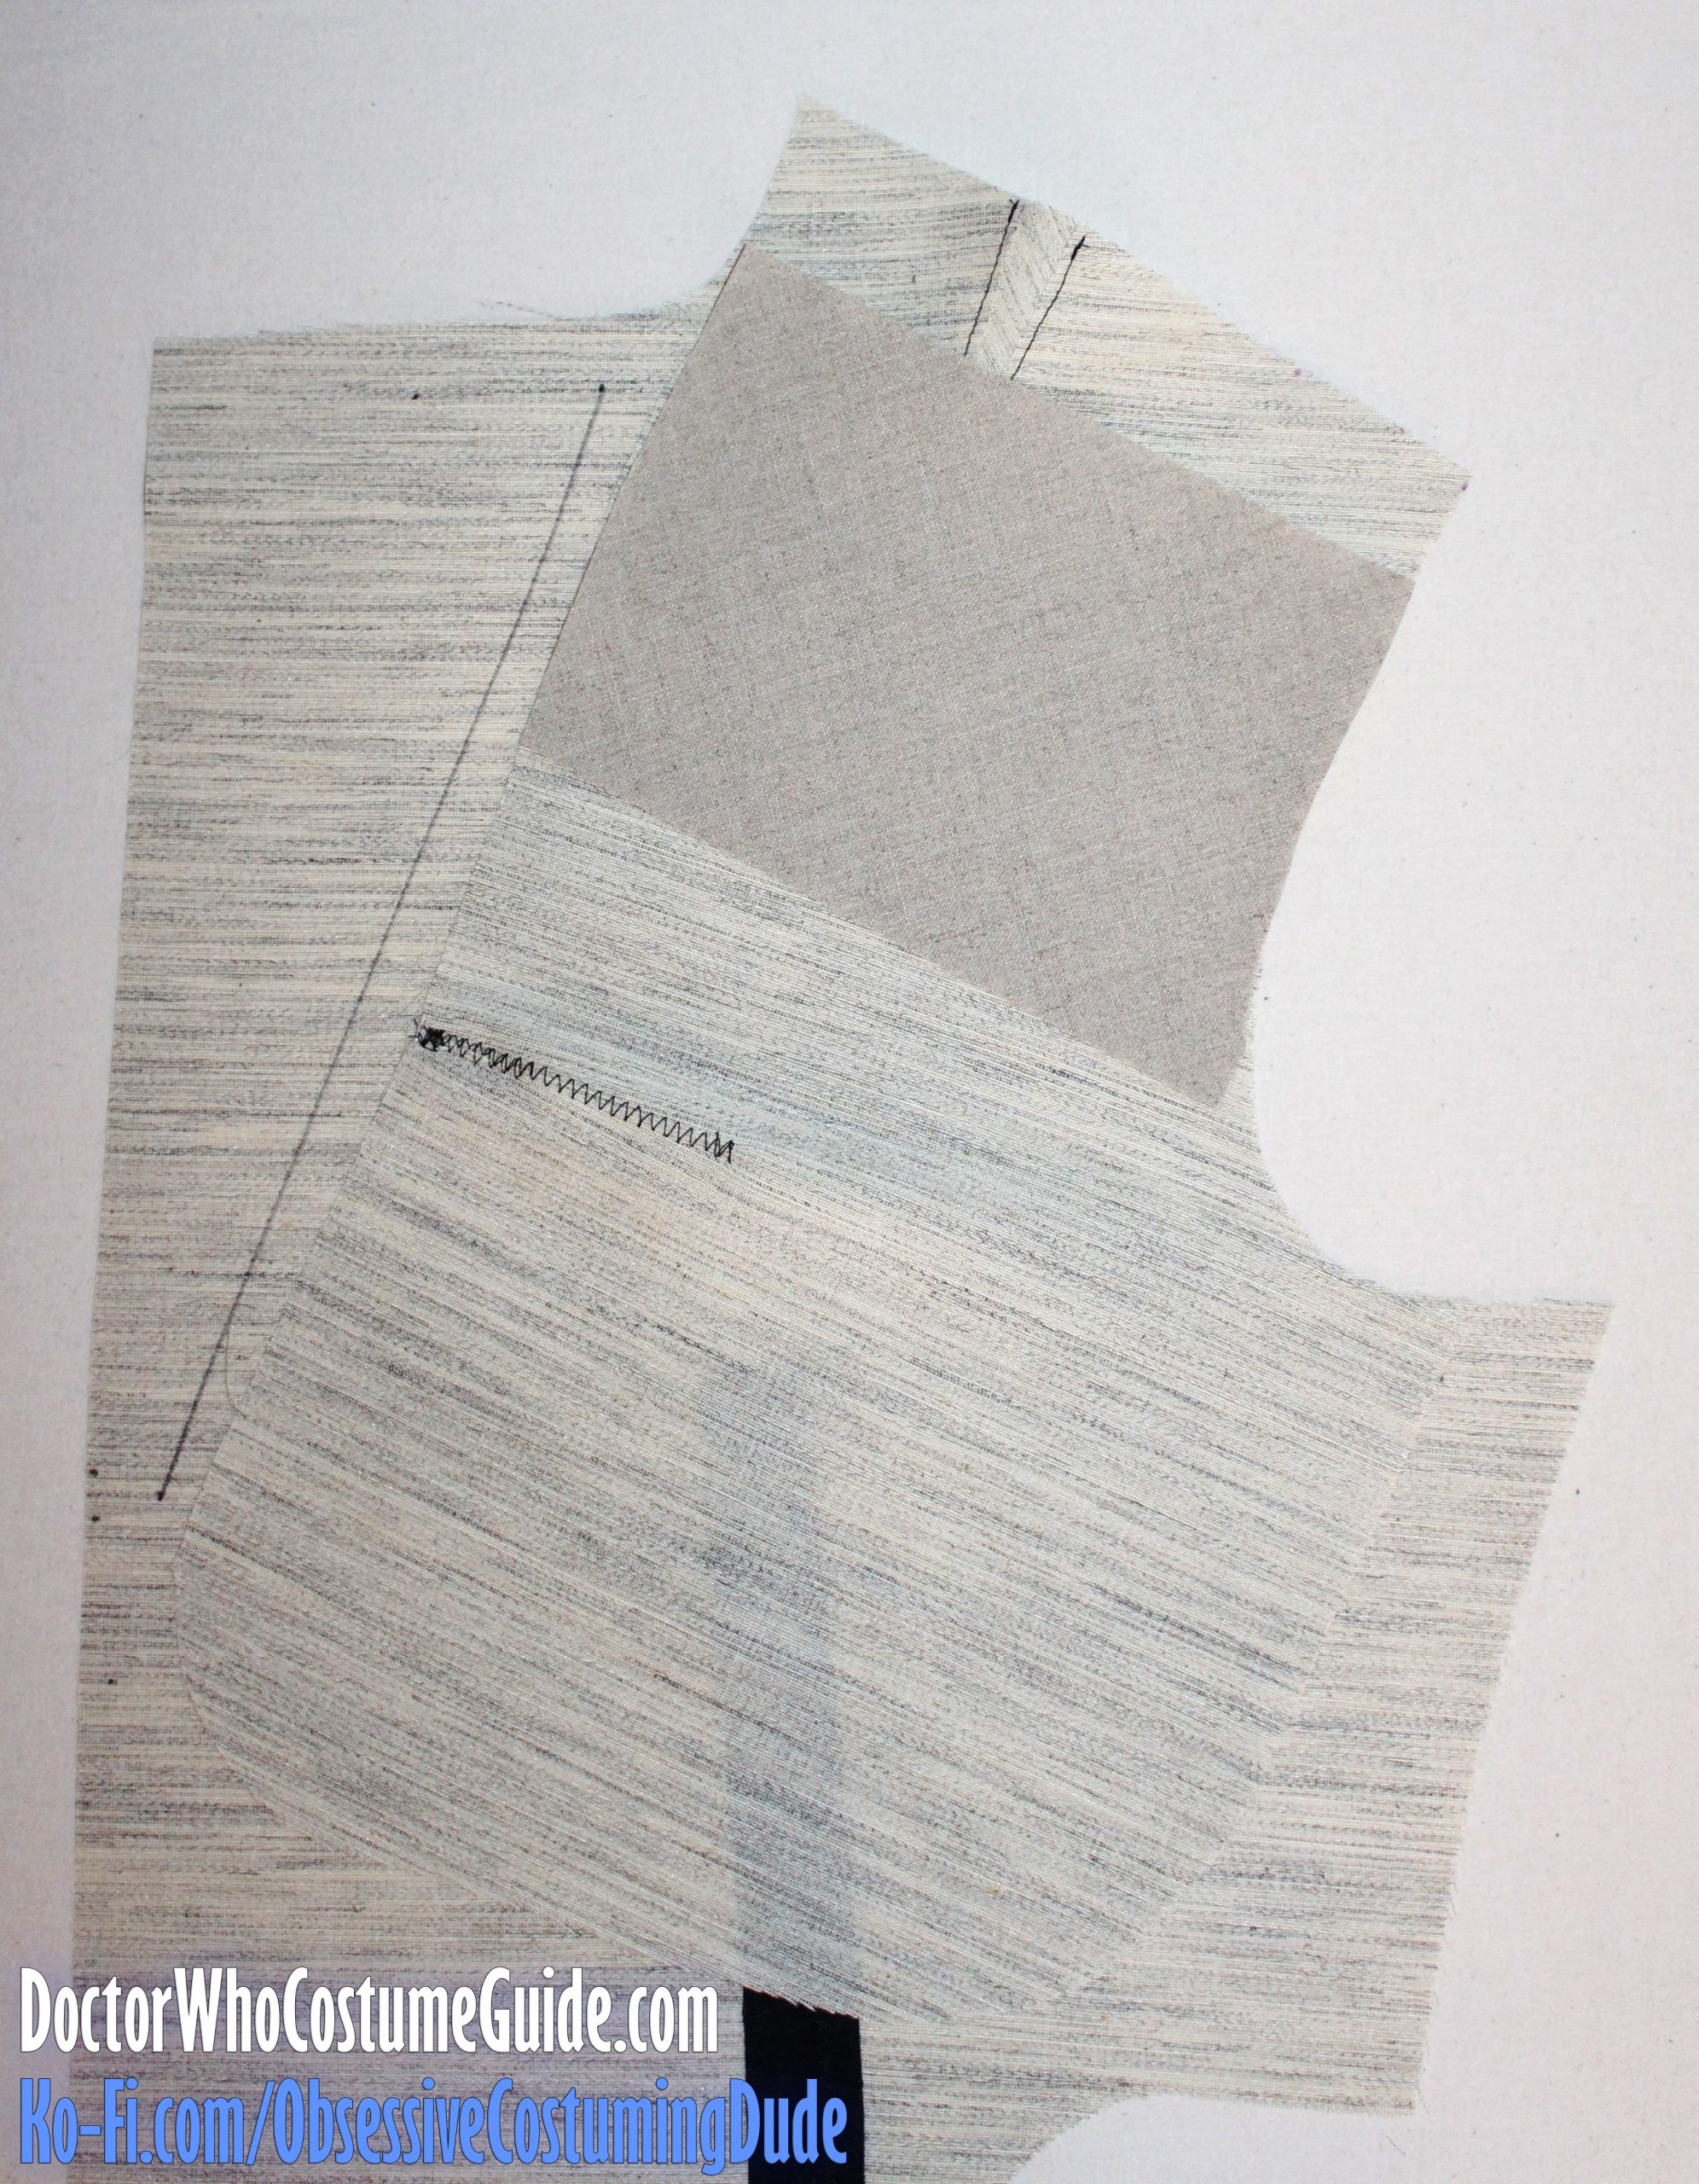
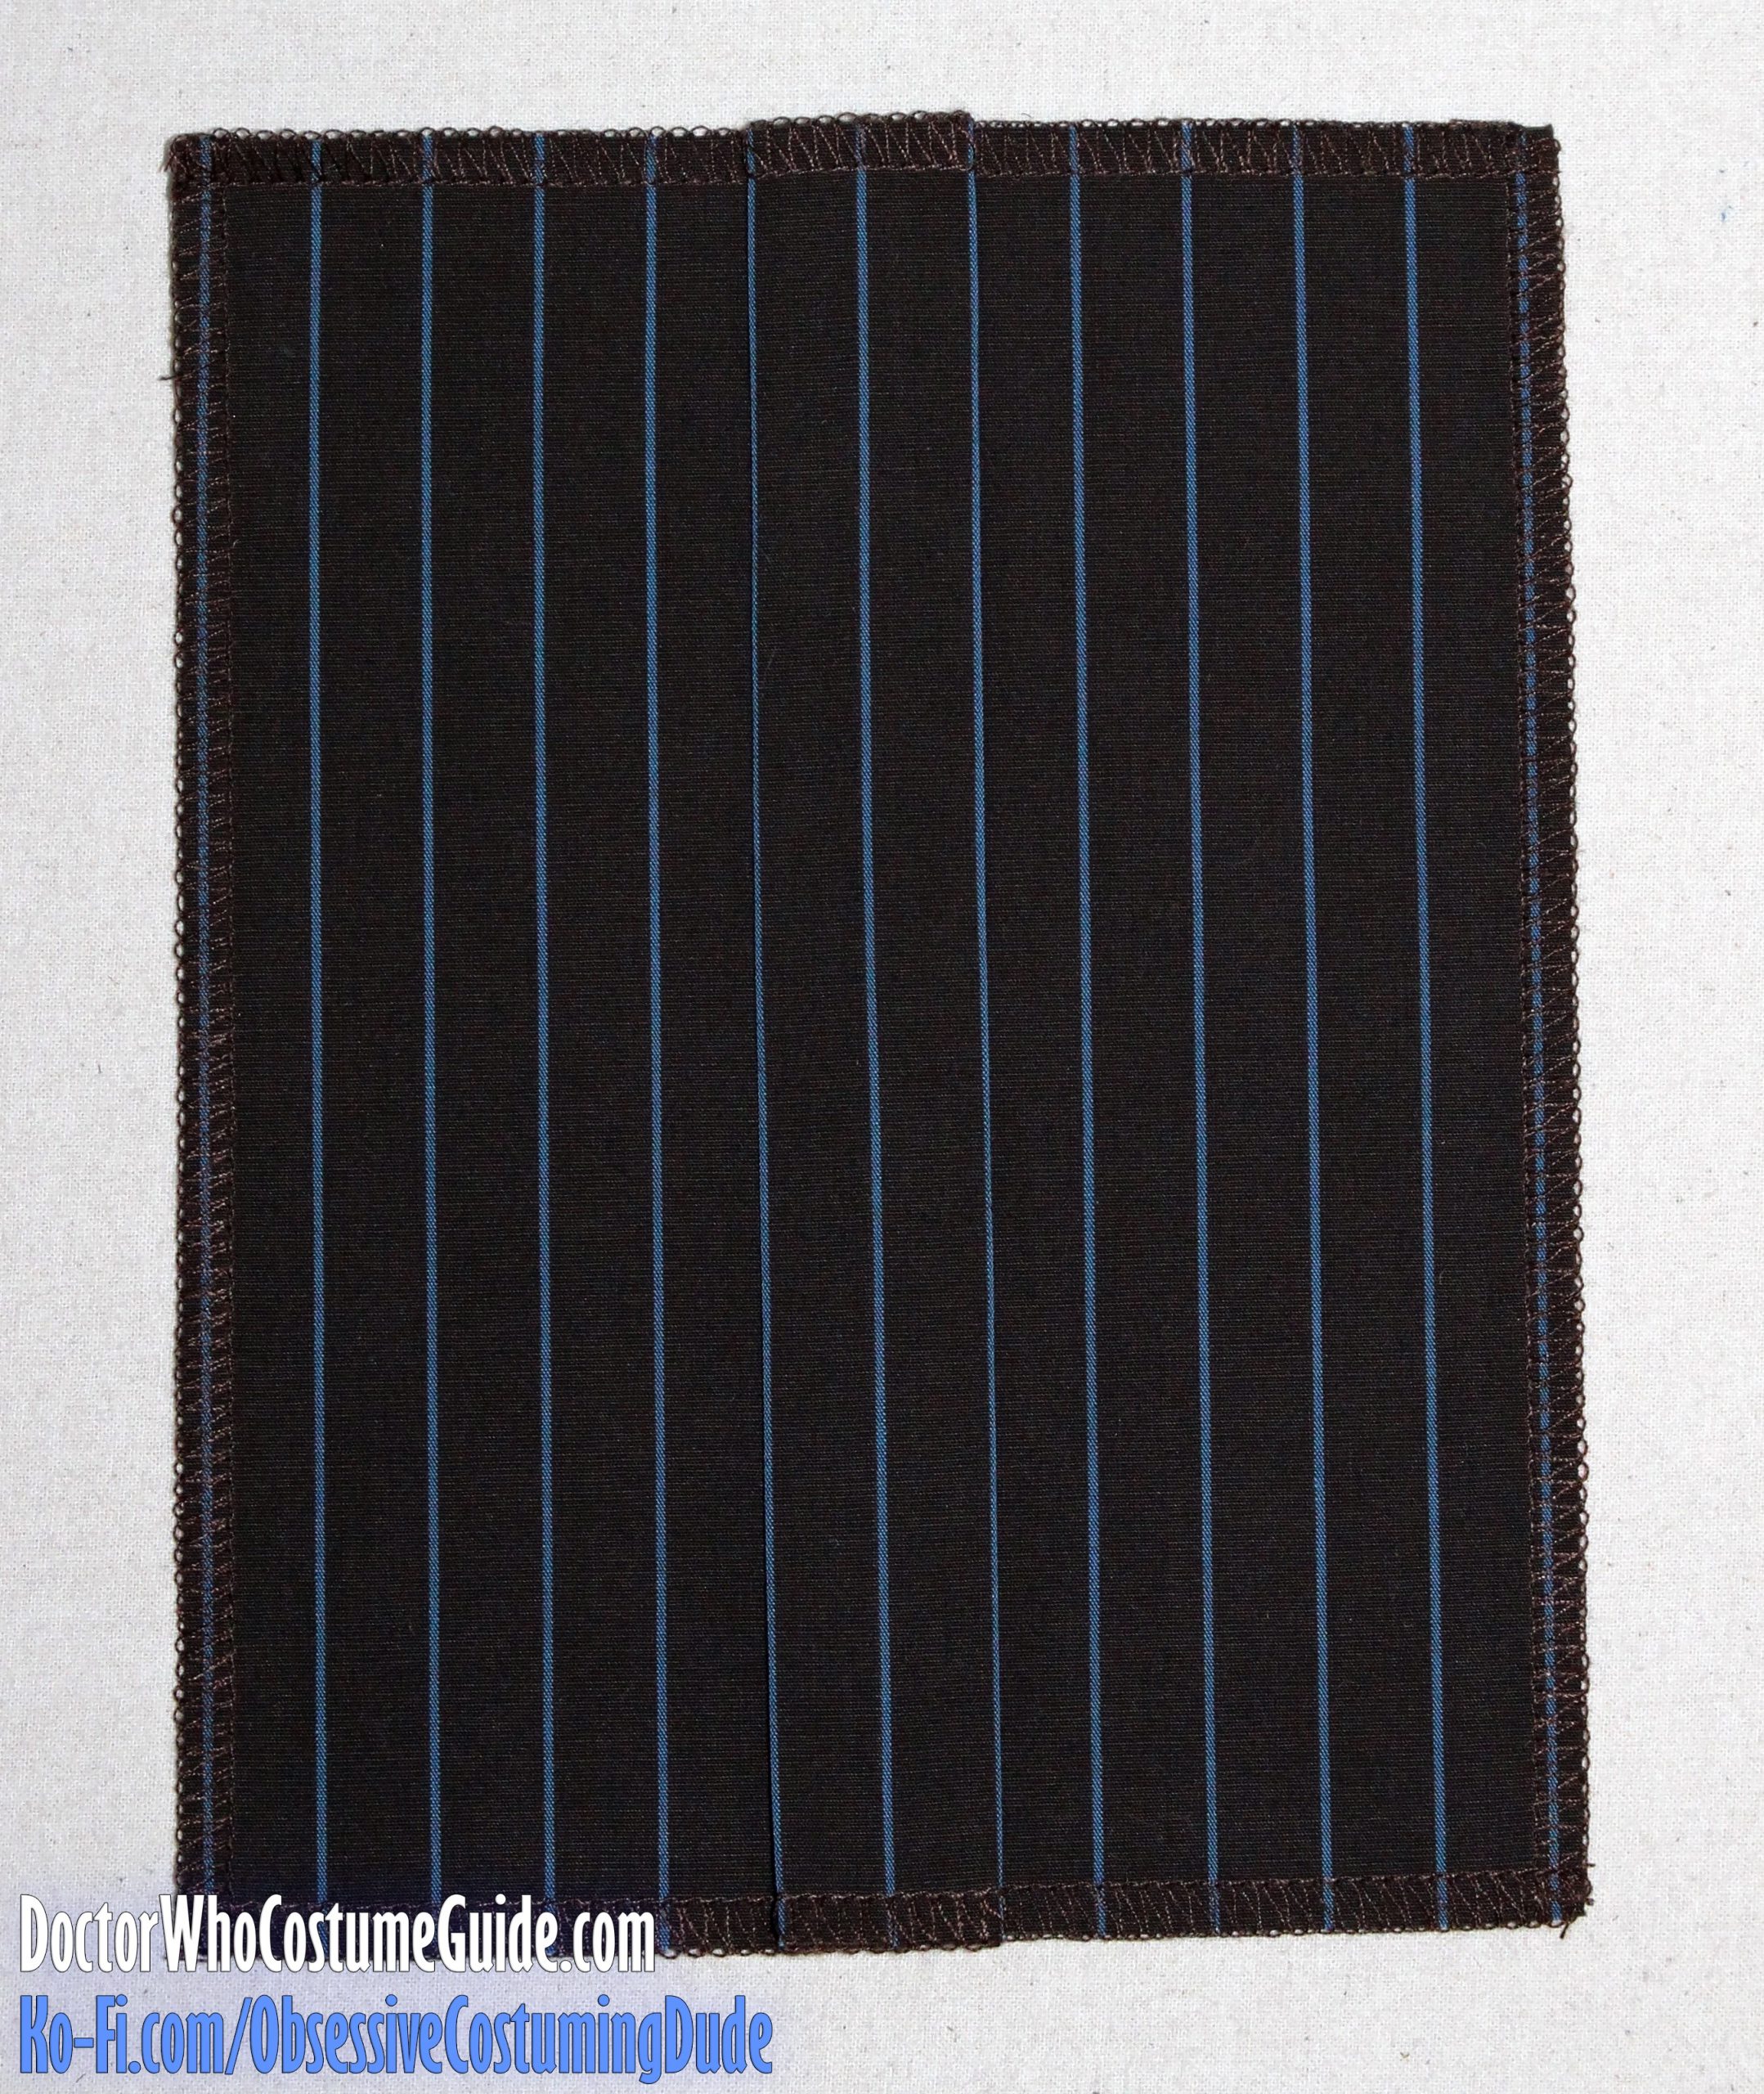
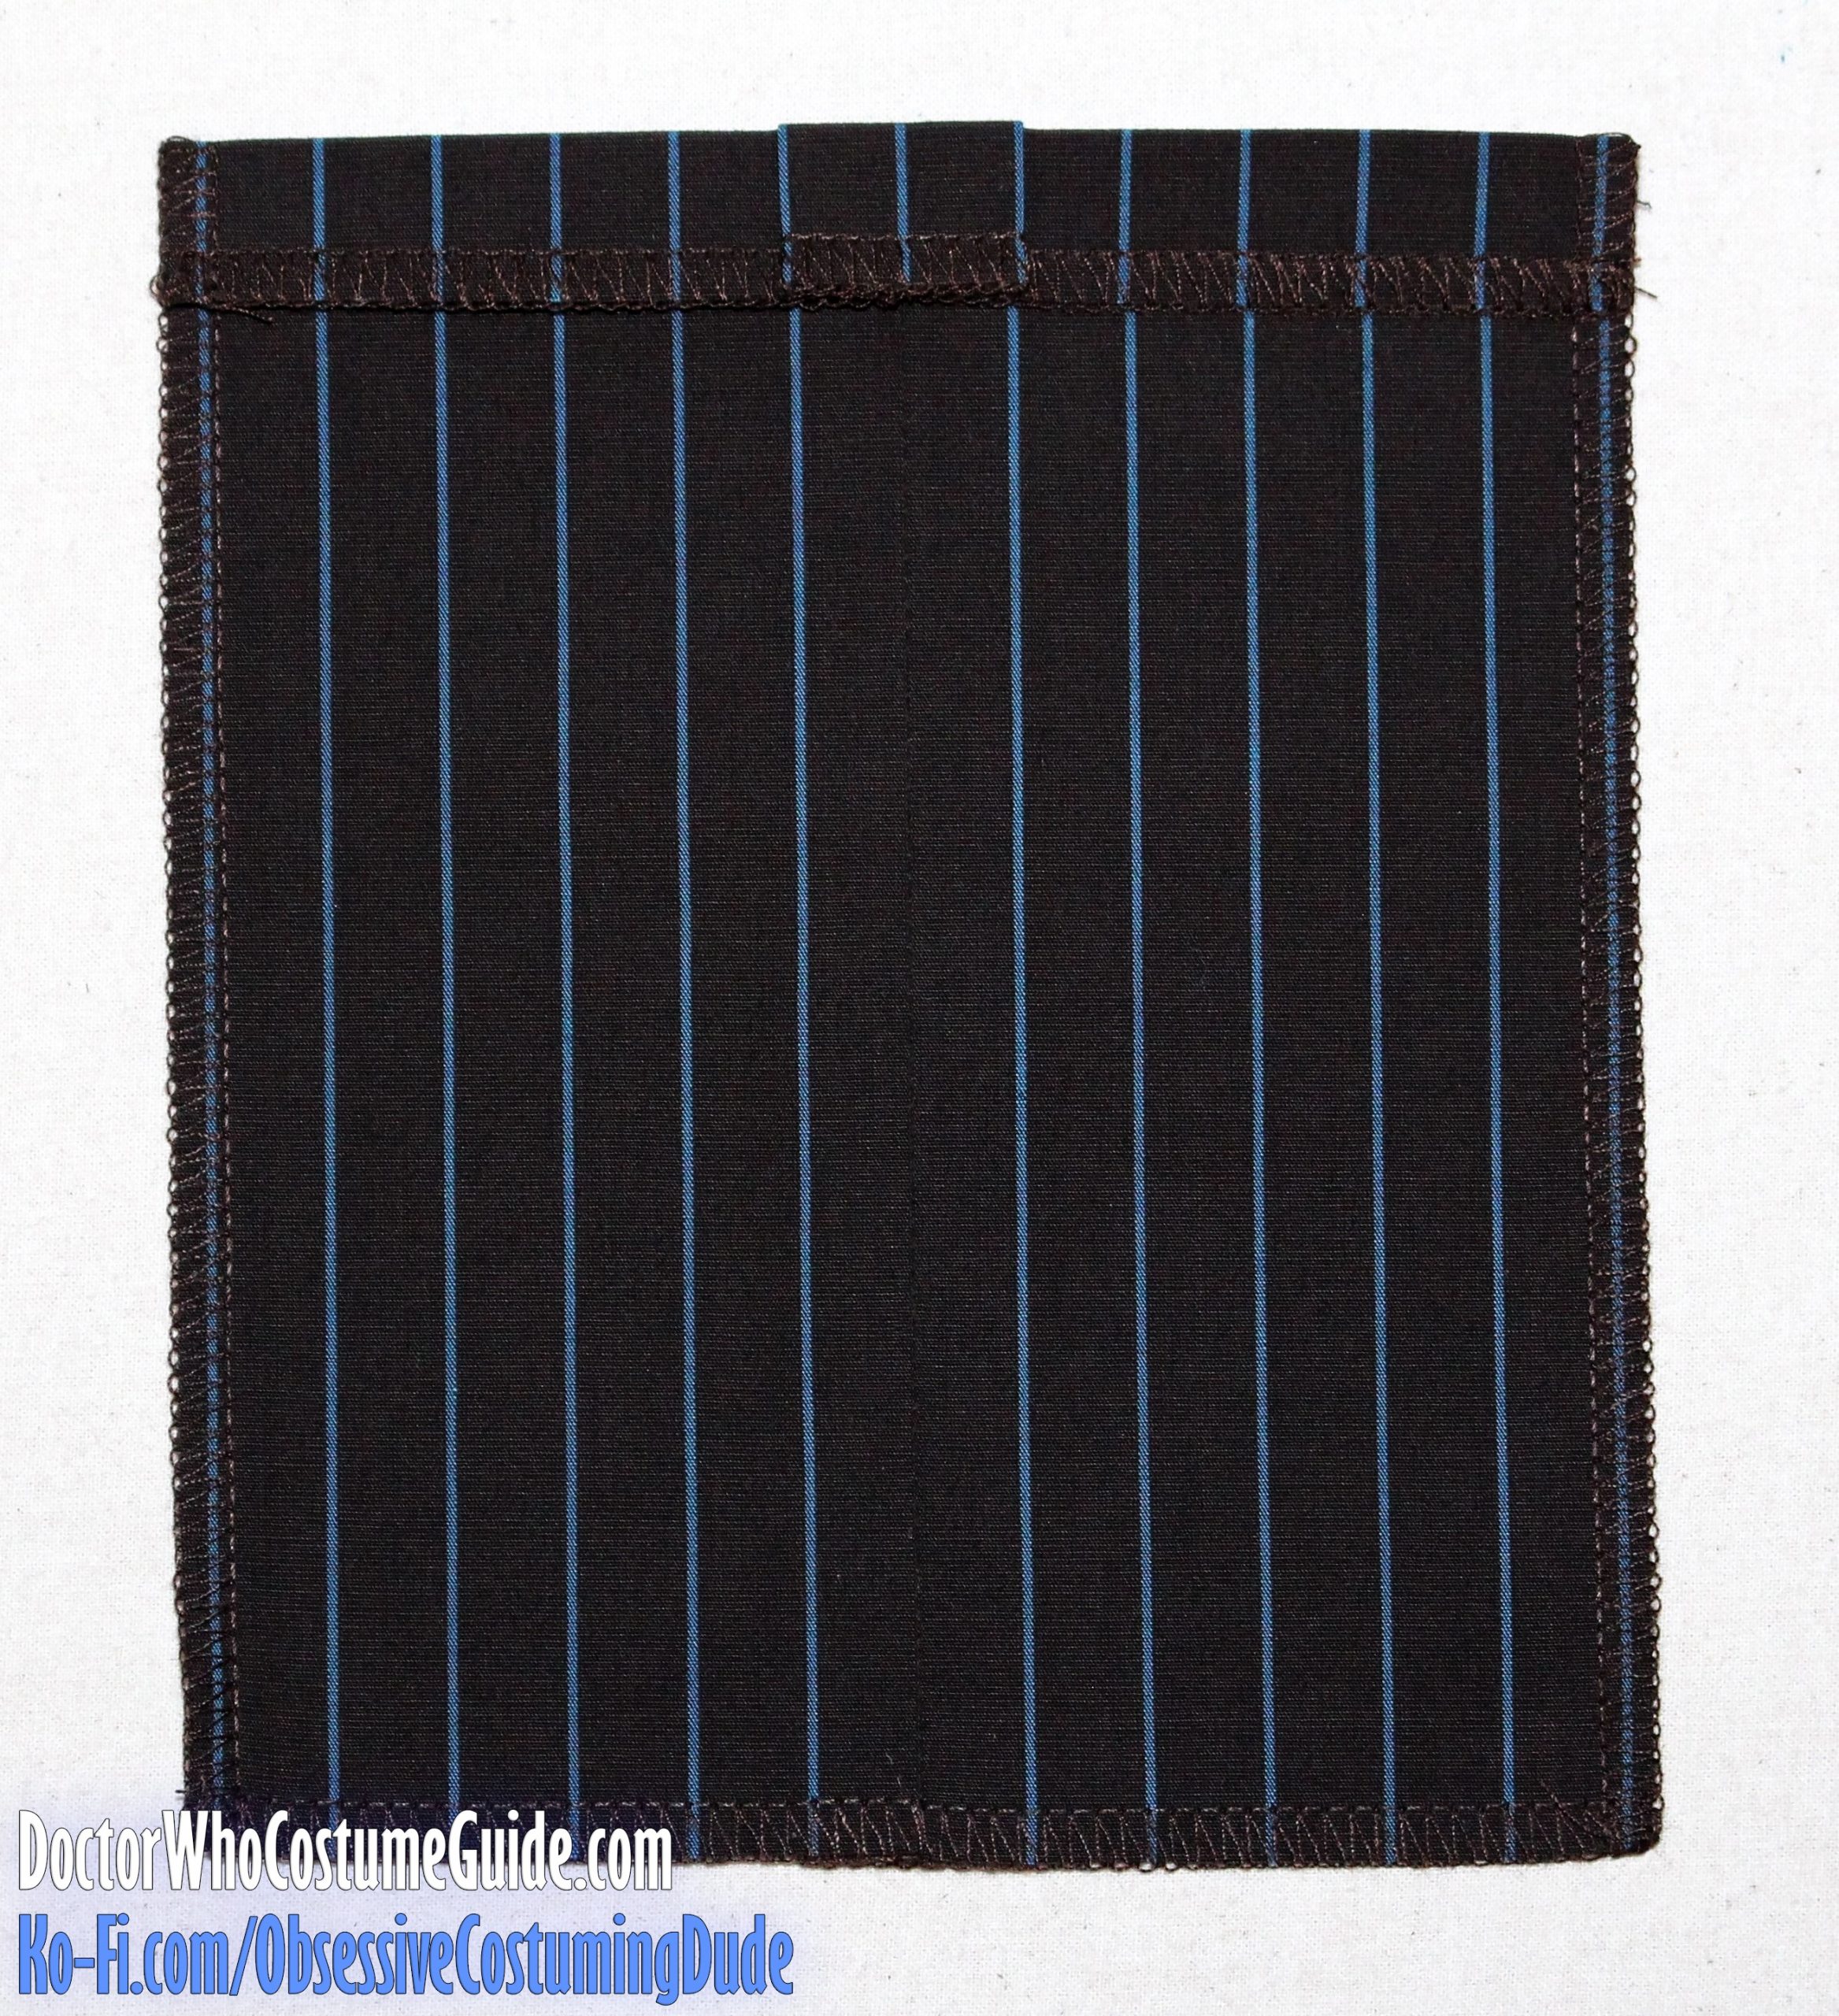
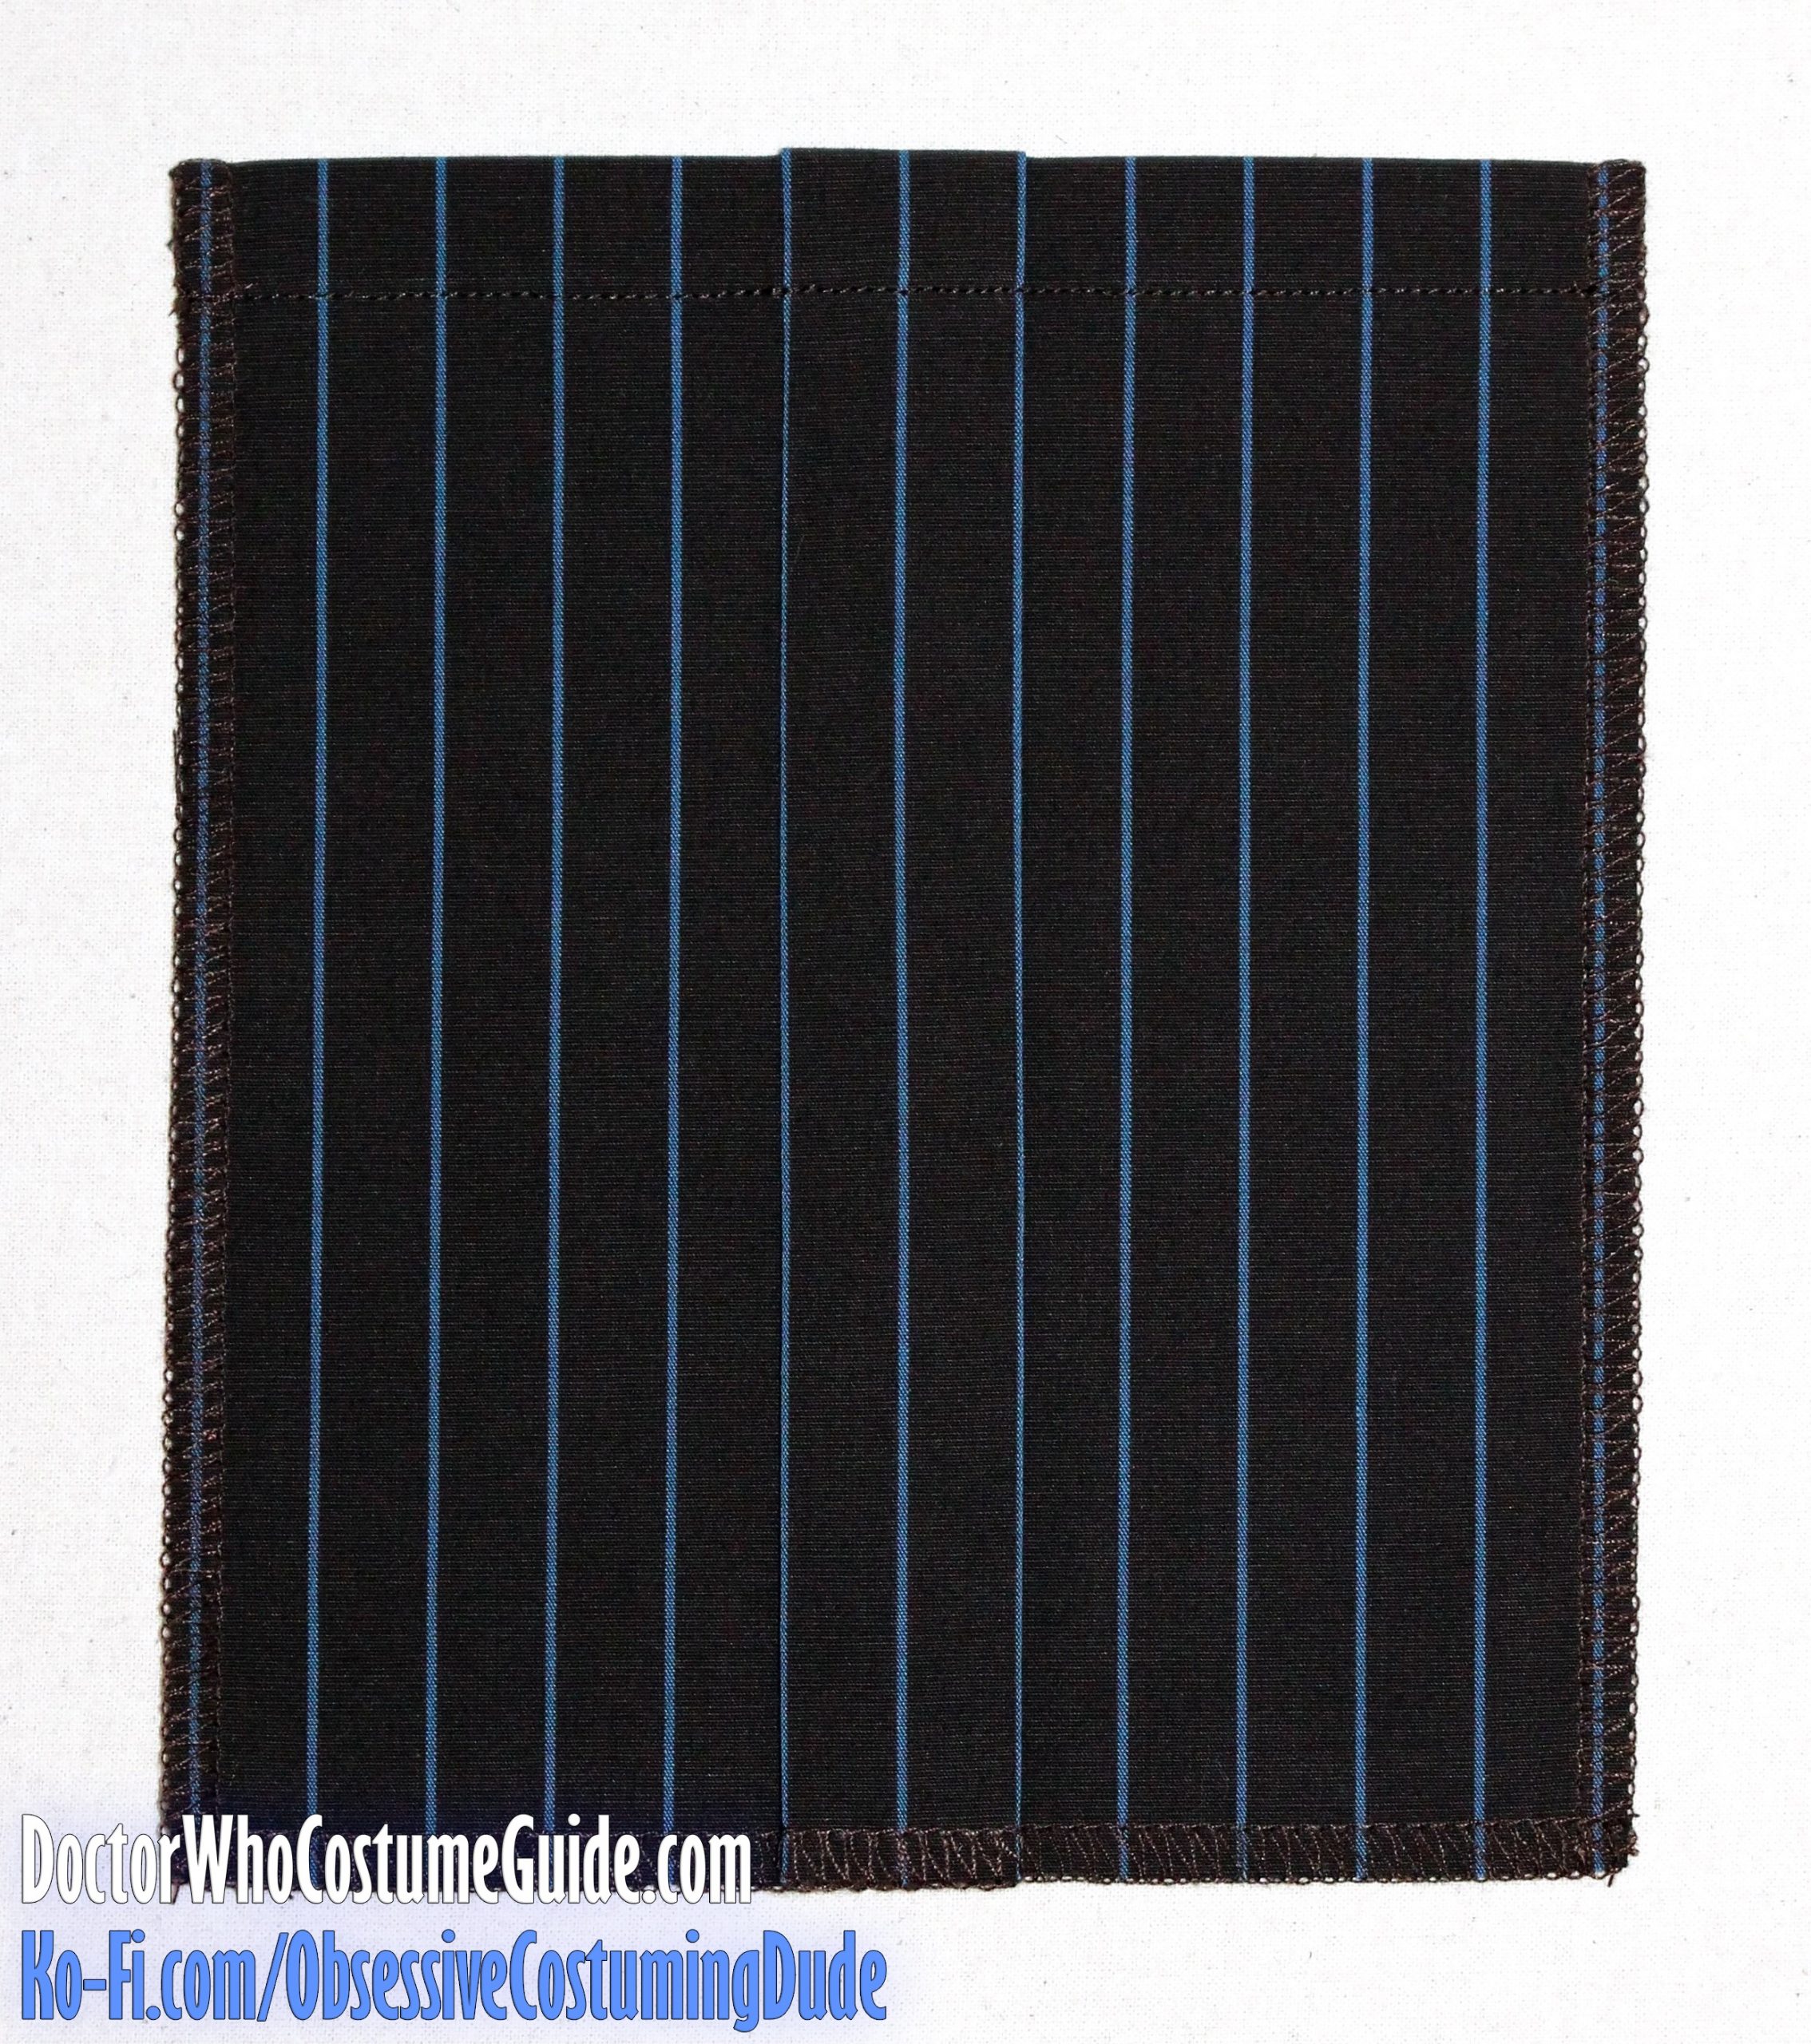
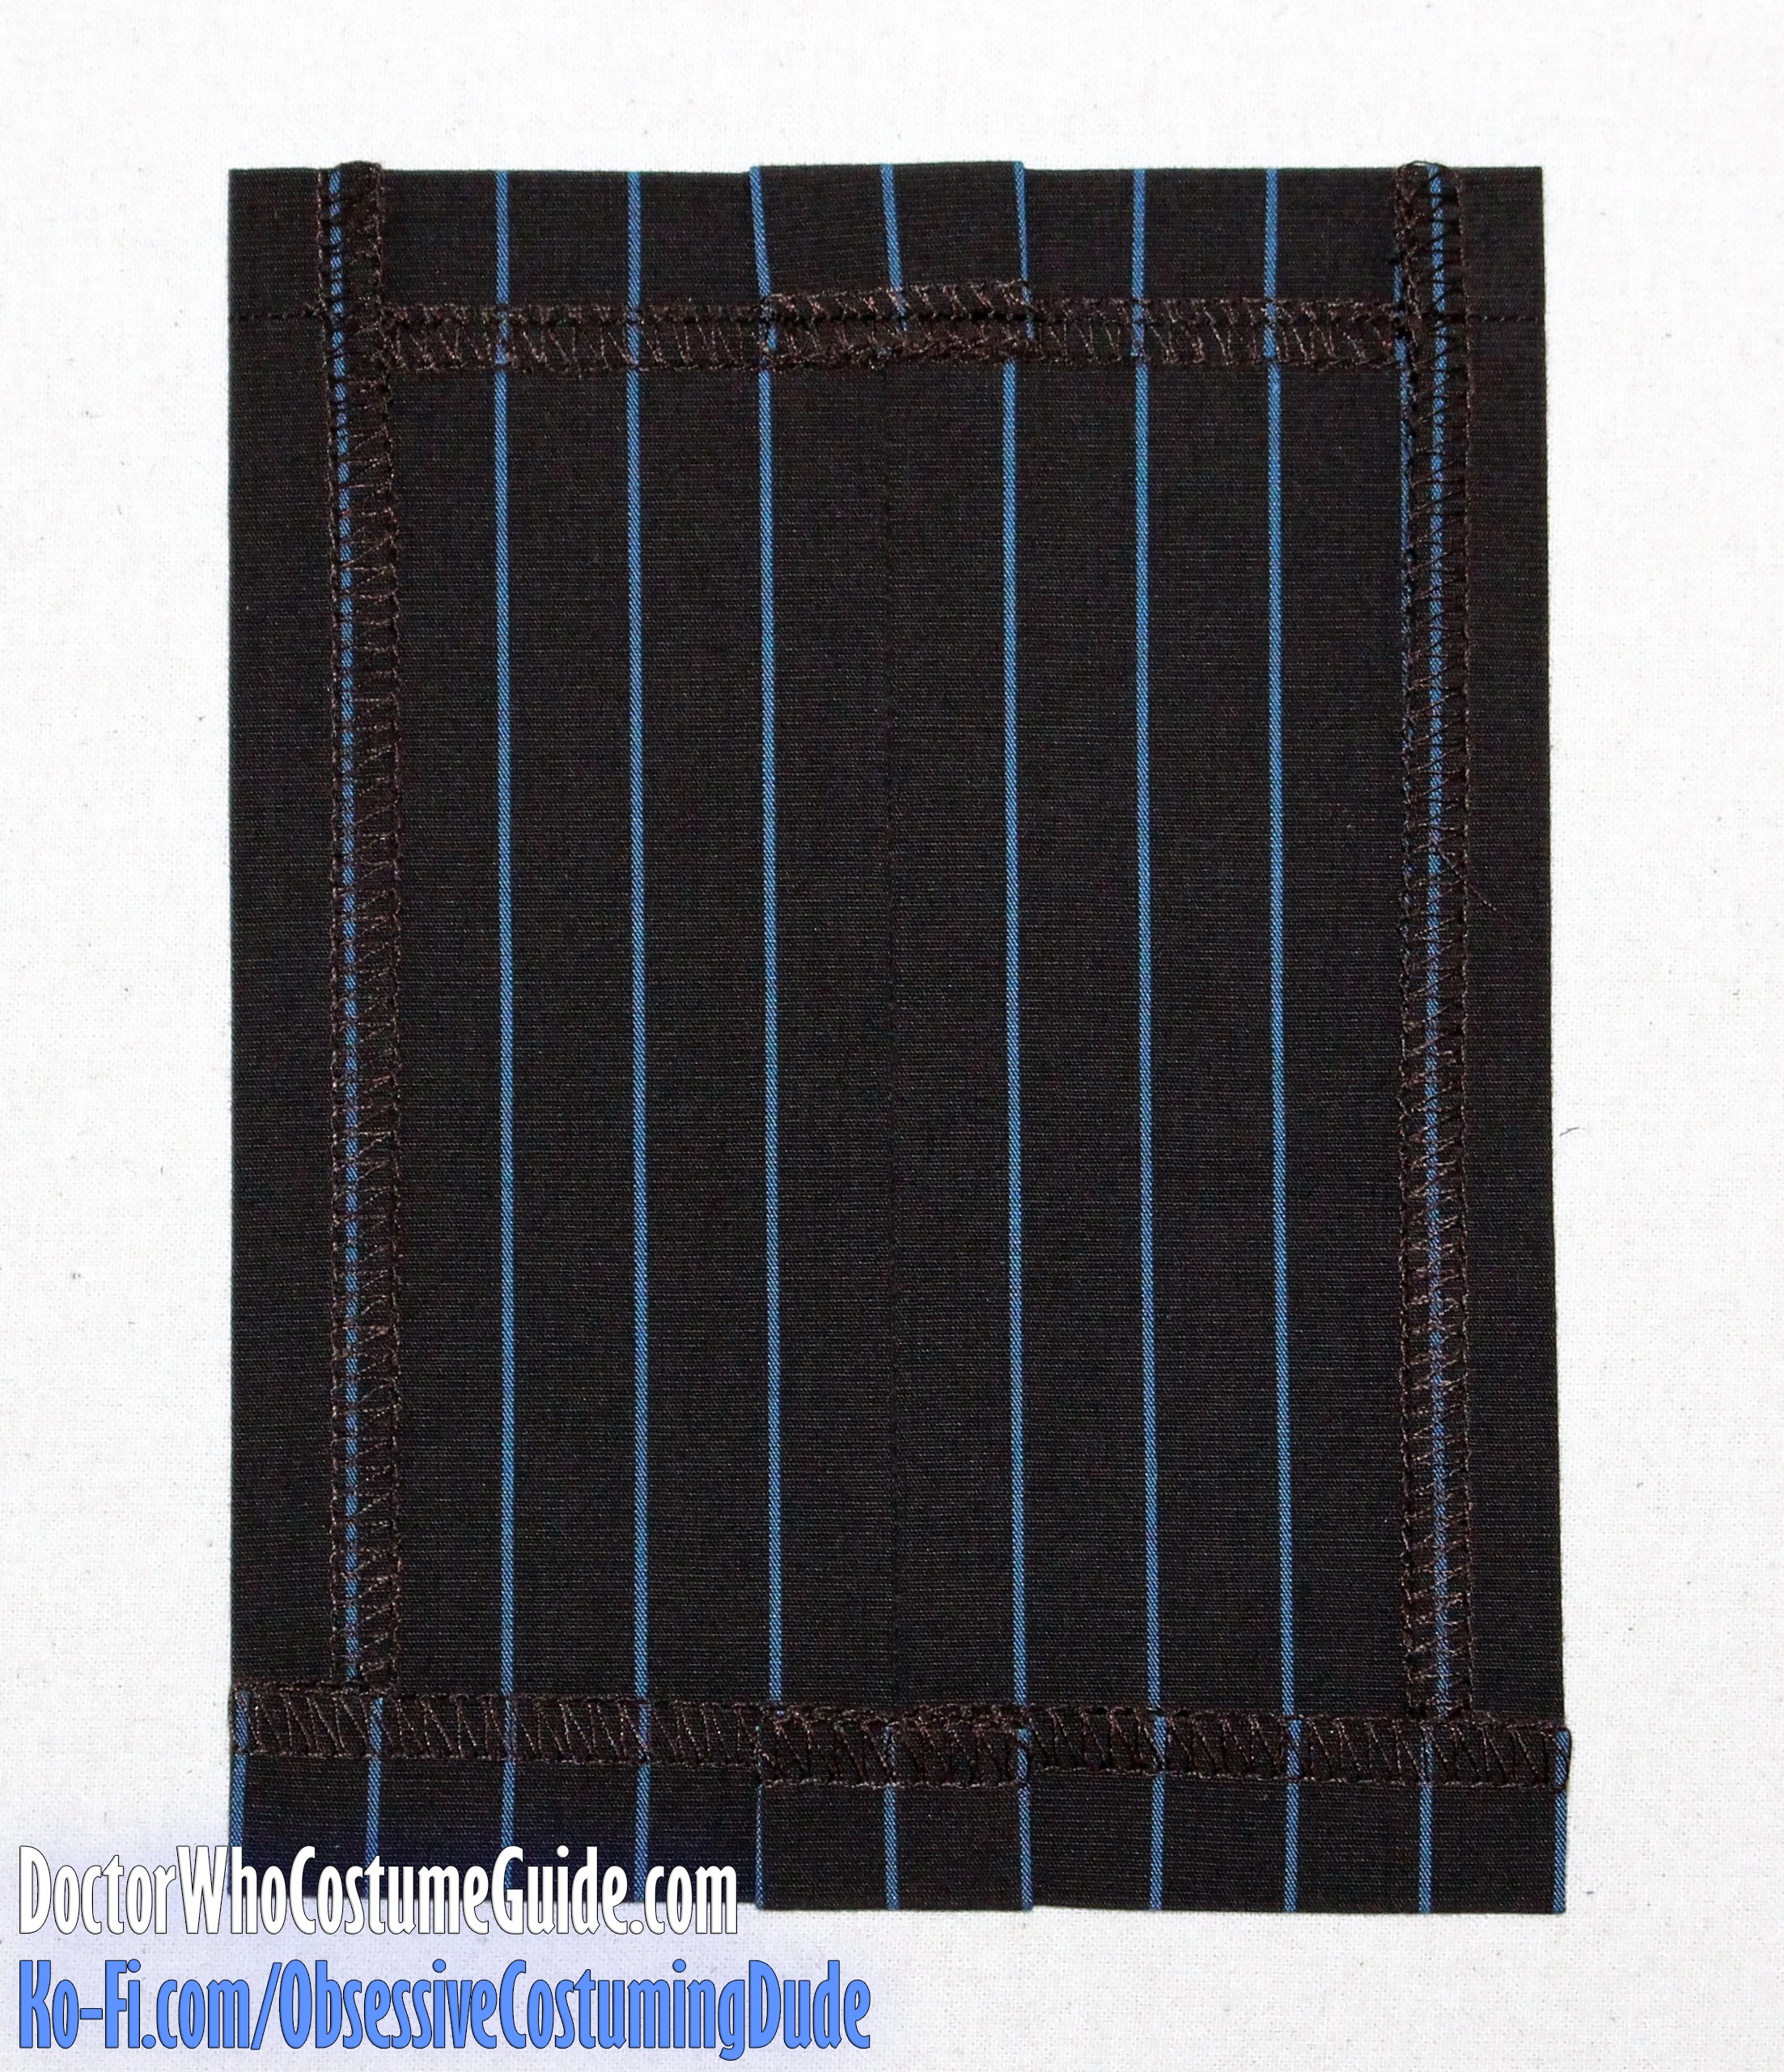
SIDE PANEL TO FRONT
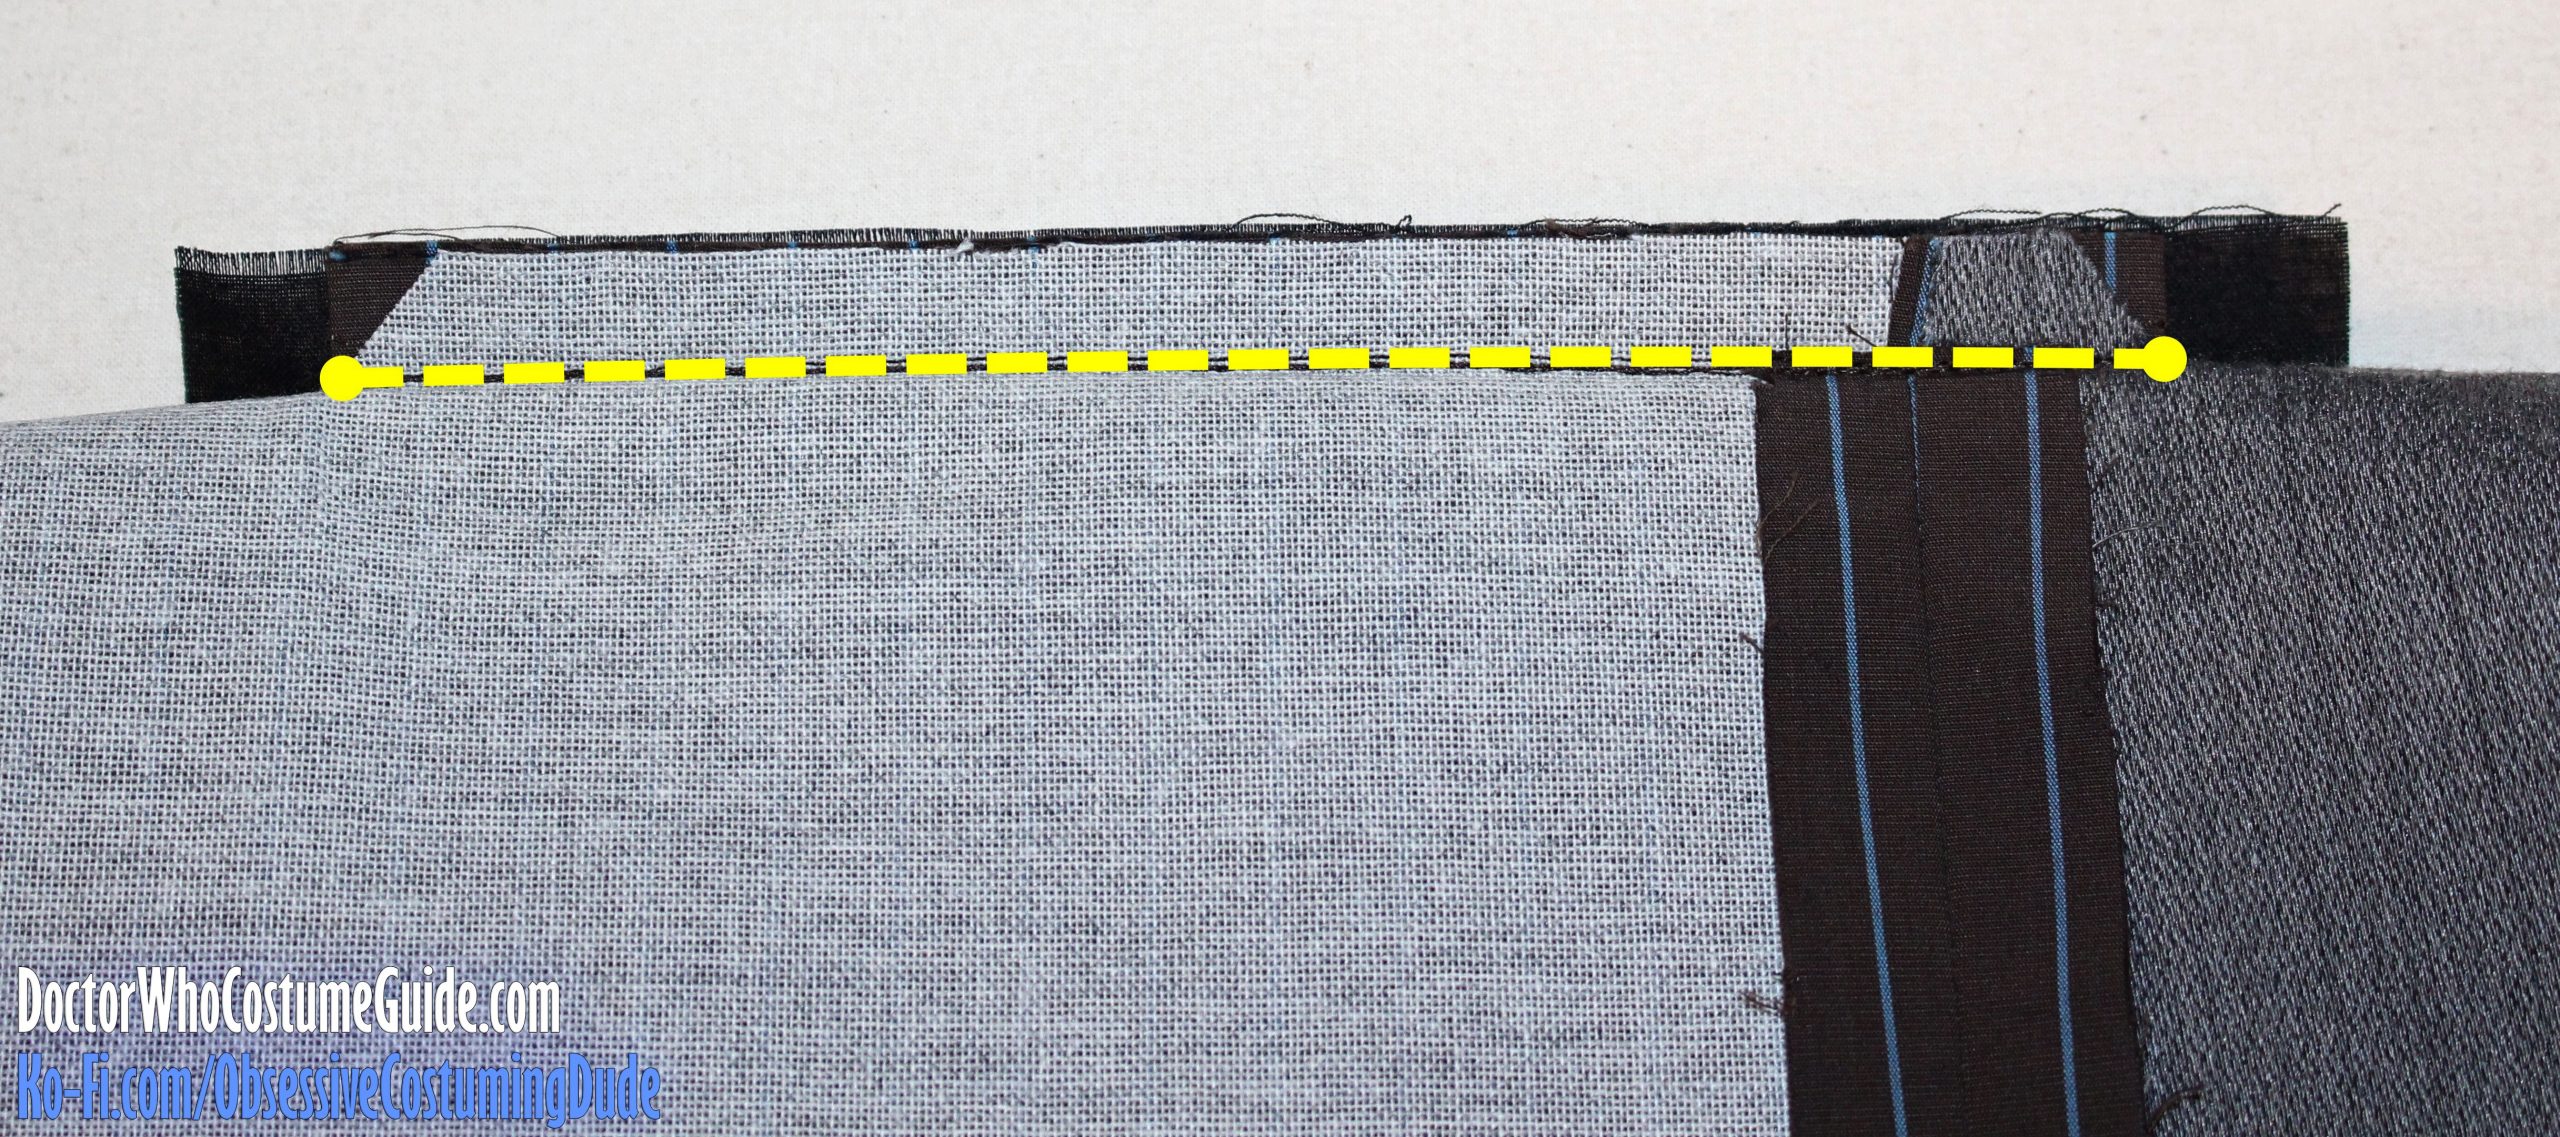
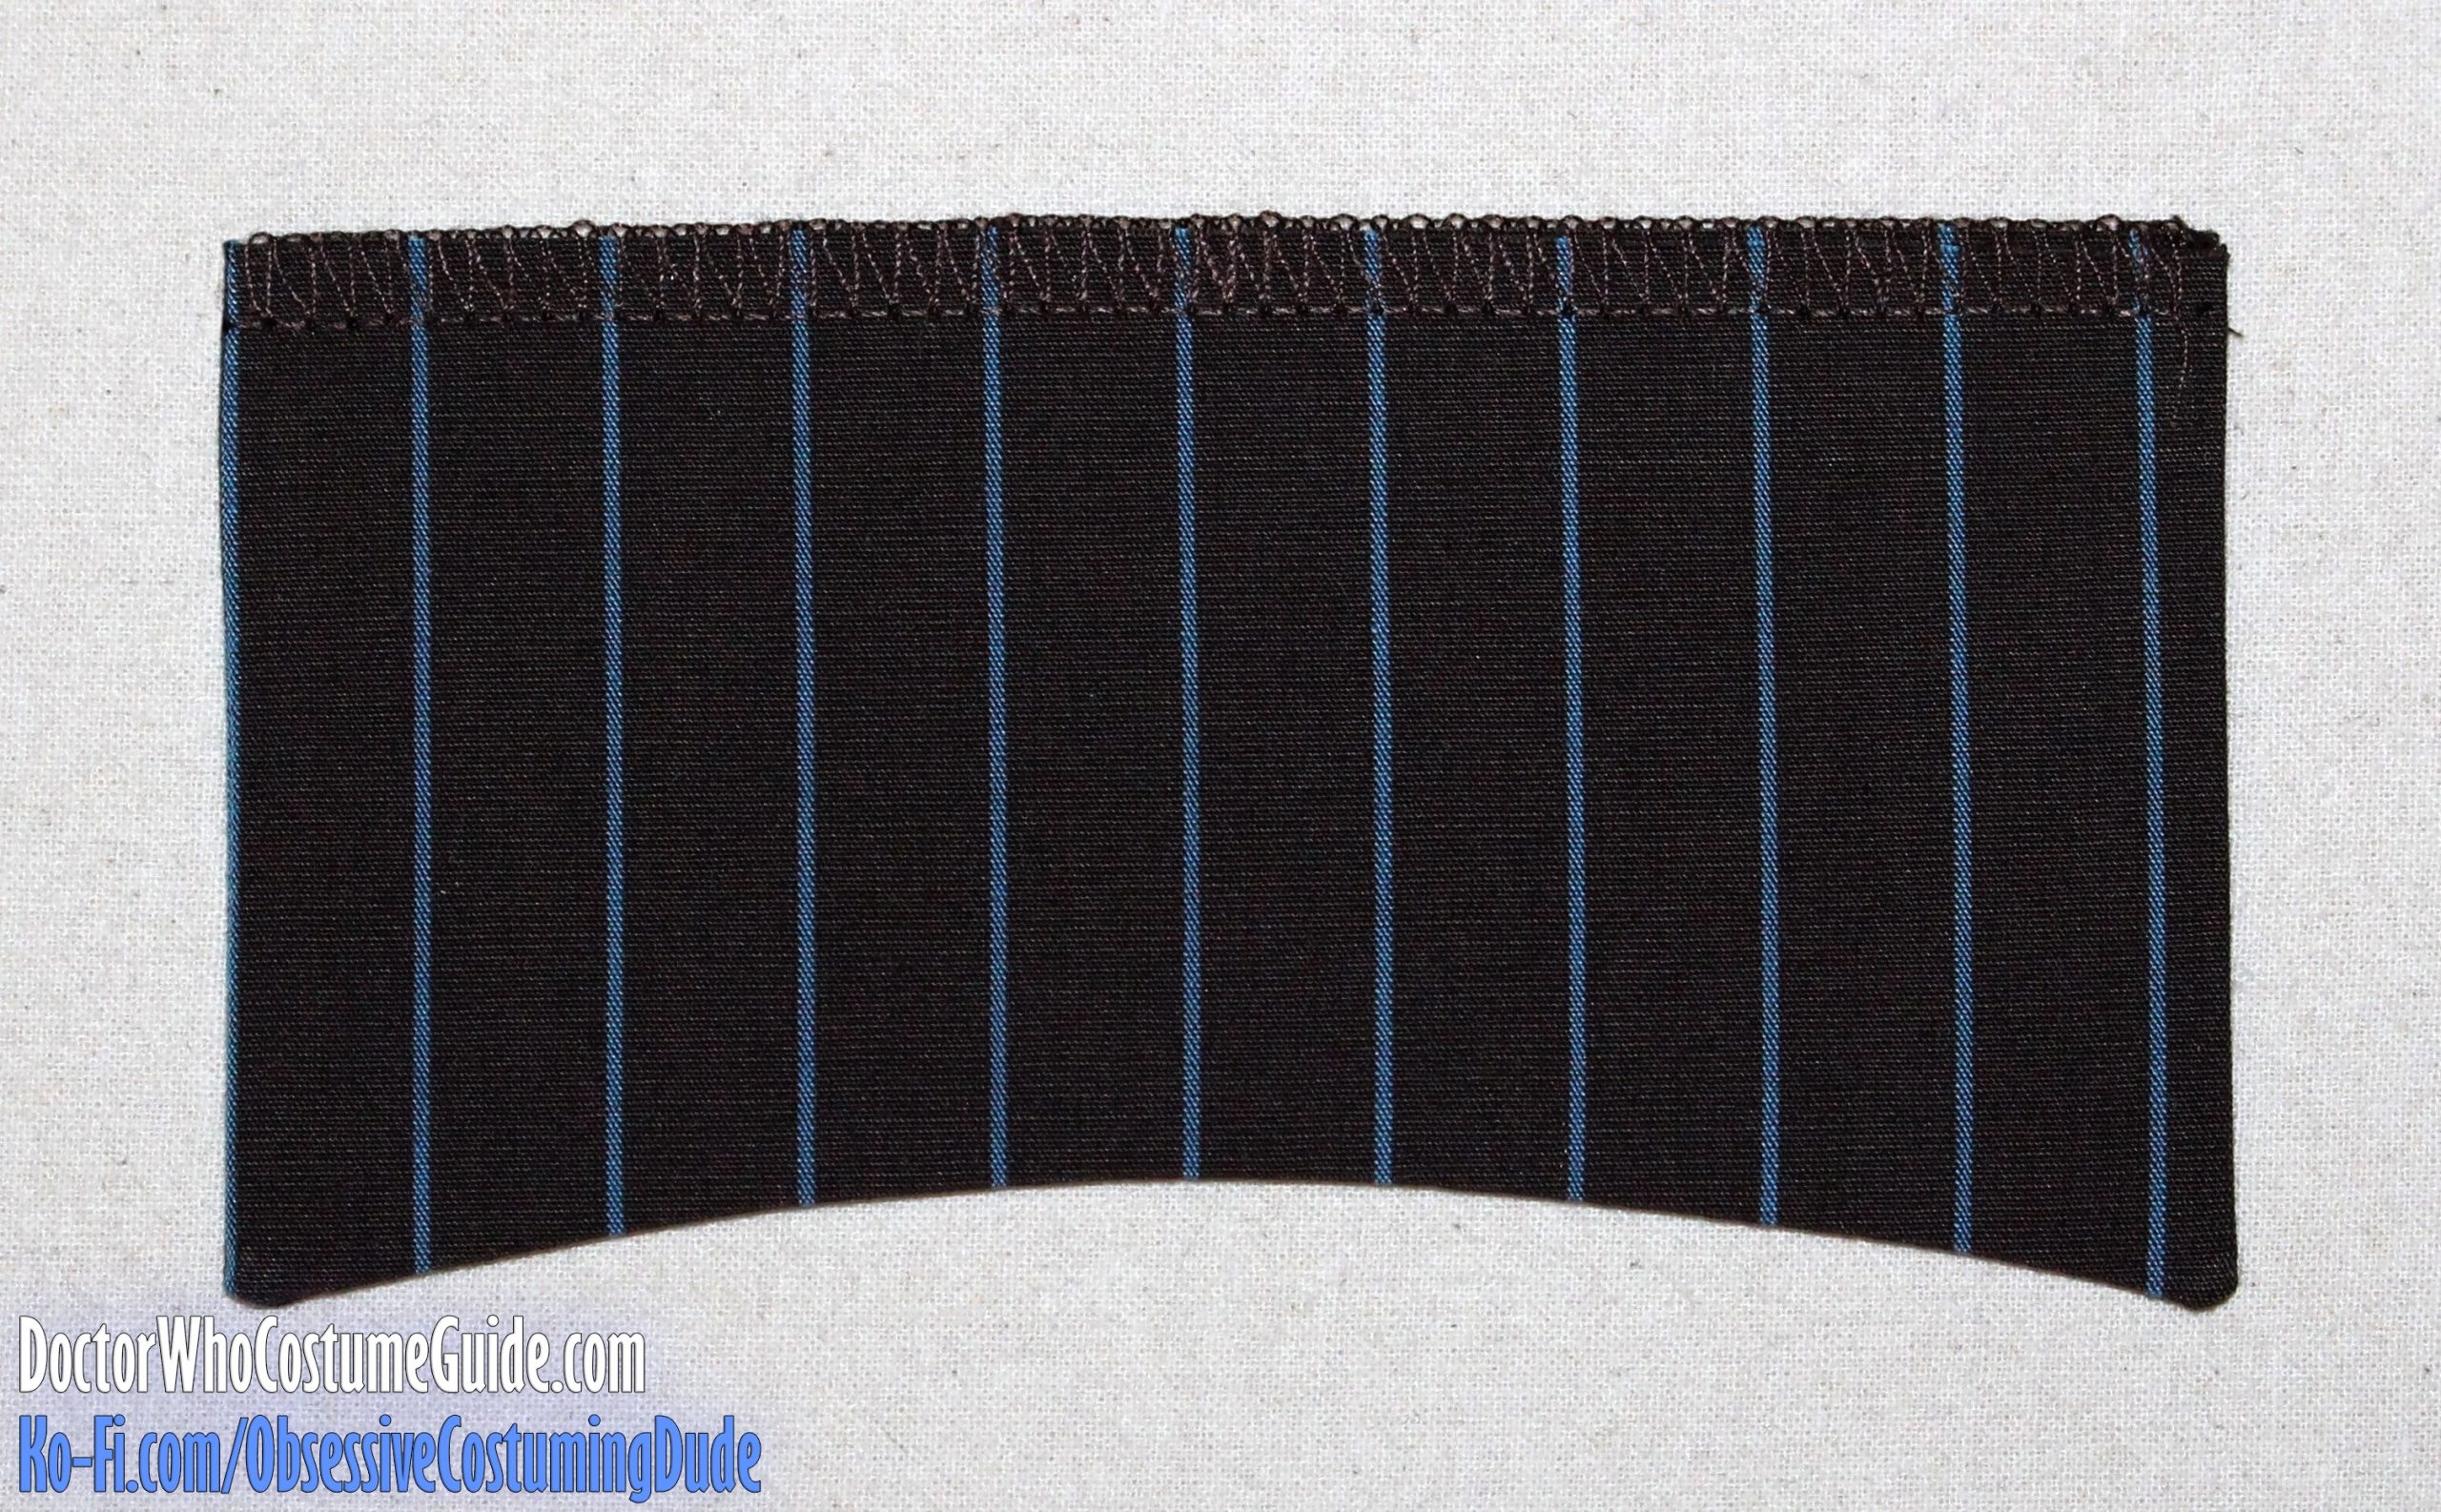
Sew the front (piece A) to the side panel (piece E).
Press the seam allowances open.
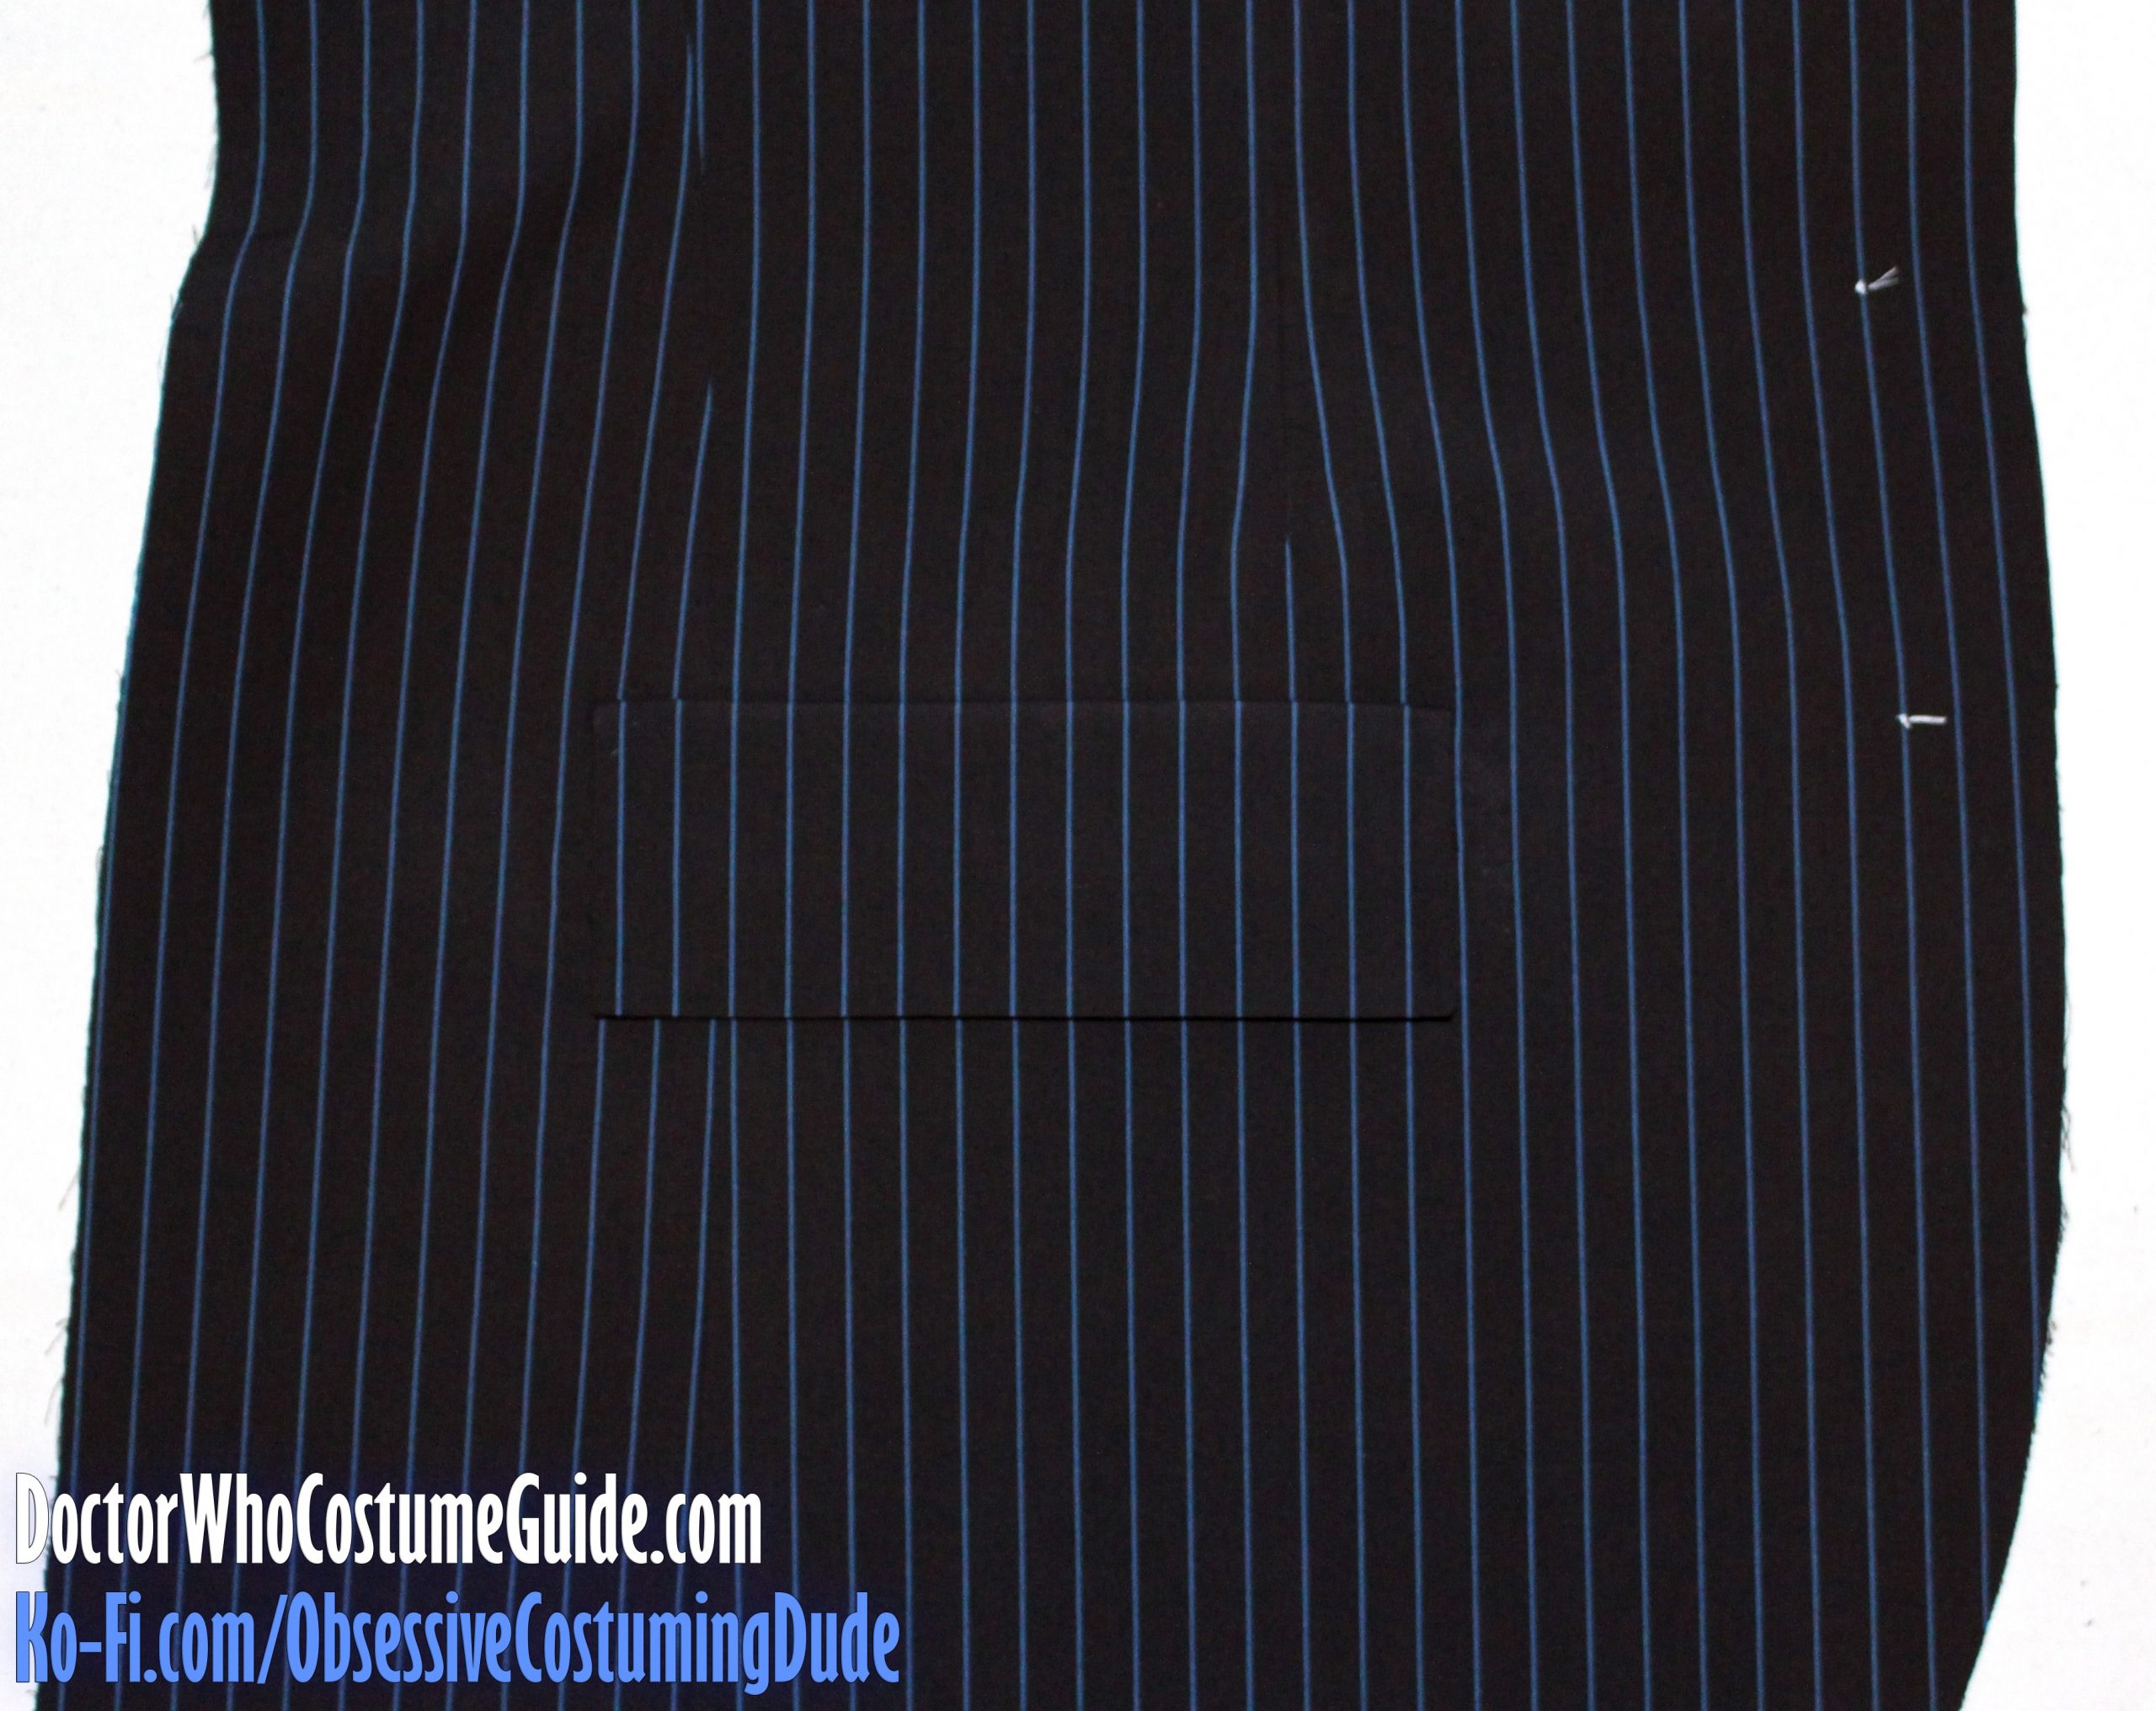
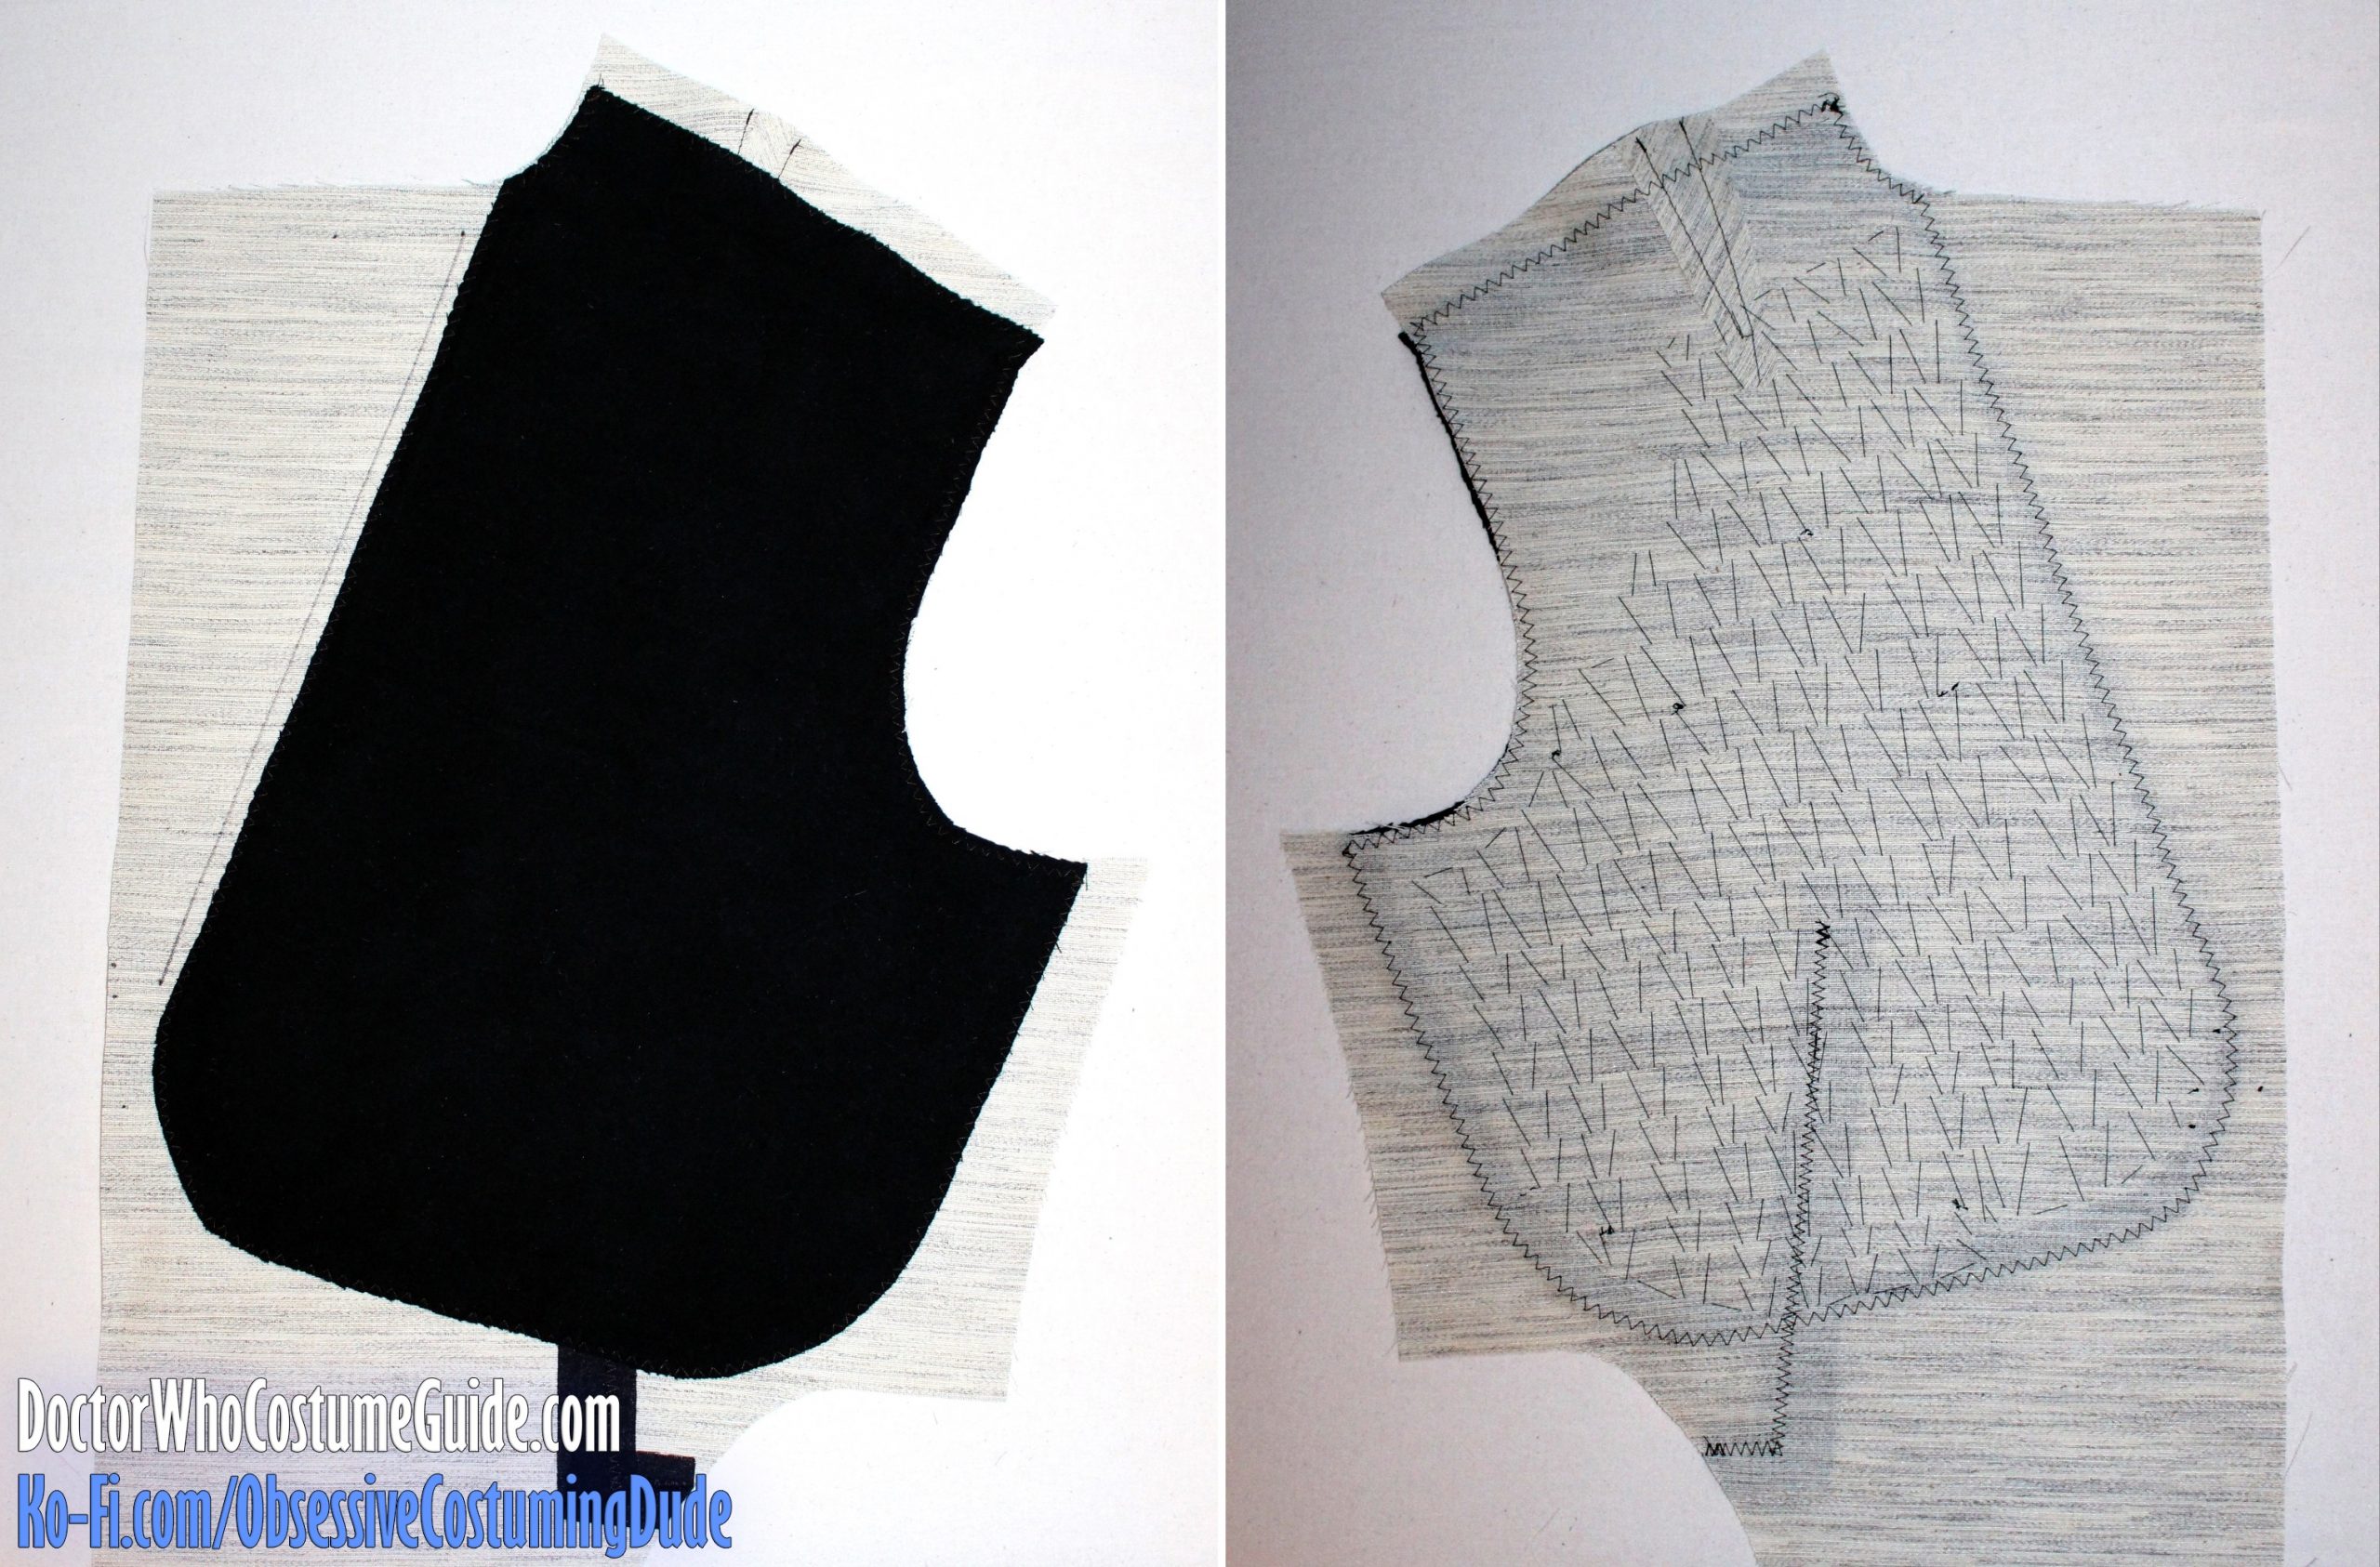
HIP POCKETS
Next up are the hip pockets, aka the “faux-flap” pockets.
These are unusual in their construction, but they’re actually pretty easy once you get the hang of it.
The basic process is pretty similar to making a typical double-welt pocket, but the upper “welt” is turned under and becomes the pocket facing, while the lower “welt” extends upward to form the pocket flap.
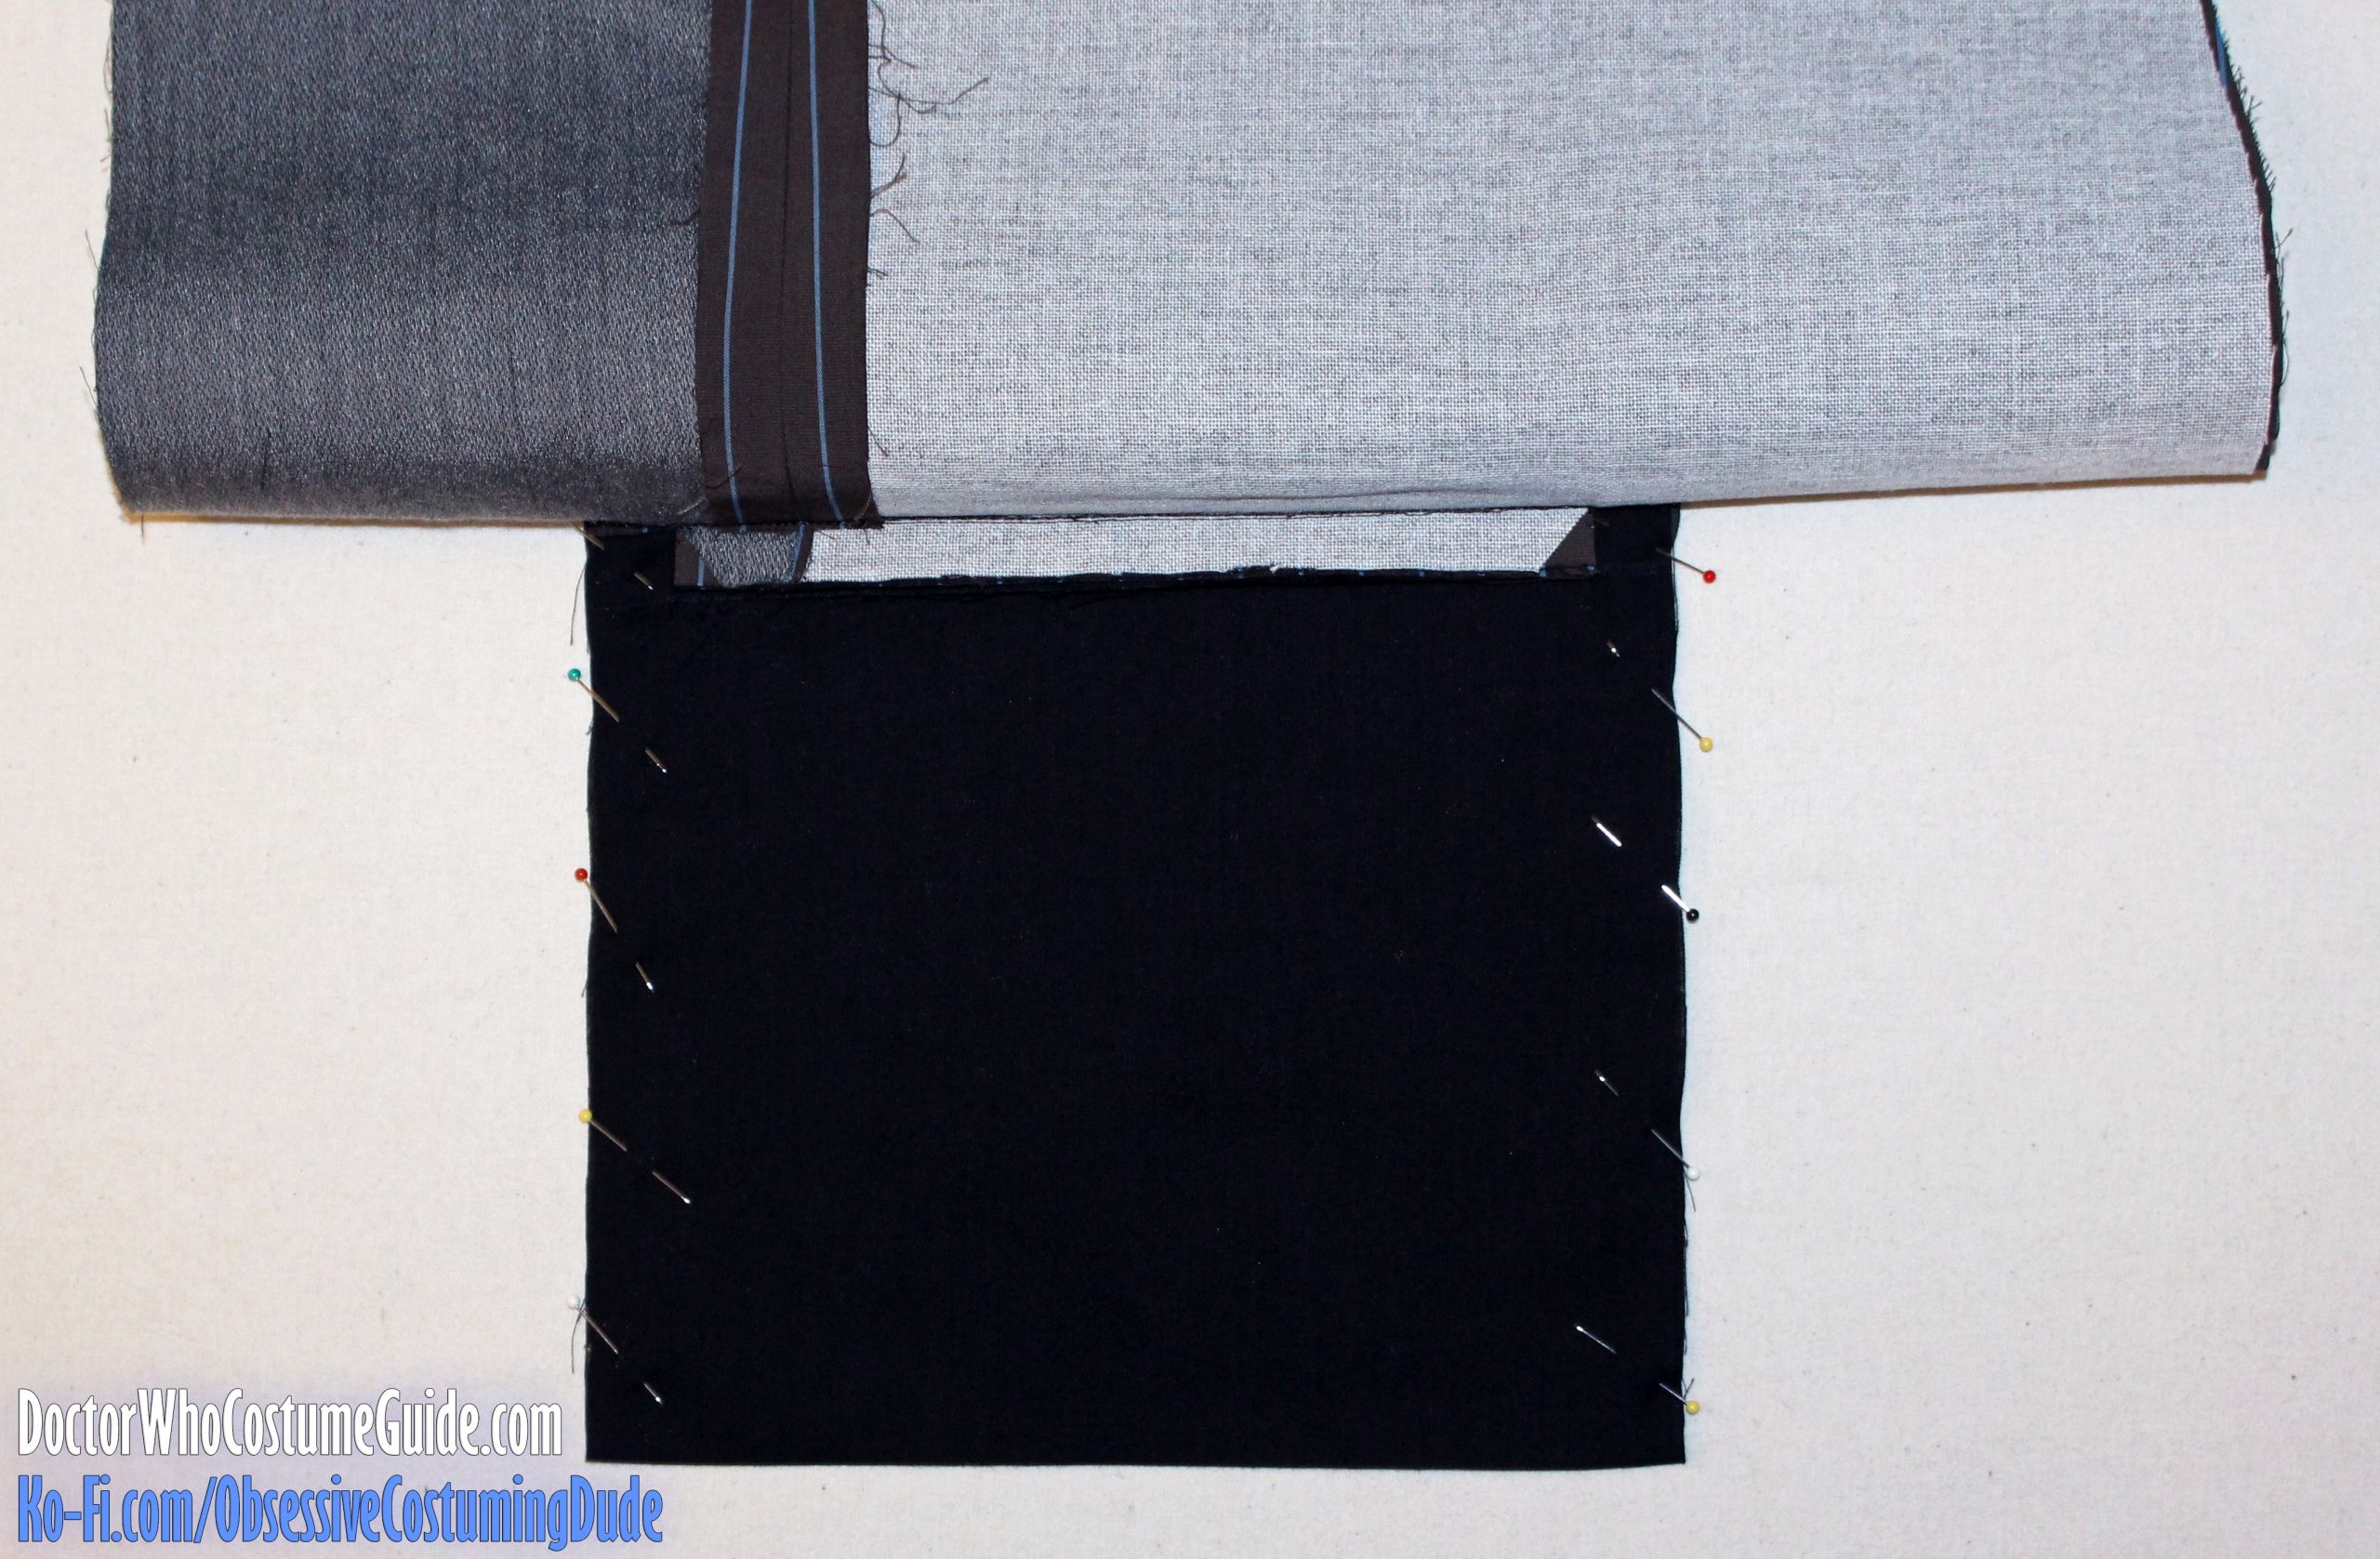
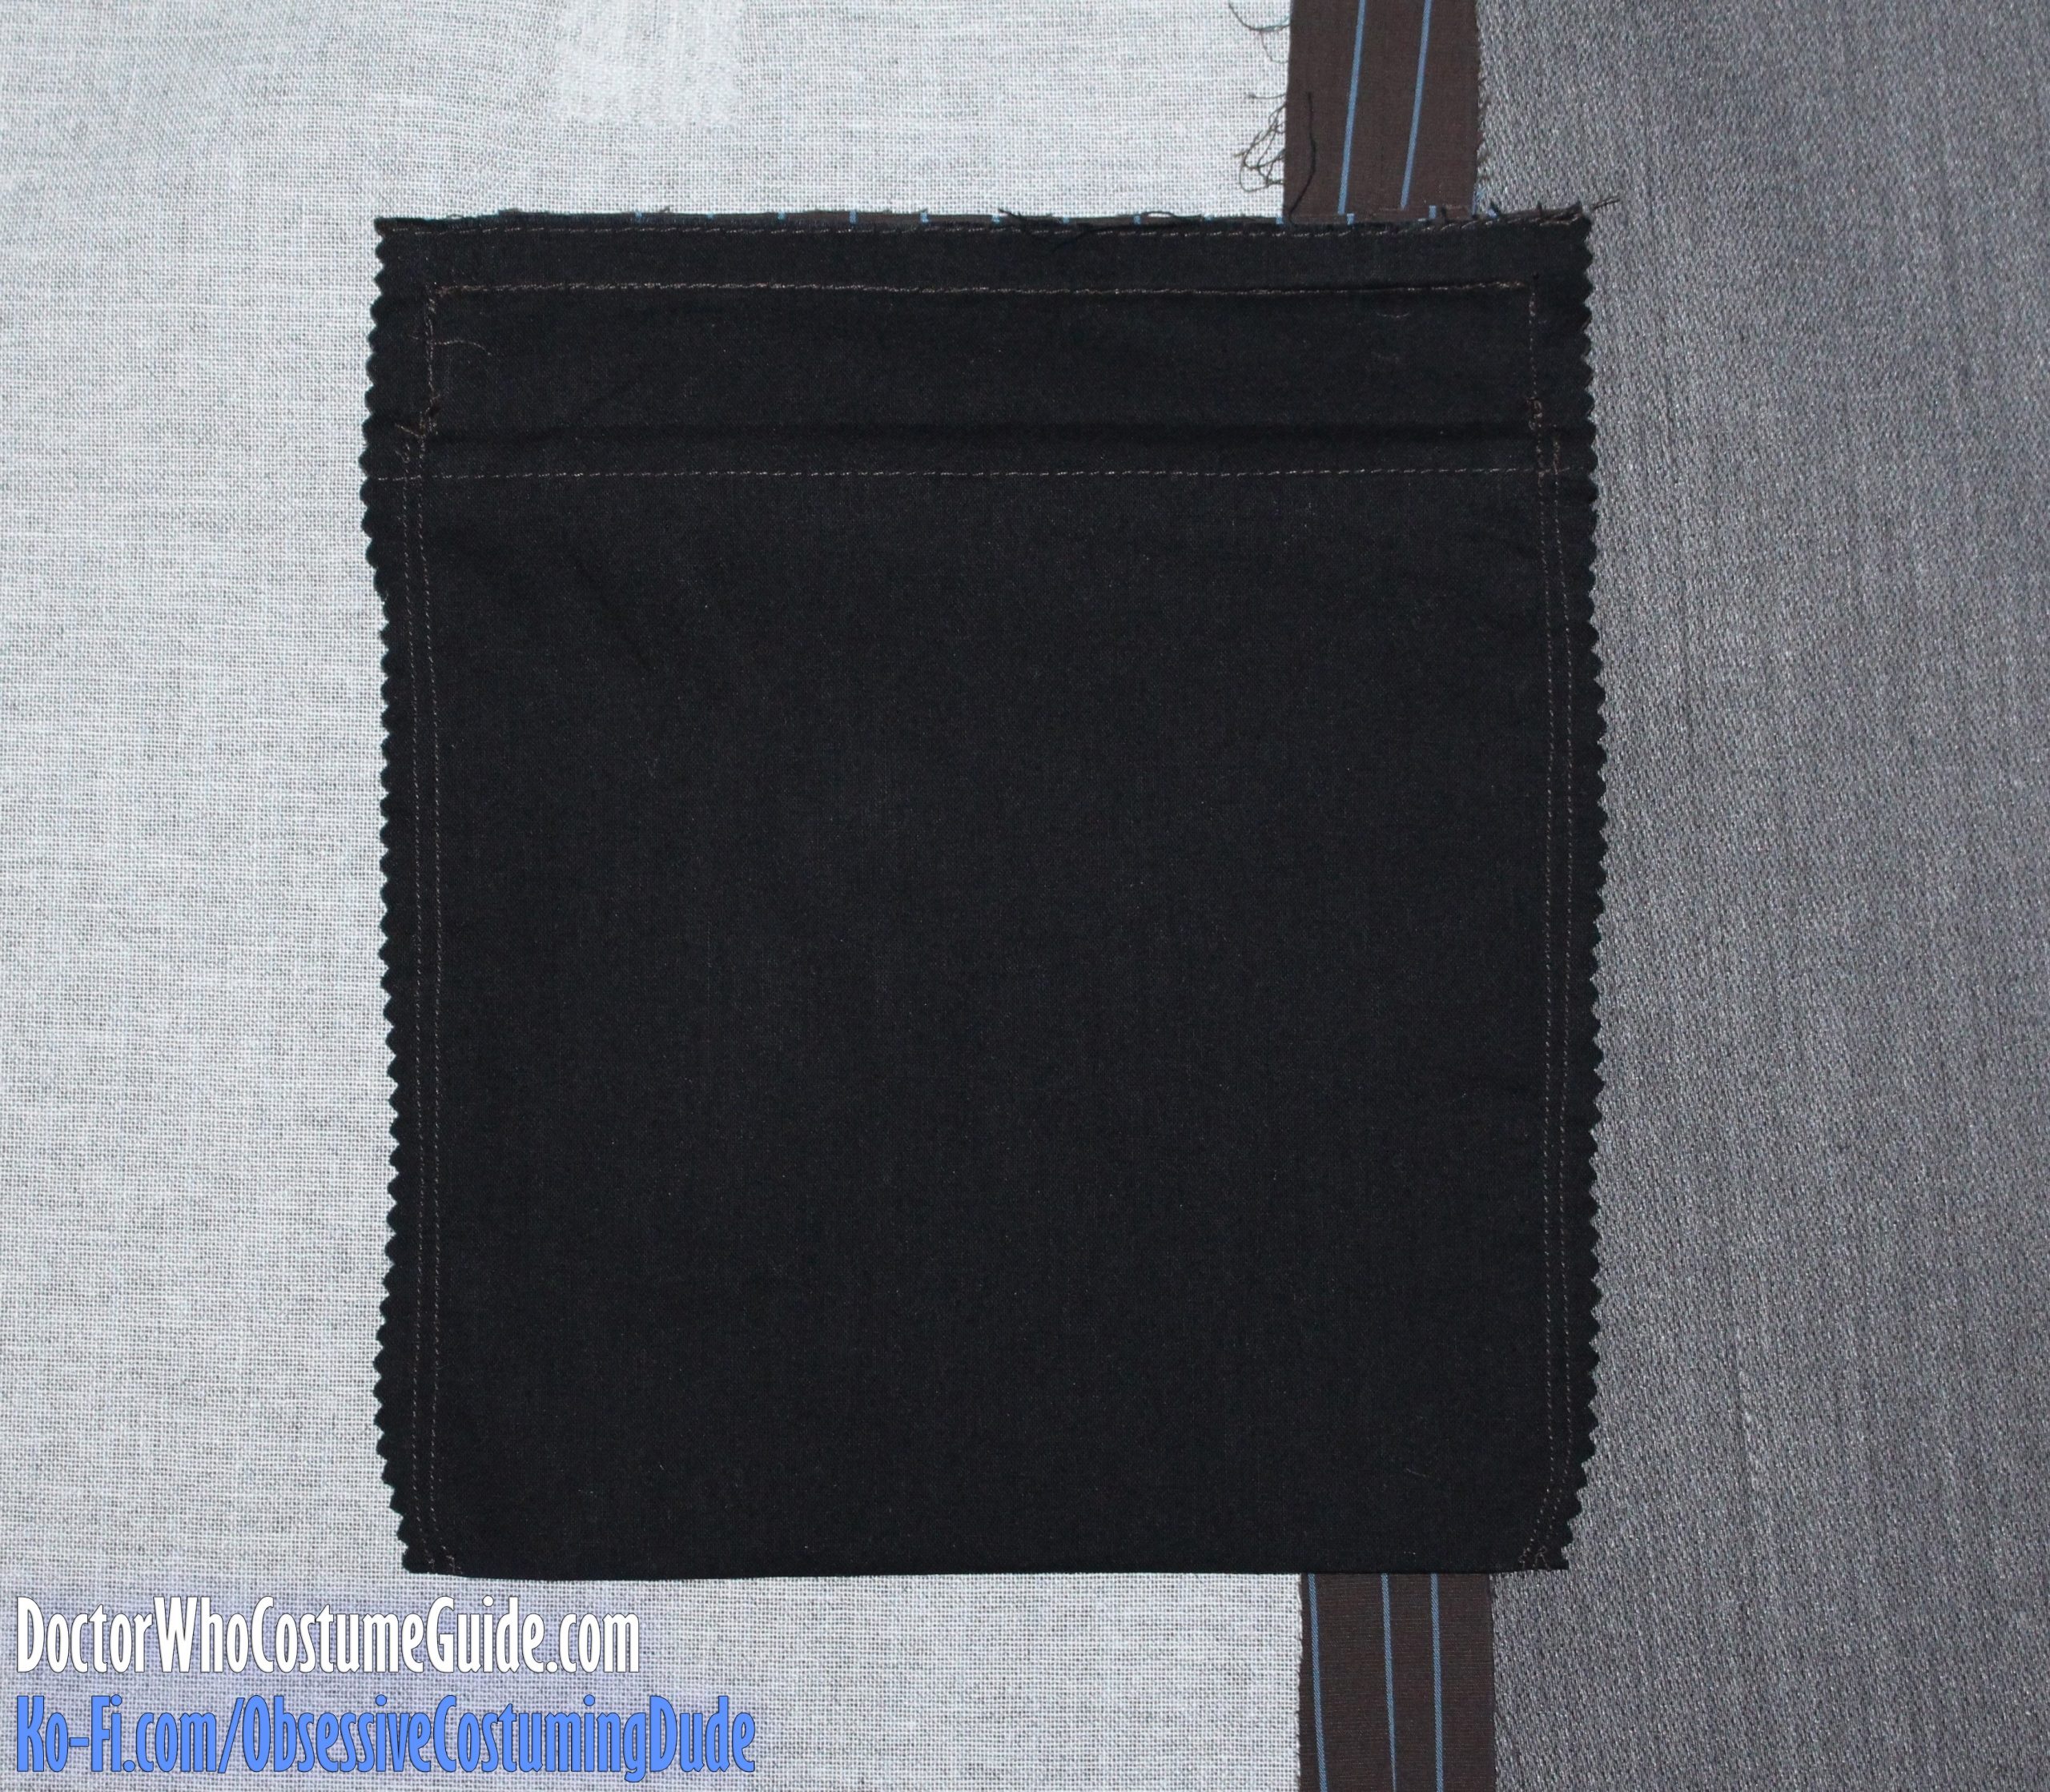
If you didn’t bolster up your lightweight cotton with a fusible hair canvas/hymo, I suggest stabilizing the underside of the pocket area with a rectangle of lightweight fusible interfacing about 8” x 2” (and cut with pinking shears, of course).
You can also draw the pocket opening on the interfacing itself, to help you position it properly.
If you did bolster your fabric up a bit, the aforementioned fusible isn’t necessary, and you can just proceed.
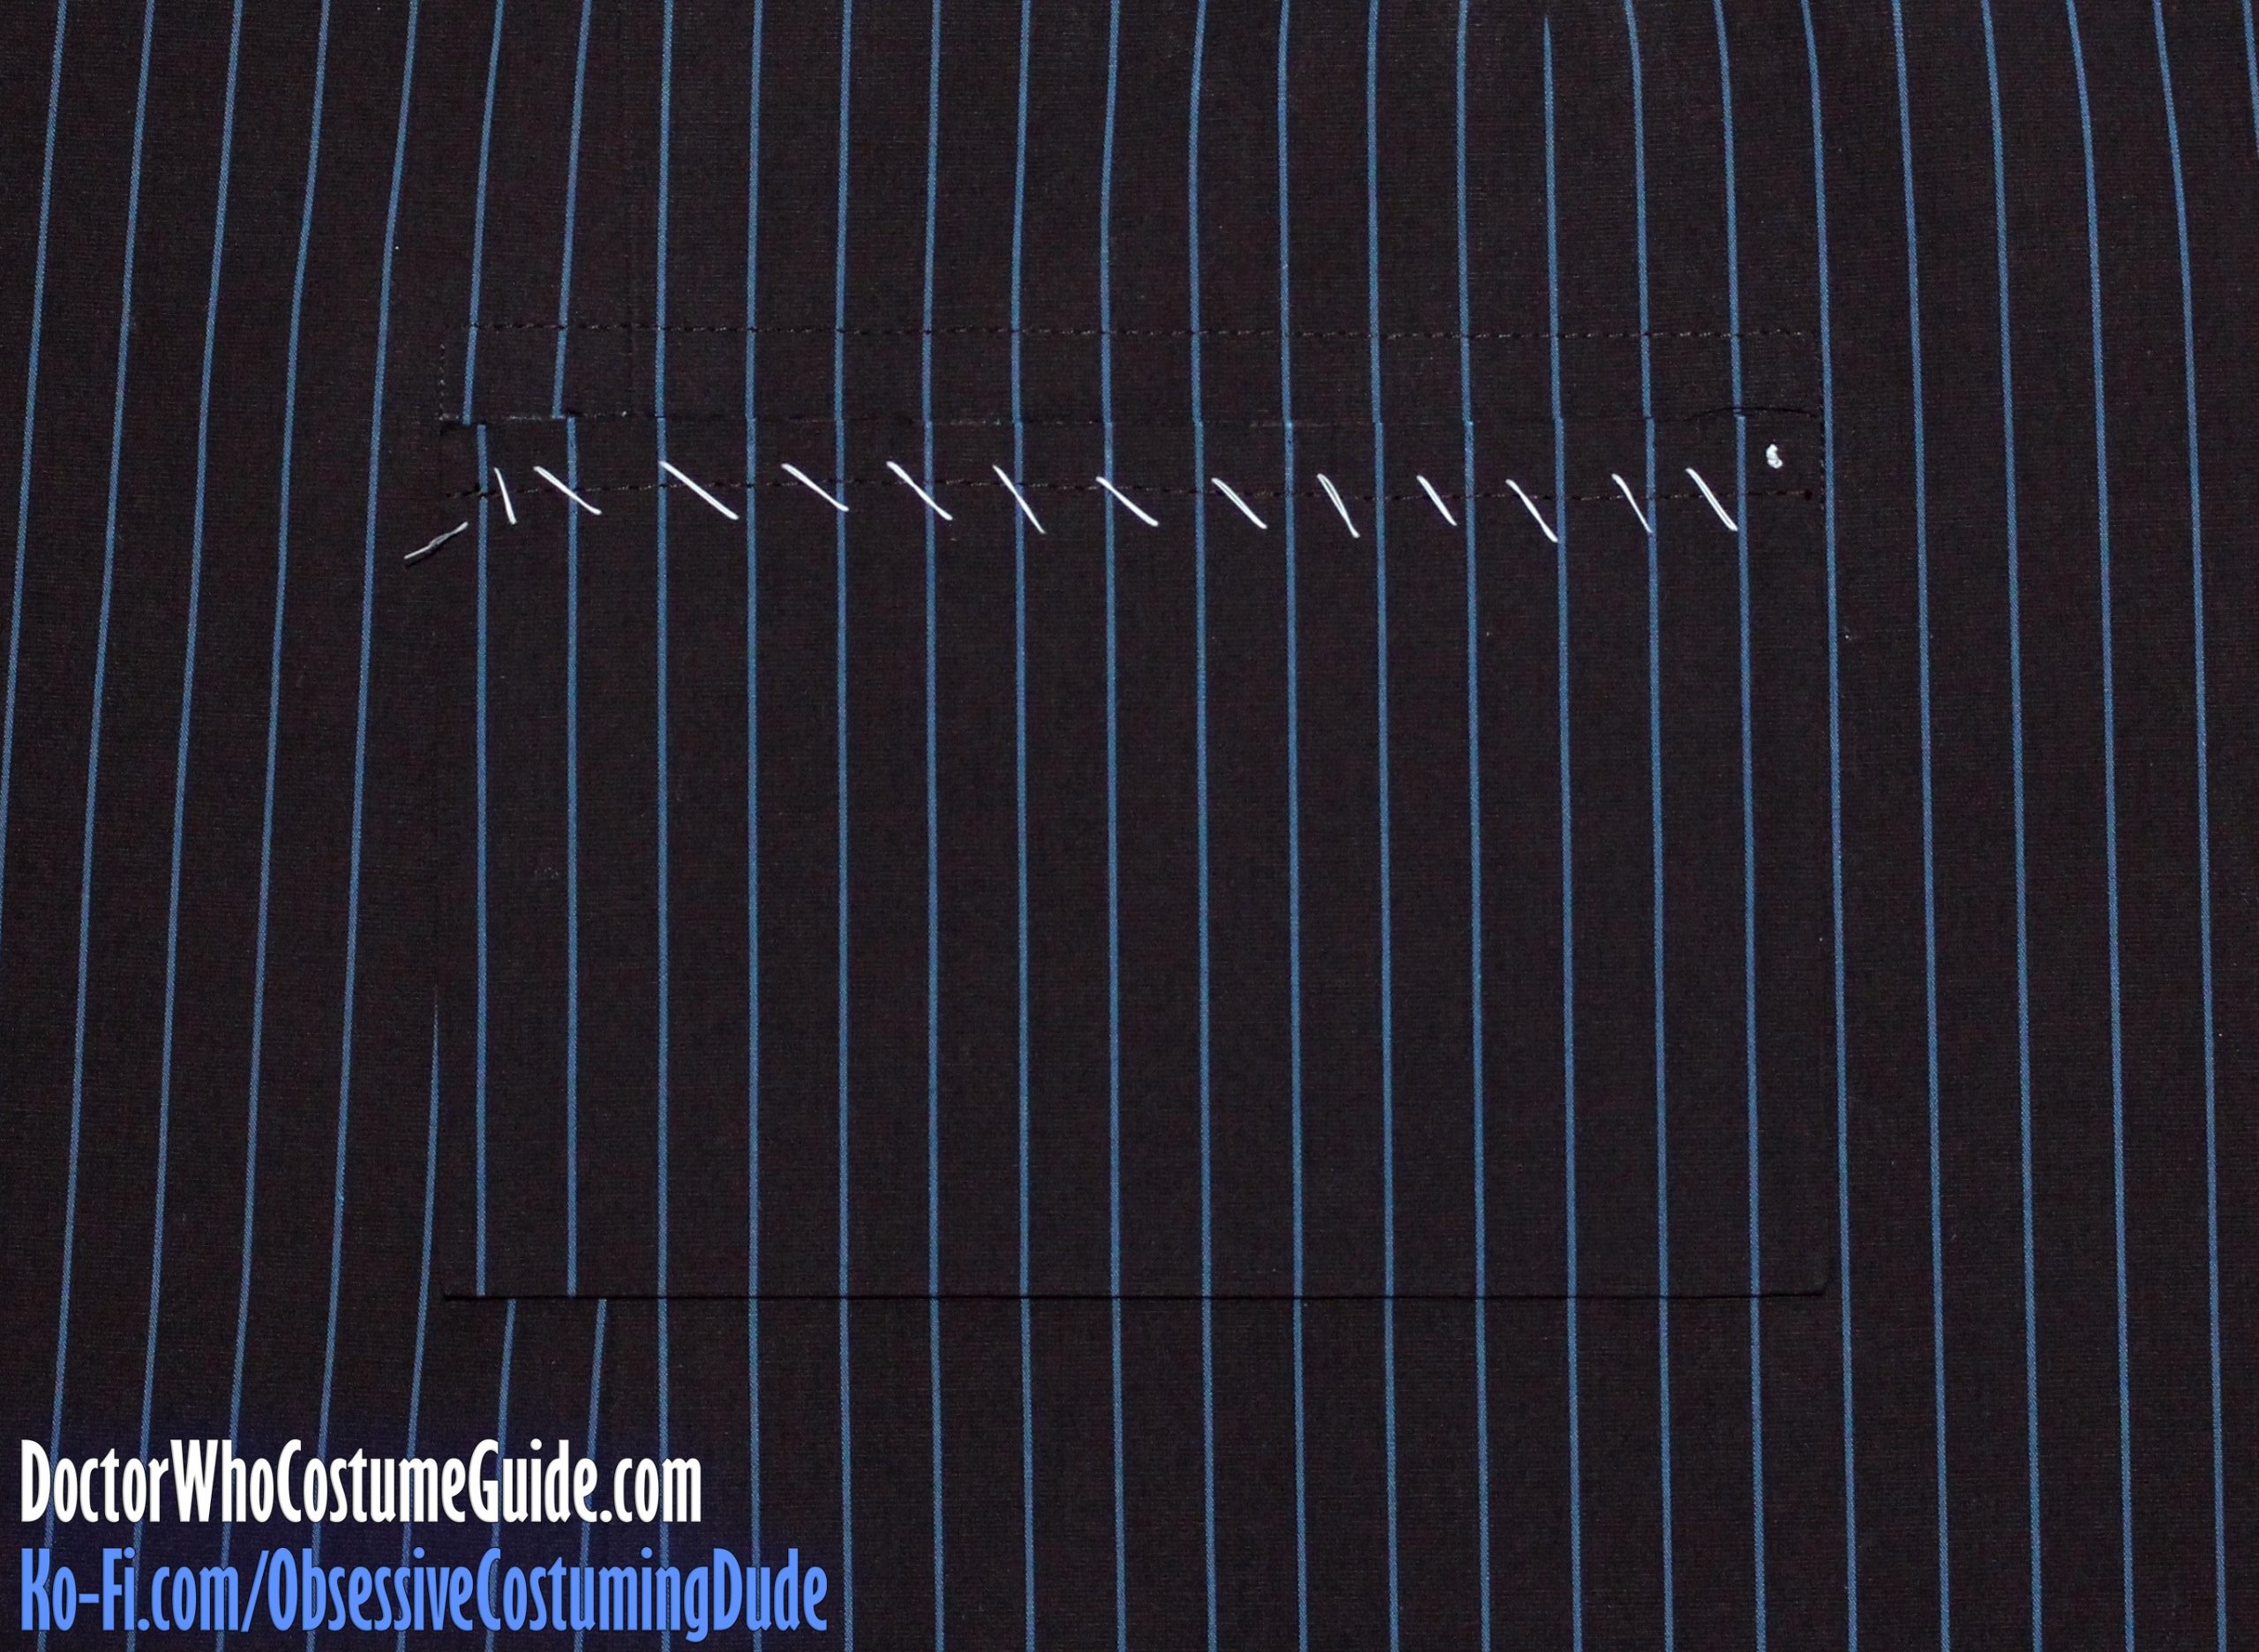
I like to lightly mark the pocket opening on the right side using tailor’s chalk.
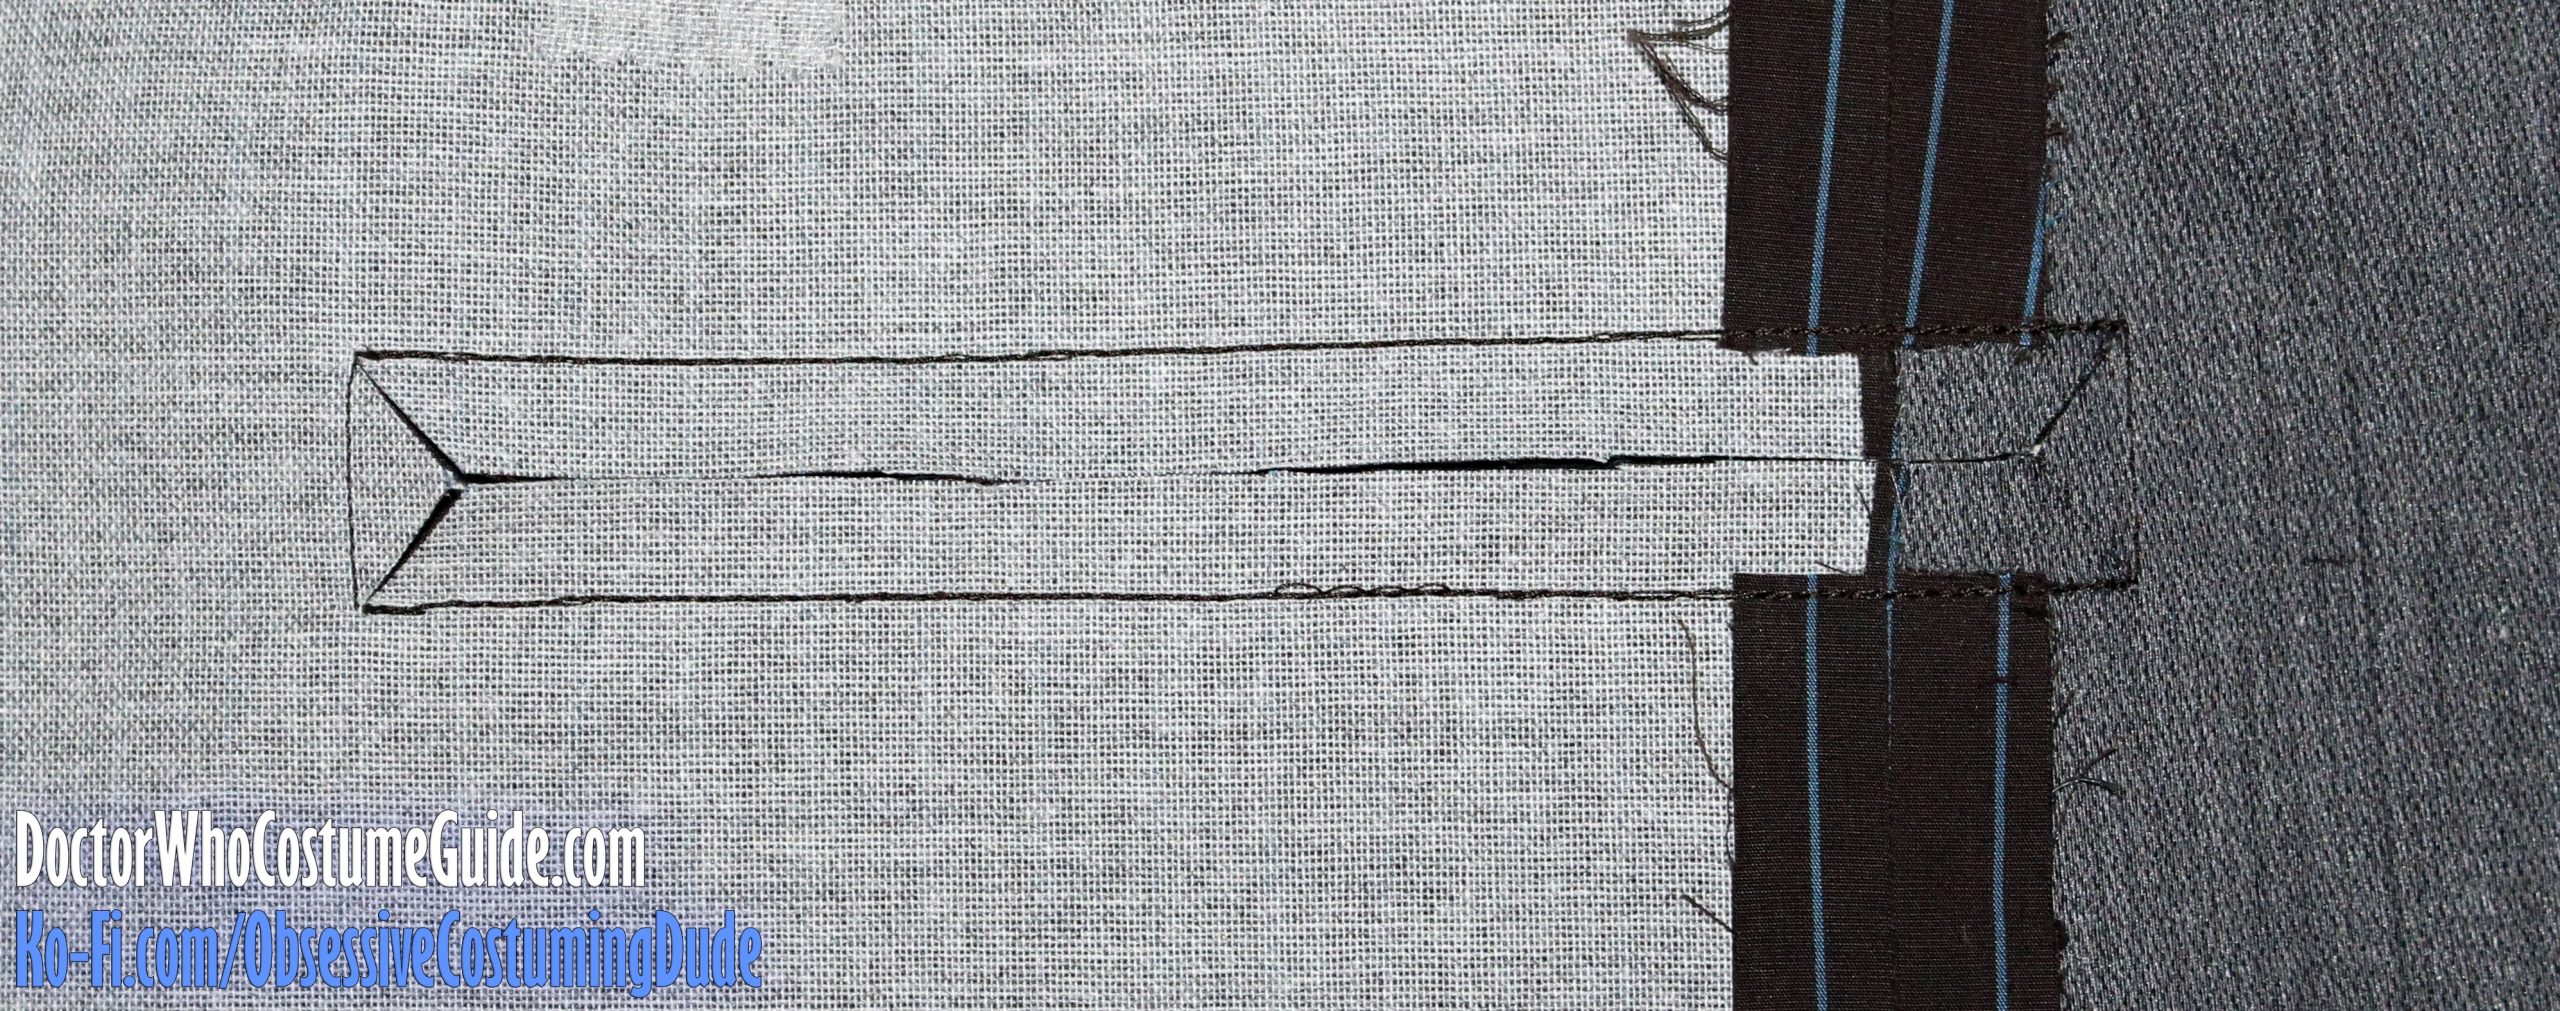
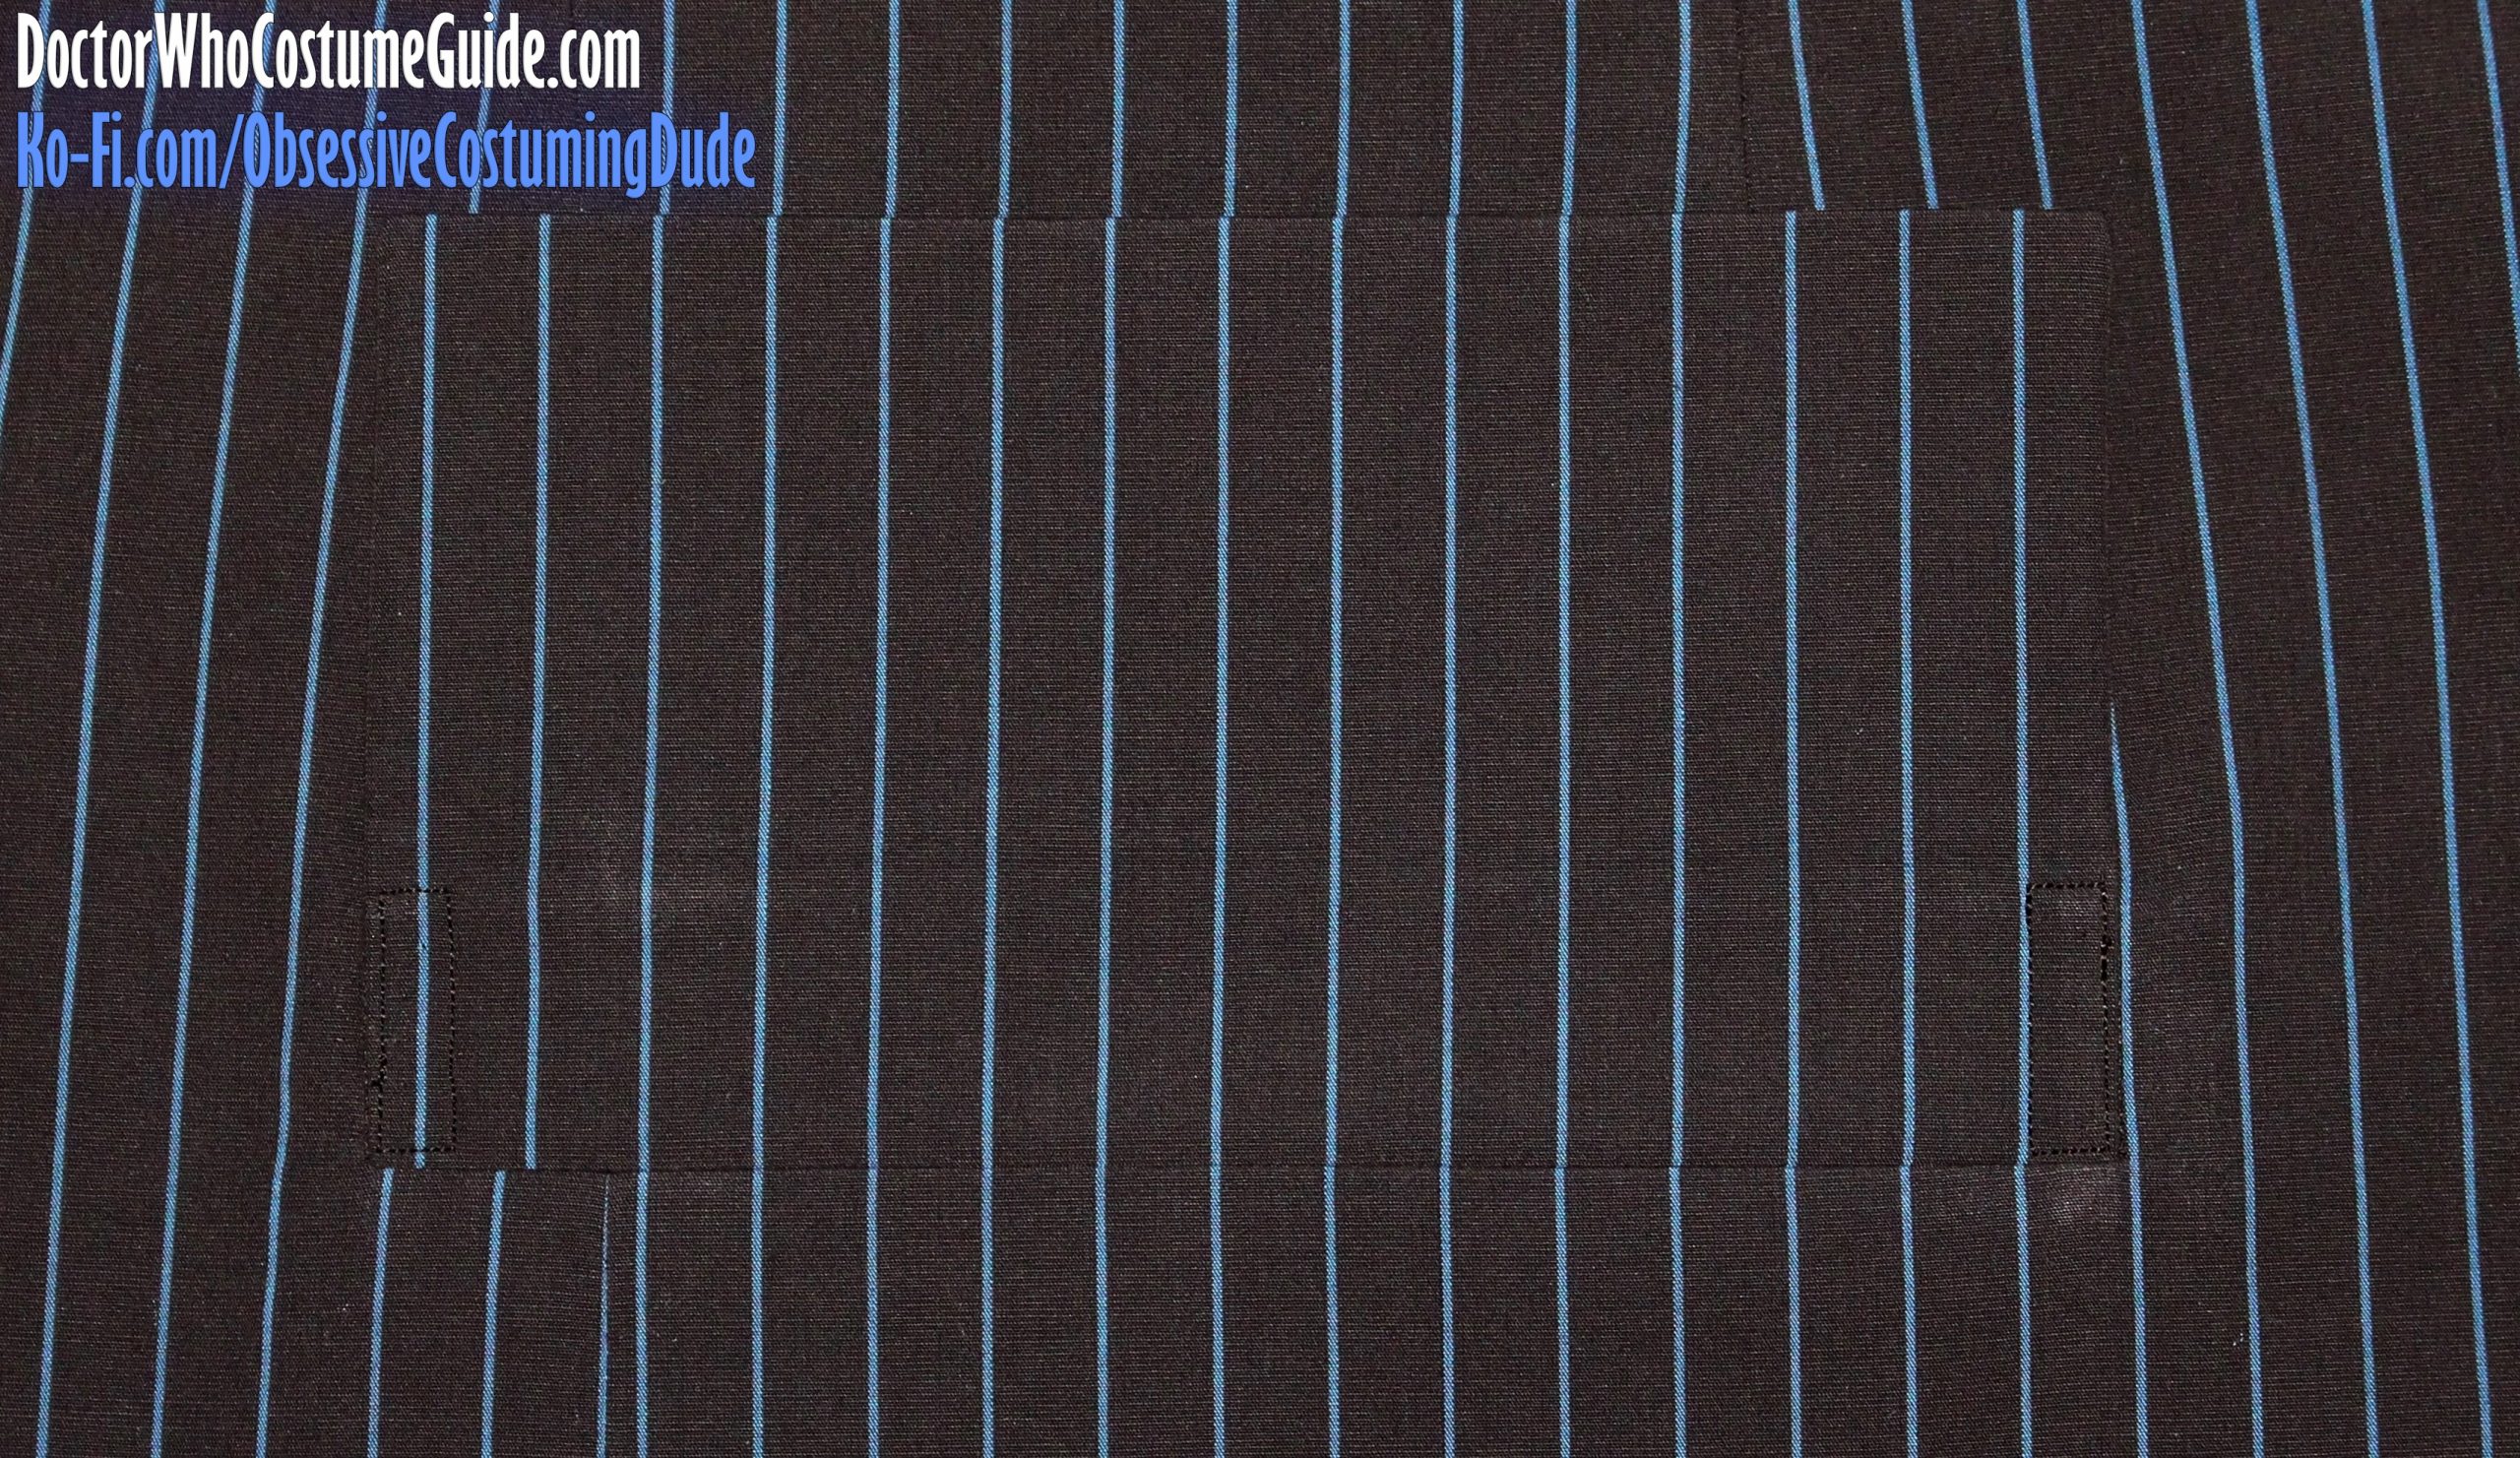
NOTE: The rear edge of the pocket opening will probably NOT extend all the way to the rear corner guides on the printed pattern! Those are there primarily as a reference, to establish a horizontal pocket opening from front to back. The actual pocket opening size is 7” wide.
TIP: Position the front edge of the pocket opening just inside of the appropriate pinstripe.
Topstitch around the perimeter of the pocket opening, shortening the stitch length around the corners.
Using your tailor’s chalk, draw a horizontal line across the center of the pocket opening.
OPTIONAL: Interface the hip pocket flap (piece J) with a lightweight fusible interfacing. (I don’t know if the original suits’ pocket flaps were interfaced or not, but again, I like to bolster them up a little bit. I tried interfacing the pocket flap with hair canvas, but the flap felt too heavy, so I recommend using a lightweight fusible instead.)
Fold the hip pocket flap (piece Q) in half the long way (so the upper and lower edges meet), matching pinstripes, but don’t press!
Sew the flap closed along the side edges, just inside of the pinstripes.
(Don’t be afraid to fudge a bit on the seam allowance; the priority is at the finished flap’s edges are where they should be, in relation to the pinstripes. I prefer the front edges to be just inside of the pinstripes, but you can stitch directly on top of or just outside the stripes if you prefer them visible.)
Trim the seam allowances, turn the flap outward, and press it flat.
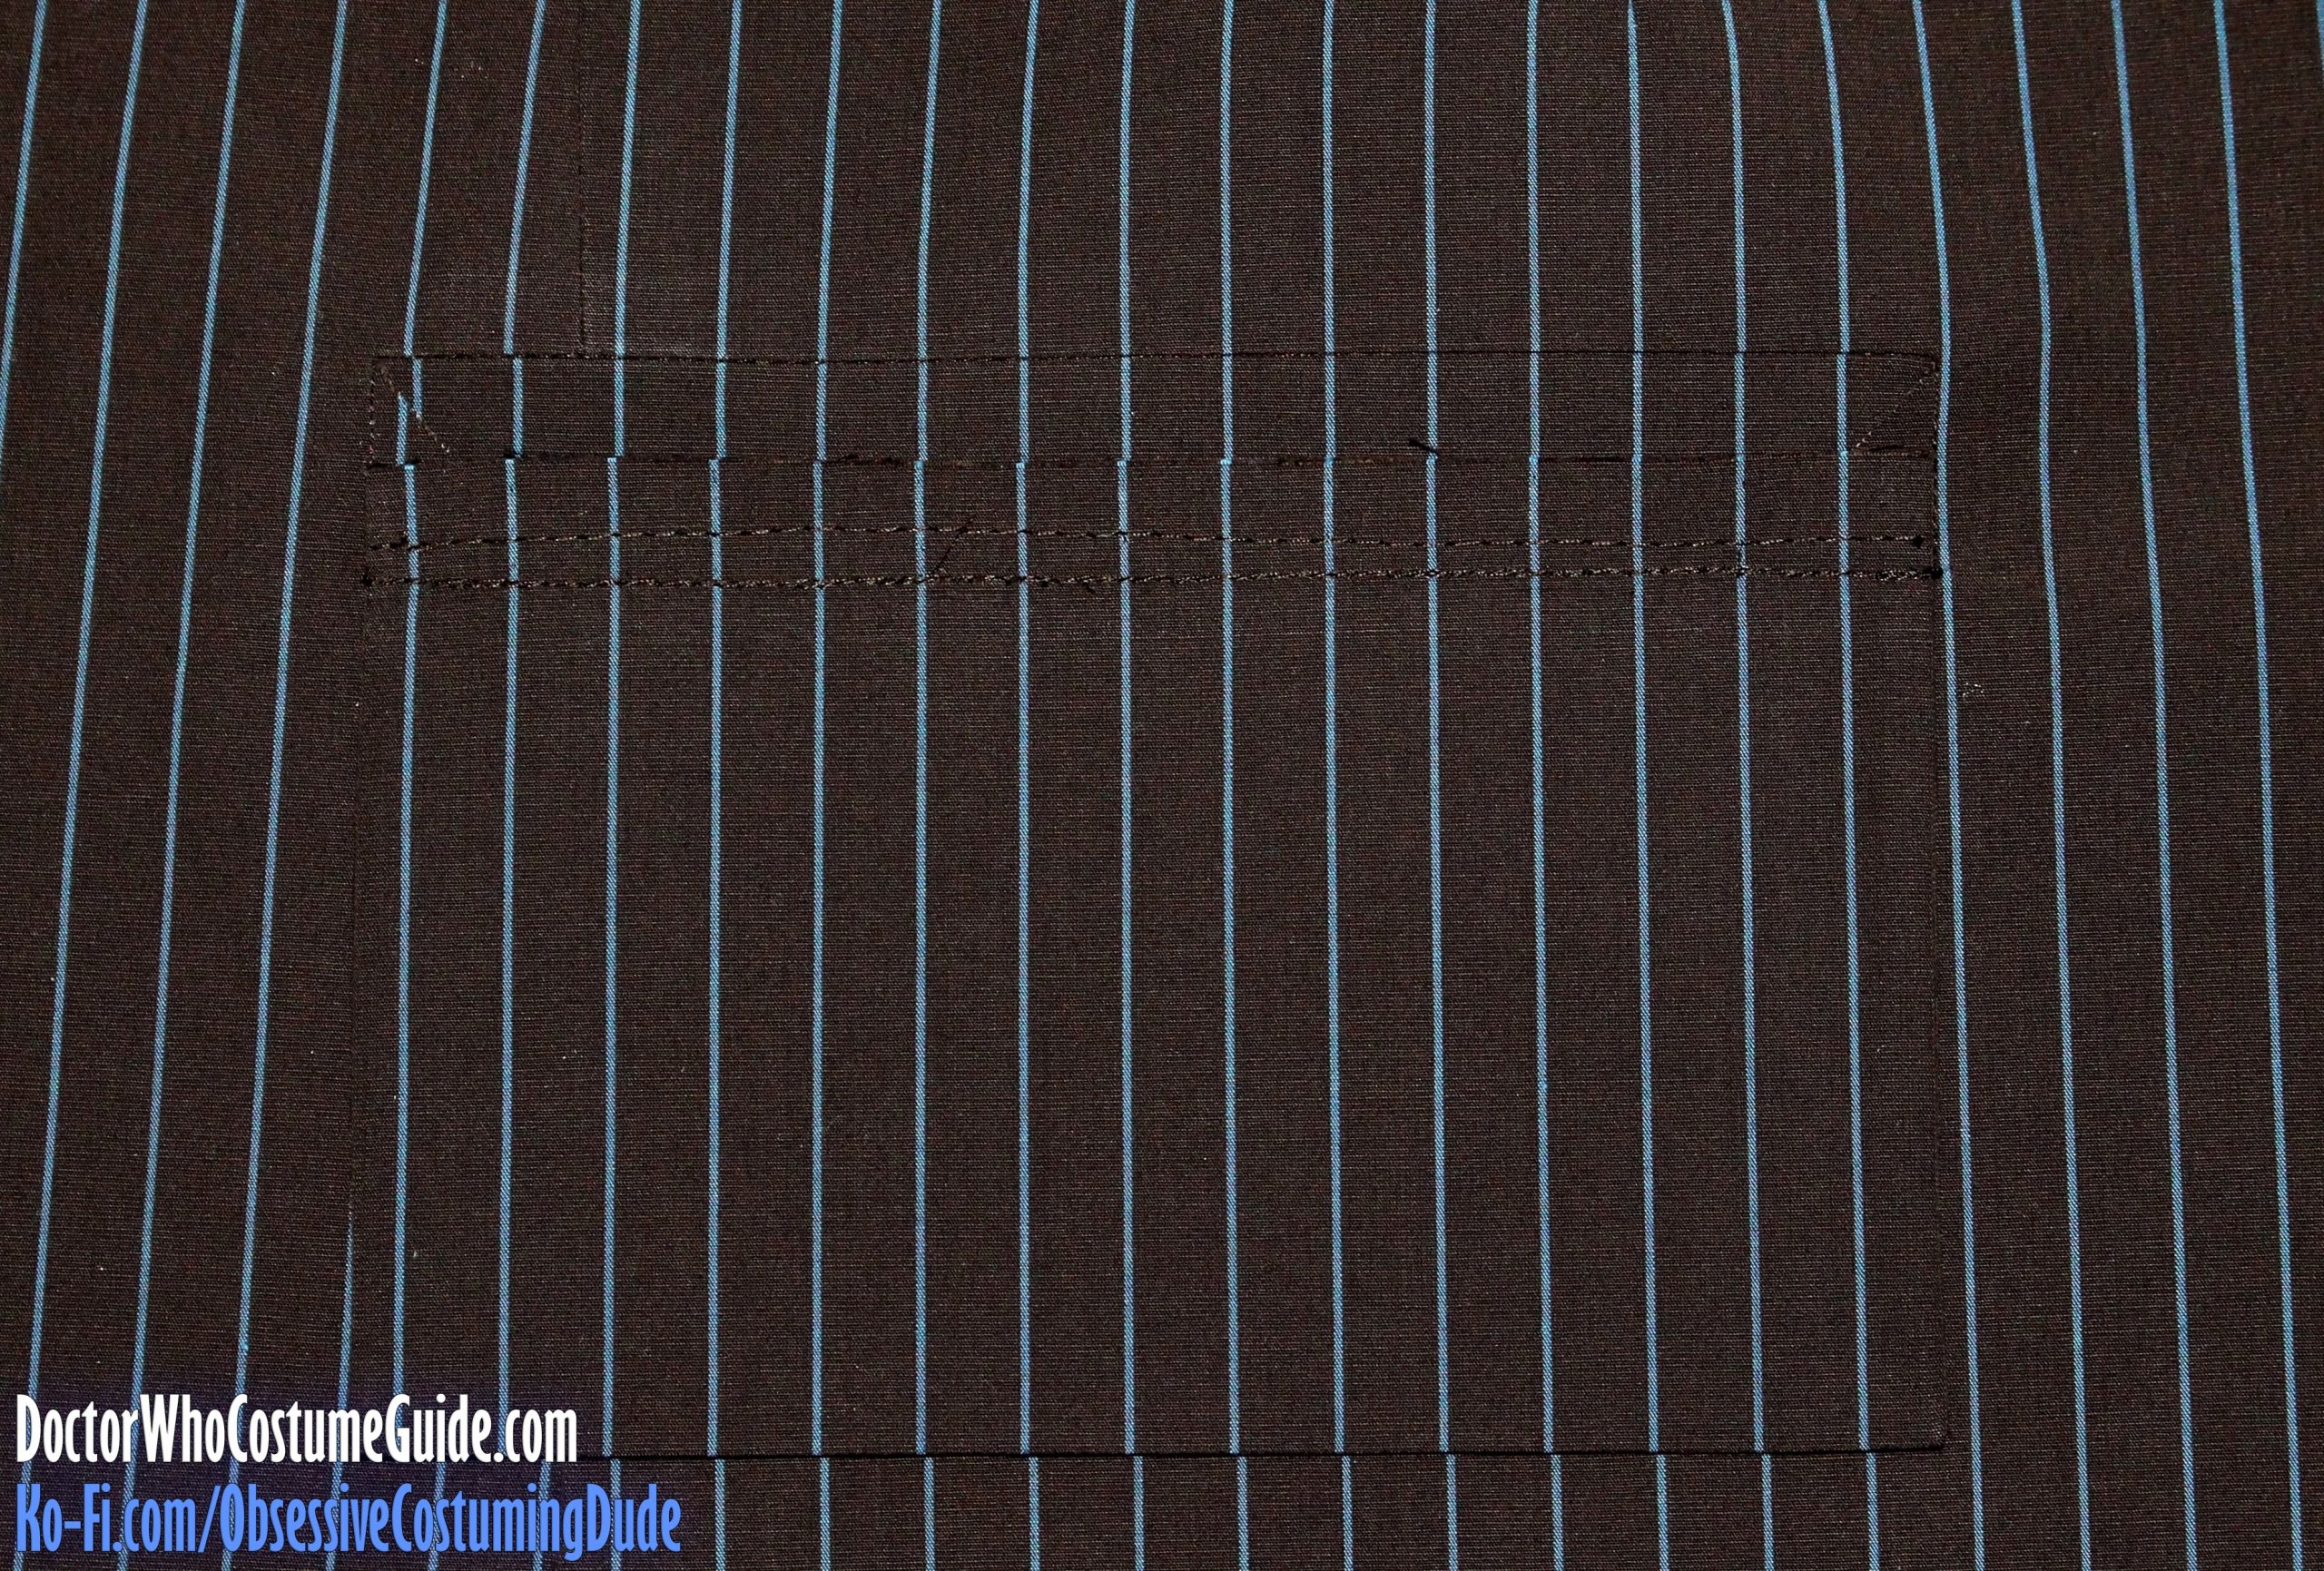
Sew or baste the flap closed across the open end, ⅜” from the edges.
Turn one of the longer edges under on the pocket facing (piece R) under ¼” and press.
With the folded edge on bottom, position the pocket facing (piece R) onto the top of the pocket bag (piece S) so the side and upper edges are flush.
Edge-stitch the pocket facing to the pocket bag around its perimeter.
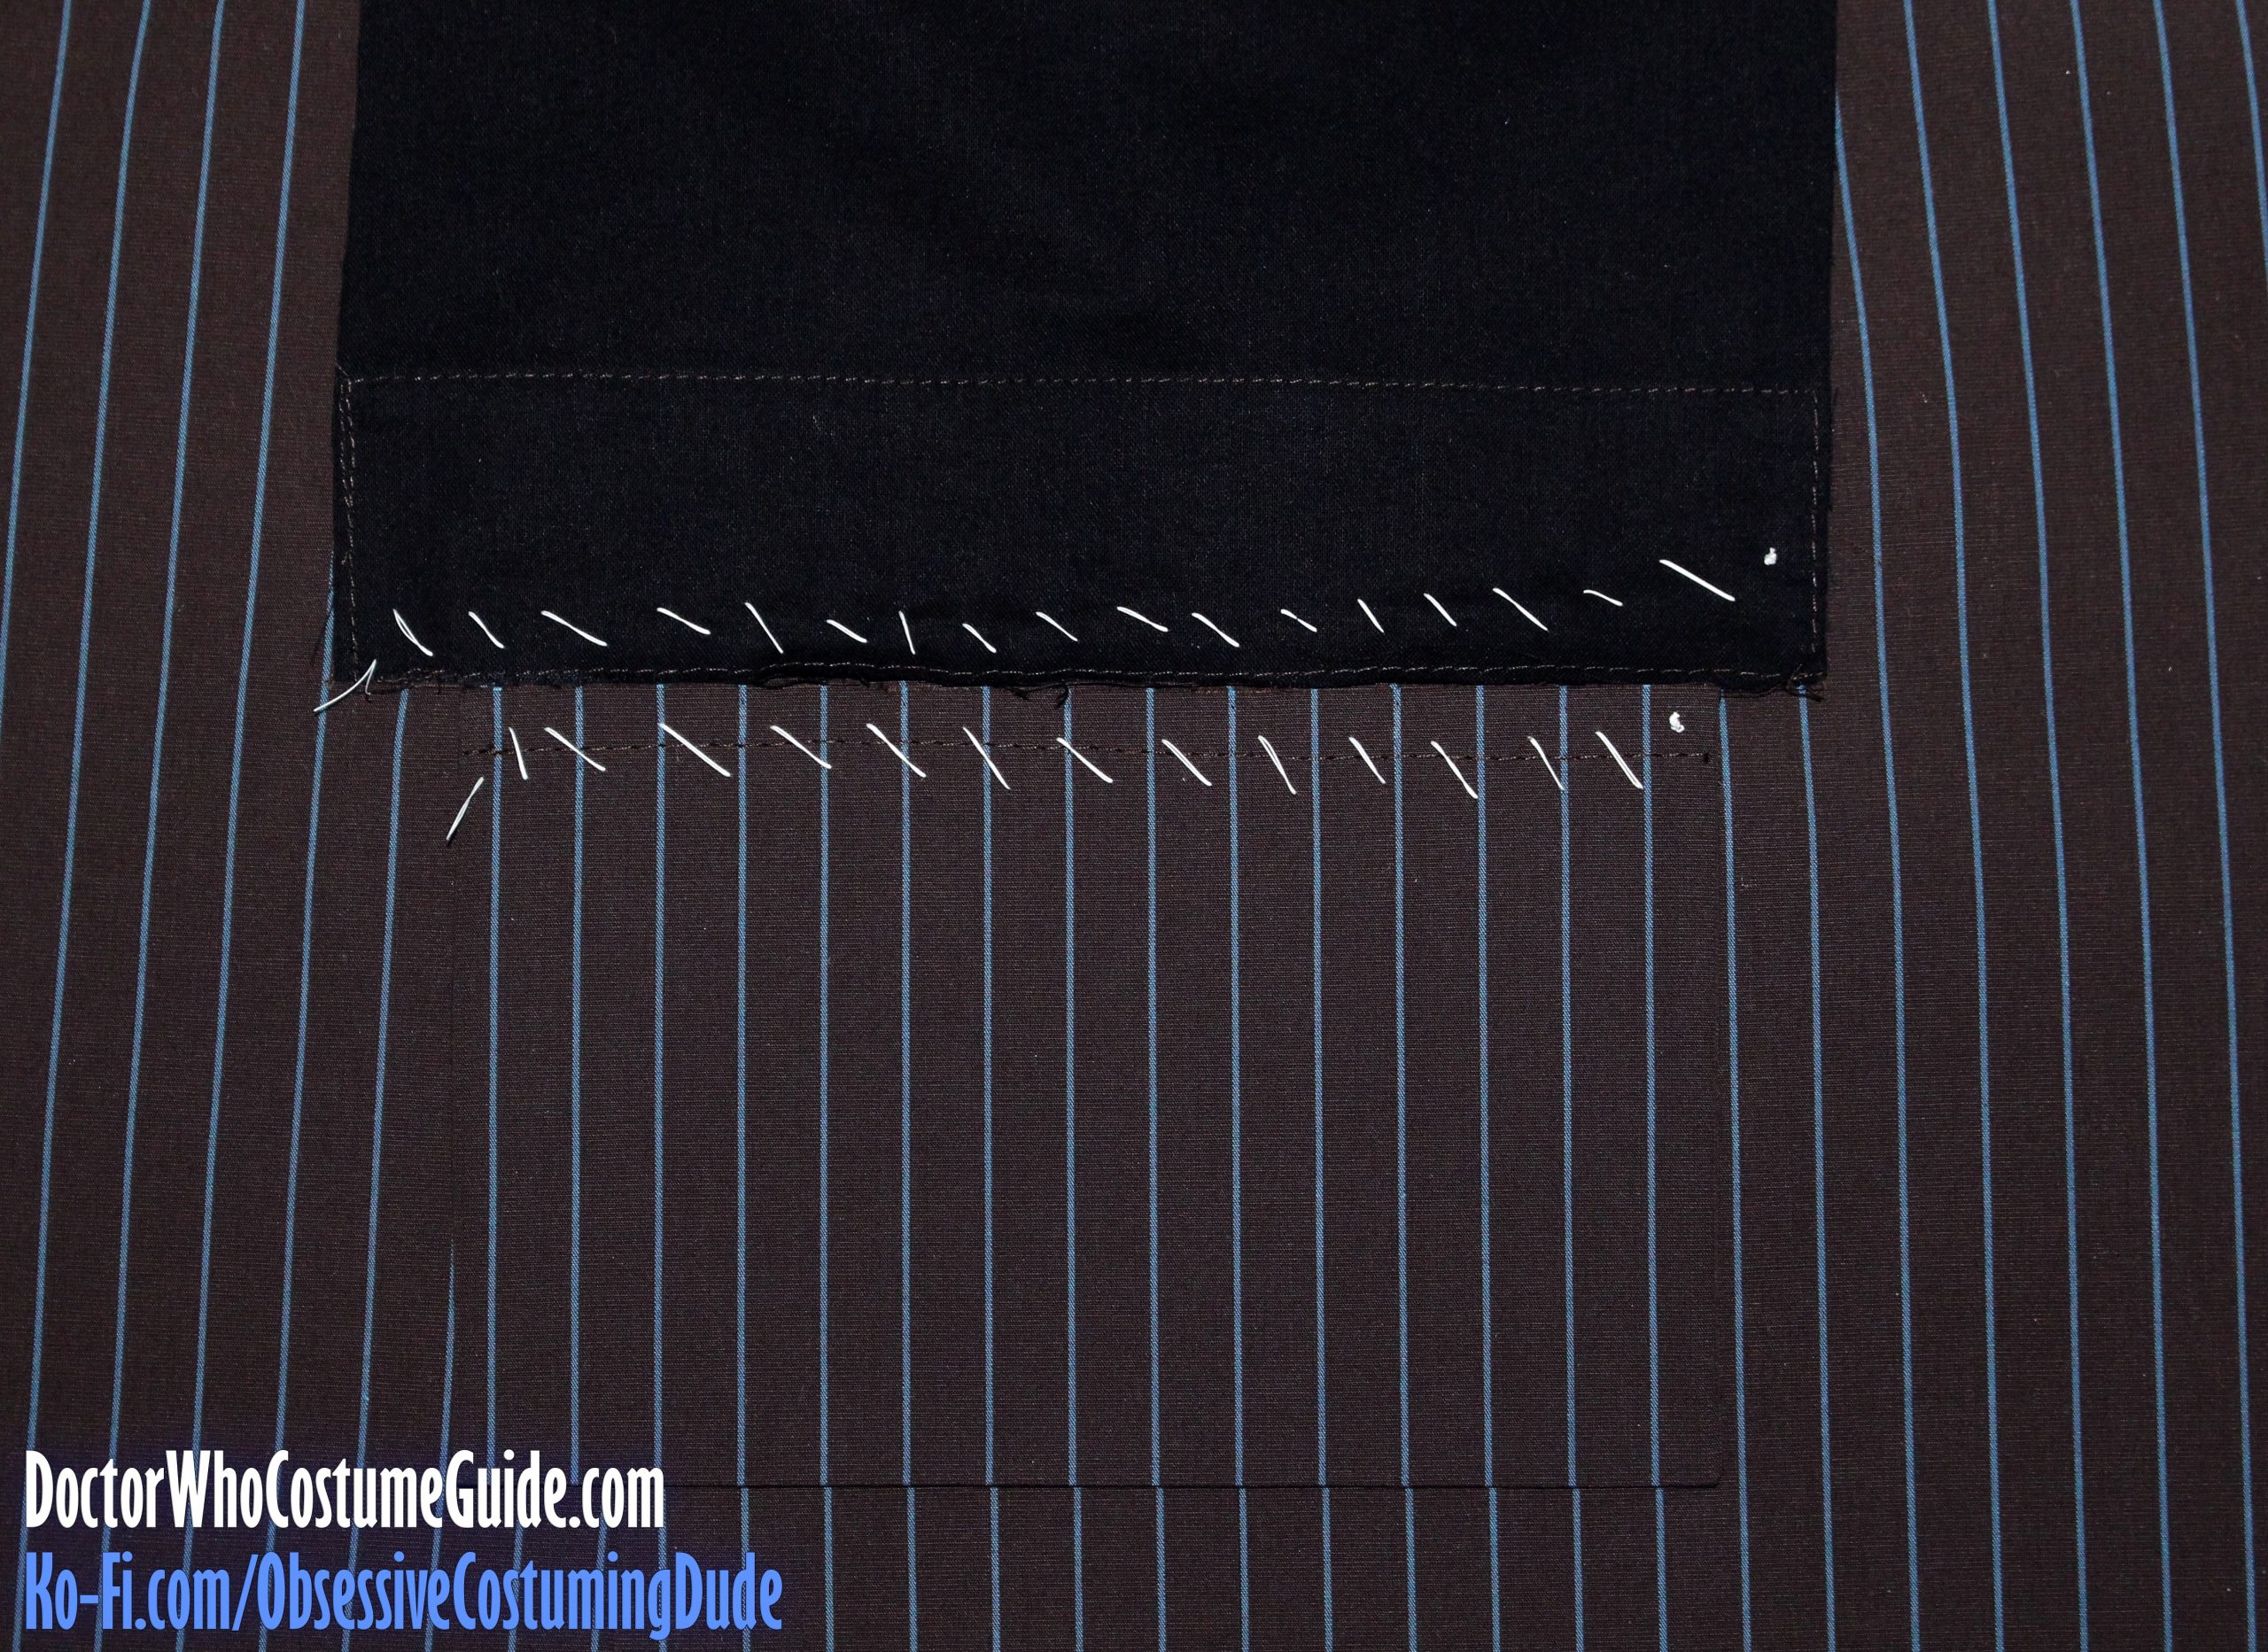
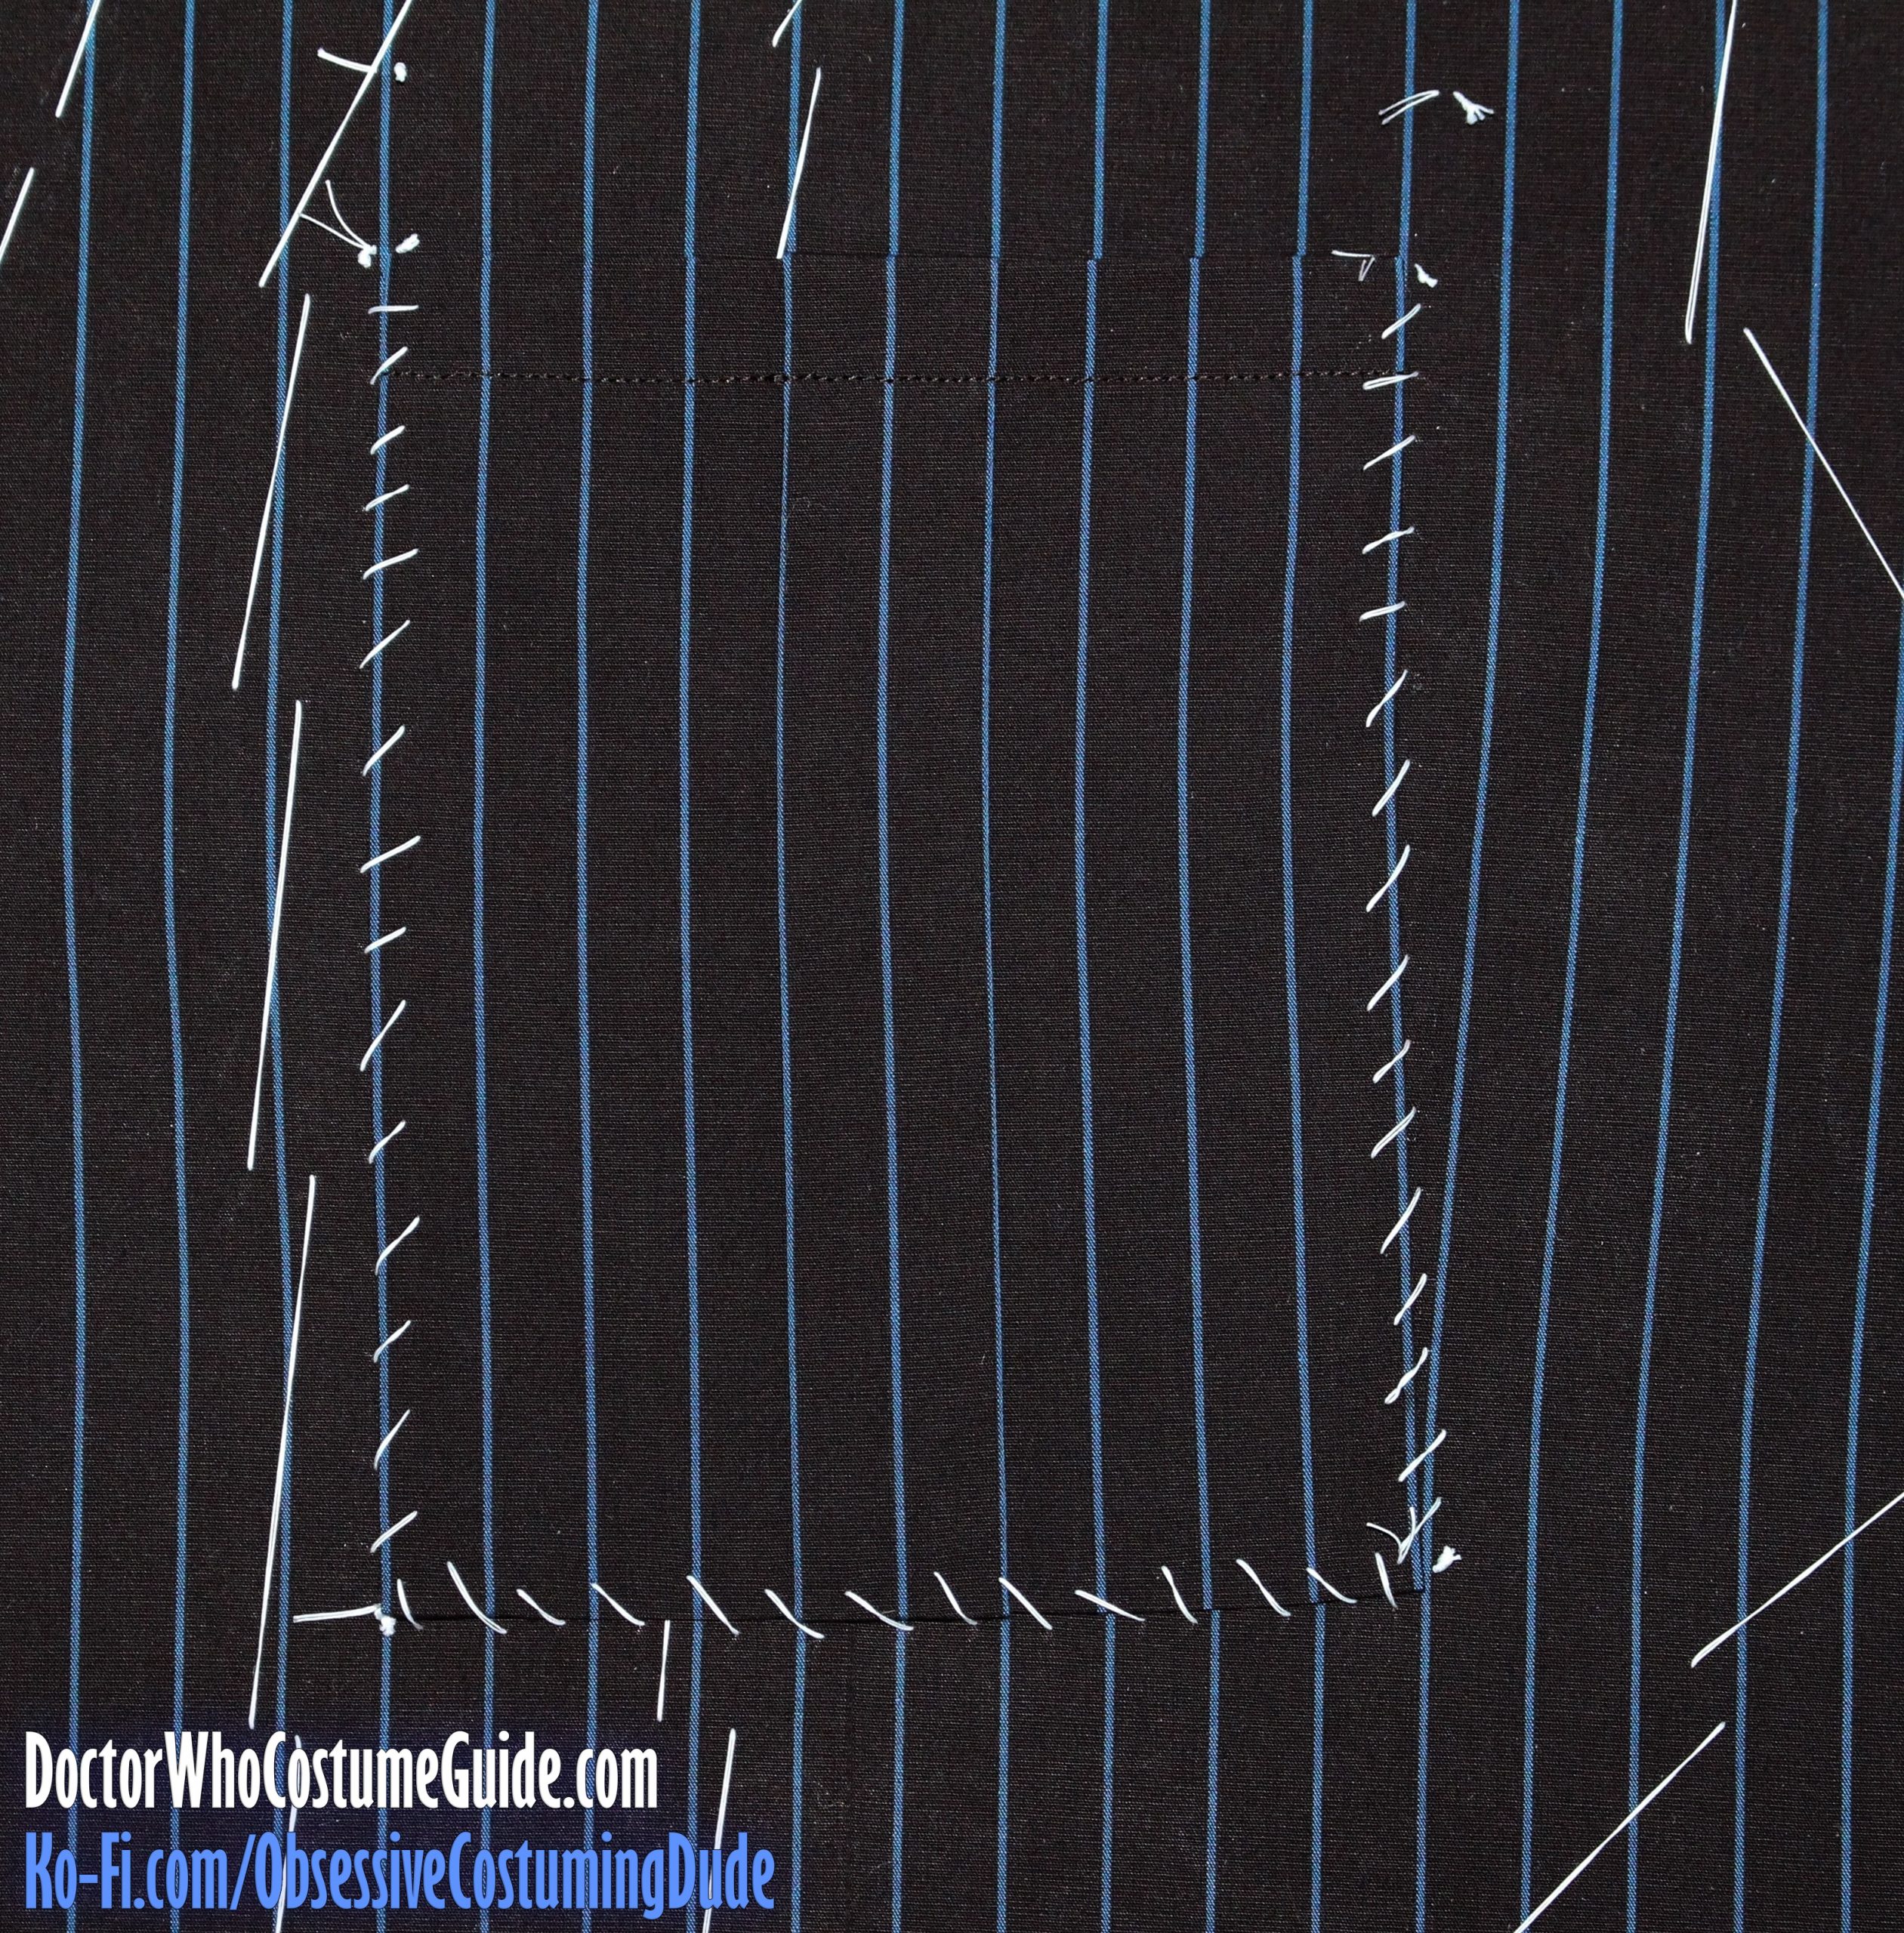
Position your pocket flap onto the right side of the jacket body, with its open/basted end flush with the chalk line you drew halfway along the pocket opening, and matching pinstripes on the jacket front. (The stripes may not properly align on the side panel; don’t worry about it.)
Carefully hand-baste the flap into place over the lower edge of the pocket opening.
Position the pocket facing/bag assembly face down (and upside-down) onto the jacket body, with the facing edges flush with the chalk line and pocket flap edges, again matching pinstripes on the jacket front.
(Note that while the pocket flap is the exact width of the pocket opening, the pocket facing/bag assembly is wider, because it actually has seam allowance on each end.)
Carefully hand-baste the pocket facing/bag assembly into place over the upper edge of the pocket opening.
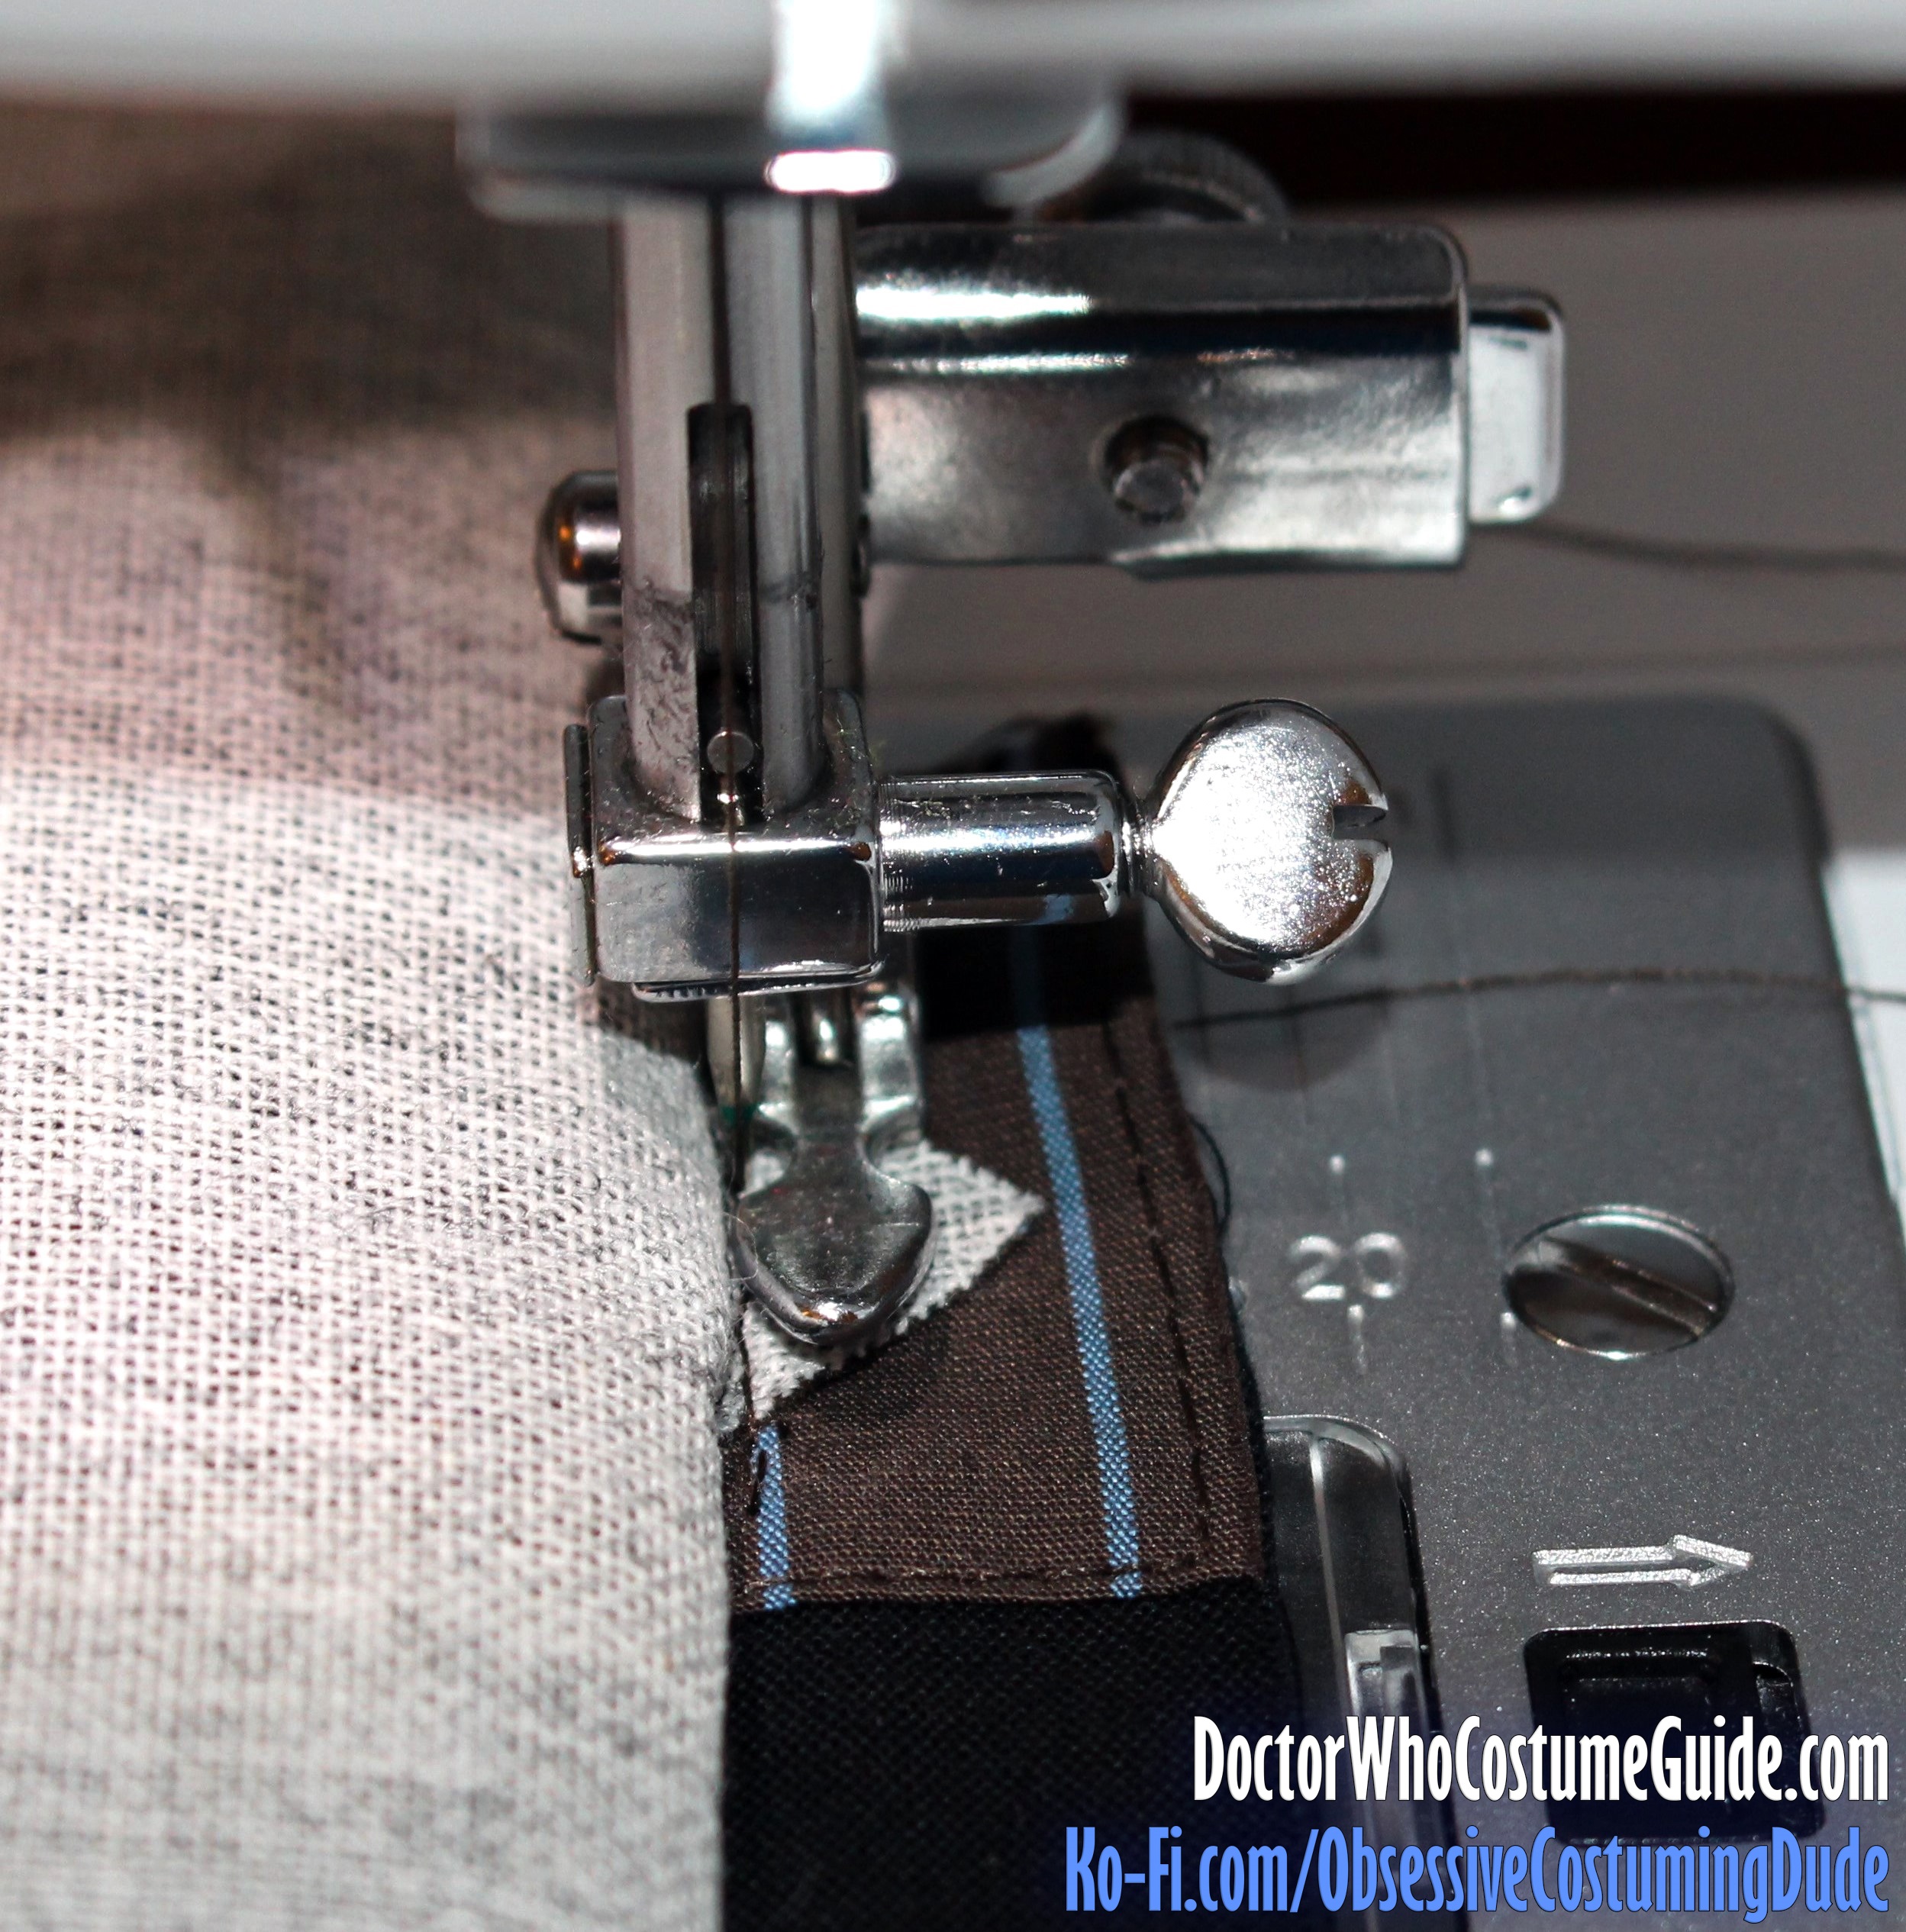
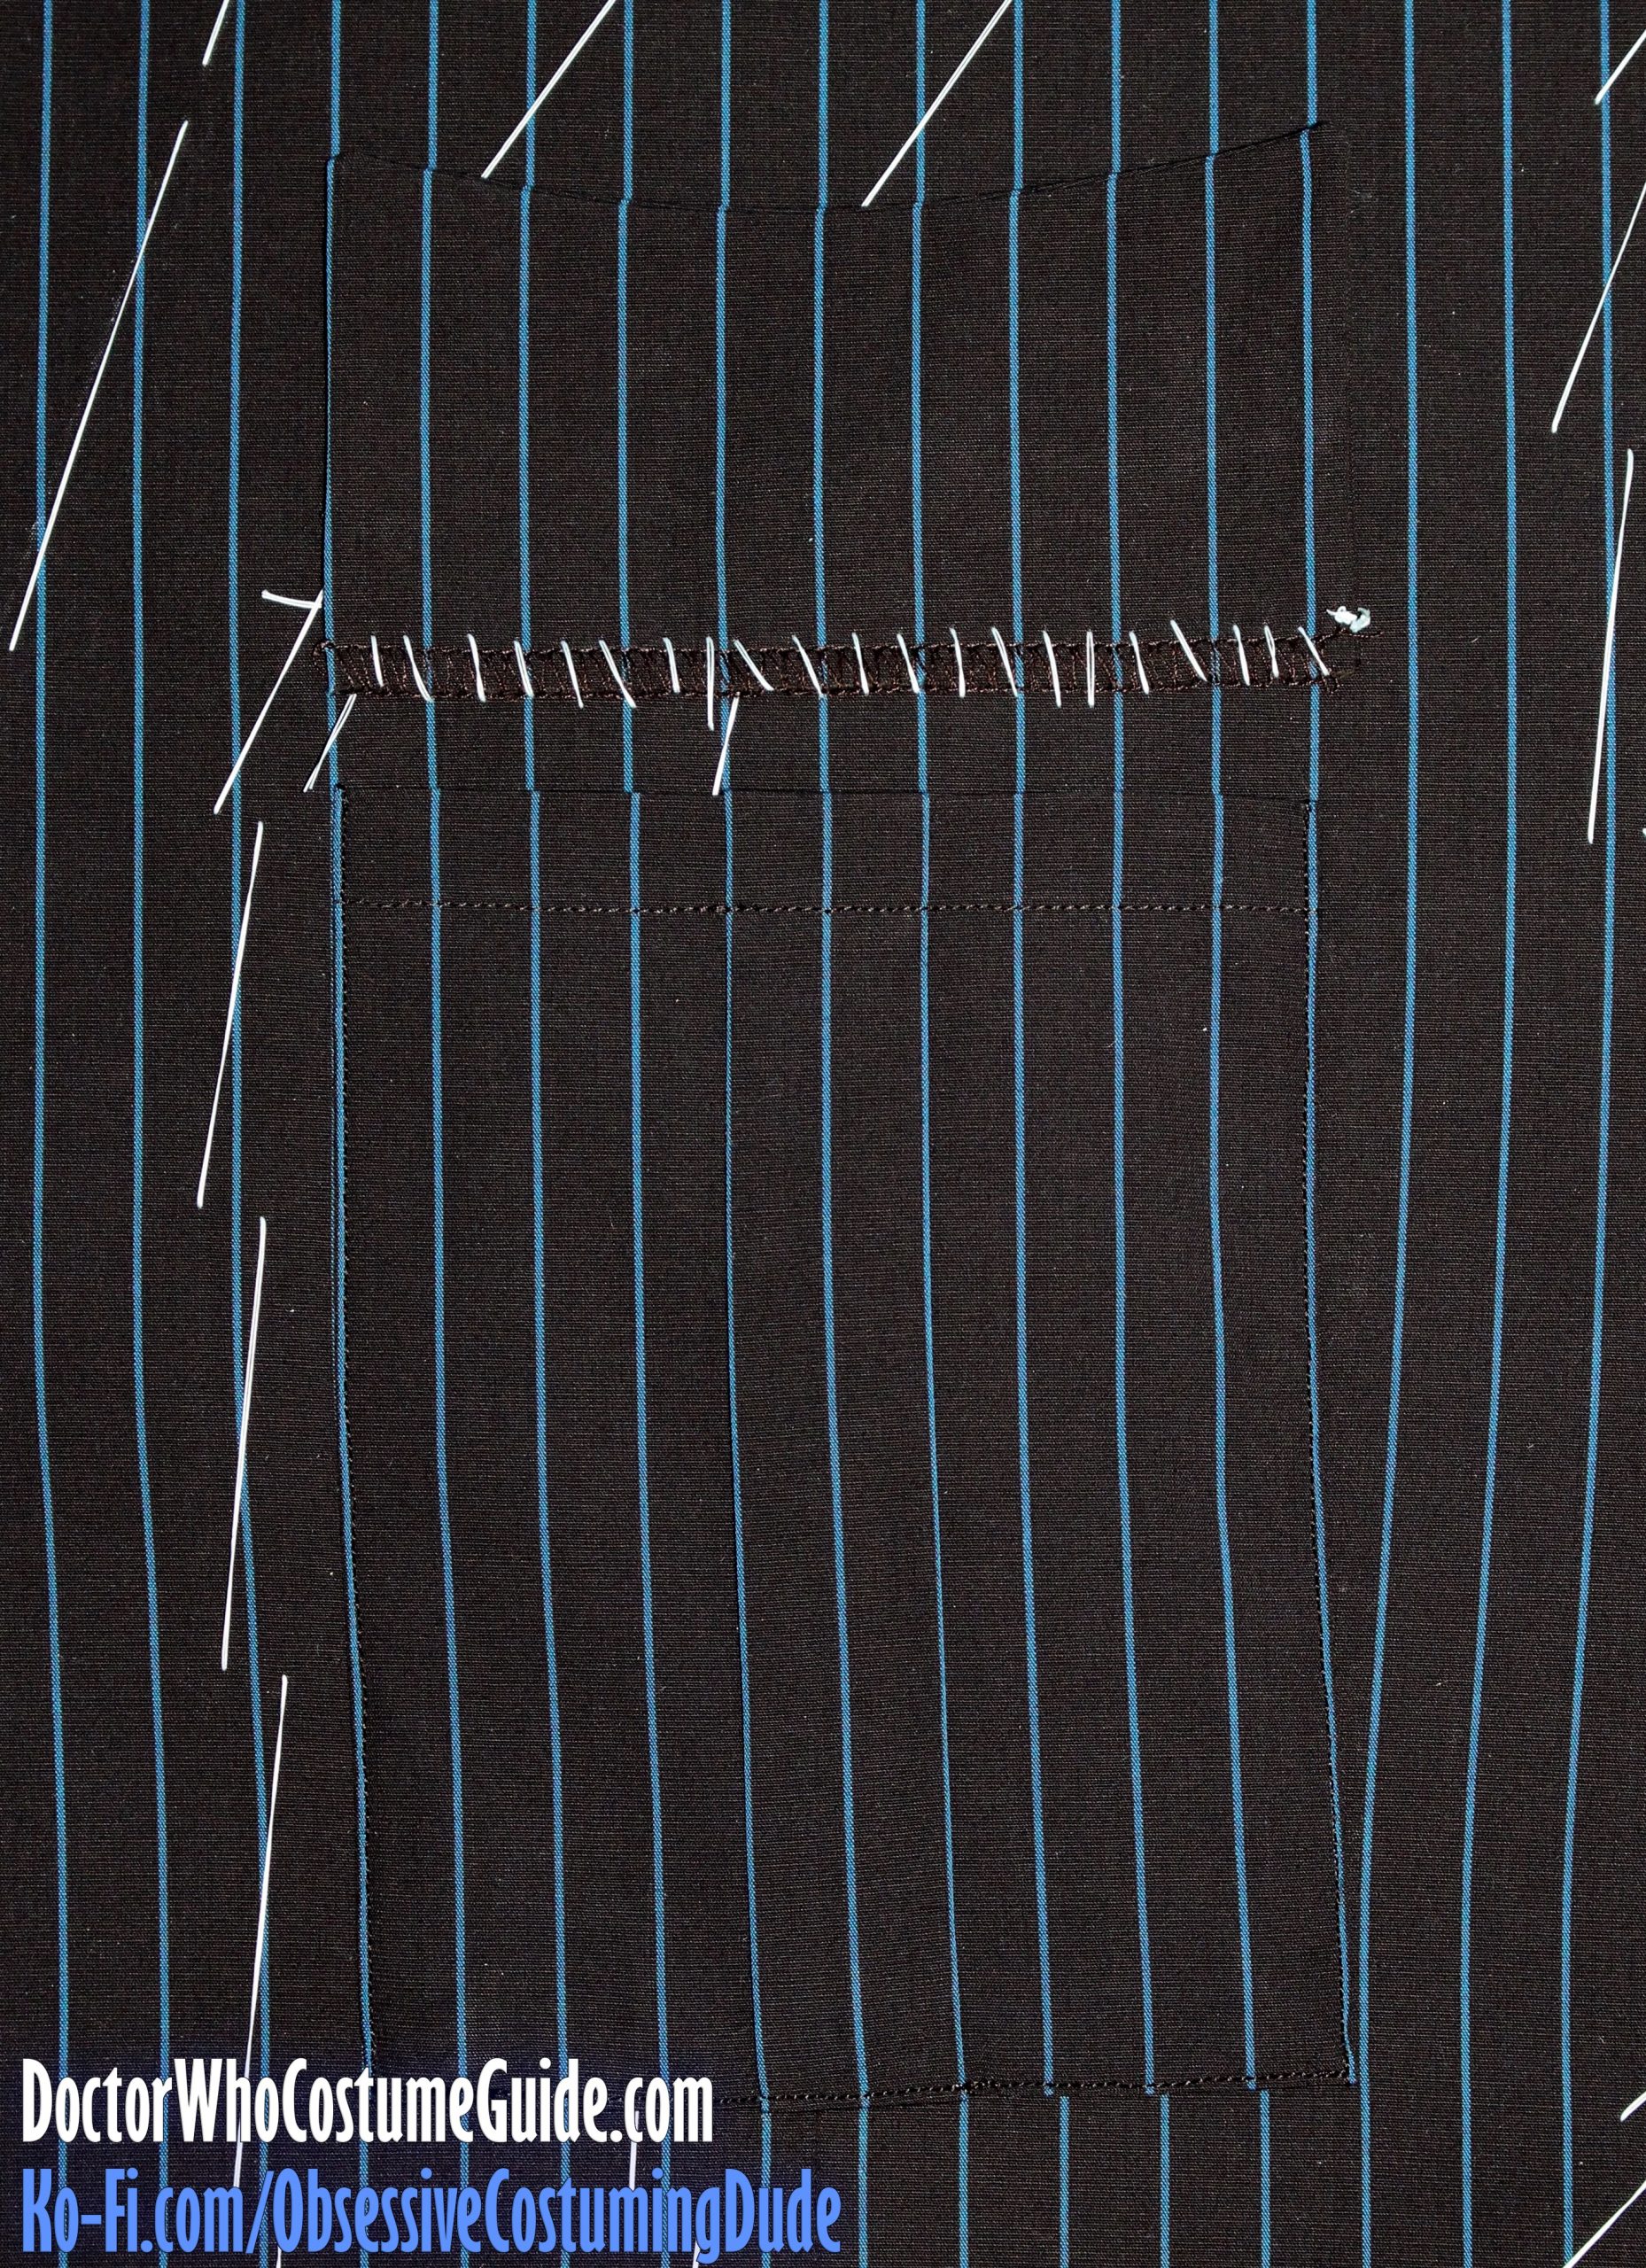
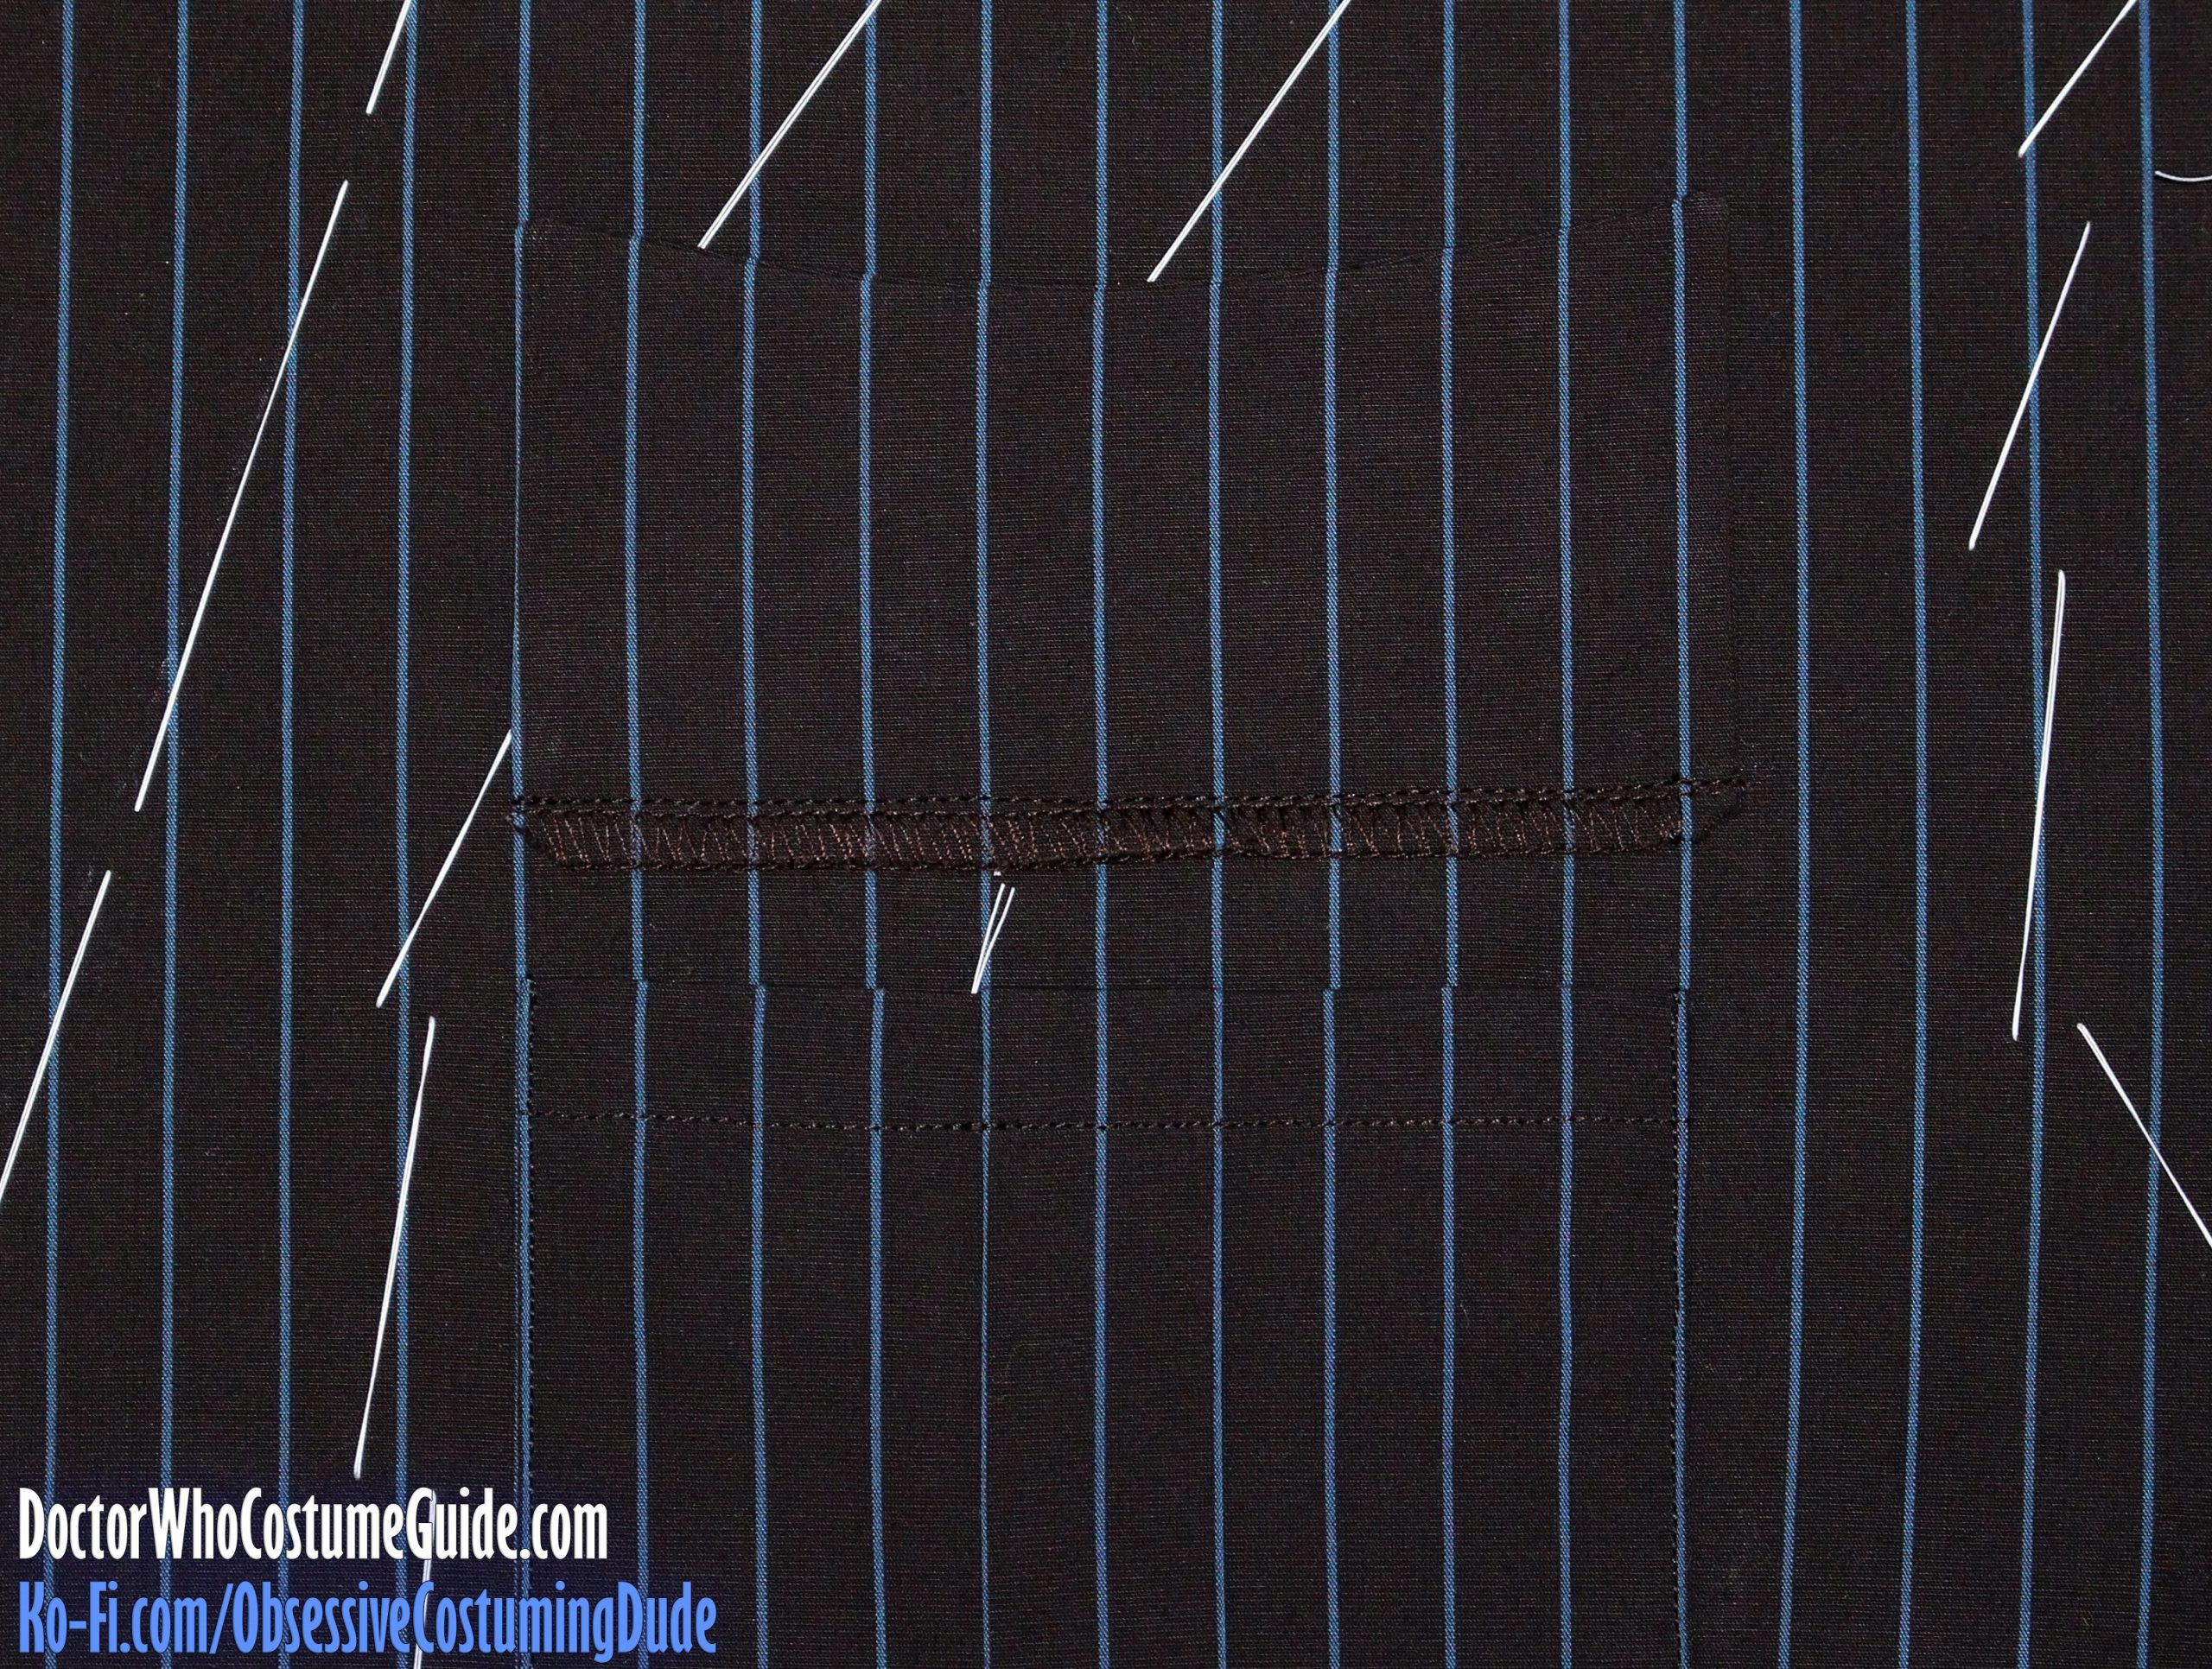
On the wrong side of the jacket, using your quilting/walking foot, stitch again over the upper and lower (long) edges of the pocket opening, beginning and ending exactly at the corners of the pocket opening.
TIP: Baste along the stitch lines and check to make sure the pinstripes properly align along the pocket seam lines before sewing!
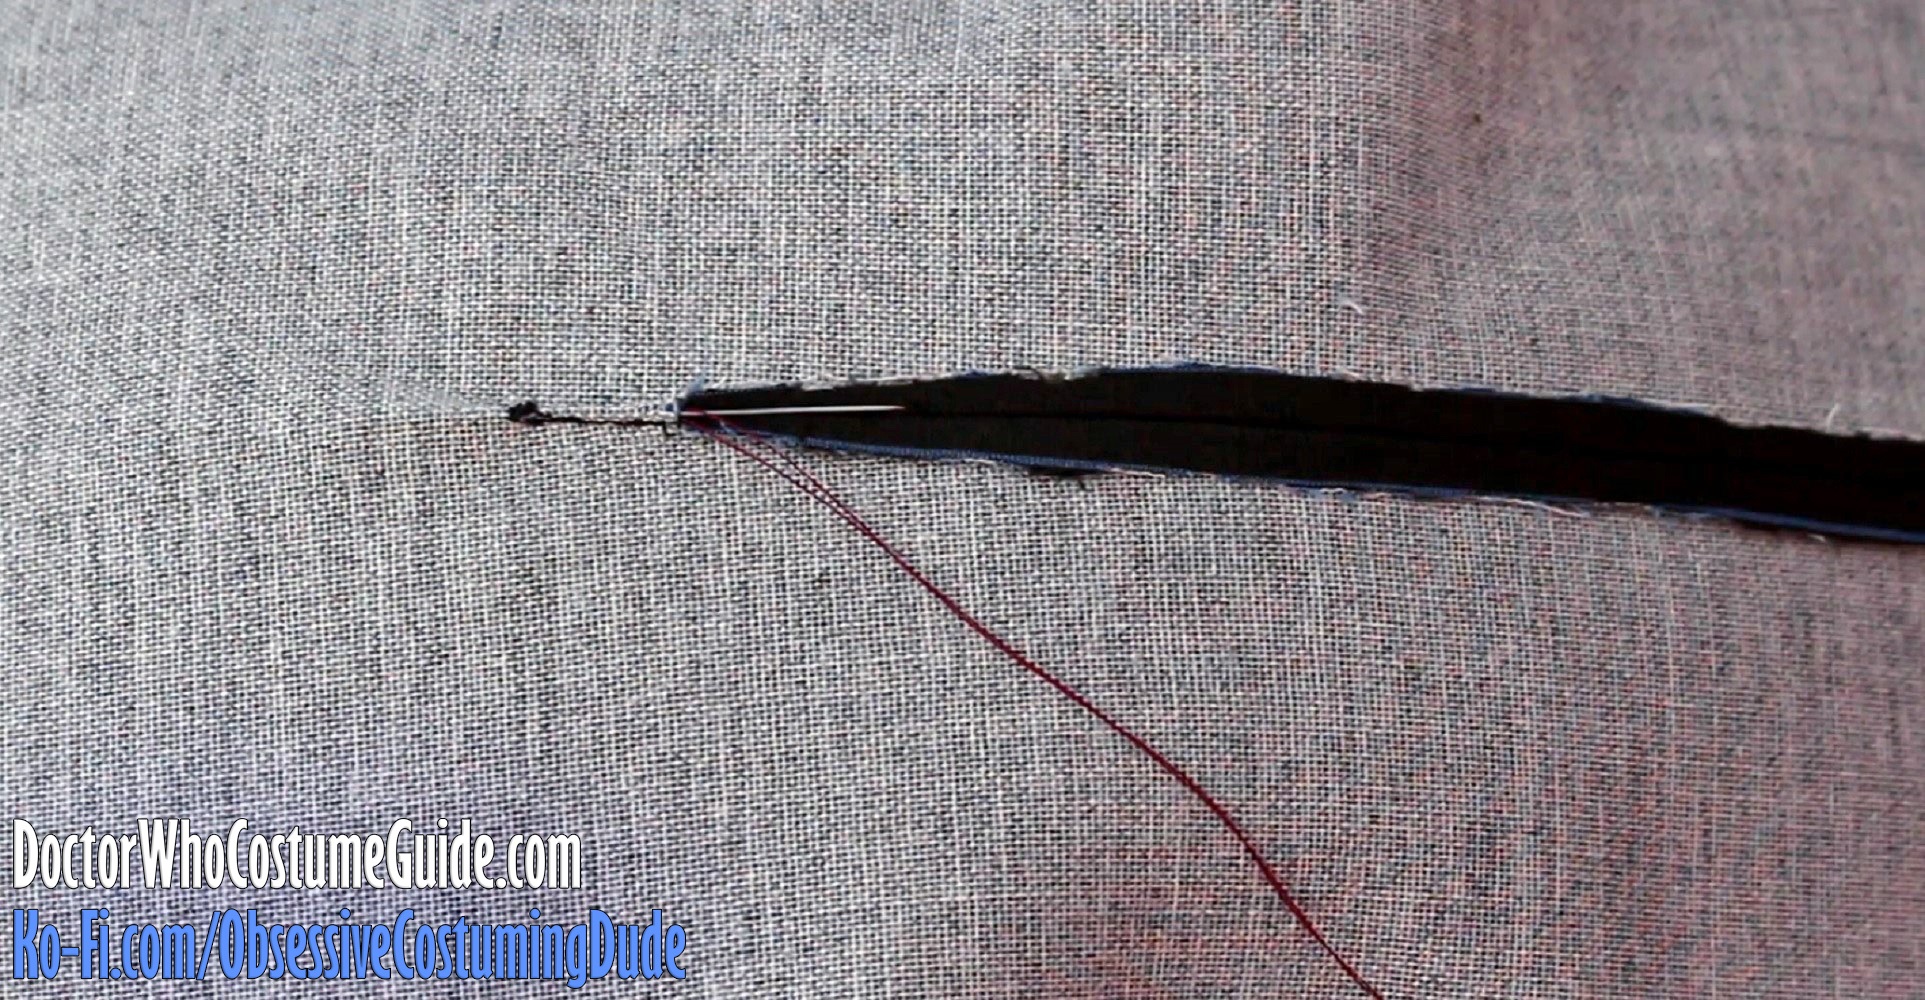
Slash the pocket opening across the center, stopping about ⅜” from the ends and snipping a “Y” shape to the corners on each side, catching only the garment fabric (not the facing, flap, or pocket pouches).
TIP: Be sure to clip all the way to the corners, but not past them! Sharp scissors are essential for this!
TIP: Trim some bulk out of the seam allowances, to help the layers turn under and lie flatter. (See above.)
Turn the facing/bag under by pulling it through the pocket opening and pressing the layers flat. (Be sure to press the pocket opening’s upper seam allowance upward.)
Turn the basted/open end of the pocket flap under in the same manner, and press the layers flat. (Be sure to press the pocket opening’s lower seam allowance downward.)
At the front and back edges of the pocket opening, carefully press the little triangular “prongs” under to the wrong side along the stitch line. (I find tweezers helpful for this.)
From the right side, pull the jacket body away so the edge of the pocket is visible.
Using your zipper/piping foot, sew the triangular “prongs” to the pocket facing.
Turn the jacket over, so the wrong side is facing you.
Pull the pocket bag upward until its lower edge is flush with the lower pocket/flap seam allowances, and pin it into place.
Turn the jacket back over, onto the right side, and rotate it so it’s upside-down.
Pull the lower jacket body downward, out of the way, so the pocket’s lower seam allowances are visible.
Again using your zipper/piping foot, sew the pocket bag to the lower pocket/flap seam allowance, close to the previous stitch line.
Rotate the jacket back around so it’s face up.
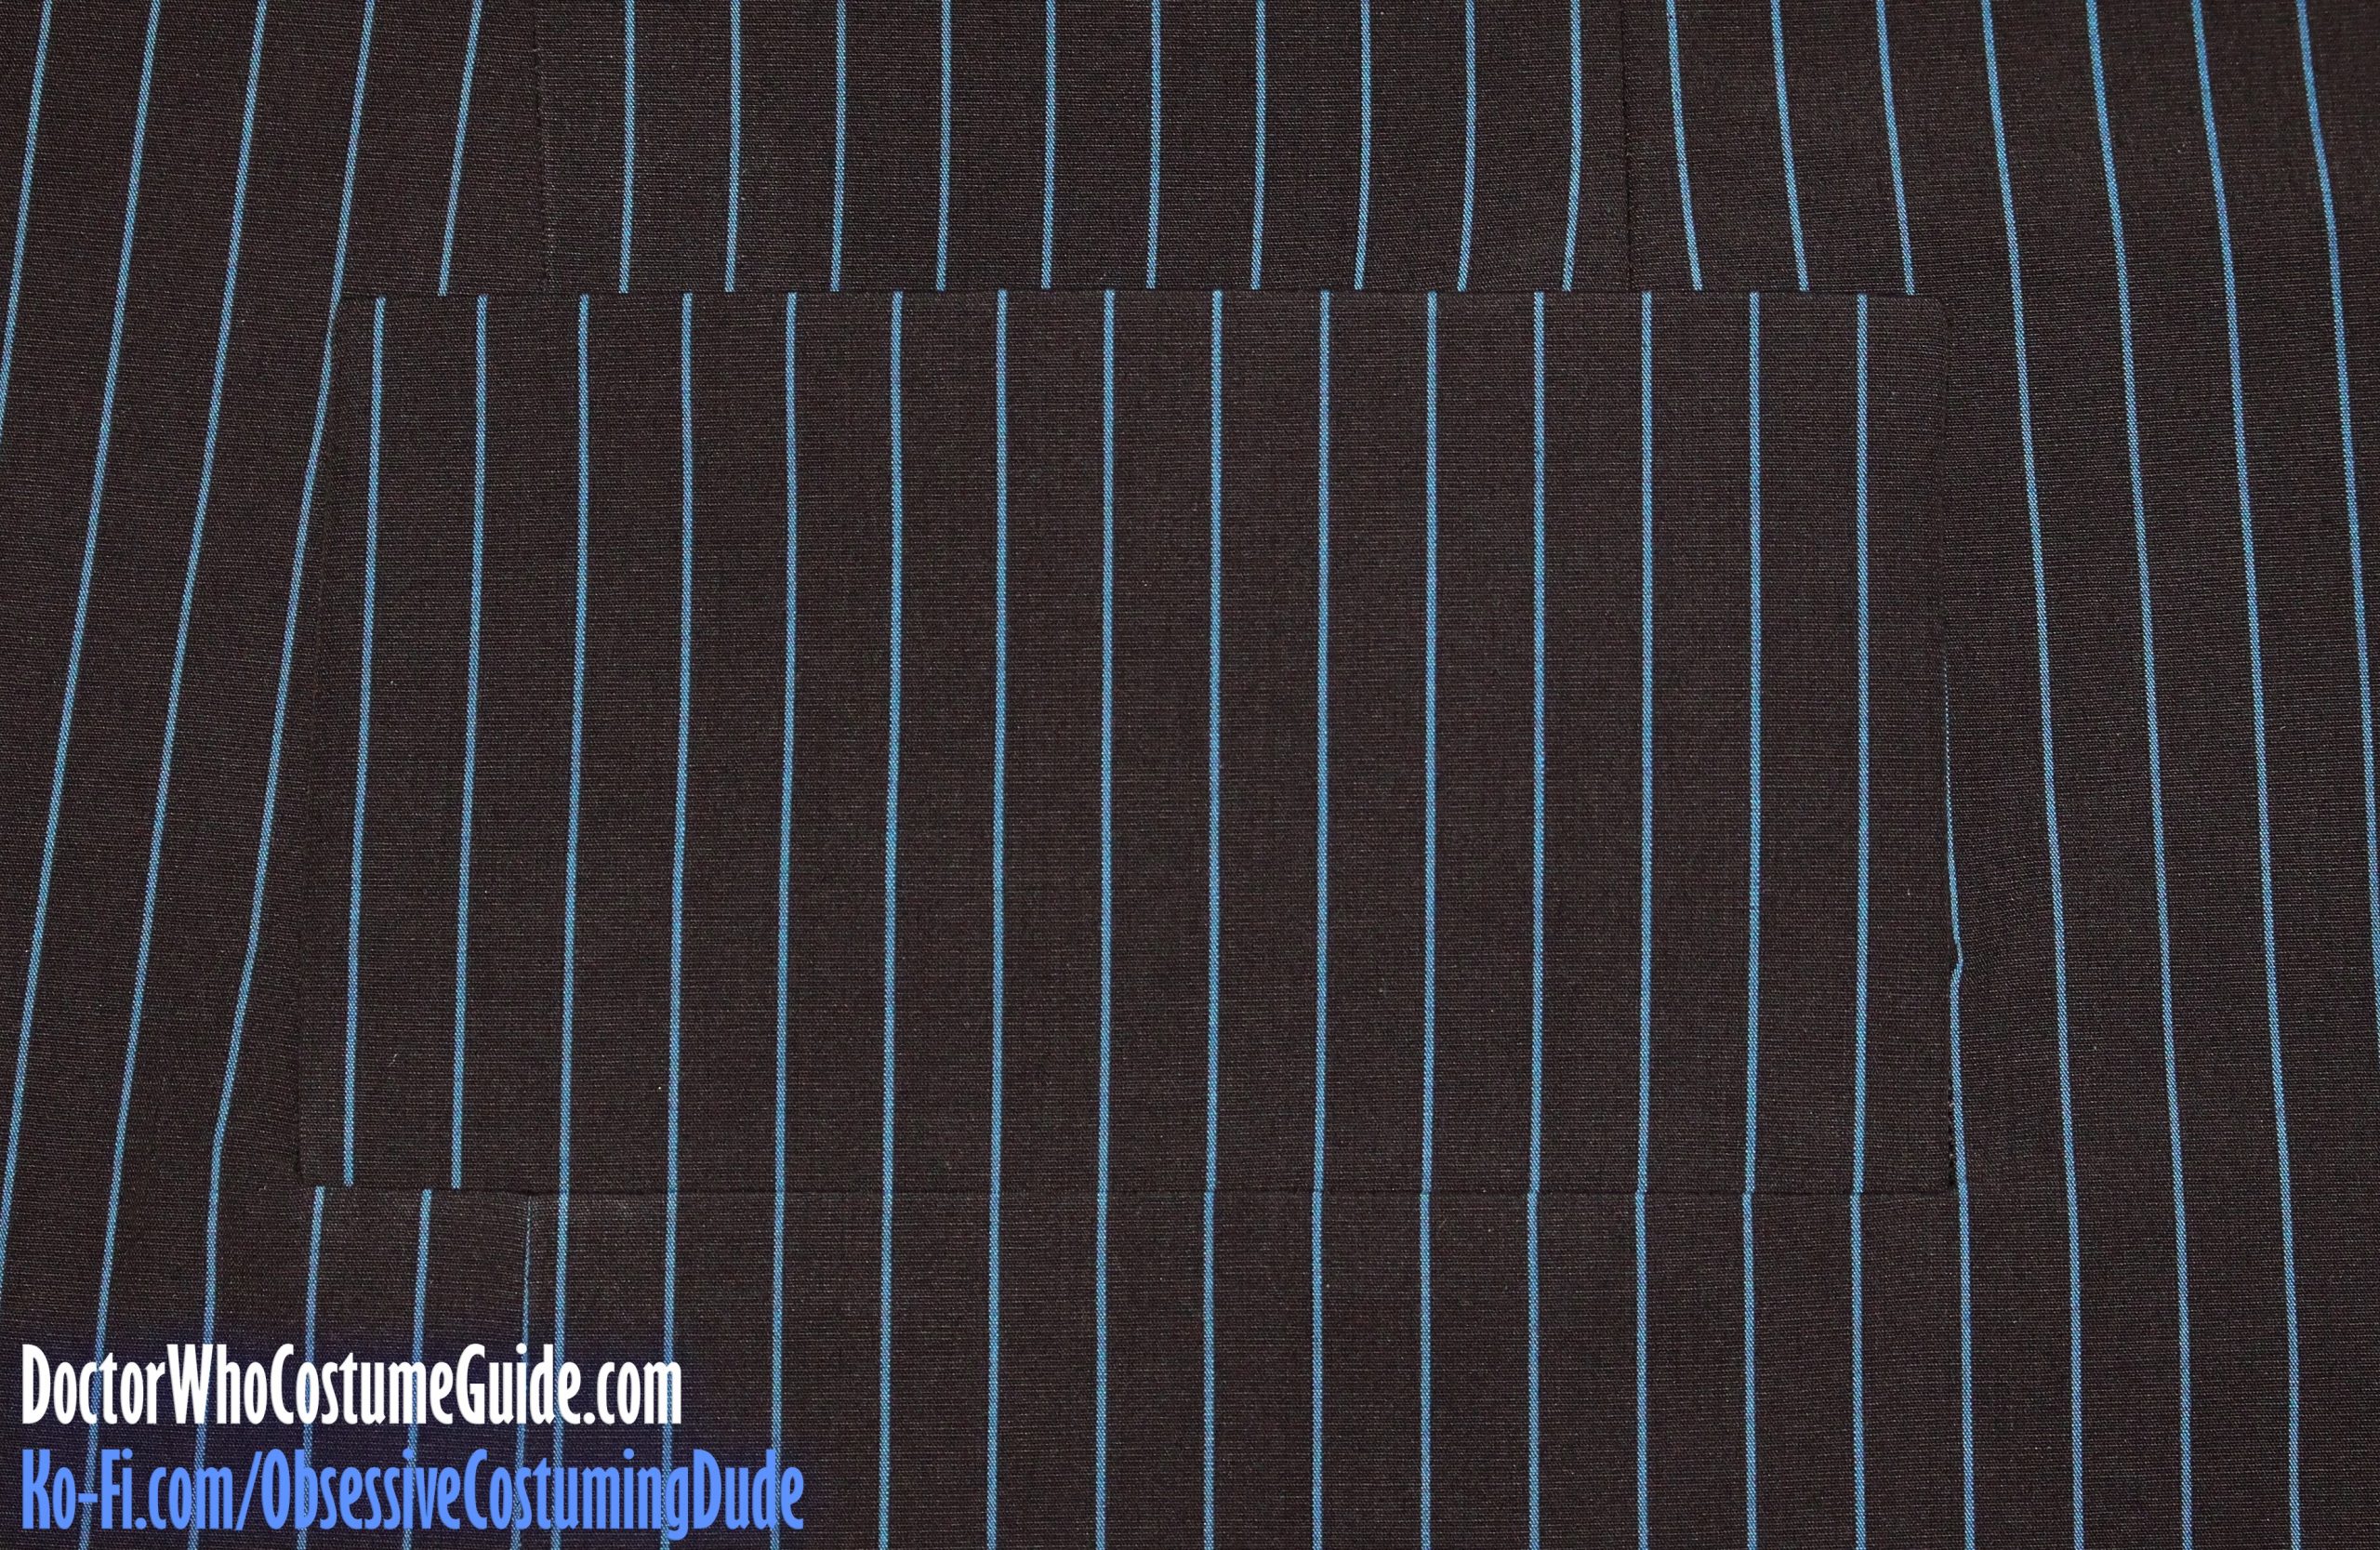
Lift the lower jacket out of the way, revealing the pocket bag.
Press the crease onto the lower edge of the pocket bag.
Pin the edges of the pocket bag together.
Stitch the sides of the pocket bag closed.
I like to curve my stitching slightly toward the bottom, rather than producing sharp lower corners.
I also like to stitch again ⅛” from the previous stitching and trim the allowances with pinking shears.
On the right side of the jacket, hand-baste the side edges of the pocket flap to the jacket. (This will help prevent any “gapping” between the finished pocket and jacket.)
Using your quilting/walking foot and a short stitch length, sew a small rectangular “box” on each lower end of the pocket flap through all layers to secure and reinforce them.
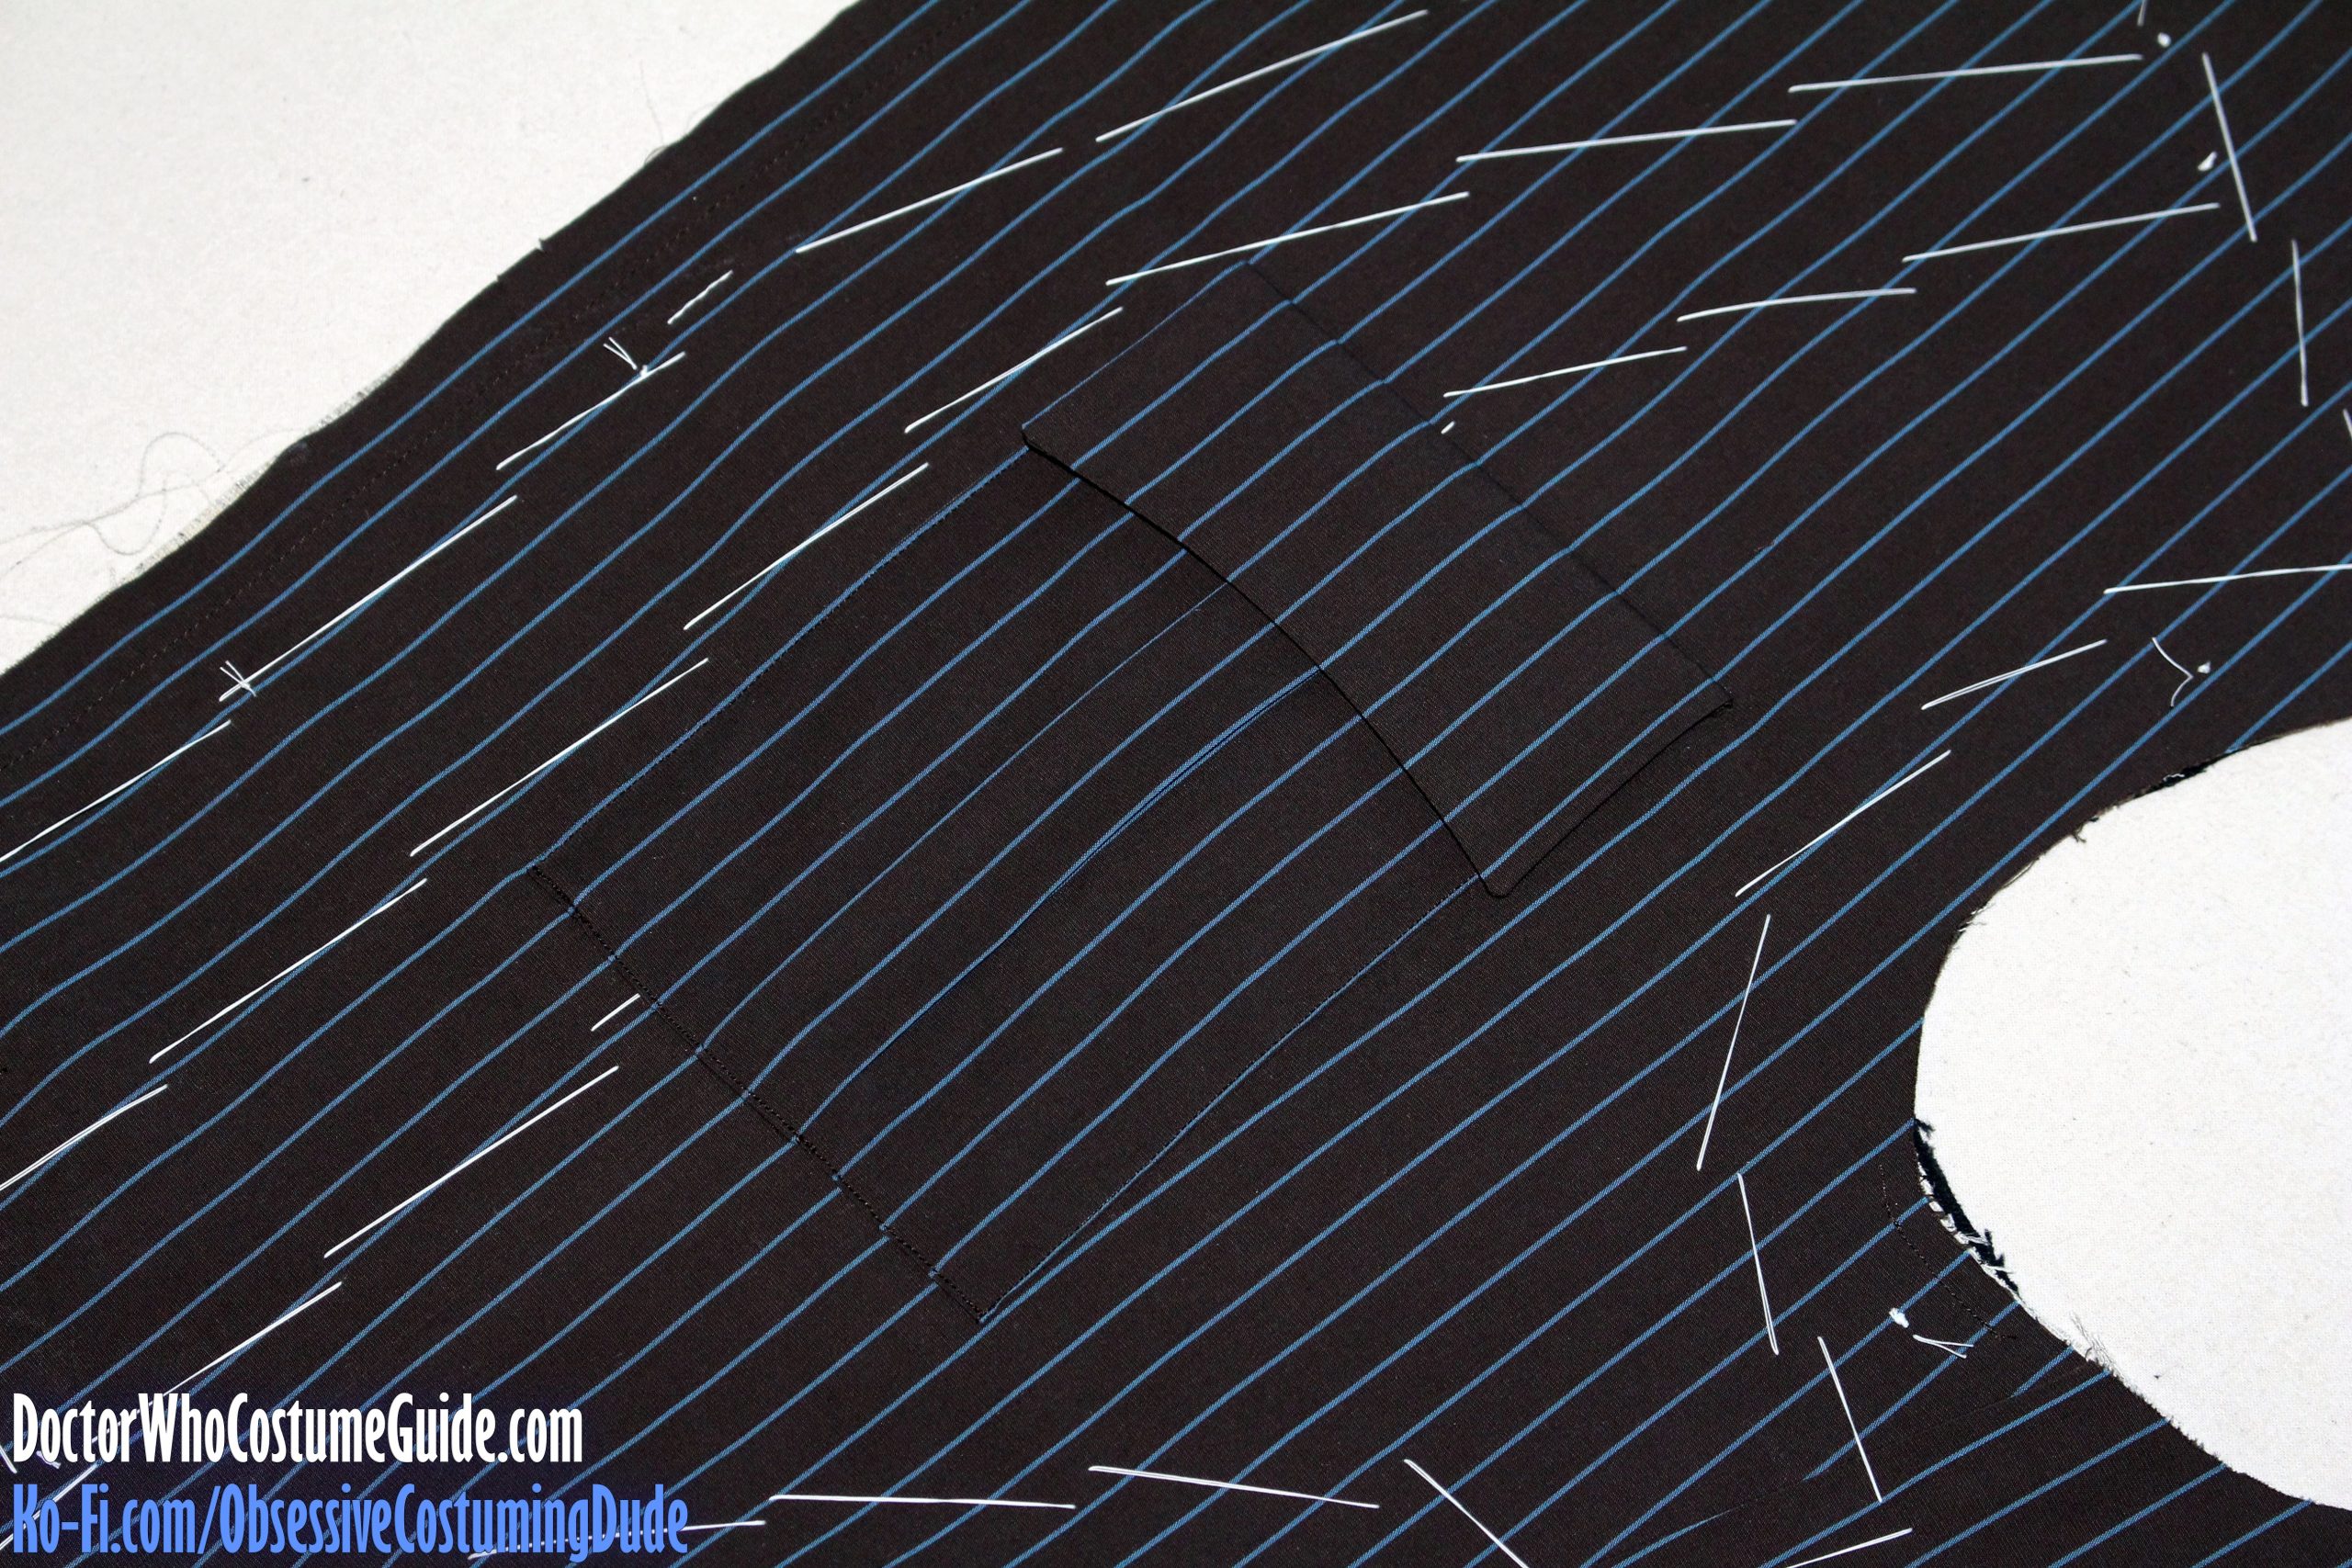
Press the pocket flap downward, and there you have it – a “faux-flap” pocket!
One final thing I like to do is to “anchor” the outer corner of the pocket to the underarm using a 1” strip of (straight-grain) muslin.
To do this, simply sew the strip to the pocket’s upward seam allowance, press it upward, and sew the other end into the lower armscye.
Take care to determine the ideal length of the strip before attaching it! If the strip is too short, it will pull on the jacket (ew), but if it’s too long, it won’t really provide any support at all.
Rather than trying to determine the proper length while the assembly is lying as flat as possible, I prefer to experiment a bit by draping the fabric vertically as if it were being worn to determine the proper length.
Repeat for the other side.
FRONT STRUCTURING
At this point, you could prepare and attach the left chest pocket (and its corresponding flap), or you can do it after the front canvas assembly has been basted to the front.
Each way has its pros and cons.
Doing it now means you have fewer layers to sew through when attaching the pocket, but it’ll also be a bit more difficult to baste the canvas assembly to the front afterward.
On the other hand, basting the canvas assembly to the front is easier without the pocket in the way, but sewing the pocket onto the jacket front later also entails sewing through more layers.
I sewed my pocket onto the jacket after basting the front canvas, but either way is fine.
There are different schools of thought regarding the preparation of the canvas assembly and the resulting structure of the jacket front.
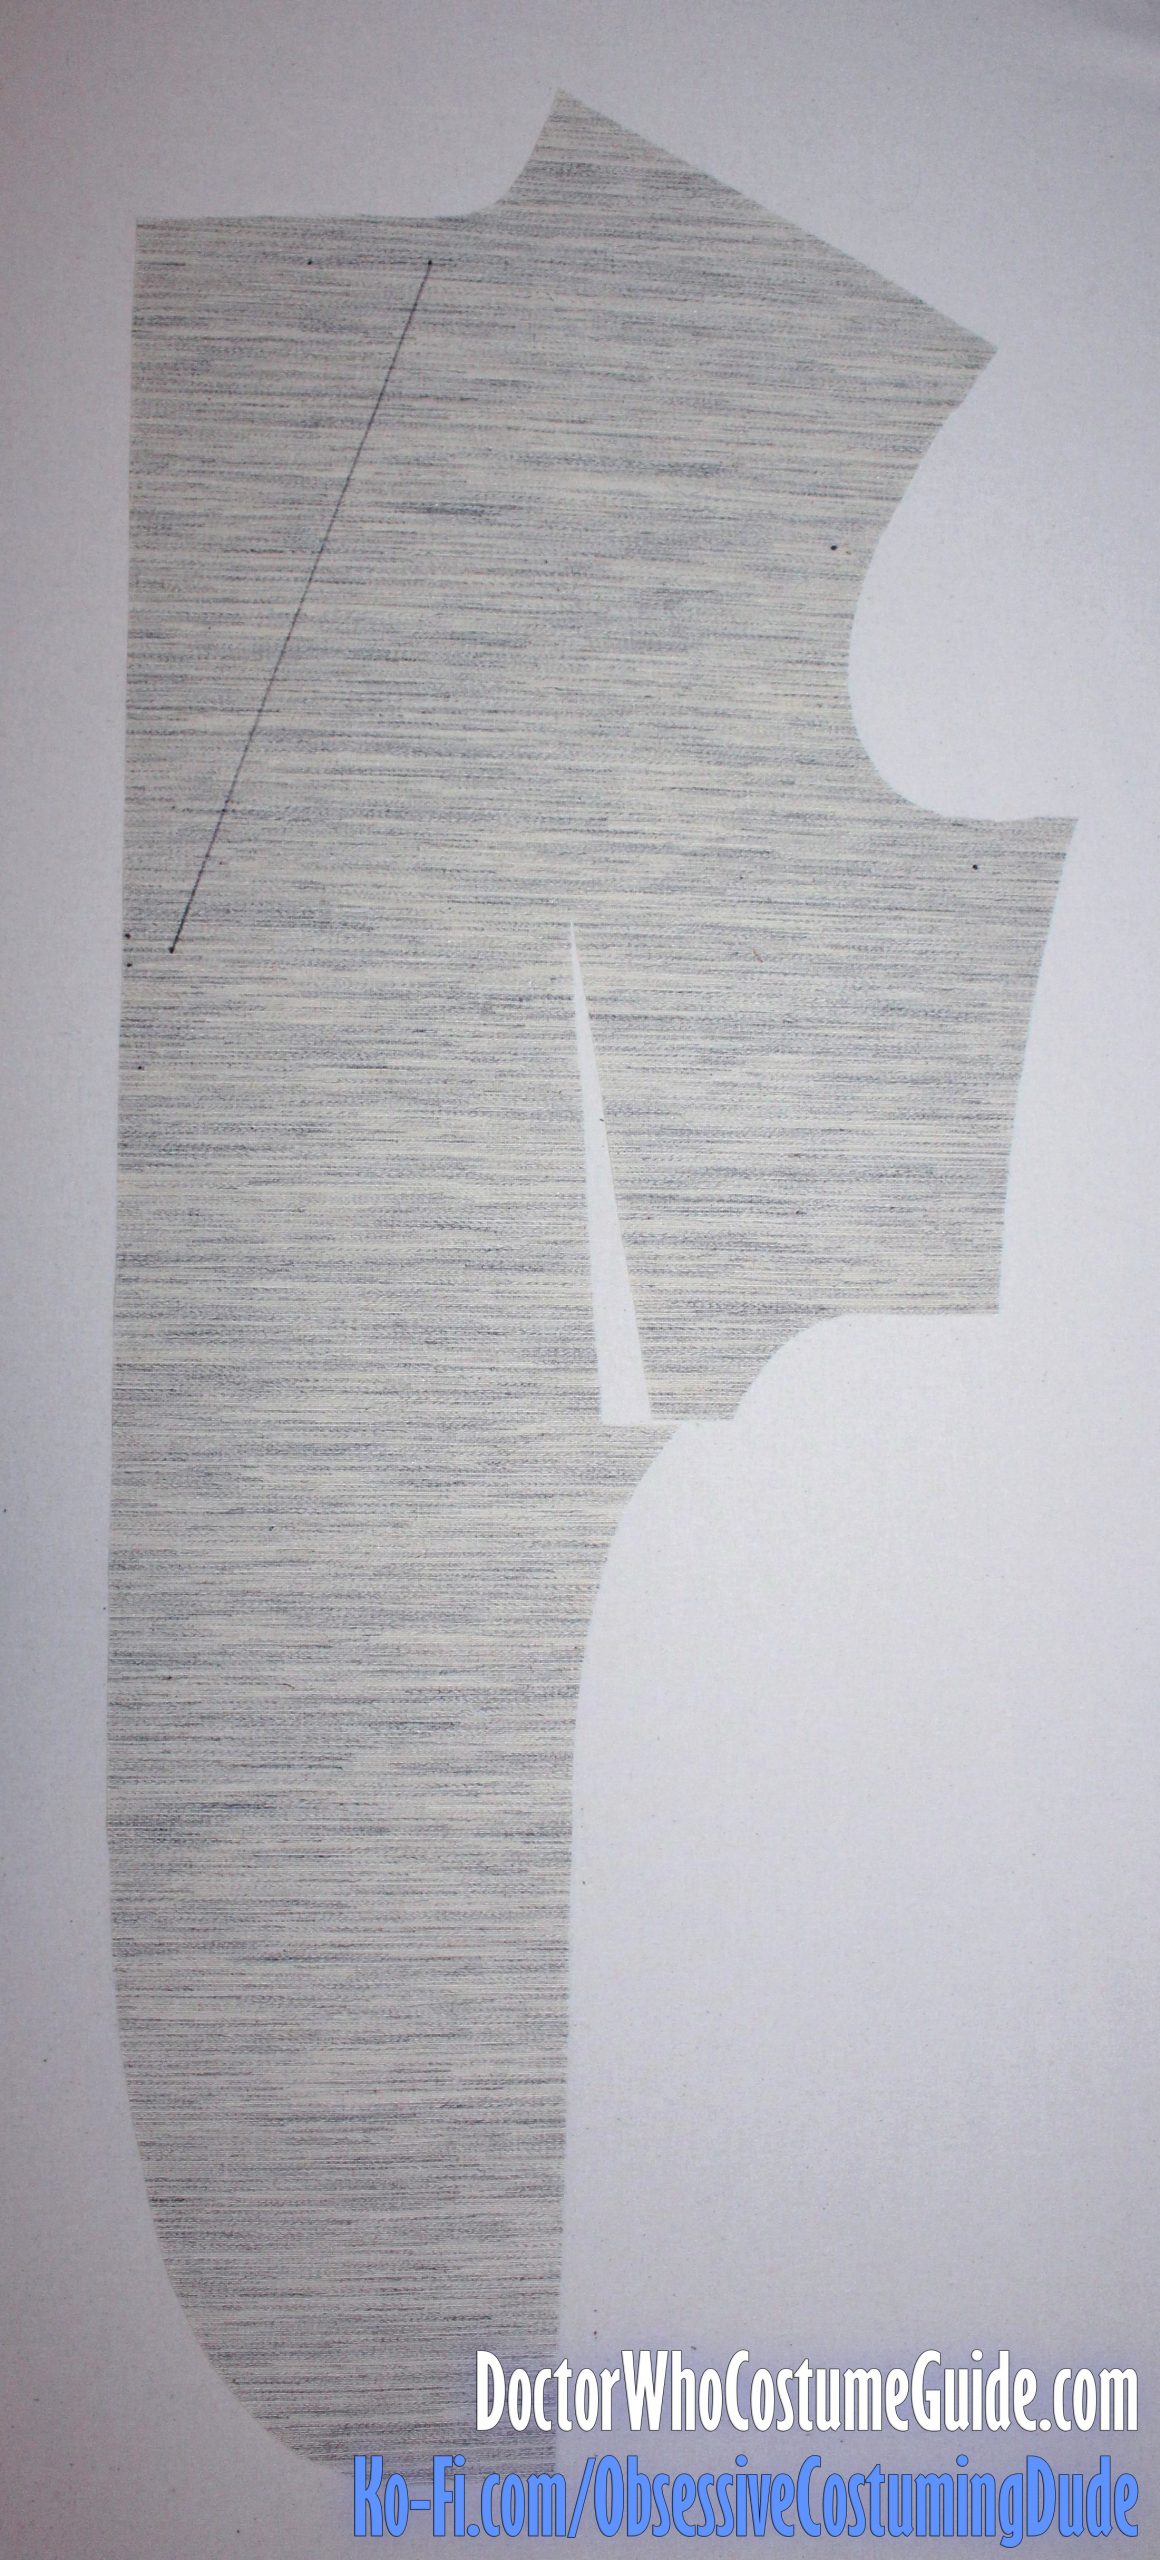
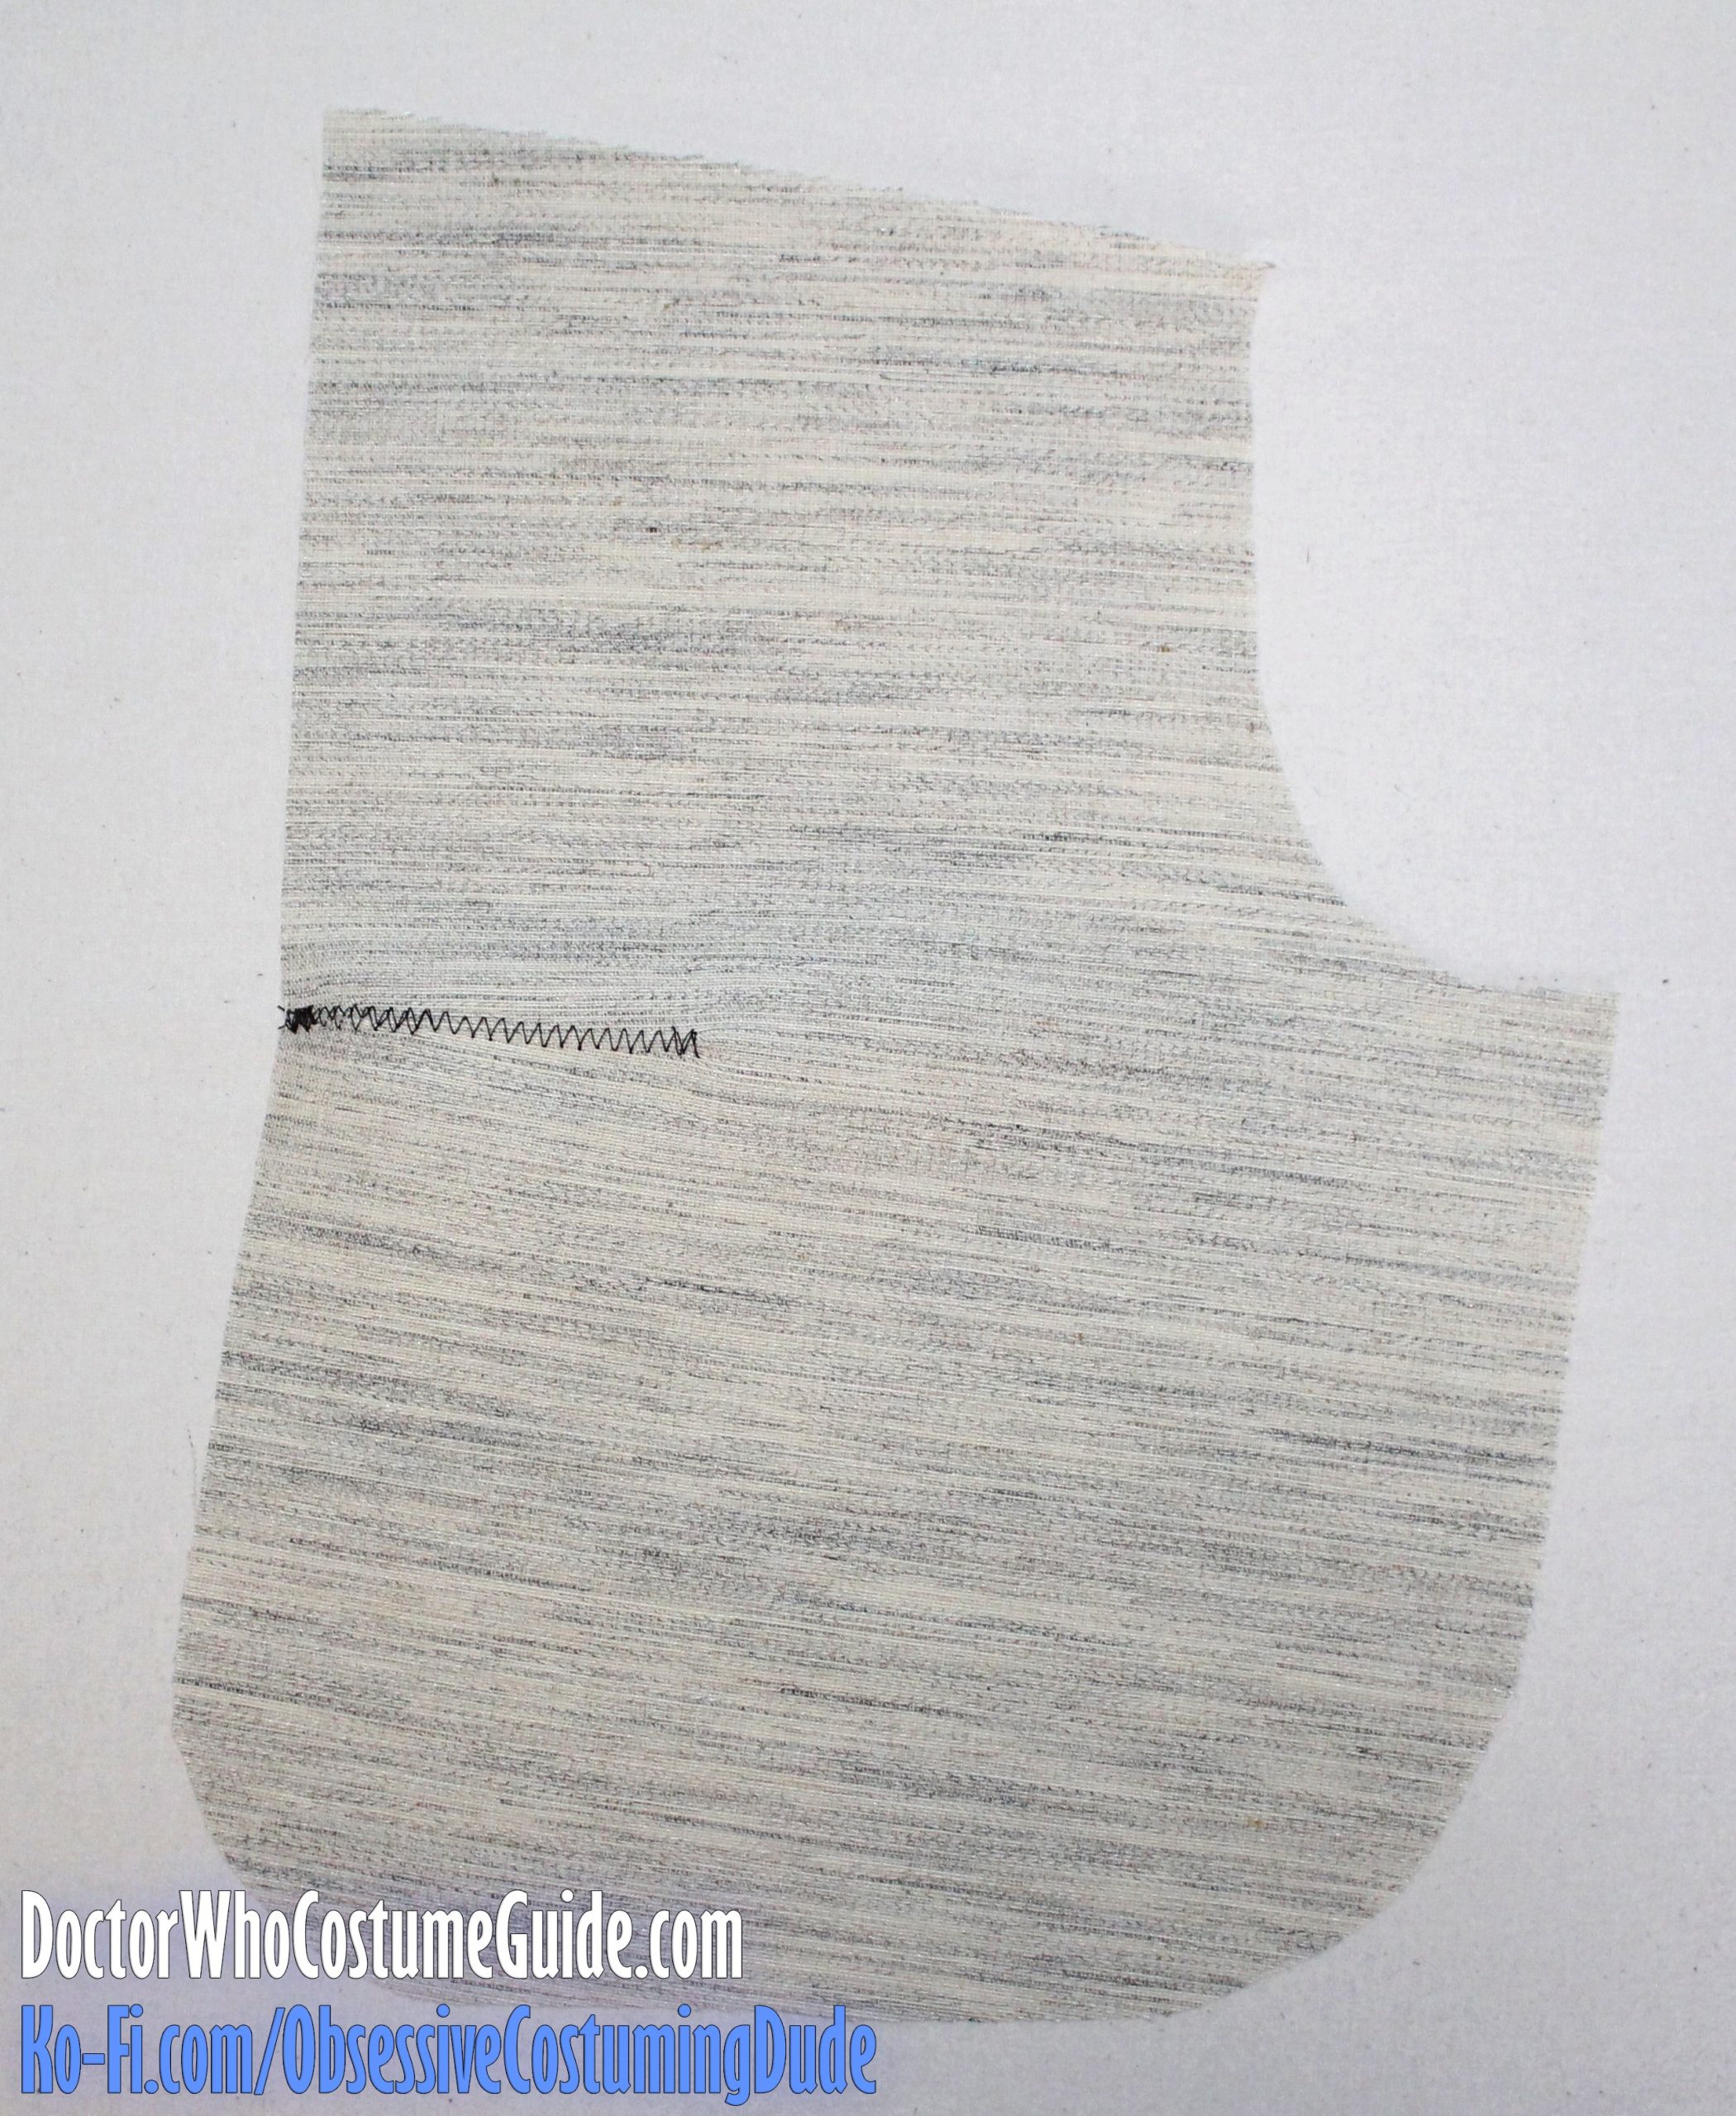
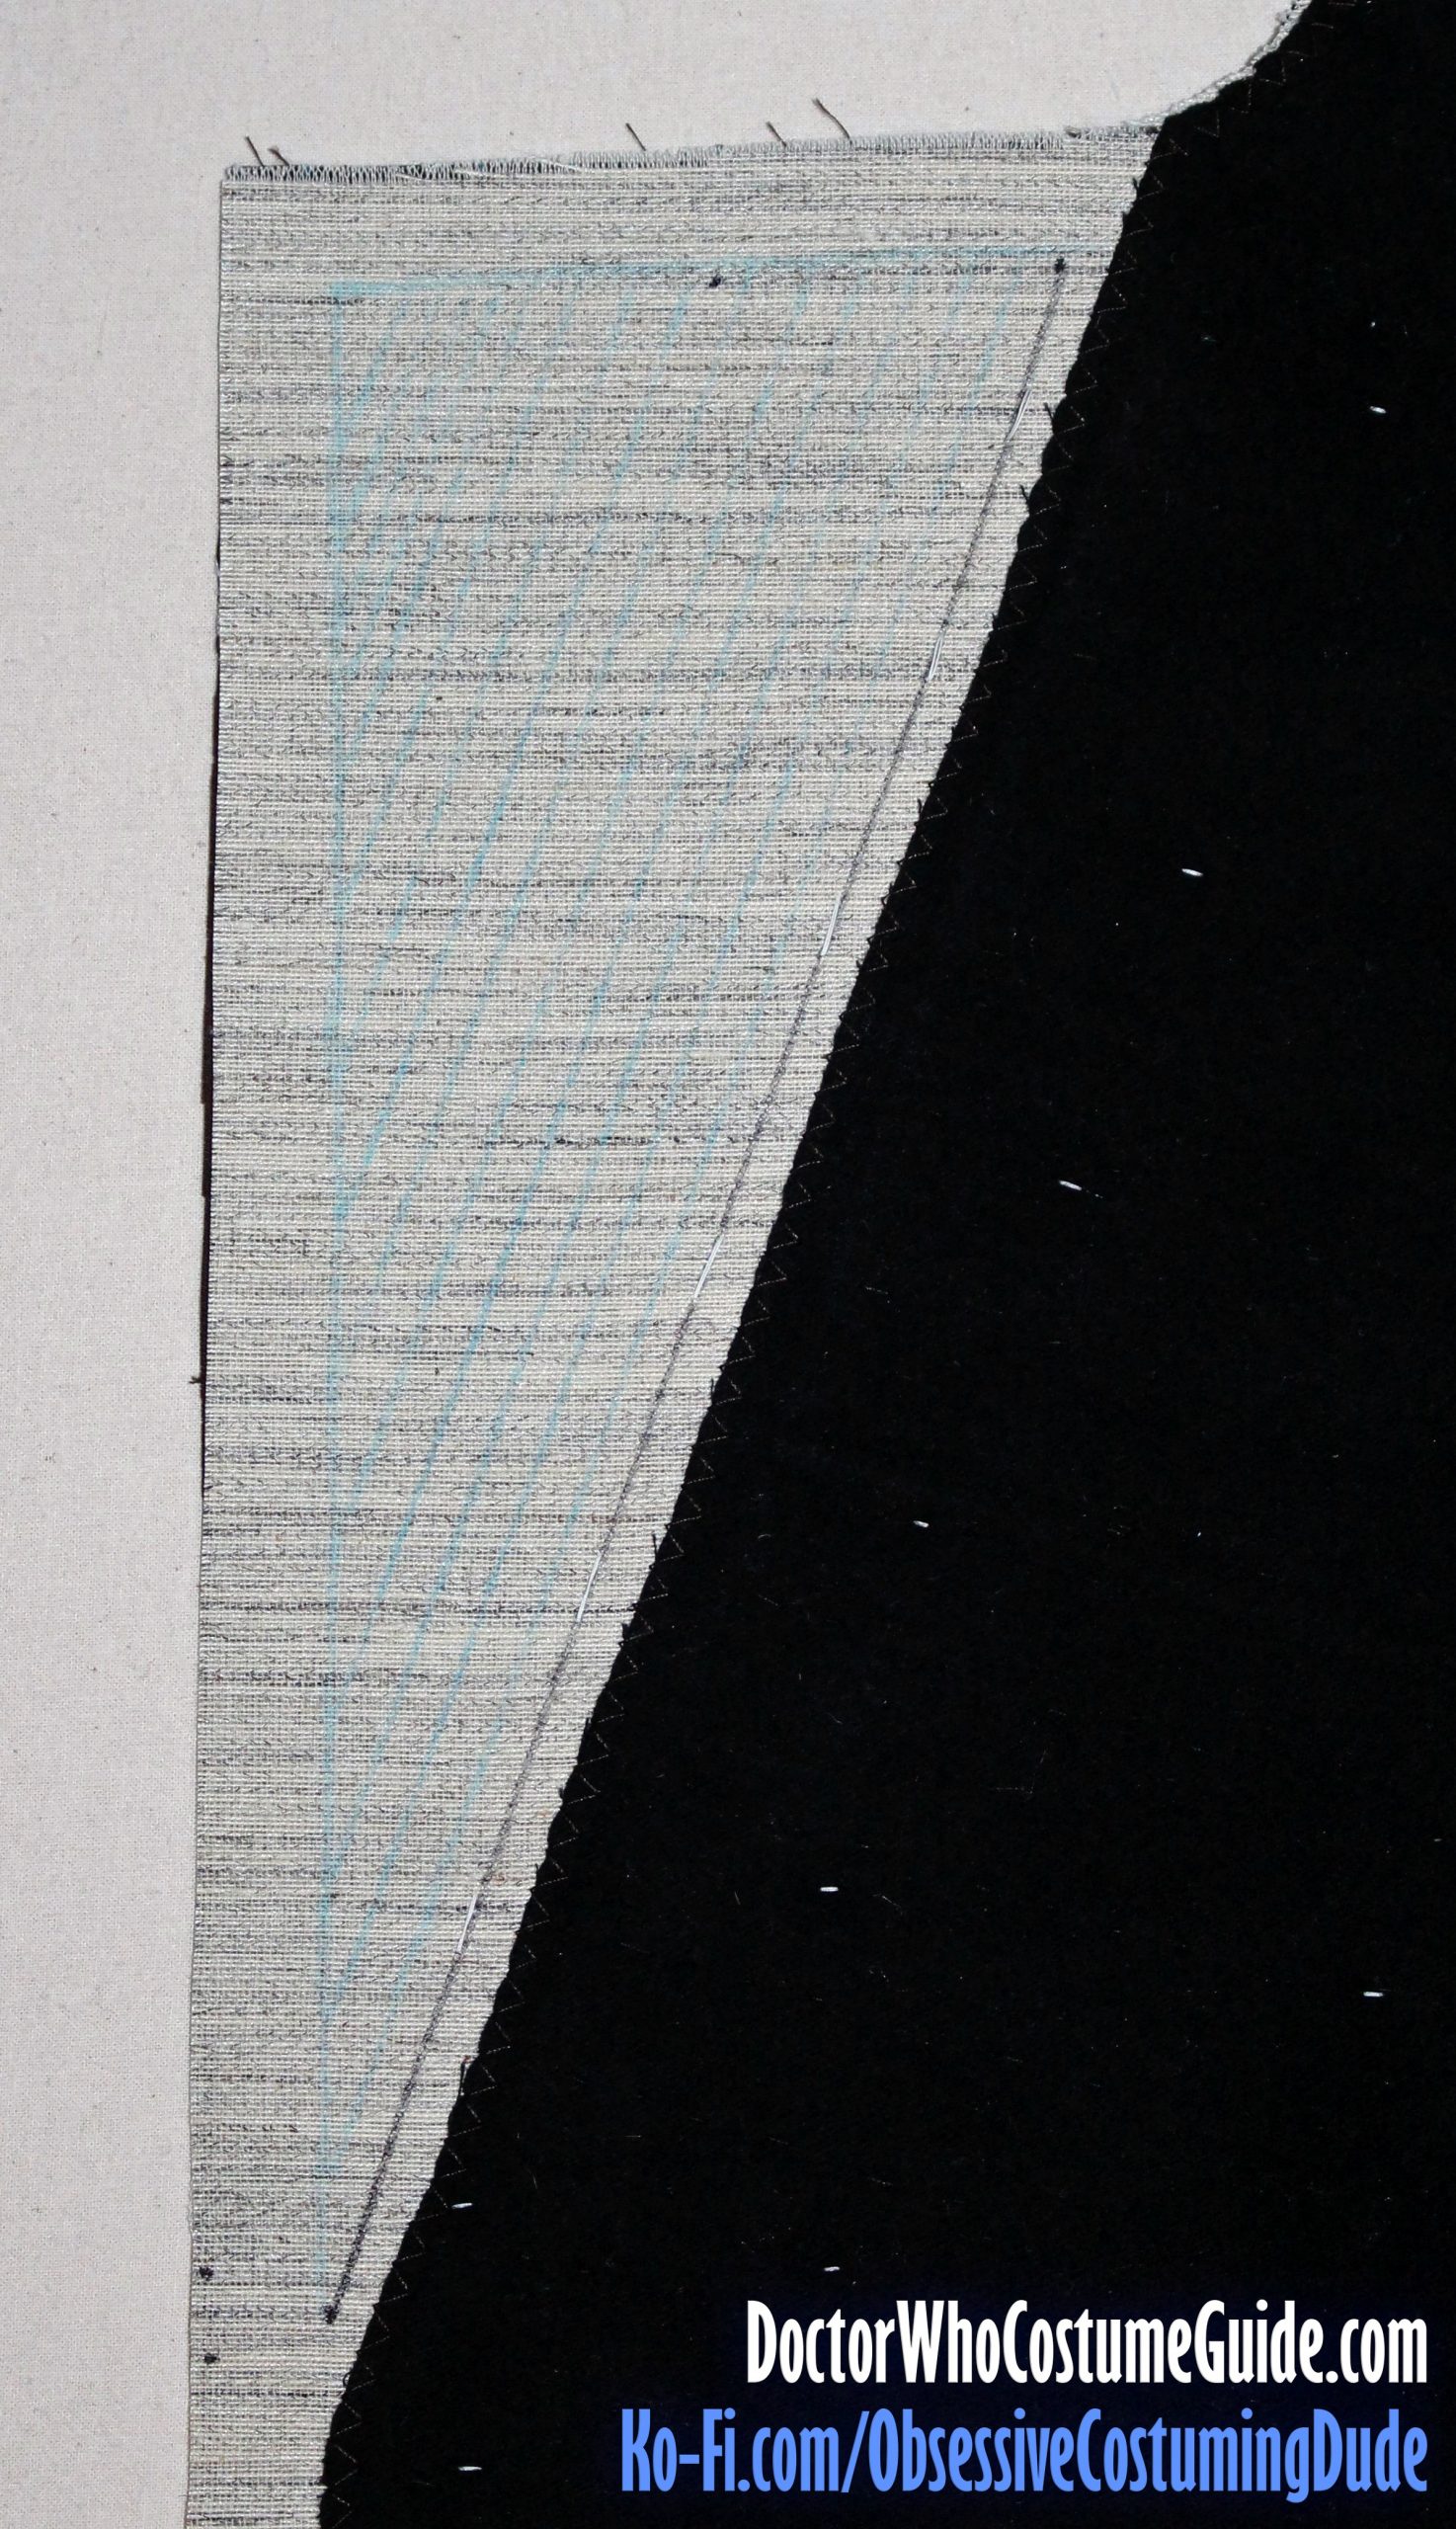
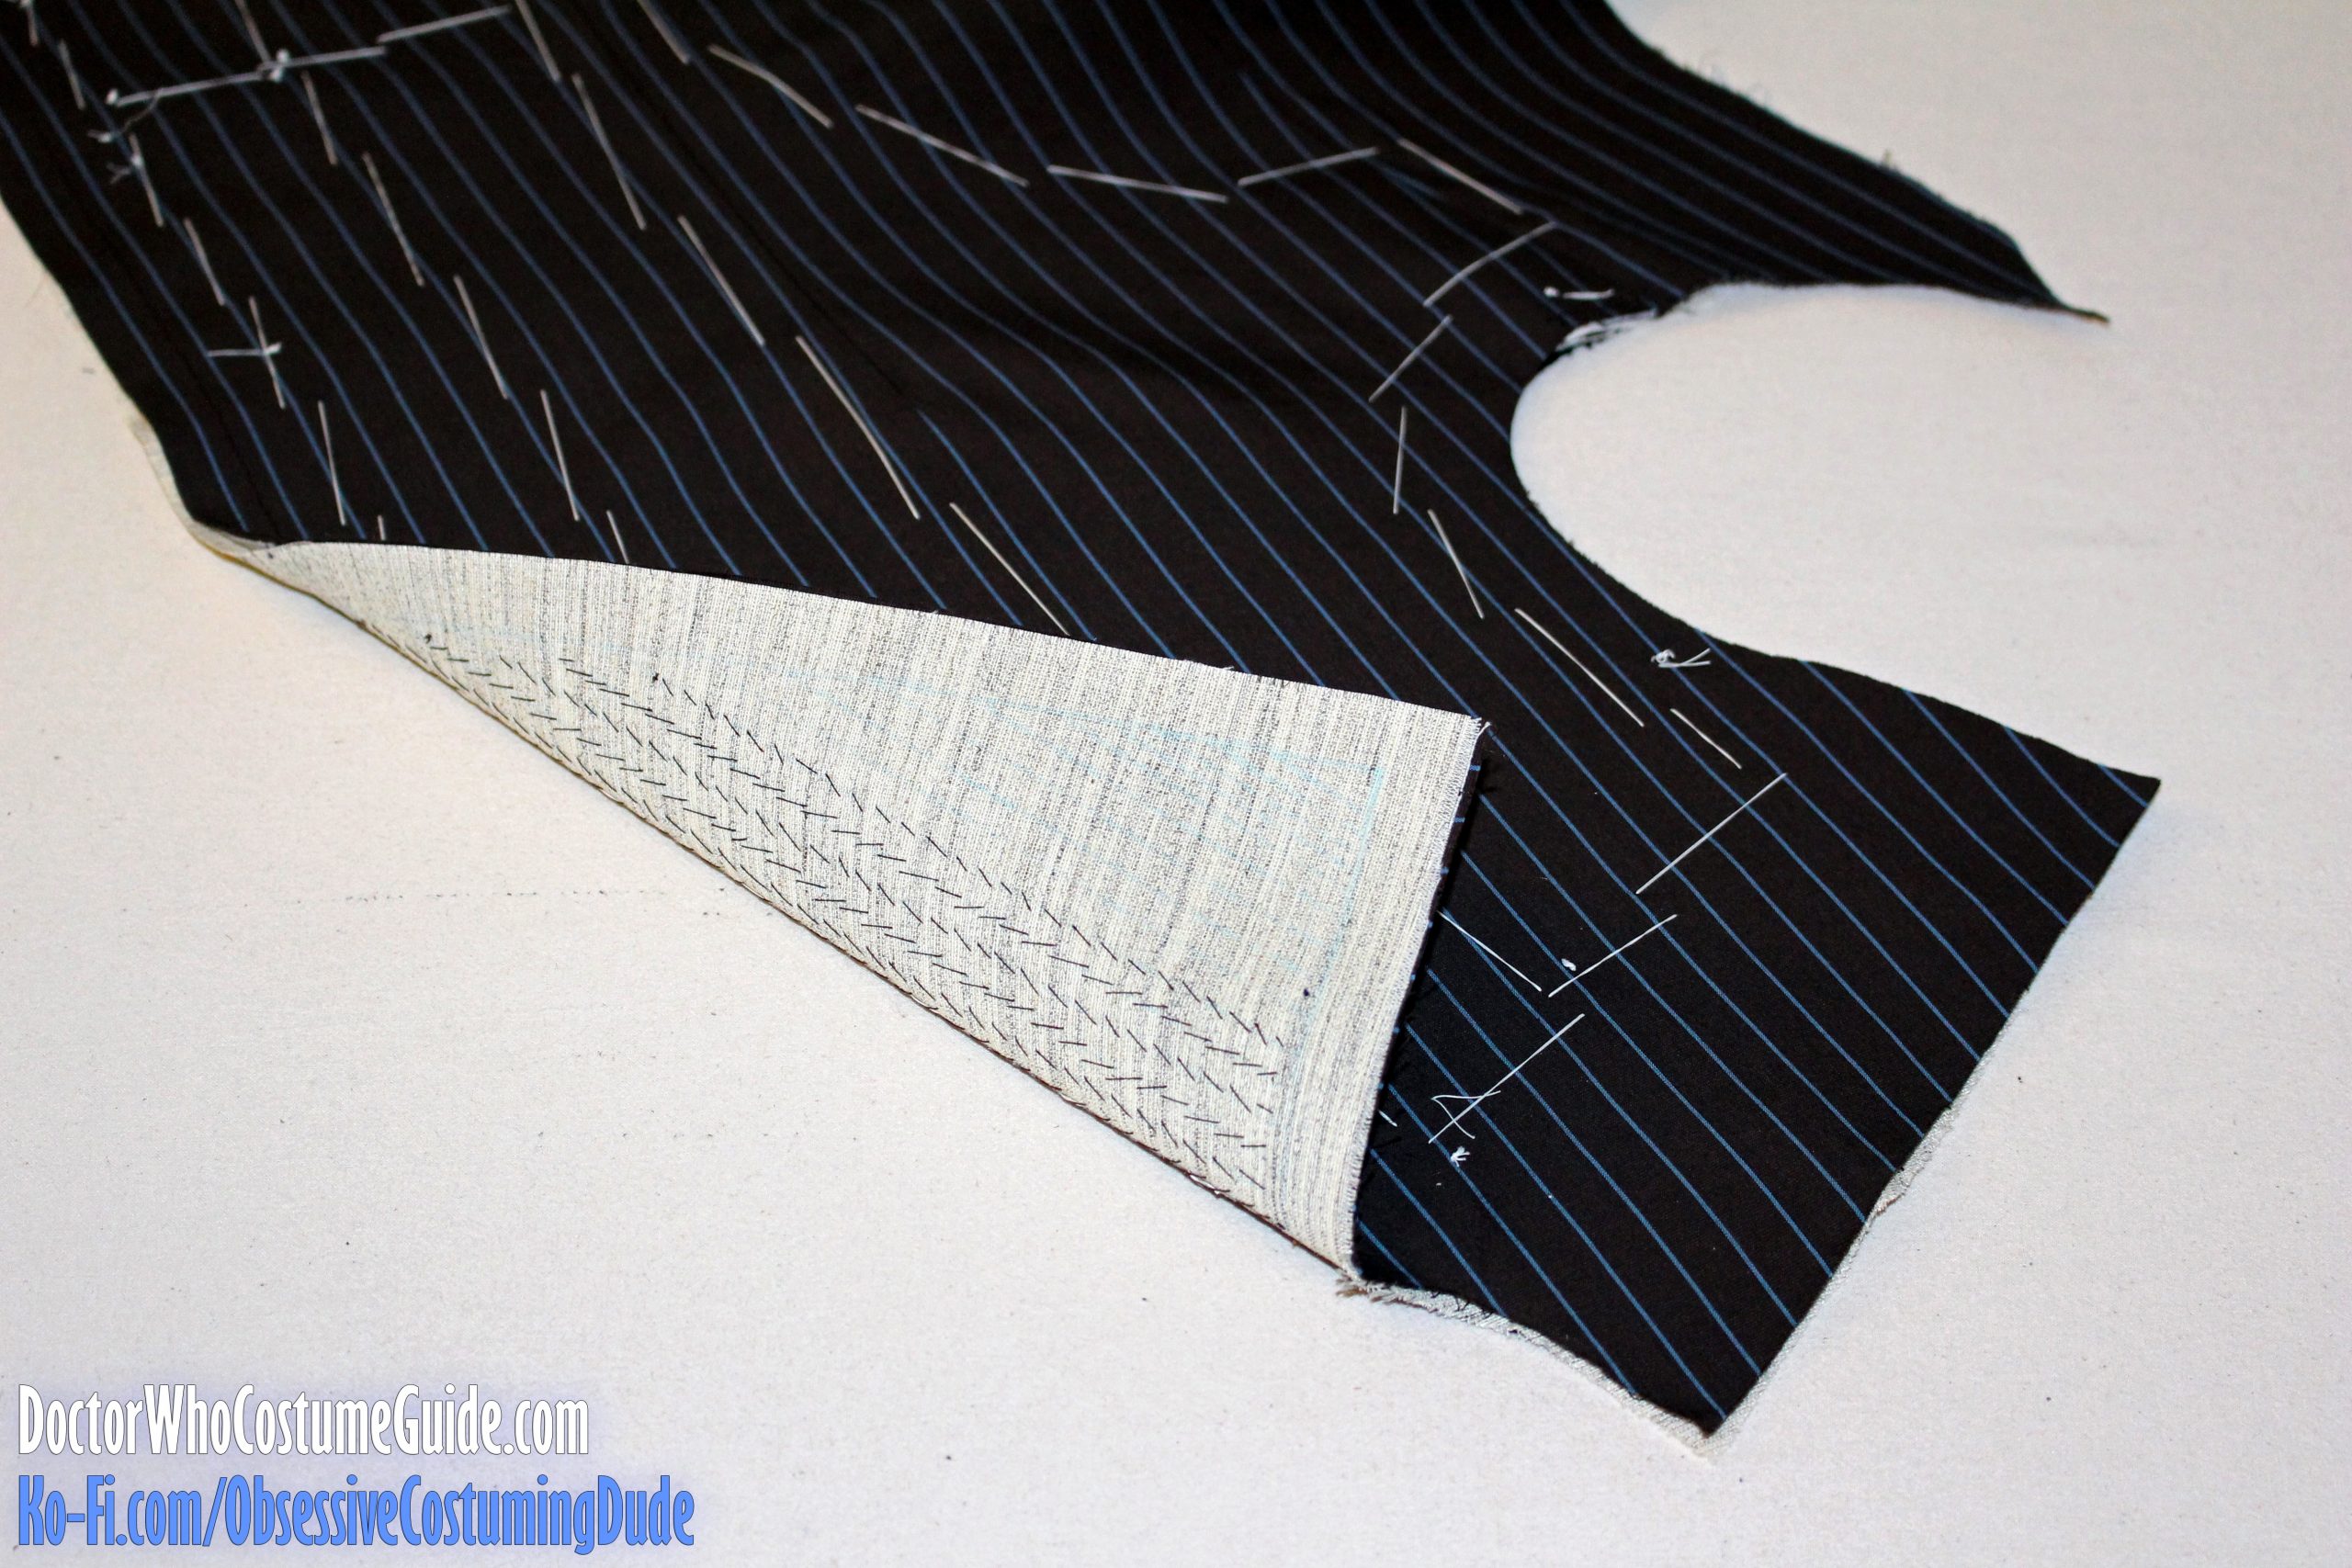
Begin by cutting your front interfacing (piece B). As I mentioned previously, I used a medium weight hair canvas.
I also like to mark the roll line, guides, notches, etc. on the canvas.
Unlike the jacket front, there are no darts on the canvas. (Sewing darts into the canvas would create an undesirable amount of bulk in the dart area.)
Instead, suppression lines are used.
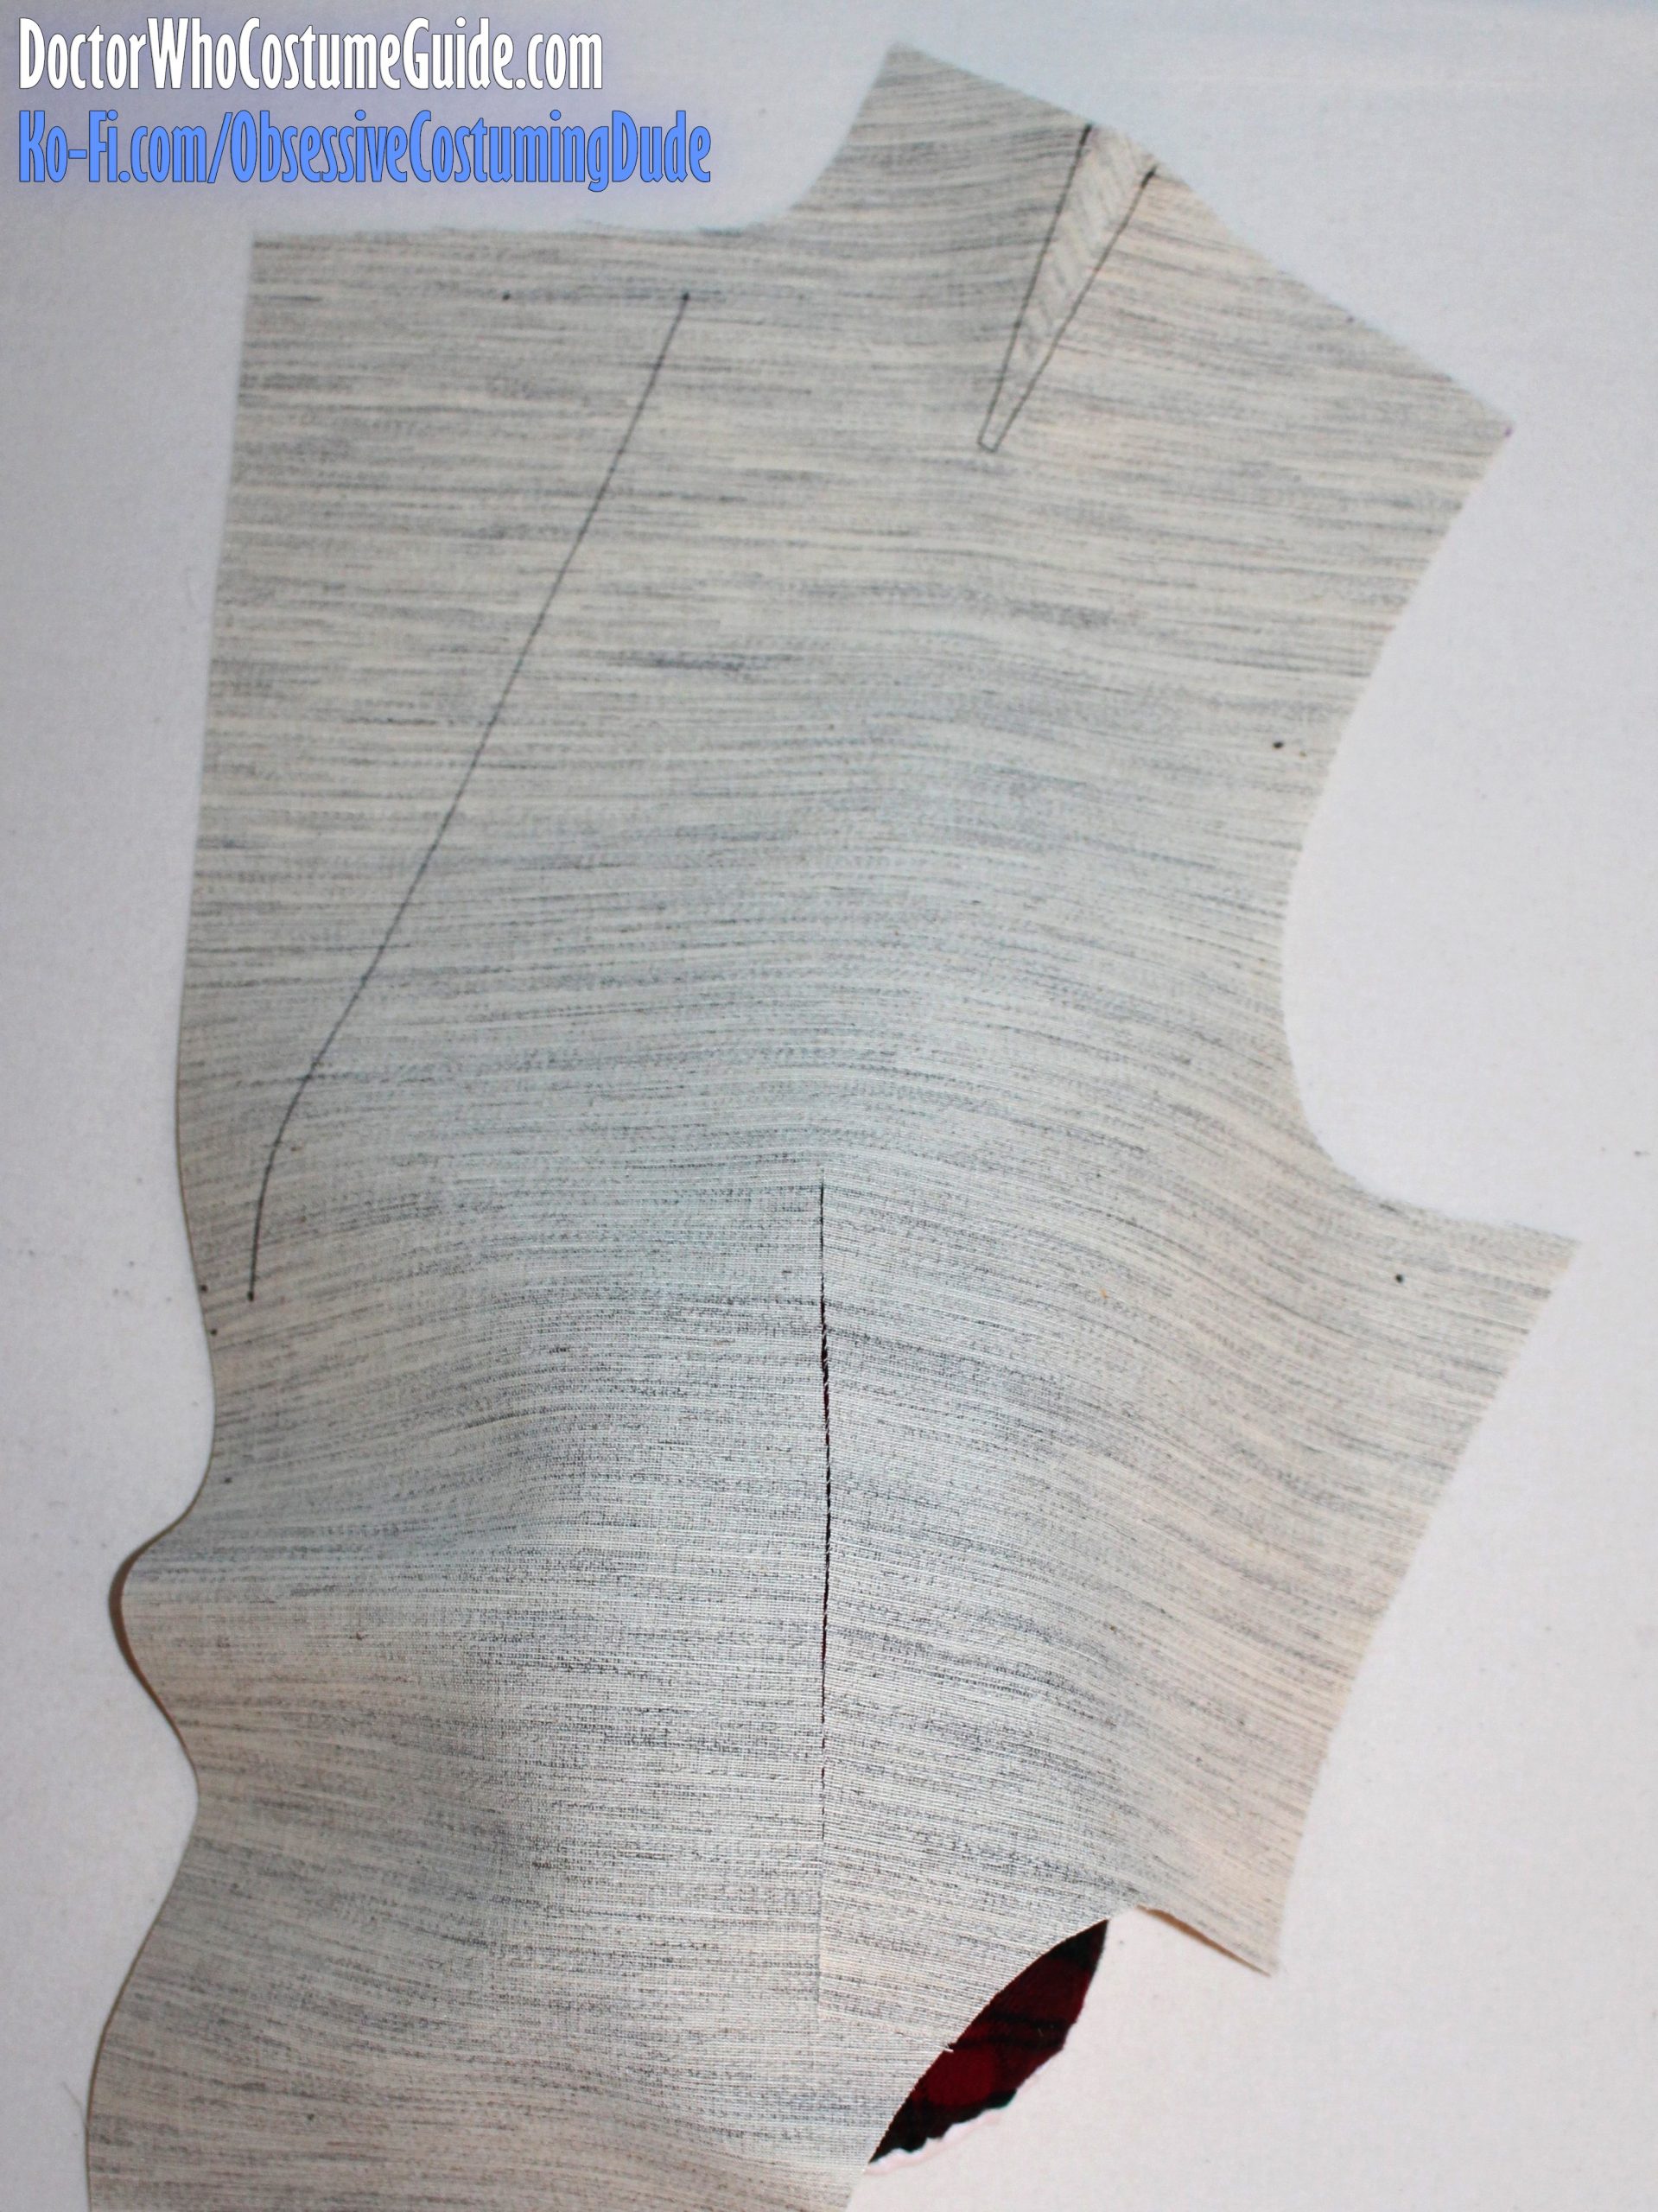
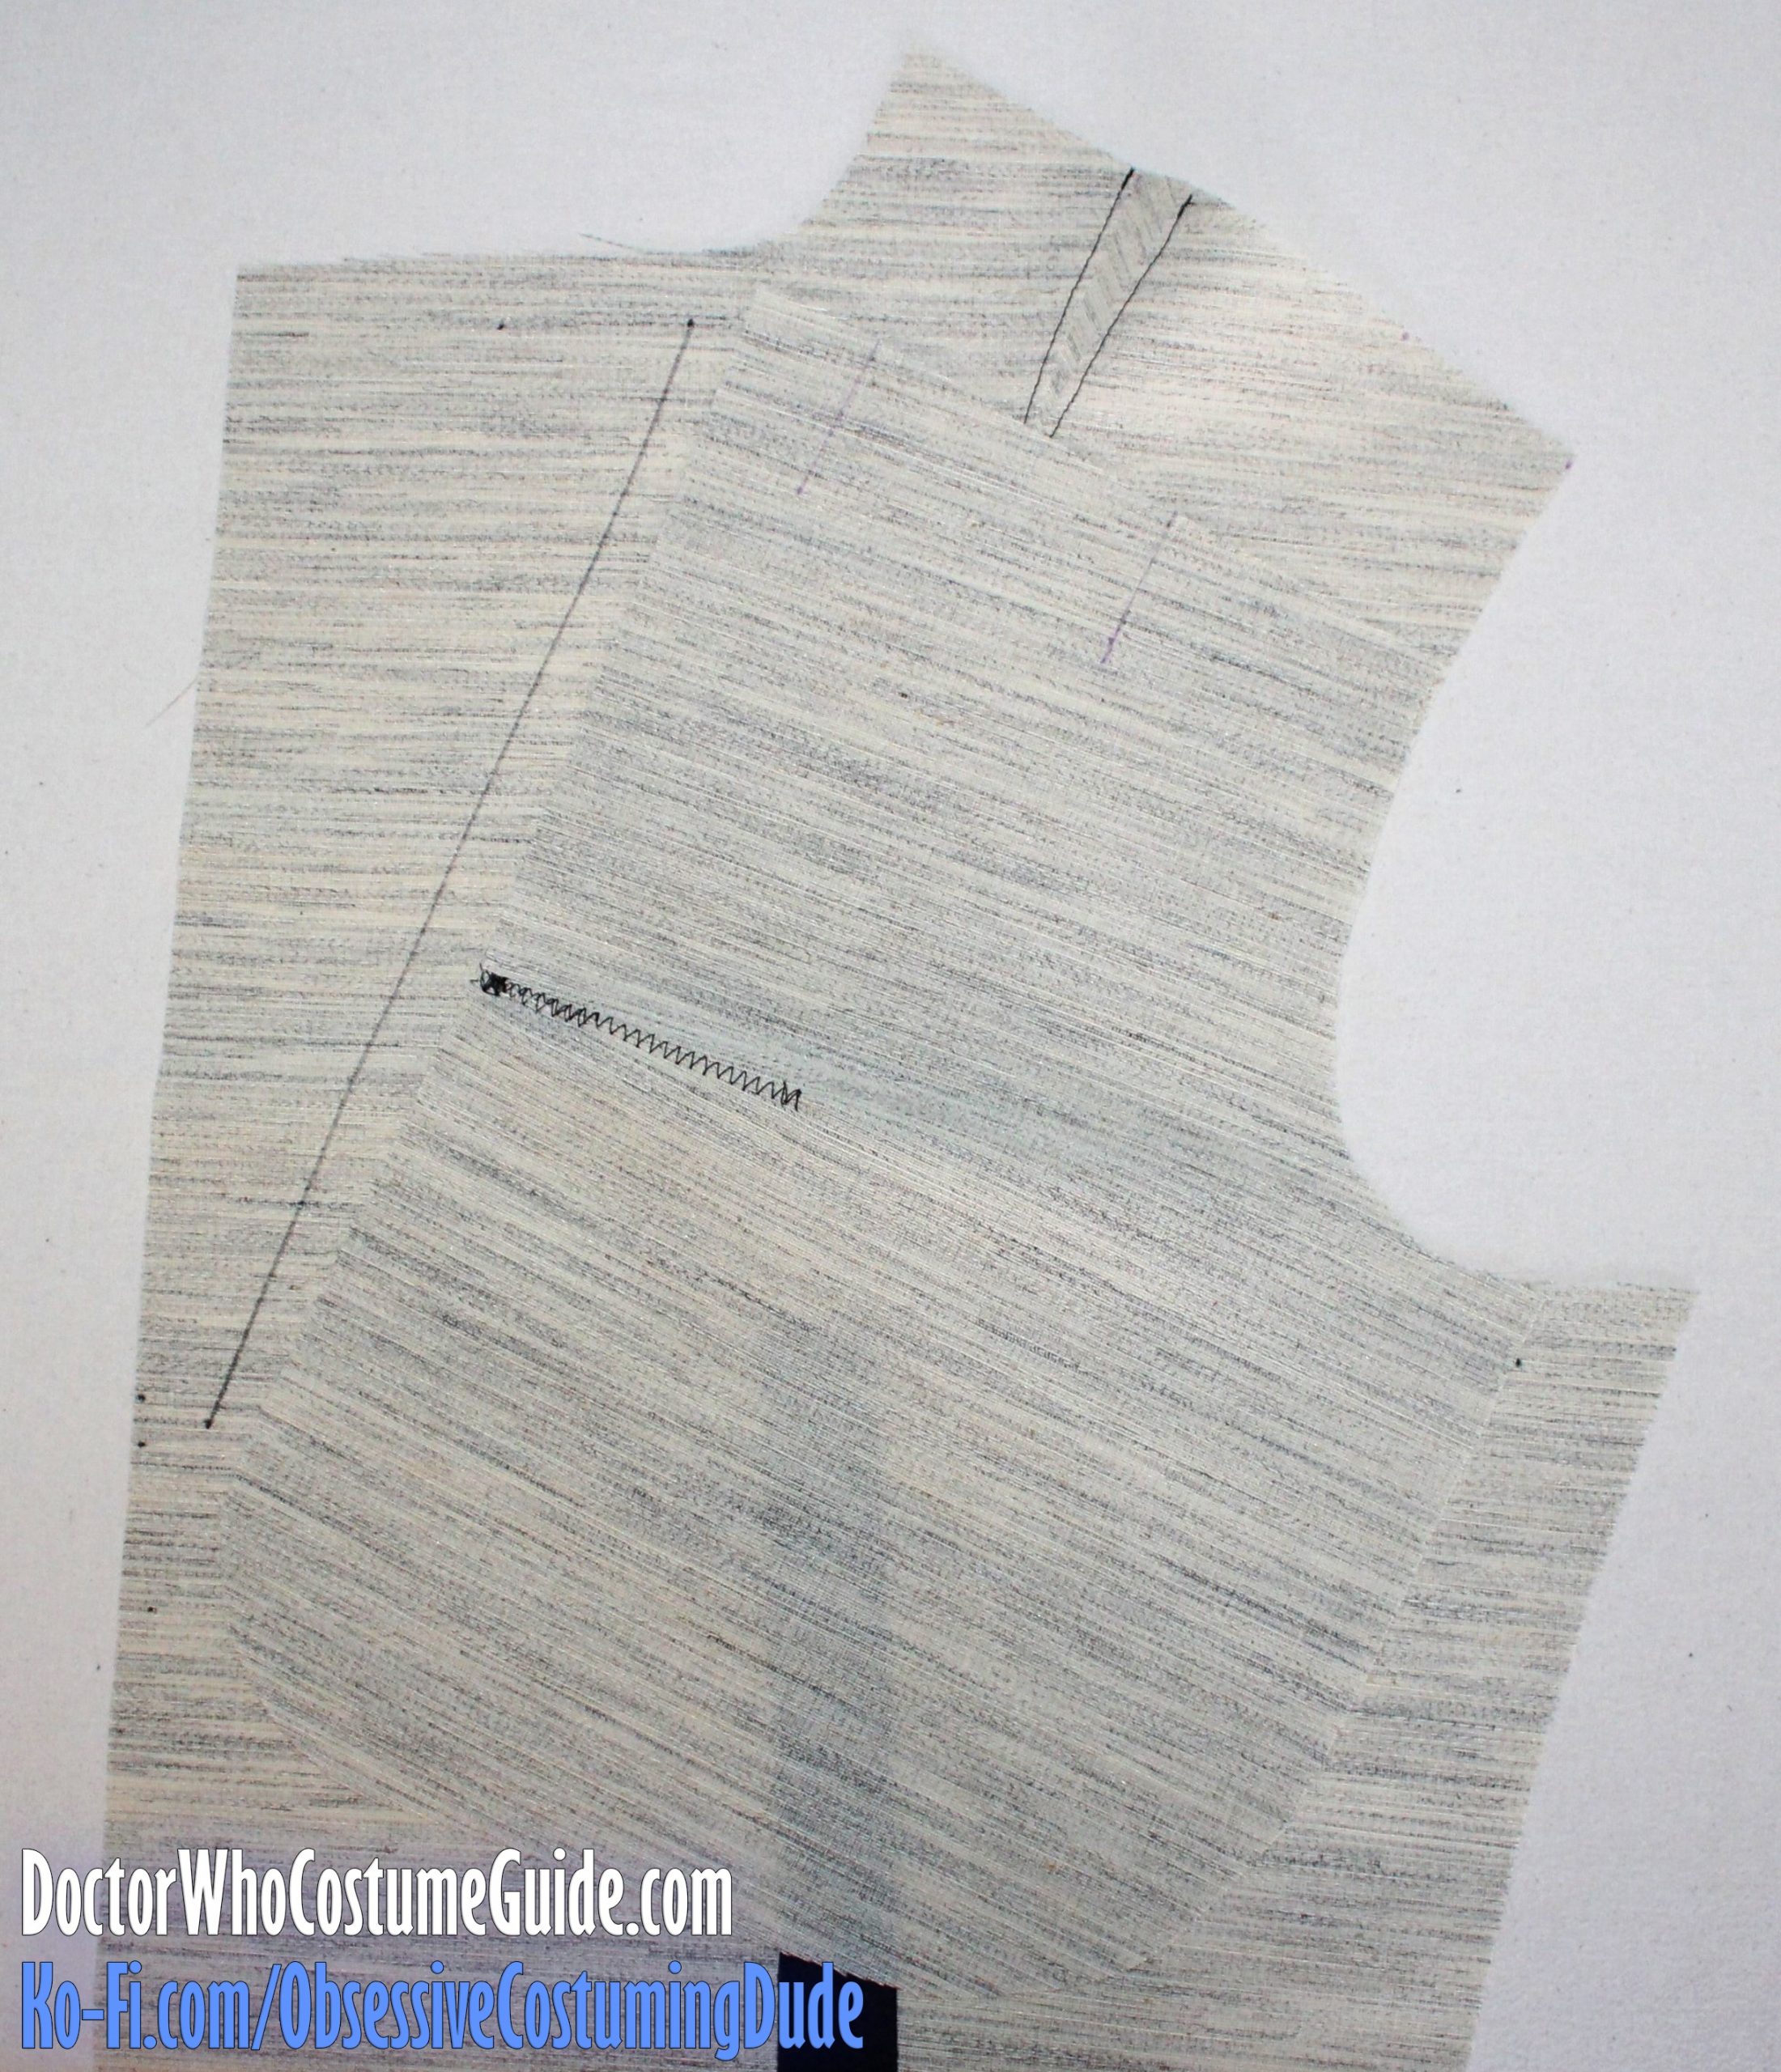
Cut horizontally into the outer edge of the canvas, and trim away the suppression material.
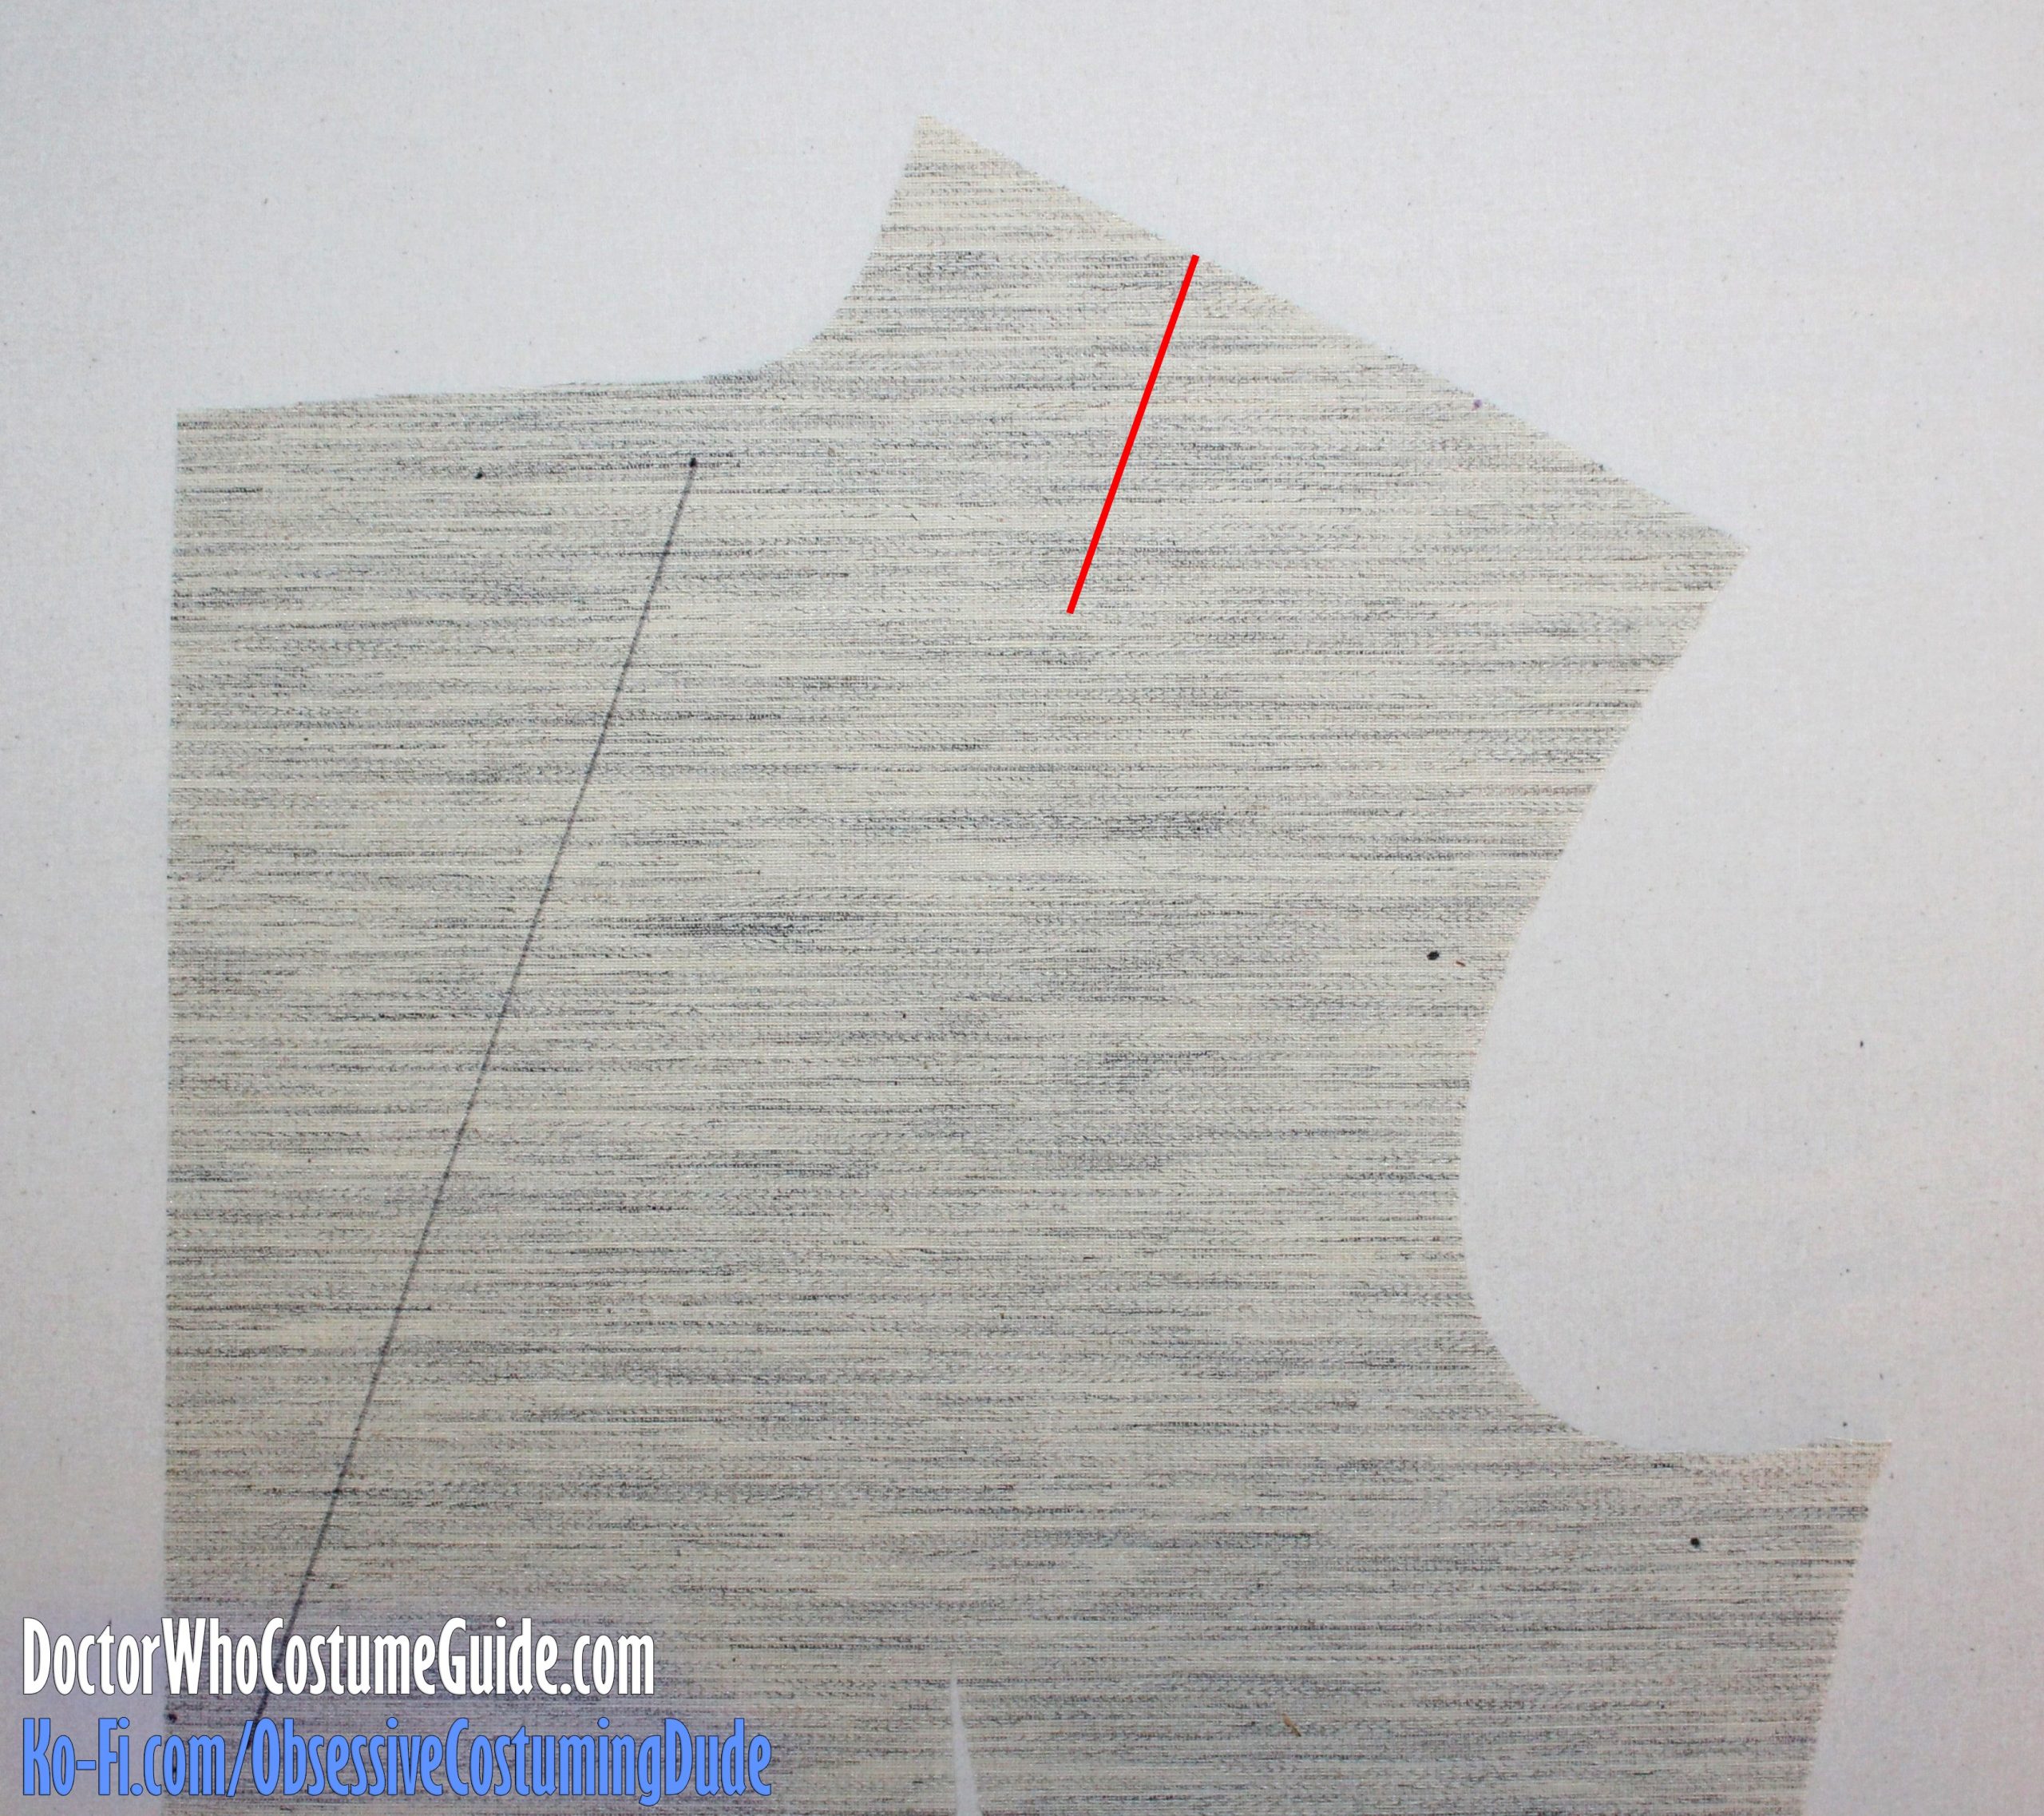
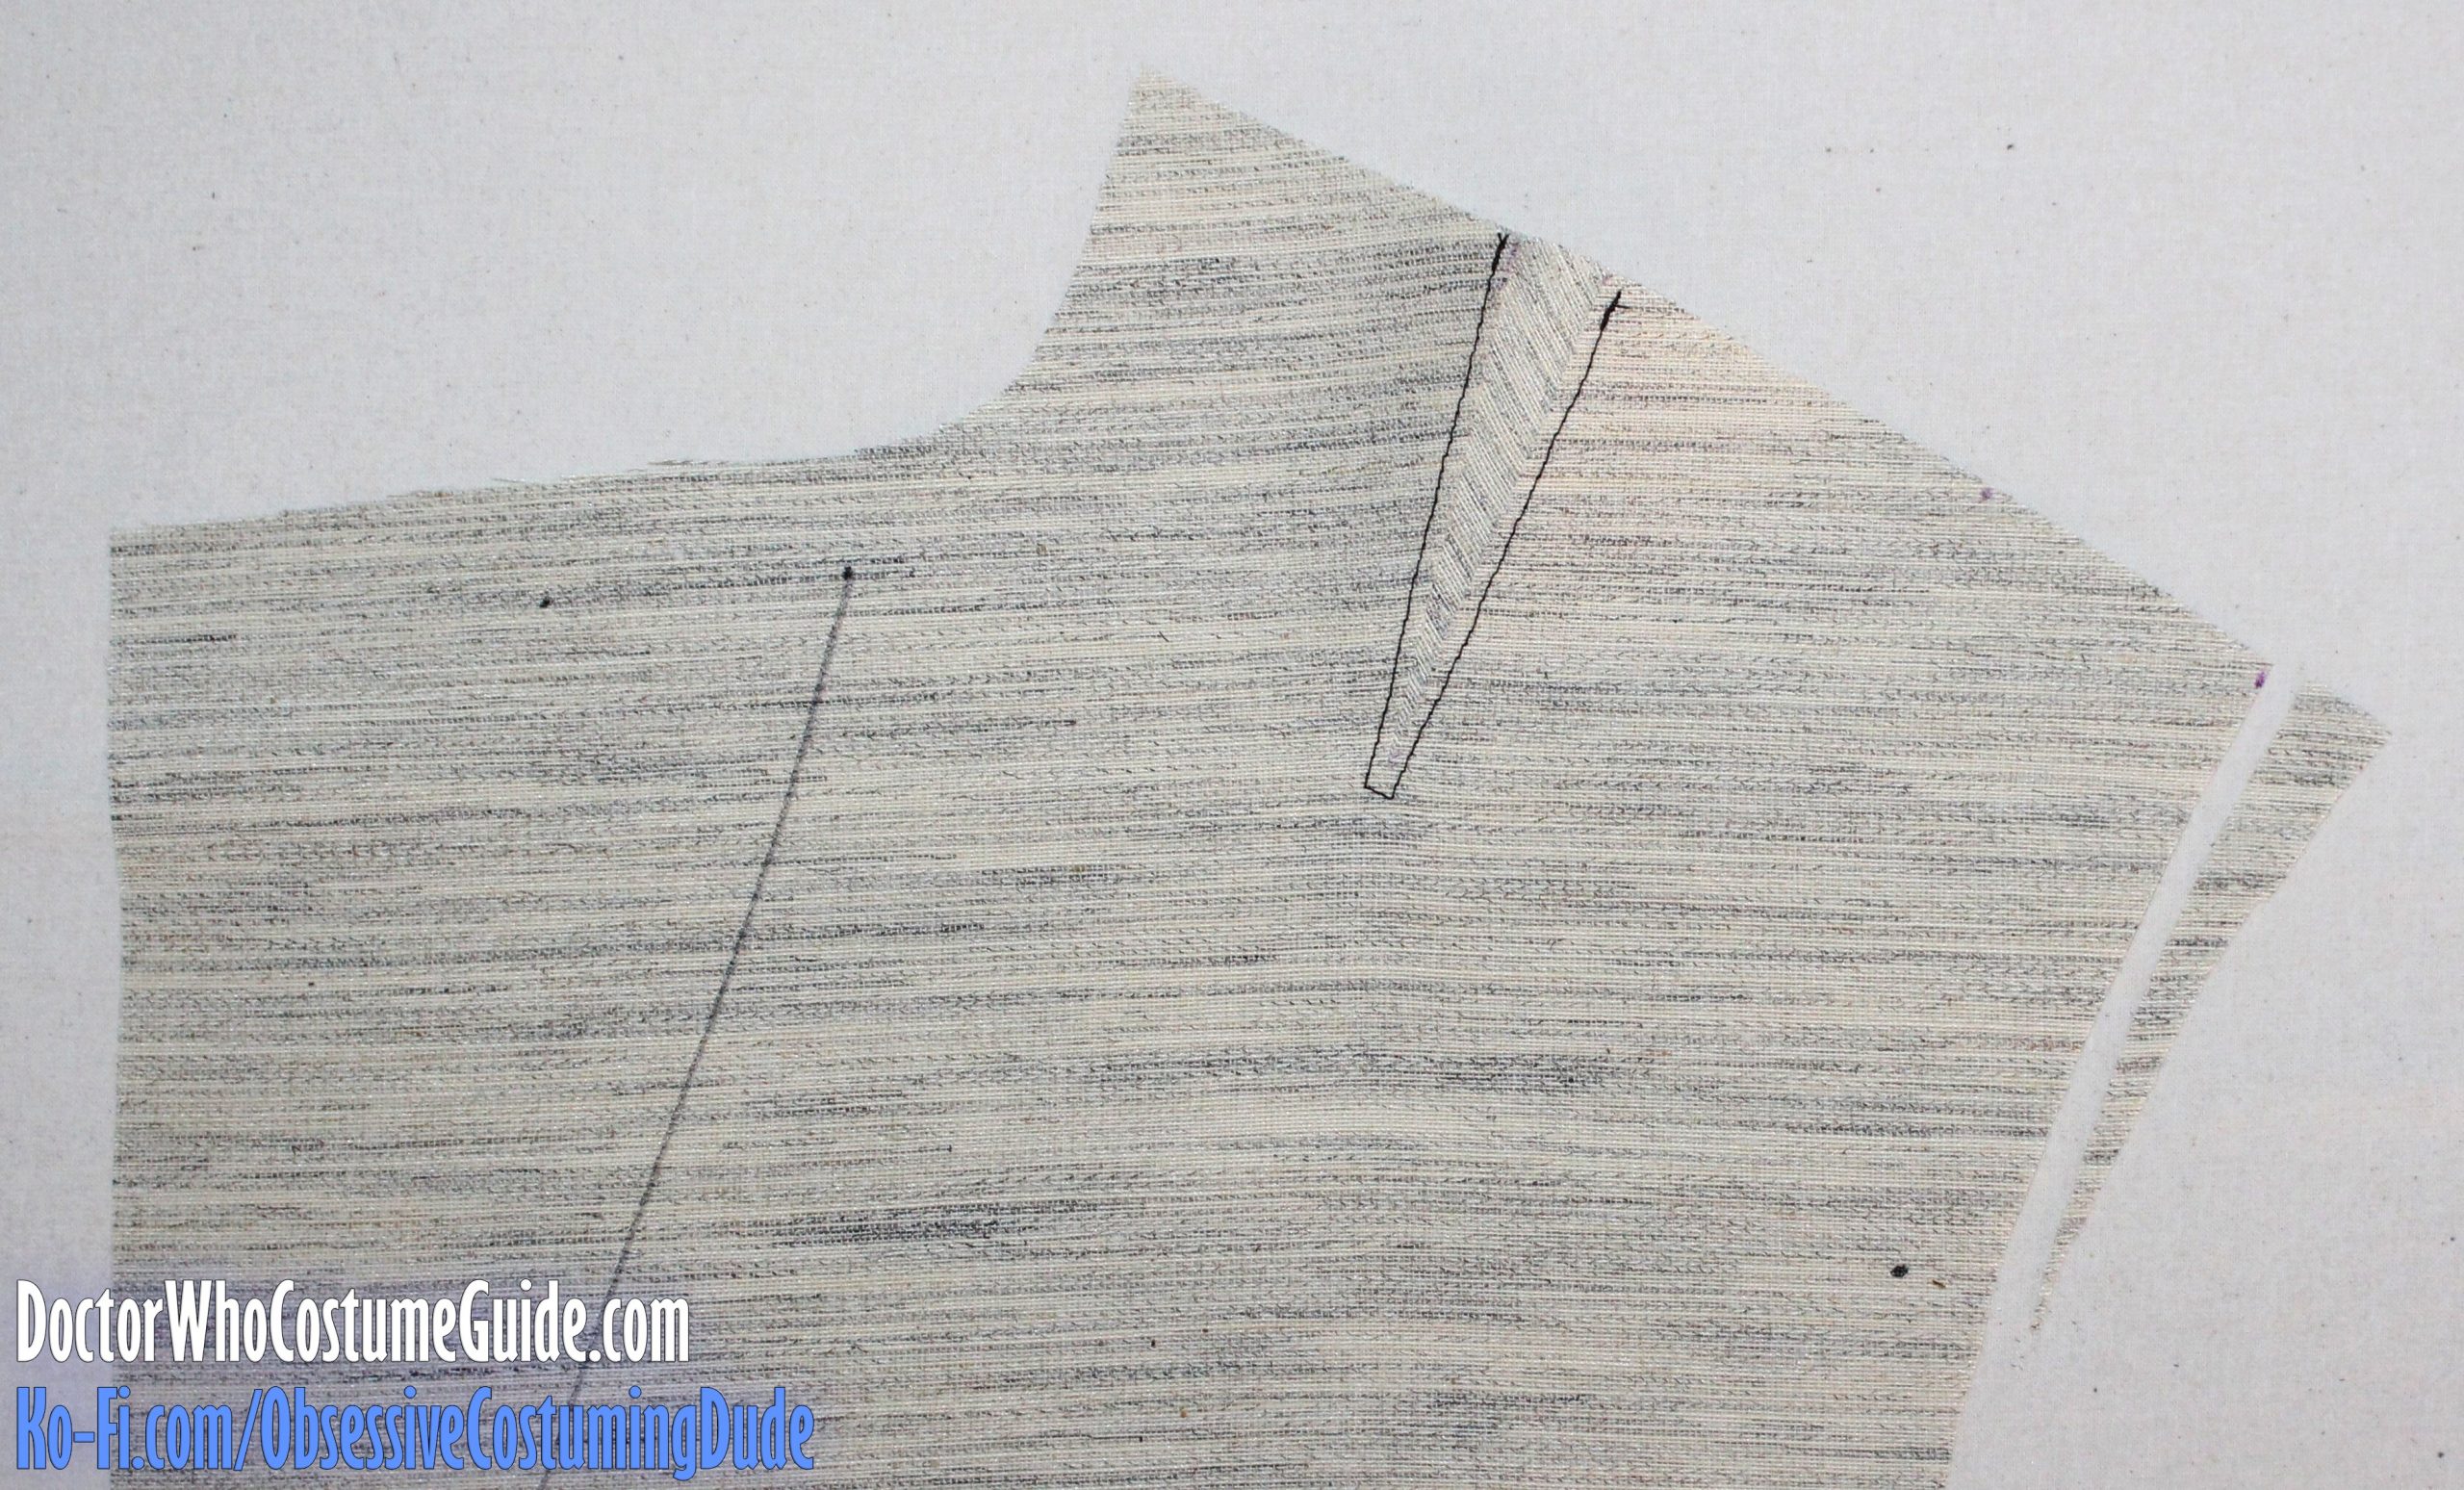
About a third of the way across the shoulder from the neckline, cut a slit into the canvas about 3” long and parallel to the roll line.
Cut horizontally into the outer edge of the canvas, and trim away the suppression material.
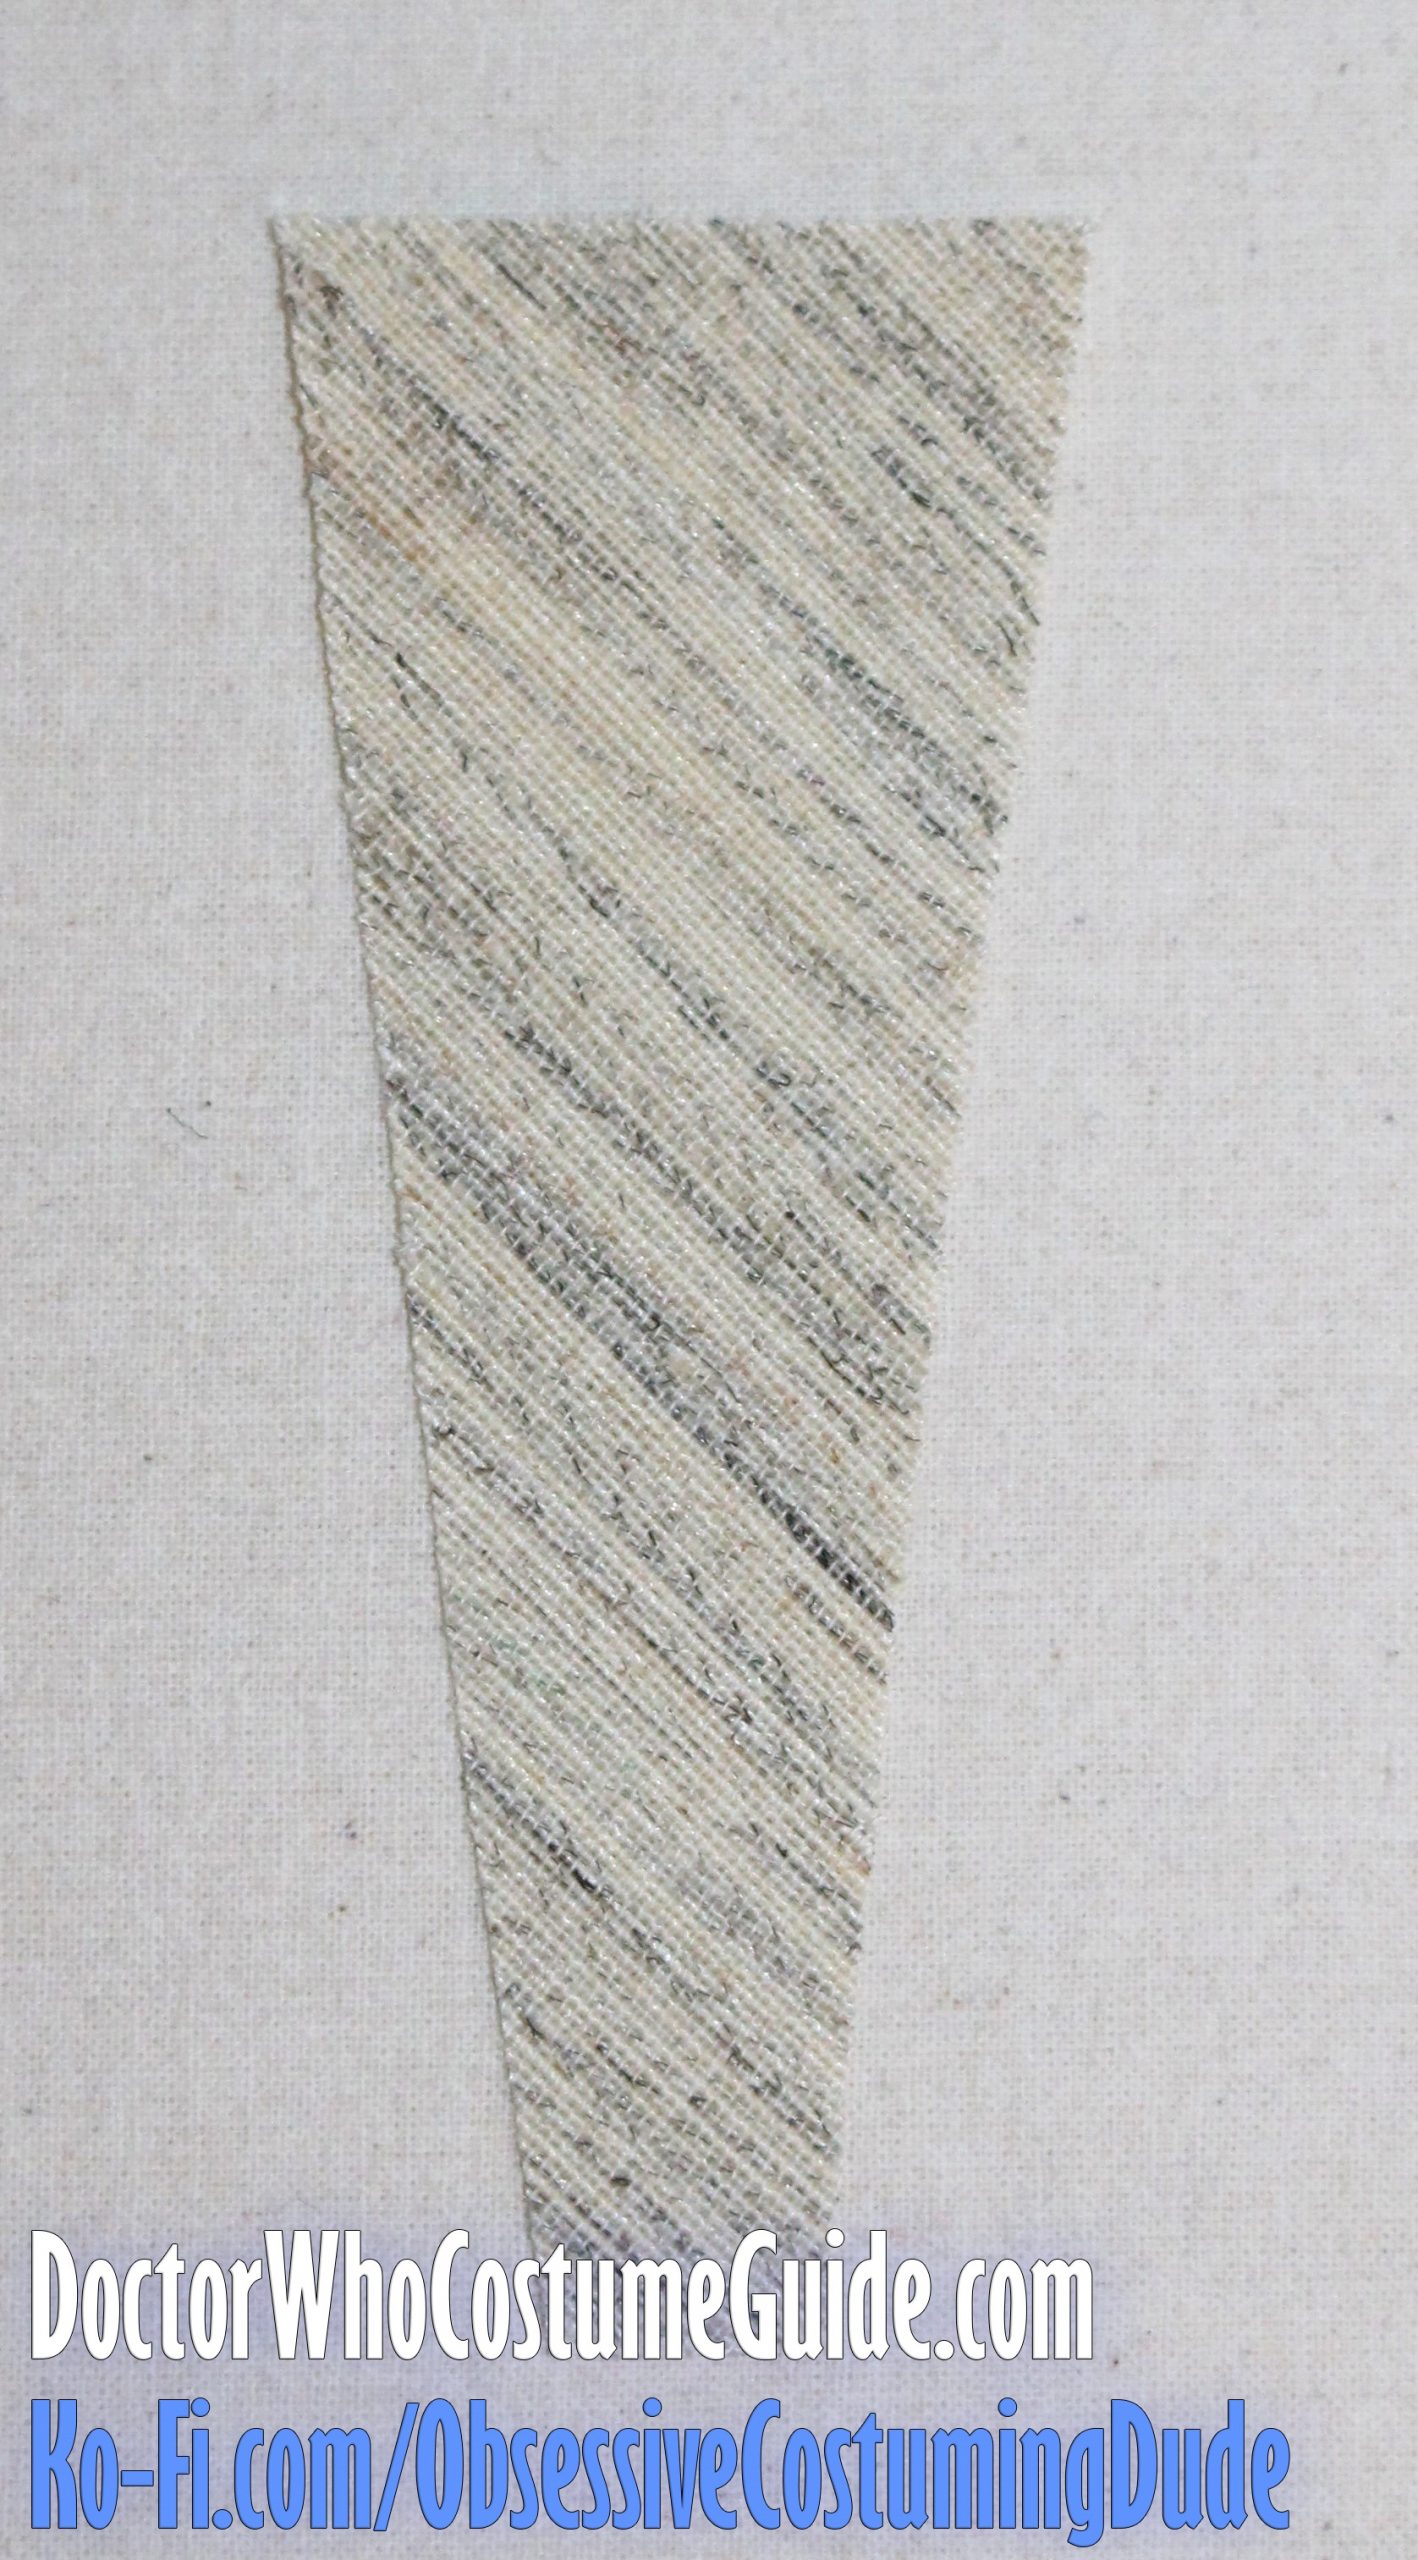
Then, cut a bias strip of canvas in a wedge shape, about 1 ½” wide at the top, ½” wide at the bottom, and about 4” long.
Spread the shoulder slit open slit open a bit. (Cabrera says ½”, but Nordheim says 1”, so just experiment and see what you prefer.)
Slide the insert underneath the split, and machine-stitch it into place.
Because we added a bit to the shoulder, it’s actually a little too wide now, so trim it back down to size along the upper/outer armscye area. (See above.)
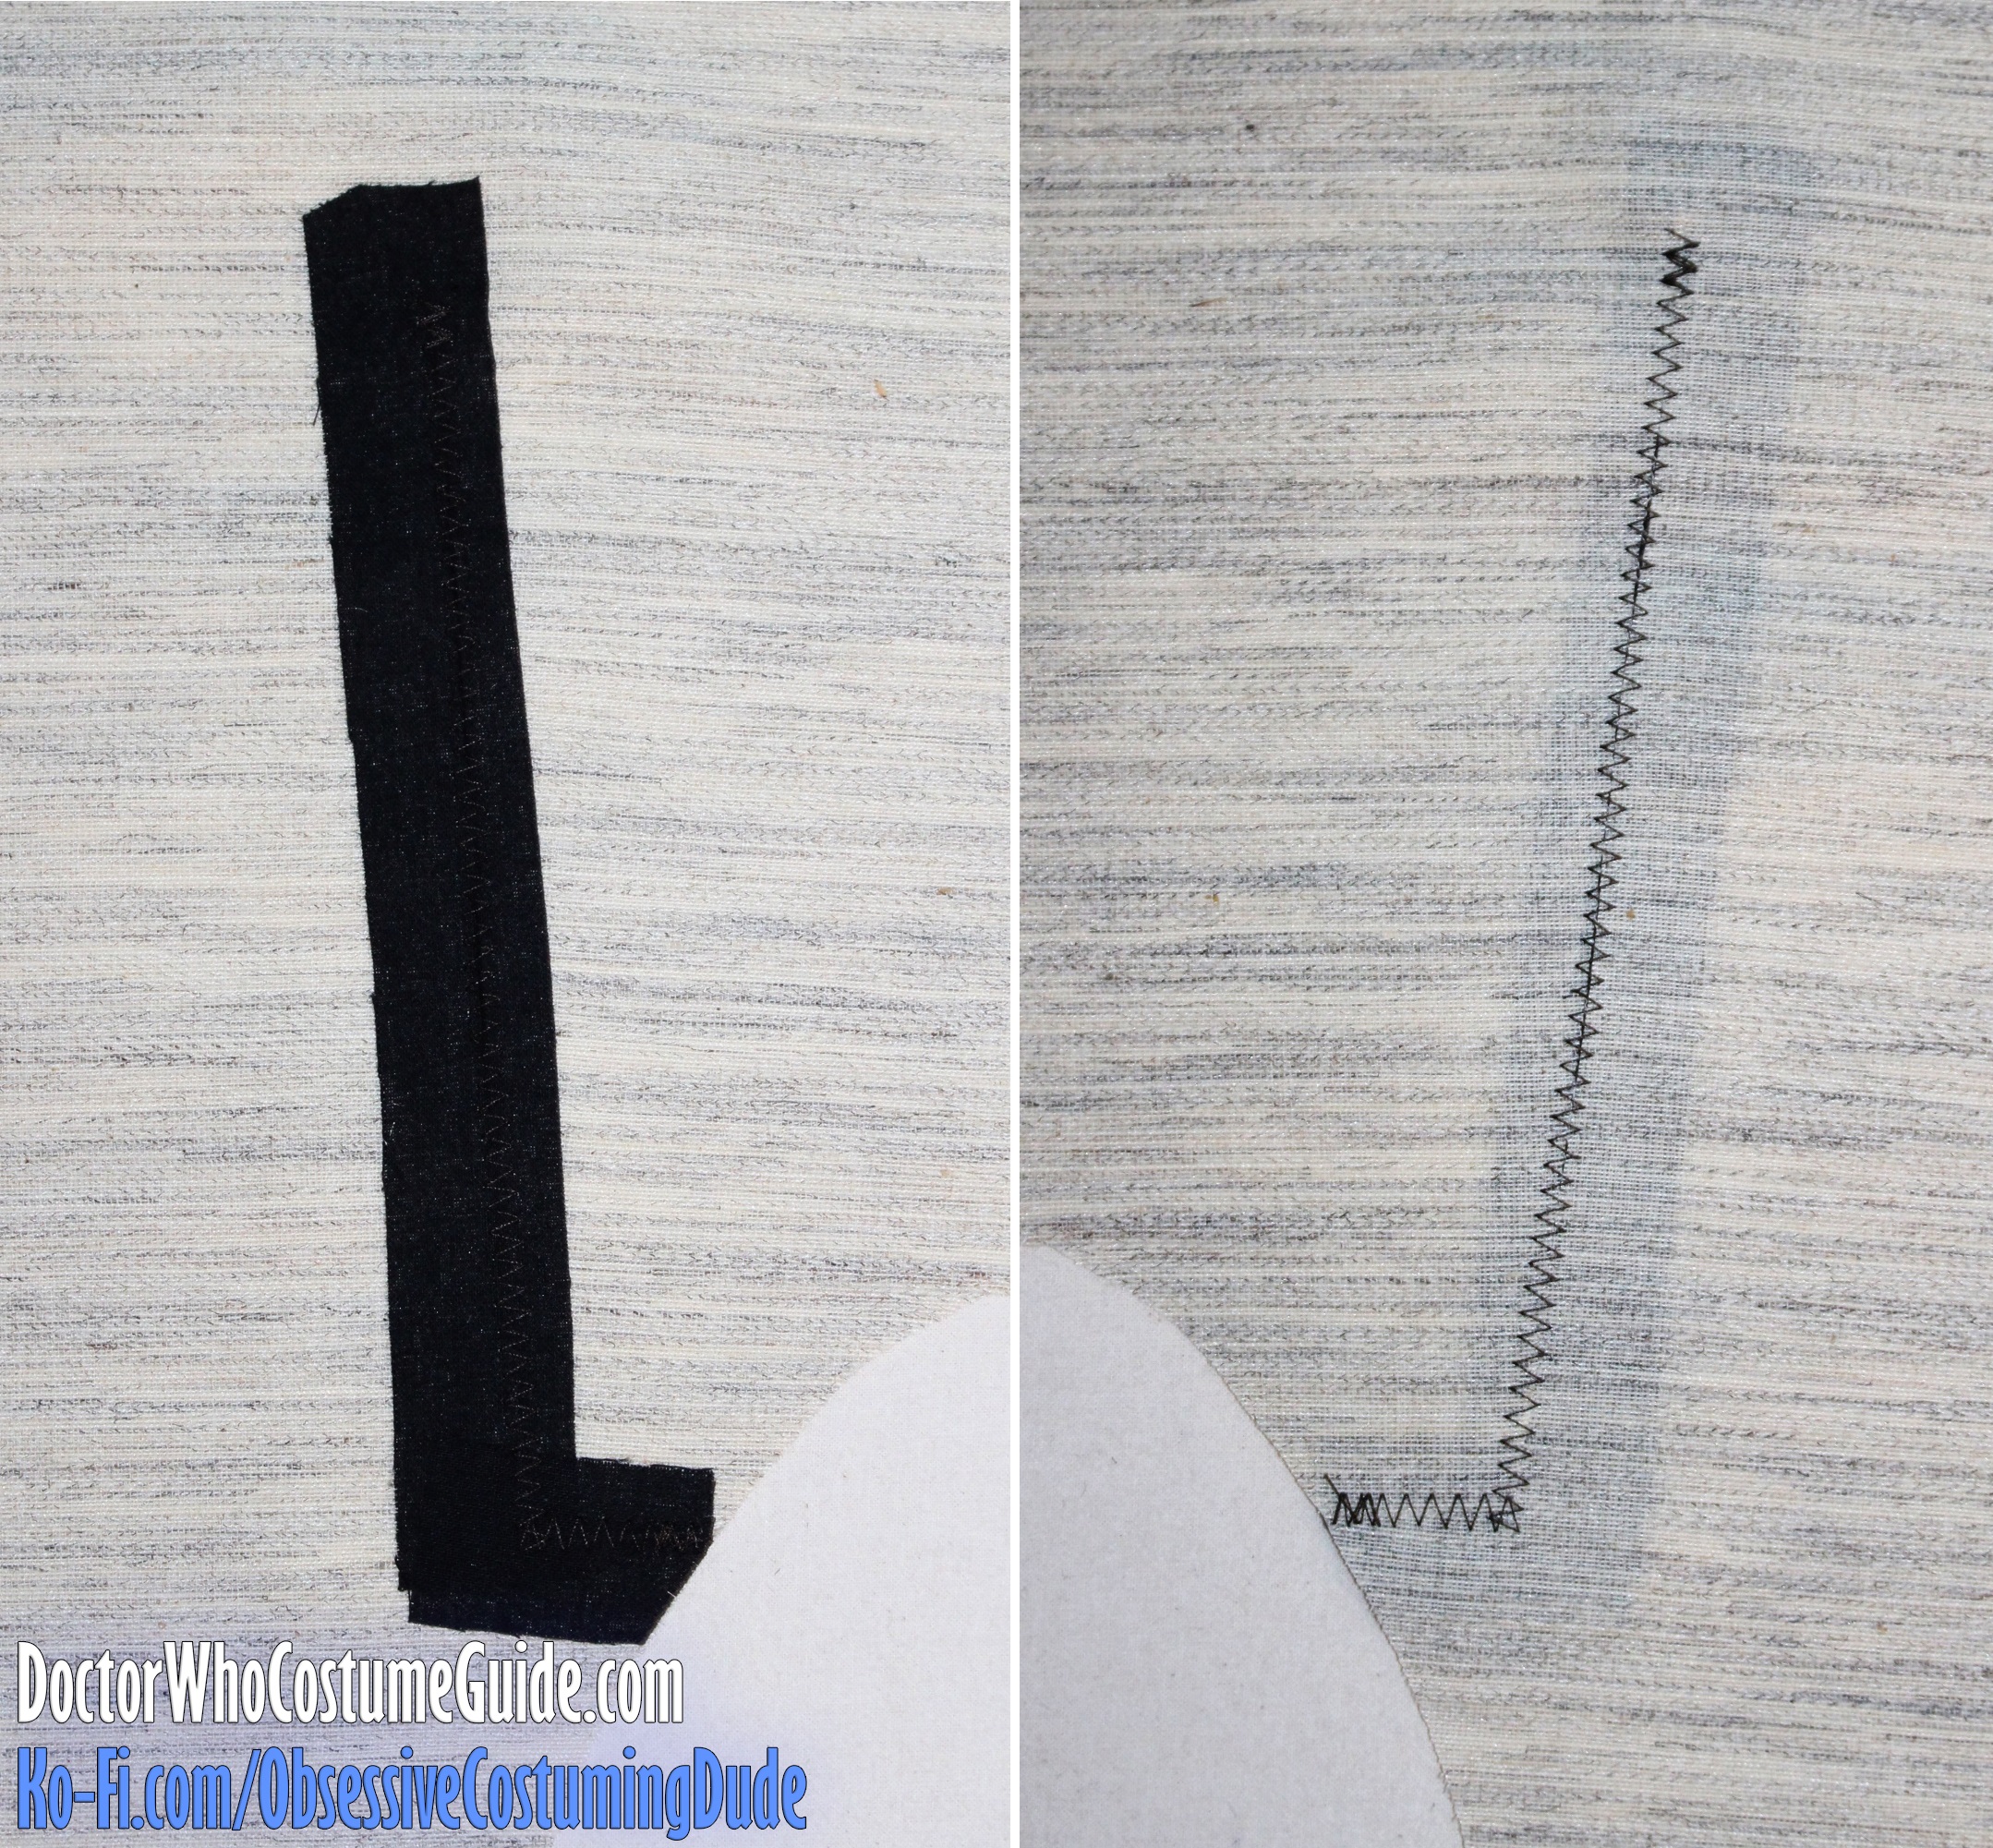
Place the canvas over a tailor’s ham and draw the edges of the waistline suppression together so they’re flush.
Cut a small strip of fusible interfacing about 1” wide and apply it over the suppression.
Then, zig-zag stitch over the edges to secure them together.
A high-end suit jacket will usually have some additional structuring in the chest area, but it’s up to you how far you want to go with this.
The idea is to give the jacket its own character so it doesn’t entirely depend on the wearer’s body for shaping.
Specifically, structuring the chest area helps prevent sagging and wrinkles in the hollow upper chest area …
Wrinkles like these:
Season 4 publicity photo
8x01 "The Day of the Doctor" (publicity photo)
On the other hand, sometimes the upper chest area on his suits looked fabulous – nice and smooth.
2x12 "Army of Ghosts"
4x1 "Partners in Crime"
4x2 "The Fires of Pompeii"
8x01 "The Day of the Doctor" (publicity photo)
Granted, these are rather extreme examples – reality is often between them – and doubtless some of the “chest wrinkles” were a gradual result of the continuous production use taking its toll. Most of us probably won’t be running around in our suits daily for months on end! Not to mention getting dunked in goo, splashing through puddles, having drinks (and other liquids) thrown on us, leaping through fire, and all sorts of other shenanigans like that.
So, decide how smooth you want your suit’s upper chest area to ideally be, or how wrinkly you’re willing to accept it being for whatever reason.
Personally, I wanted a prettier, more conventional “look” for my suit, so if this is your desired result as well, I suggest interfacing the upper chest area the way Cabrera described in his book (and which I’ll summarize for you here).
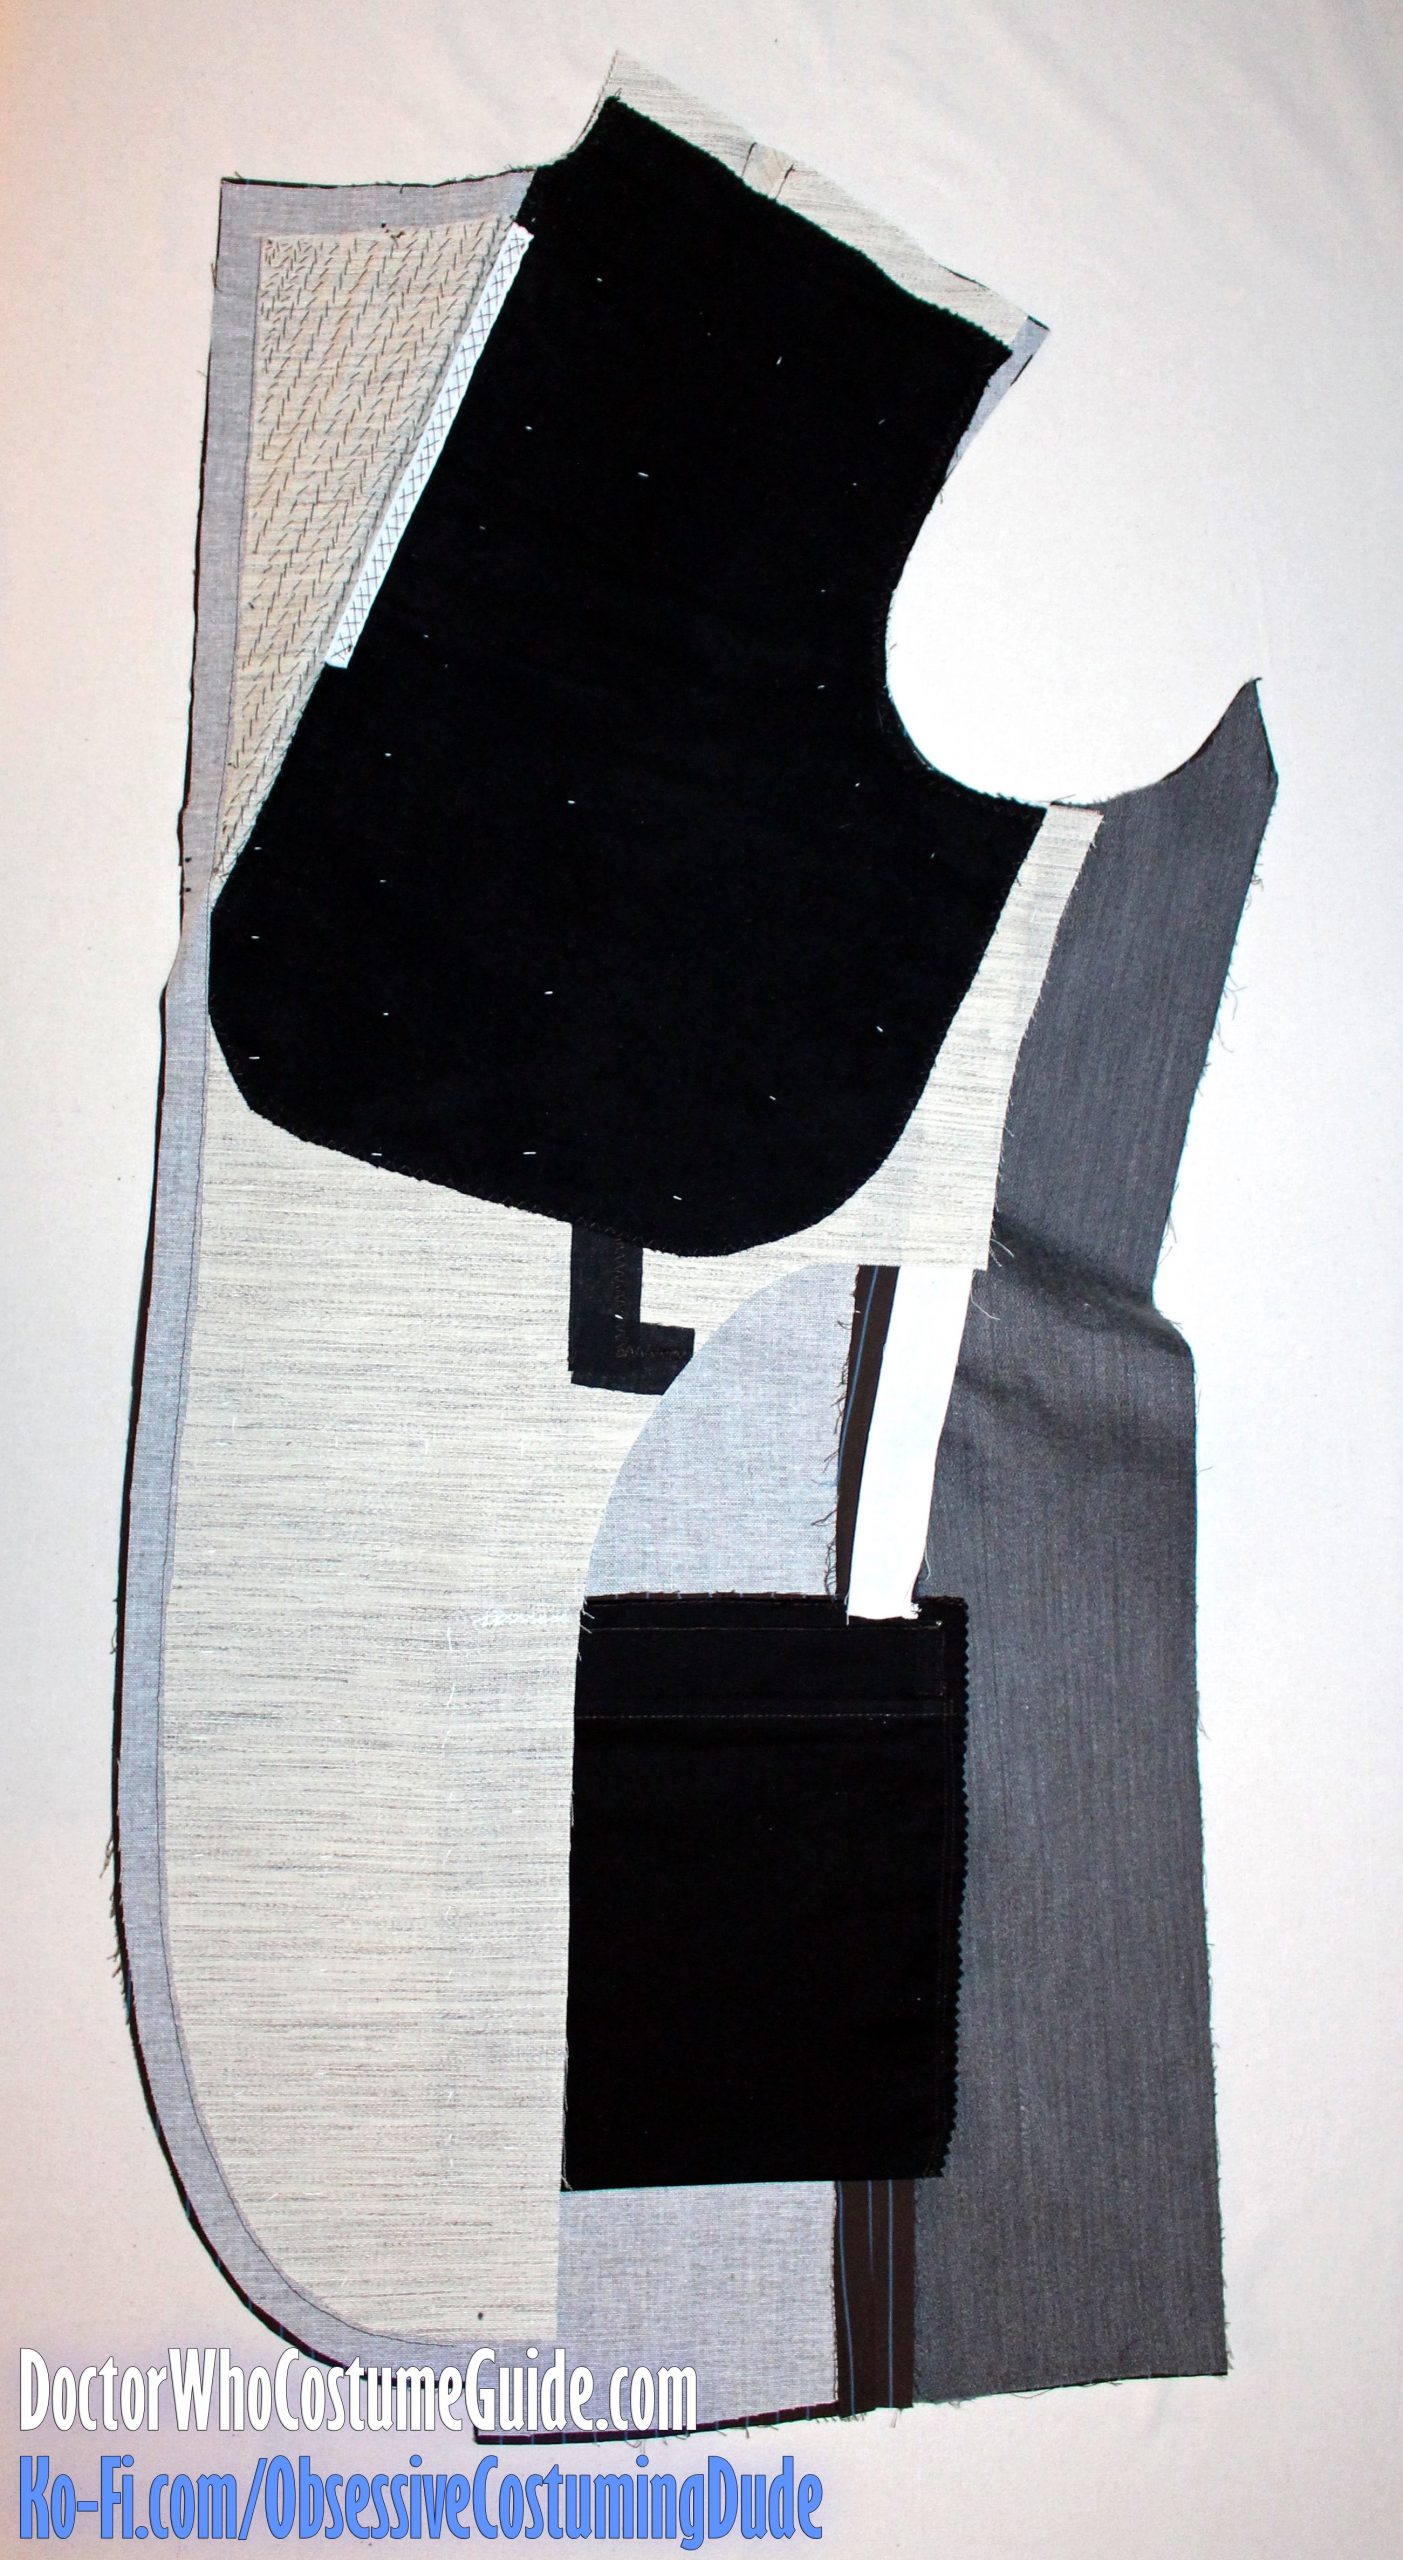
Cut another layer of hair canvas for the chest plastron (piece C), with the straight grain being parallel to frontmost edge.
This second chest canvas piece should be oriented so its upper edge is about 2” below the shoulder seam, the lower edge is about 2” above the waistline, the armhole edges are flush, and the frontmost edge is about ½” outside of (and parallel to) the roll line.
About halfway along the frontmost edge (which is next to the roll line), cut out a dart that’s ½” wide and 3” long.
Pull the edges together and sew the dart closed with a zig-zag stitch.
Position the chest plastron onto the jacket canvas as described previously (so its top edge is about 2” below the shoulder seam, and the centermost edge is about ½” outside the roll line).
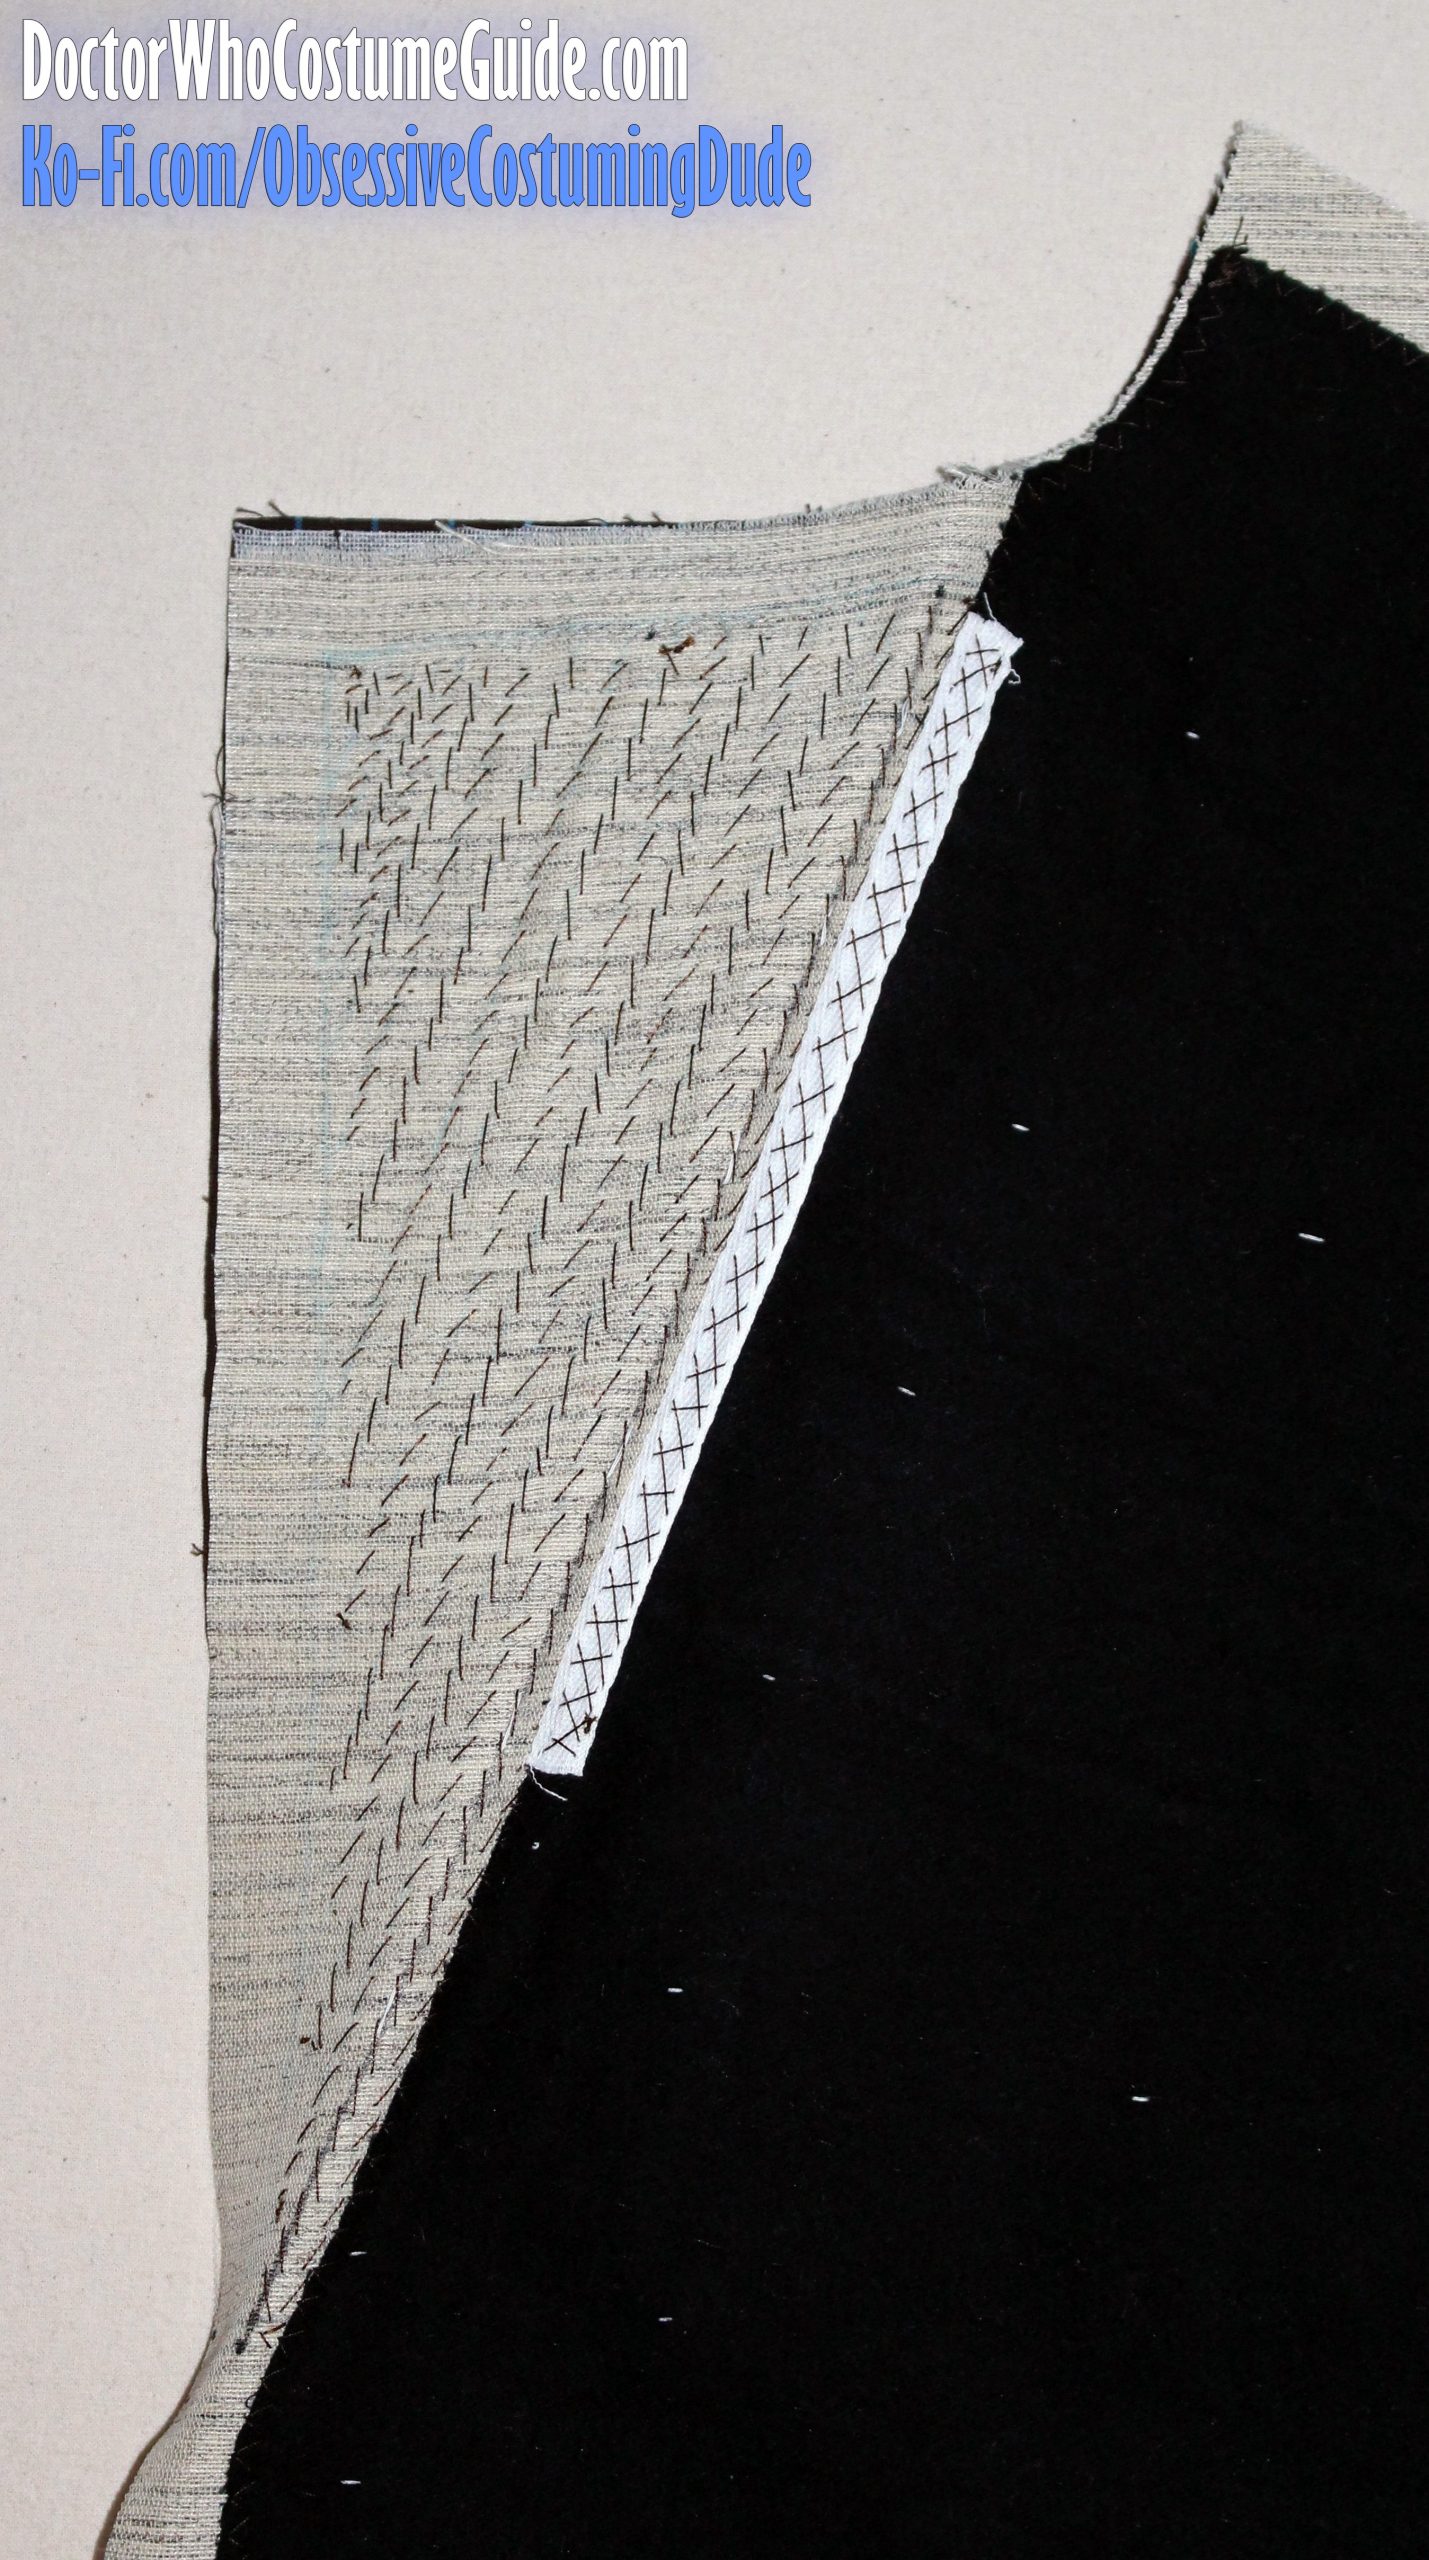
Cut two slashes into the chest canvas, about 1 ½” on each side of the shoulder insert, and 1 ½” deep.
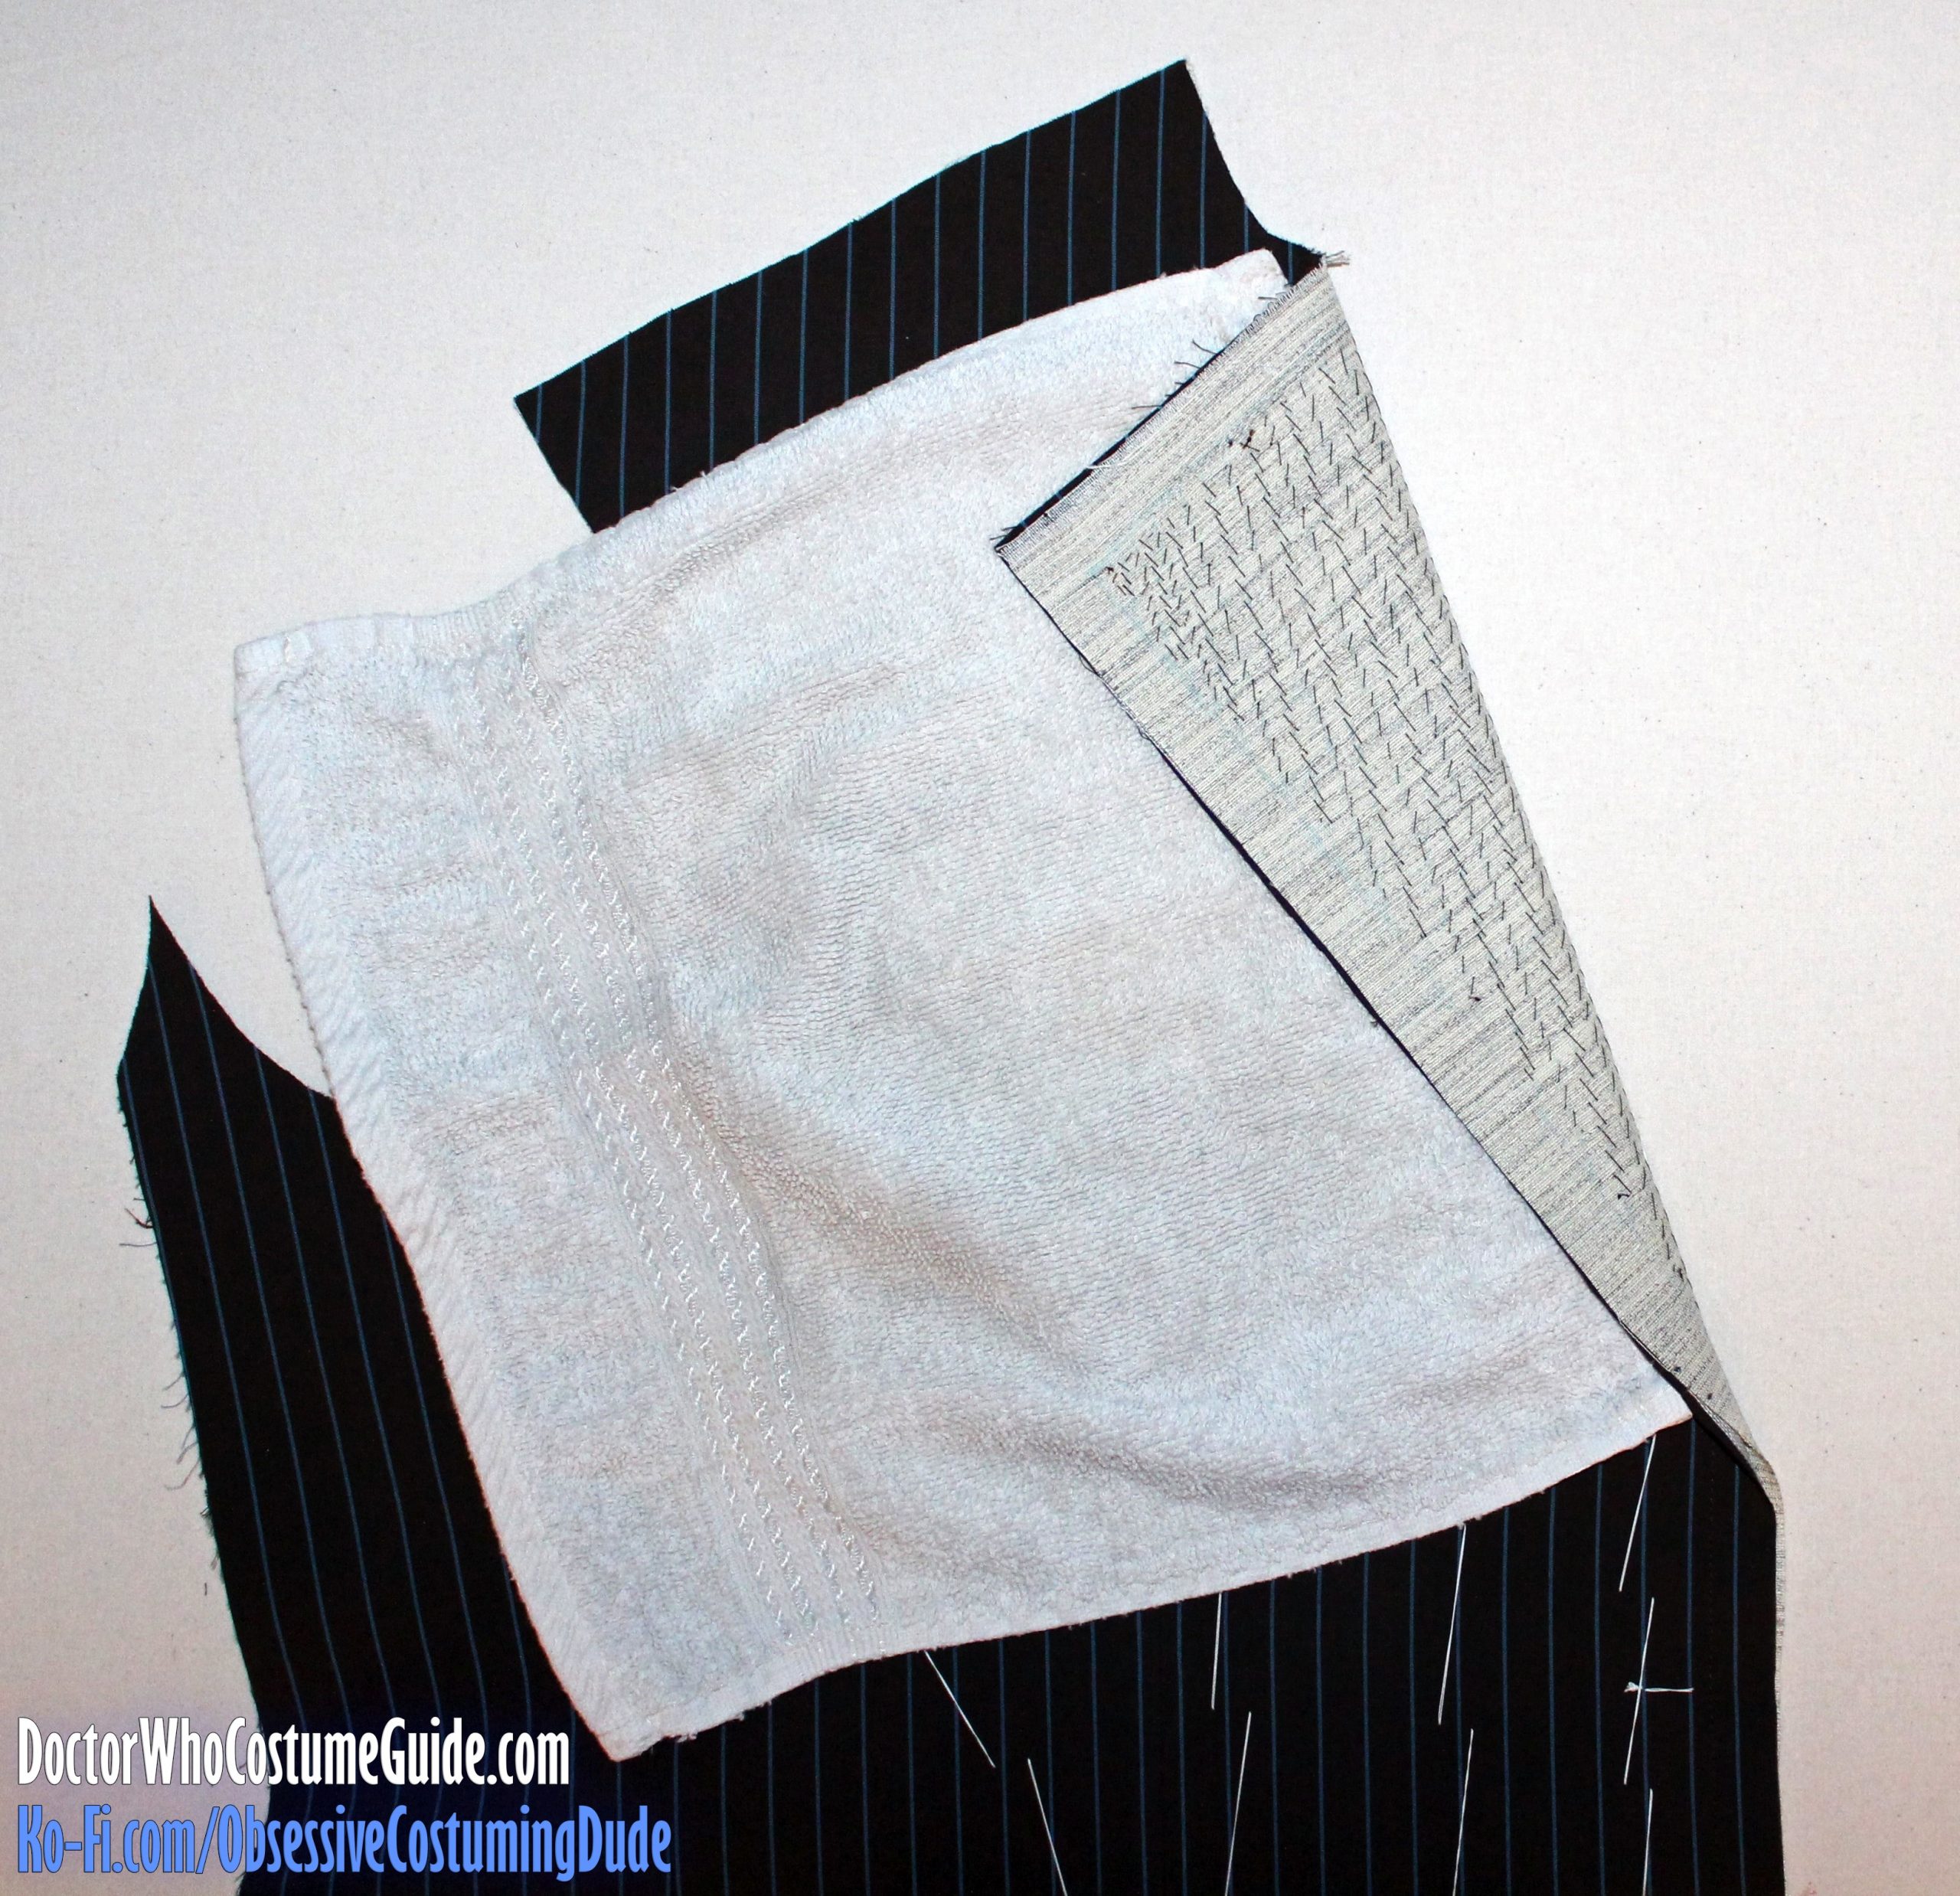
Cut a bias strip of French canvas 5” wide and place it on top of the chest plastron, so its upper edge extends about an inch above the top of the plastron.
Trim the armhole edge so it’s flush with the other layers.
Place your chest flannel (piece D) over all the layers, with the centermost edge being ¼” away from the roll line.
Trim the edges flush with the other layers at the armhole.
Then, tailor-baste all the layers together.
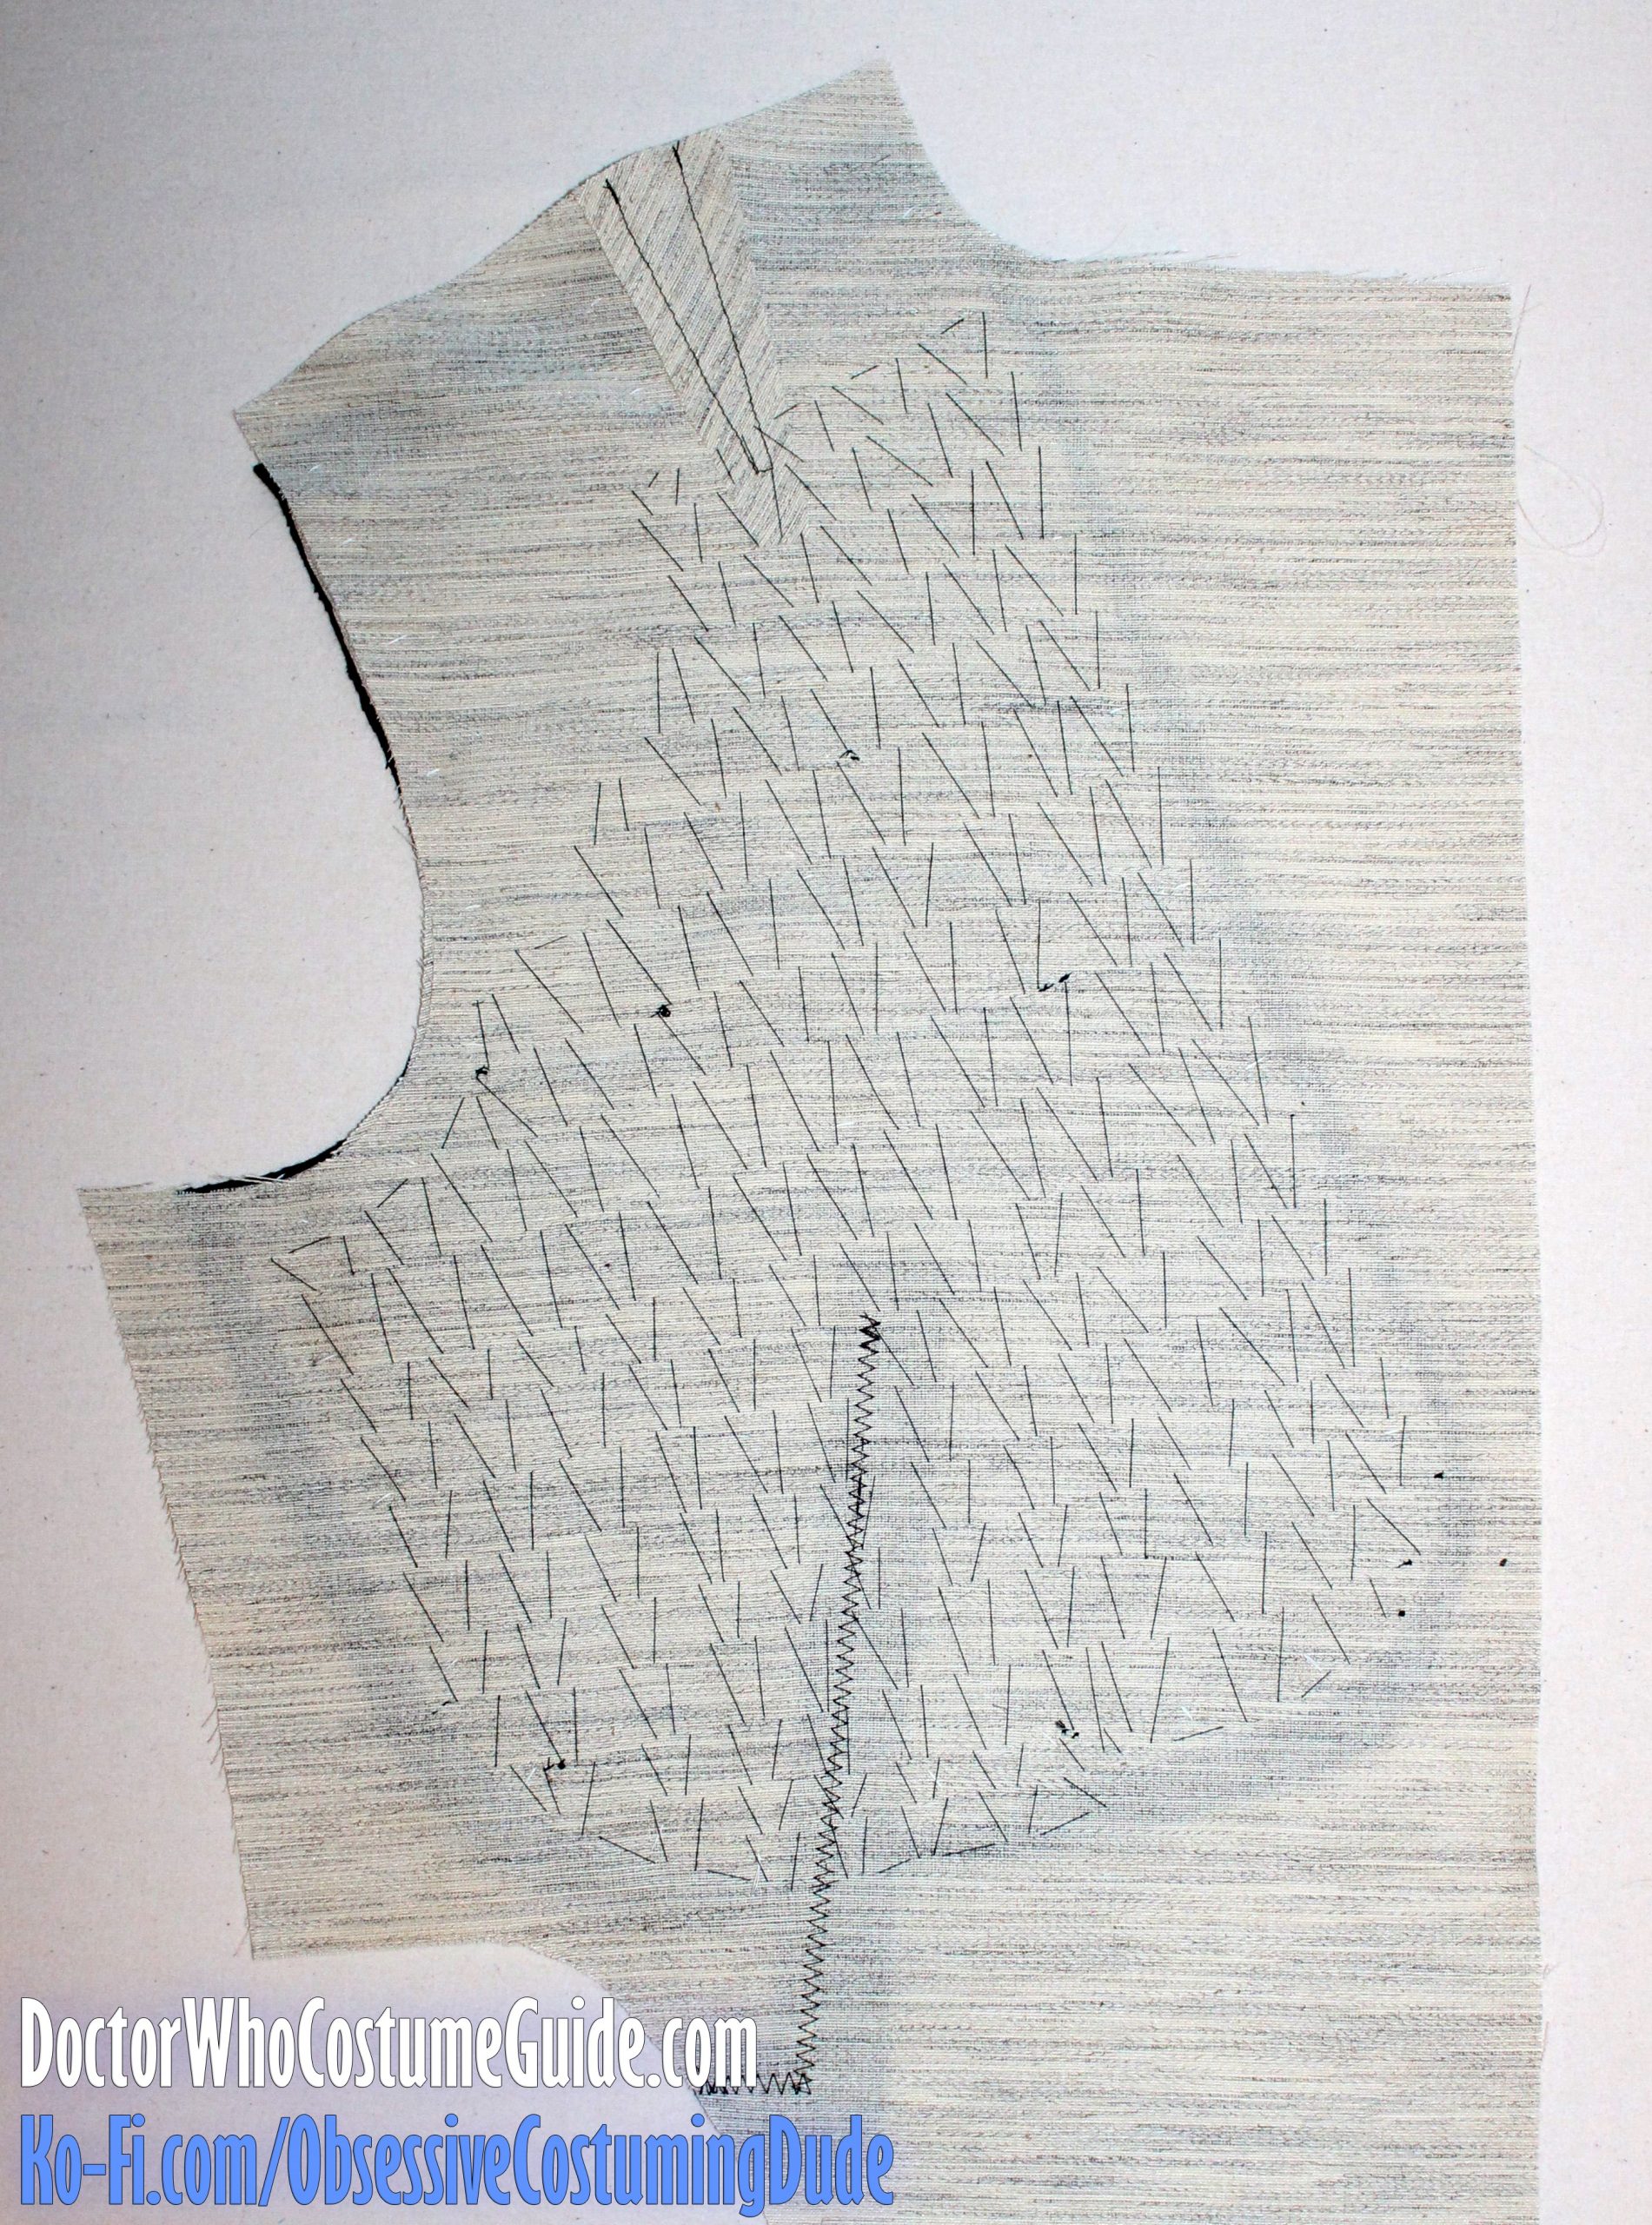
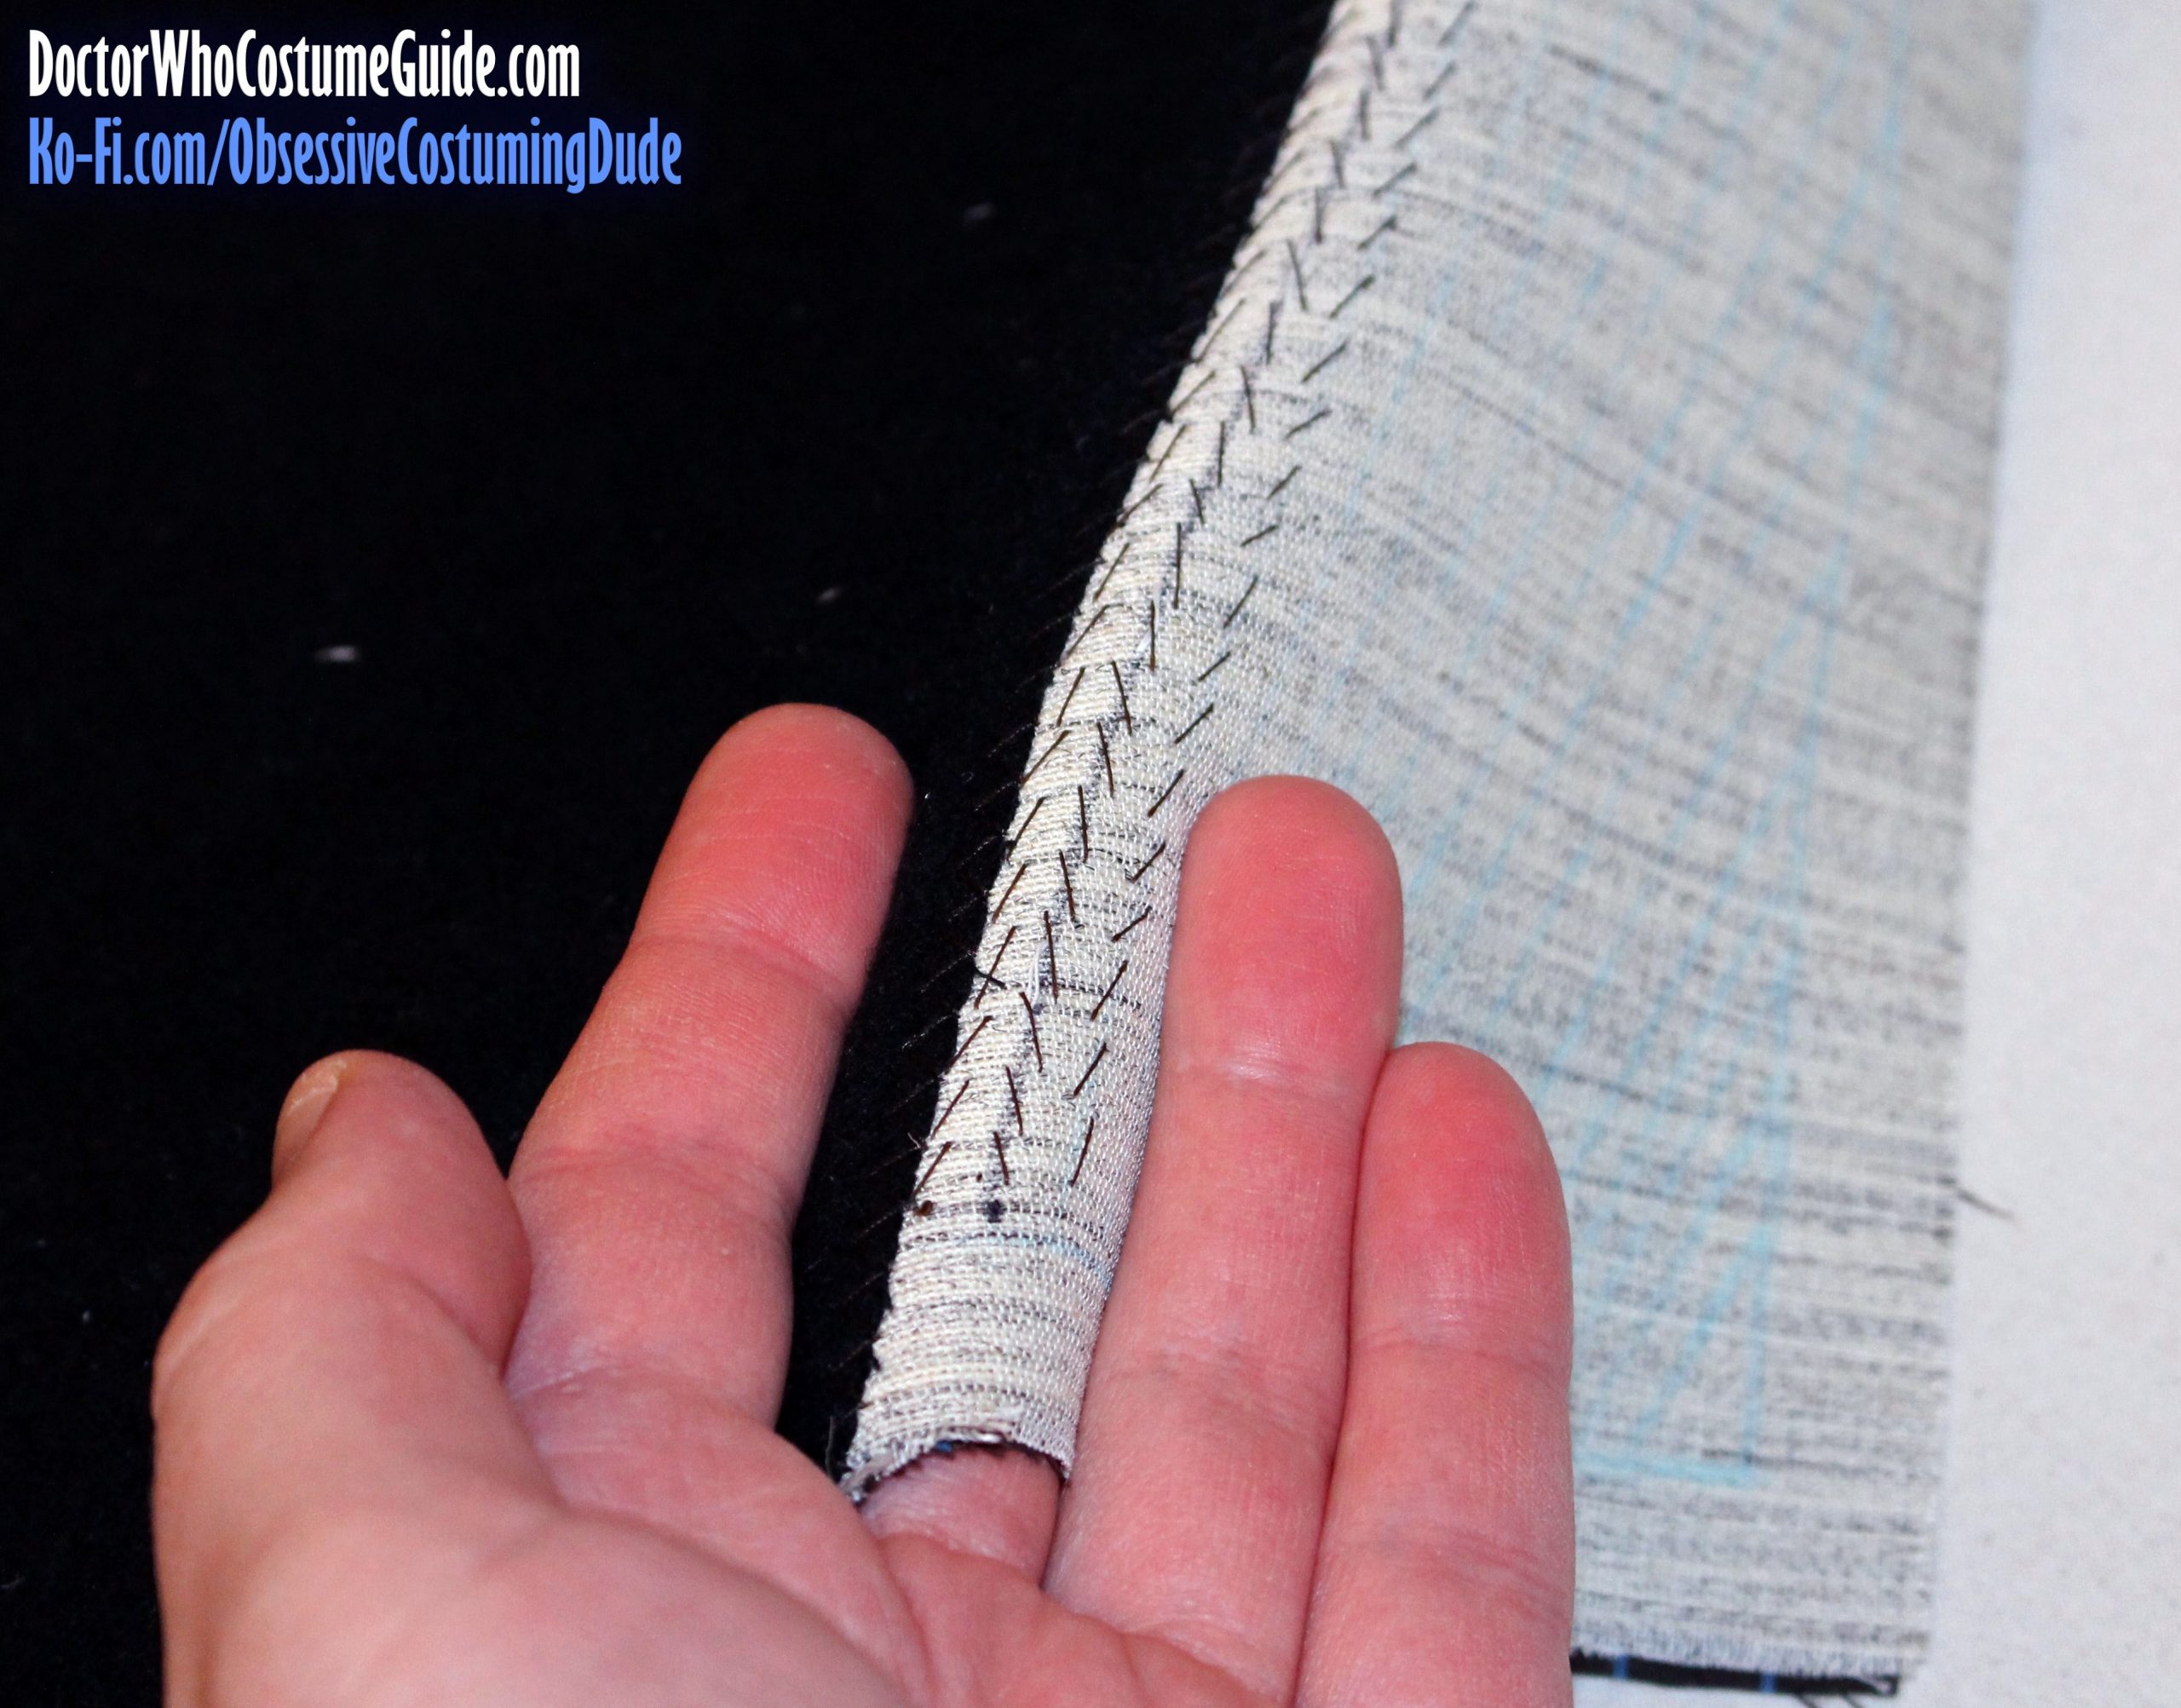
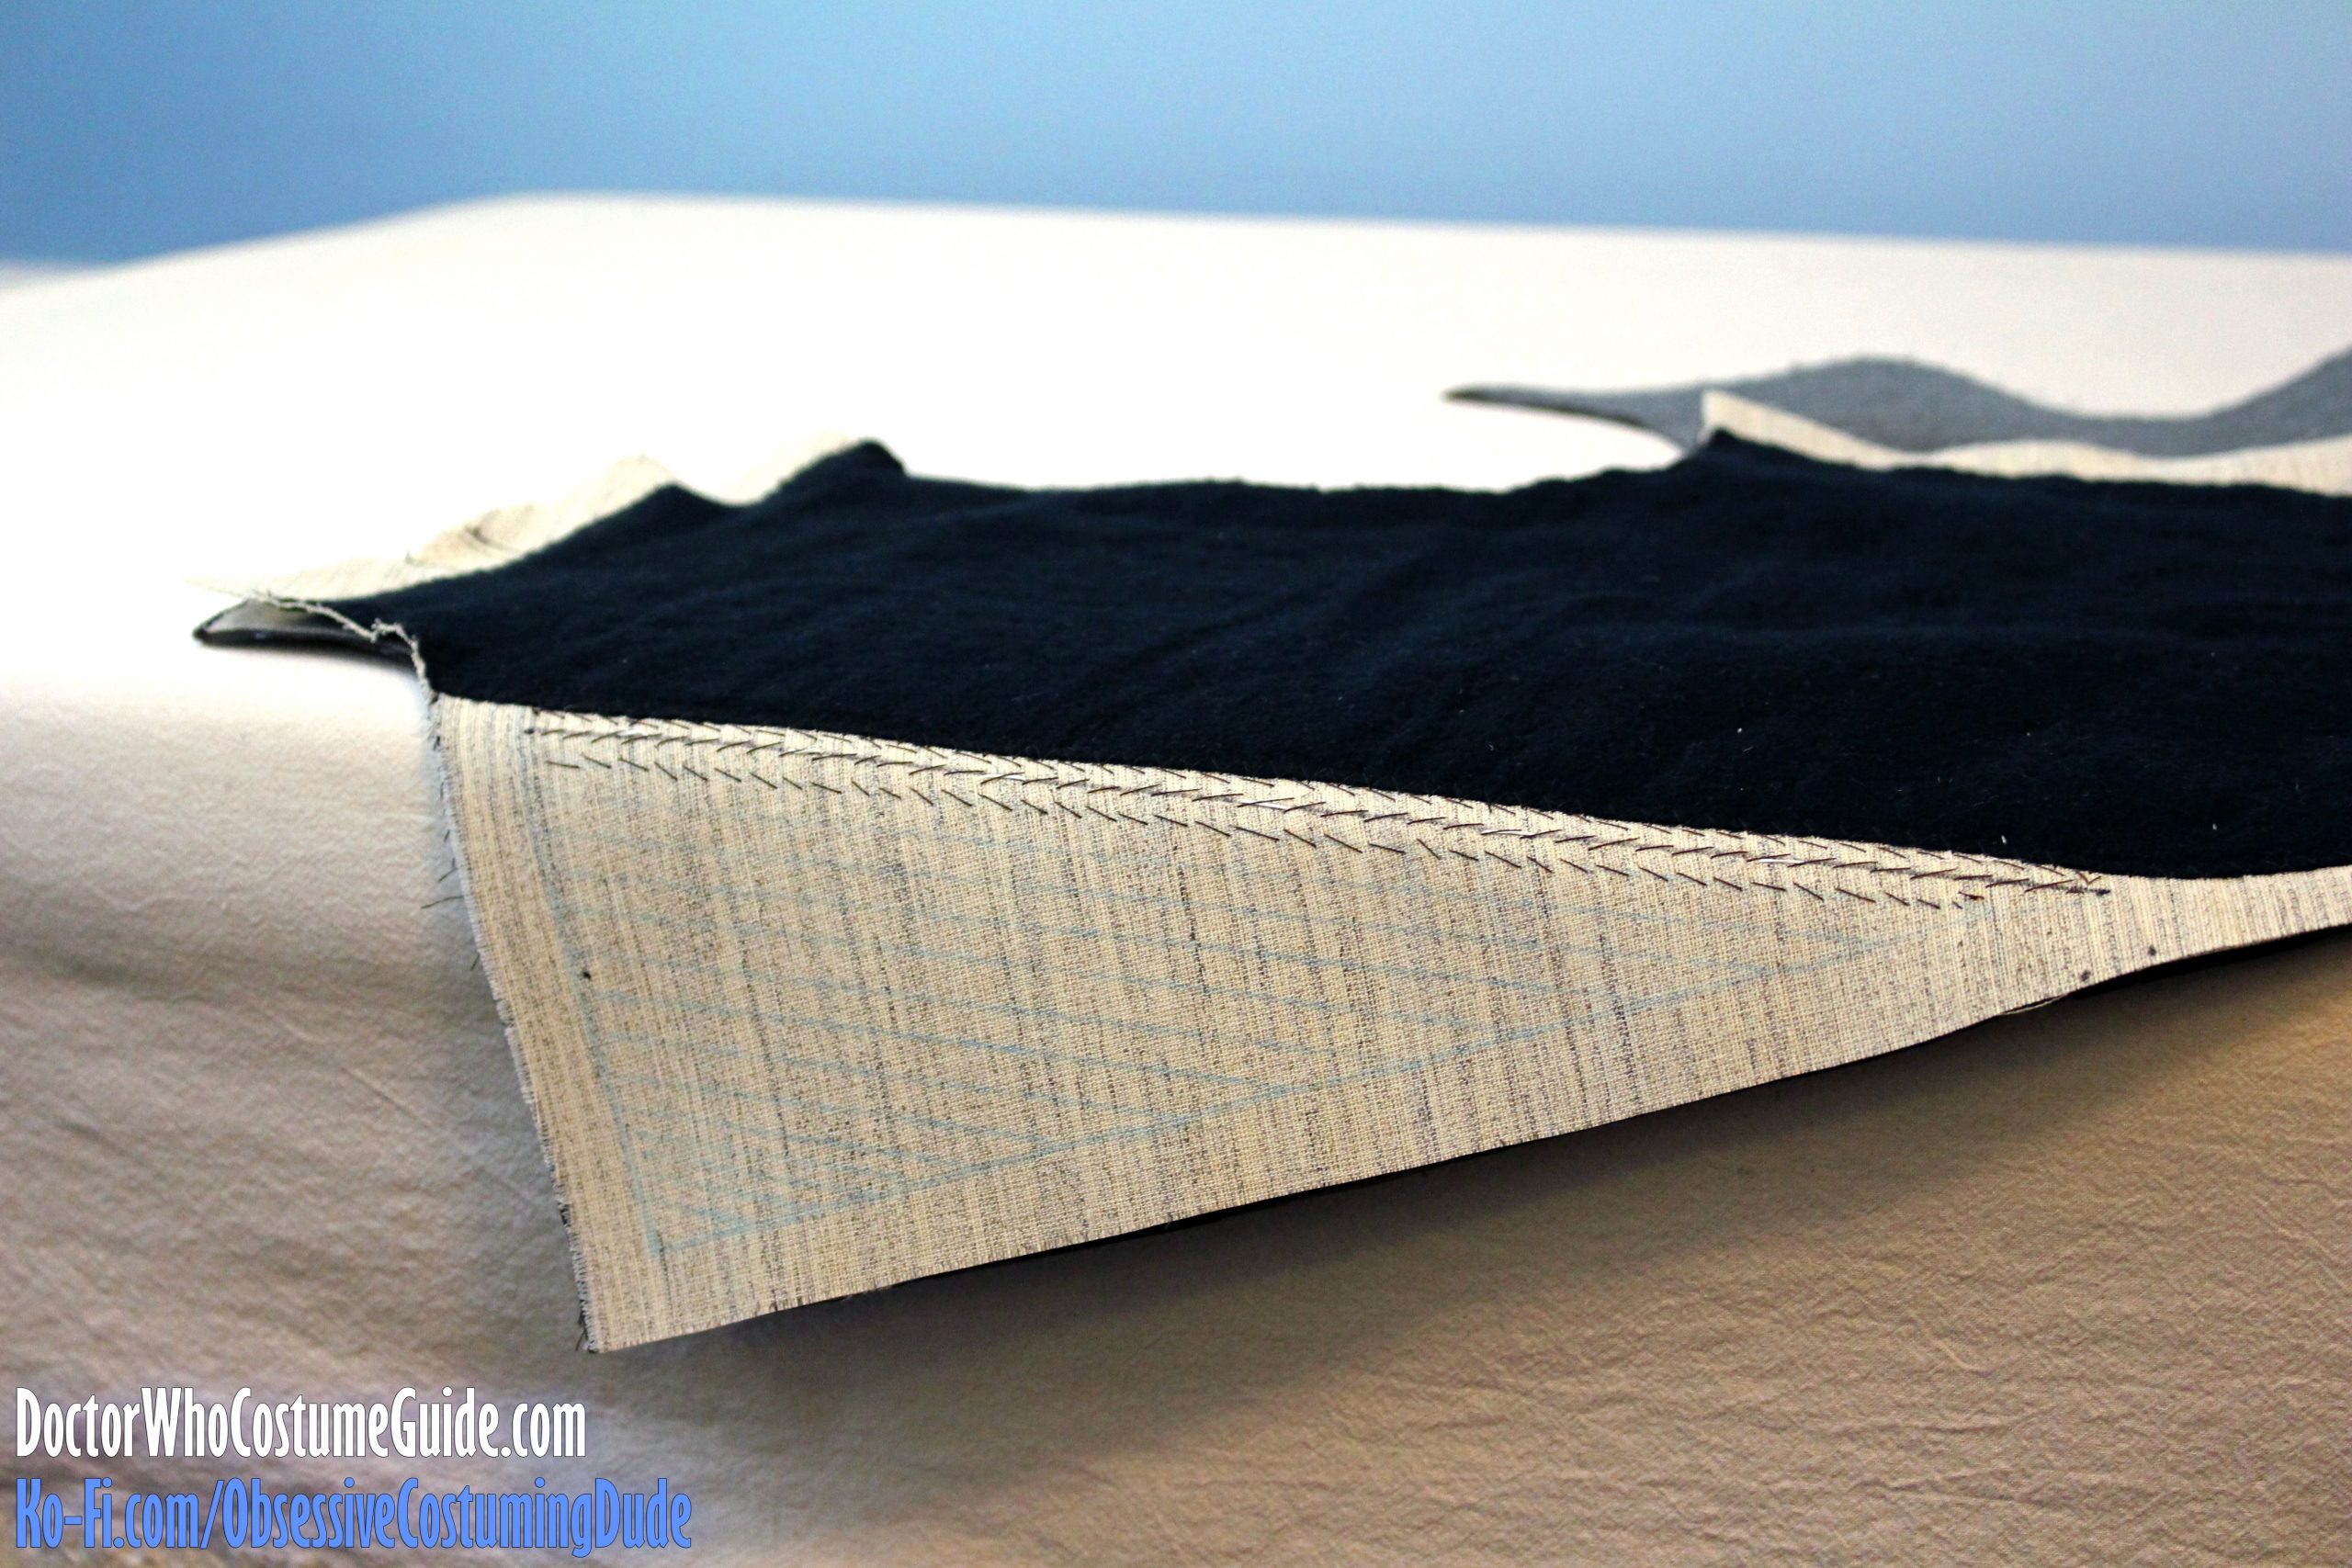
From the outside of the canvas assembly (the side without the flannel), padstitch the layers together, parallel to the roll line.
These stitches can be larger than “normal” padstitches (such as those on a collar and lapel), and you can grab as much of the layers as you like, since the stitching won’t be seen on the finished suit.
Padstitch the entire lower area, except for the uppermost 2 ½” or so from the shoulder and 3” from the armhole. Taper the upper curve into the armhole.
This helps contour the canvas assembly toward the wearer’s body.
On the wrong side, secure the edges of the flannel to the canvas with a zig-zag stitch.
Then, gently press the canvas assembly.
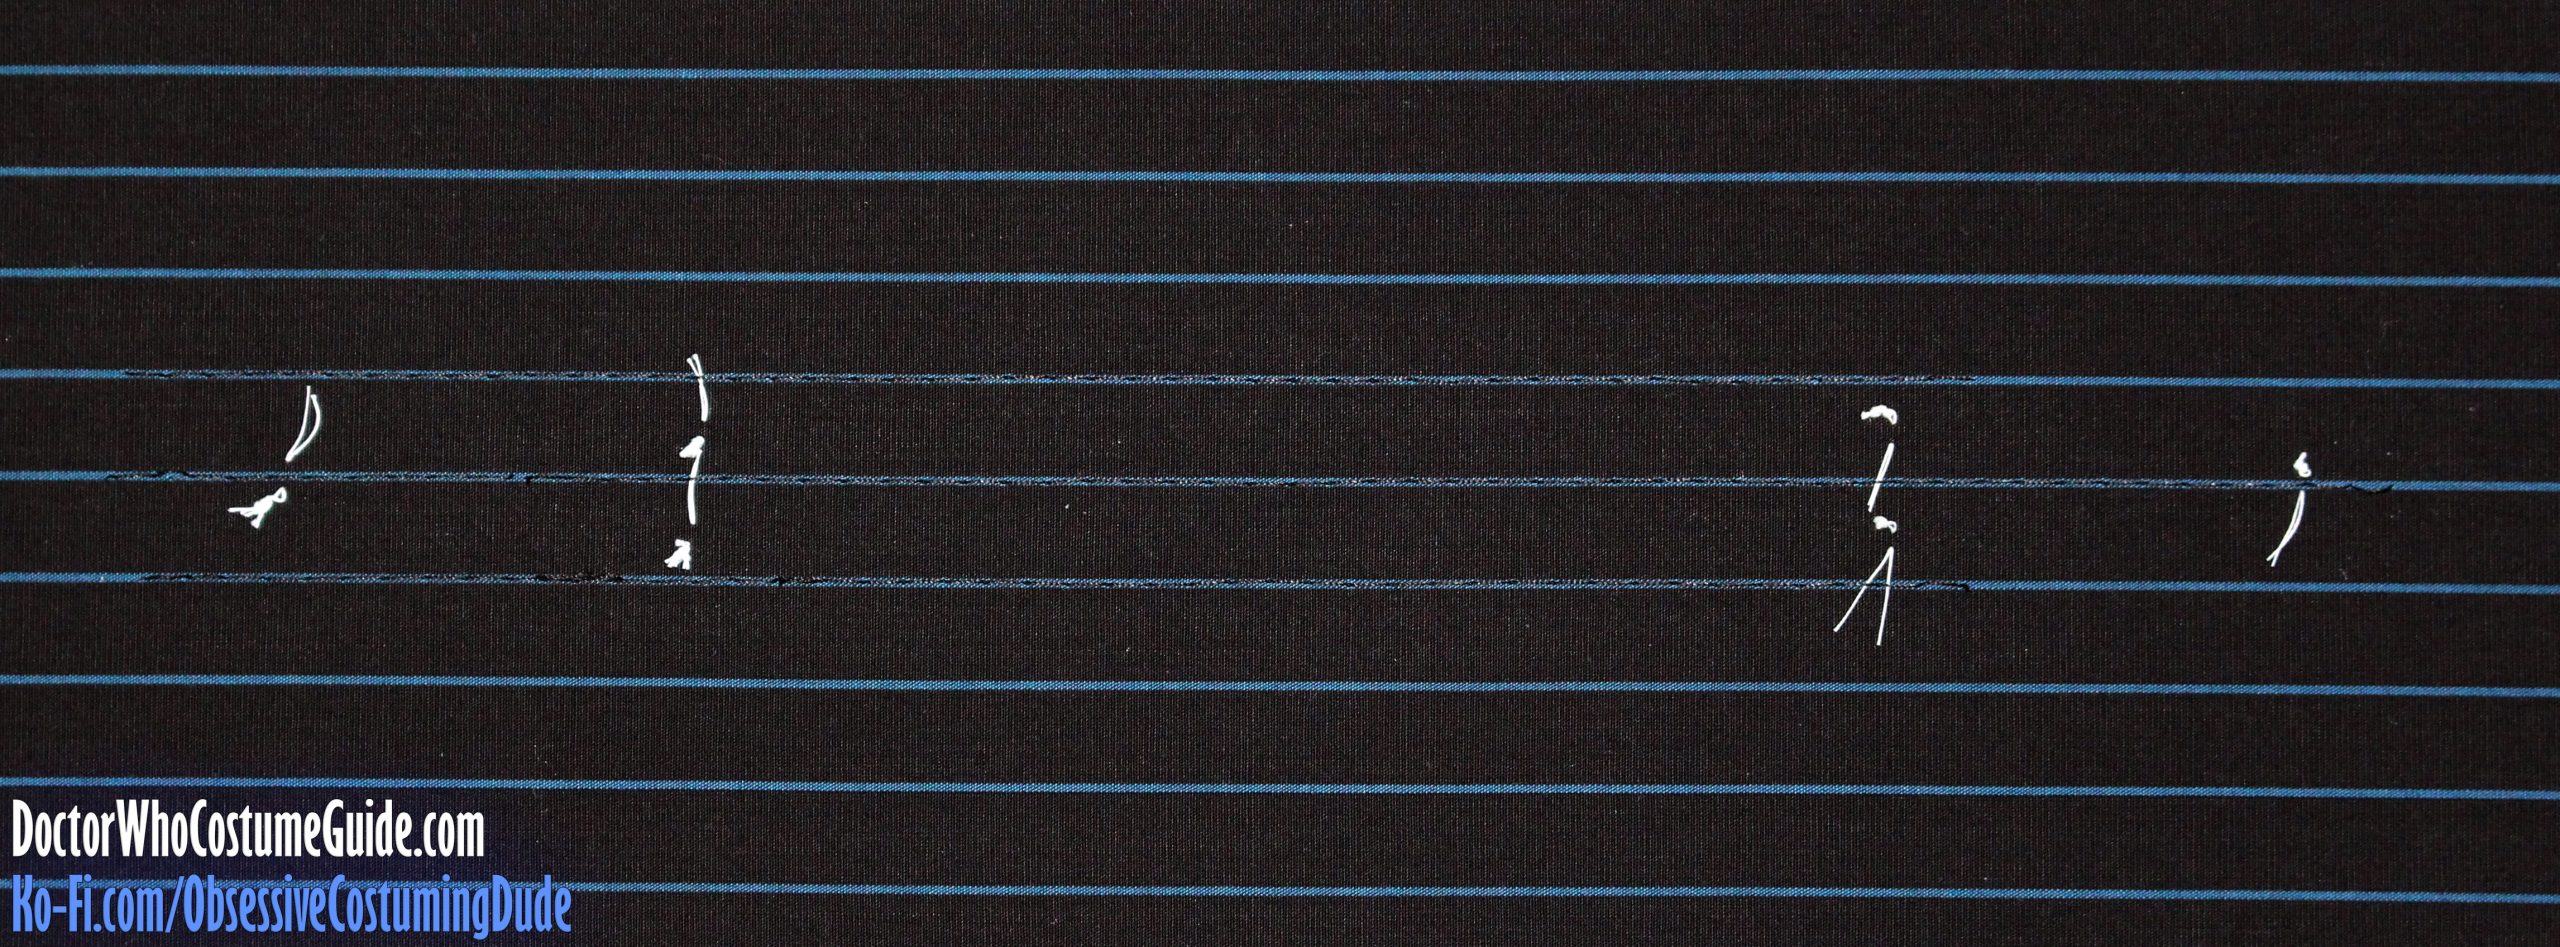
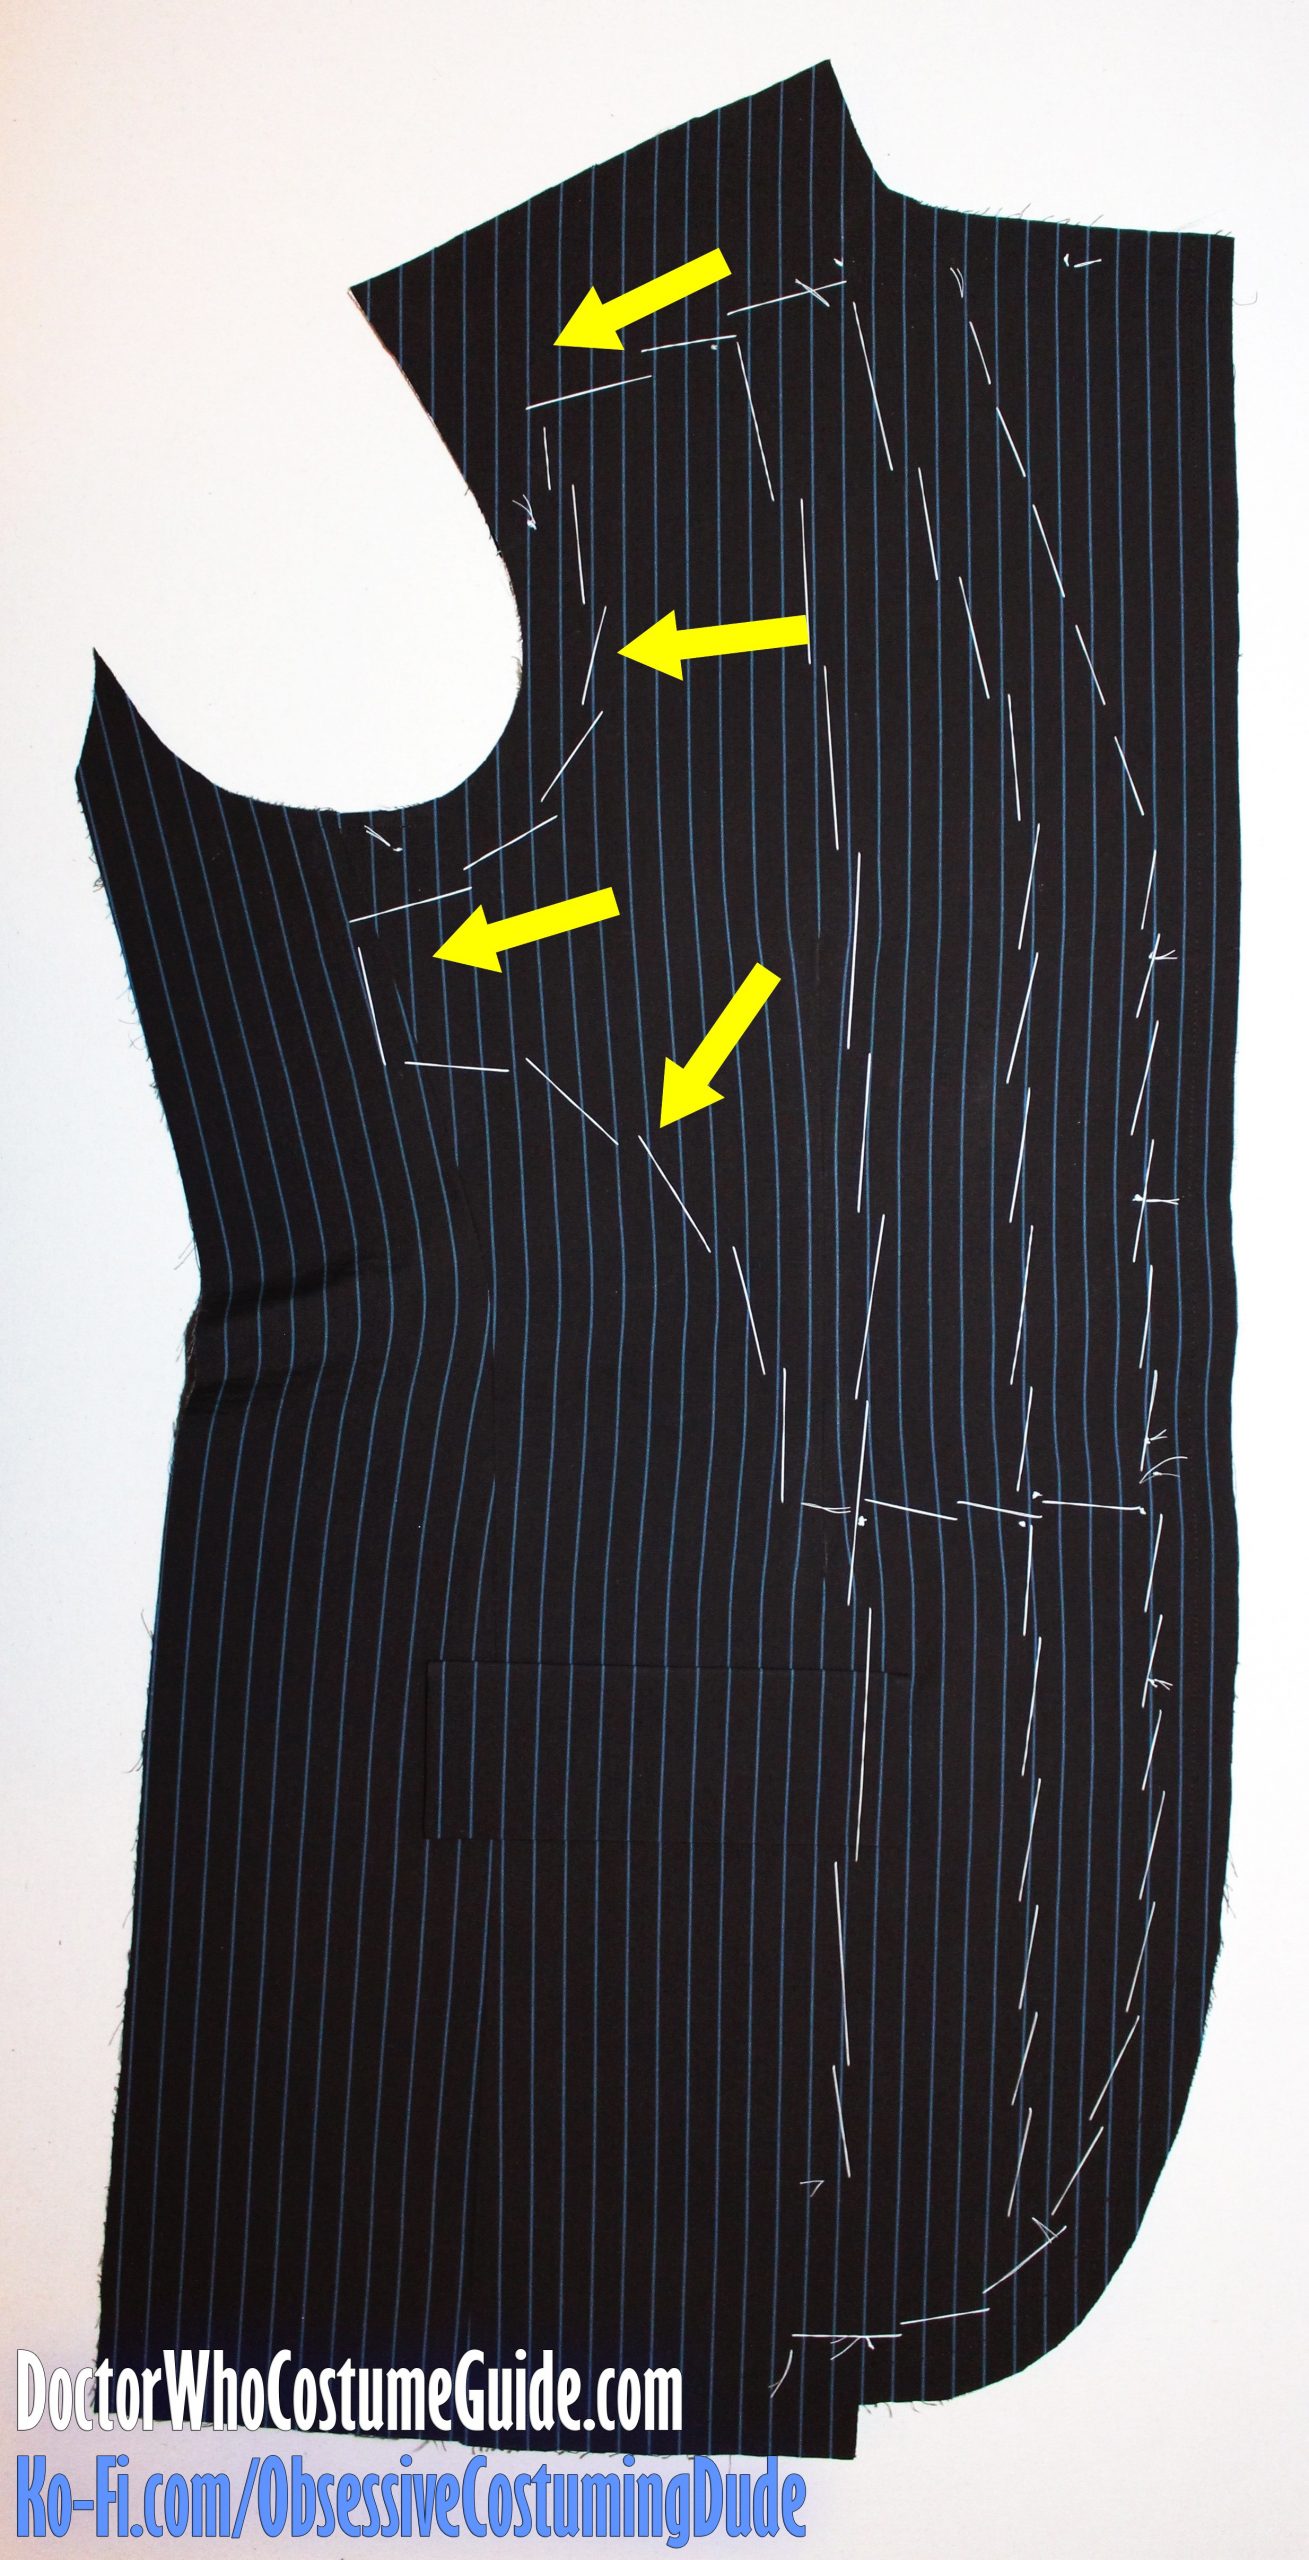
The front interfacing assembly and the jacket assembly must now be “married” so they can be handled as a single unit, and the best method I know of accomplishing this is Cabrera’s from Classic Tailoring Techniques for Menswear.
This strategy involves several rows hand-sewing (with cotton basting thread) in key areas to fasten the two pieces together, gently smoothing the fabric ahead of your stitching as you go.
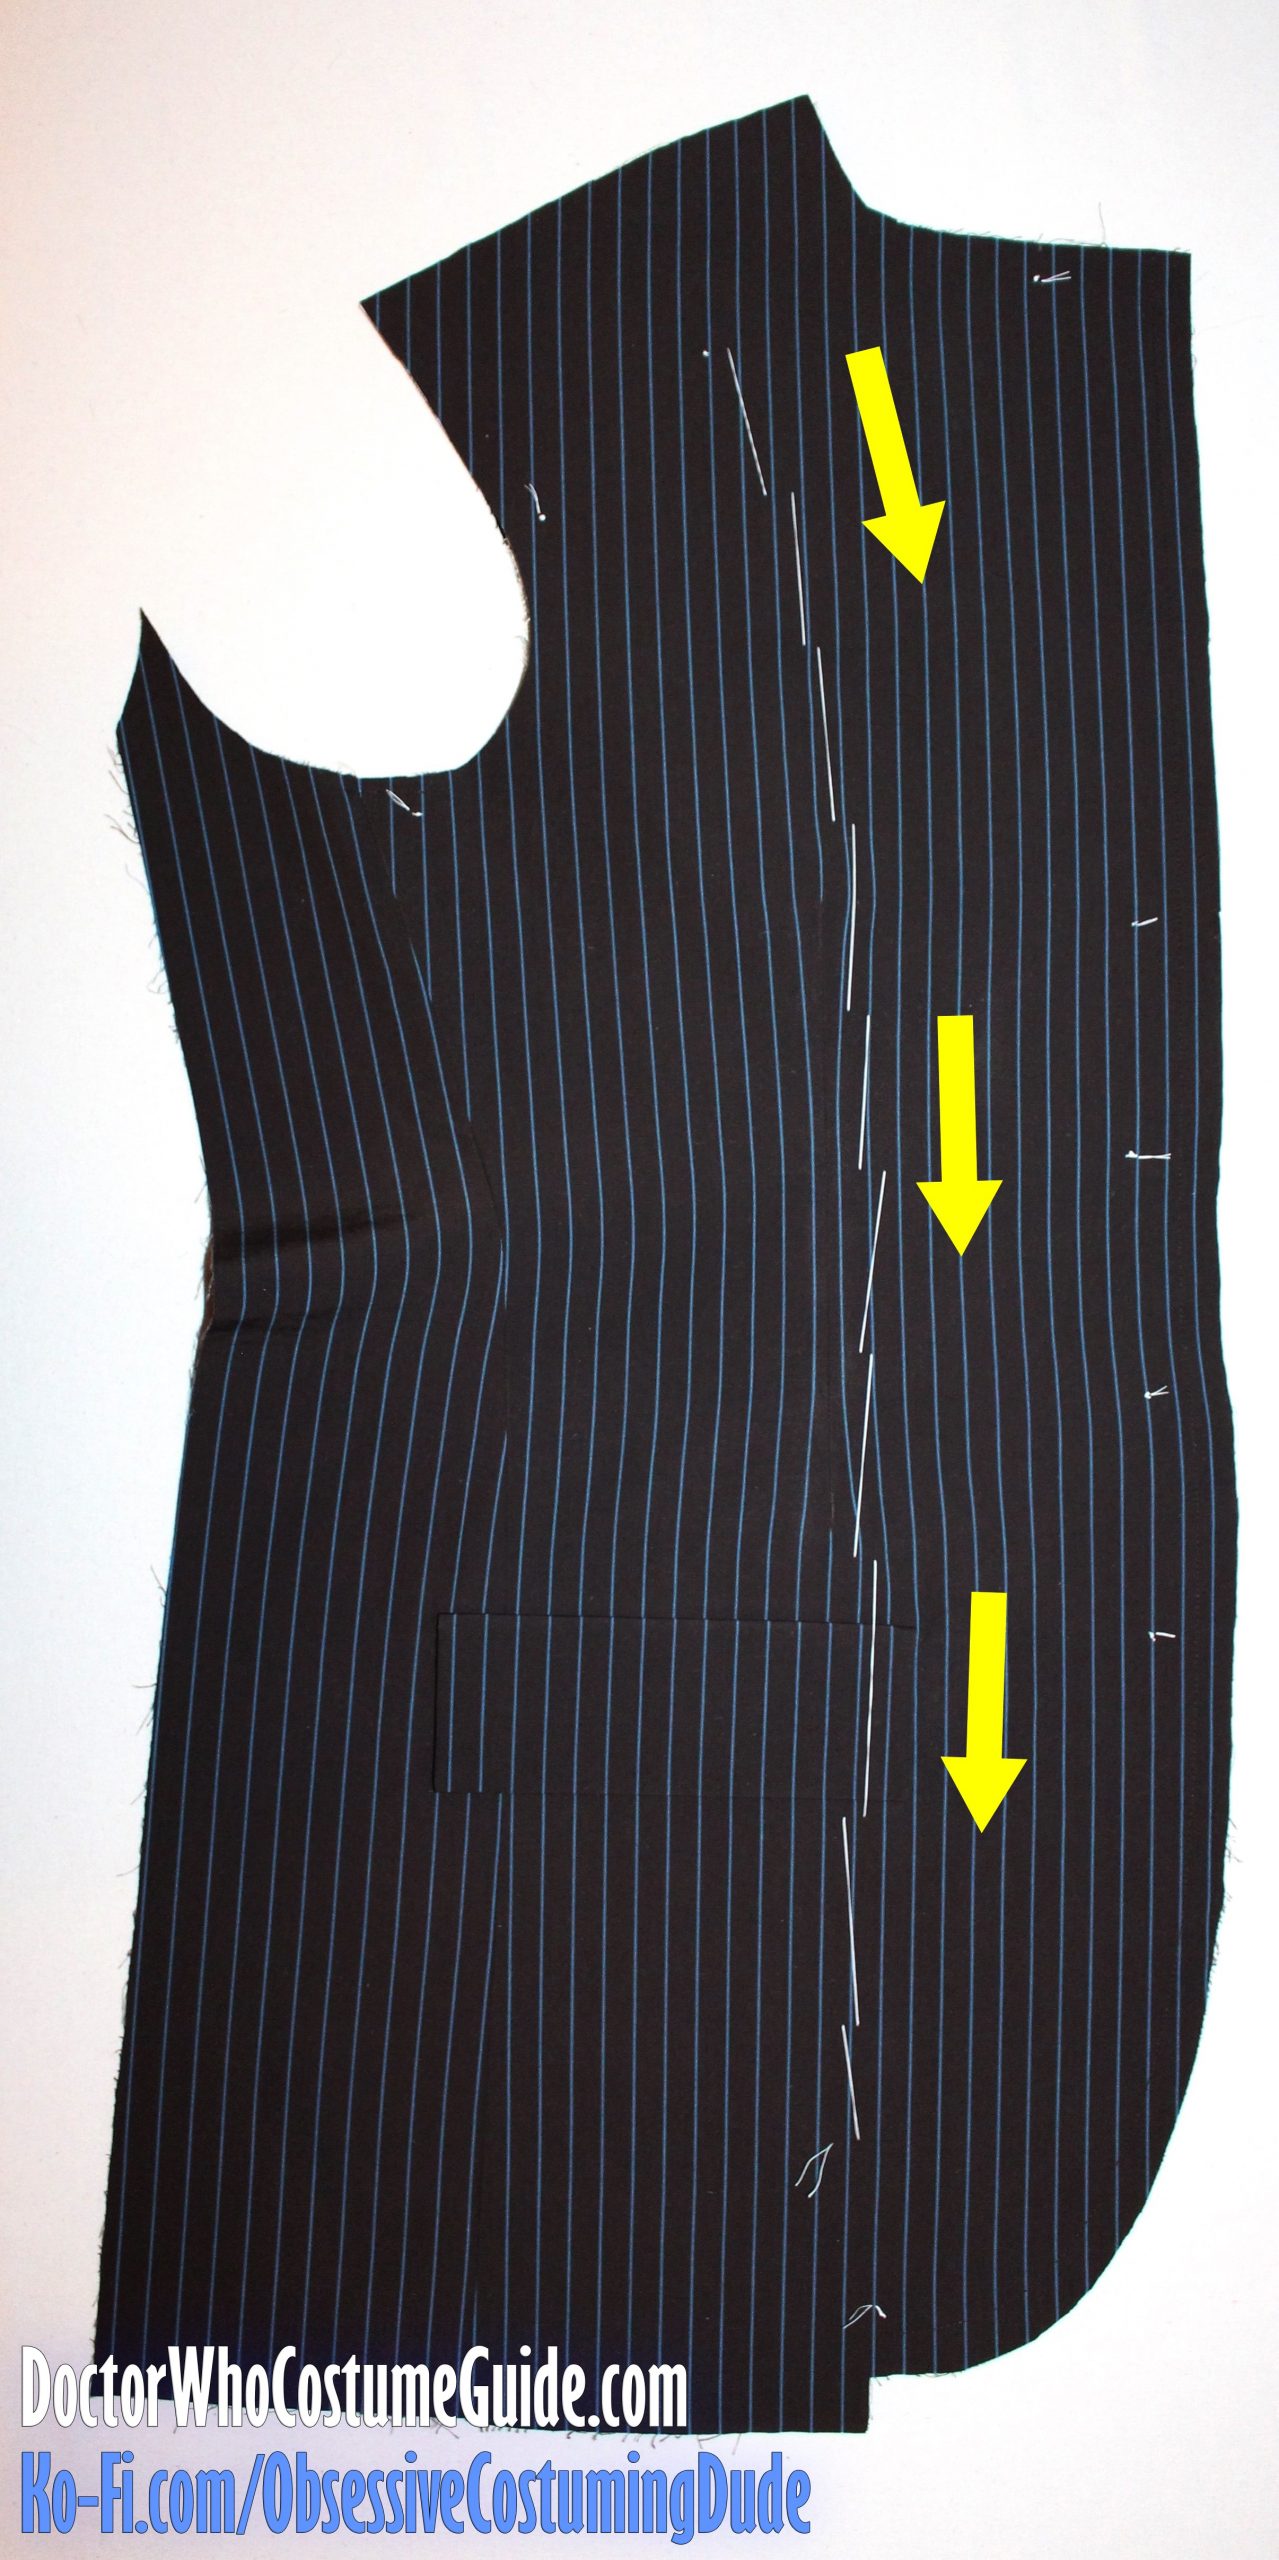
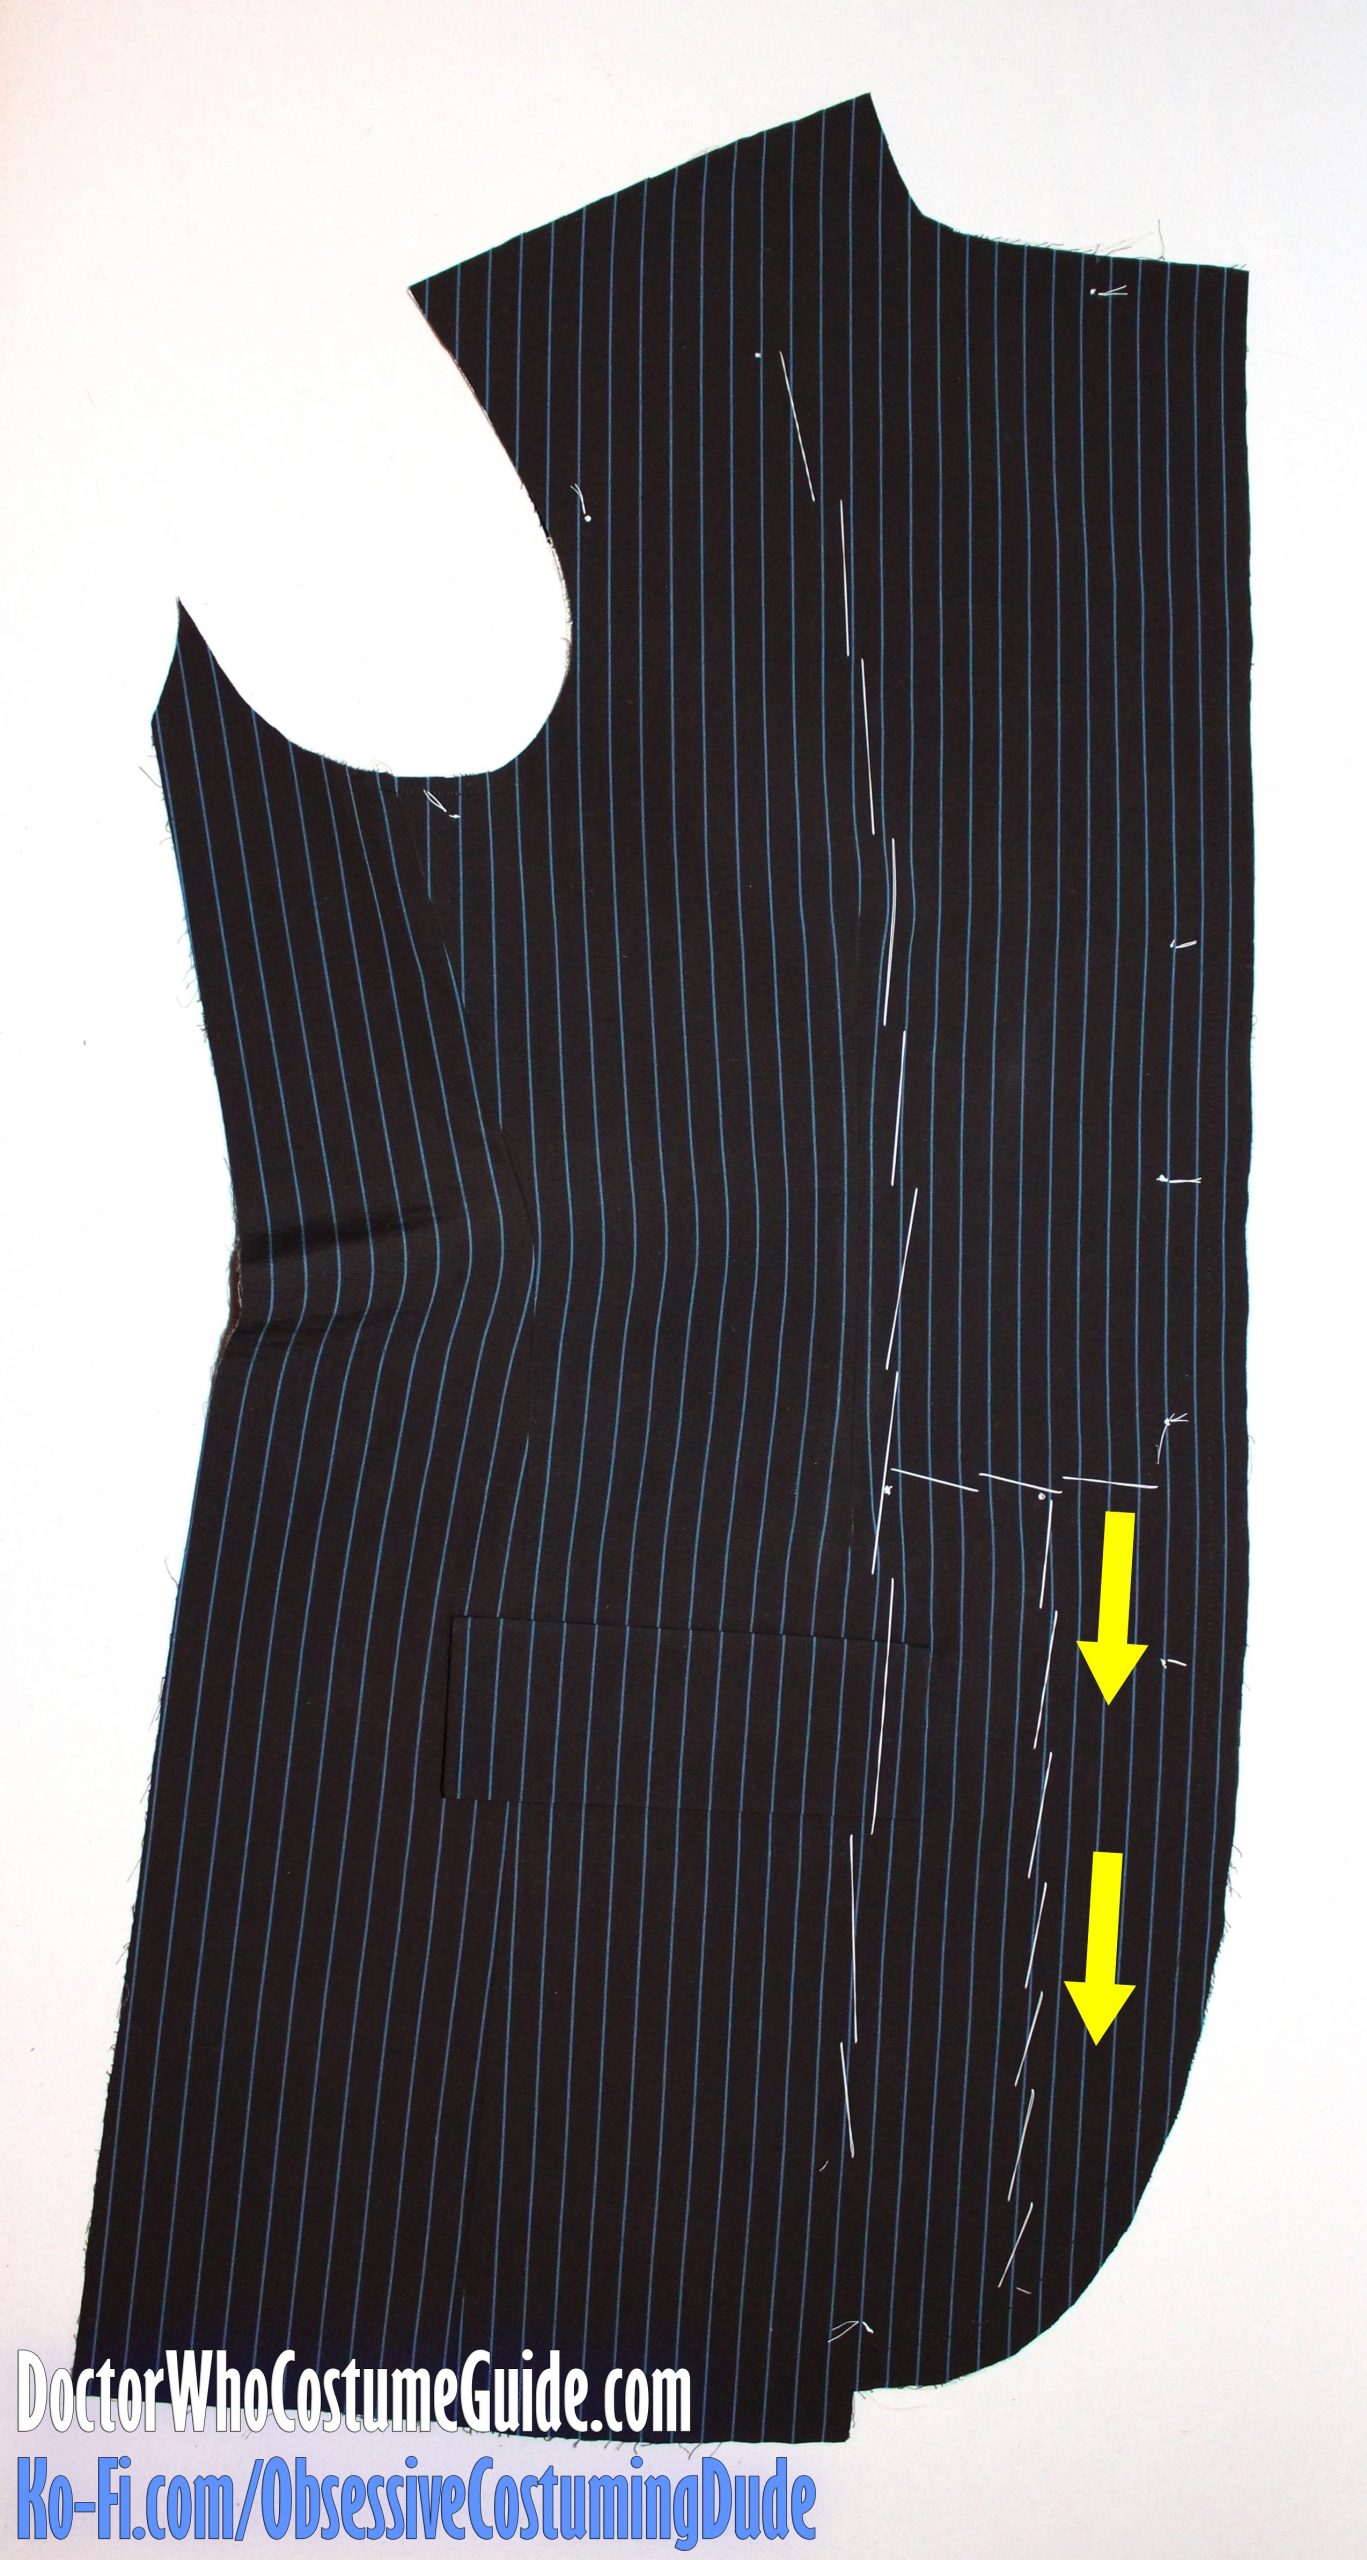
For the first stitch, begin above the front dart about 3″ from the shoulder and baste the two assemblies together in a downward direction, gently smoothing the fabric ahead of each stitch.
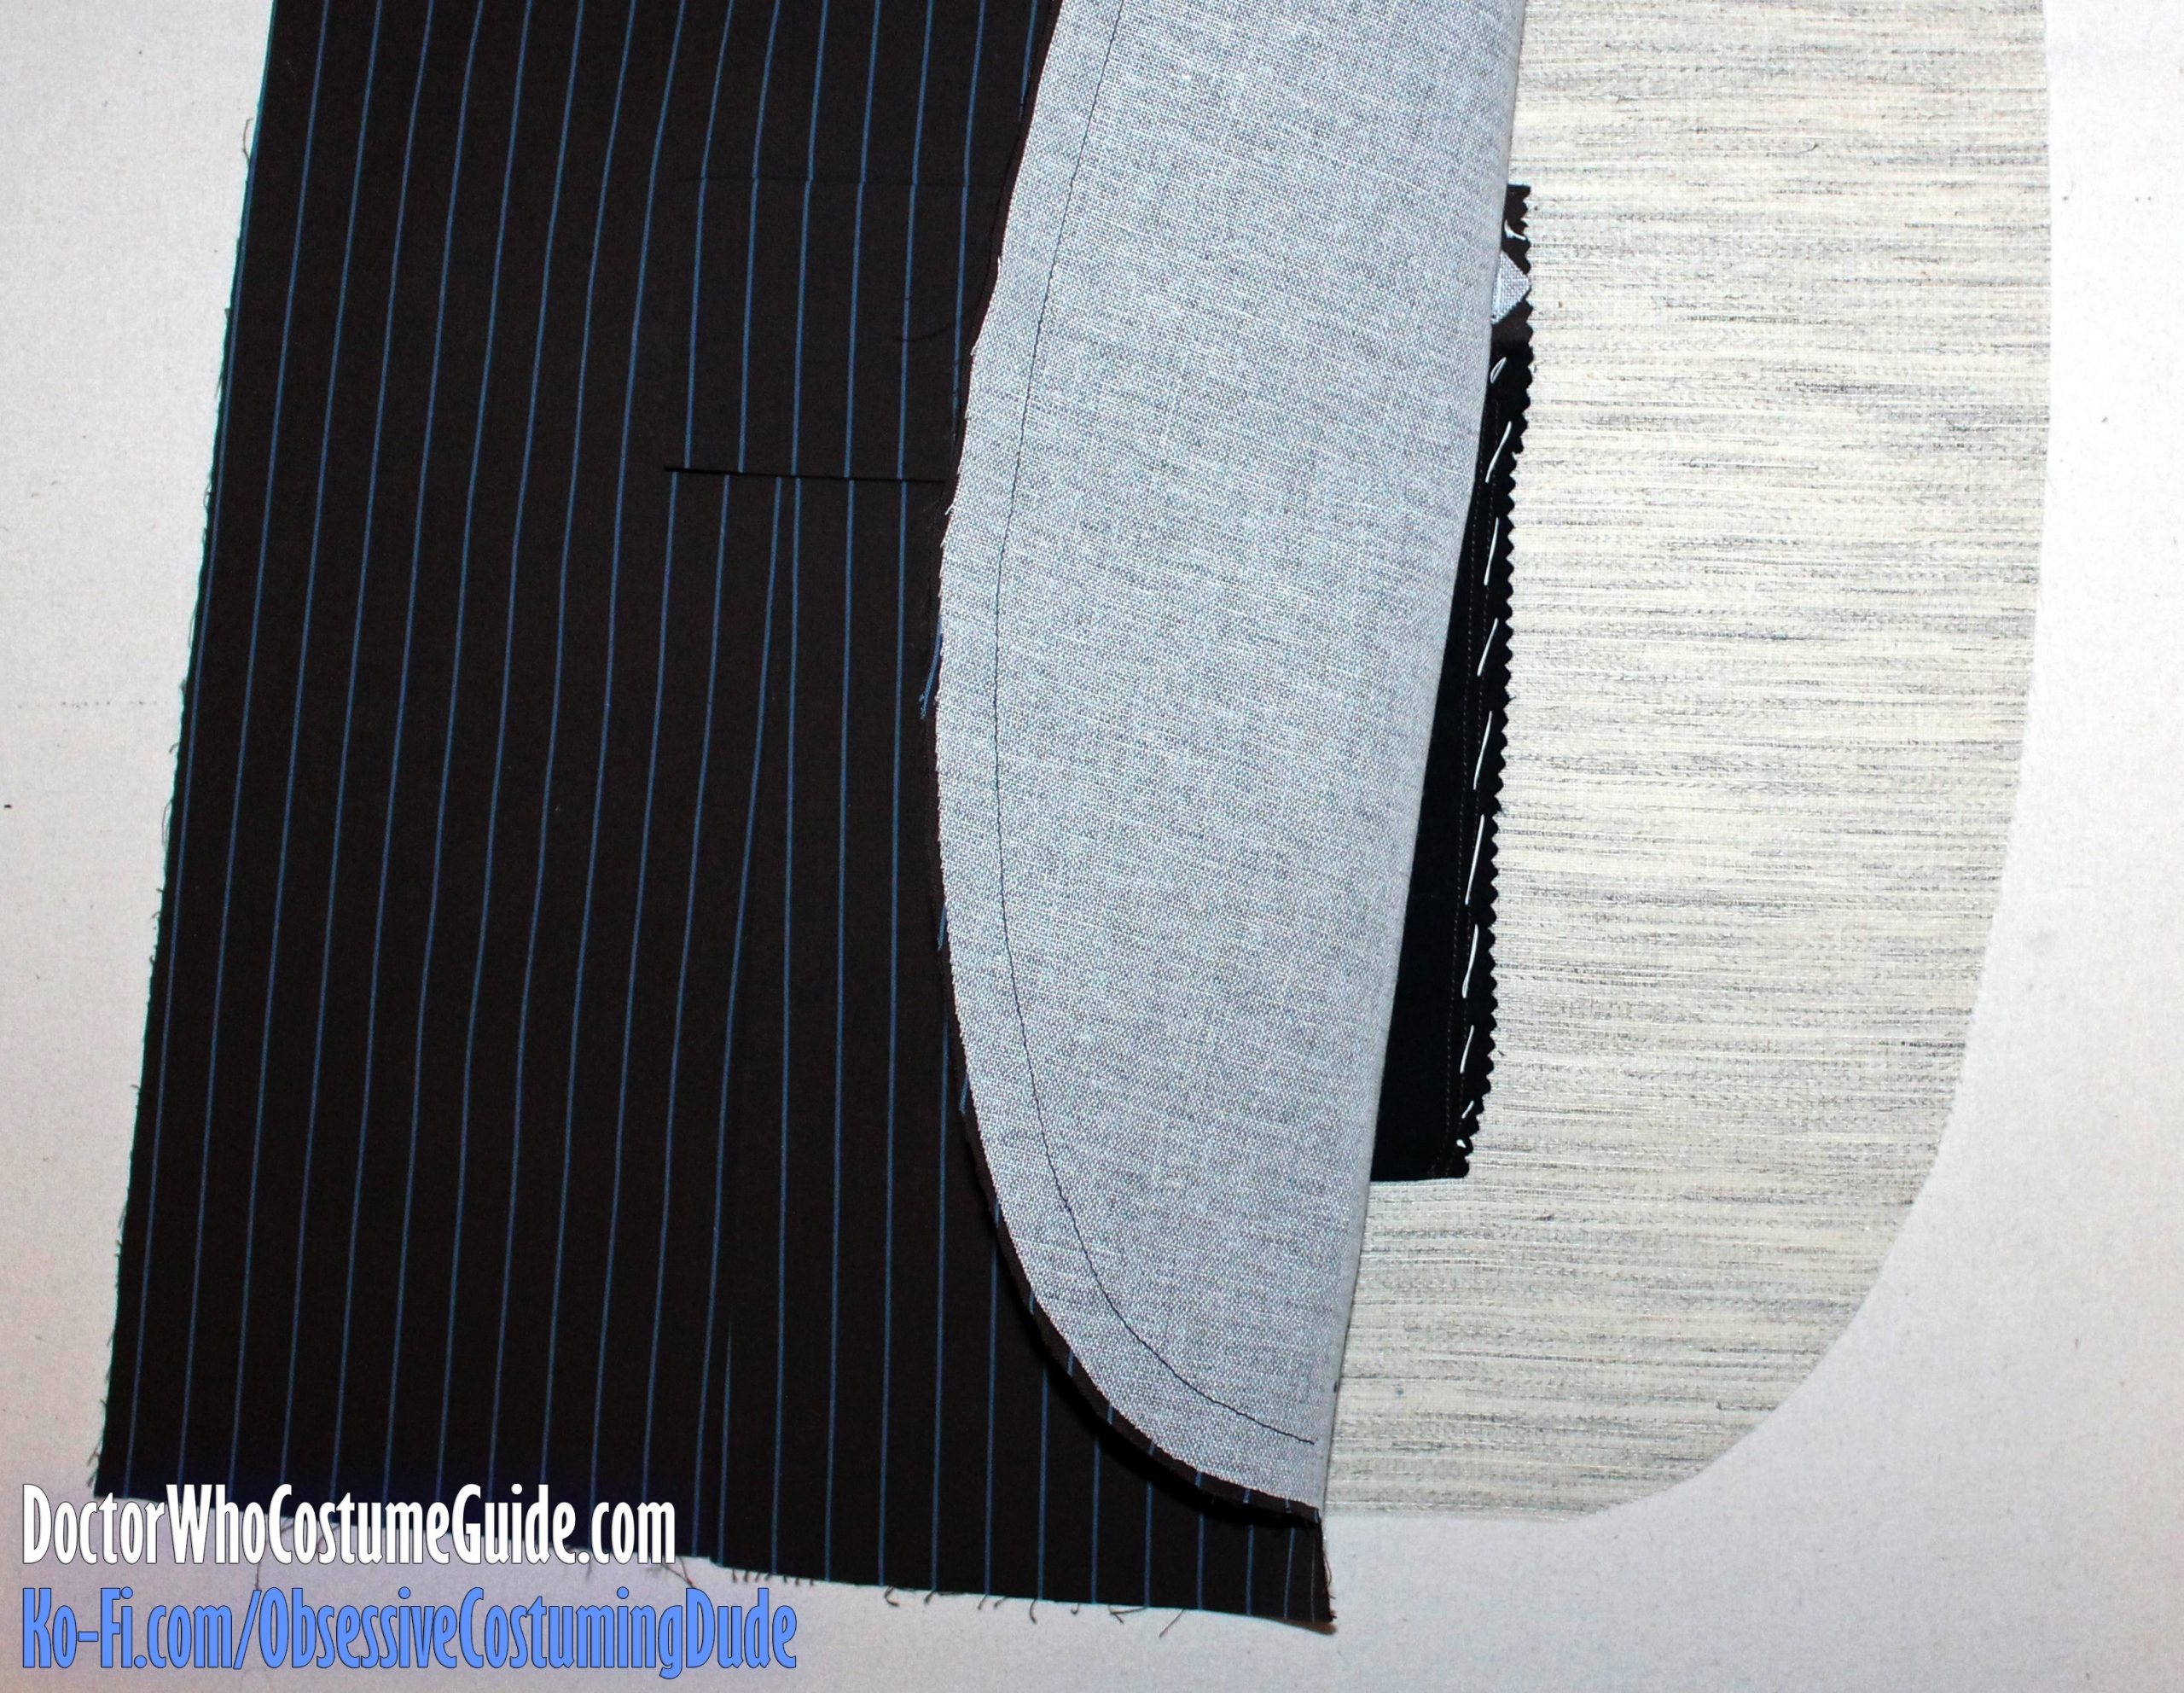
Before continuing to “marry” of the jacket and interfacing, the front edge of the hip pocket pouch needs to be secured to the canvas to stabilize it.
Gently pull the jacket away from the canvas along the front edge until the pocket pouch is visible, then baste the pocket edge to the canvas.
Fold the jacket front back in place, then baste the two together across the waistline, from the first row of basting to about 1” from the front edge.
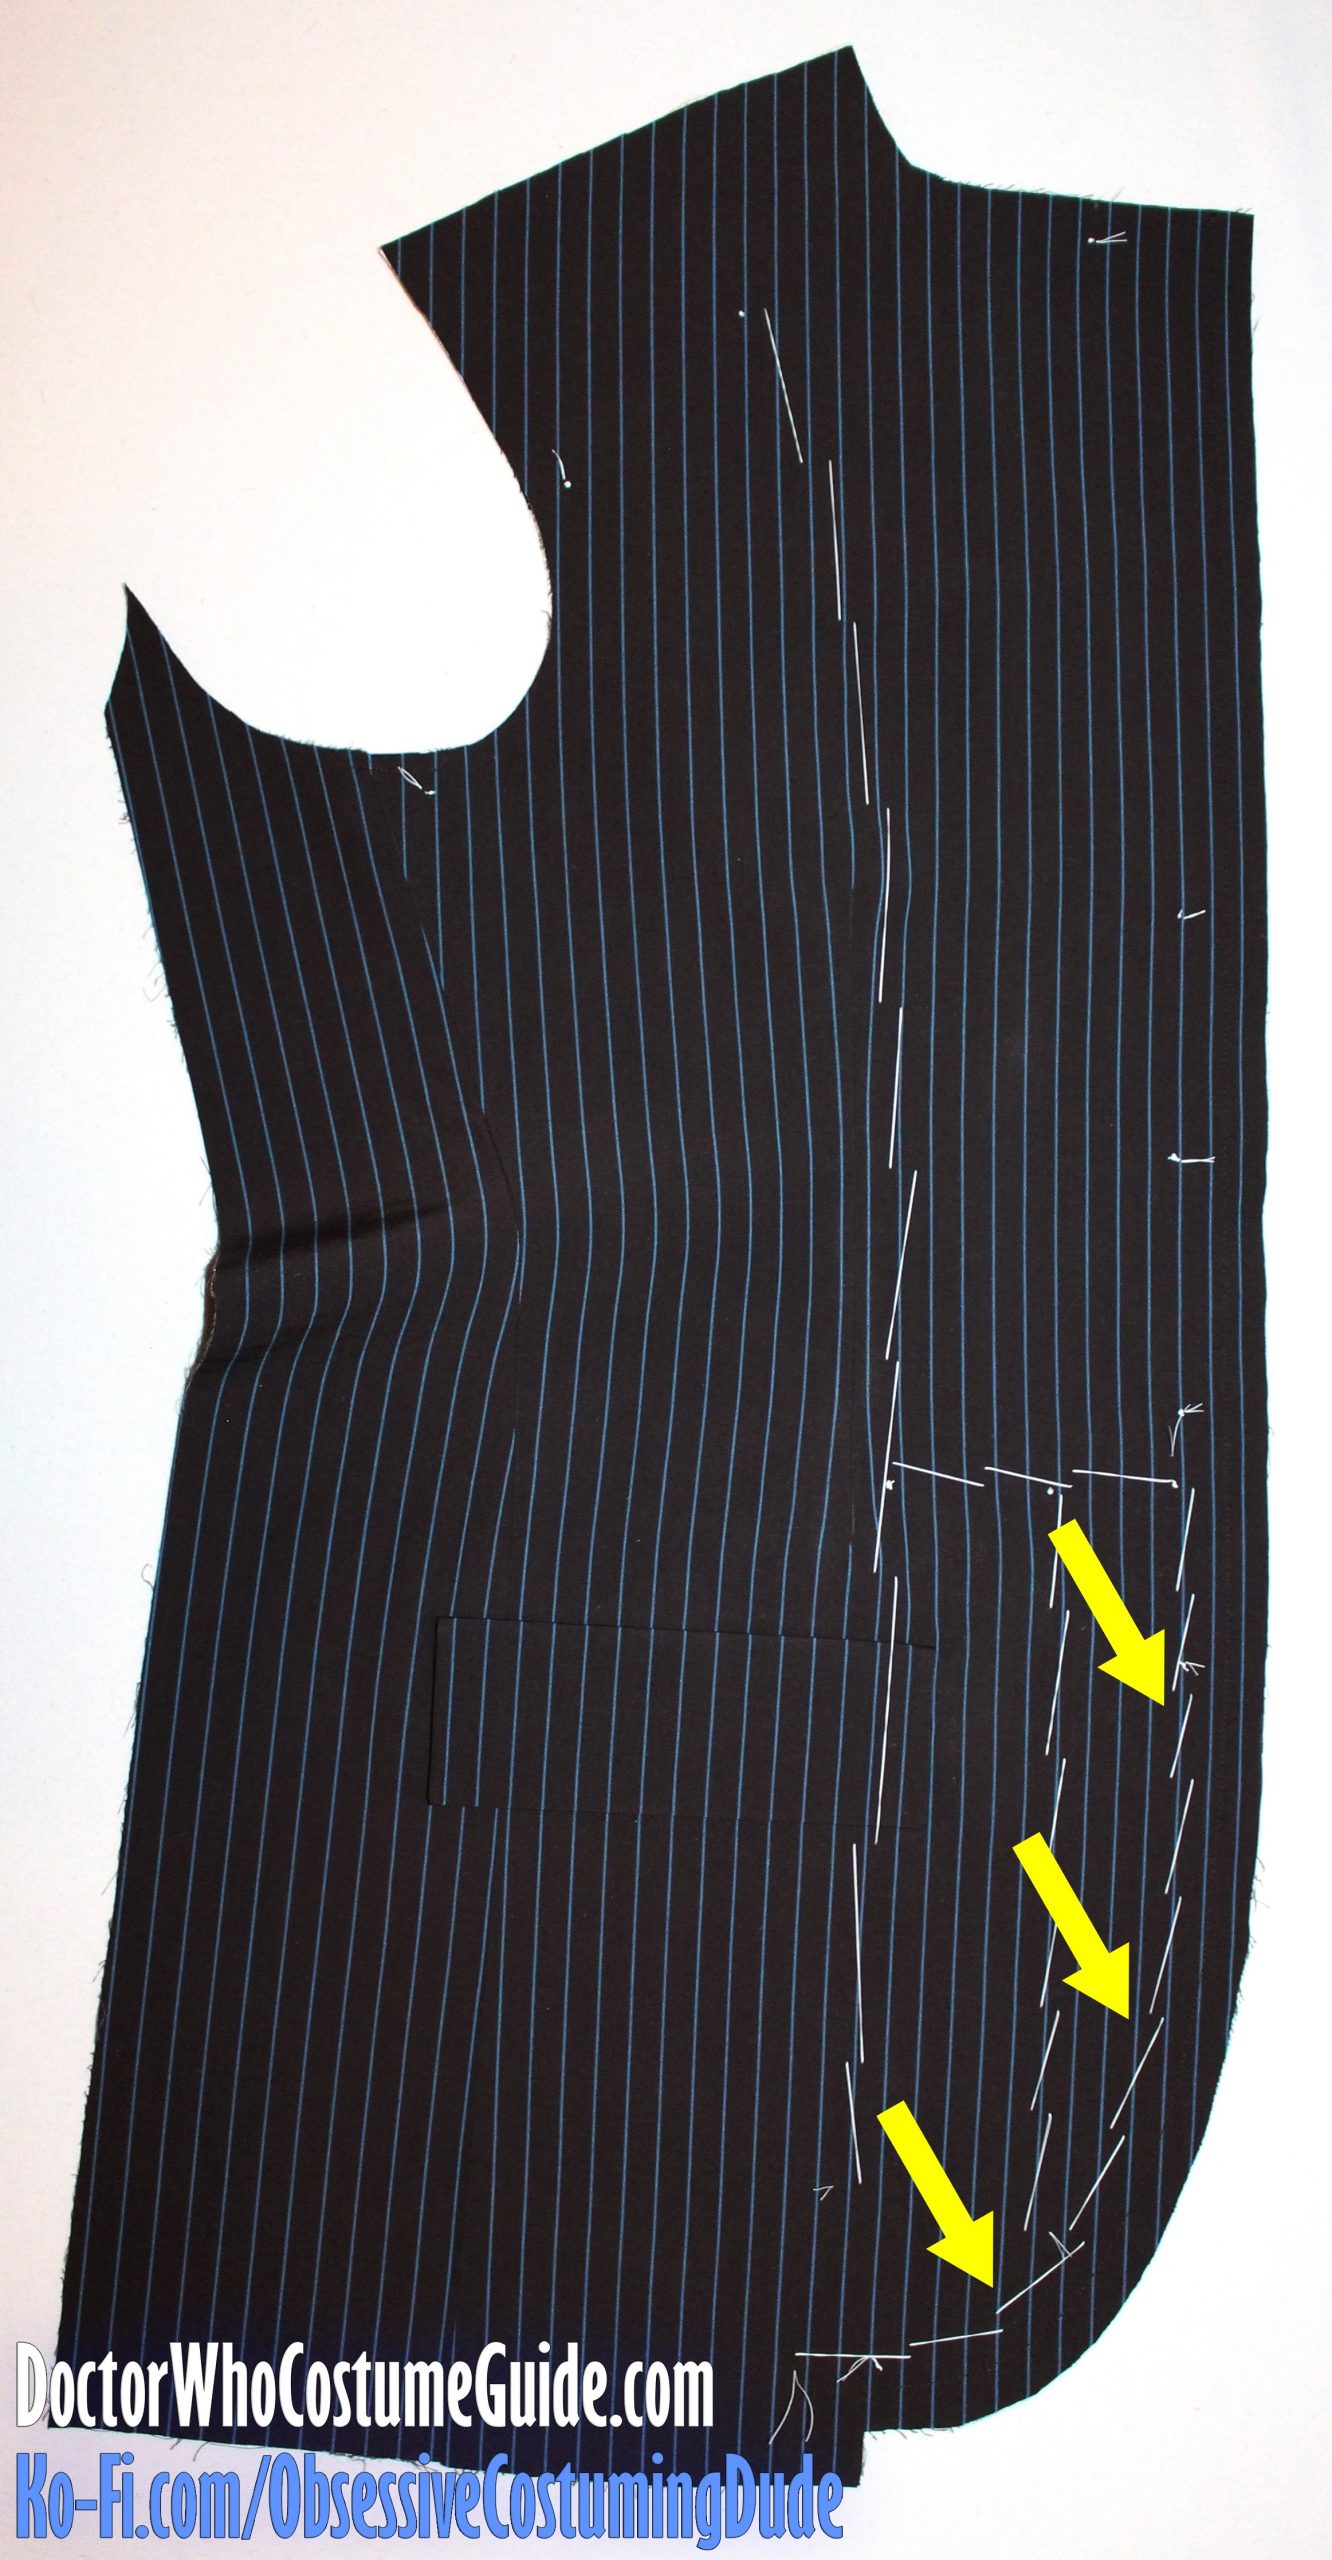
About halfway between the first stitch line and the front edge of the jacket, baste downward from the waist to the hem, gently smoothing the fabric in the direction of the arrows.
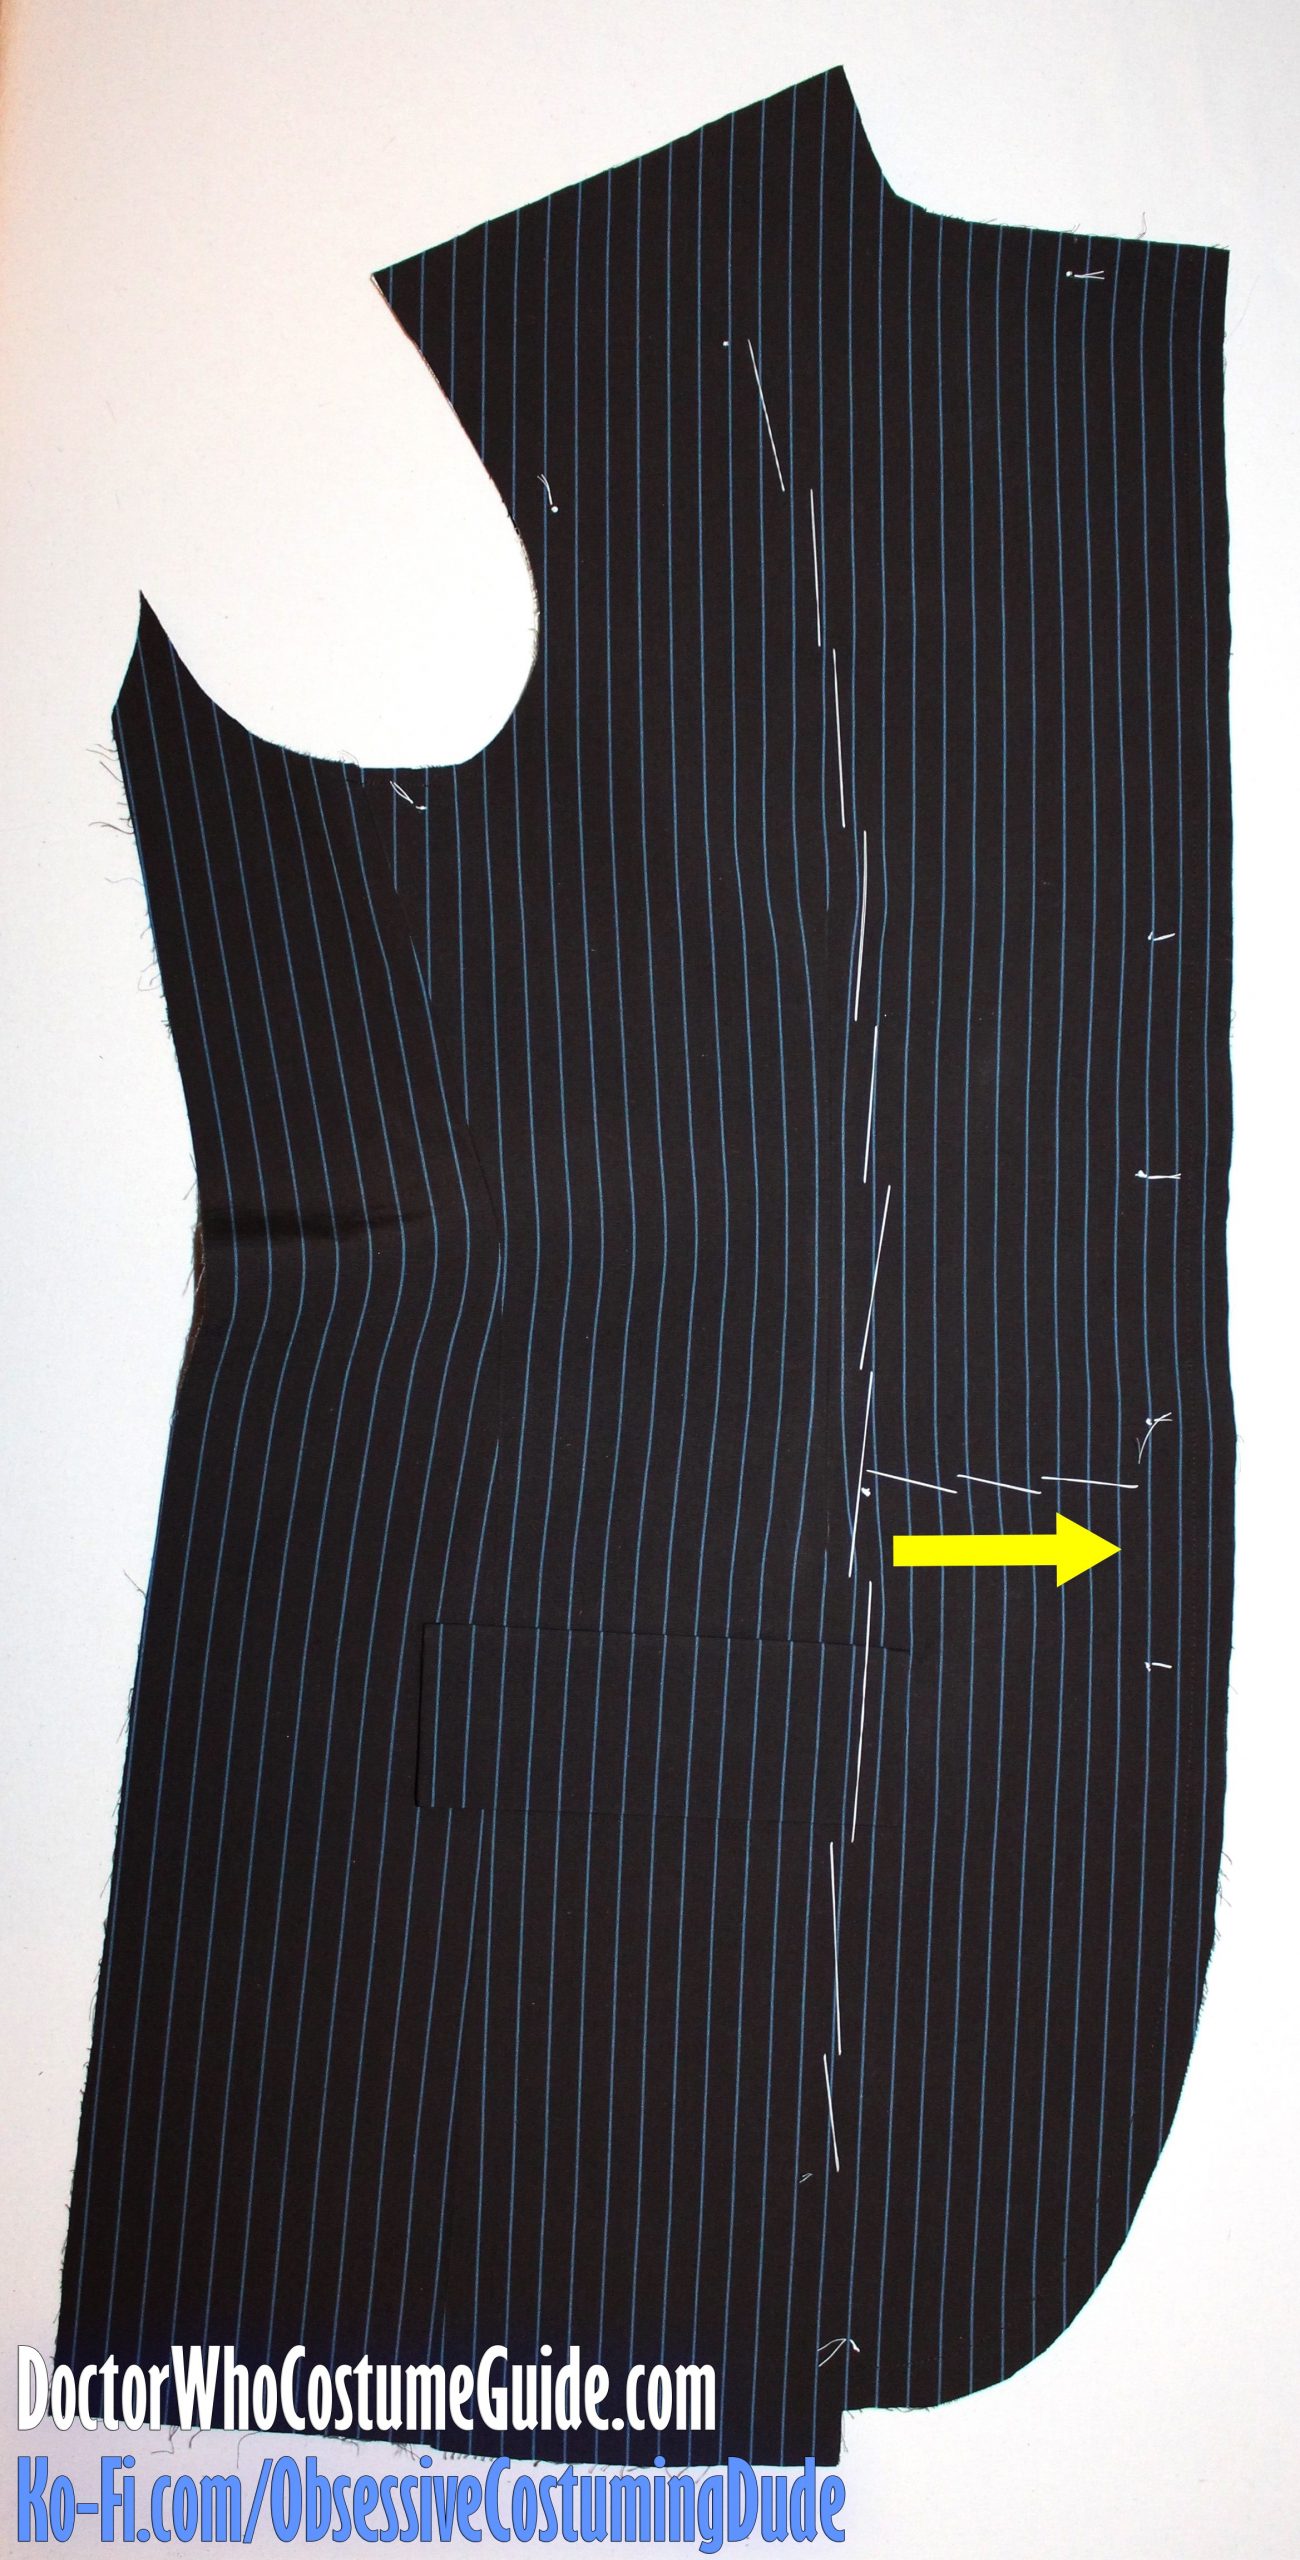
About 1″ from the front edge of the jacket, baste downward from the waist along the lower curve, again gently smoothing the fabric outward (in the direction of the arrows).
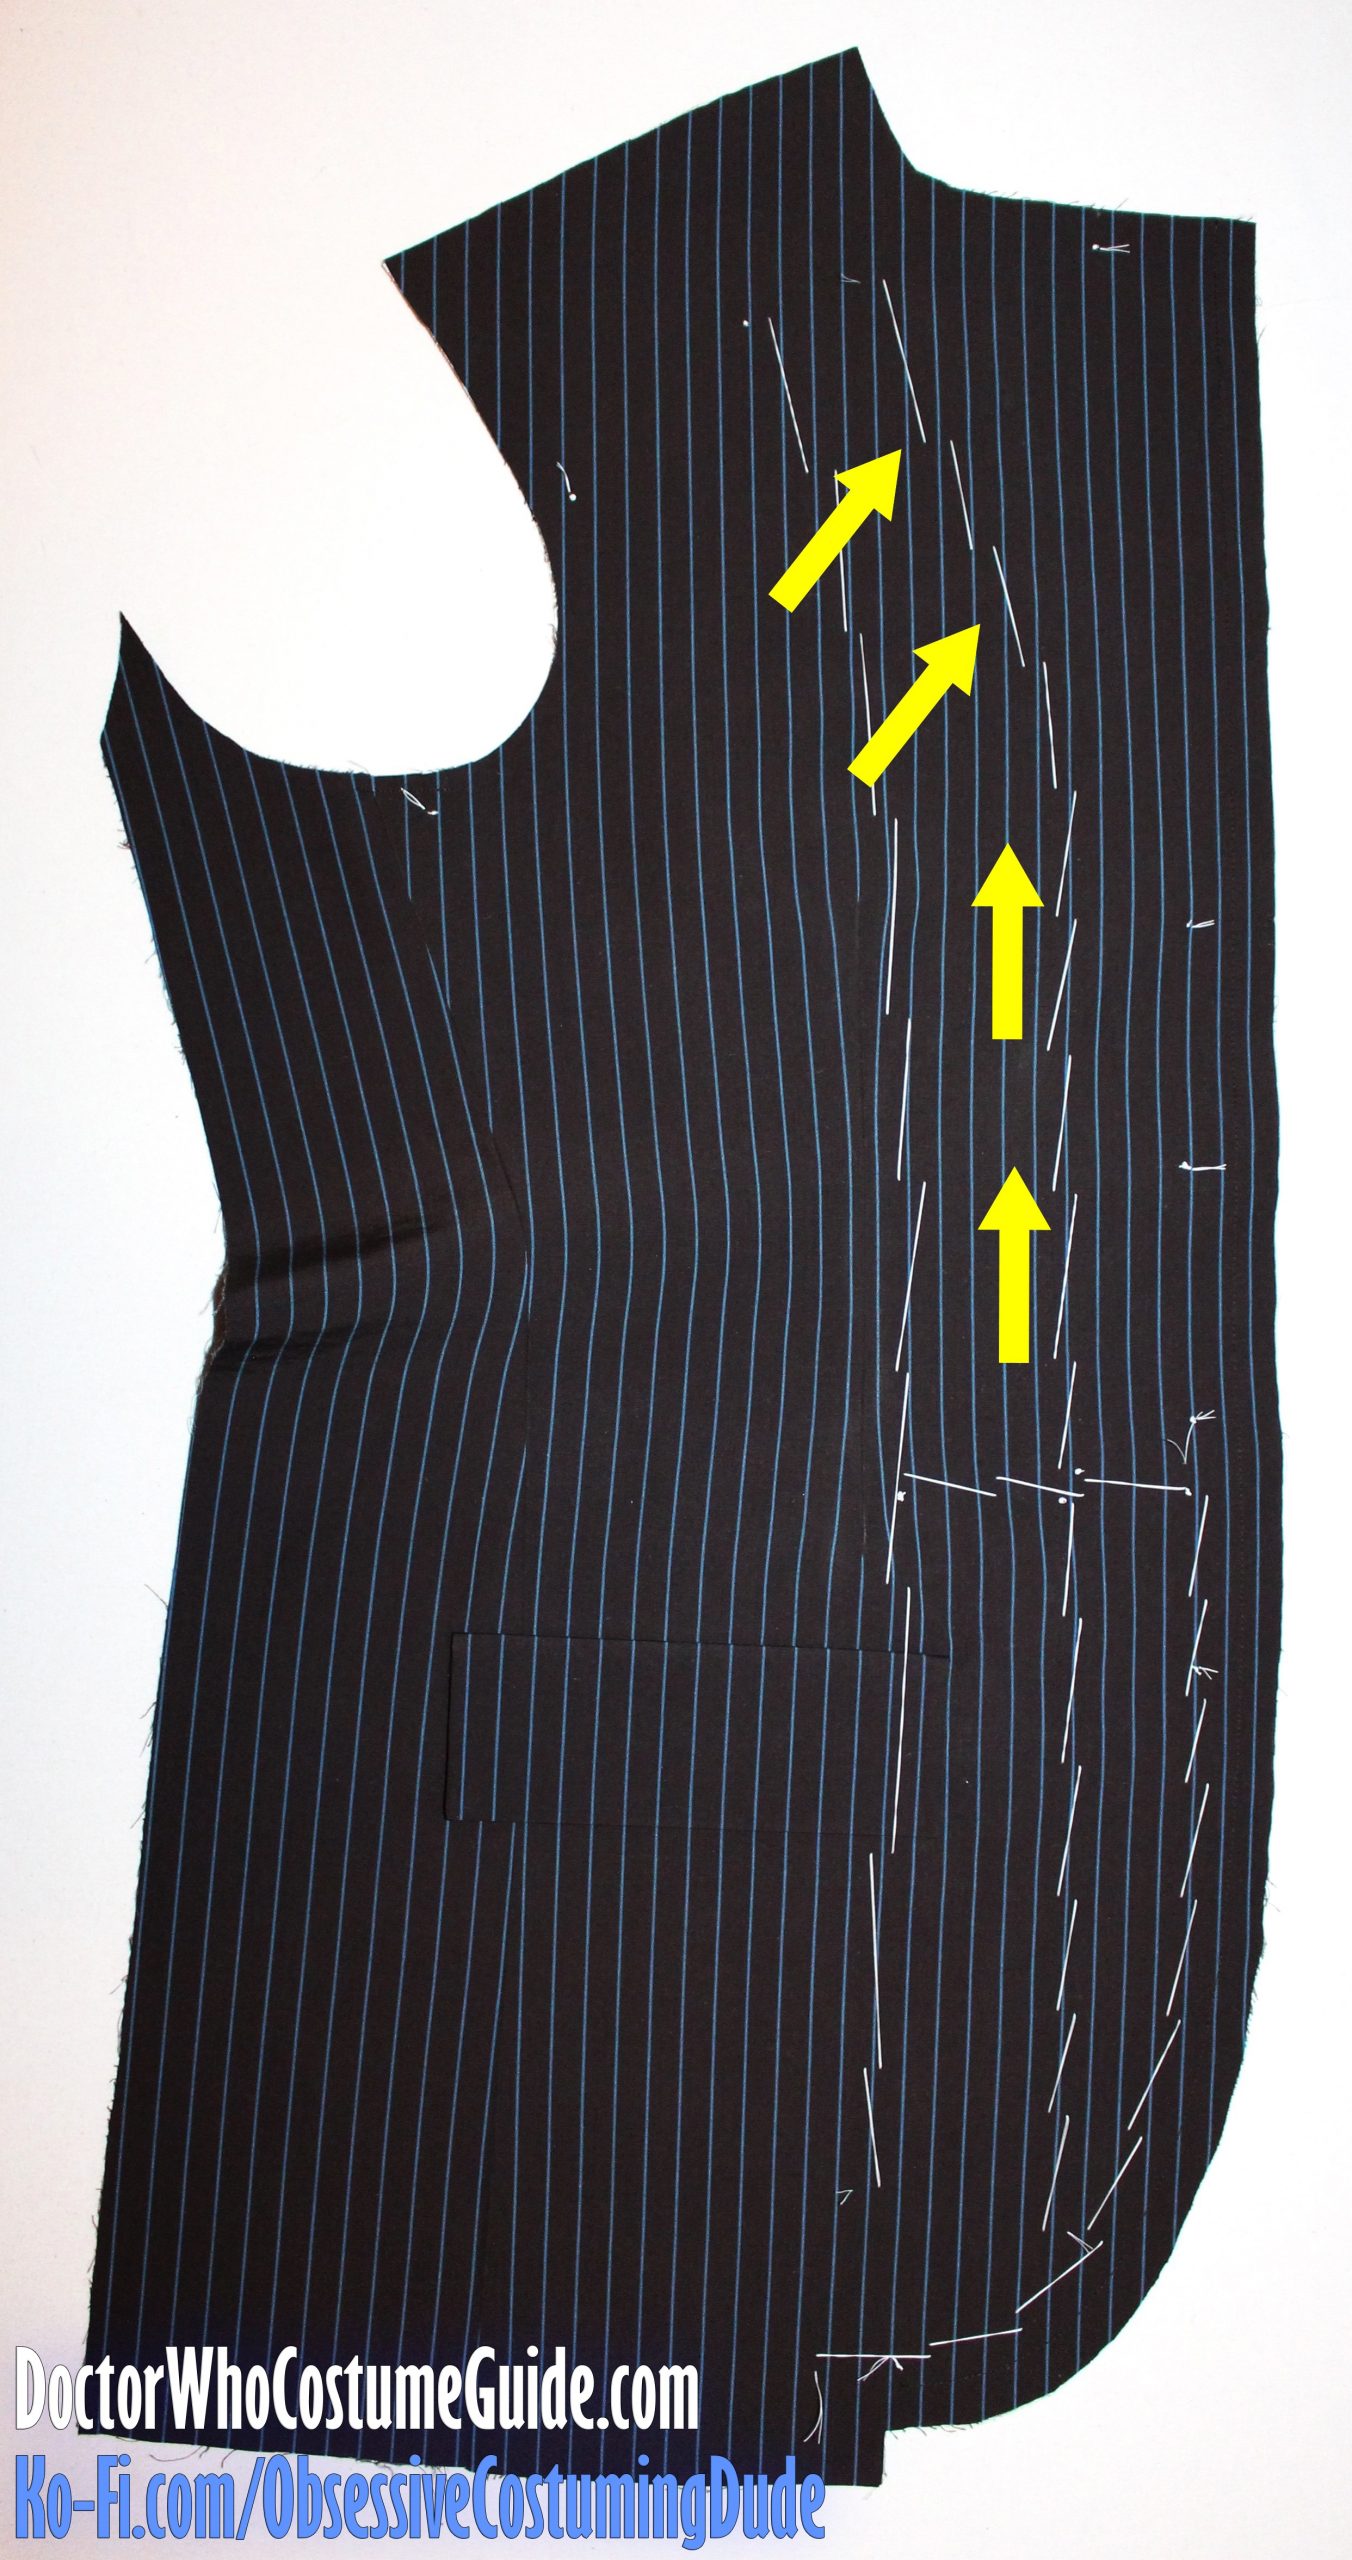
Beginning about halfway between the first stitch line and the front edge of the jacket, baste upward from the waistline stitch to about 3″ below the shoulder, smoothing the fabric toward the upper front corner (in the direction of the arrows).
Beginning about 1″ from the front edge of the jacket, baste upward from the waistline, then pivot and stitch directly over the roll line – again, smoothing the fabric toward the upward front corner as you go (in the direction of the arrows).
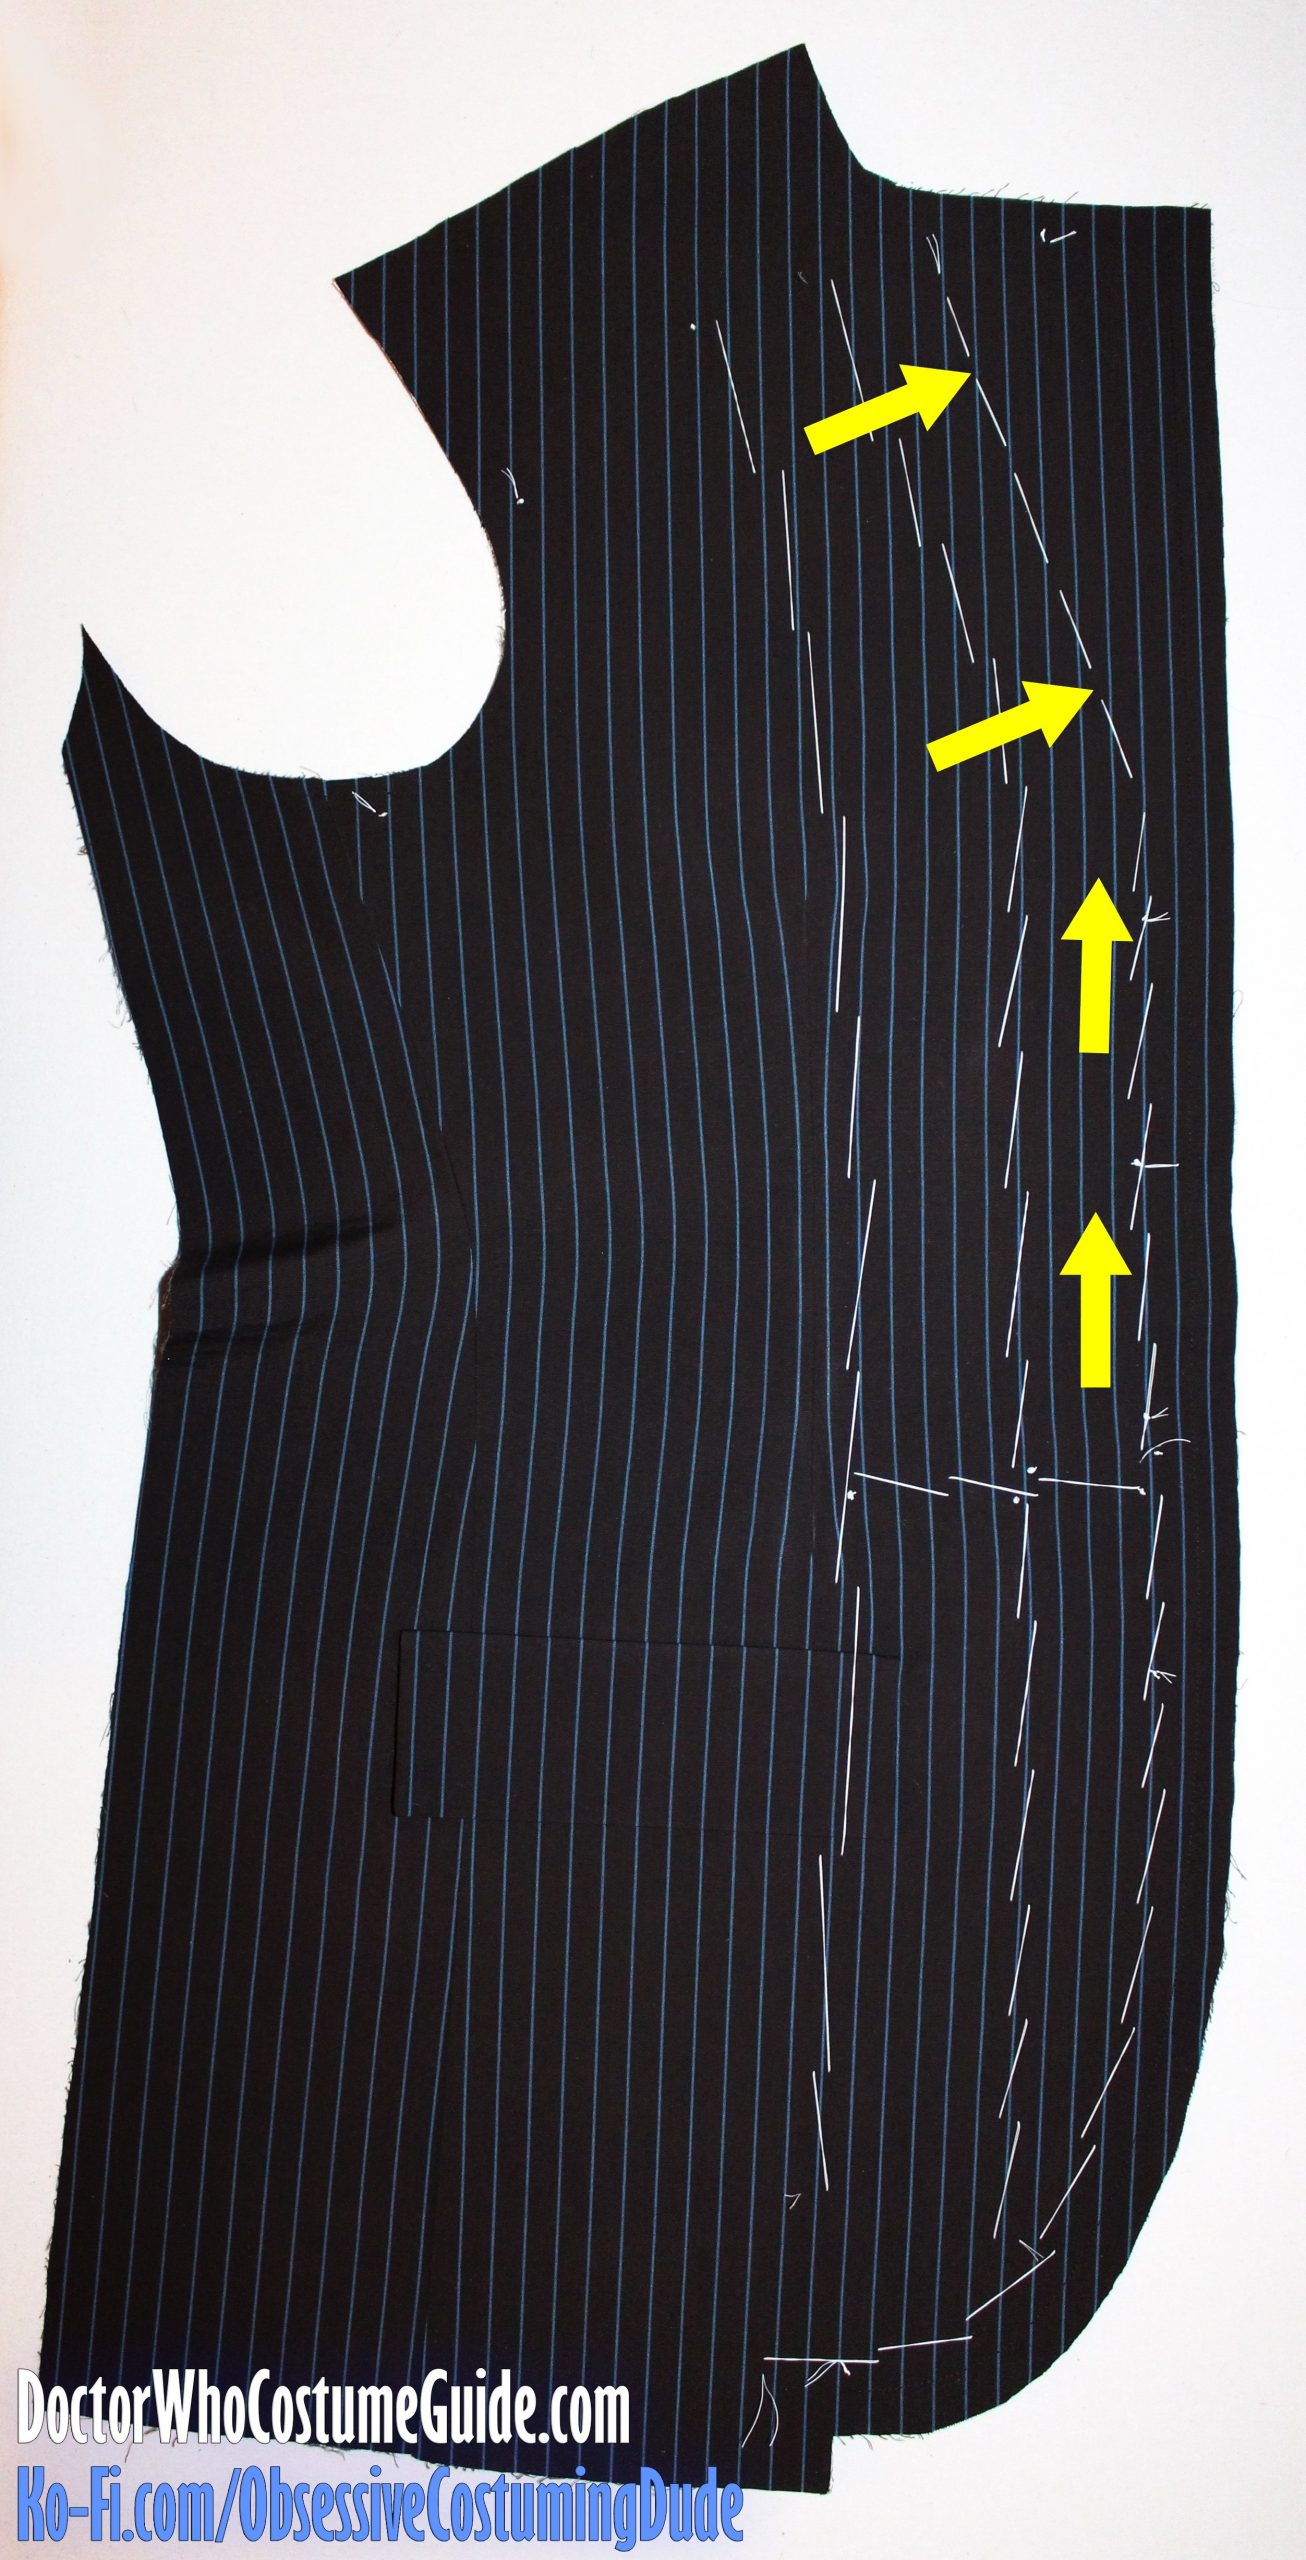
Beginning about 3″ below the shoulder, baste across the top of the other stitches, pivoting about 1″ away from the armscye to just beyond the side seam, then pivoting again toward the waist – smoothing the fabric in the direction of the arrows.
You can also machine-sew the canvas assembly to the jacket front along the armscye, from the top of the flannel to the outer edge of the canvas. (I like to do this with a narrow zig-zag stitch.)
LEFT CHEST POCKET
You can make and attach the left chest pocket now, or you can do it at the very end of the front assembly.
(I like to go ahead and do it now, before the lapels have been shaped, so they don’t have to be pulled out of the way while attaching the pocket.)
Serge the edges of your left chest pocket pouch (piece P).
The pocket pleat can simply be pressed, or you can actually sew it. (I don’t know which way the original suit pockets were handled, and I prefer to sew mine.)
The pleat lines should correspond to specific pinstripes on the pocket fabric.
Fold the pocket vertically so the appropriate pinstripes are aligned. (The folded edge should also be on a pinstripe.)
Sew the two layers together just to the left of the second-to-right pinstripe, along the matched pleat line.
Serge the edges of your left chest pocket pouch (piece P).
Unfold the pocket and press the pleat flat.
Serge the edges of your left chest pocket pouch (piece P).
Press the top edge of the pocket under ⅝”.
From the underside, topstitch the pocket hem into place ½” from the upper folded edge.
Press the side, and then bottom pocket allowances under.
Position the pocket onto the left jacket front, using the markings on the printed pattern as a guide and aligning the pinstripes on the pocket with those on the jacket body
(Note that only three of the four pocket corners are marked on the pattern! Because of the dart, the pinstripes will not properly align in the lower, outer corner.)
Baste the pocket pouch into place on the jacket body.
Using your quilting/walking foot, edge-stitch the pocket to the jacket body along the side and lower edges, reinforcing the stitches at the corners.
Remove the basting stitching.
Place your two left chest pocket flap pieces (piece O) together, matching pinstripes.
Sew the pocket flap closed along the side and lower edges, shortening your stitch length at the corners.
Trim the seam allowances down to ¼” and clip them to the stitching along the lower edge.
Turn the pocket flat right-sides-out and press.
Sew the flap closed ¼” from the upper edges, and serge the layers together if you’d like.
Position the pocket flap facing upward on the jacket body, using the marks on the printed pattern as a guide and aligning the pinstripes on the flap with those on the body.
Baste the pocket flap into place.
Using your quilting/walking foot, sew the pocket flap to the jacket body ¼” from the edge (over the previous stitch line.)
Then, trim away the outer corners of the flap’s lower seam allowance so they won’t poke out from underneath the sides later.
Press the pocket flap downward.
Slip-stitch the underside of the pocket flap to the jacket body, enclosing the allowance, and taking care to only stitch through the underside of the flap (so your stitches aren’t visible on the right side).
Press the pocket flap down, and your left chest pocket is finished!
LAPELS
Now it’s time to breathe some life into the lapels and give them character!
Start by drawing the roll line and seam lines on the upper front canvas. (You can actually do this before basting the canvas assembly to the jacket front.)
You can also draw some little guidelines for the rows of padstitching, if you’d like, parallel to the roll line. I like to do them about ¼” apart, and tighten the spacing toward the corner of the lapel.
Slide the hand you won’t be sewing with underneath and lift the jacket at the roll line with your finger.
Alternatively, you can begin with the jacket on a table, with the lapel hanging over the edge at the roll line.
Using a single strand of waxed thread, start padstitching right next to the flannel, moving onto the roll line and the rest of the lapel area.
Begin and end your stitching about ⅛” from the seam lines, so you’re not padstitching into the seam allowances.
Once you get a little past the roll line, flip the jacket over so it’s right-side-up, and the lapel is in its finished position, to continue working.
Once you’ve padstitched the entire lapel, position a wash cloth underneath it so its edge is flush with the roll line, and give it some steam to set the shape.
Then let it cool for a while.
Once it’s cooled, we need to apply some stay tape just outside the roll line, at the edge of the flannel.
Cut a length of pre-shrunk ⅜” cotton twill stay tape about 2/3 of the length of the roll line and position it over the edge of the flannel, ¼” away from the roll line.
Pin it into place, or baste it into place by hand.
The top 3” or so should be normal, but pull the lower half or so a little bit tight. (This will actually cause some small ripples to appear on the right side, but don’t worry about it for now.)
Then, catch-stitch the stay tape through all layers, catching only a tiny little bit of the outer jacket fabric each time, and stitching across the edges of the tape.
Slide the assembly over a tailor’s ham and give it a gentle pressing to eliminate any remaining ripples.
Trim away the canvas seam allowance along the front edge, from the edge of the flannel down to the bottom.
Also, trim the canvas out of the lower hem allowance.
Cut another length of pre-shrunk ⅜” cotton twill stay tape, long enough to extend from the flannel, down the front, and across the lower hem line.
(I like to cut mine a few inches too long, because it can be trimmed down later if you get to the end and have a bit too much!)
Beginning ½” outside the roll line, around the edge of the flannel, pin the tape into place so it just barely covers the edge of the canvas, about 1/16” outside of the seam line.
At the corner of the lapel, cut a tiny little wedge into the tape almost to the edge, and pivot the tape to form a sort of “faux-miter” before continuing down the front.
And at the bottom of the roll line, place about ¼” of extra ease in the tape, to help the lapel roll over without the tape pulling it closed.
Fell-stitch the tape to the jacket.
Along the outer edge, catch only a single thread of the jacket fabric. (Or, if you used a fusible interfacing on the underside of the front, only stitch through the fusible.)
Along the inner edge, catch only the canvas. (Don’t sew through to the right side of the jacket at all.)
Then gently press the stay tape, especially along the lower front curve.