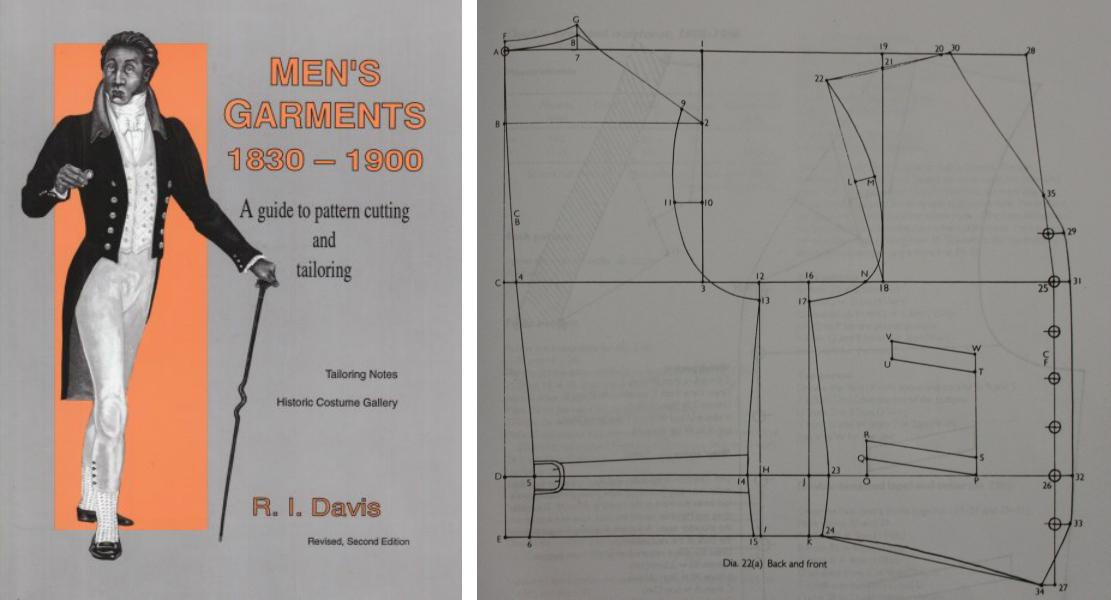
Or, you could go the “theatrical” pattern route like I did, starting with R.I. Davis’ waistcoat pattern block from his book, Men’s Garments: 1830-1900.
On the printed pattern, the sizes above correspond to the following cutting lines:
If you’d like some help interpreting all the pattern information and learn some different methods for cutting out your fabric, you may find this free sewing lesson helpful. 🙂
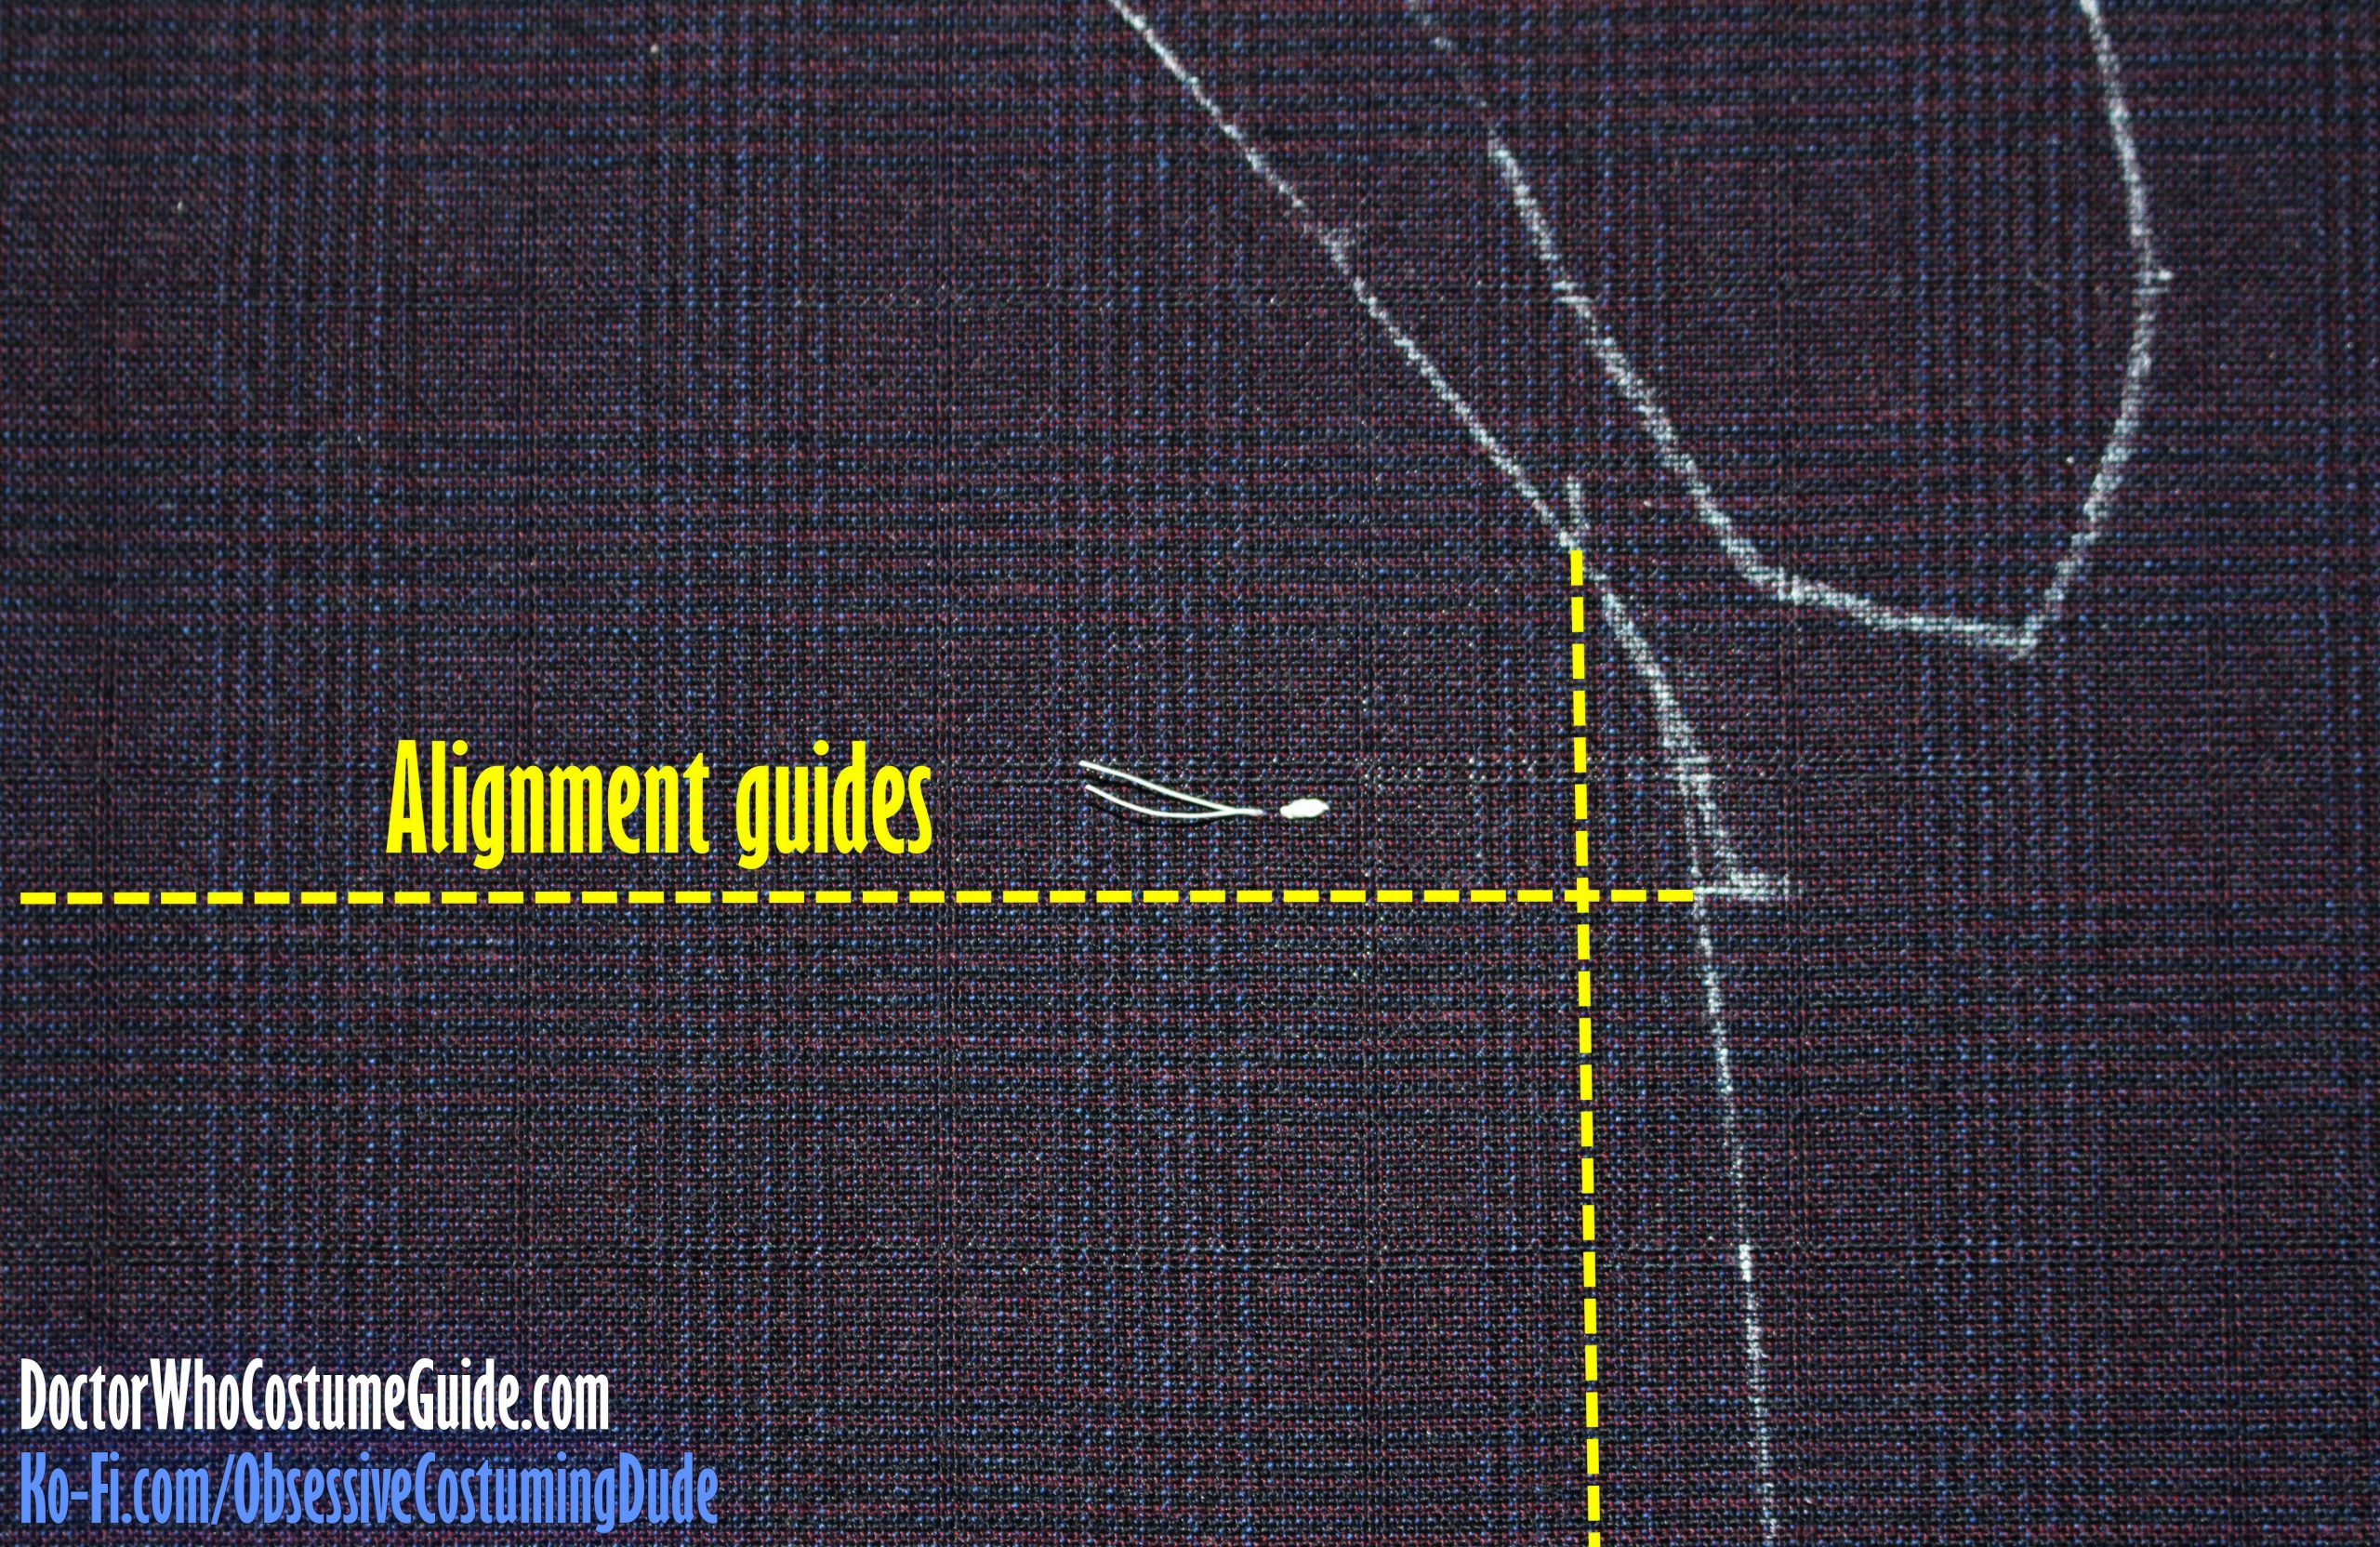
The most important thing to keep in mind when cutting this waistcoat is the actual plaid pattern woven into the fabric itself, and how it pertains to the various edges and seams of the garment.
Working with plaids can be a challenge!
For your convenience, I’ve included a few alignment guides on my pattern, if you’re wanting to replicate the specific cut of the original waistcoat(s) worn by Matt Smith in the actual show.
There are two on the waistcoat front (piece A).
Position the horizontal alignment guide so it’s flush with the top of a row of horizontal stripes.
Position the vertical alignment guide so it’s centered between a row/column of vertical stripes.
There are two identical alignment guides on the front facing (piece F), should you wish to cut your front facing so the plaid patterns align across the front and lower front seams.
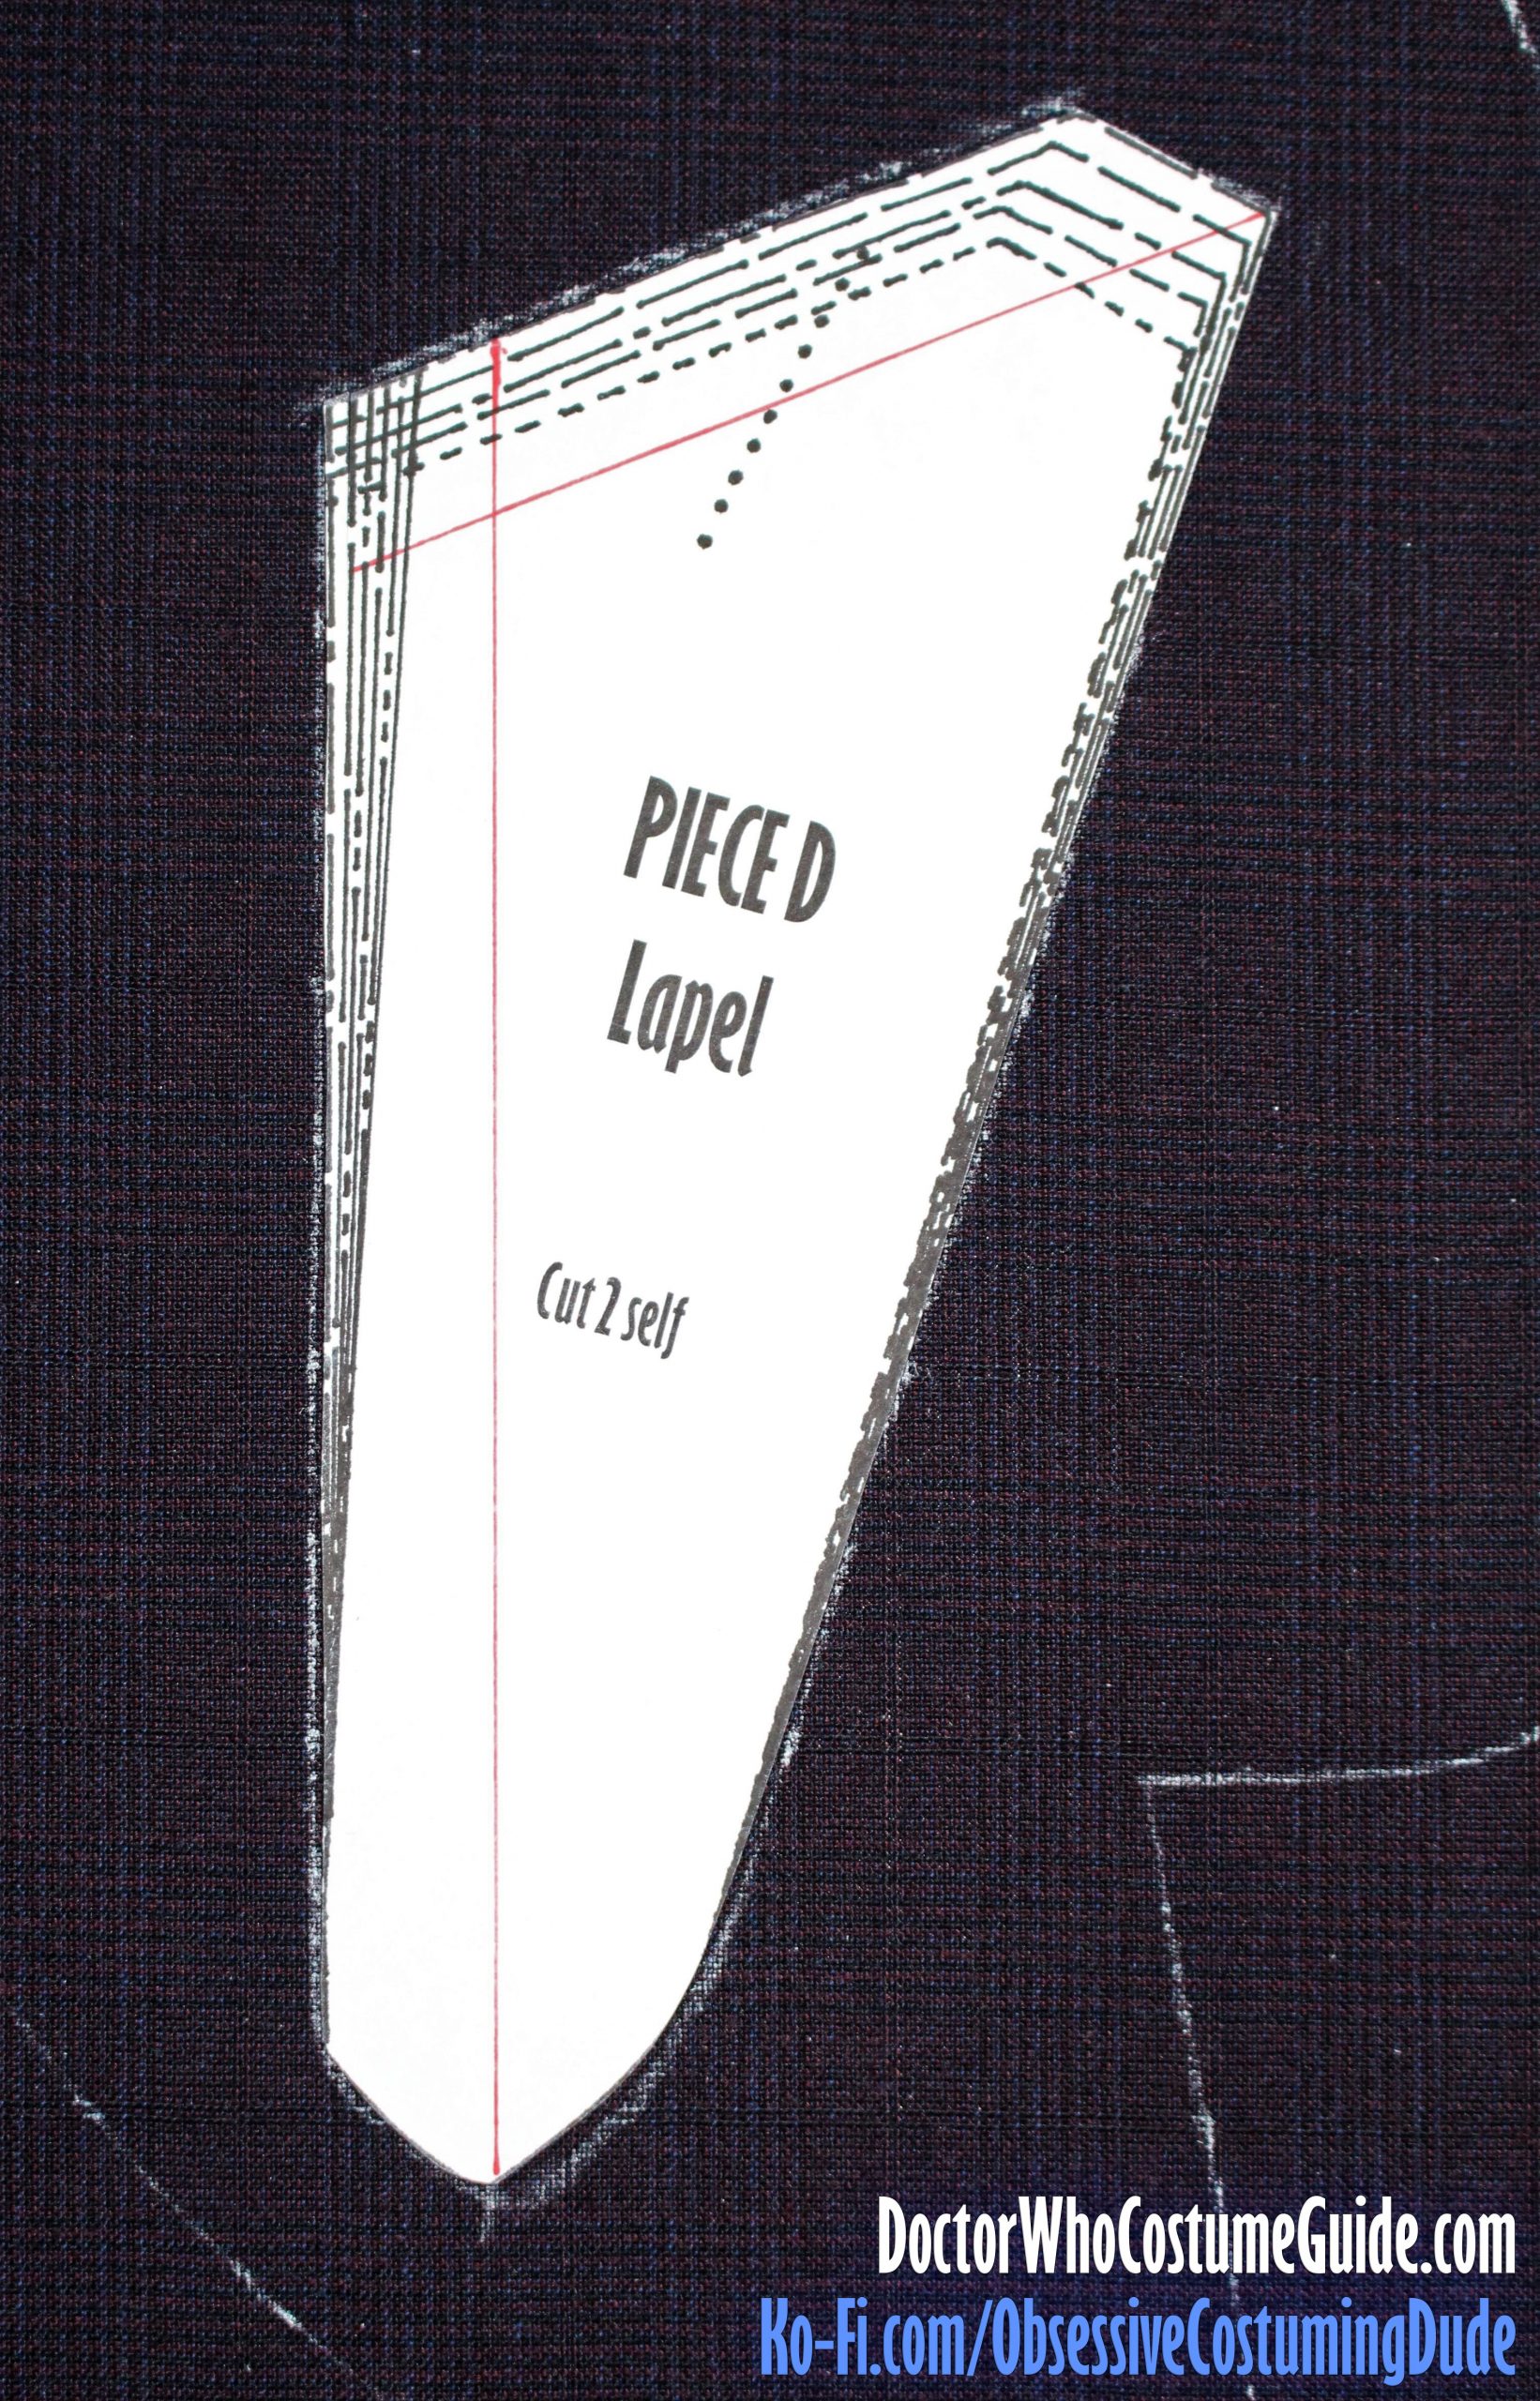
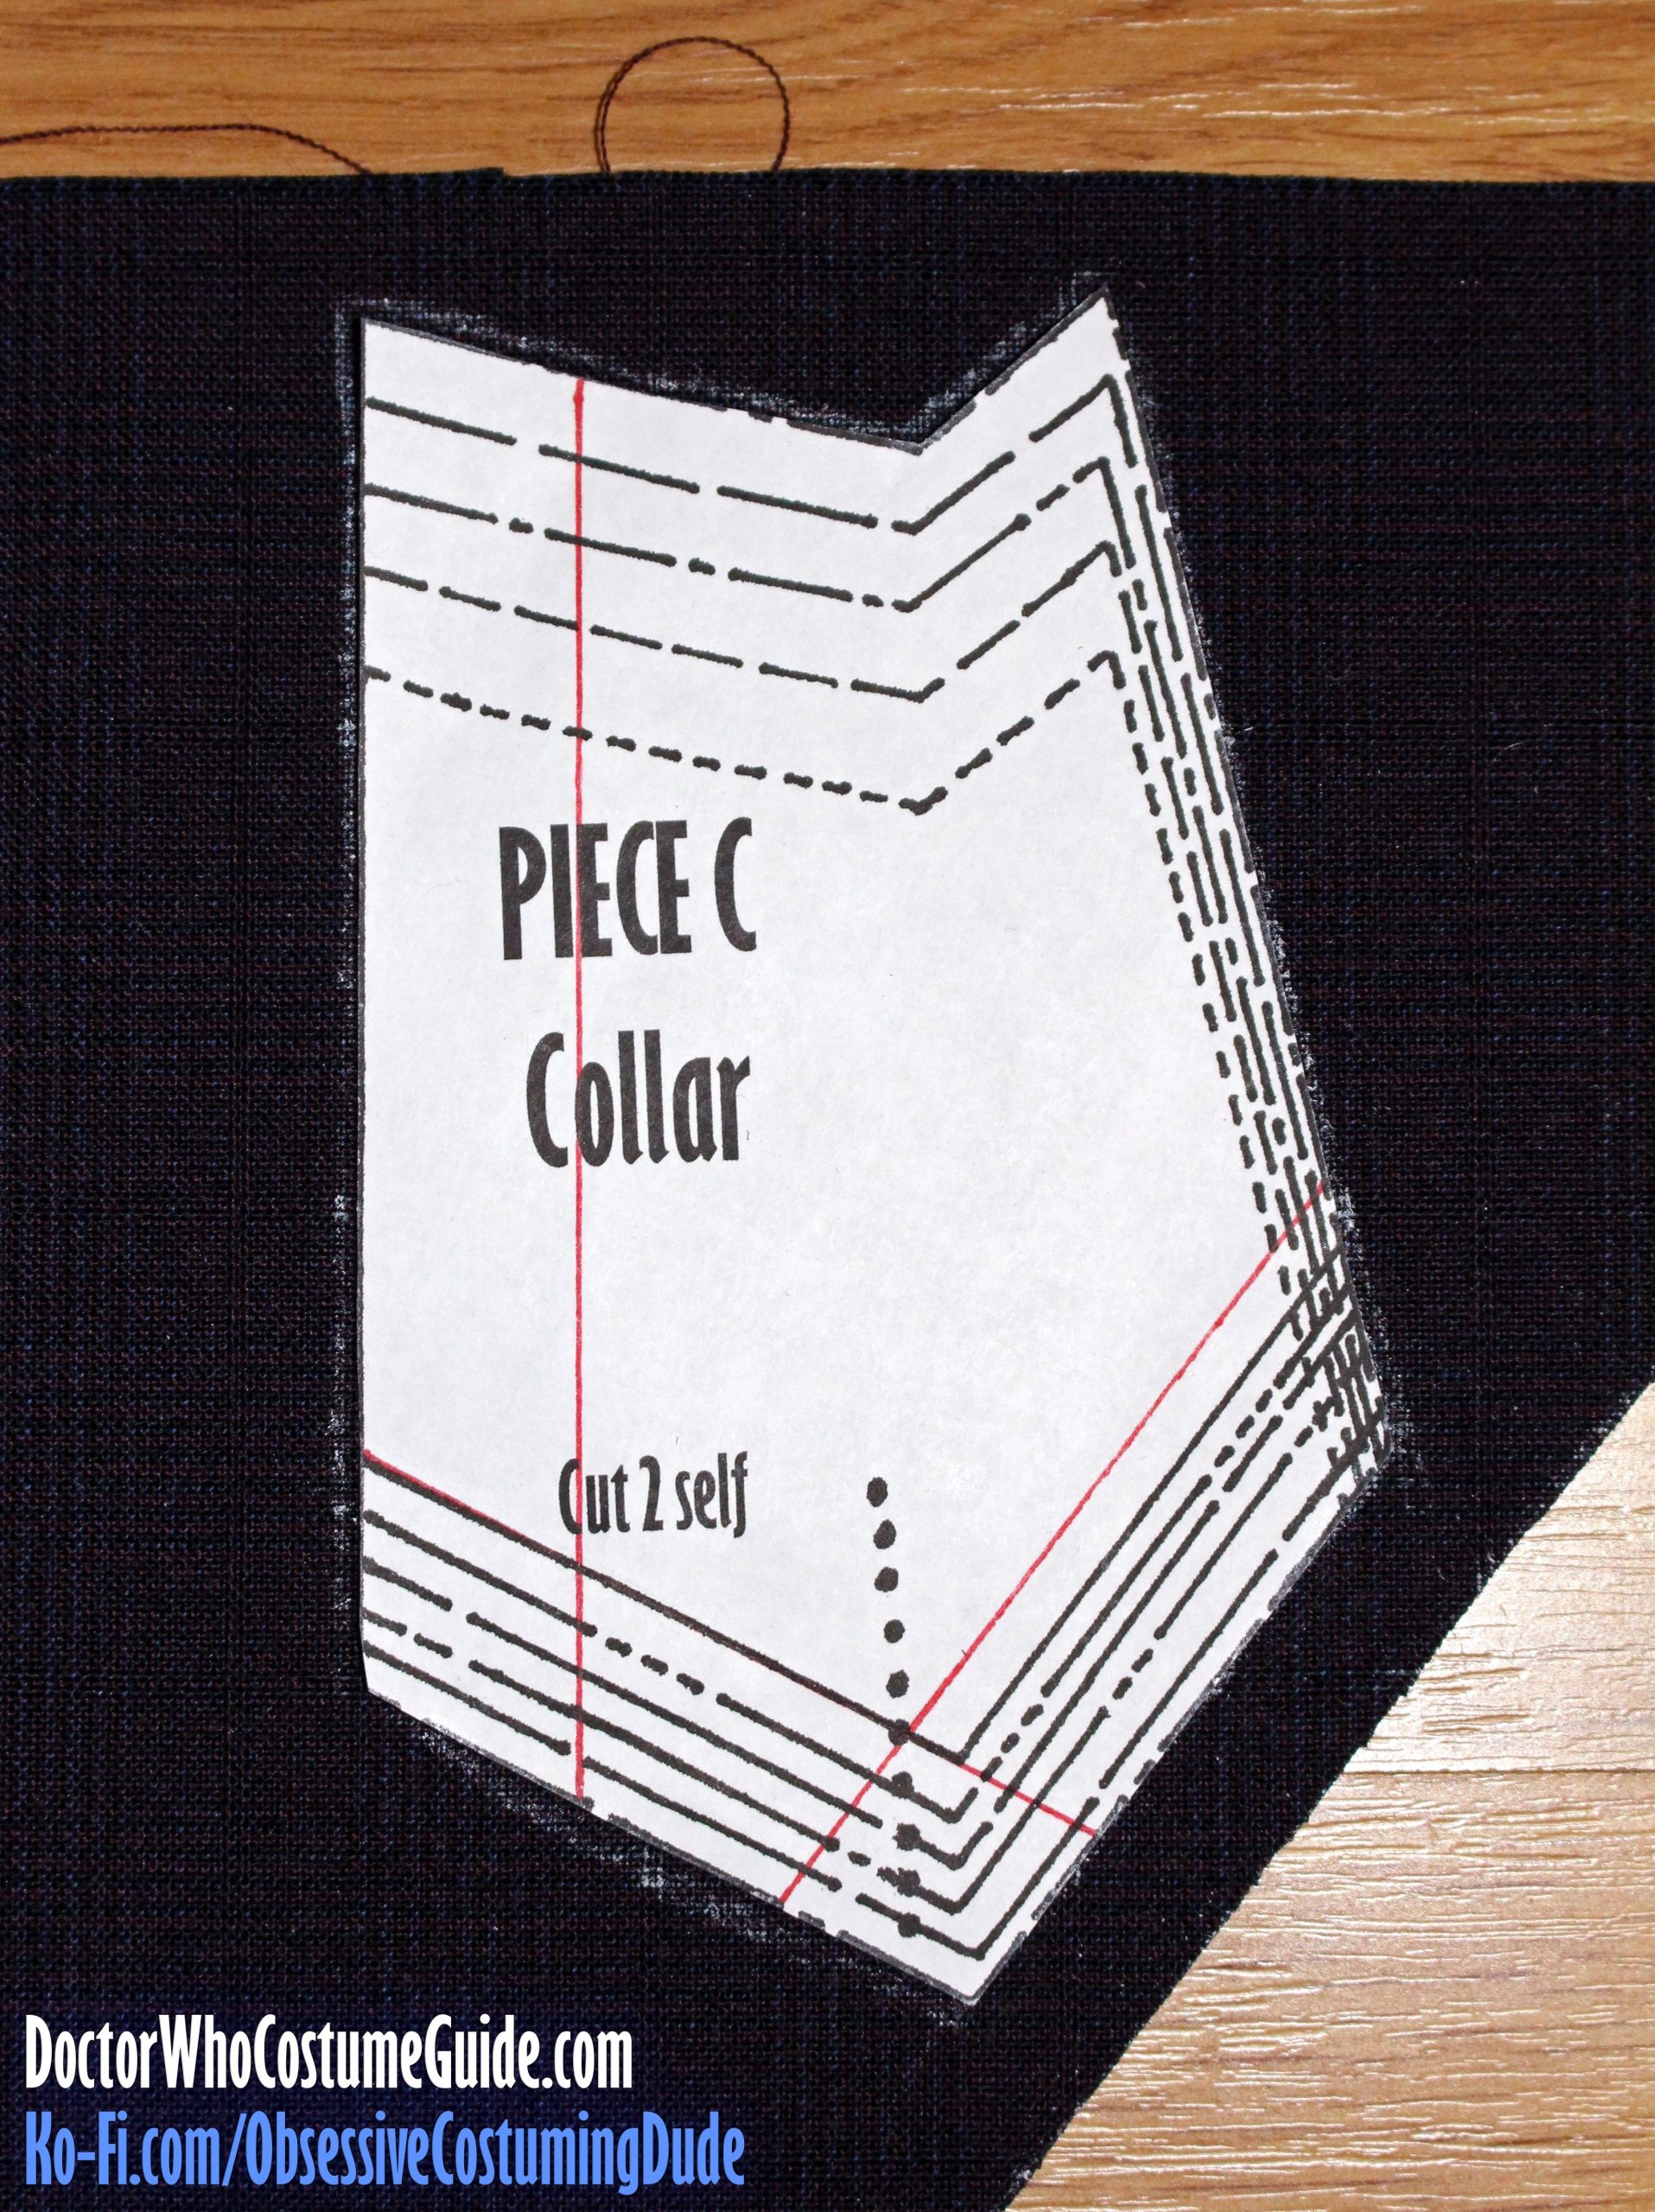
There are no alignment guides on the collar (piece C) or lapel (piece D), simply because with all ten sizes, including an alignment guide would have made everything too cluttered and confusing on the printed pattern.
However, to reproduce the cut of the original waistcoat(s) in regard to plaid, cut out your paper pattern piece in the appropriate size.
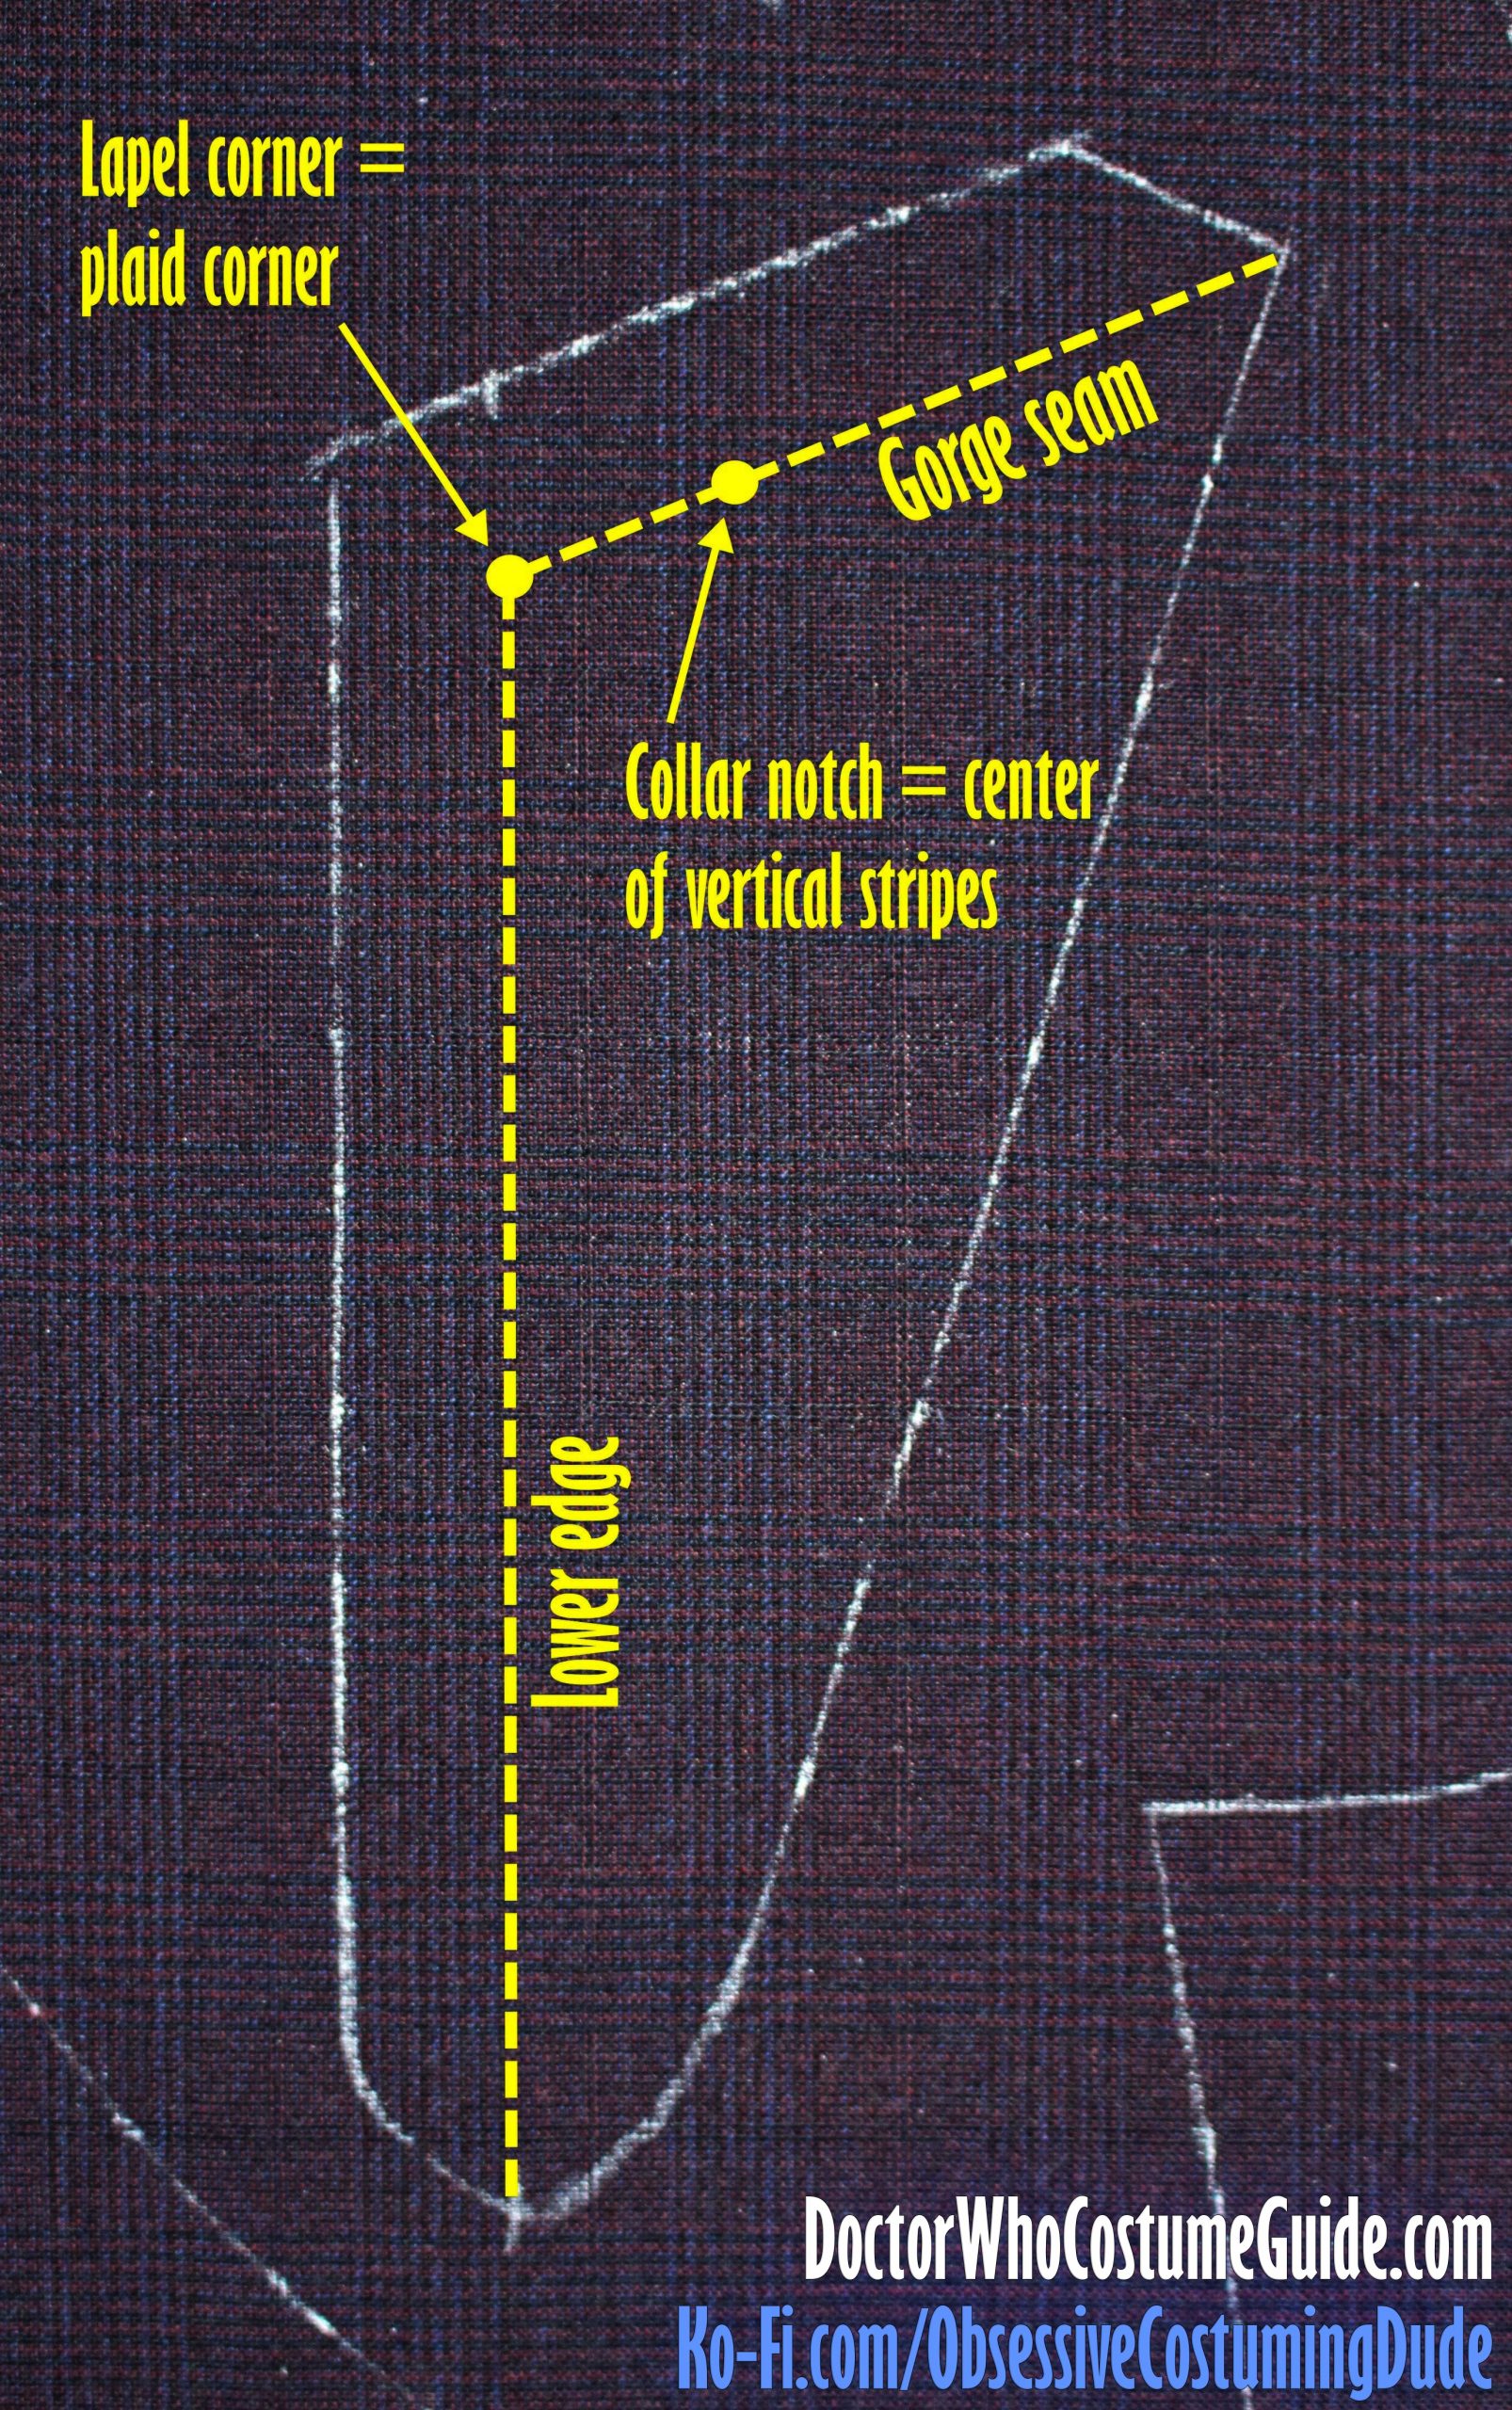
Position the corner of the lapel exactly on the lower right corner of what I call a “plaid intersection” (where the horizontal and vertical lines intersect) for the right side.
The collar notch should be exactly centered between a “plaid intersection.”
The lower edge should be flush with the outer edge of the vertical stripes.
(Obviously, mirror this cut for the left side of the waistcoat.)
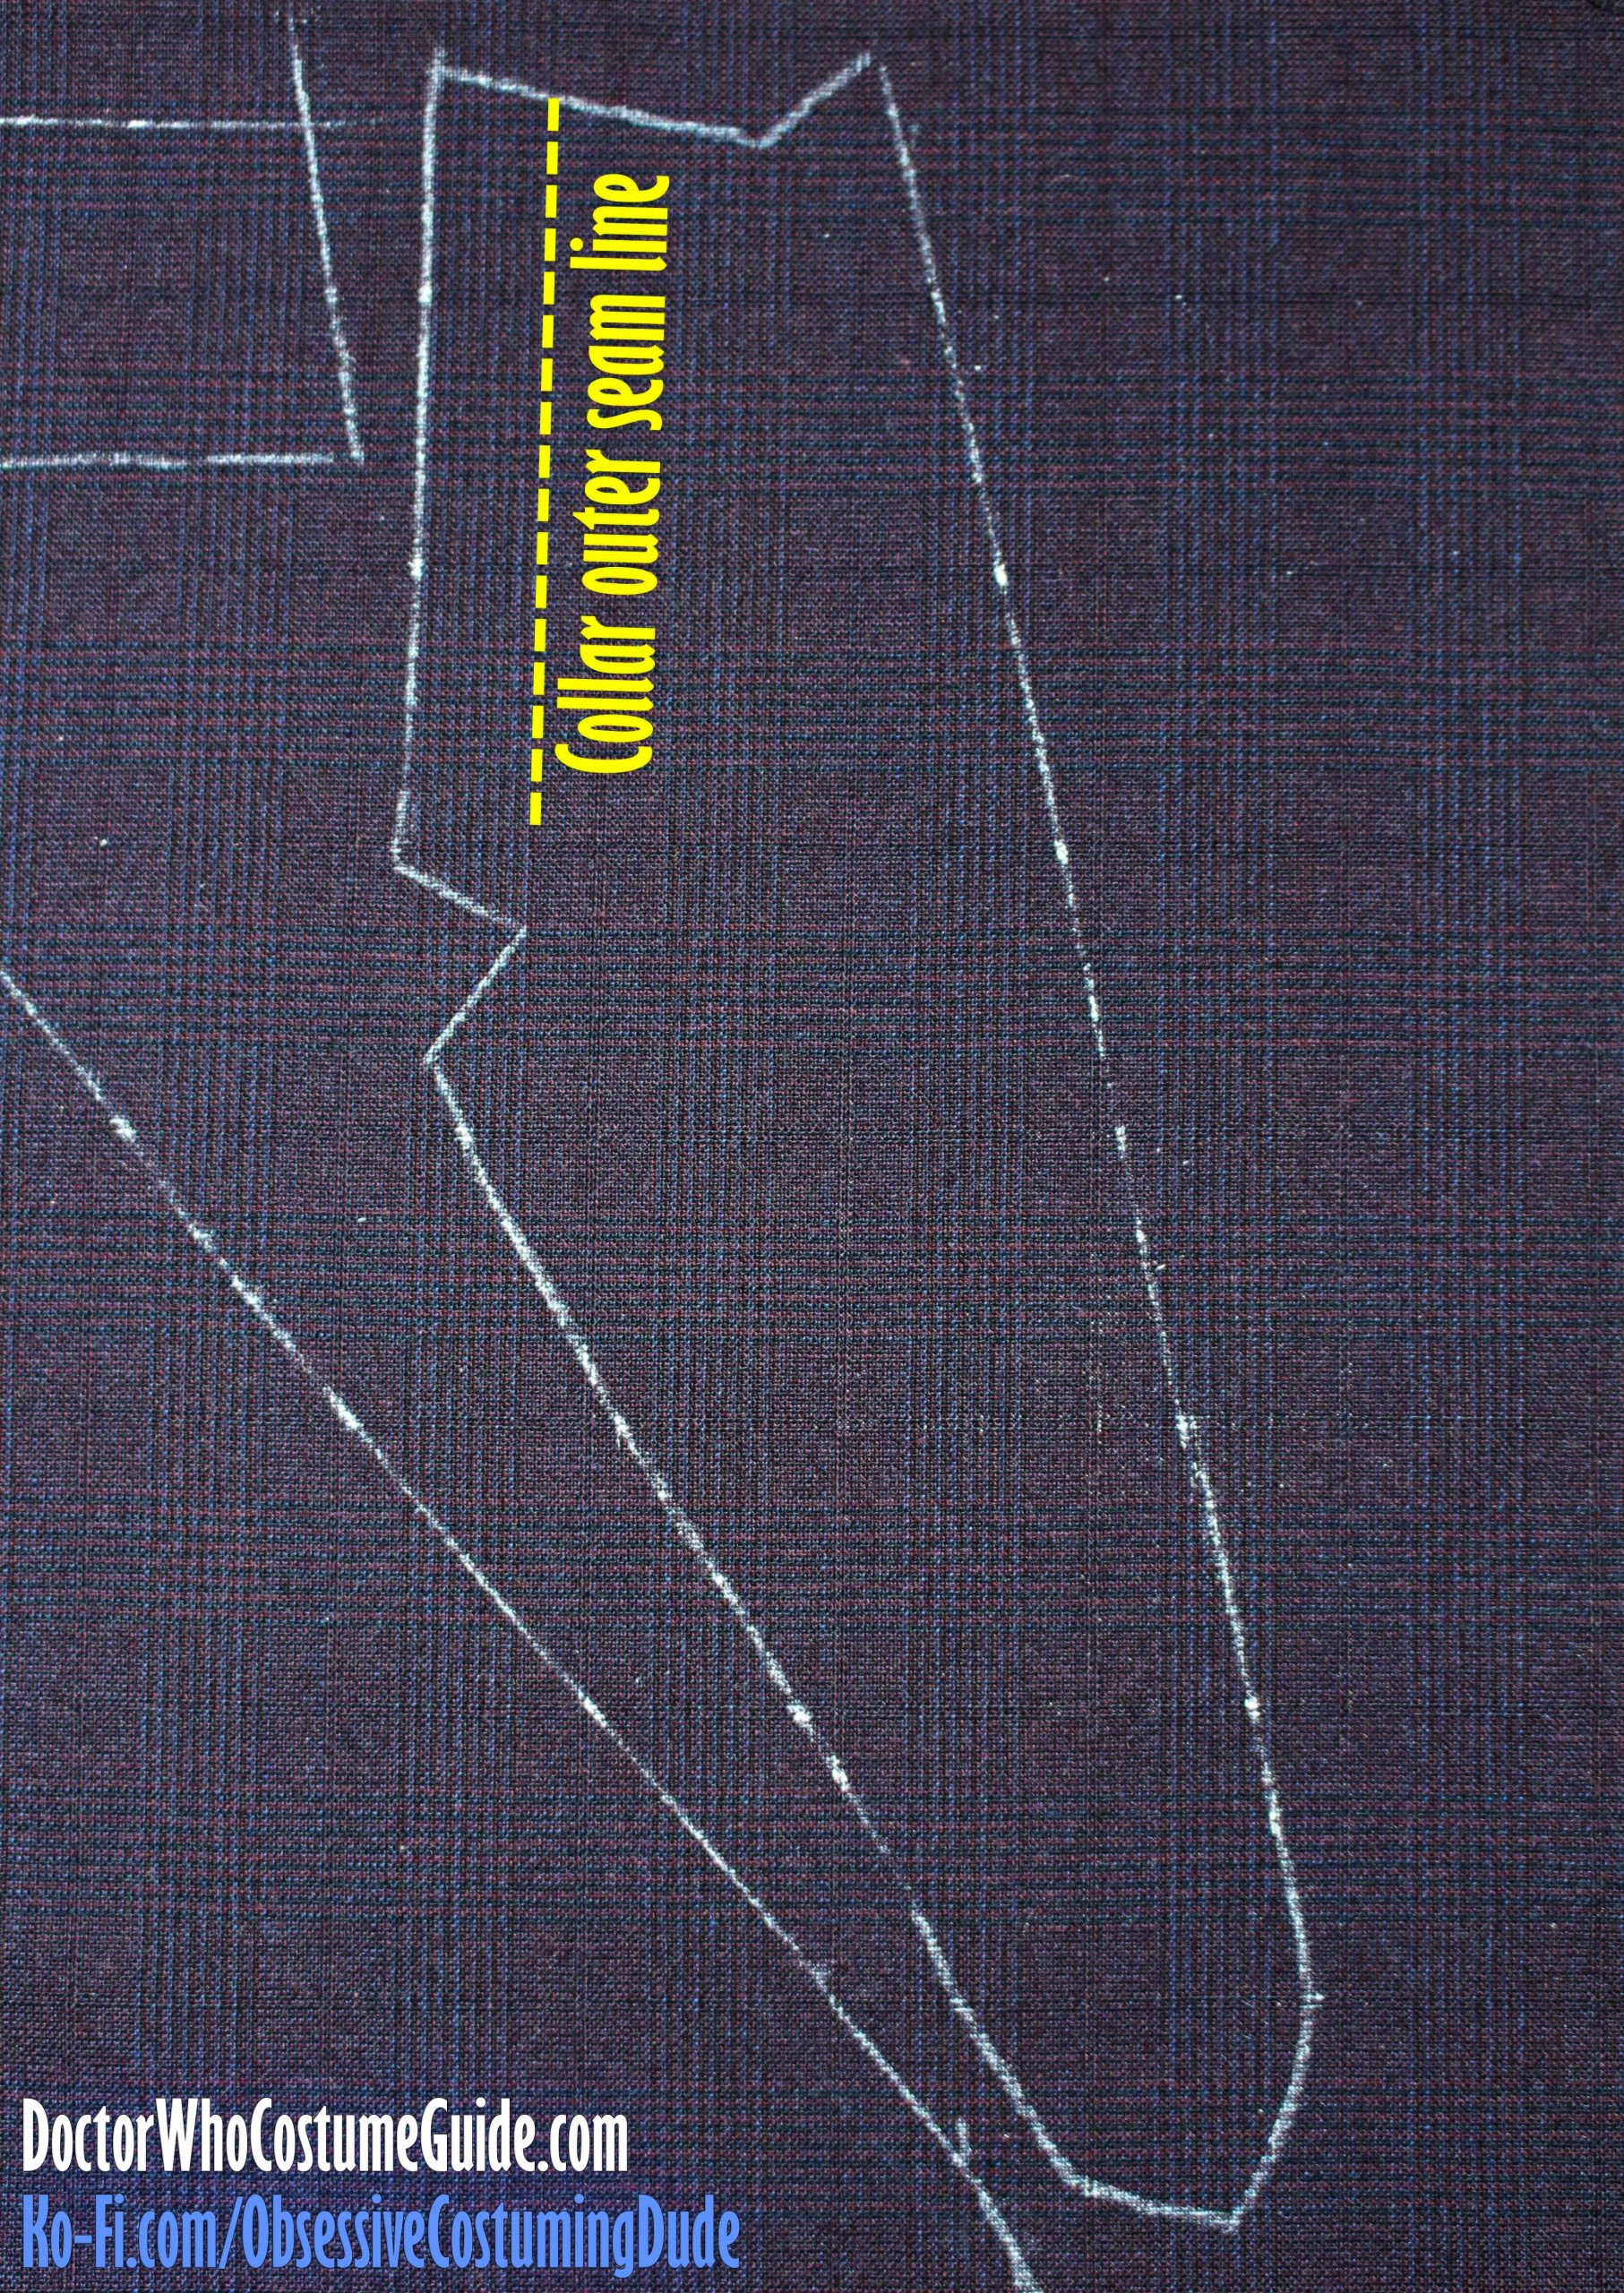
On your collar pattern piece, draw the outer, lower, and gorge seam lines. (Again, these are ⅝” from the edges on my pattern.)
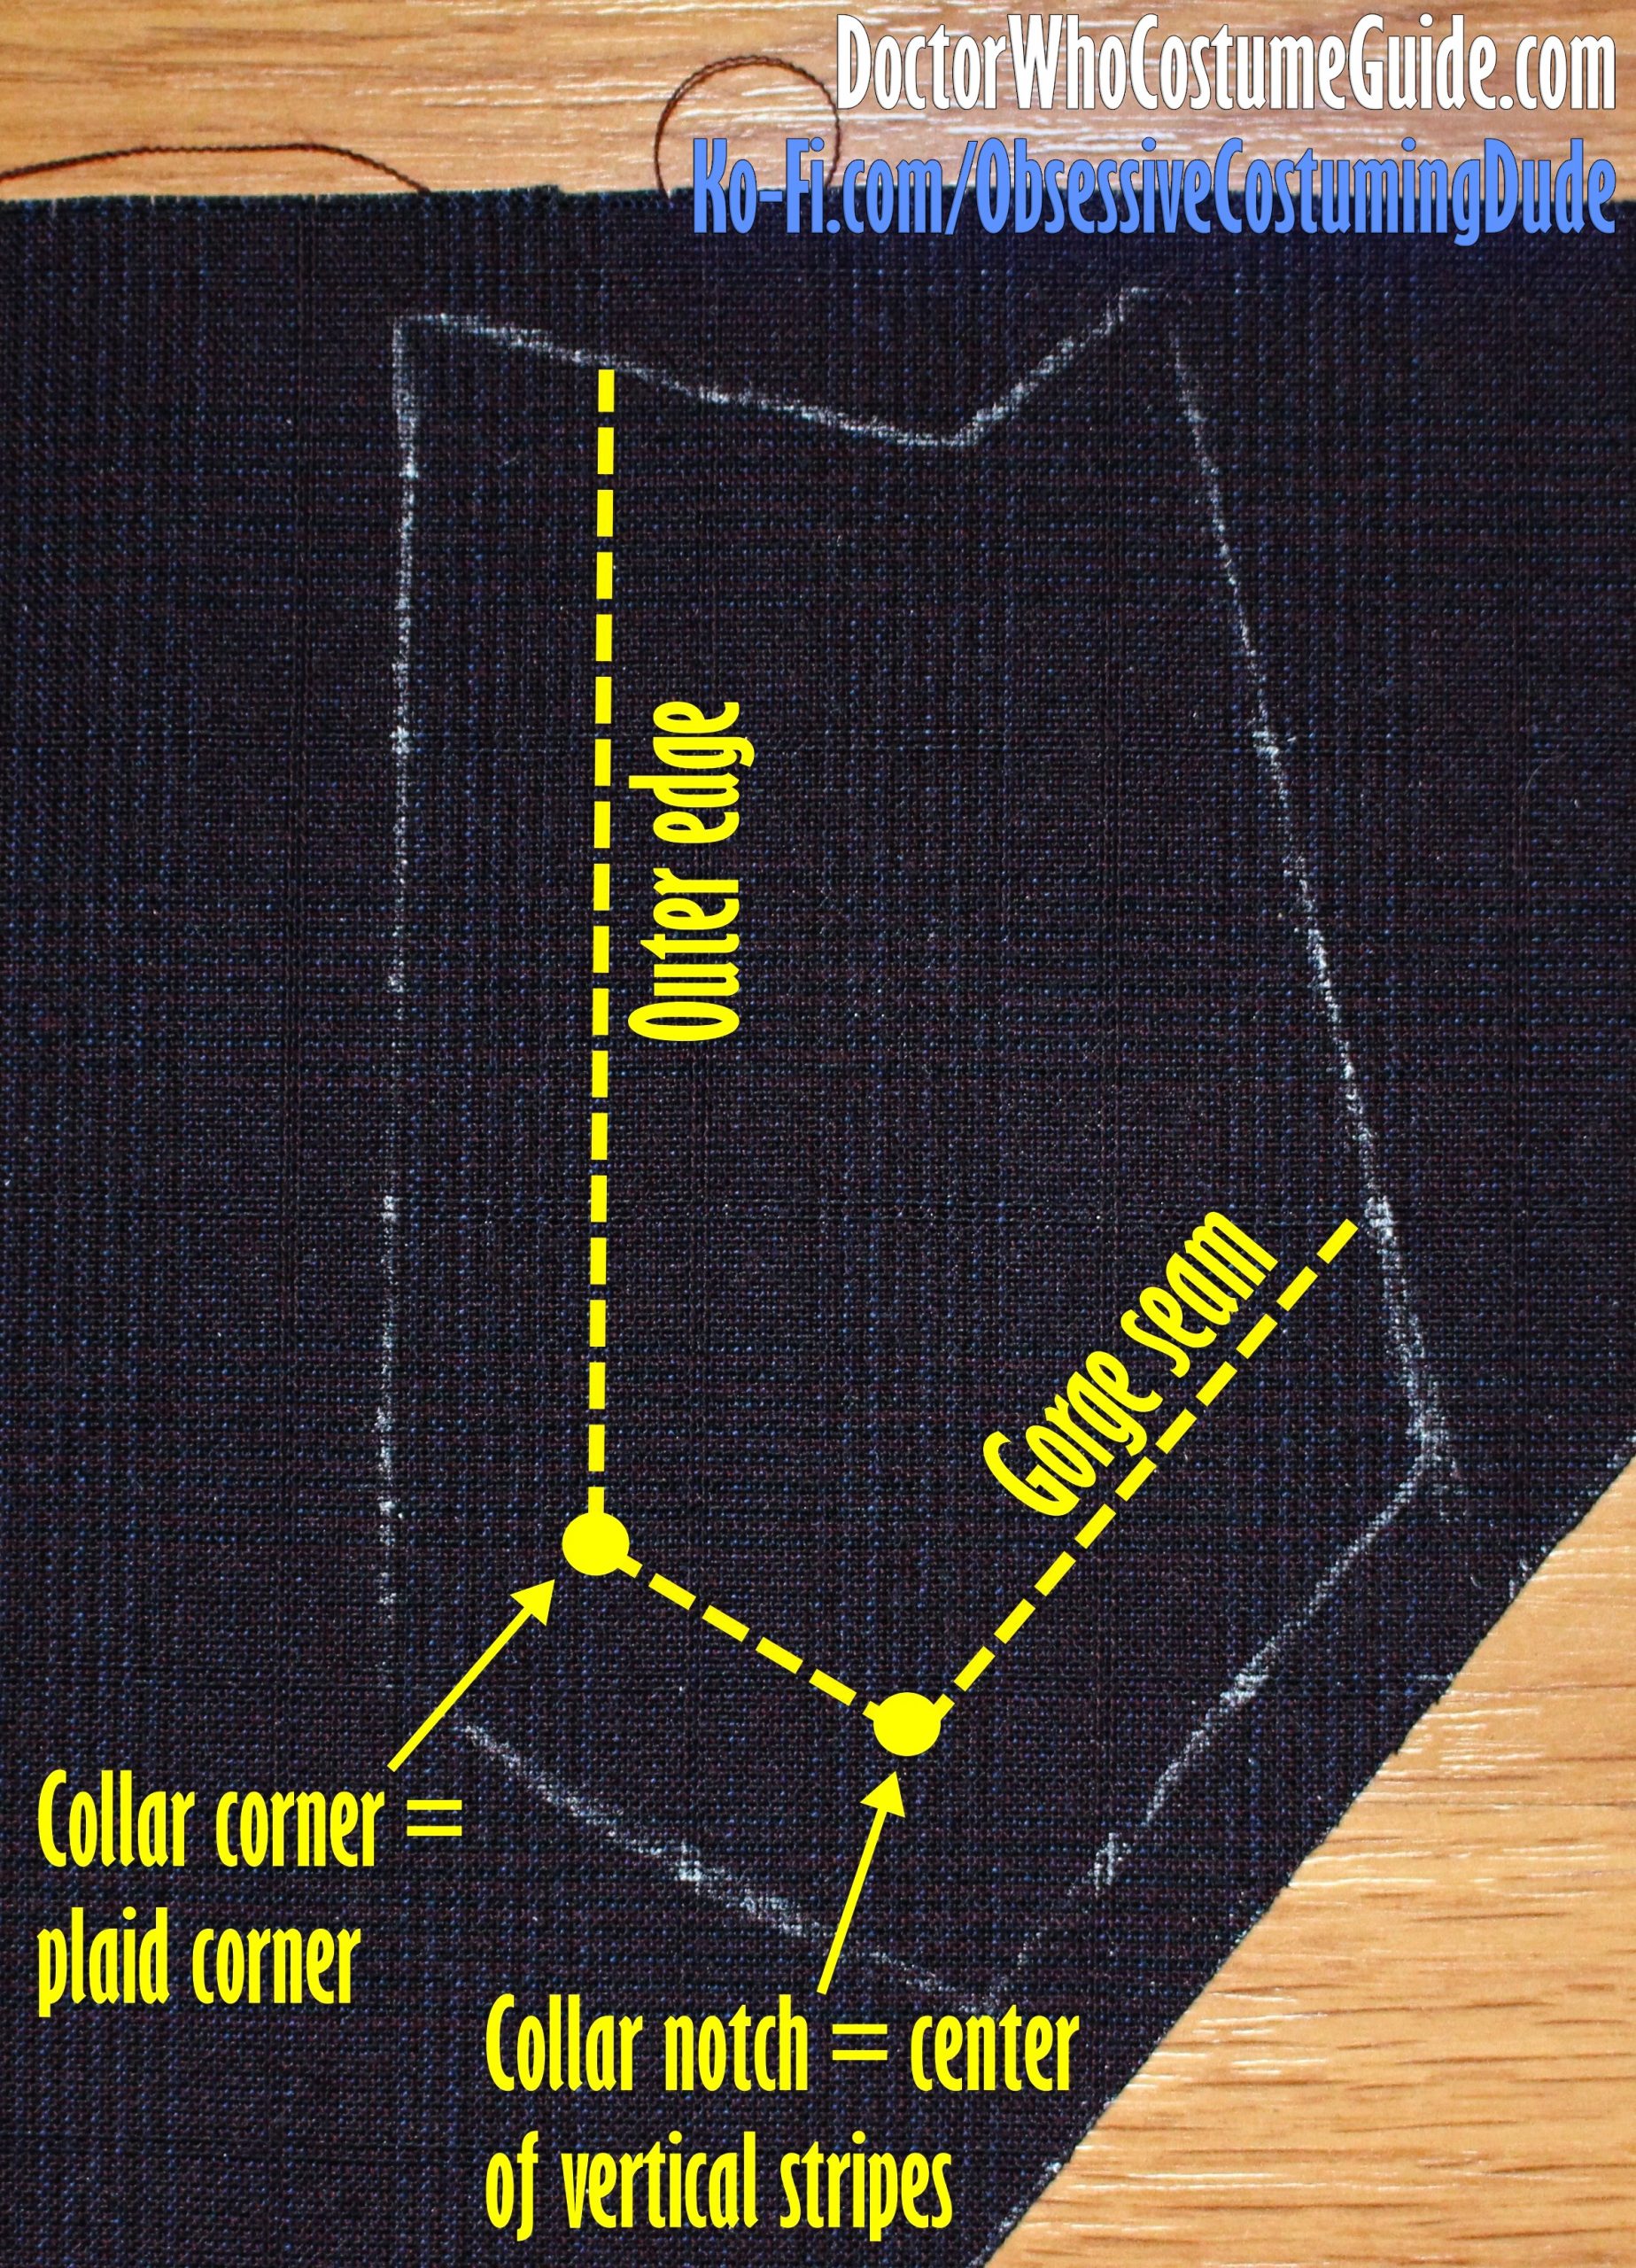
Position the corner of the collar exactly on the lower right corner of a “plaid intersection.”
The collar notch should be horizontally centered along the vertical stripes, and vertically centered between rows of horizontal stripes.
The outer edge should be flush with the outer edge of the vertical stripes.
The collar/lapel facing (piece E) can really be cut however you like, since it won’t be visible on the finished garment.
I recommend assigning priority to cutting the other, plaid-specific pieces first, then cutting the collar/lapel facing from whatever scraps of fabric remain.
However, if you have the luxury of options, you could cut the collar/lapel facing exactly as you did the upper front of the waistcoat, just for the hell of it.
Alternatively, you could cut it so it either properly aligned with the plaid on either the collar or lapel.
Personally, I just cut mine so the upper/outer (collar) seam line was flush with the outer edge of vertical stripes.
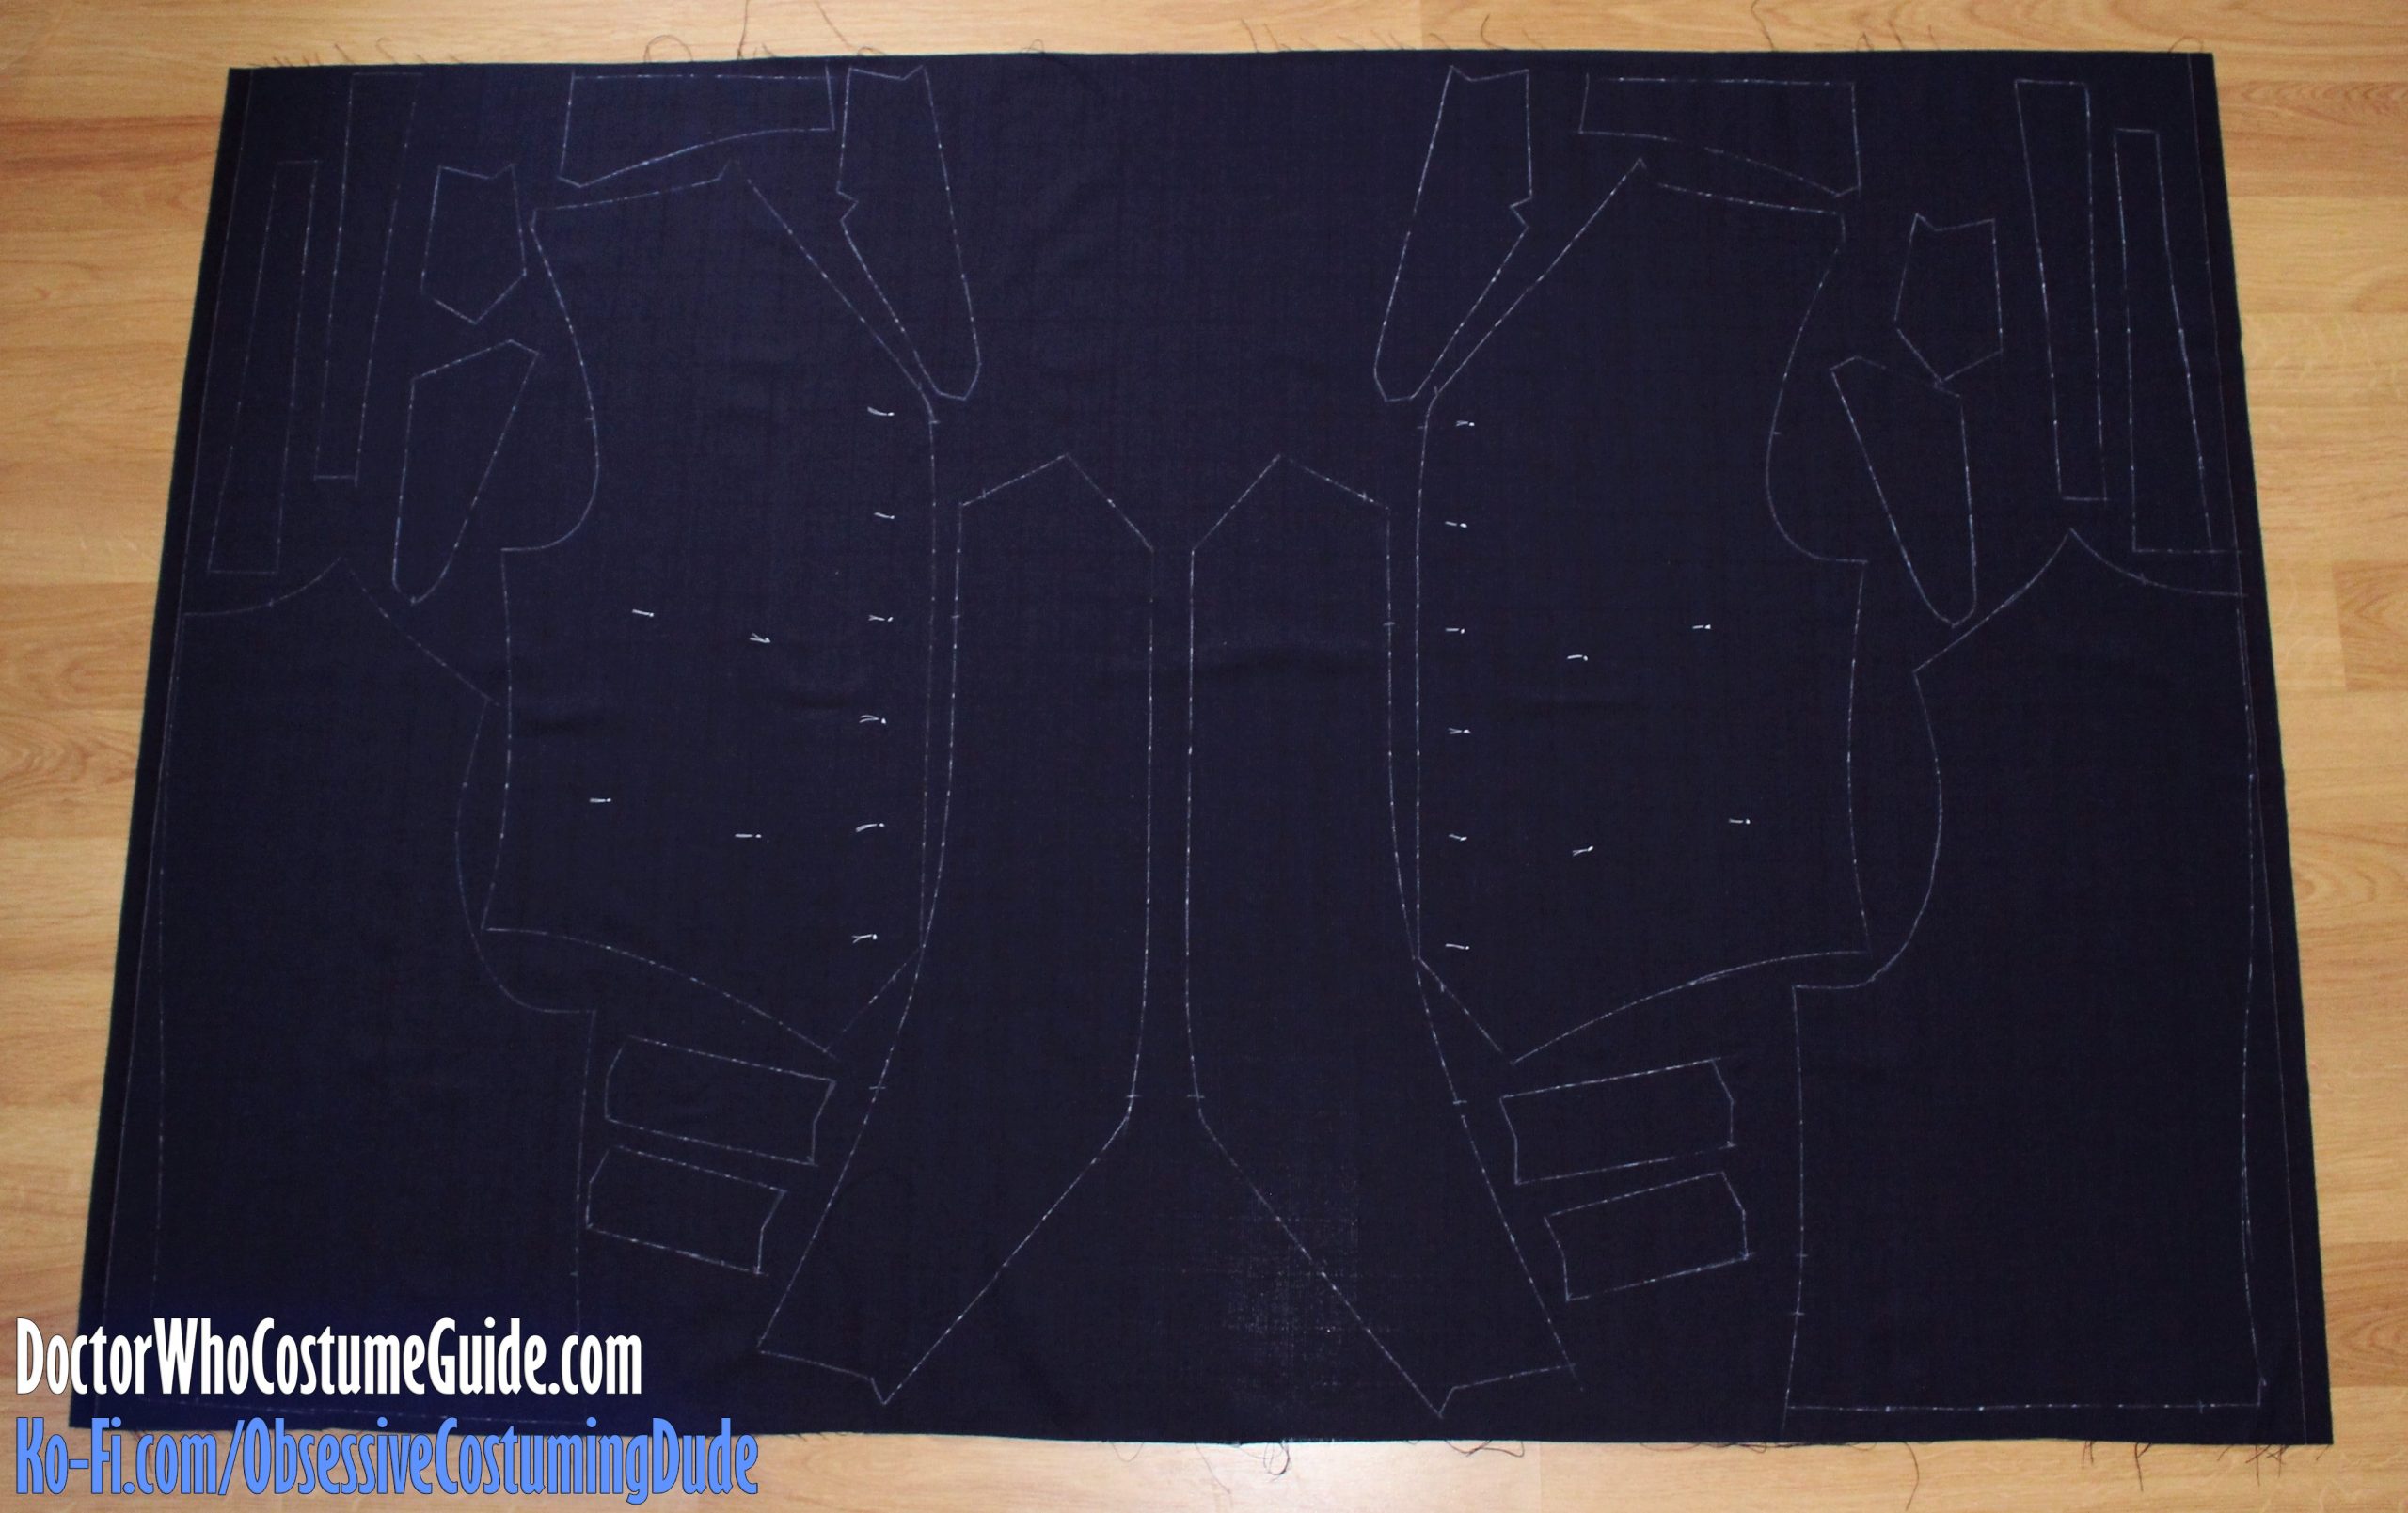
Also, remember that the back of this waistcoat was made with the same plaid fabric as the front, so cut your back pieces so the plaid patterns will properly align across the center back seam!
If you can get yours to align across the side seam, even better.
And finally, use the pocket alignment guides on the printed pattern, in combination with the plaid pattern on the fabric, to cut the welts so the plaid pattern flows uninterrupted from the waistcoat front onto the pocket welt.
I had to play quite a bit of Tetris with my pattern pieces, but I ultimately managed to fit them all into a single meter of fabric.
(Note that I was cutting a size 42, and this was a meter of fabric, not a yard! Those extra few inches really helped. I definitely recommend at least 1 ½ yards for sizes 44 and above.)
Mark the button and pocket positioning in the manner of your preference; I prefer to use small “tailor’s tacks” using white thread.
If you’re using a sew-in hair canvas on the waistcoat front, also cut a layer for each front panel.
If you’re using a fusible hair canvas, I suggest applying it to a large area of the “anniversary” fabric before cutting out the waistcoat front (rather than applying it afterward).
TUTORIAL NOTE
There’s no “one” single way to make a waistcoat; there are several different waistcoat-making techniques.