On the printed pattern, the sizes above correspond to the following cutting lines:
If you’d like some help interpreting all the pattern information and learn some different methods for cutting out your fabric, you may find this free sewing lesson helpful. 🙂
NOTE: All pattern pieces include ⅝” seam allowance, unless otherwise noted.
JACKET:
A – Front
B – Front interfacing
C – Chest plastron
D – Chest flannel
E – Side panel
F – Back
G – Upper sleeve
H – Under sleeve
I – Front facing
J – Front lining
K – Side lining
L – Back lining
M1 and M2 – Upper collar
N1 and N2 – Under collar
O1 and O2 – Chest pocket flap
P1 and P2 – Chest pocket pouch
Q – Hip pocket flap
R – Hip pocket facing
S – Hip pocket bag
T – Back waistband
U – Interior pocket welt
V – Interior pocket bag
TROUSERS:
AA – Front
BB – Back
CC – Left waistband
DD – Right waistband
EE – Right fly
FF – Left fly
GG – Front pocket yoke
HH – Front pocket facing
II – Front pocket bag
JJ – Back pocket welt
KK – Back pocket bag
LL – Back pocket facing
MM – Belt loops
NN – Button tabs
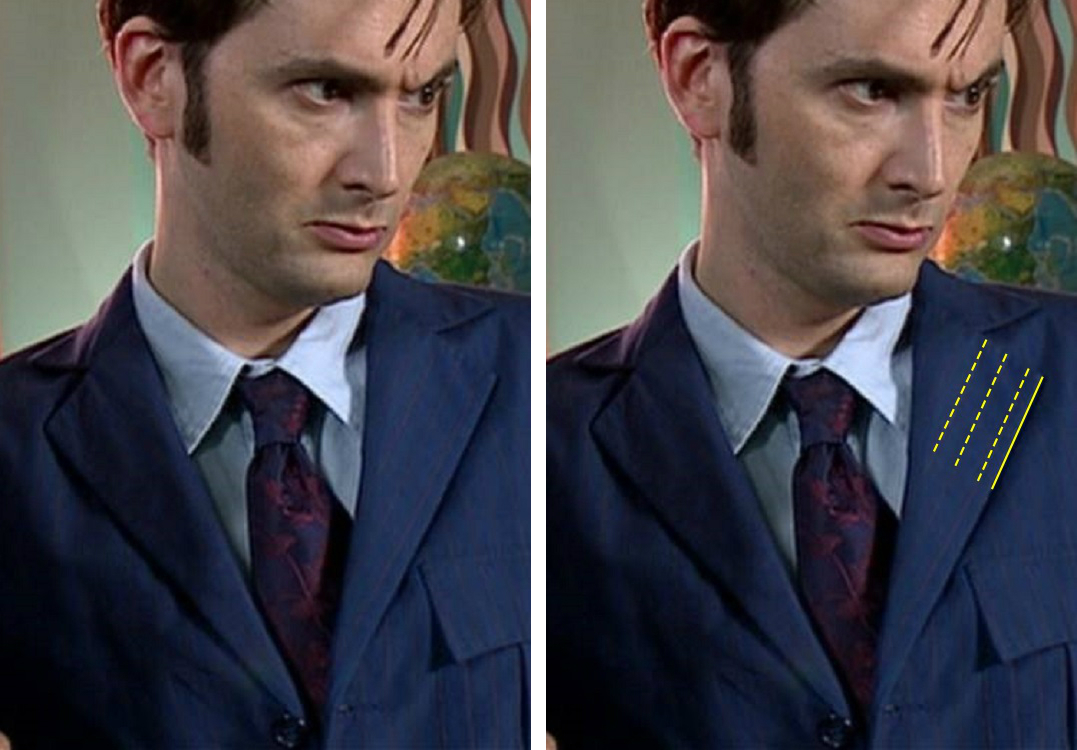
As you may recall from my costume analysis, there were multiple styles of blue suits over the Davies/Tennant-era, specifically in regard to the pinstripes on the collars and lapels.
For the later version of the blue suit collar (with the front collar edges parallel to the pinstripe), use collar pieces M1 and N1.
4x13 "Journey's End"
For the earlier version of the blue suit collar (with the slanted collar edge), use collar pieces M2 and N2.
4x6 "The Doctor's Daughter"
In both cases, I suggest drawing a parallel line ⅝” from the upper collar’s front edge on the pattern piece (M1 or M2), to establish a reference for the collar’s front seam line.
Then, position the pattern piece over the fabric with the front seam line however you prefer – either on a pinstripe (for the early version), or crossing over a pinstripe (for the later version).
I also suggest drawing a parallel line ⅝” from the upper collar’s back edge, to establish a reference for the collar’s center back seam line.
Ideally, the center back should automatically either fall on a pinstripe, or exactly halfway between two pinstripes.
However, since this particular suit is fabric-specific, you may need to “cheat” a little bit in one direction or the other.
One way is to ease in a slightly larger collar, or stretch a slightly smaller one, just a tiny bit (say, 1/16” on each side).
A better way is to slightly adjust the jacket’s neckline to compensate, by taking in or letting out the center back and/or shoulder seams a tiny bit. (For example, if you have to extend the back edge of your upper collar by ⅛” so the seam line falls on or exactly halfway between two pinstripes, simply let out the center back seam at the neckline by ⅛”, or let out the shoulder seams at the neckline by 1/16”.)
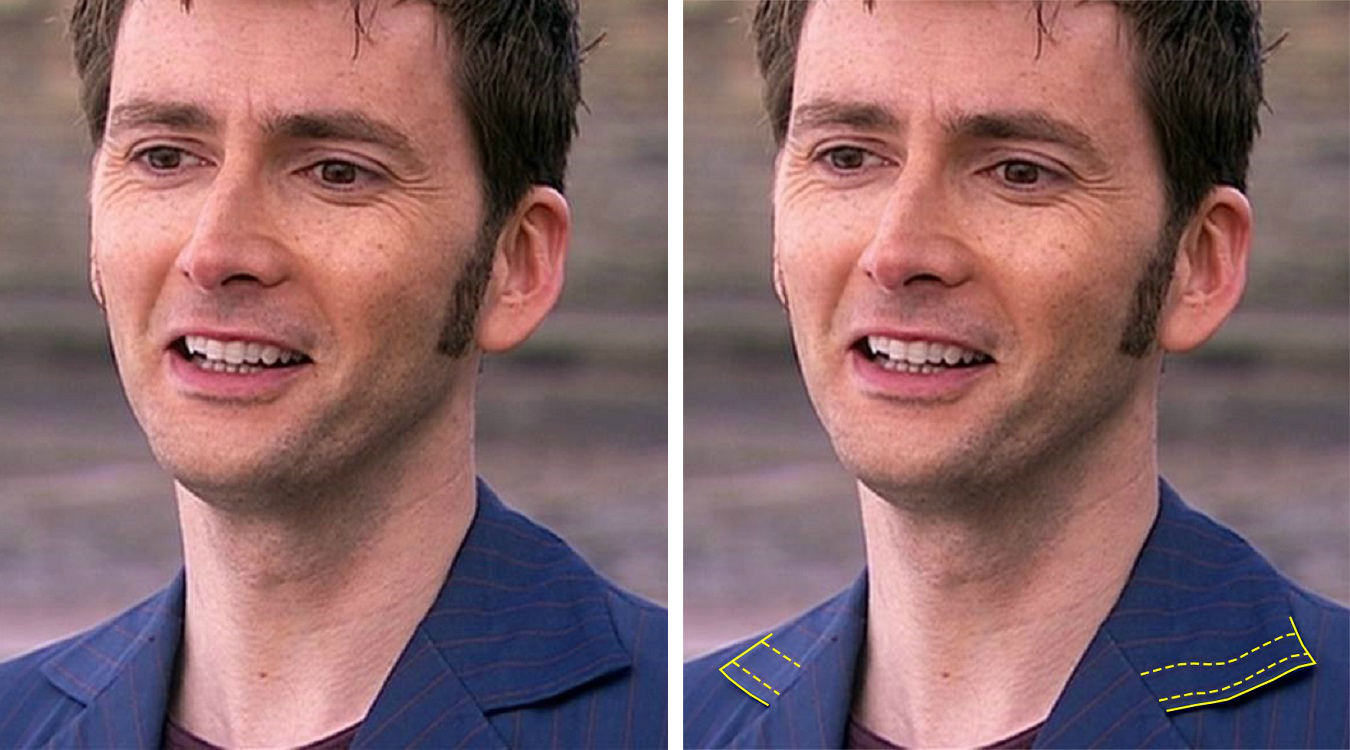
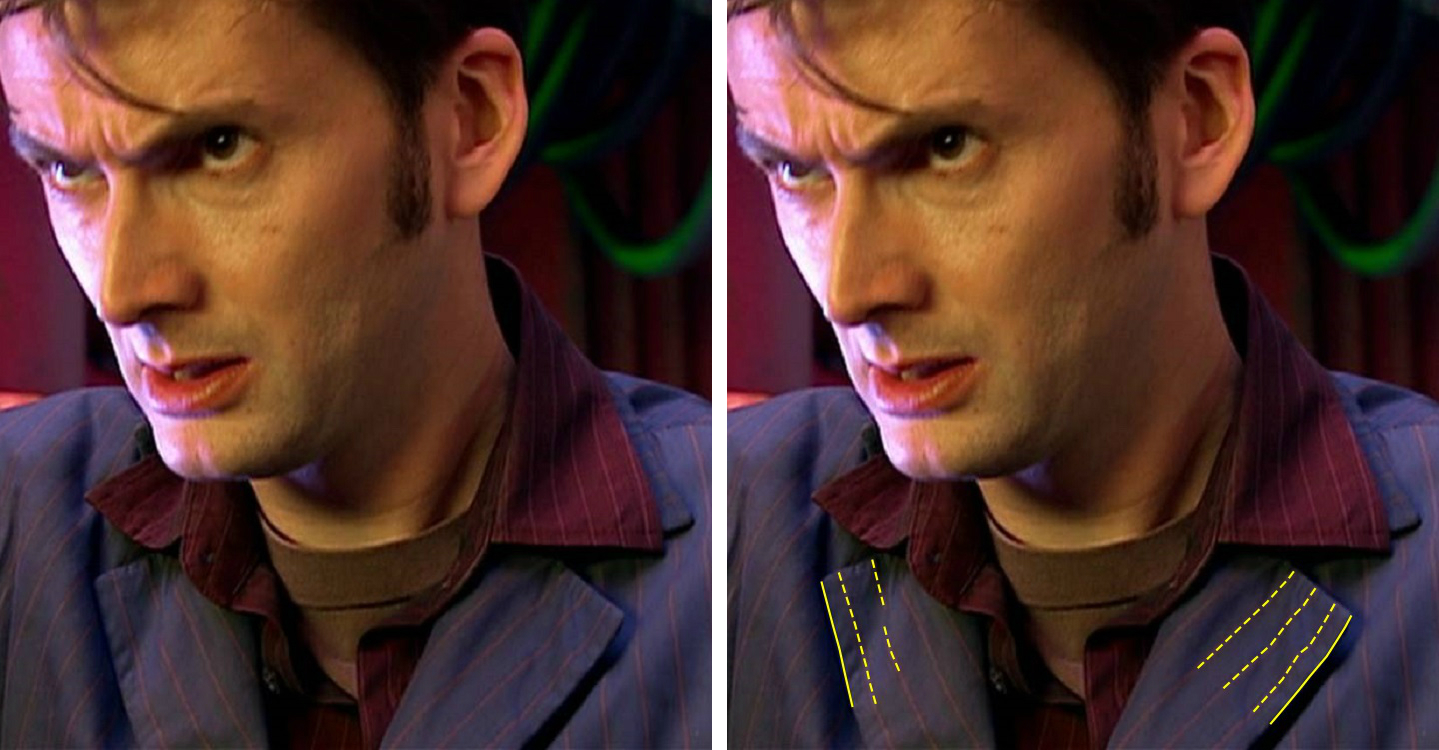
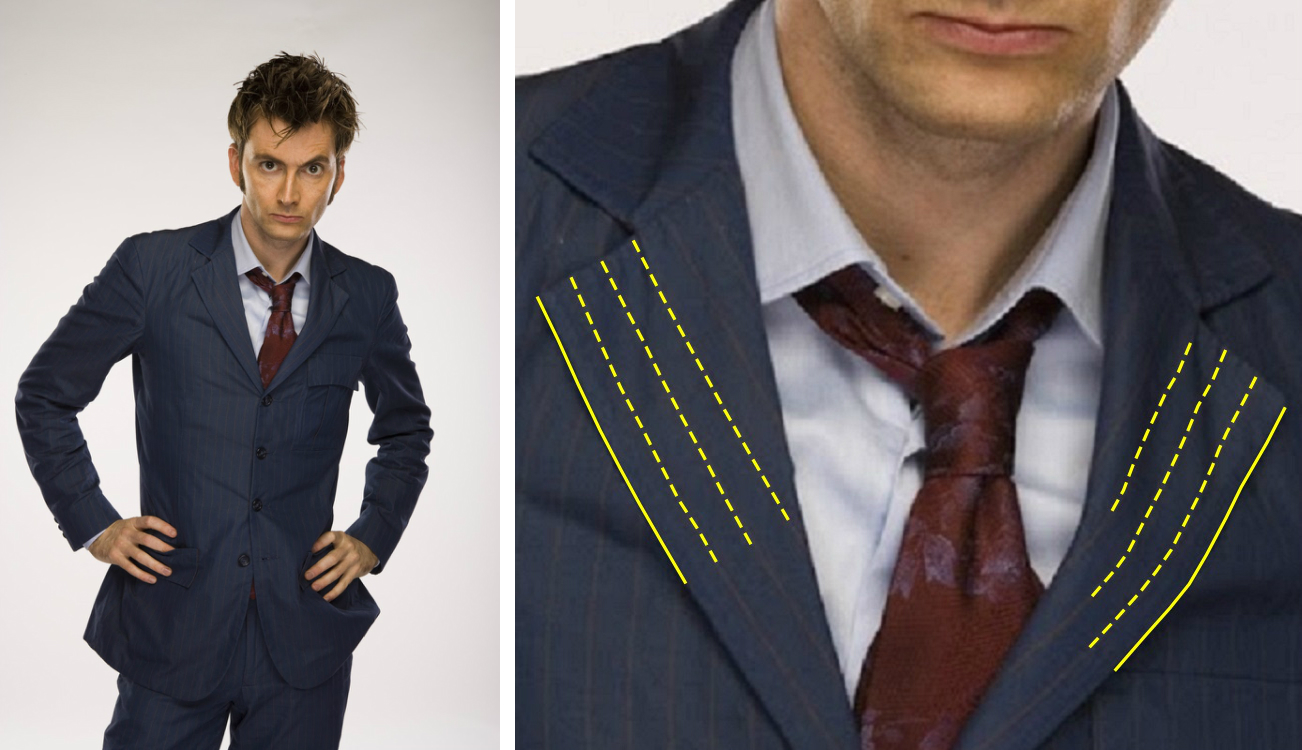
As you may also recall from my costume analysis, the pinstripe positioning on the blue suit lapels varied.
The earlier version of the blue suit had the jacket’s front edges on pinstripes, but the outer edges of the lapels between pinstripes.
3x6 "The Lazarus Experiment"
3x7 "42"
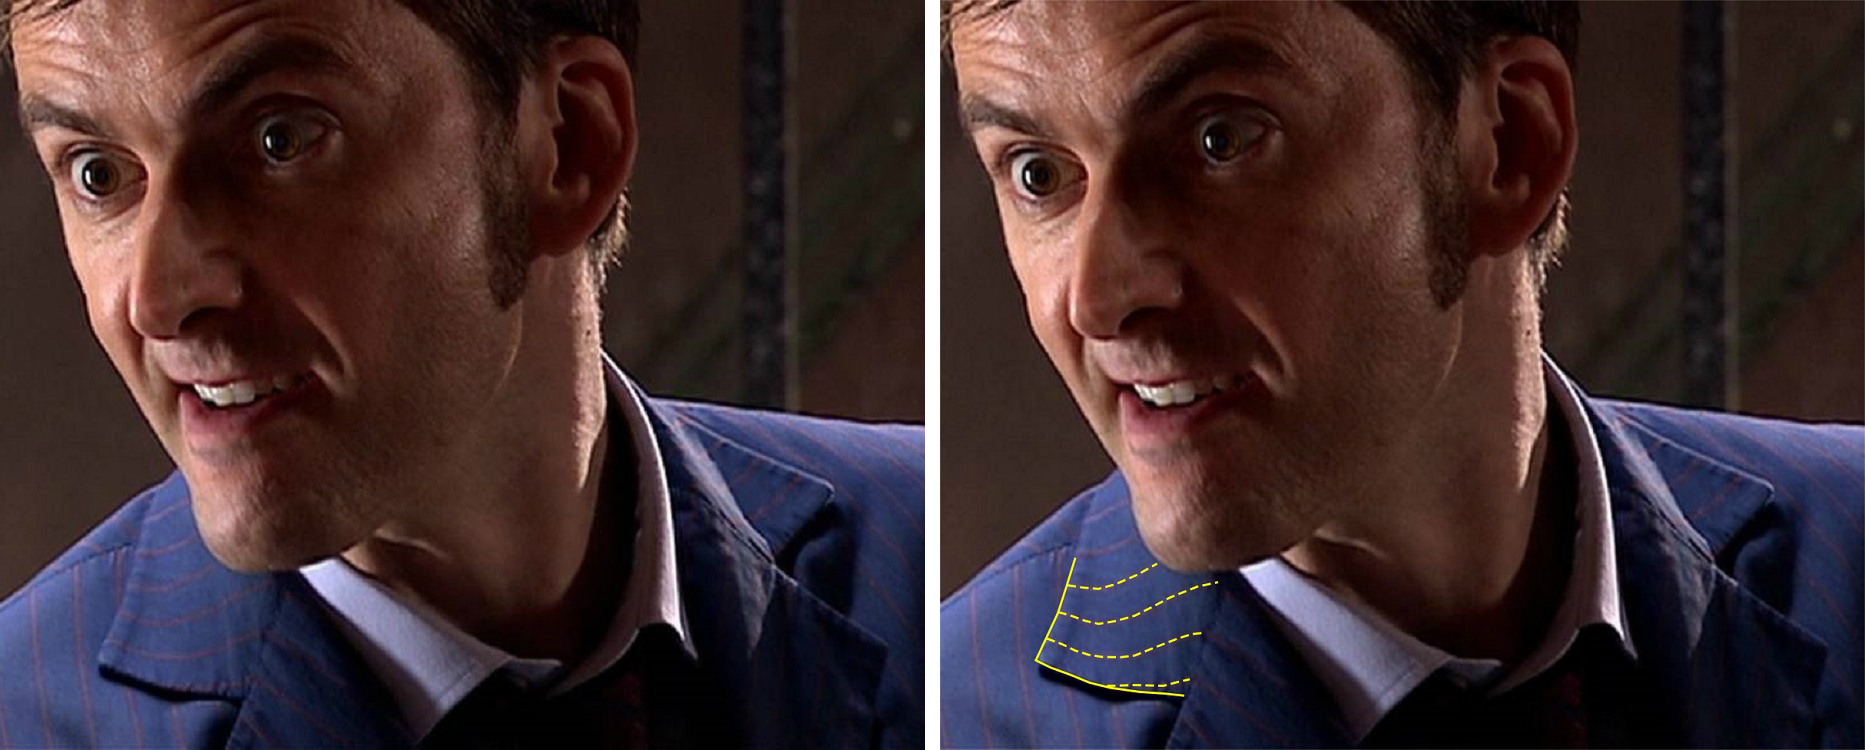
The later version of the blue suit, however, had the outer edges of the lapels on pinstripes.
4x5 "The Poison Sky"
Season 4 publicity photo
Simply use the front alignment guide on the printed pattern to achieve whichever result you desire.
Now that you have your materials gathered, determined your sizing, and decided on your jacket style …
CUTTING
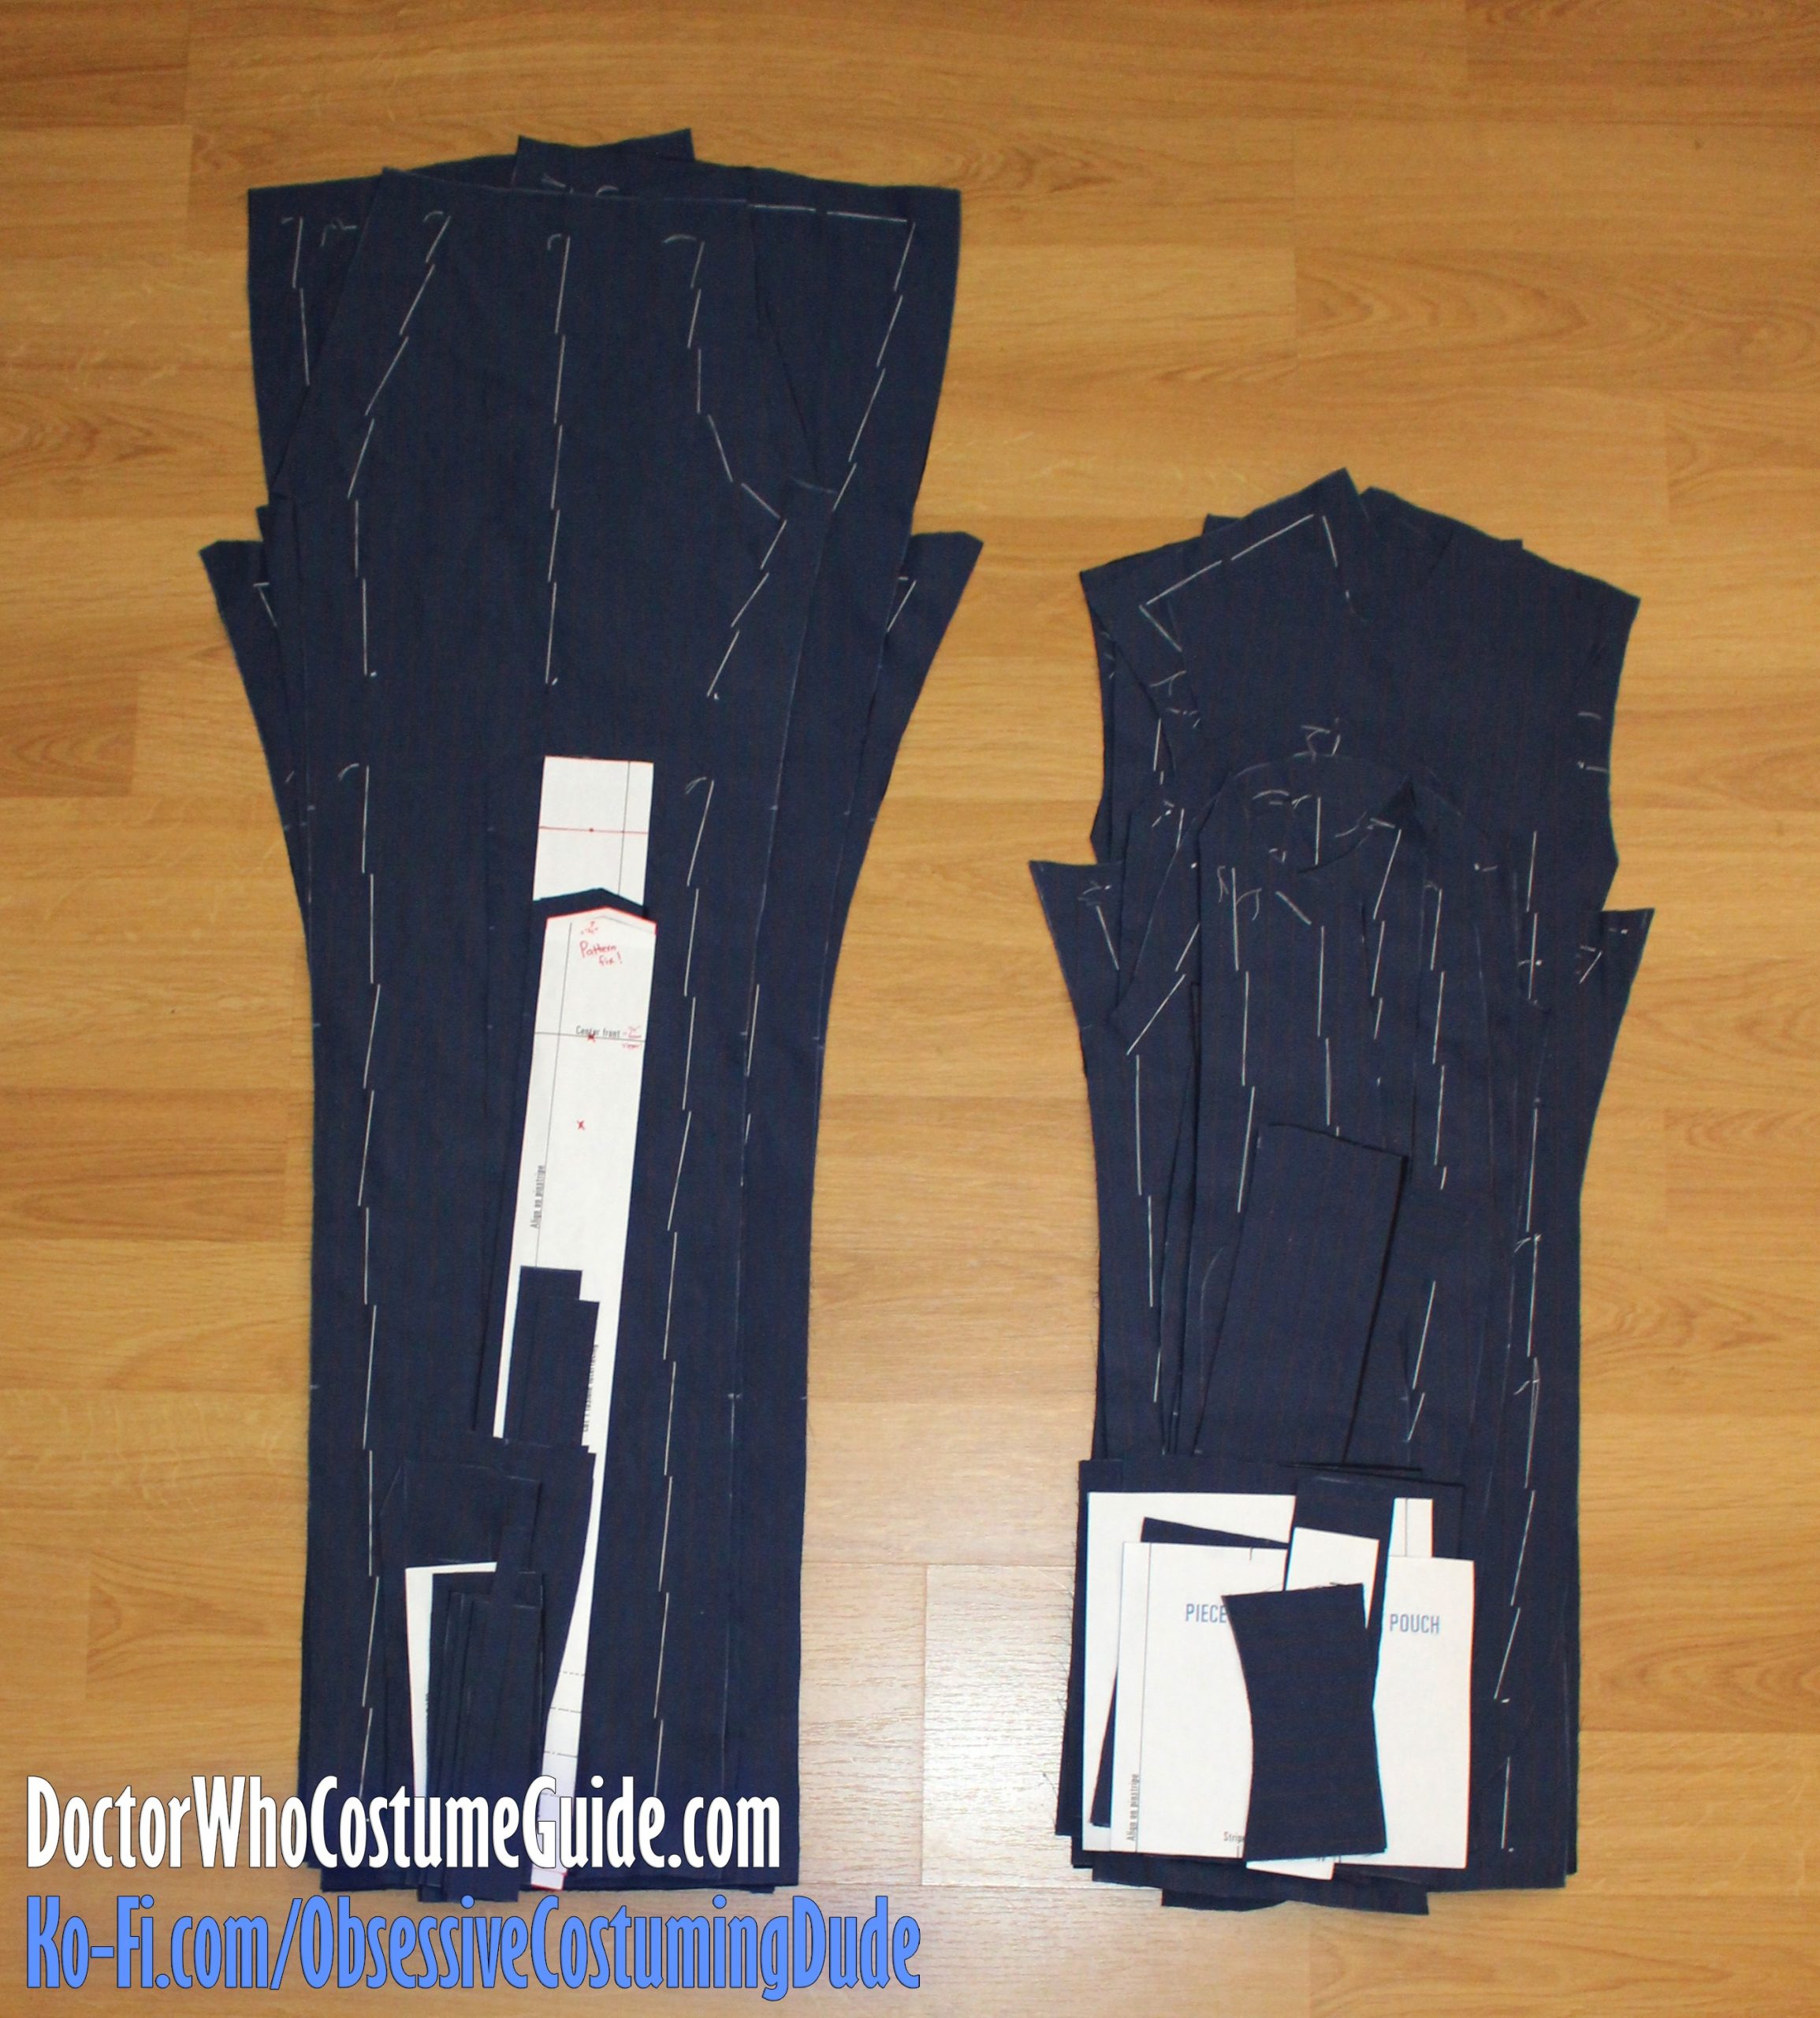
After you’ve washed and pressed your fabric, cut out the suit jacket and trousers as indicated on the printed pattern, remembering to mark all balance lines and dots.
TIP: Use the pinstripe alignment guides on the printed pattern to ensure proper alignment while constructing the suit! (If you cut at random, it will likely be impossible to match the stripes at the appropriate seams/intersections.)
TIP: I prefer to unfold my fabric, lay it flat, and trace my pattern pieces with tailor’s chalk before cutting. This allows me to play Tetris with the pattern pieces and get the most value out of my yardage.
TIP: If you are backing your blue shirting fabric with sateen, I suggest placing it on top of the sateen, with both lying flat on a flat, smooth surface. Trace your pattern piece, tailor-baste the two layers of fabric together, and then cut both layers simultaneously. This takes longer, but it helps ensure the two pieces are exactly the same size.
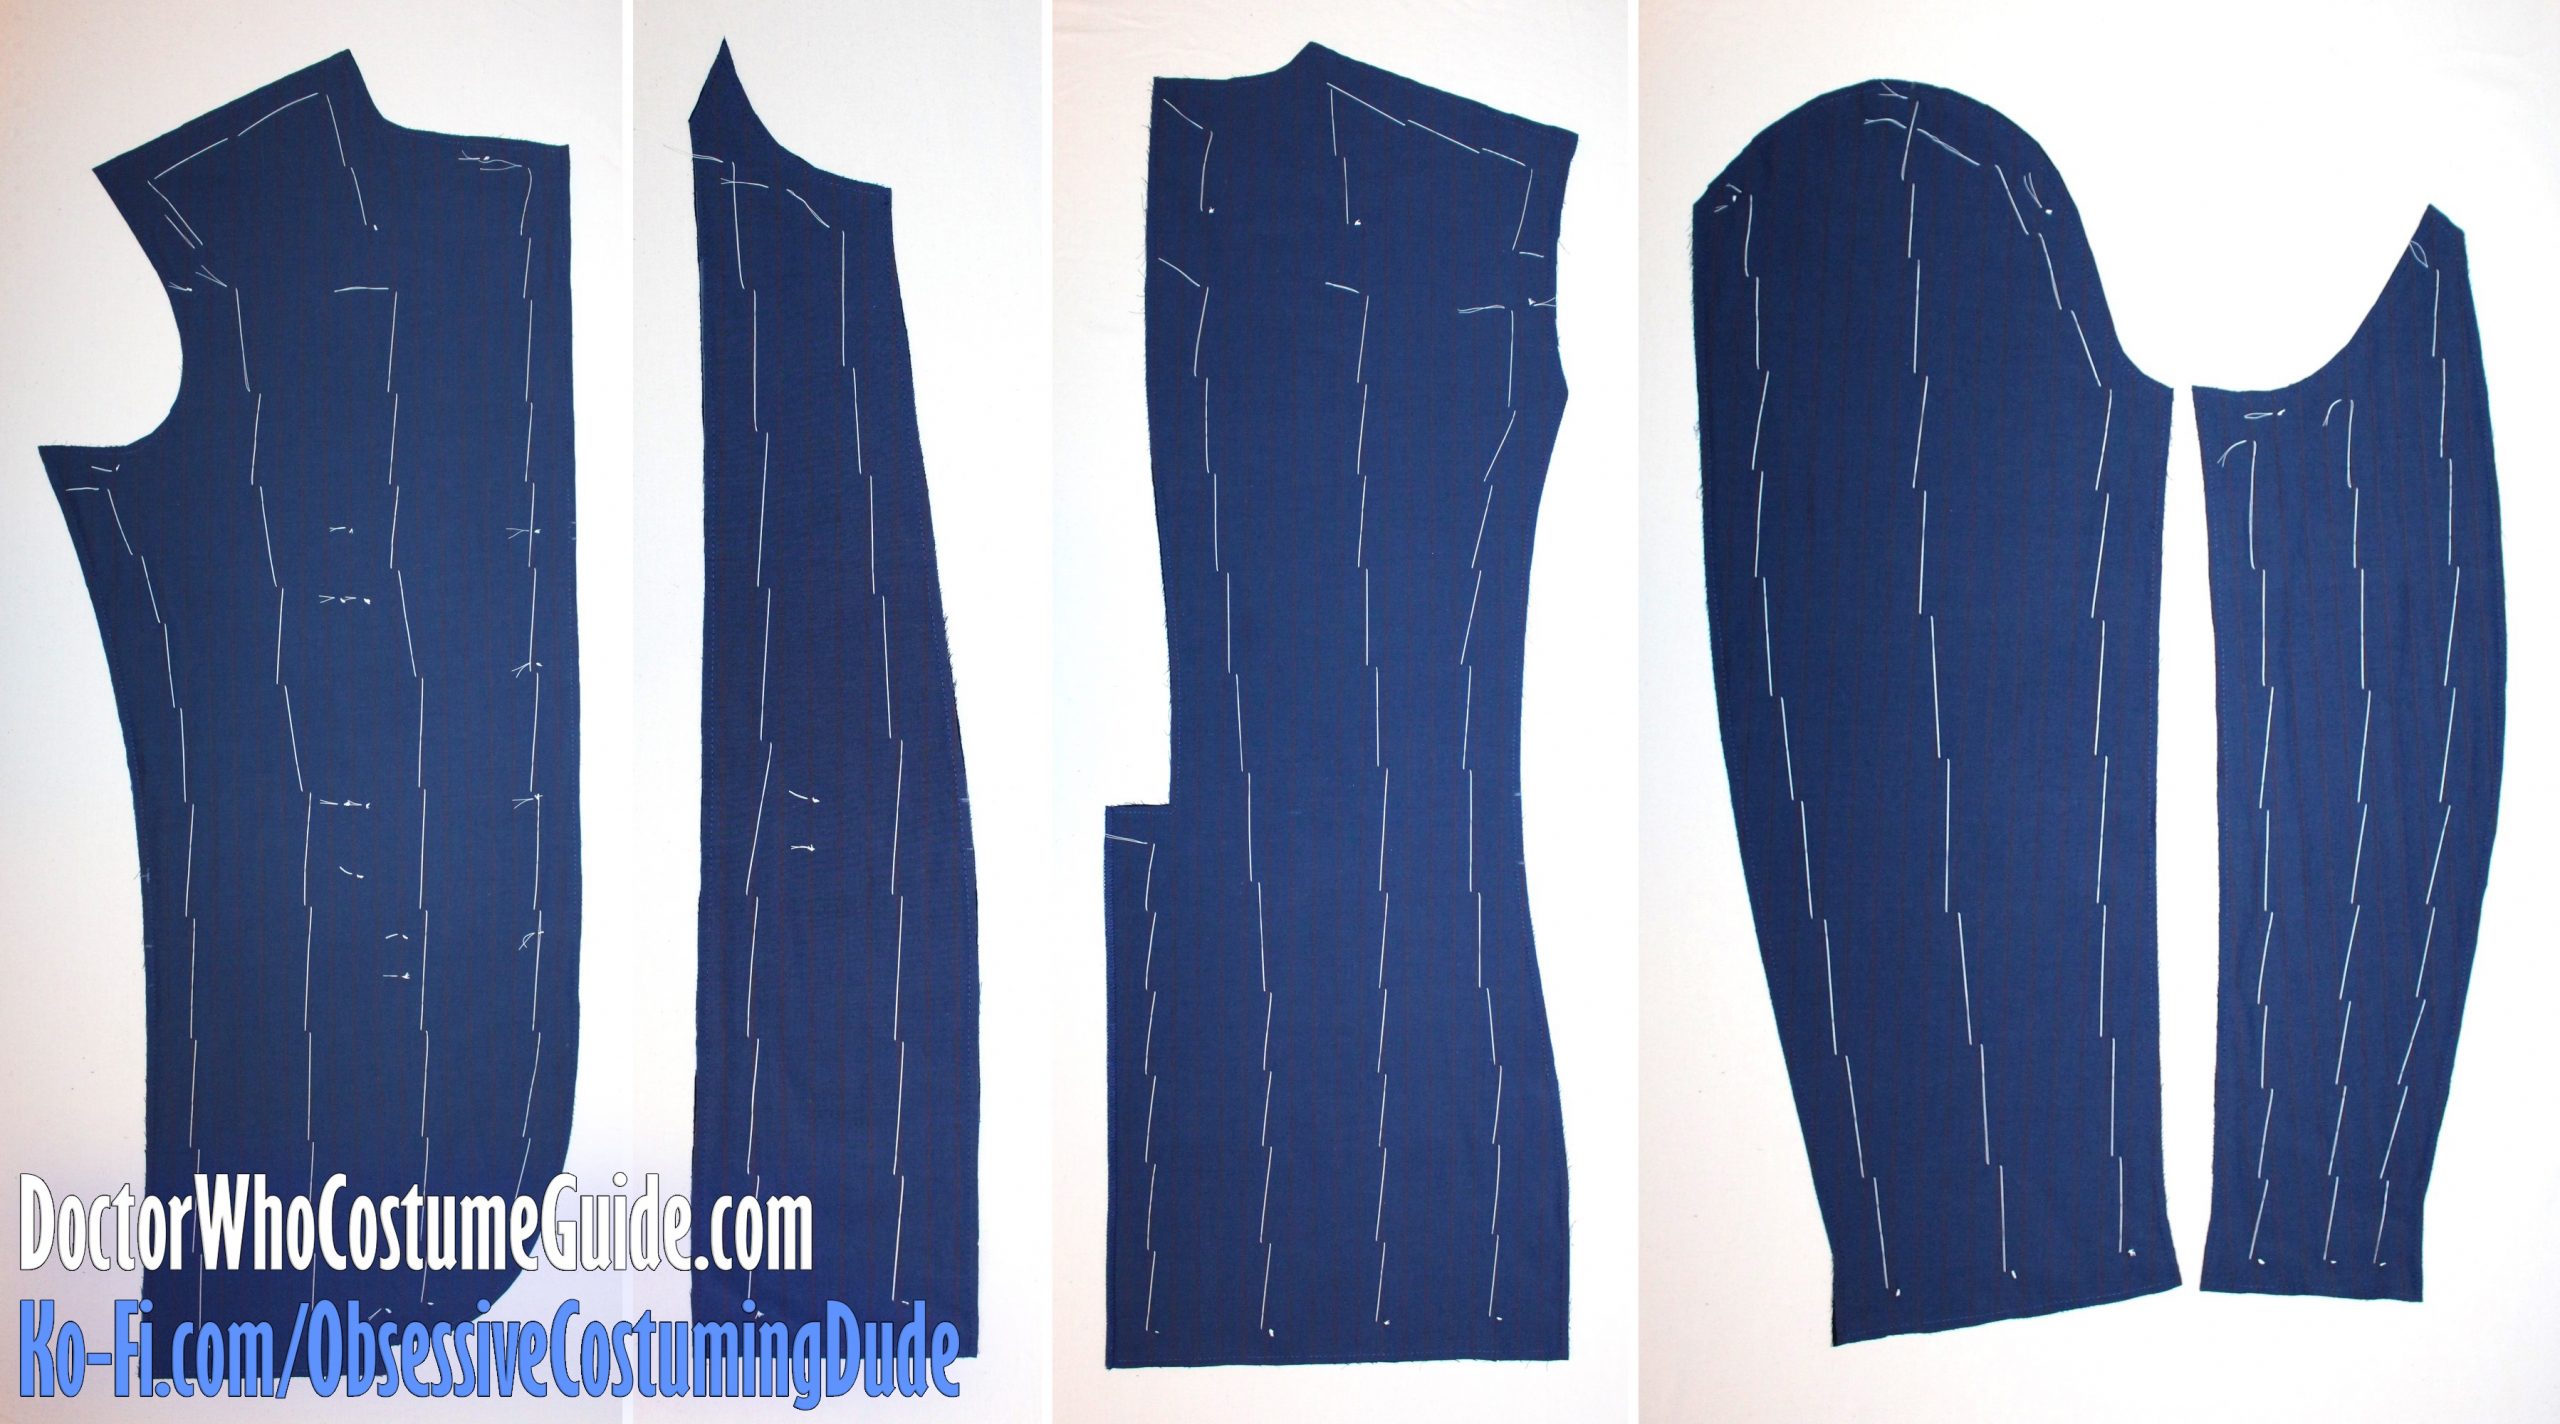
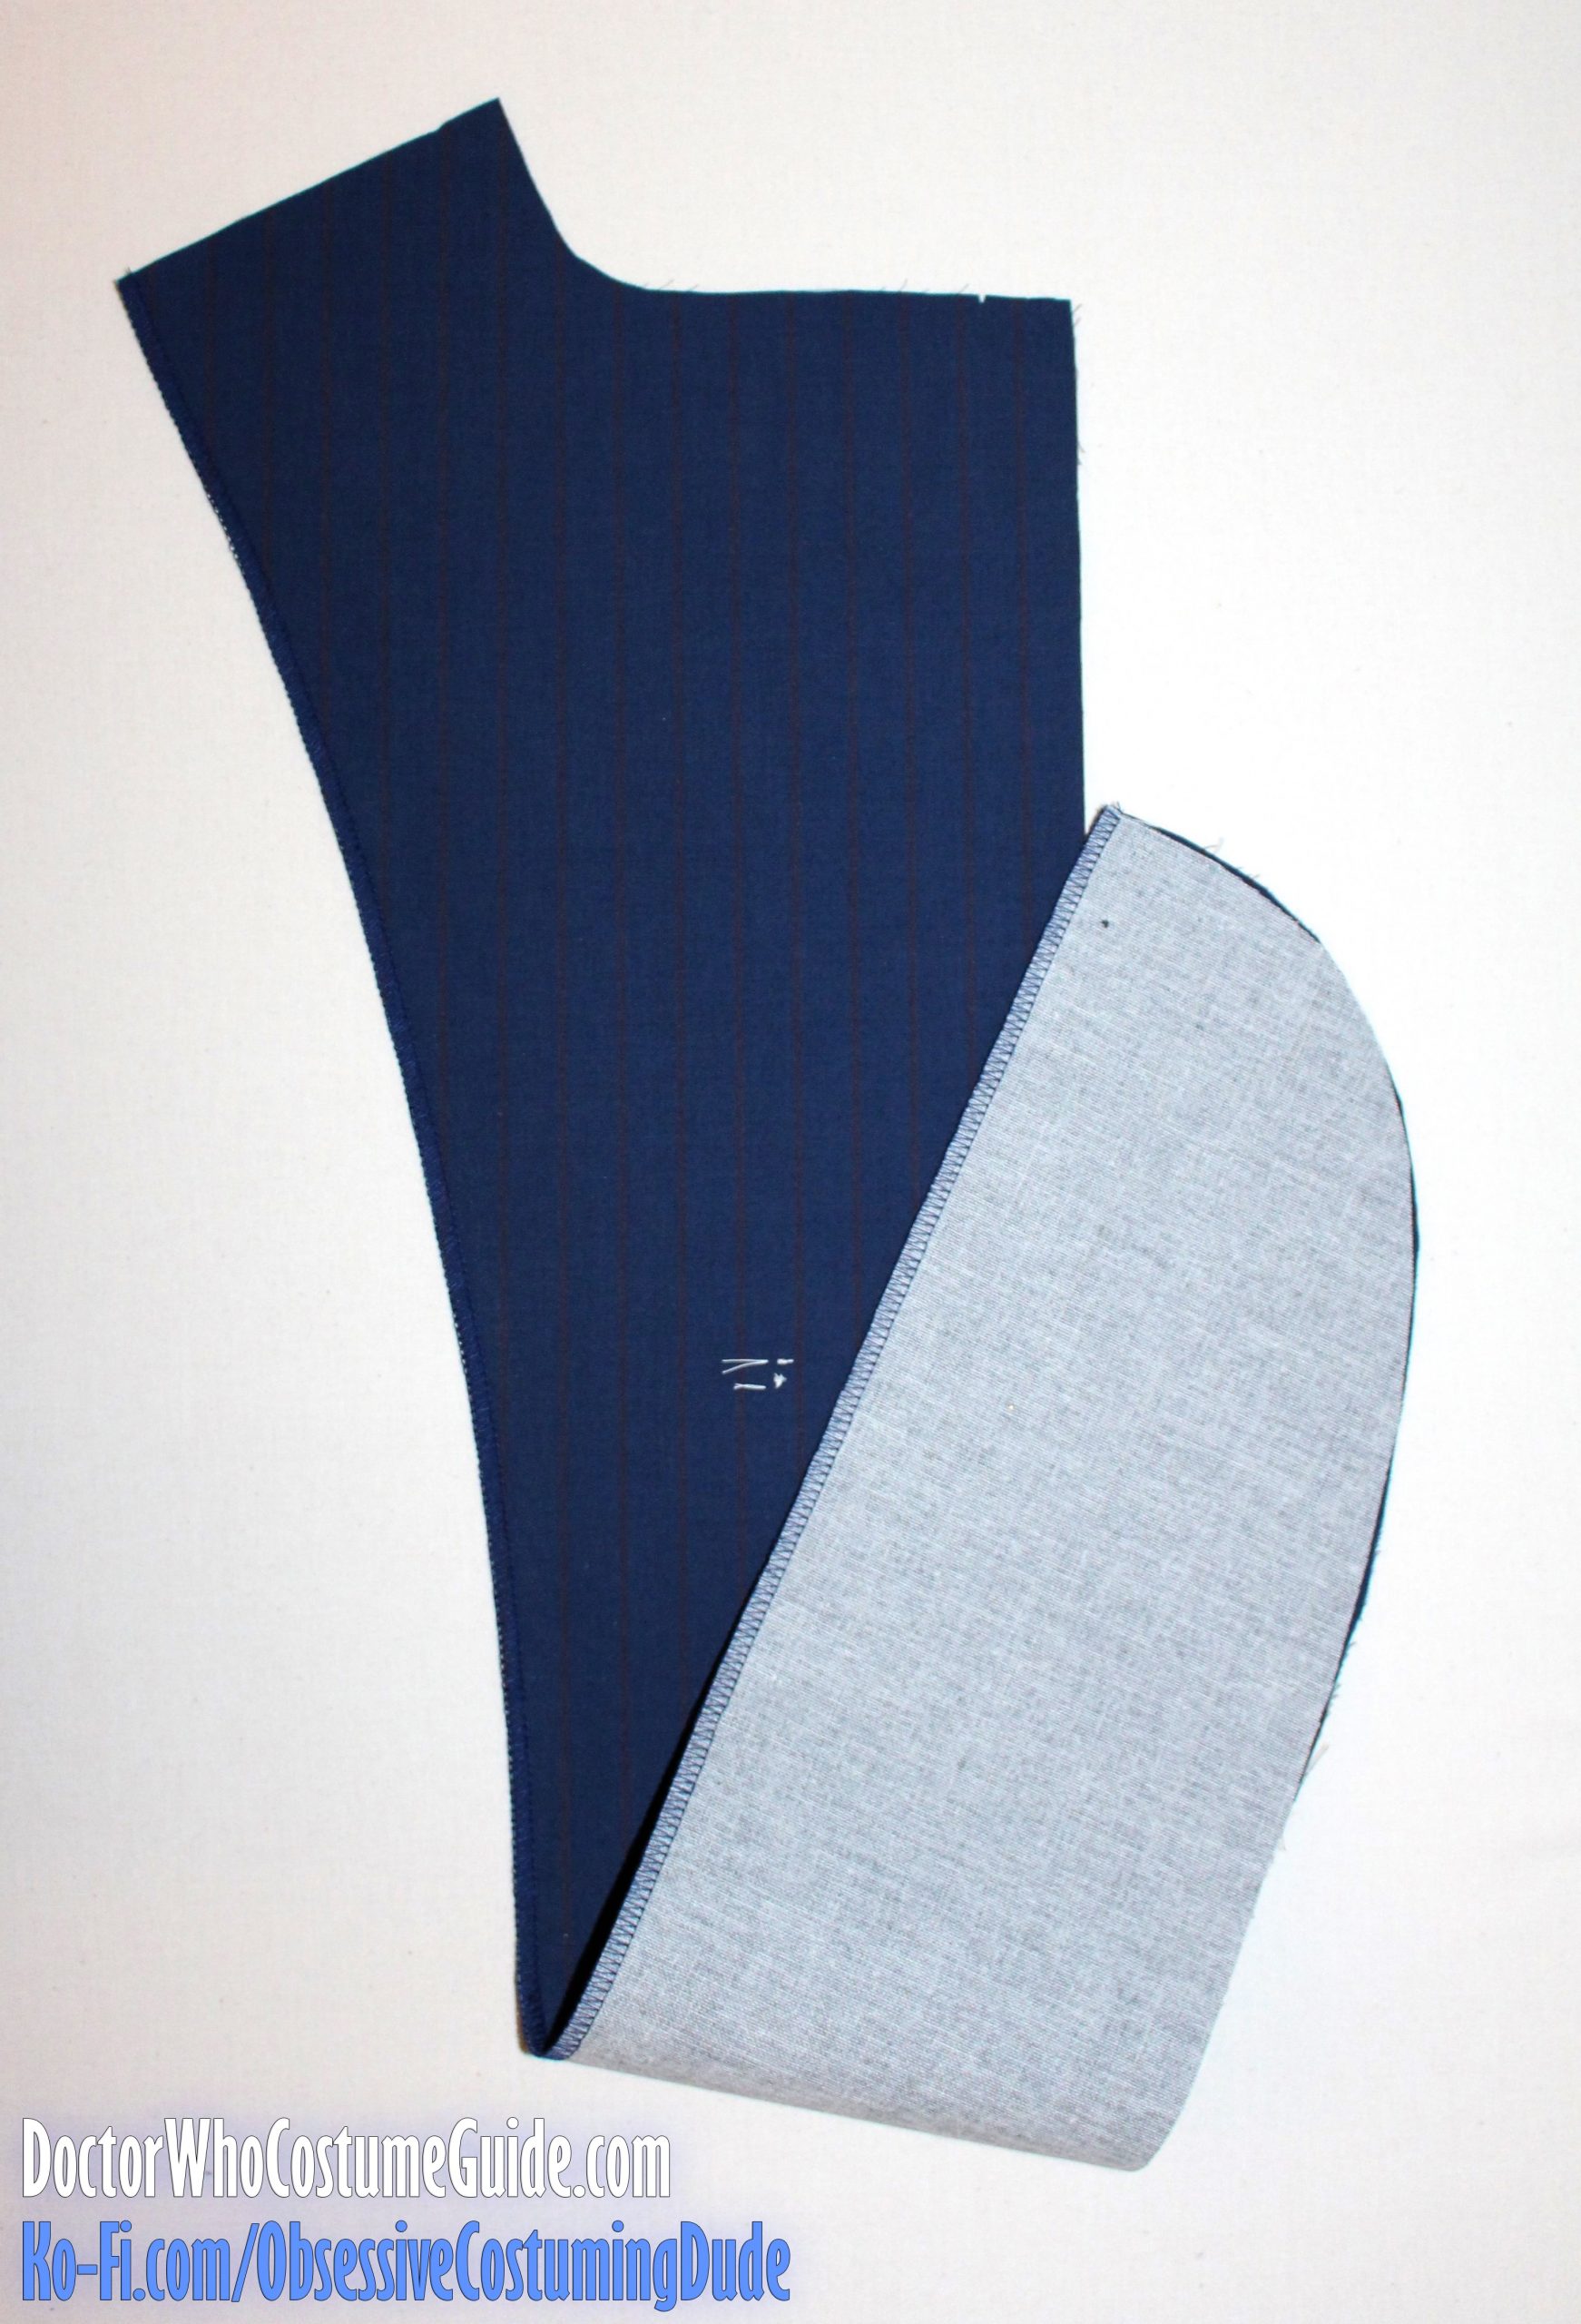
As mentioned previously in the “Required materials,” for the suit in this tutorial, I chose to bolster the lightweight cotton up using sateen, just as Louise Page told me the original suits were.
I underlined the blue shirting with sateen on the following pattern pieces: the jacket front (piece A), side panel (piece E), back (piece F), upper sleeve (piece G), and under sleeve (piece H).
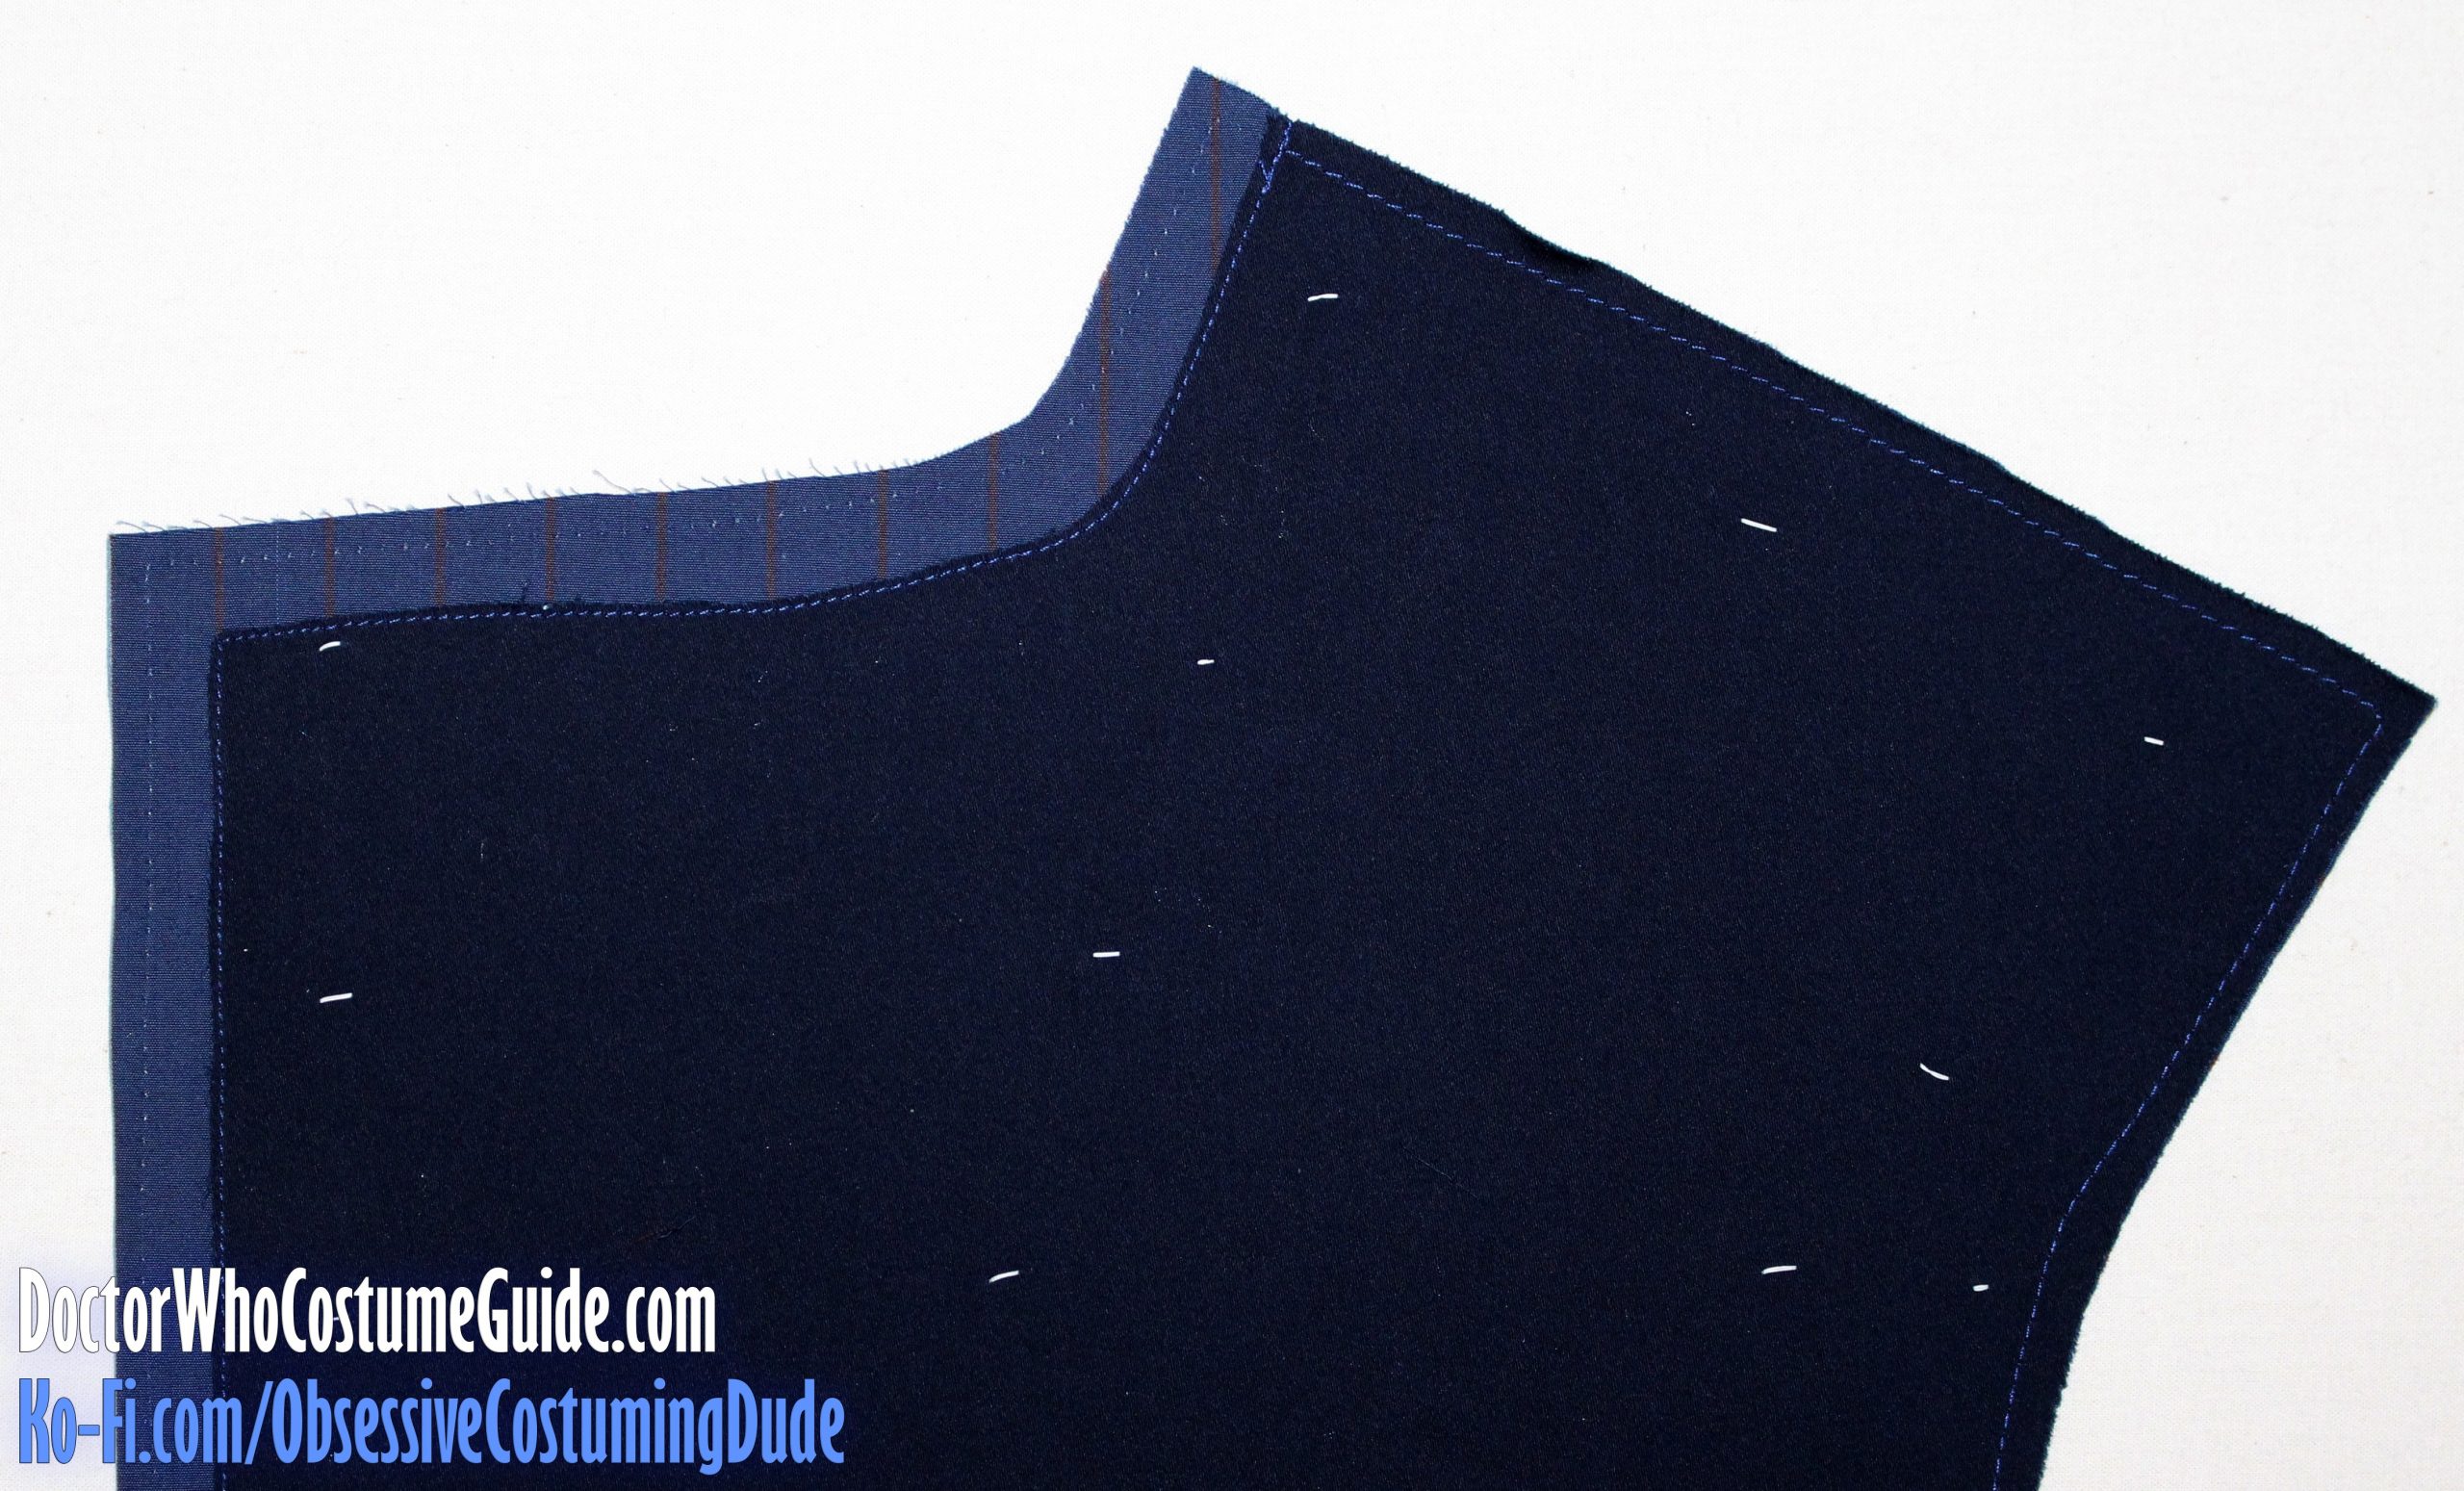
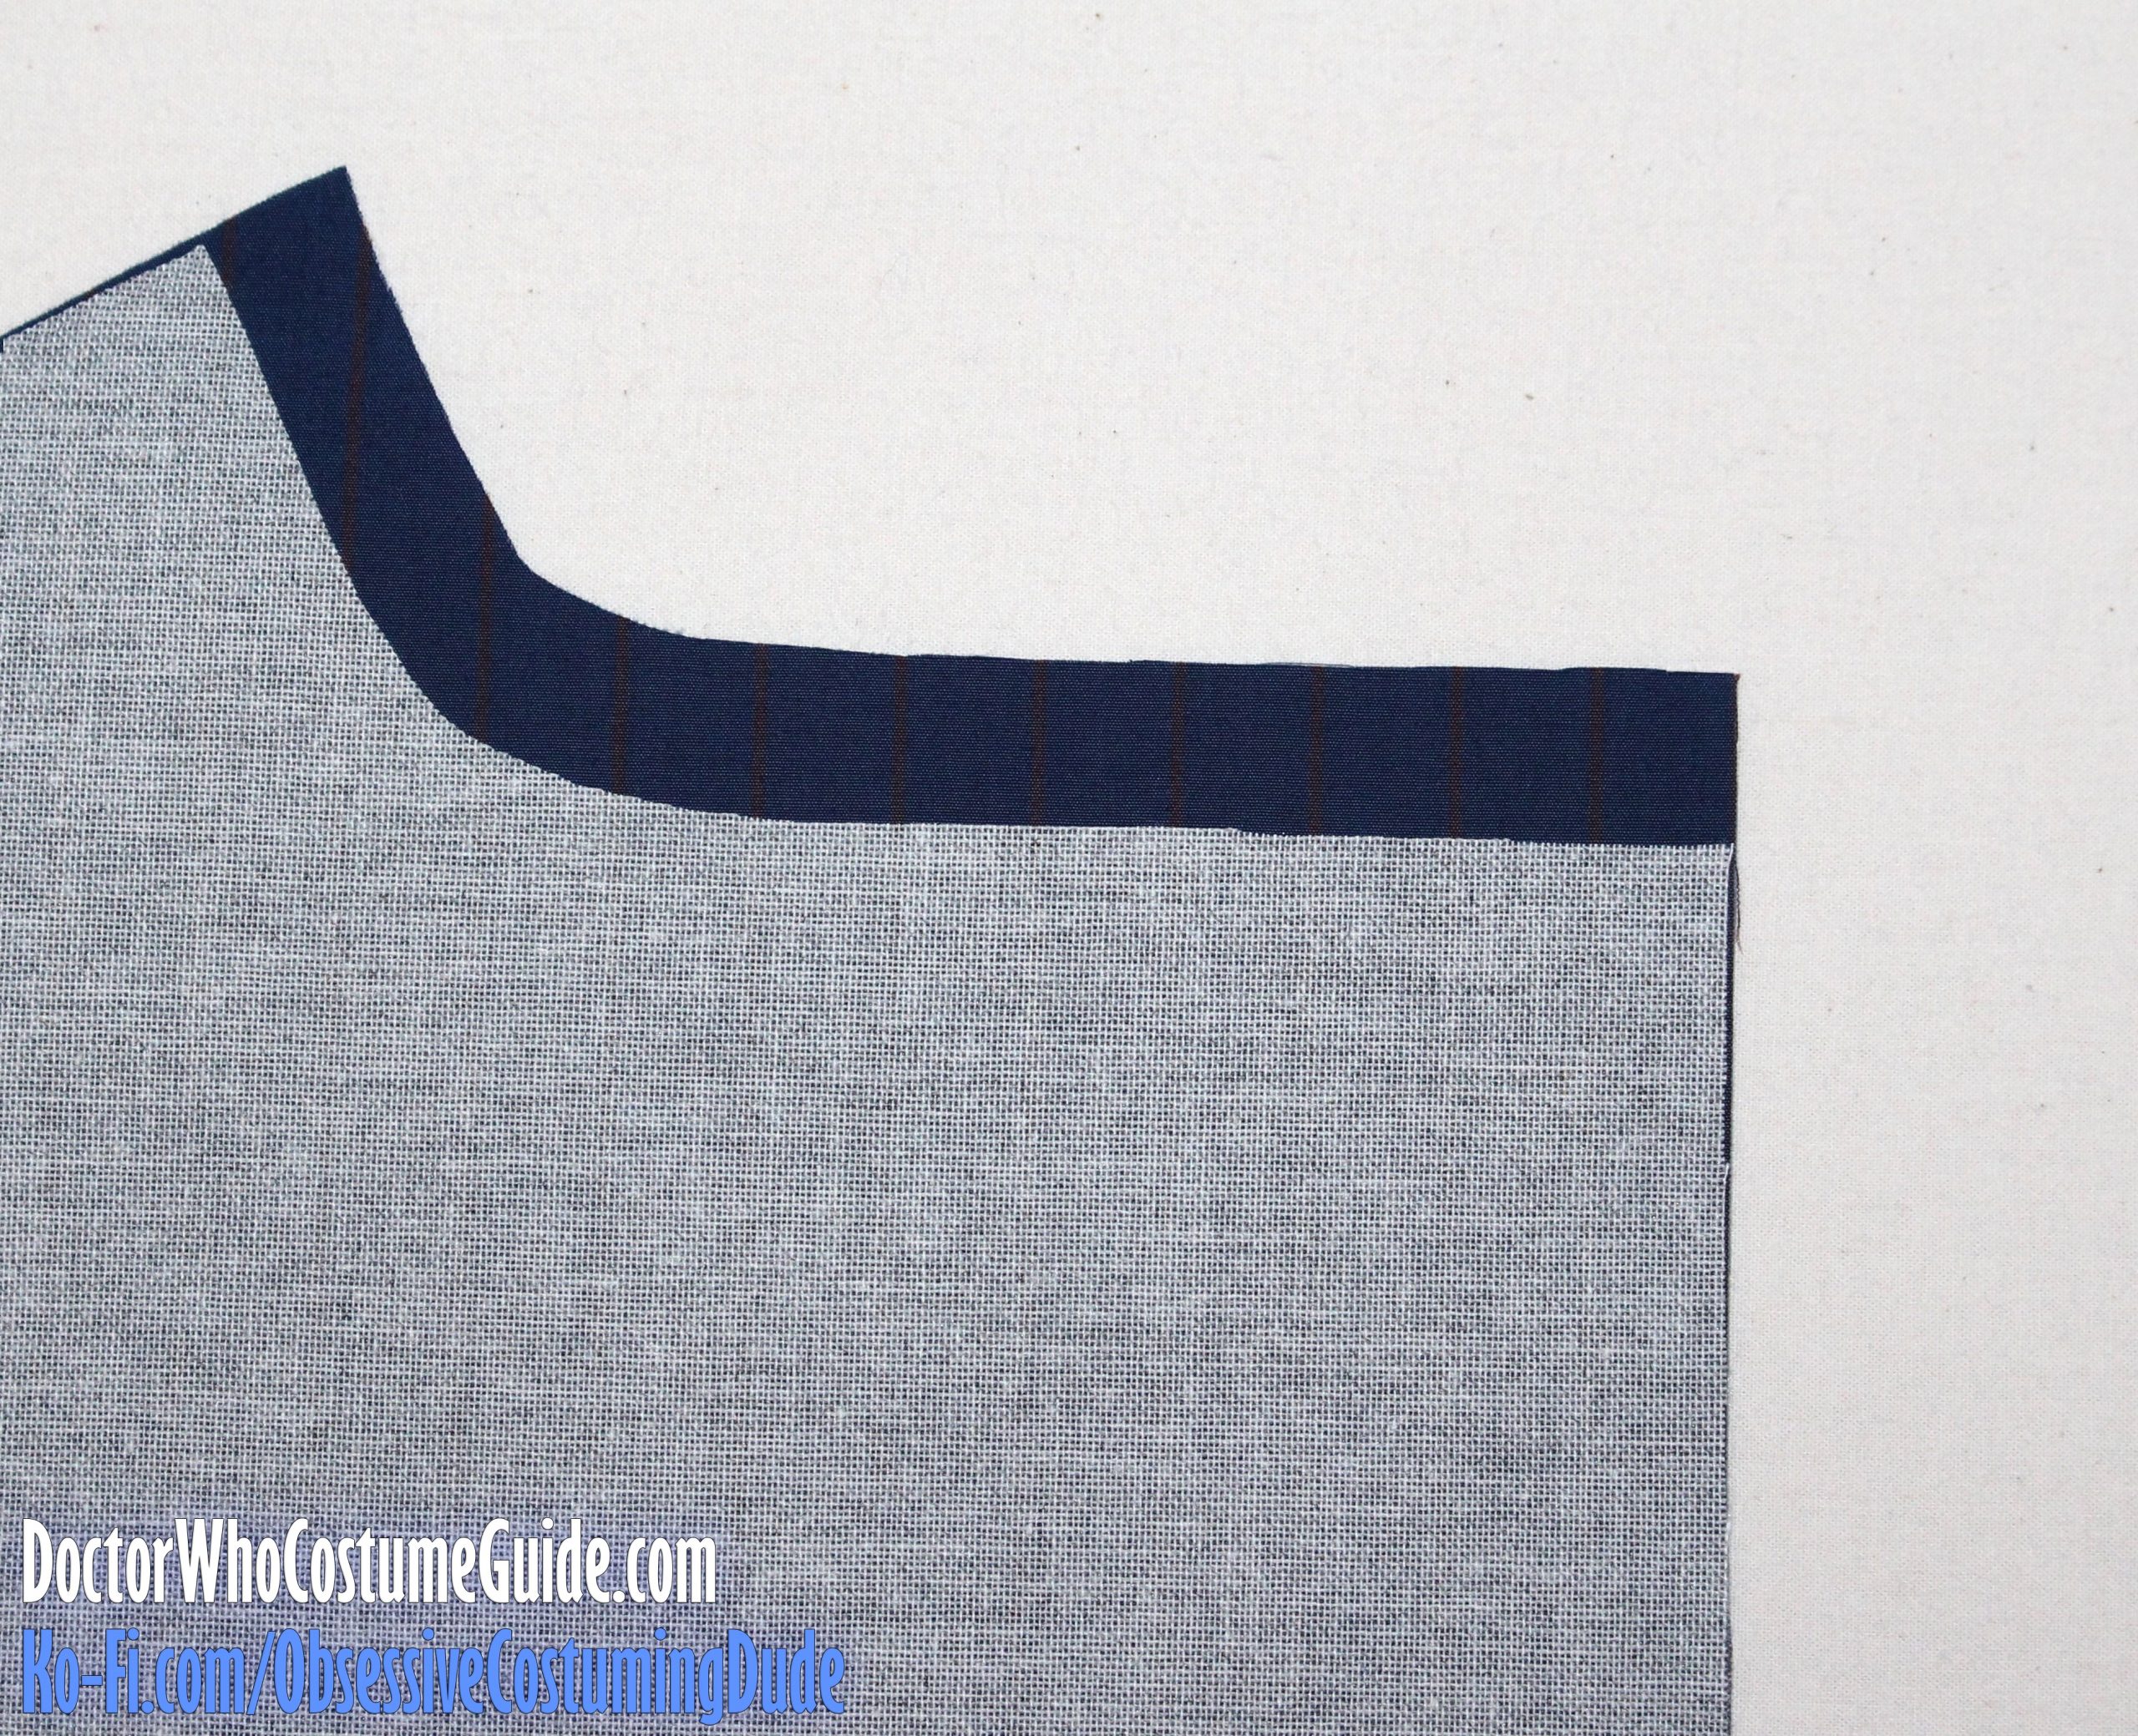
On the jacket front (piece A), I suggest stitching the layers together along the front and neckline seam lines, then trimming away the sateen as closely as possible to the stitching to reduce bulk.
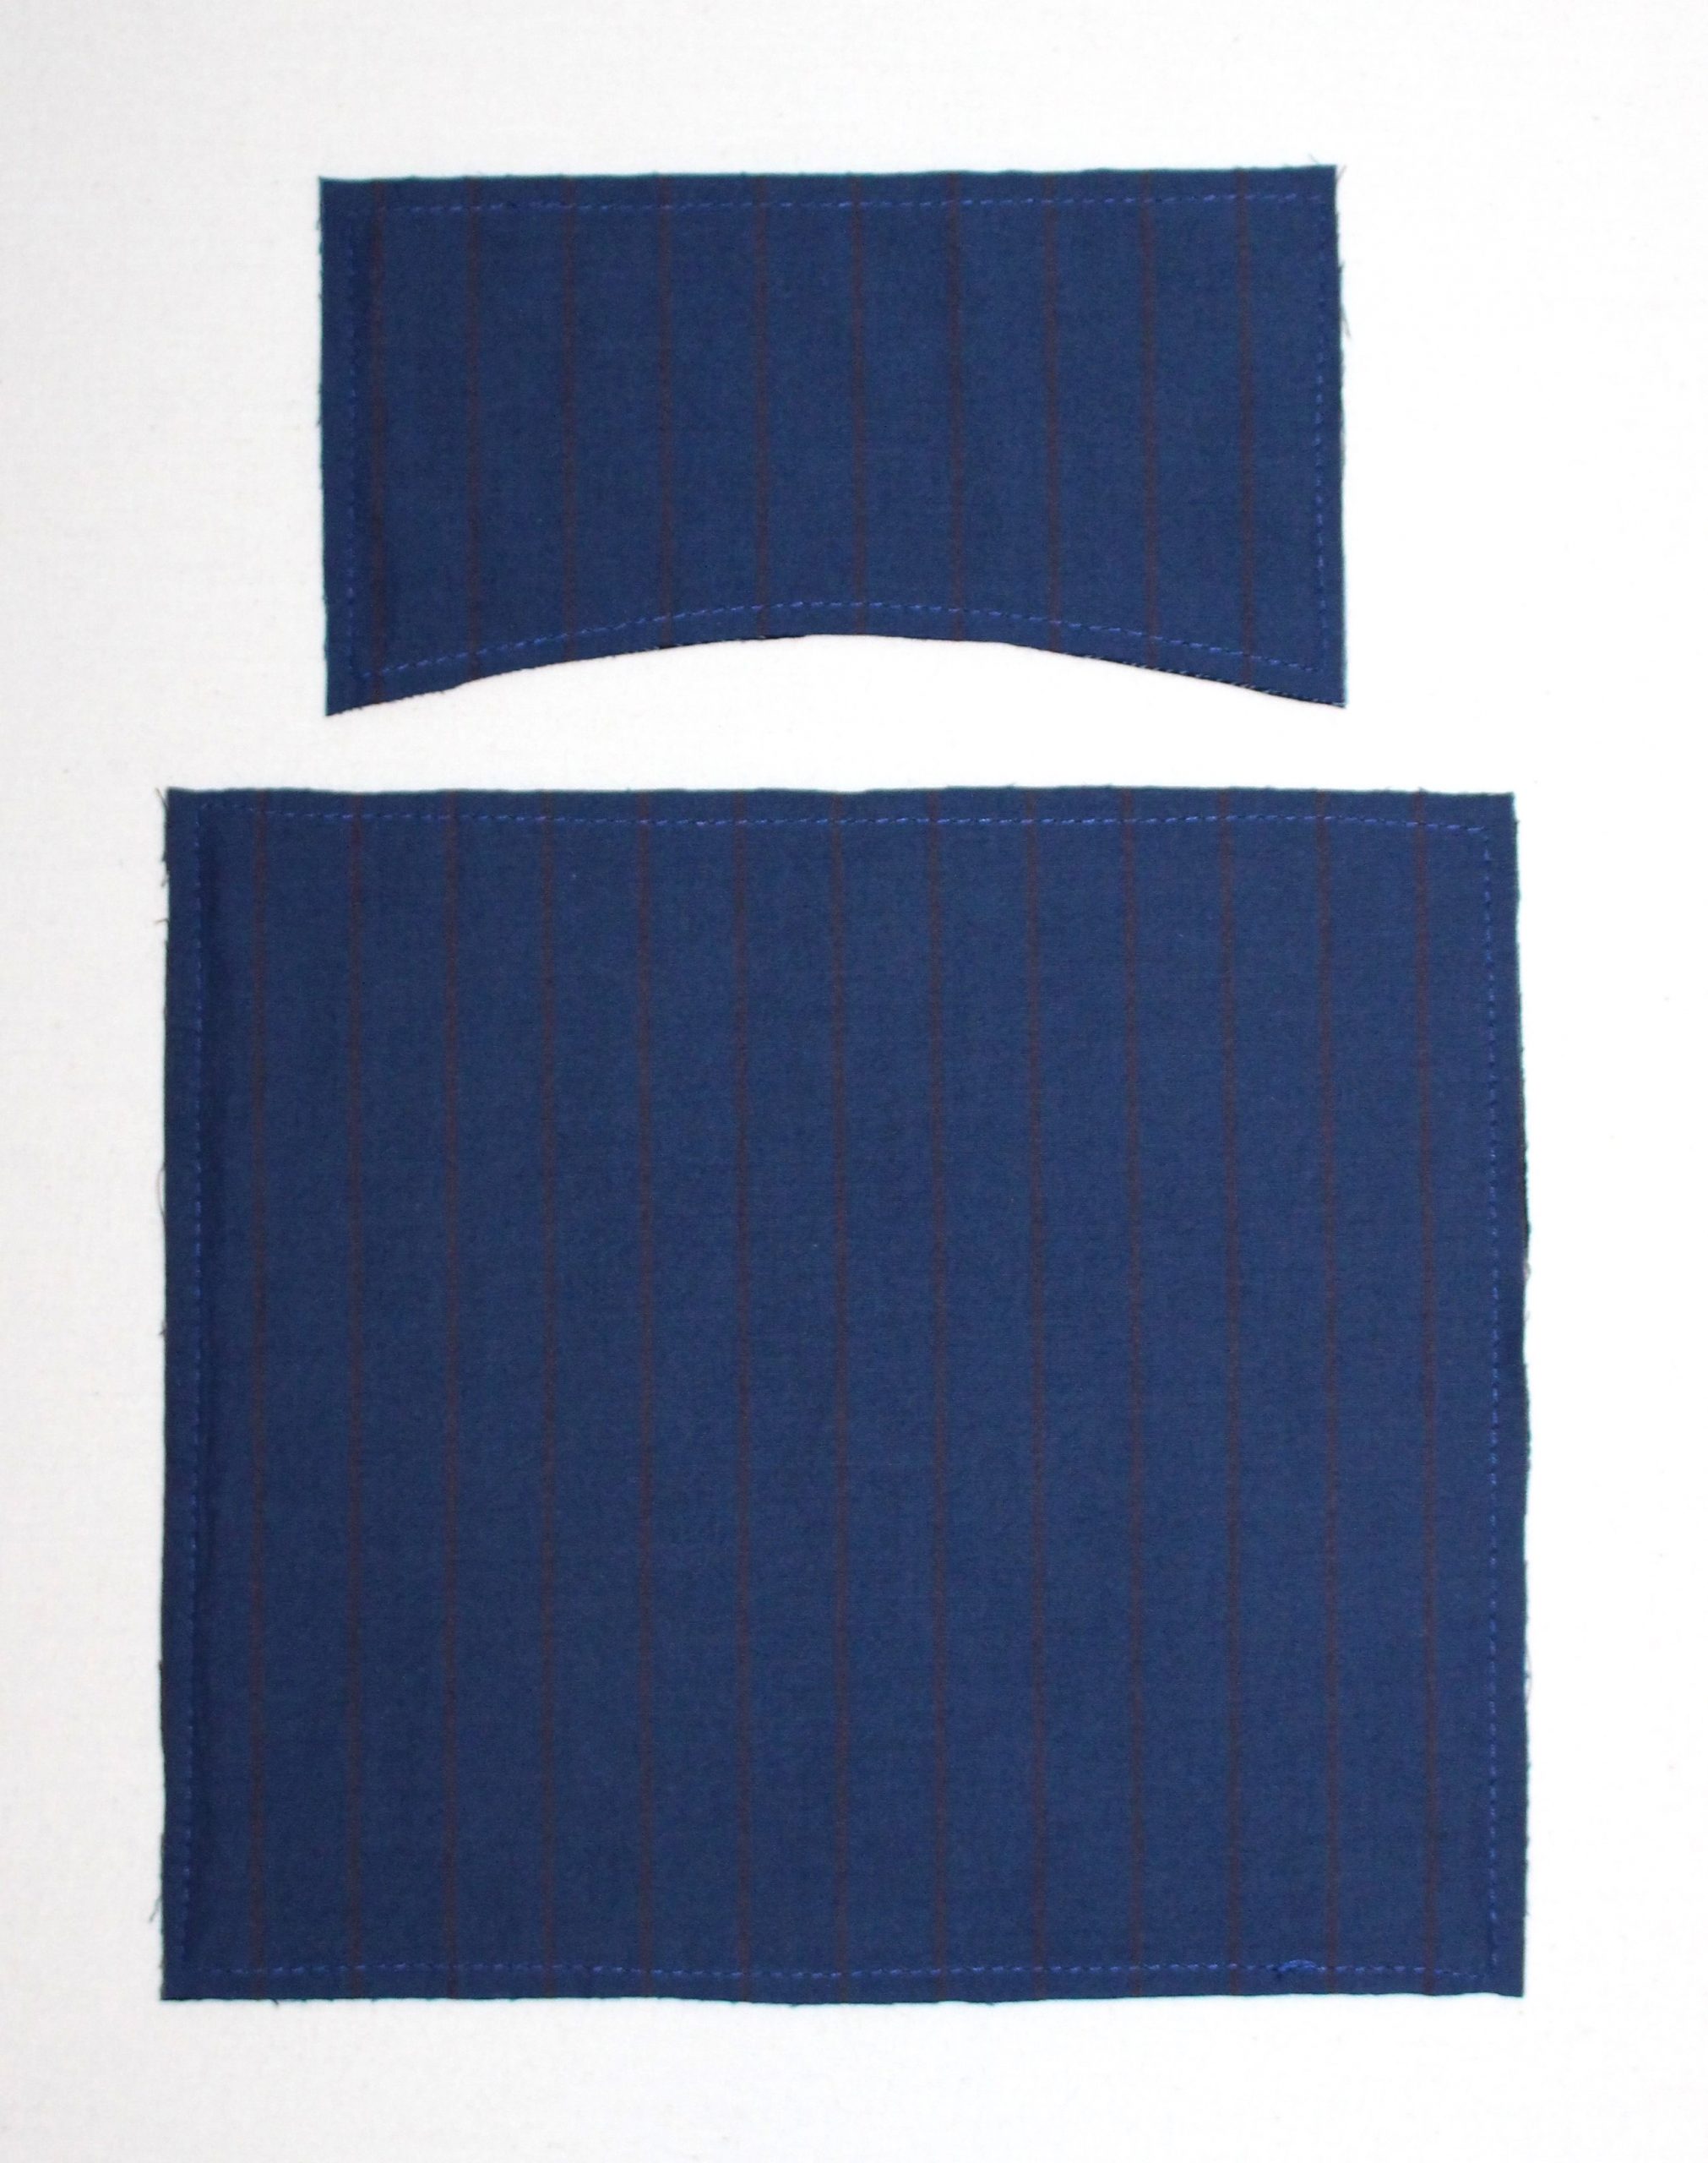
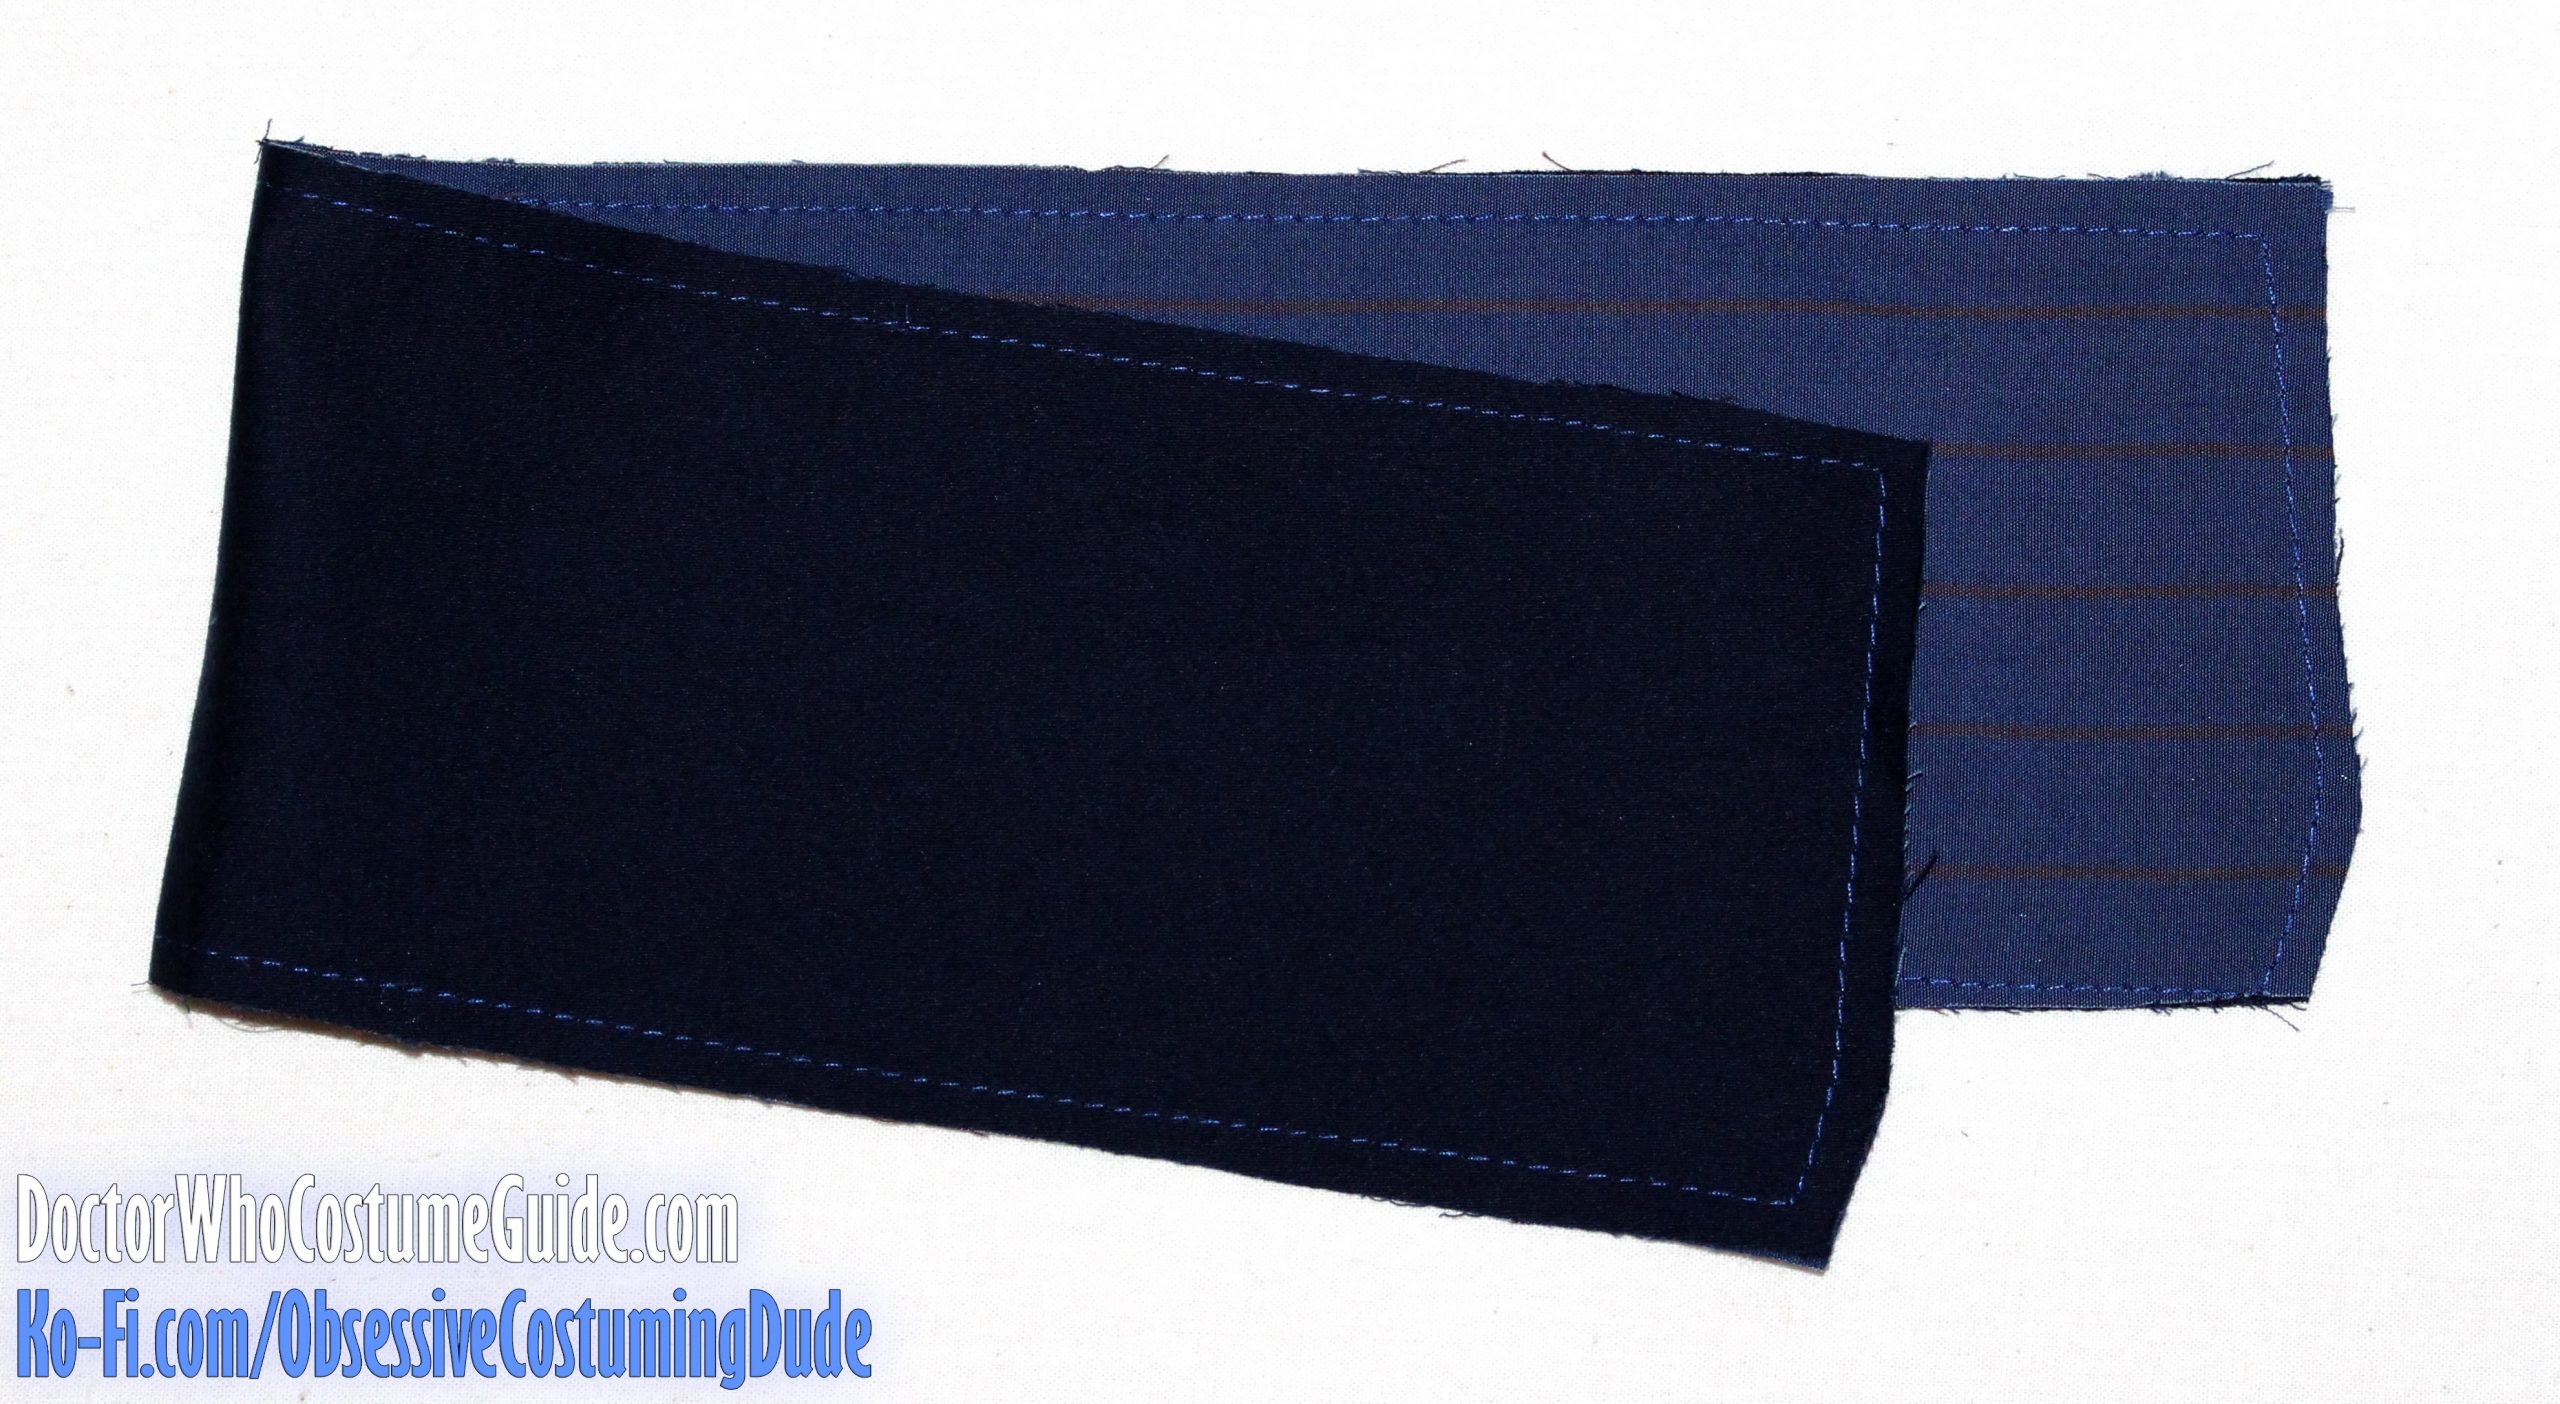
As an experiment, I also backed my chest pocket flap (piece O), chest pocket pouch (piece P), hip pocket flap (piece Q), and back waistband (piece T) with the sateen.
For the pocket flaps, I only did one side – not both, and not the facing.
Overall, I’m pleased with the results, although I’d say the sateen isn’t necessary on the chest pocket, and a fusible interfacing work just as well on the back waistband.
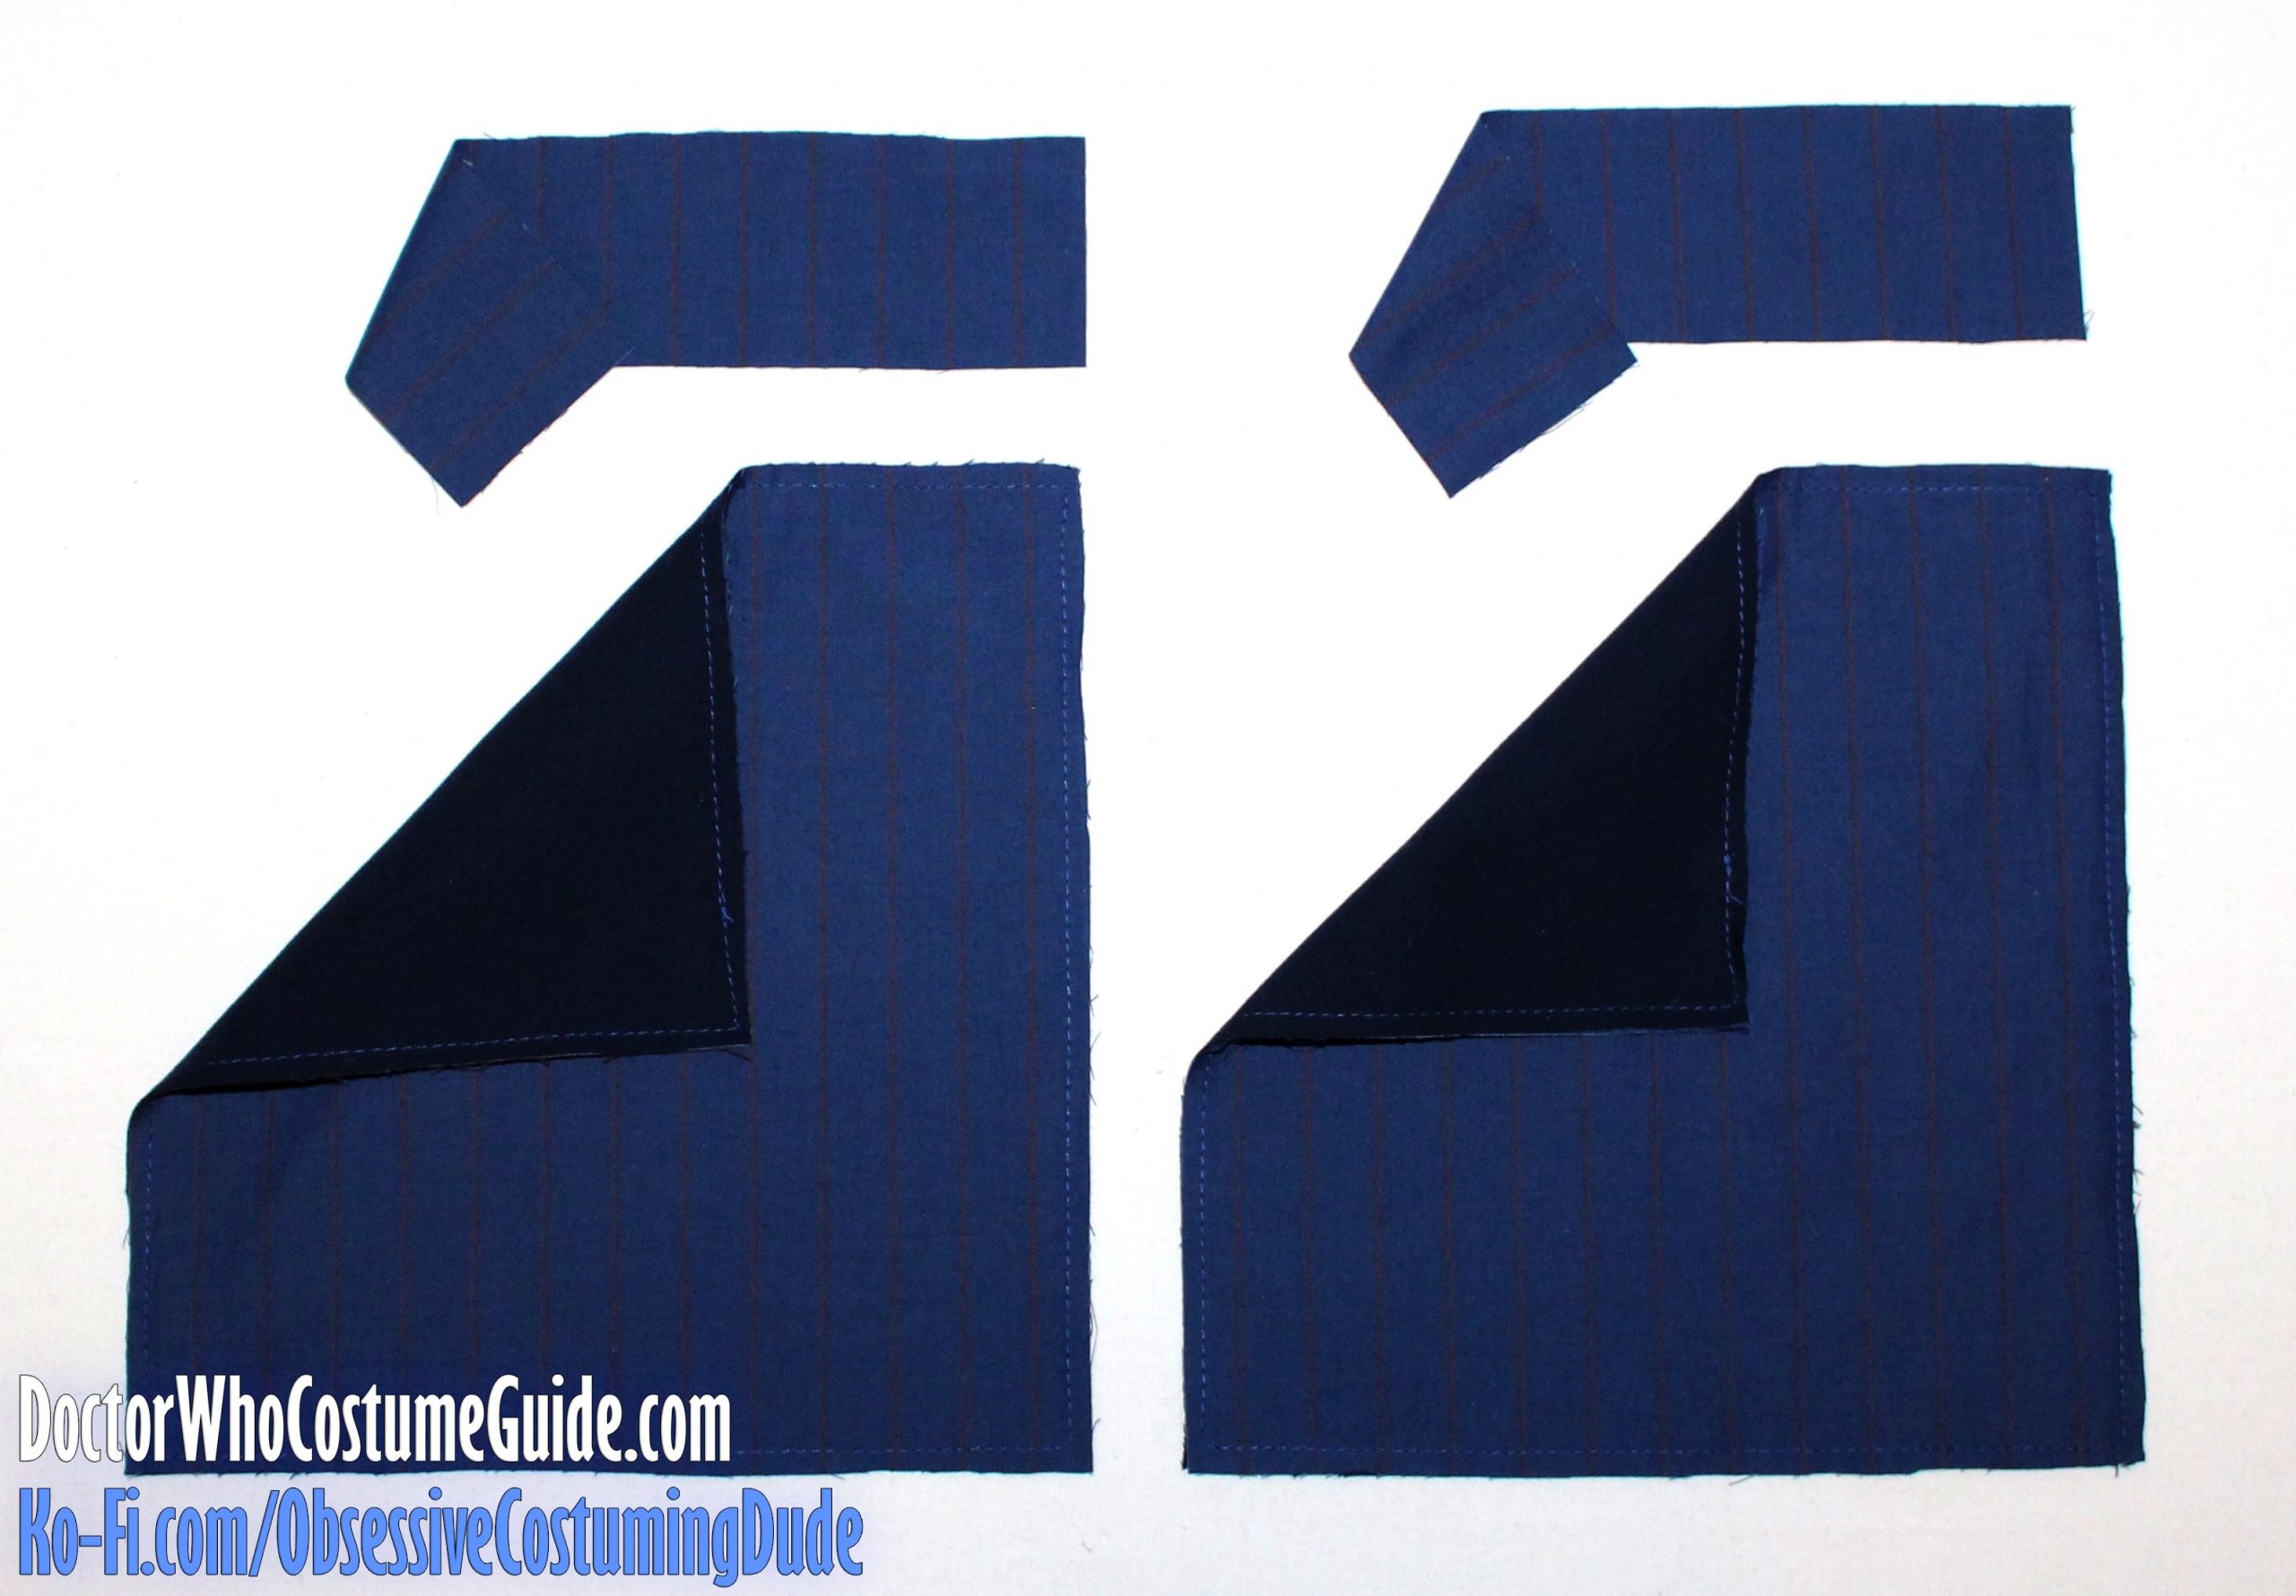
In addition to the trousers’ pant legs (pieces AA and BB), I also backed the left fly (piece FF) and one right fly (piece EE) with the sateen.
Once your pattern pieces are cut, I suggest machine-basting or sewing the layers together inside the seam allowance; I like to stitch ¼” from the edges, around the entire perimeter of the pieces.
Even with the layers sewn together, on the larger pieces, I suggest leaving the tailor-basting in for as long as possible. (The smaller pieces, like pocket flaps and flies, should be fine.)
Although the sateen backing produced good results, in retrospect, I believe a similar result could be achieved with less work by simply using a lightweight fusible interfacing, like I did on my brown suit.
For the front facing (piece I), I used “Light Weight Deluxe Fusible Hymo 72” (T15-U)” from B. Black and Sons.
Before applying the interfacing, I suggest trimming away the seam allowance along the neckline.